* The combination is up to you and your imagination. I have even used a combination of basil, sage, oregano, chives, parsley, and rosemary. If you prefer a stronger herb flavor, double the amount of herbs.
Garlic-Herb Bread
1 large loaf
Everyone loves freshly made bread and pastries, so what if we take it one step further and combine this freshness with the delicious taste of garlic and a variety of fresh herbs? This recipe is a step-by-step guide to reaching delicious and crunchy garlic-herb bread in the comfort of your...
Read more... own home. Everyone will love it, and it will be especially popular for those who have a herb garden and can utilize homegrown herbs.
Read lessx saved
 Tom the Chef Founder
November 8, 2023

Ingredients:
- 4 ½ cups of bread flour
- Extra flour for flouring surface
- 1 TSP of confectioners’ sugar
- 1 ½ TSP of active dry yeasts
- 1 TBSP of salt
- ½ cup of herbs of your choice - fresh and finely chopped
- 6 cloves of garlic - peeled and sliced
- 2 cup of water - preheat in microwave to lukewarm (about 90 to 100°F)
Tools:
- 1x Measuring Cups
- 1x Measuring Spoons
- 1x Chef’s knife
- 1x Cutting Board
- 1x Piano Whisk
- 1x Kitchen Mixer with Hook Attachment or Large Mixing Bowl
- 1x Plastic Wrap
- 1x Bowl Scraper
- 1x Proofing Basket or Mixing Bowl with Kitchen Towel
- 1x Baking Sheets + Oven or Grill + Pizza Stone and Pizza Paddle
- 1x Razor or sharp knife
- 1x Small Heat Proof Bowl
- 1x Ice Cubes
Recipes
Best served with:
Directions:
1. Dough:
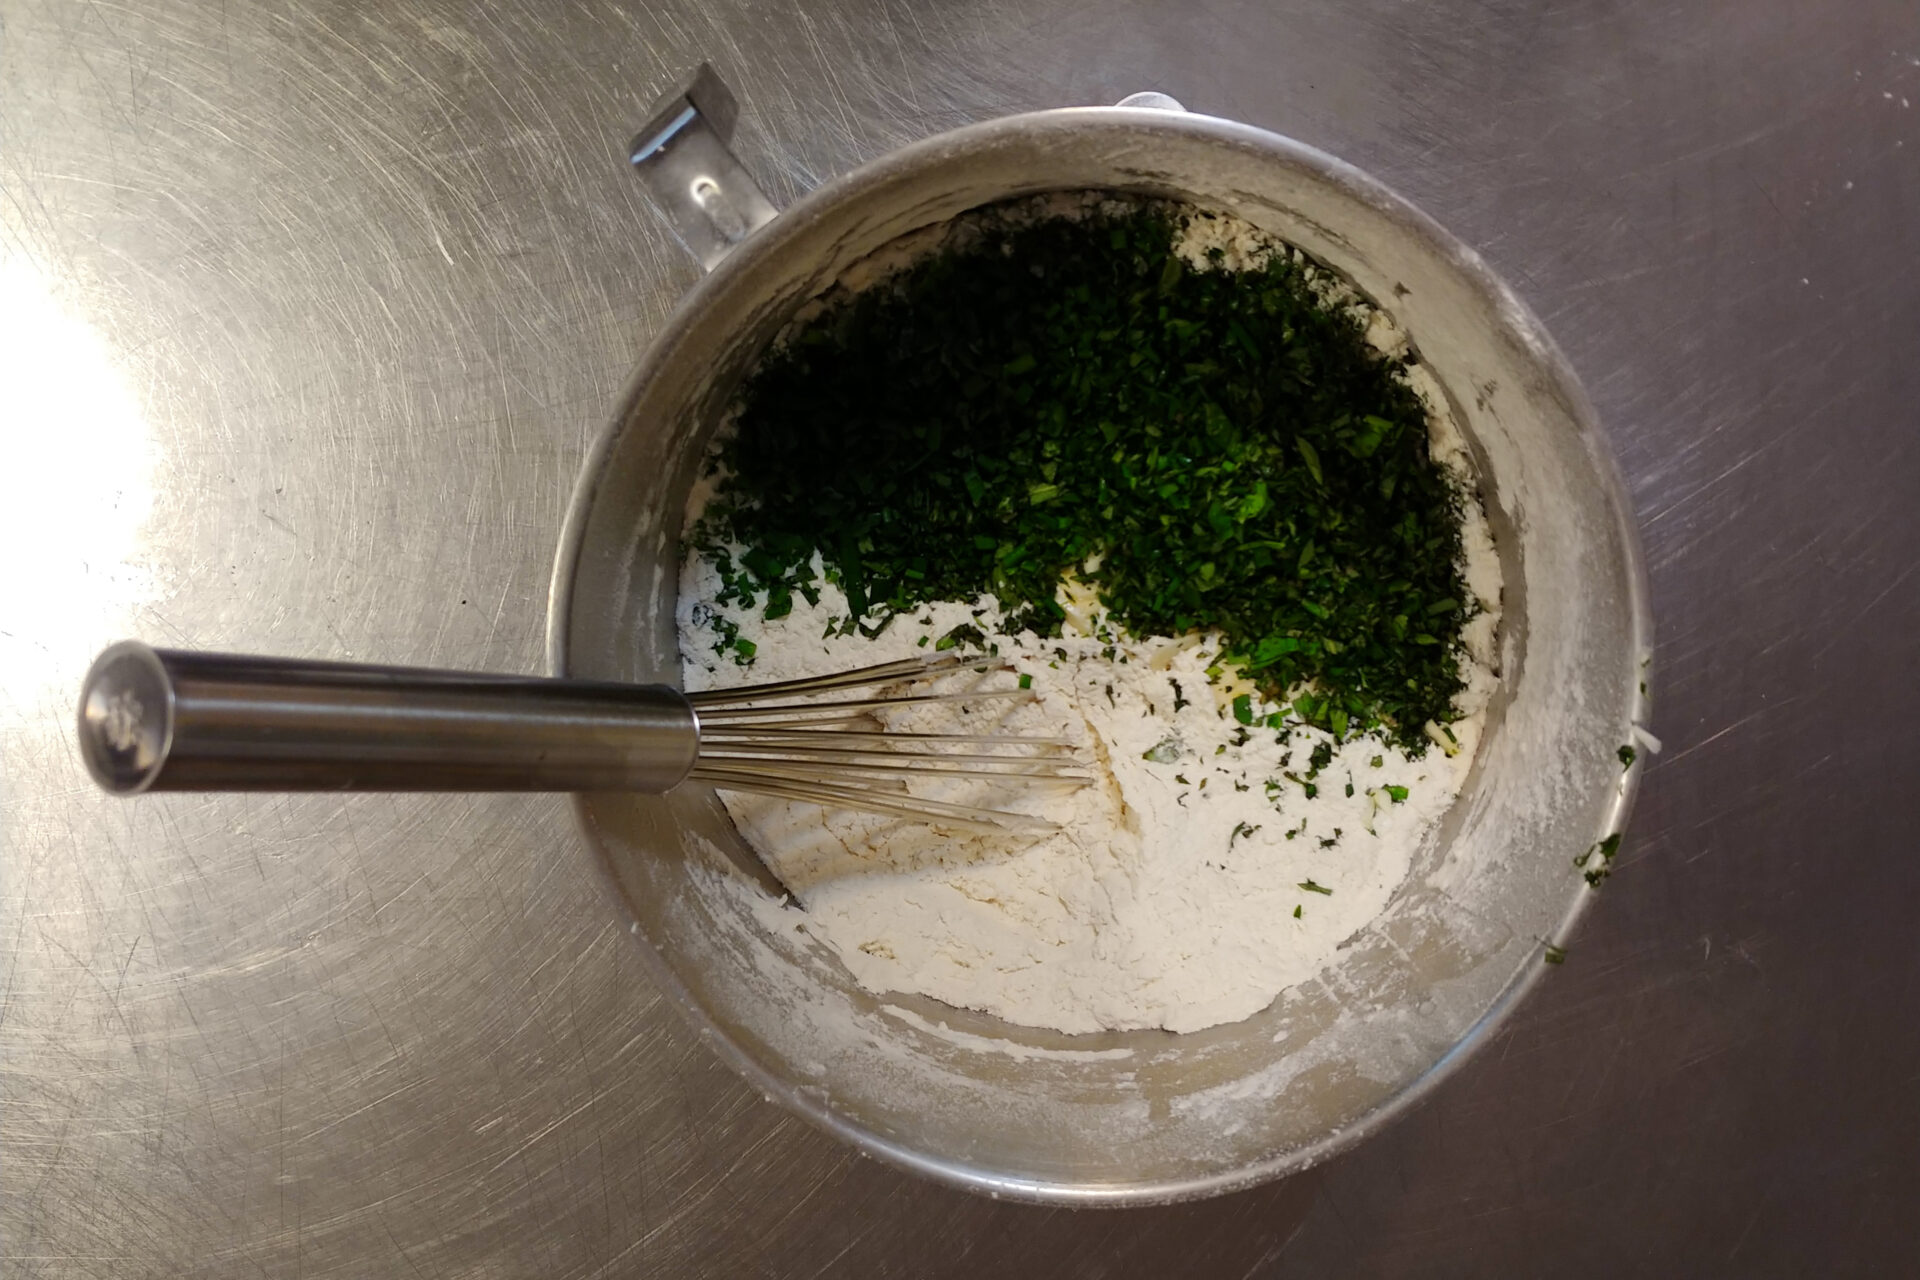
1.1. Add into the kitchen mixer with a hook attachment:
4 ½ cups of bread flour
1 TSP of confectioners’ sugar
1 ½ TSP of active dry yeasts
1 TBSP of salt
½ cup of fresh herbs – finely chopped
6 cloves of garlic – sliced
Briefly stir with a whisk just enough to combine all ingredients (about 1 minute).
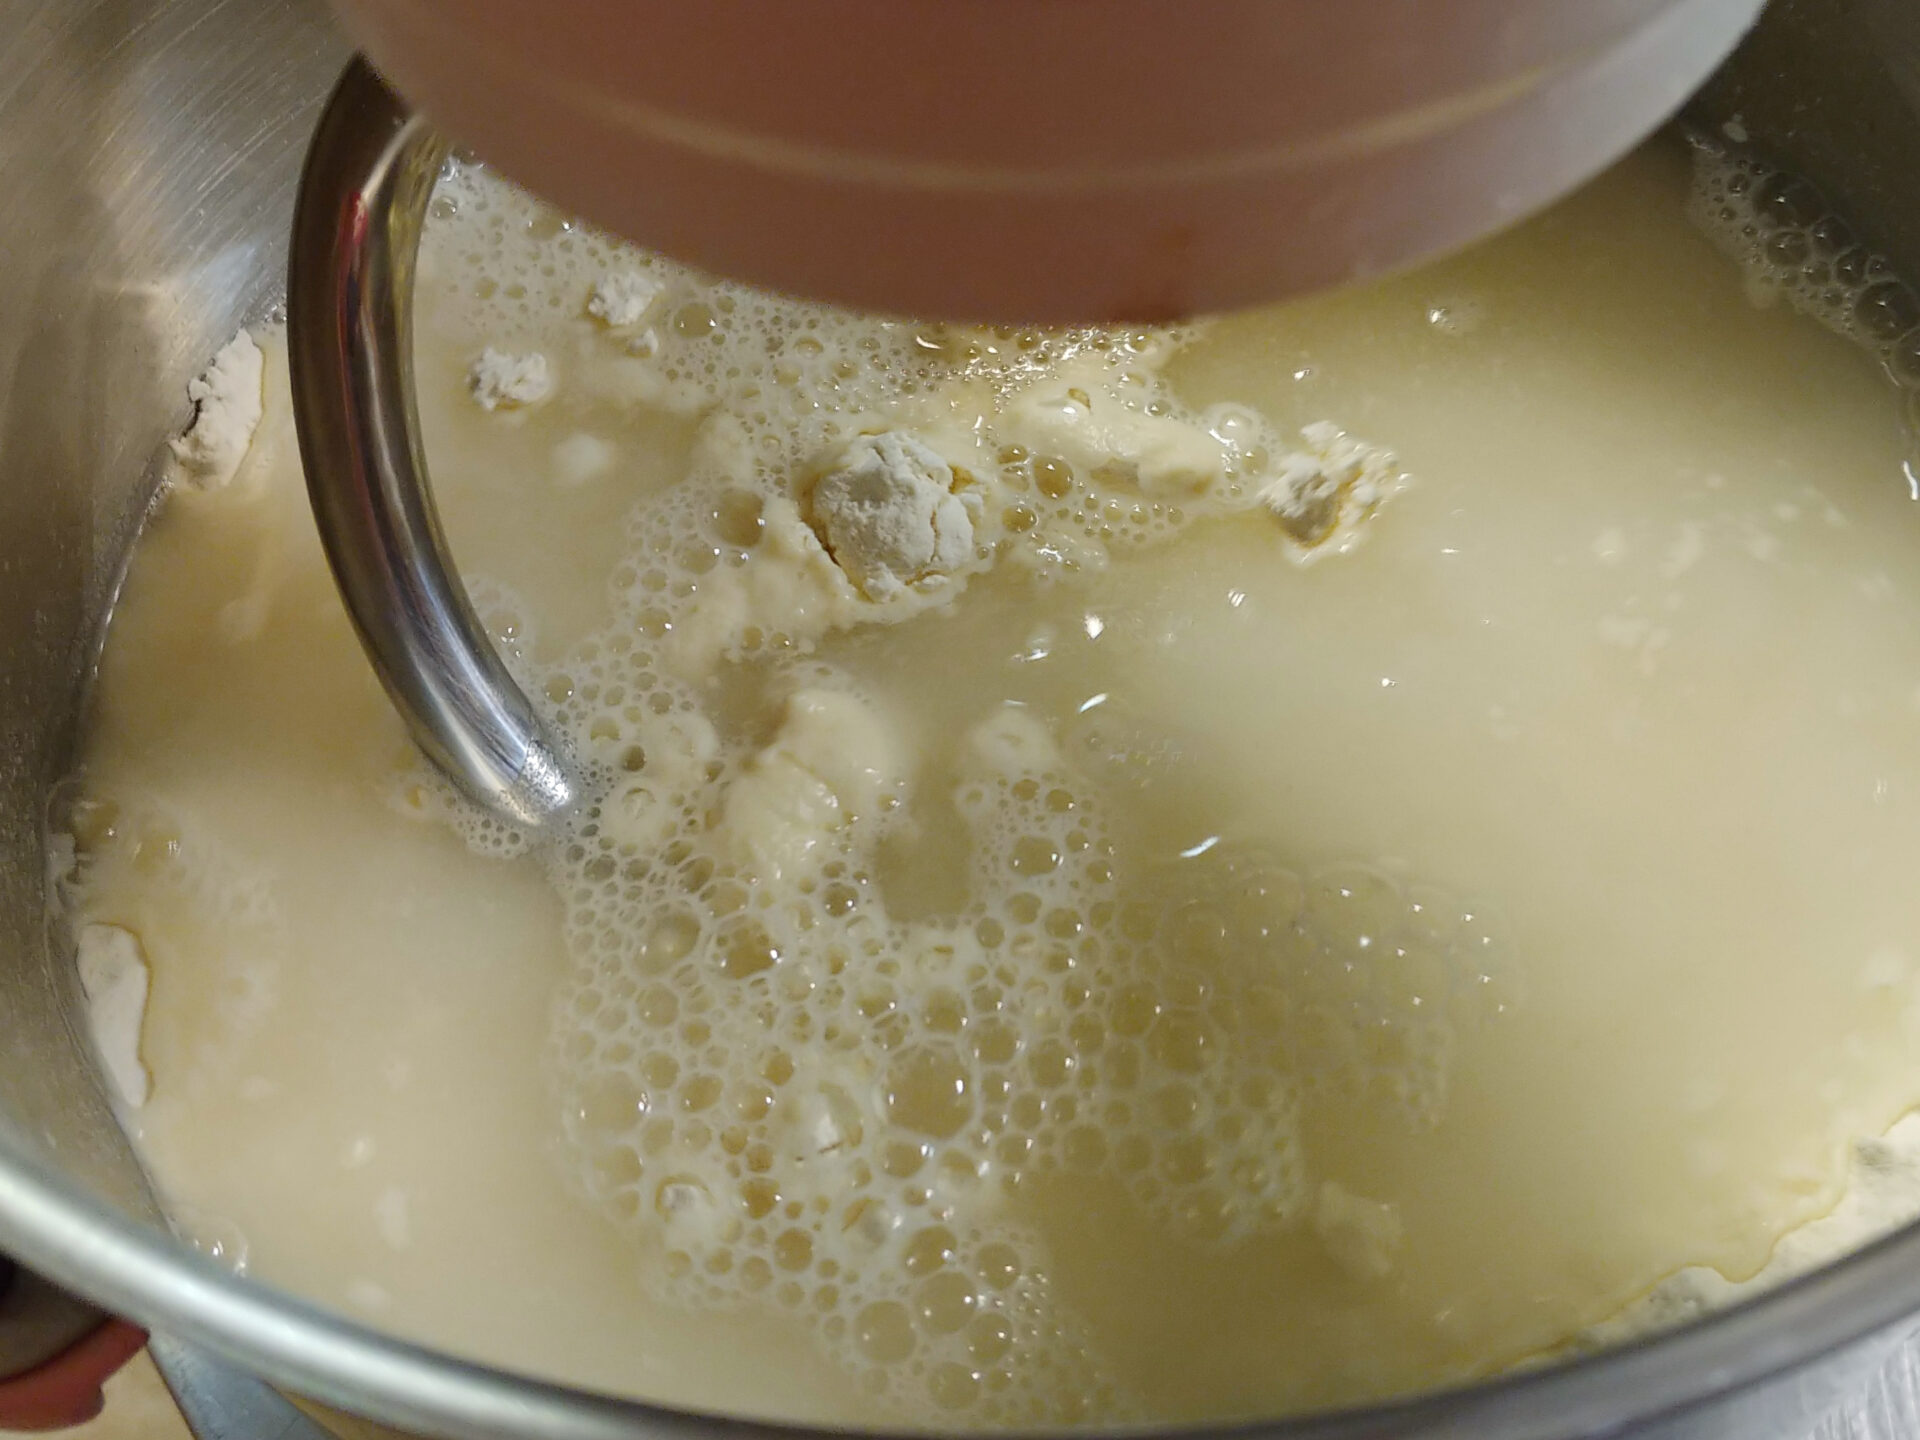
1.2. Add:
2 cups of water
Knead on a low speed until all ingredients are partially incorporated (about 1 – 2 minutes).
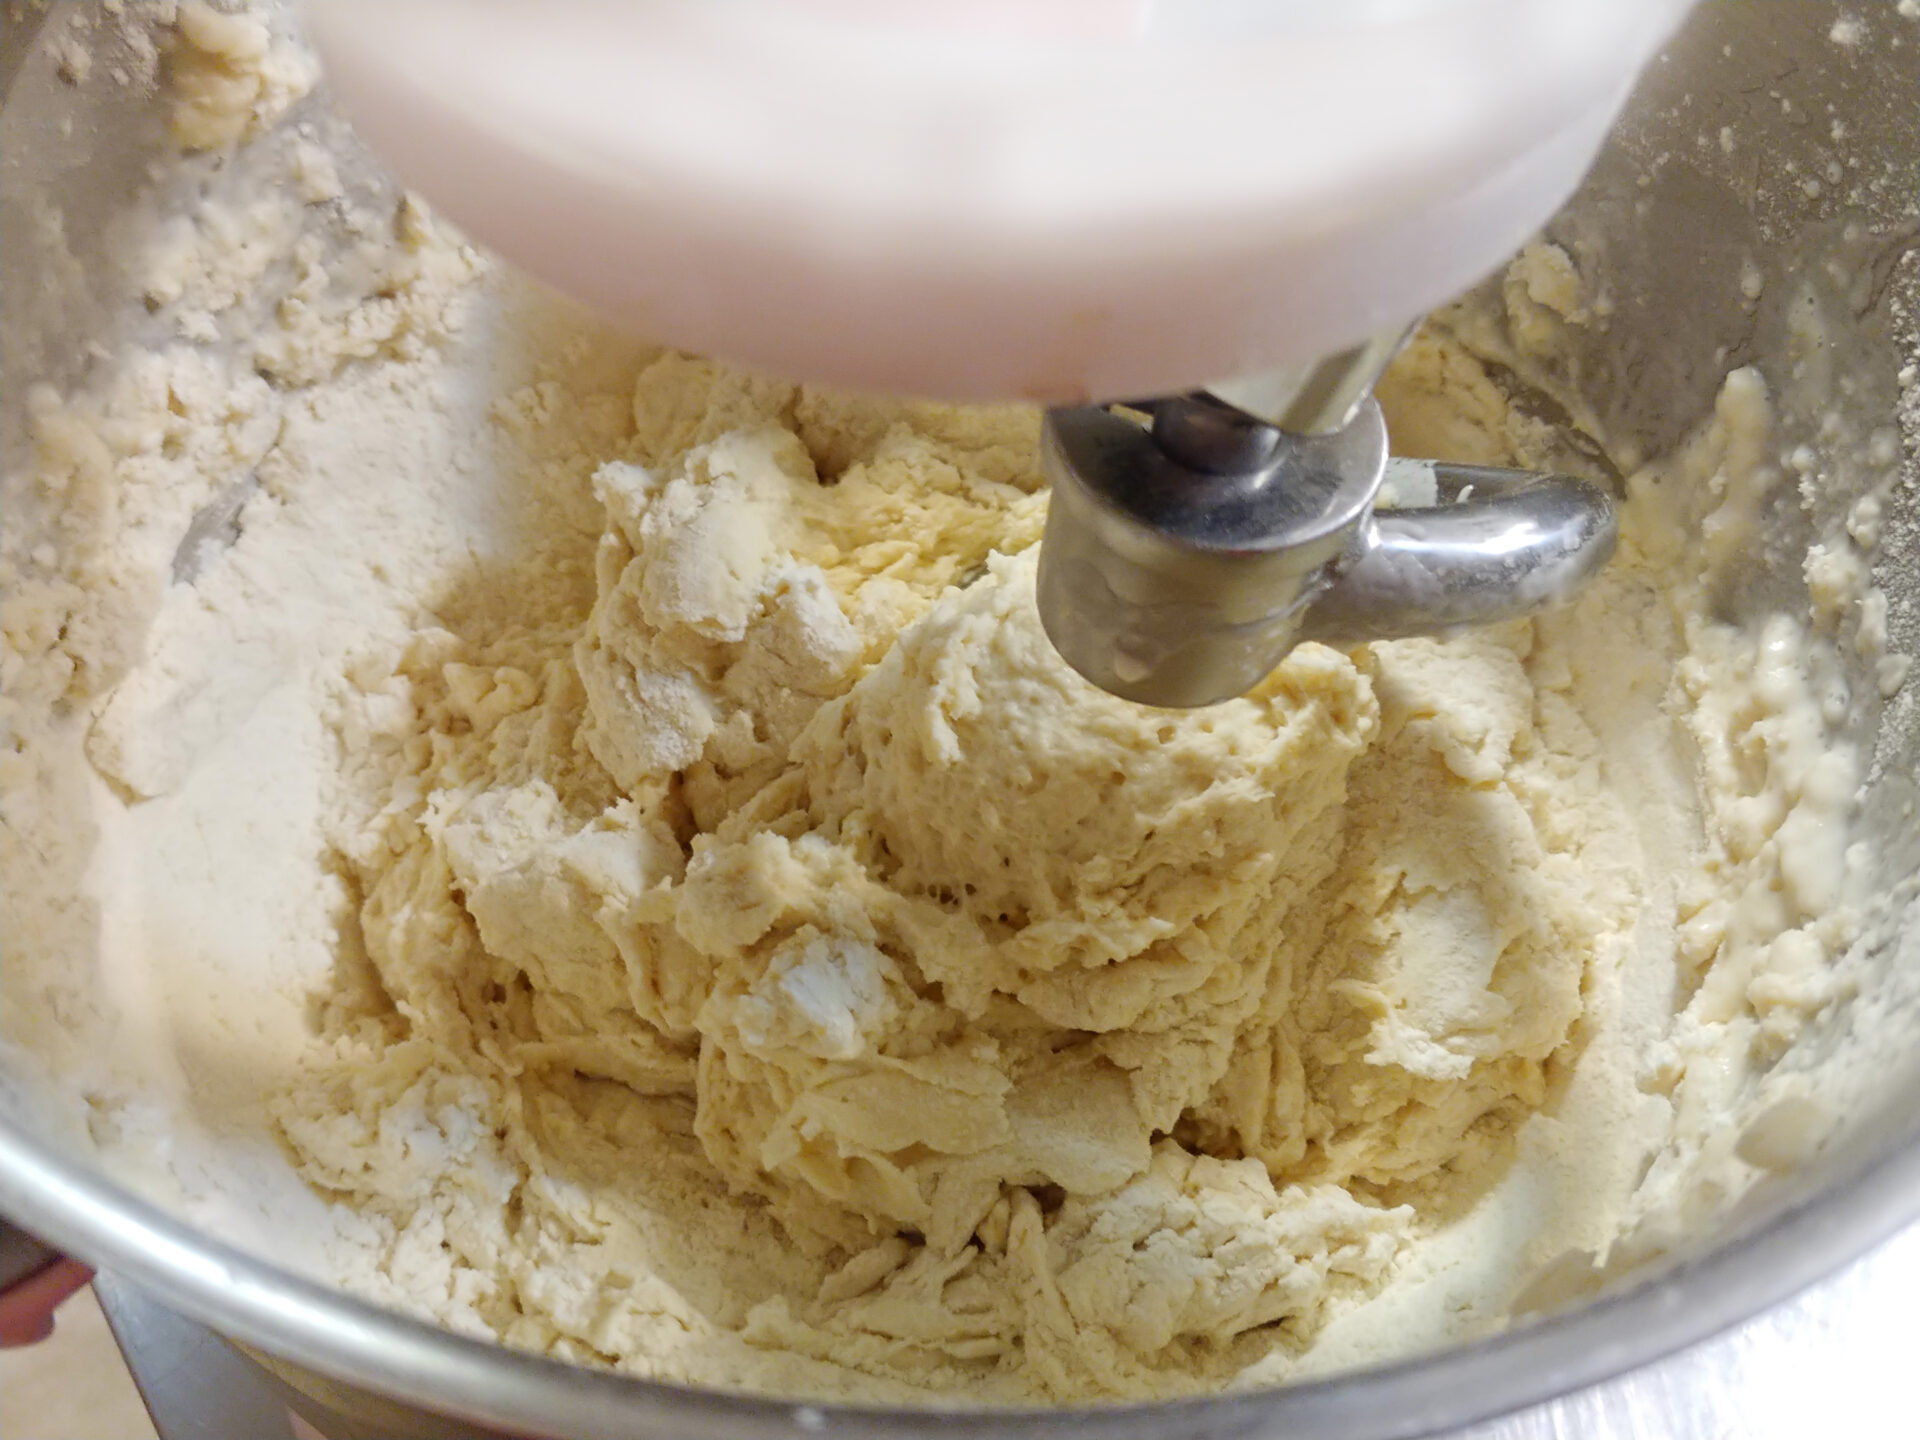
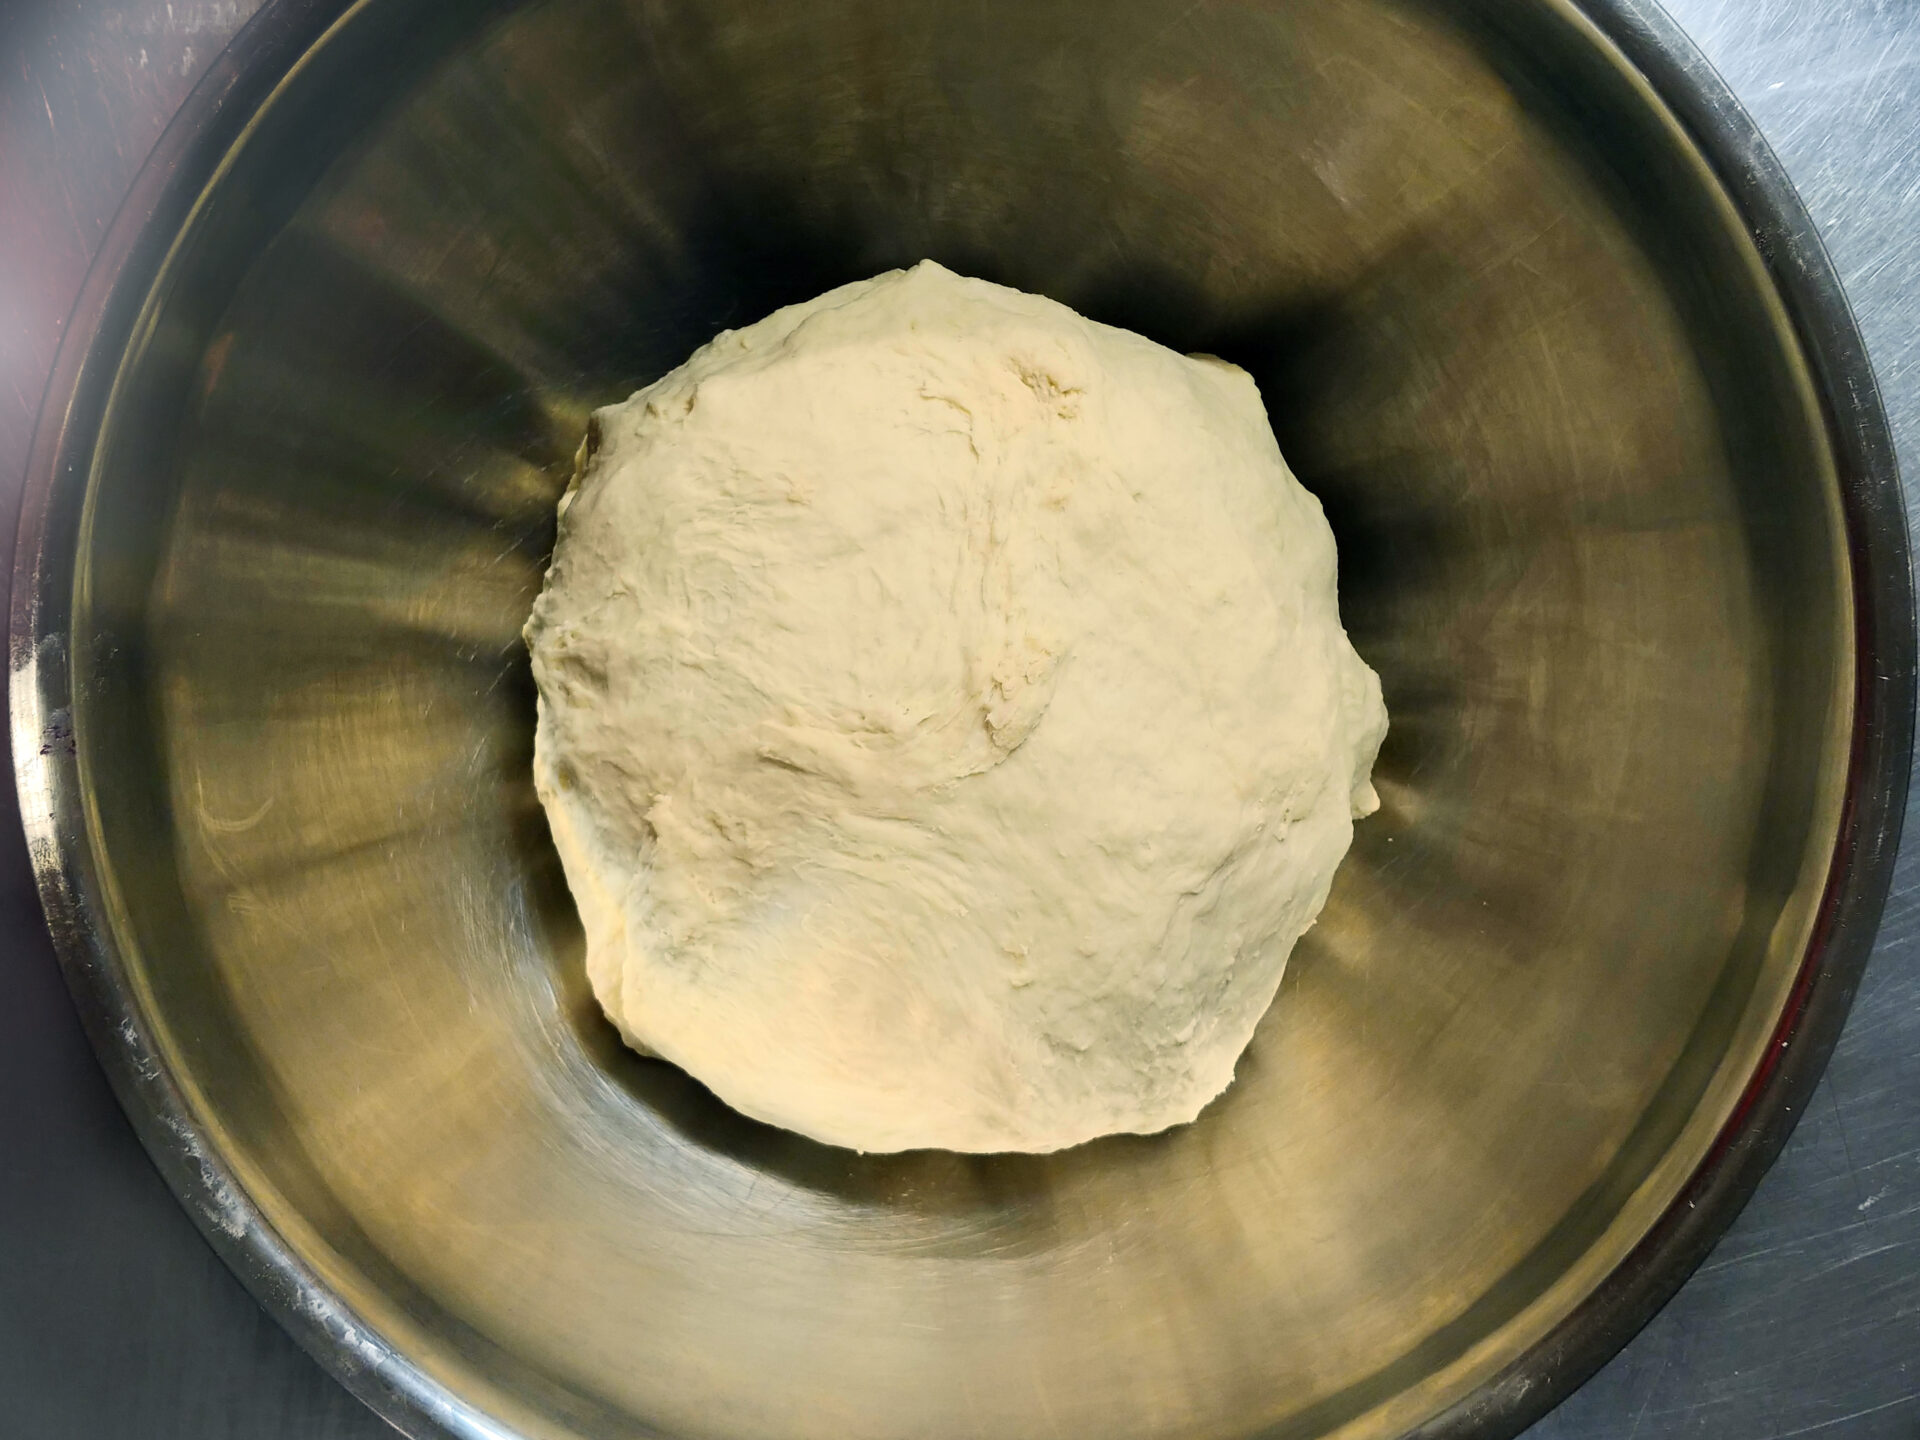
1.3. Then, increase the speed to medium-high and knead until a compact dough is formed (about 1 – 2 minutes).
Note:
- The dough should not be too sticky (at least not too much).
- If it sticks to the mixing bowl after about 2 to 3 minutes of processing, add 2 TBSP of flour and process for 1 – 2 minutes. That should solve the problem. If not, add a little more flour.
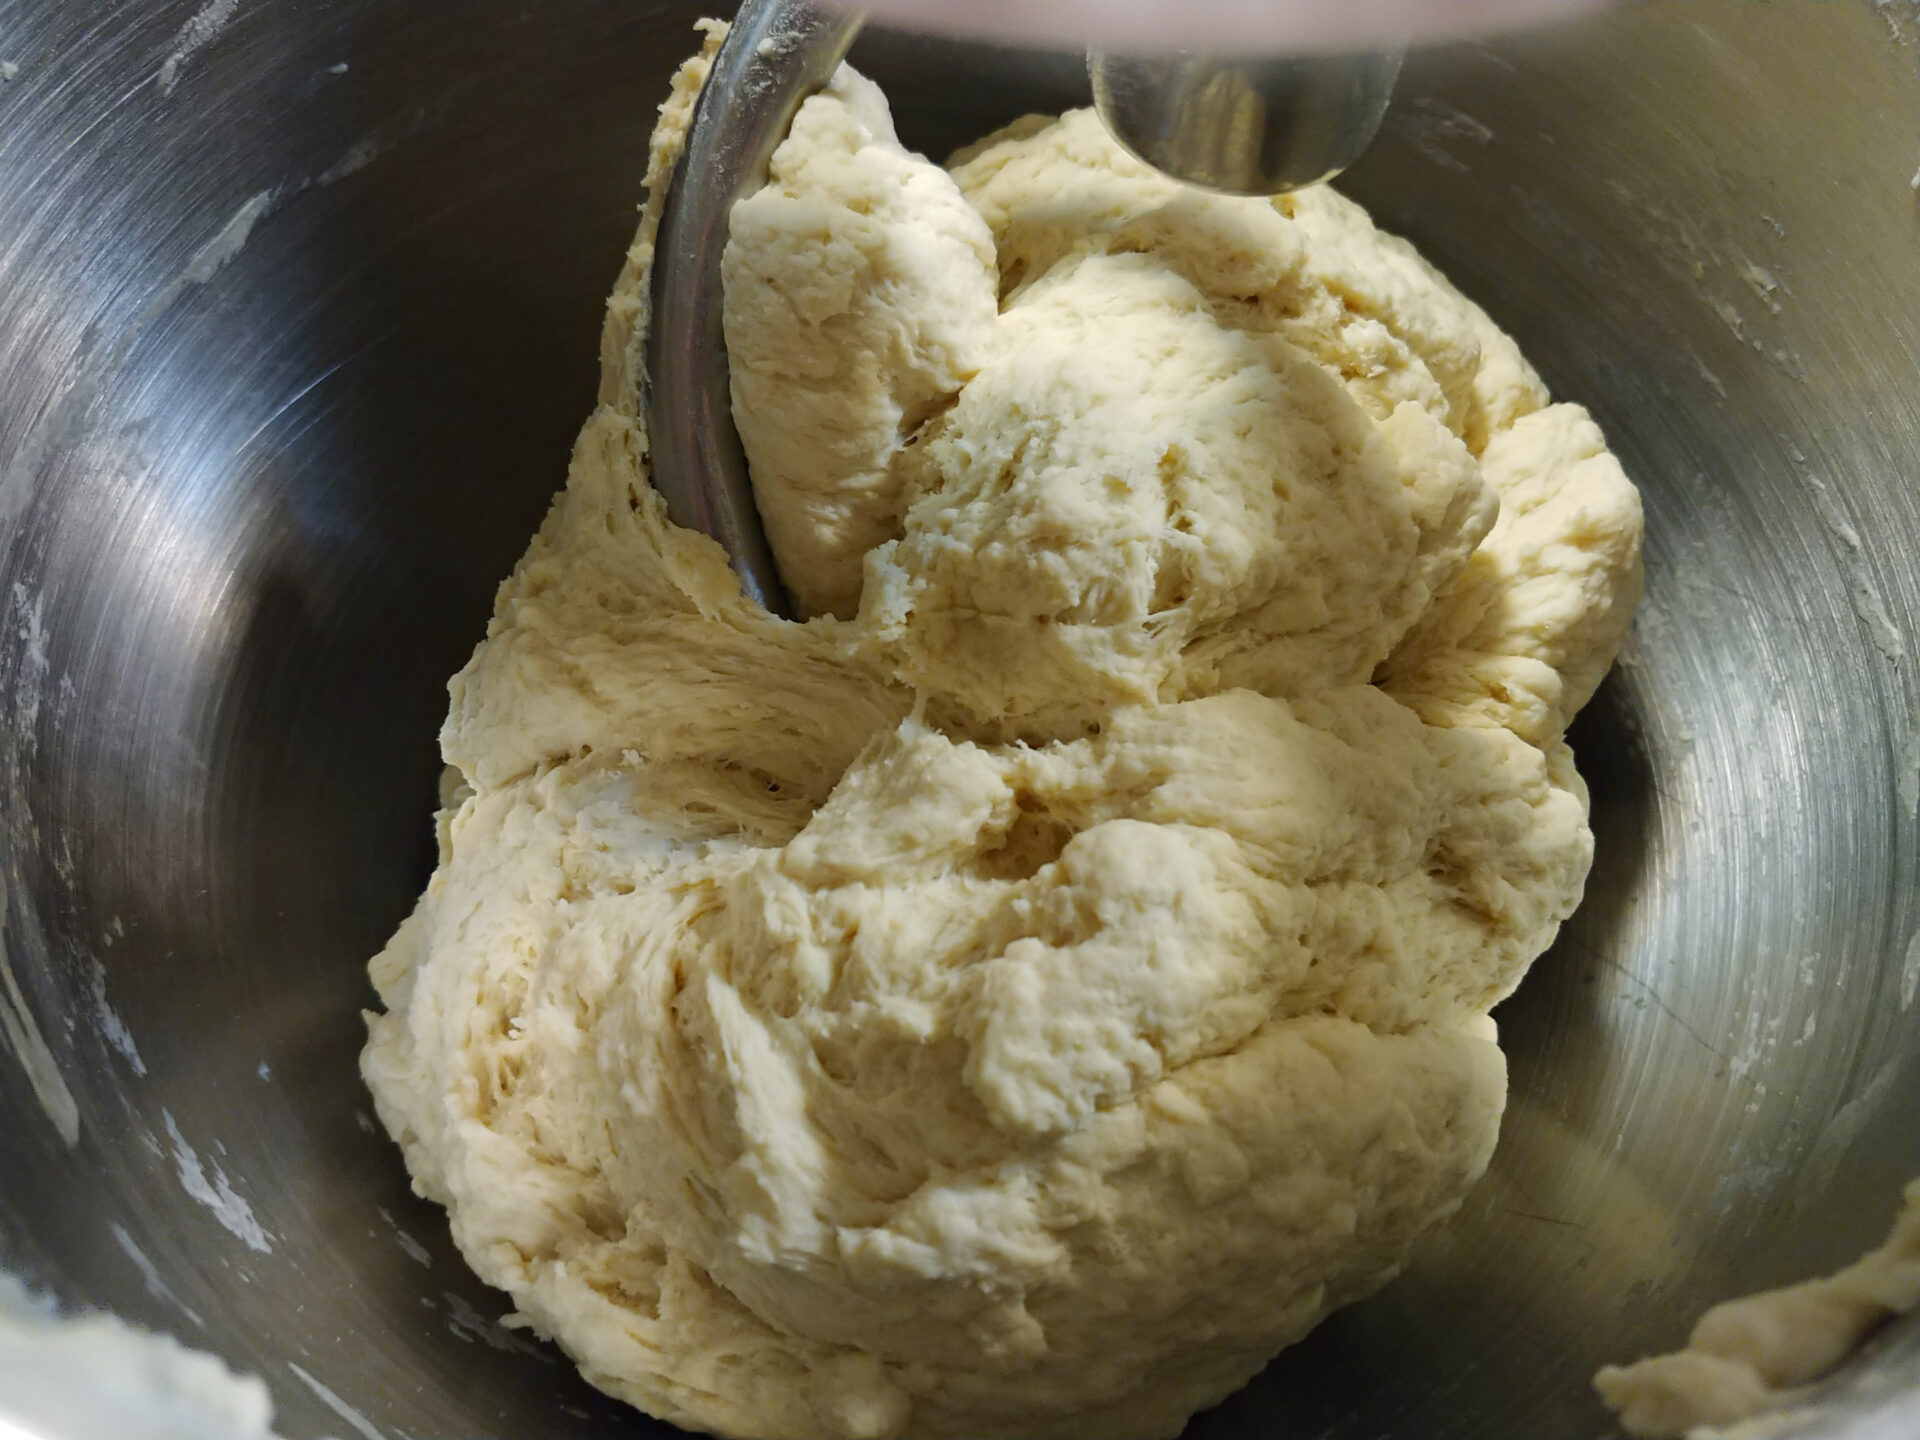
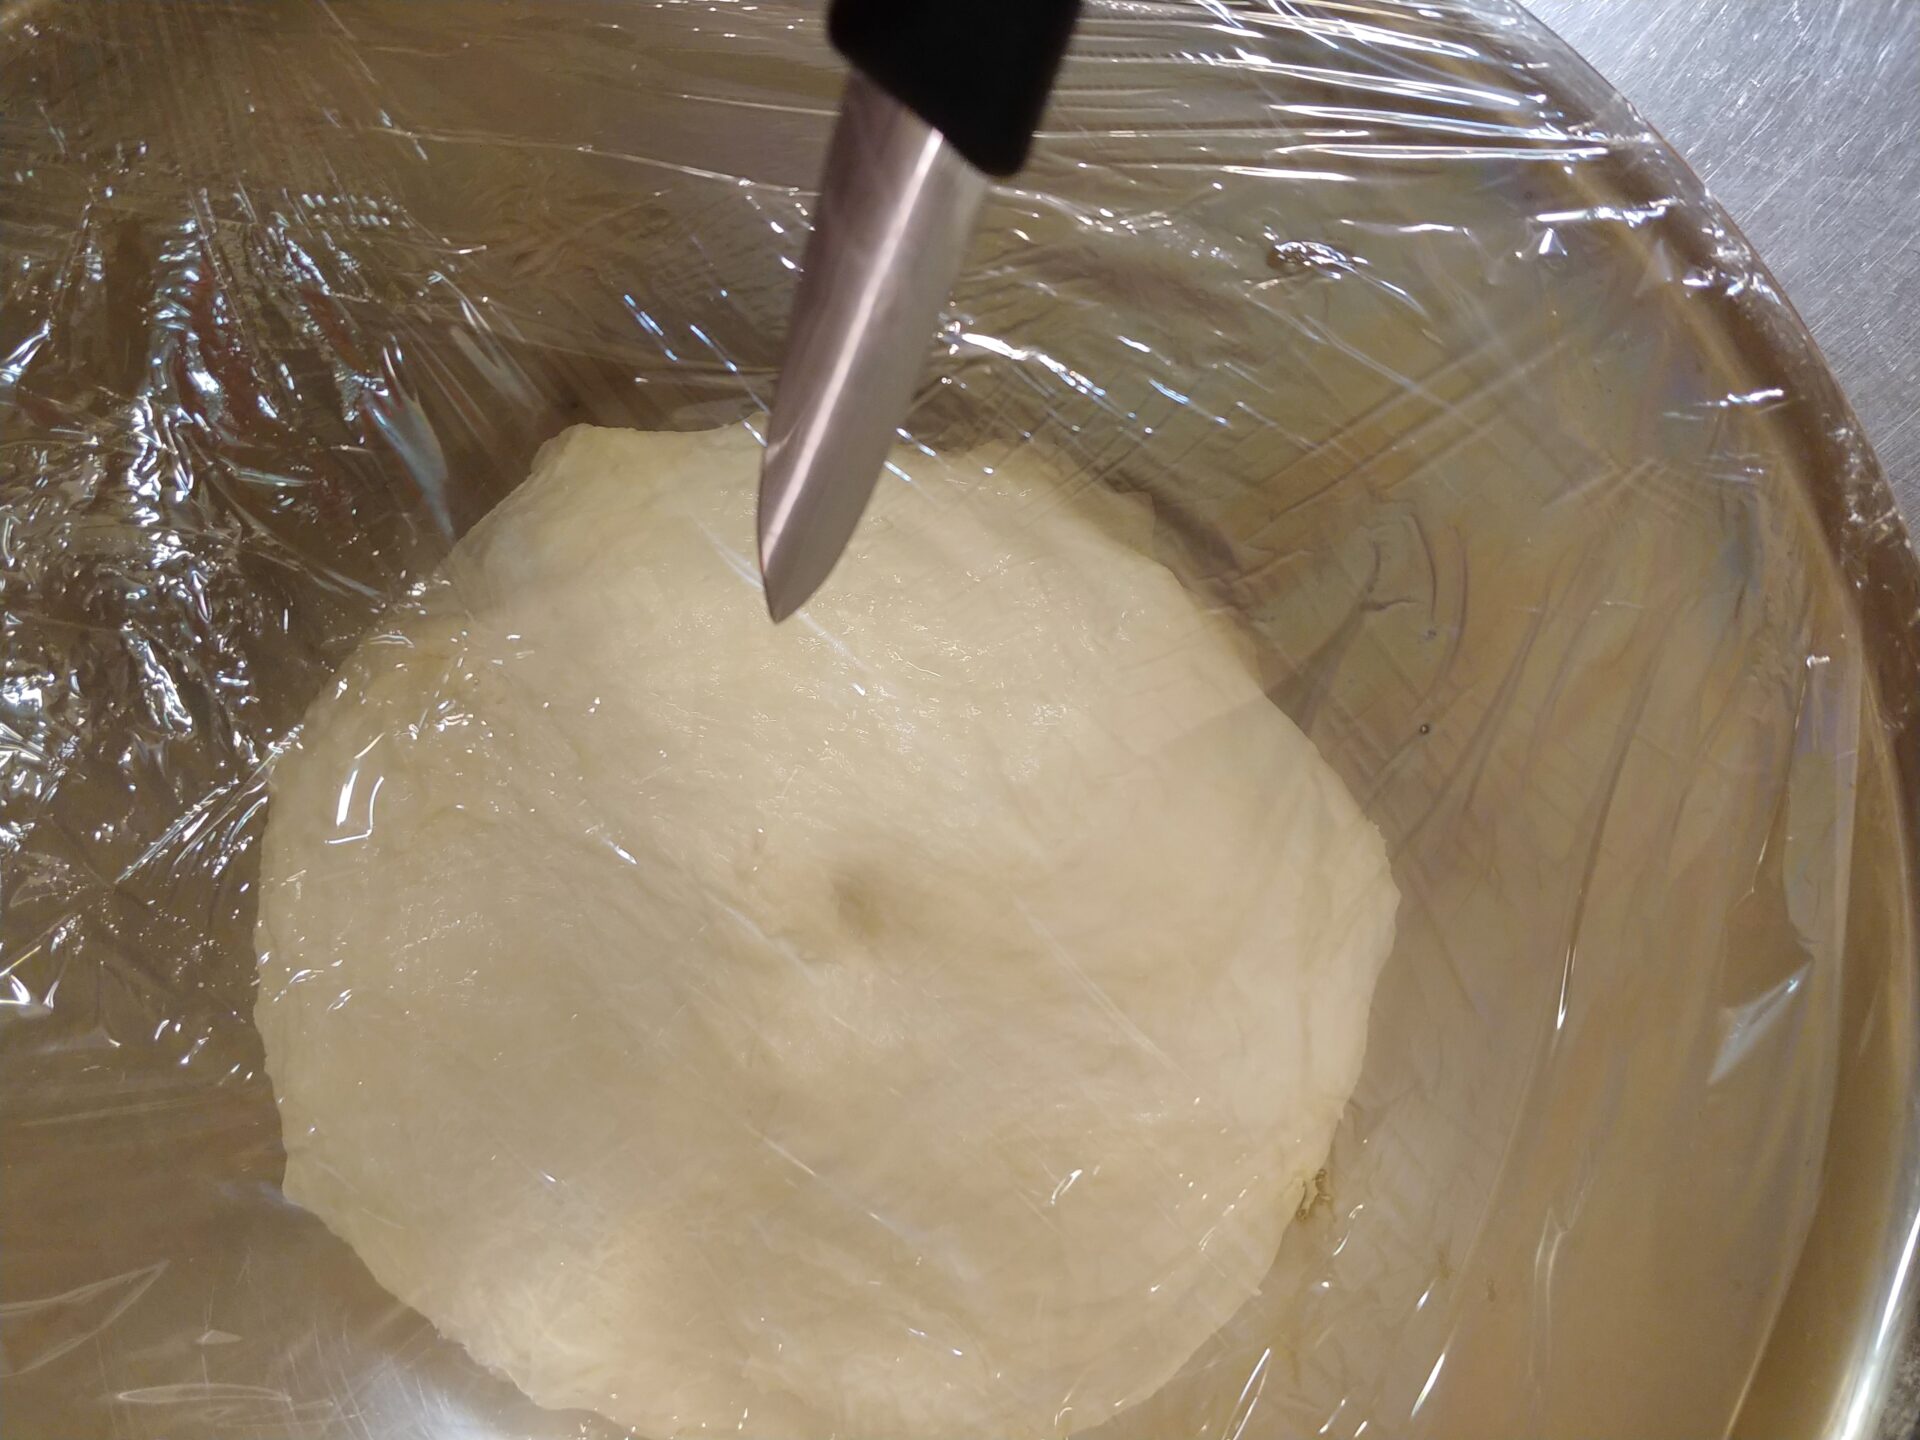
2. Rising the dough:
2.1.
Remove the bowl with the dough from the mixer and cover the bowl with plastic wrap.
2.2.
Let it rise in a warm place until it doubles in size (about 2 – 3 hours).
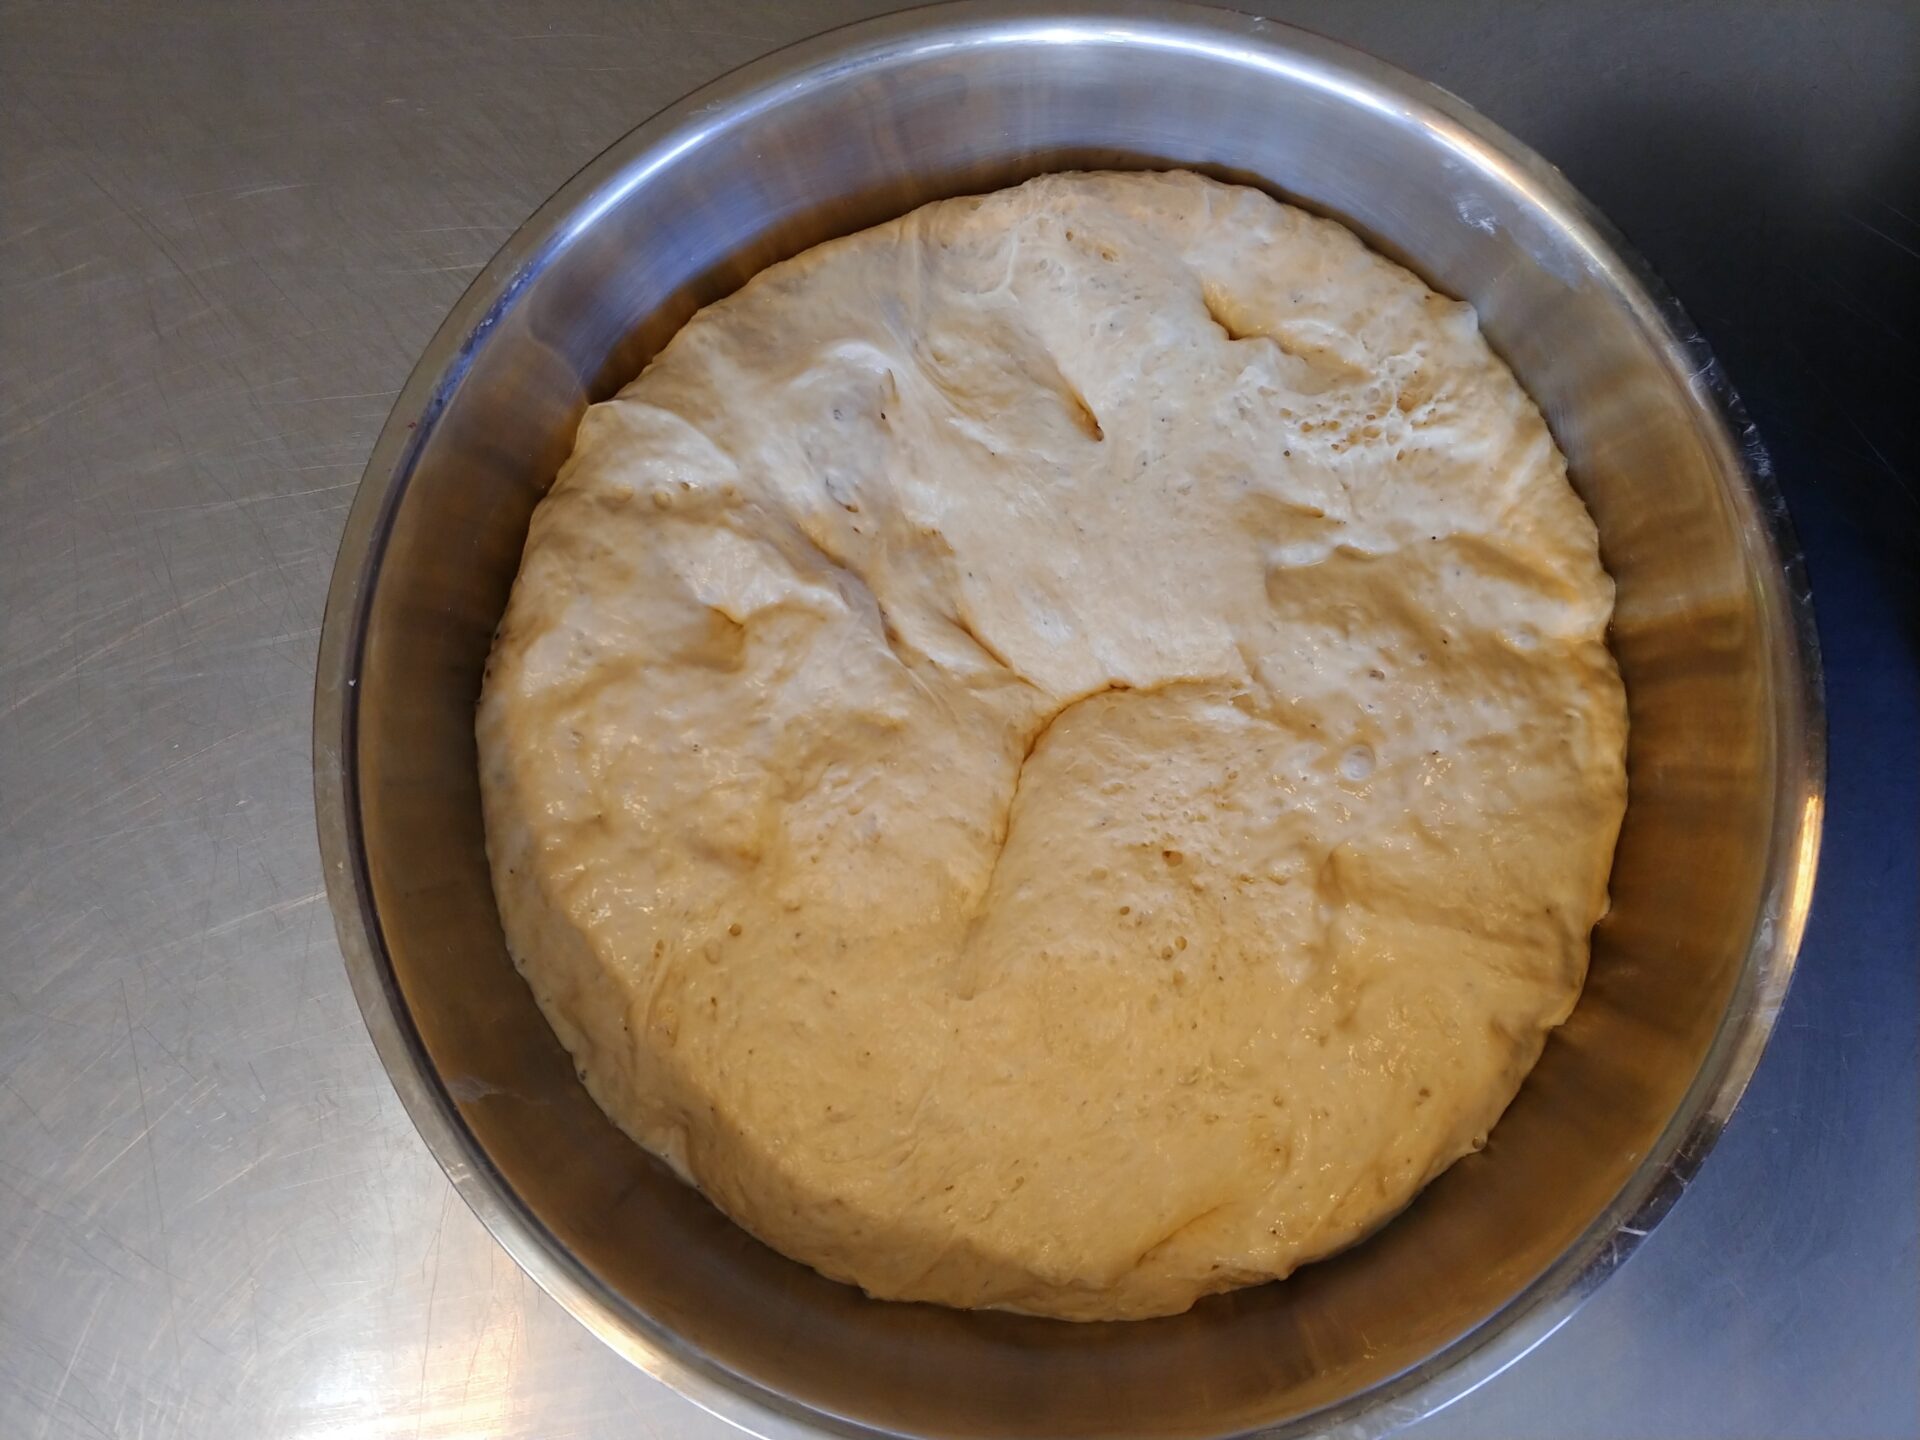
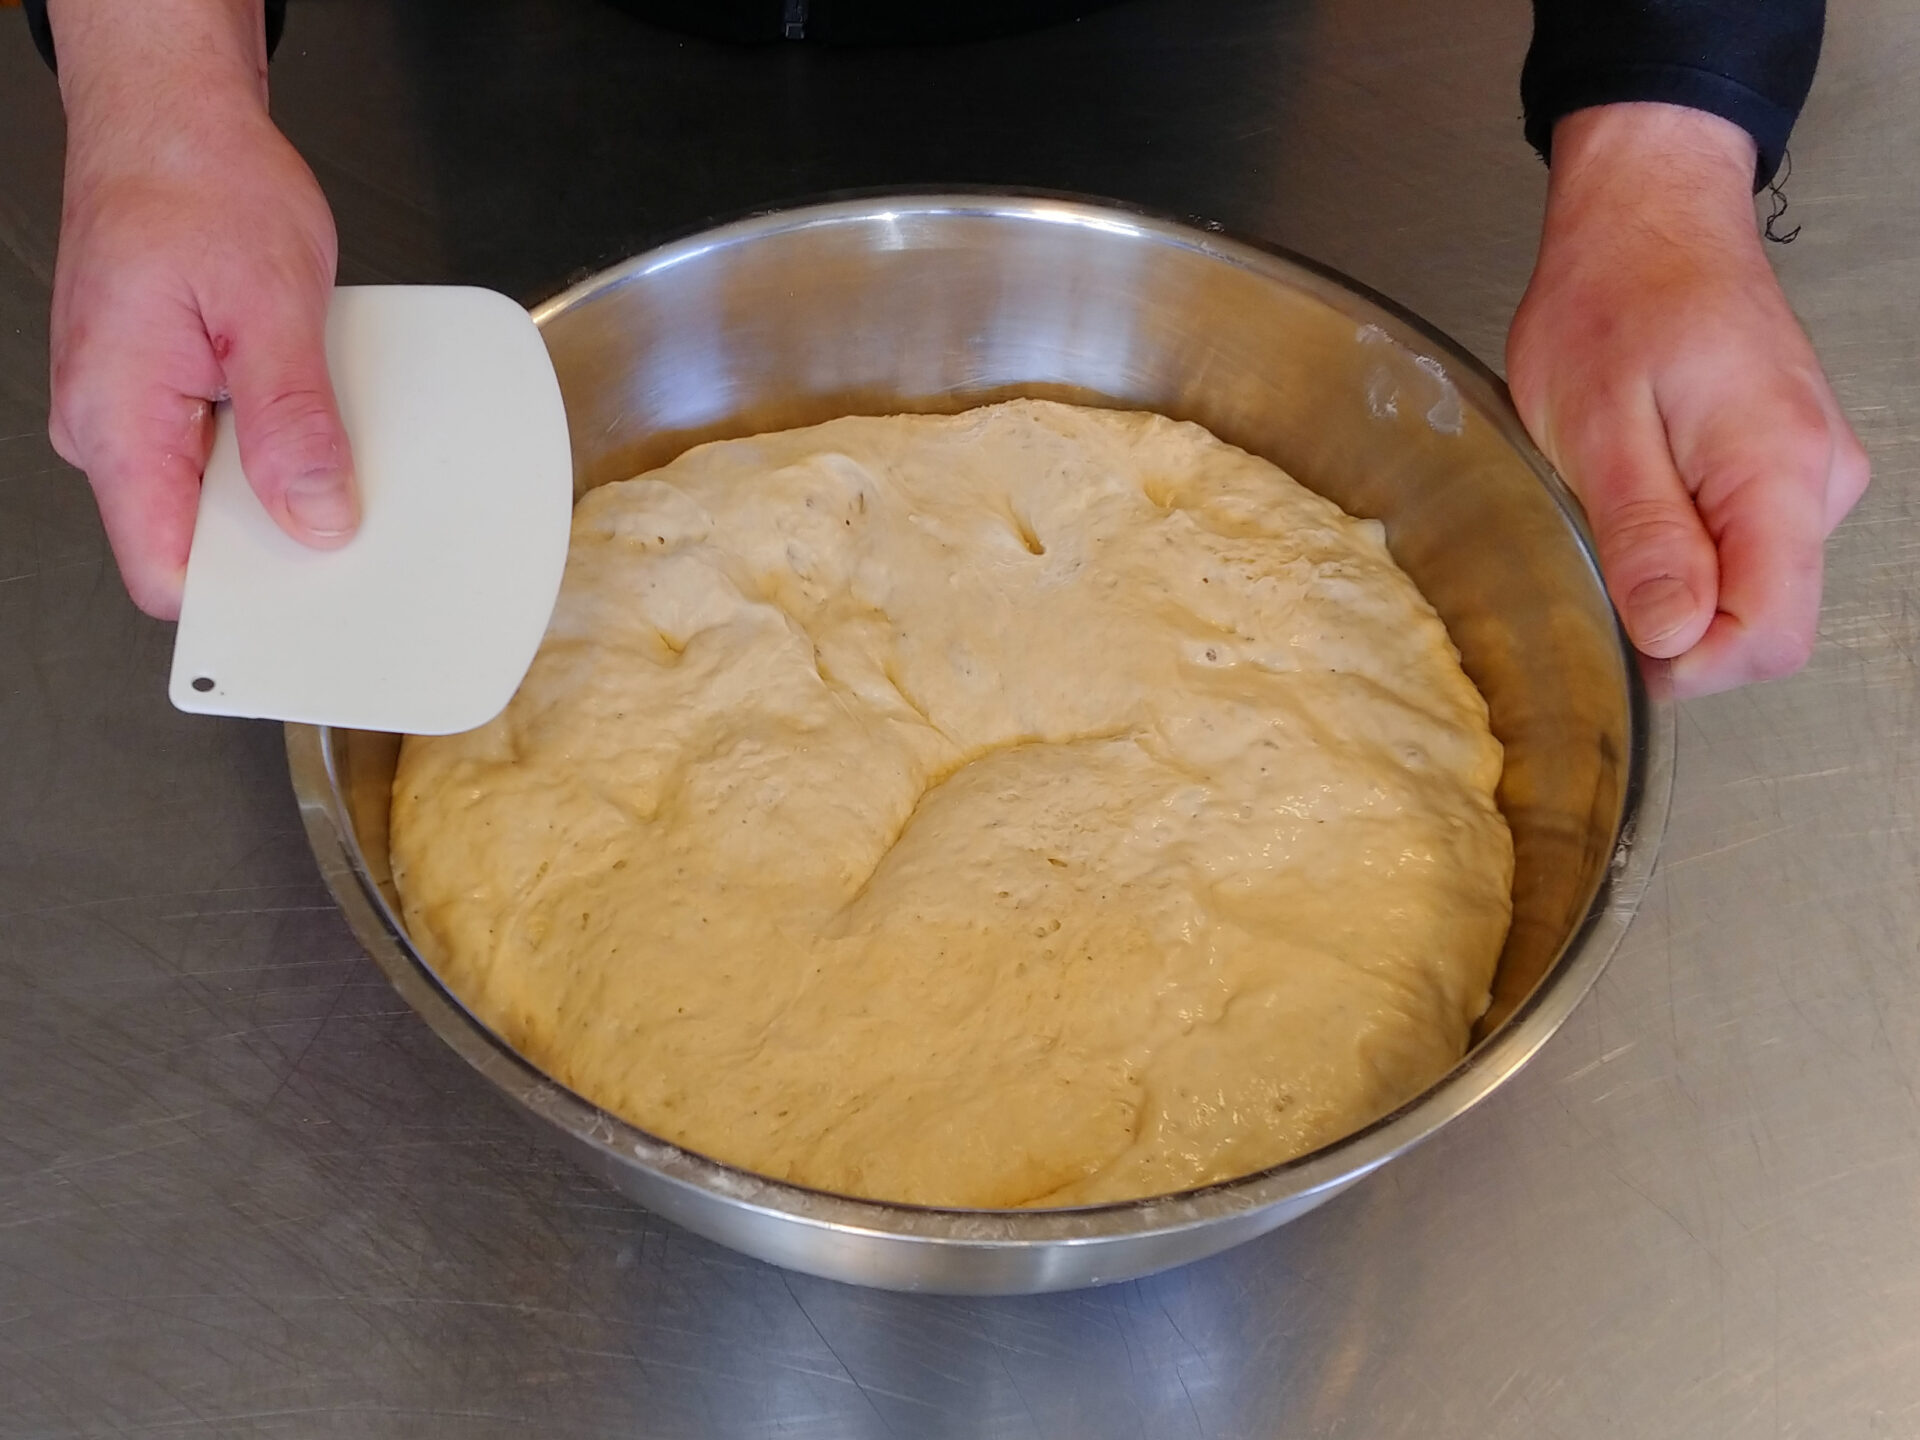
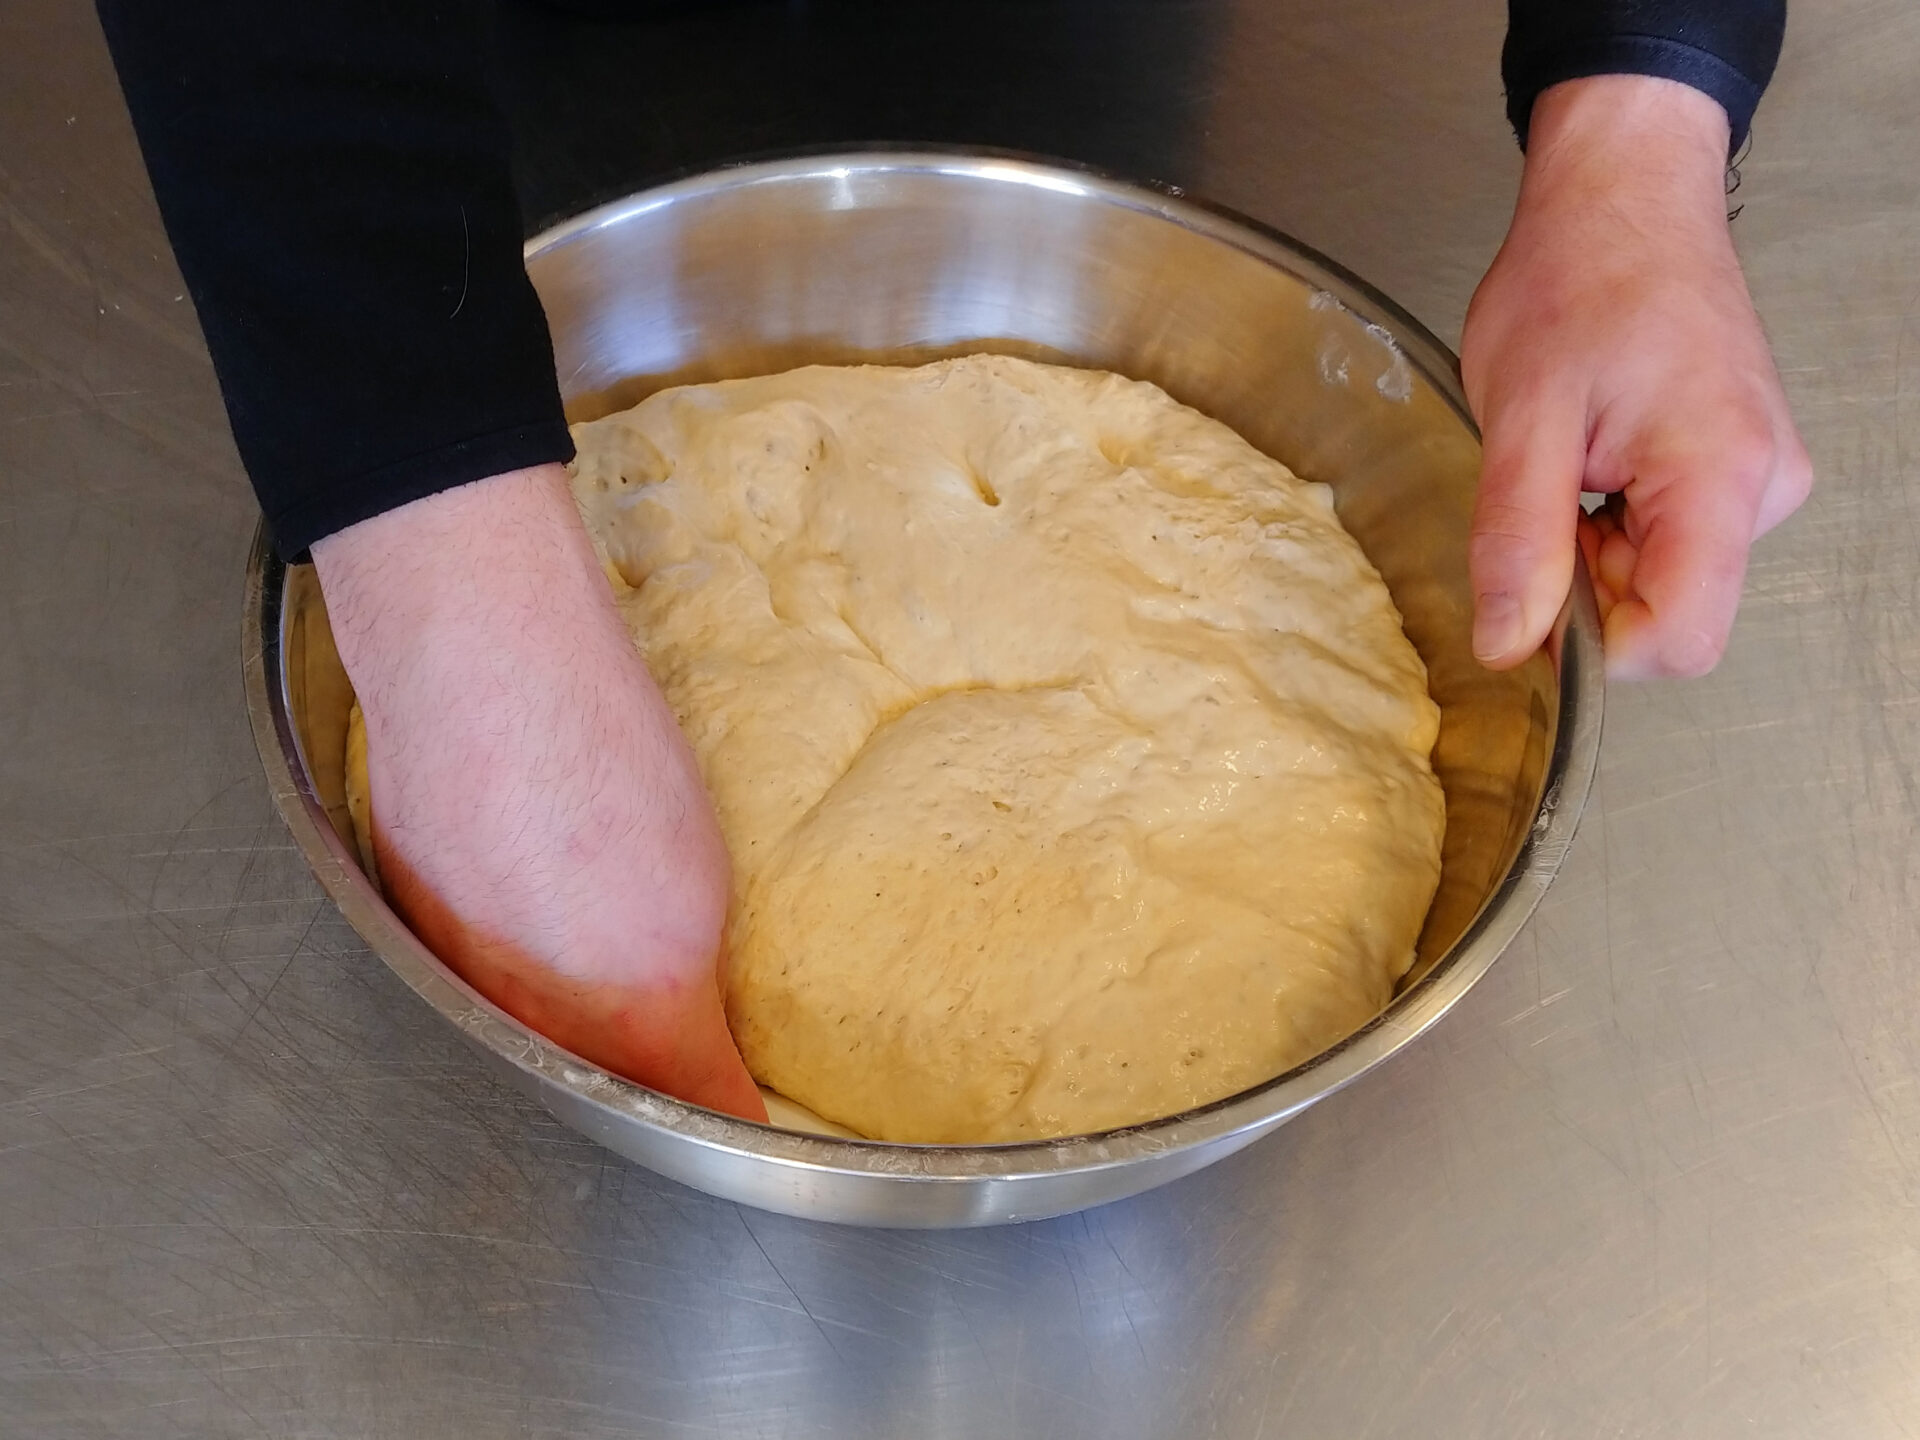
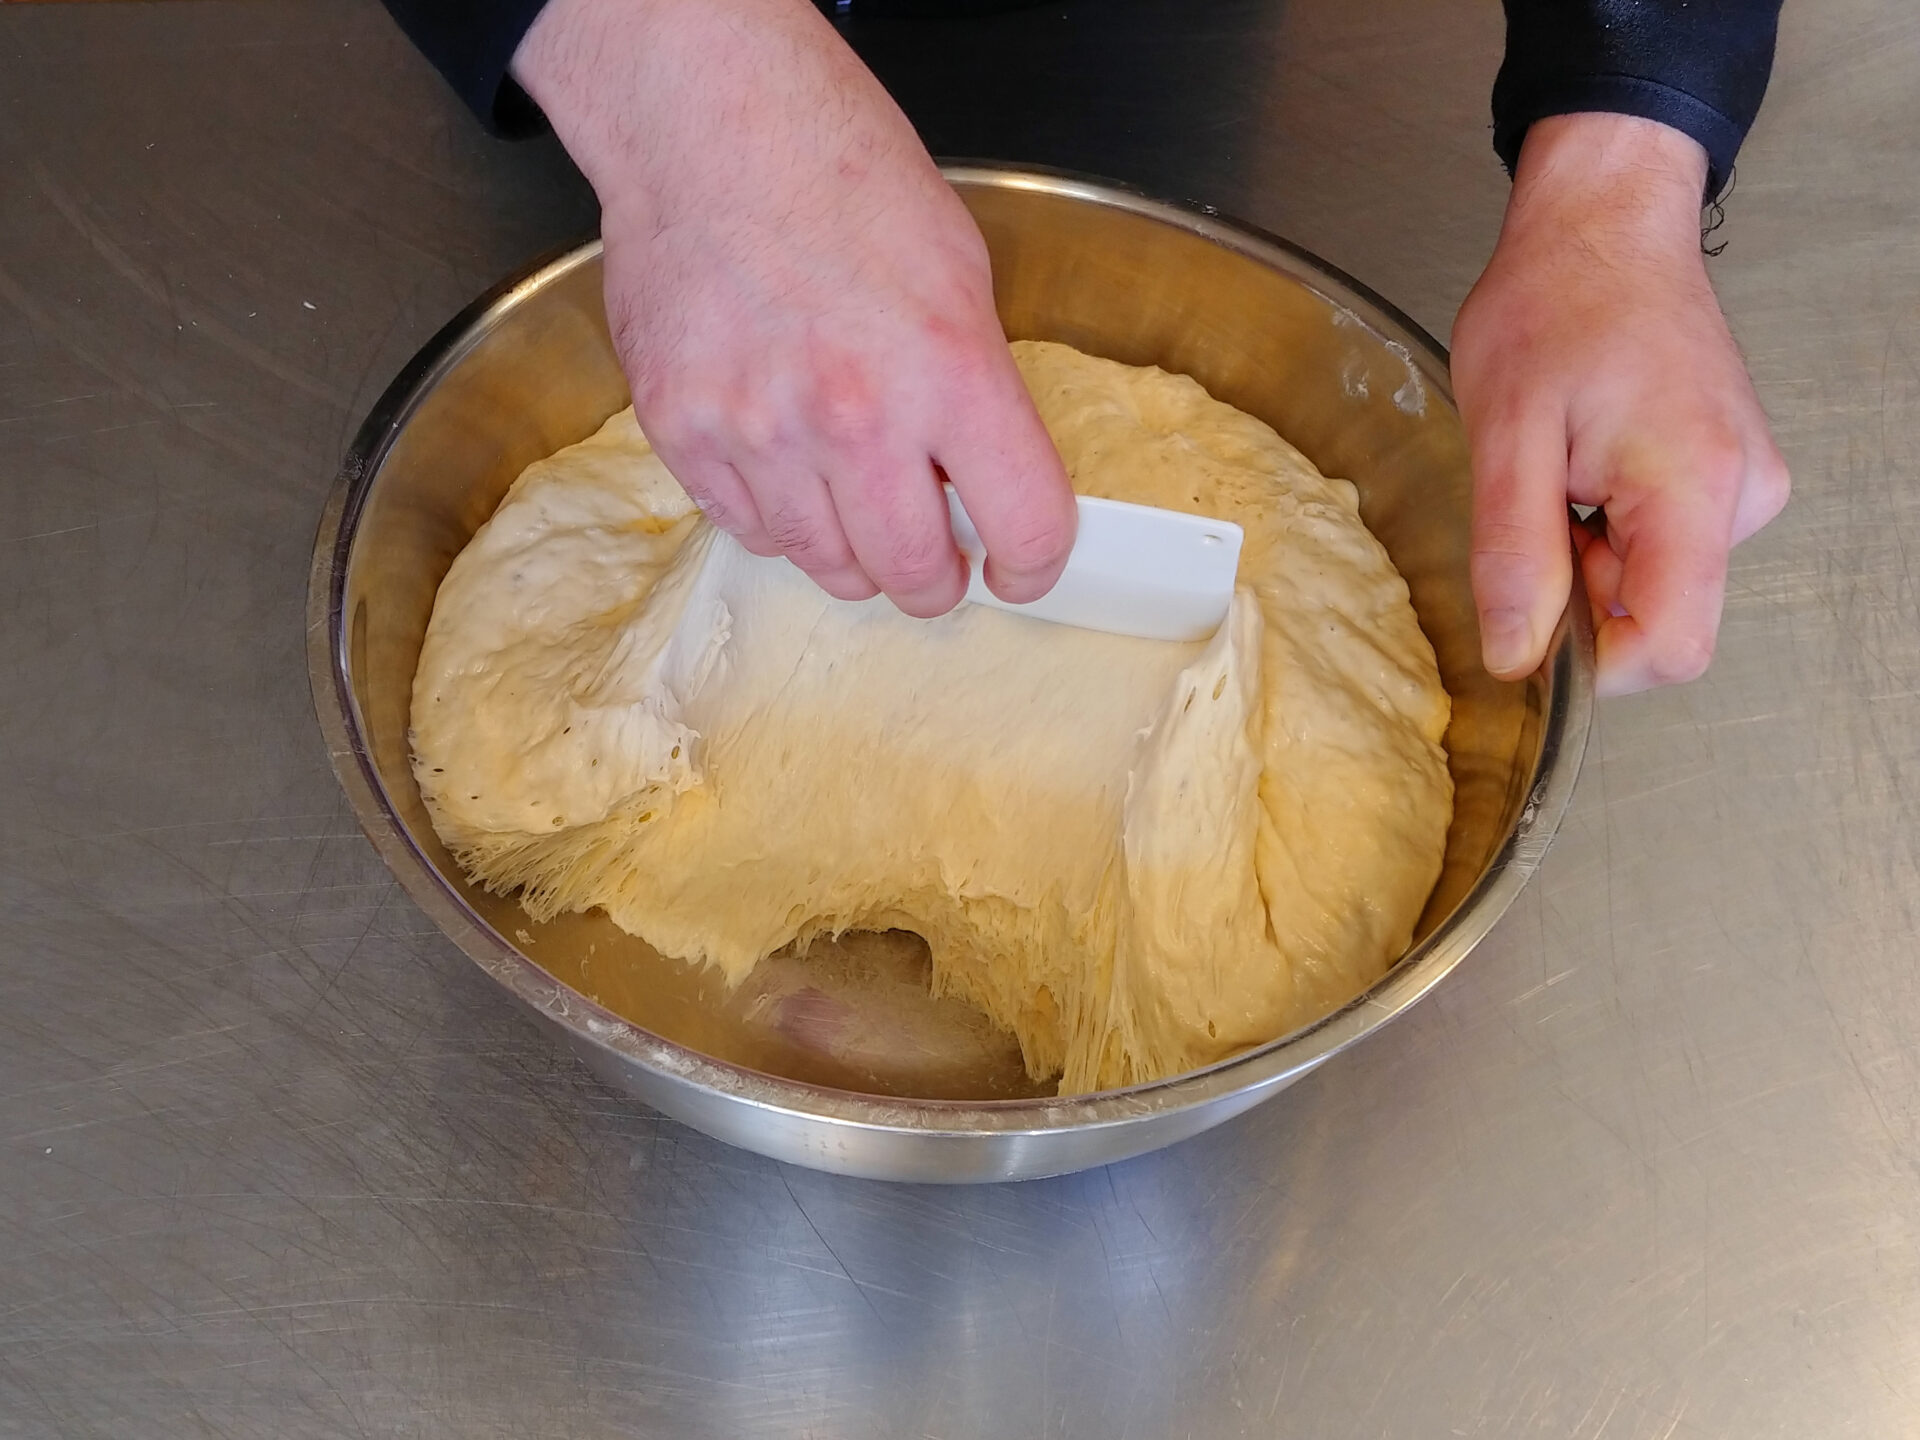
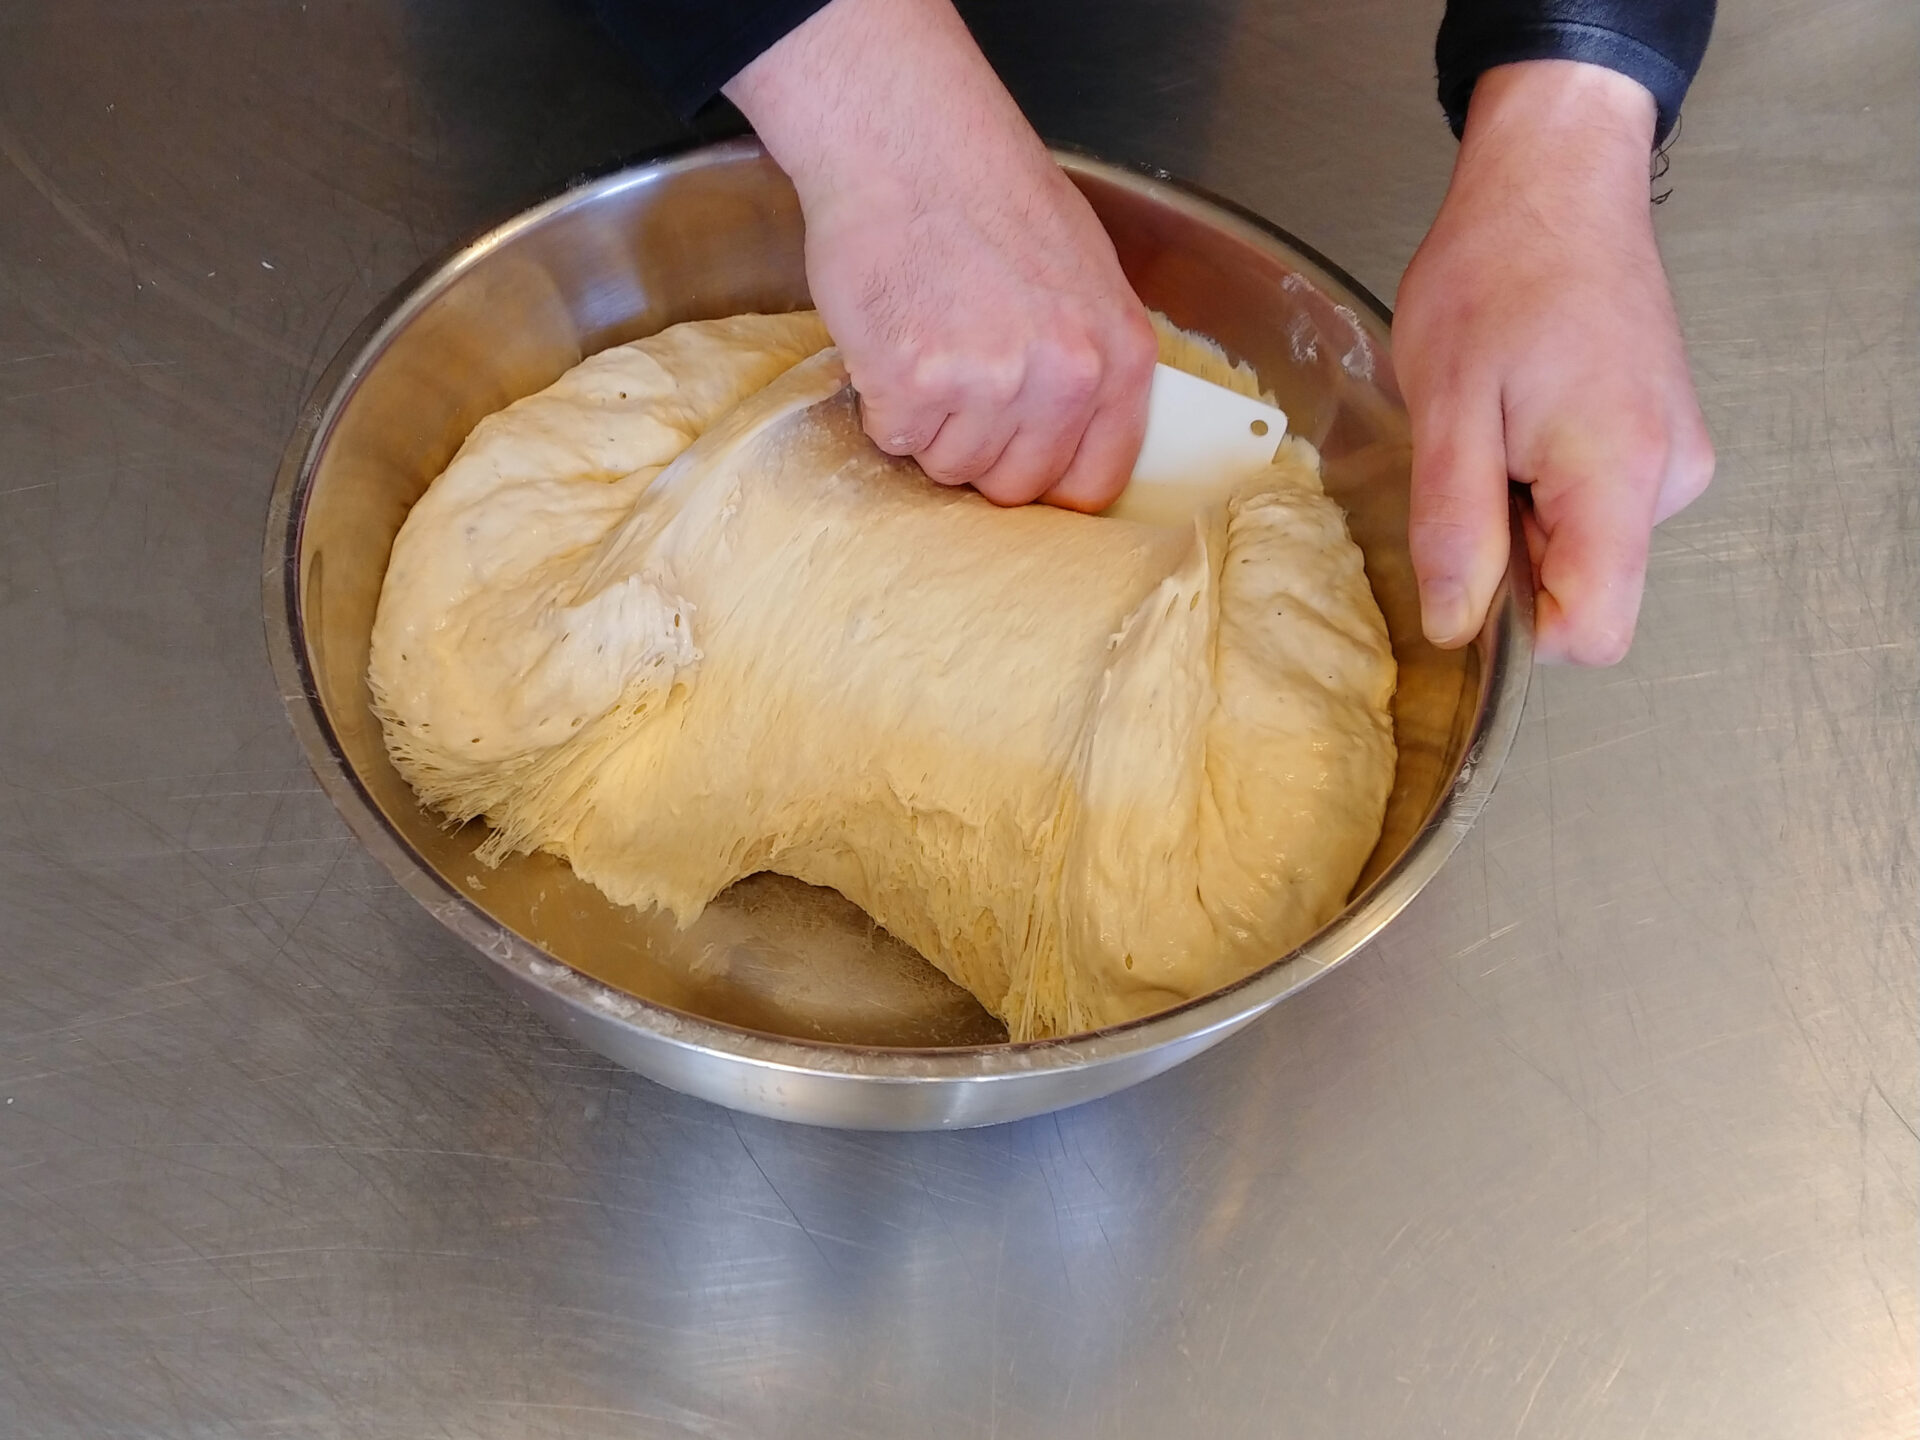
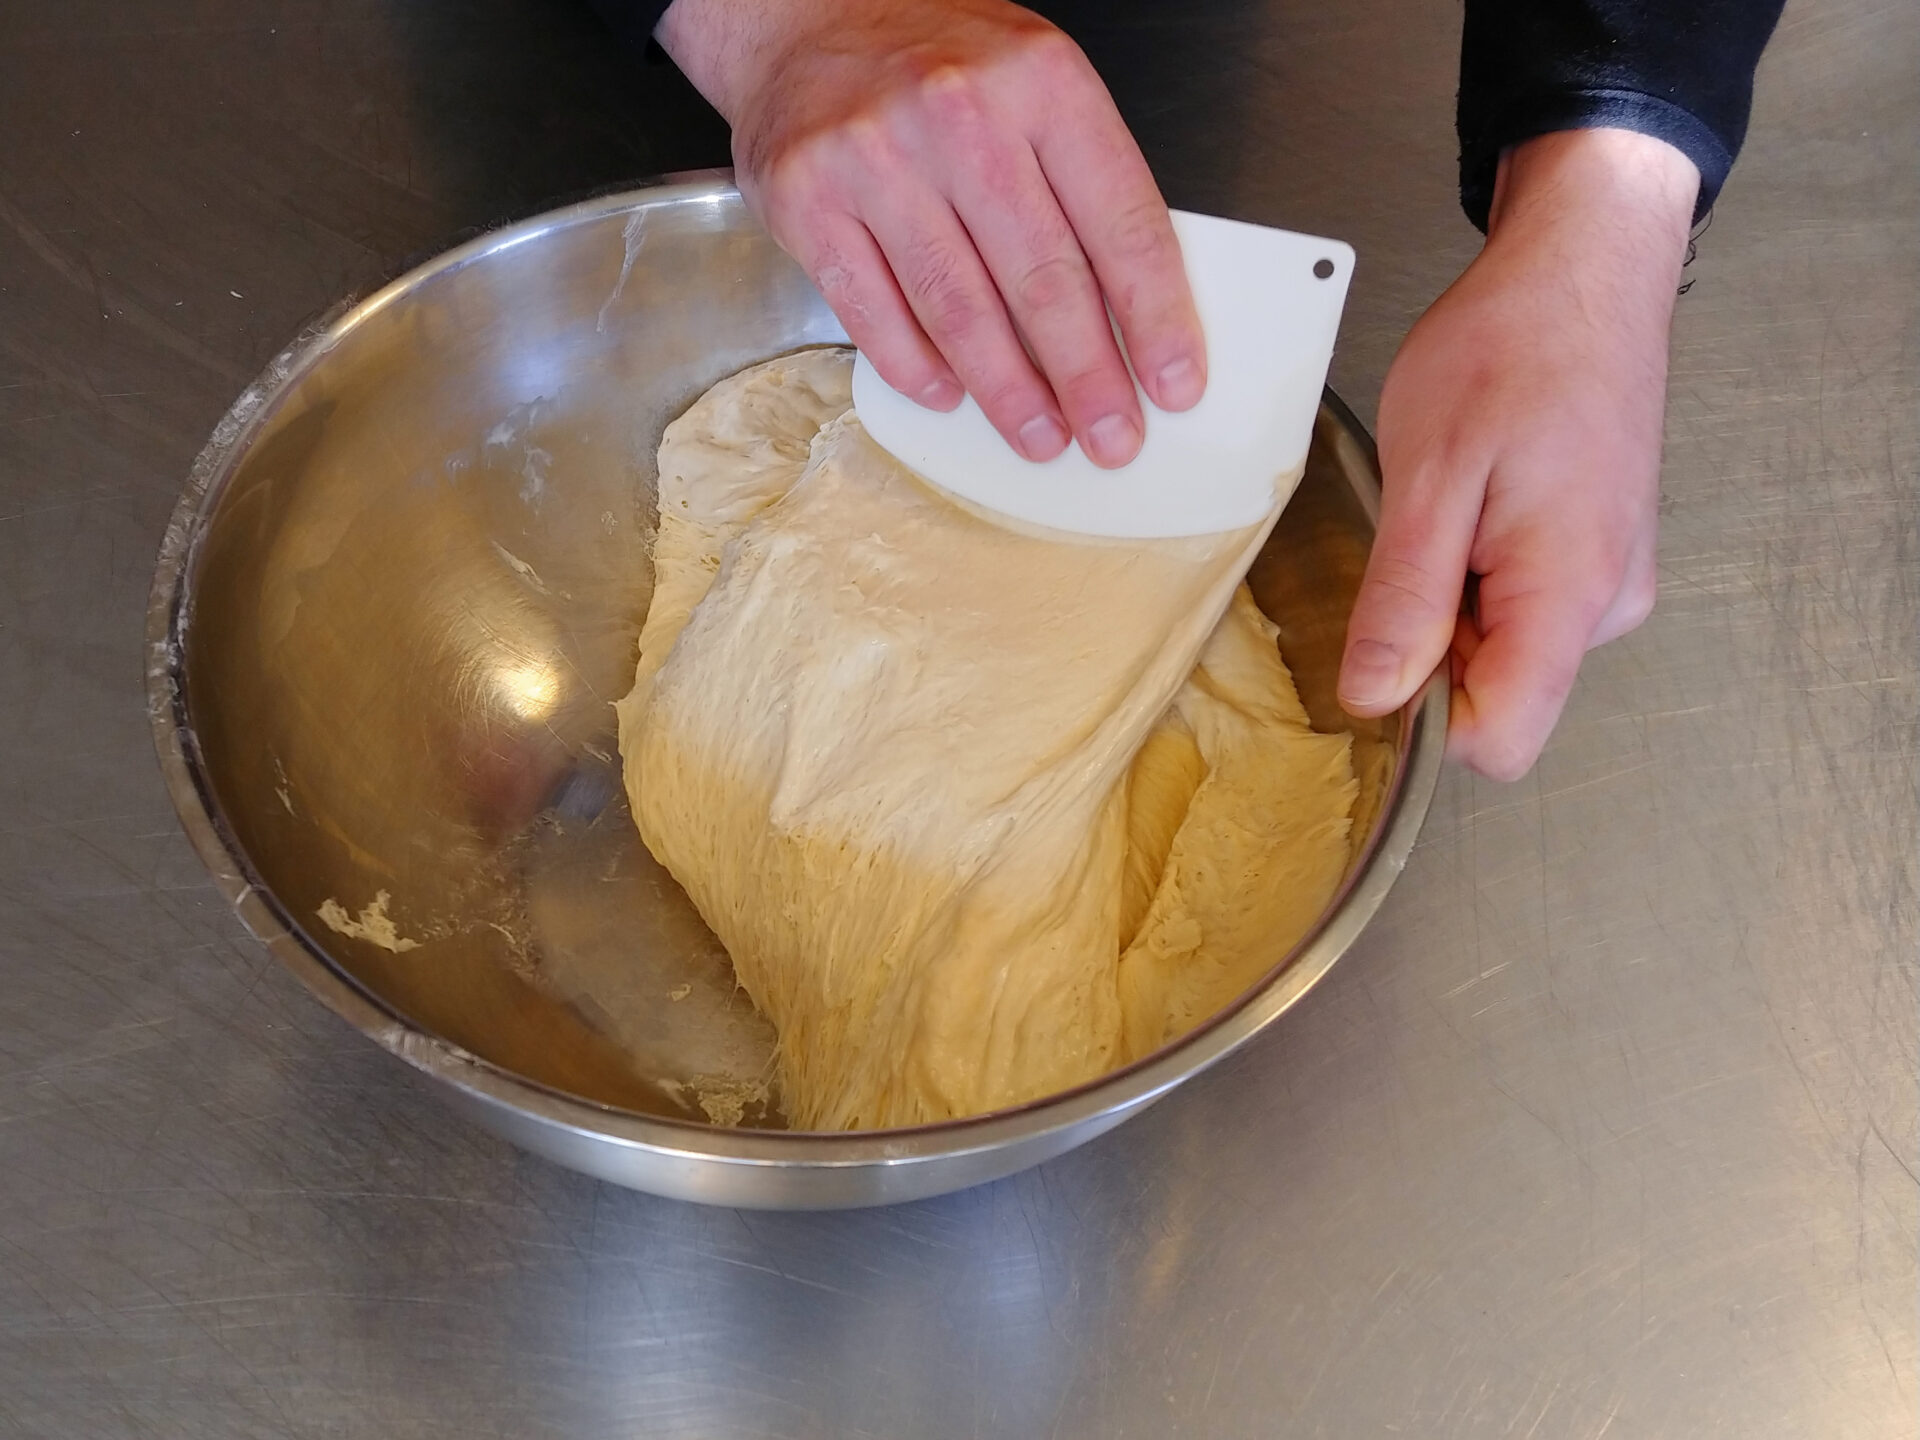
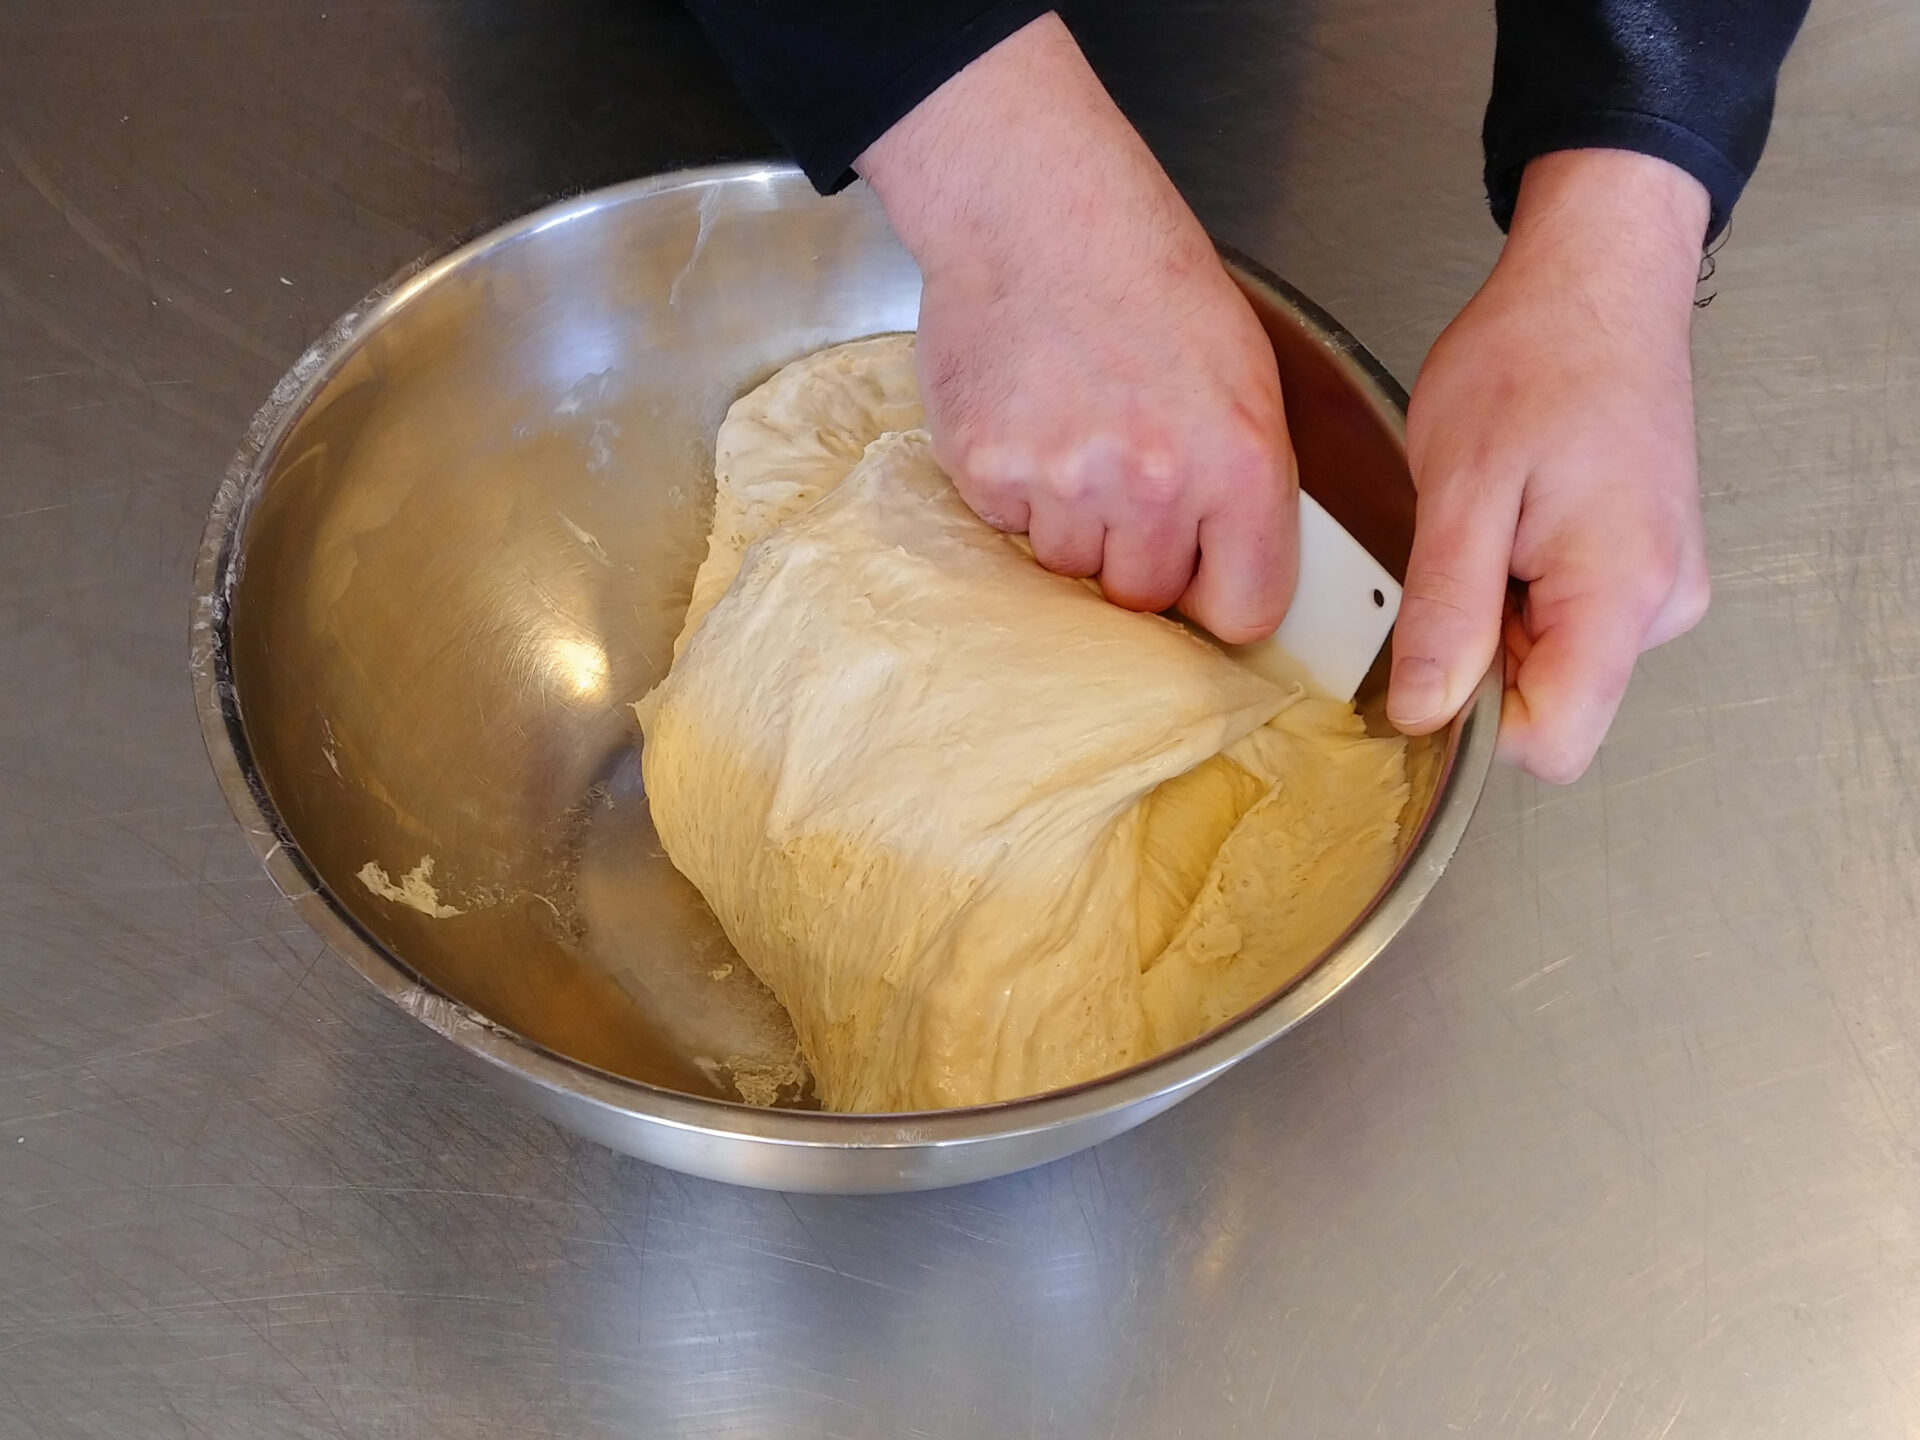
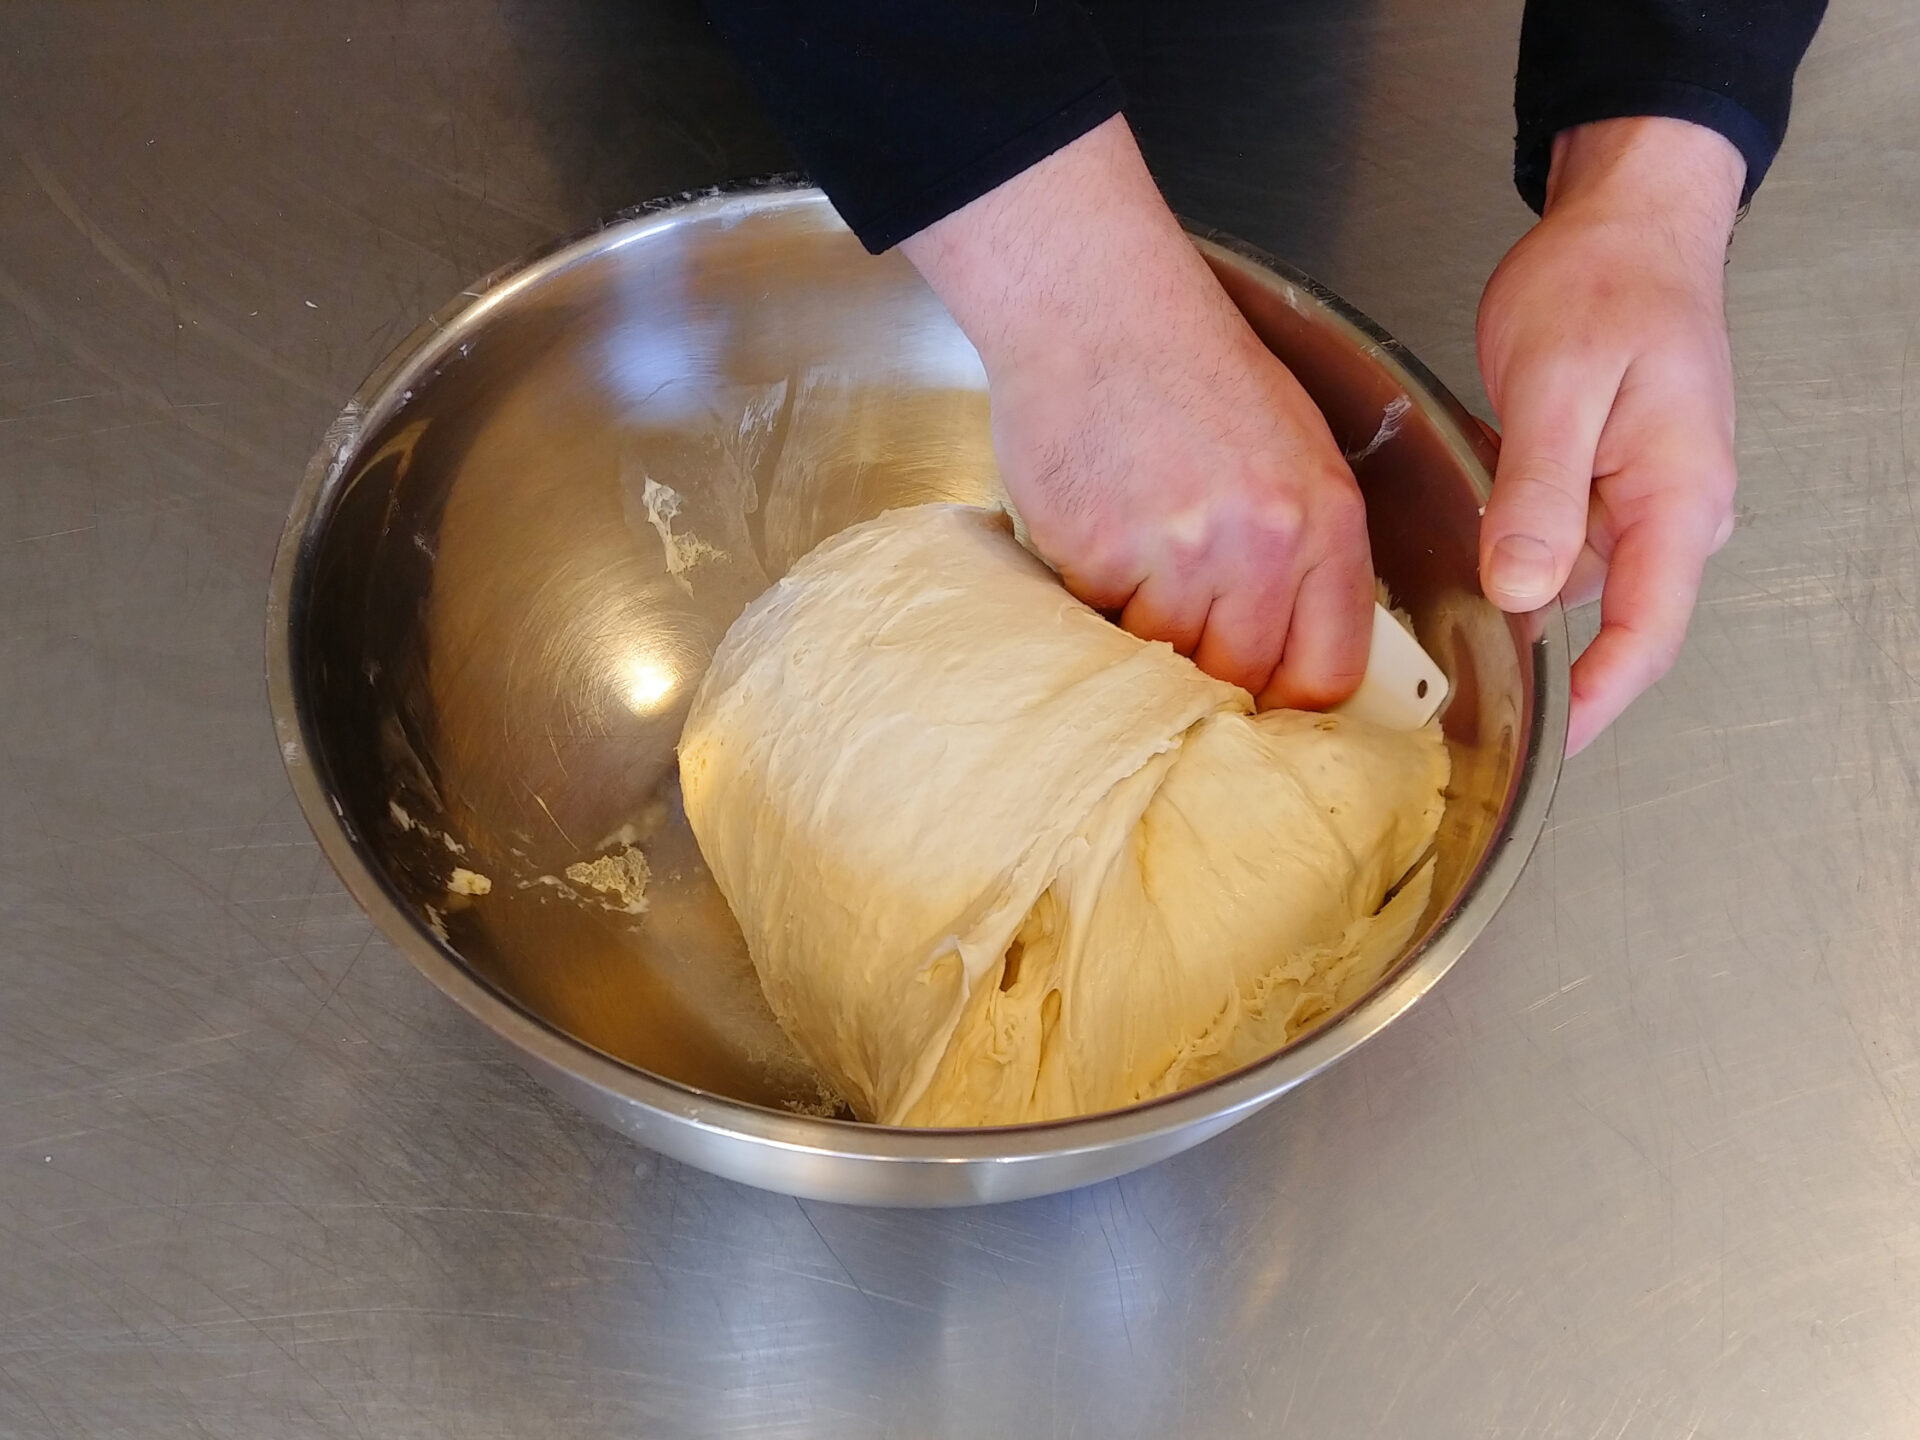
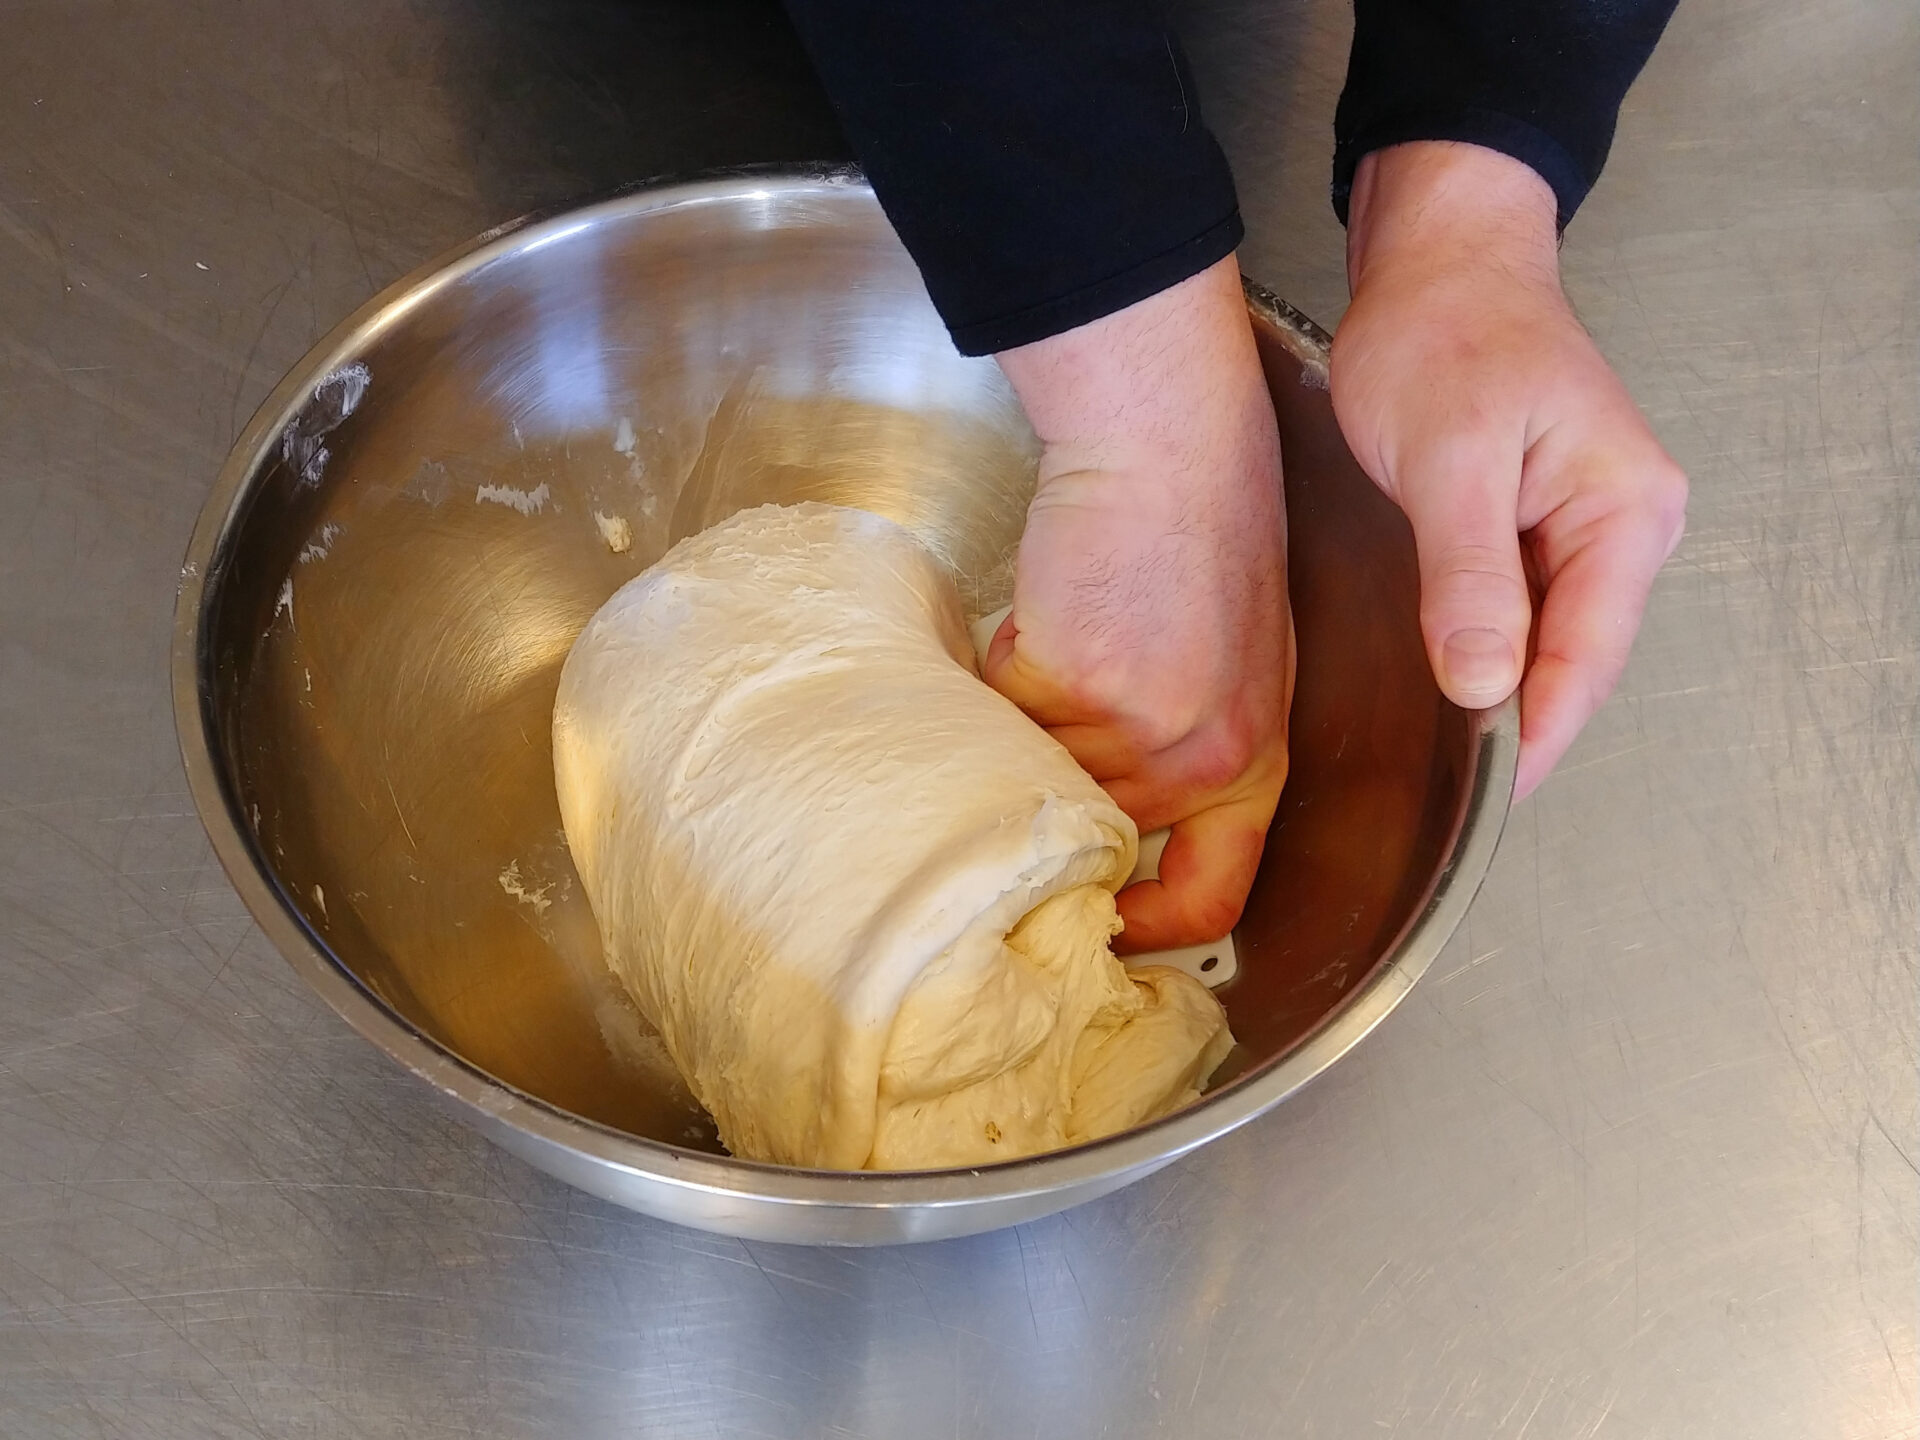
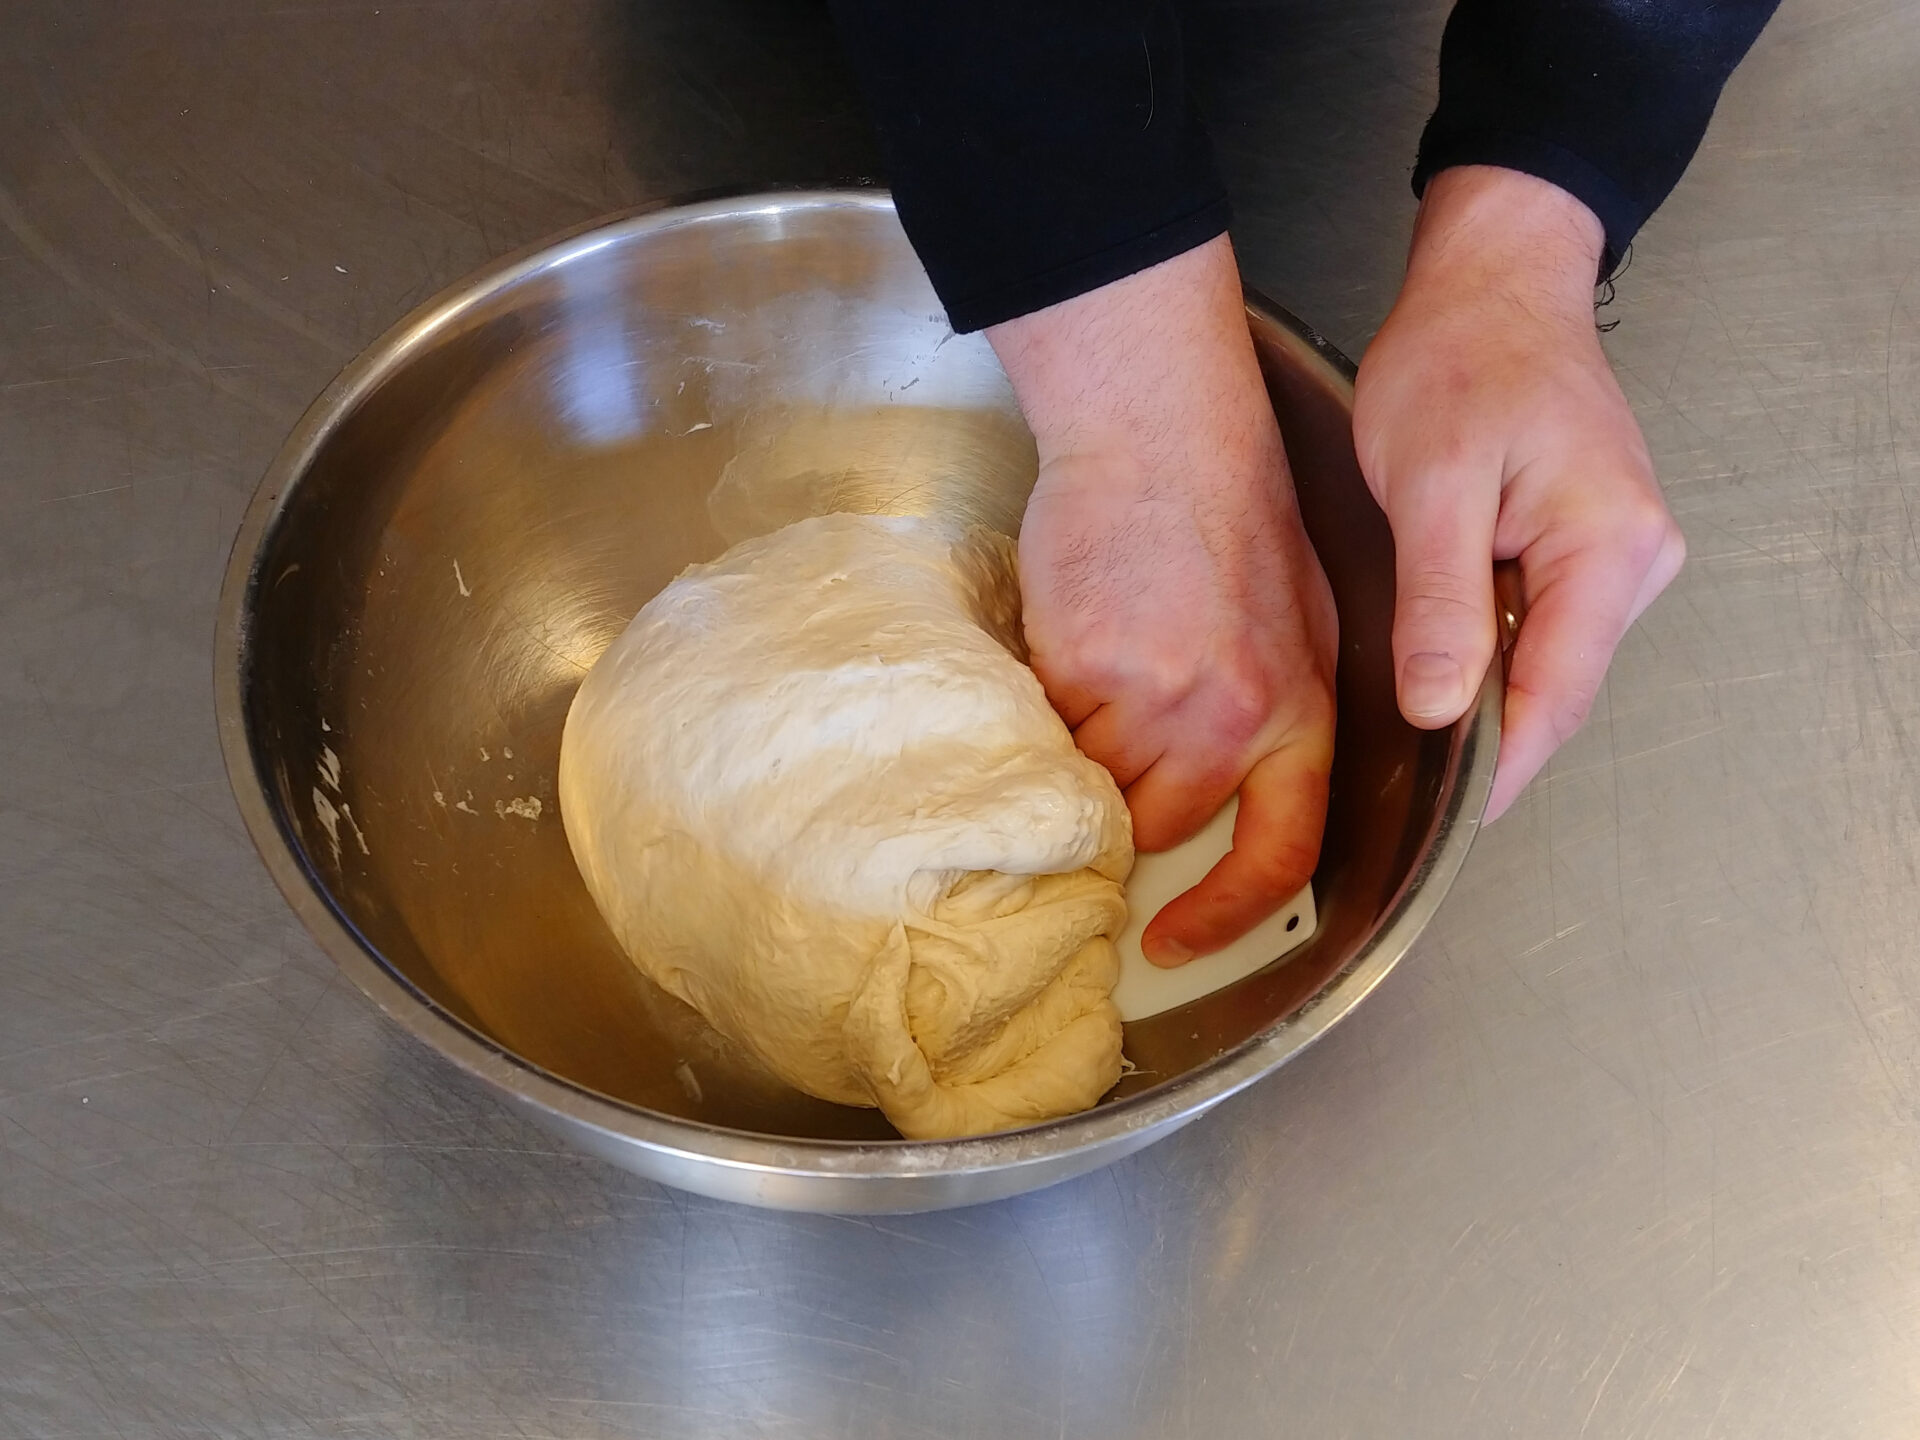
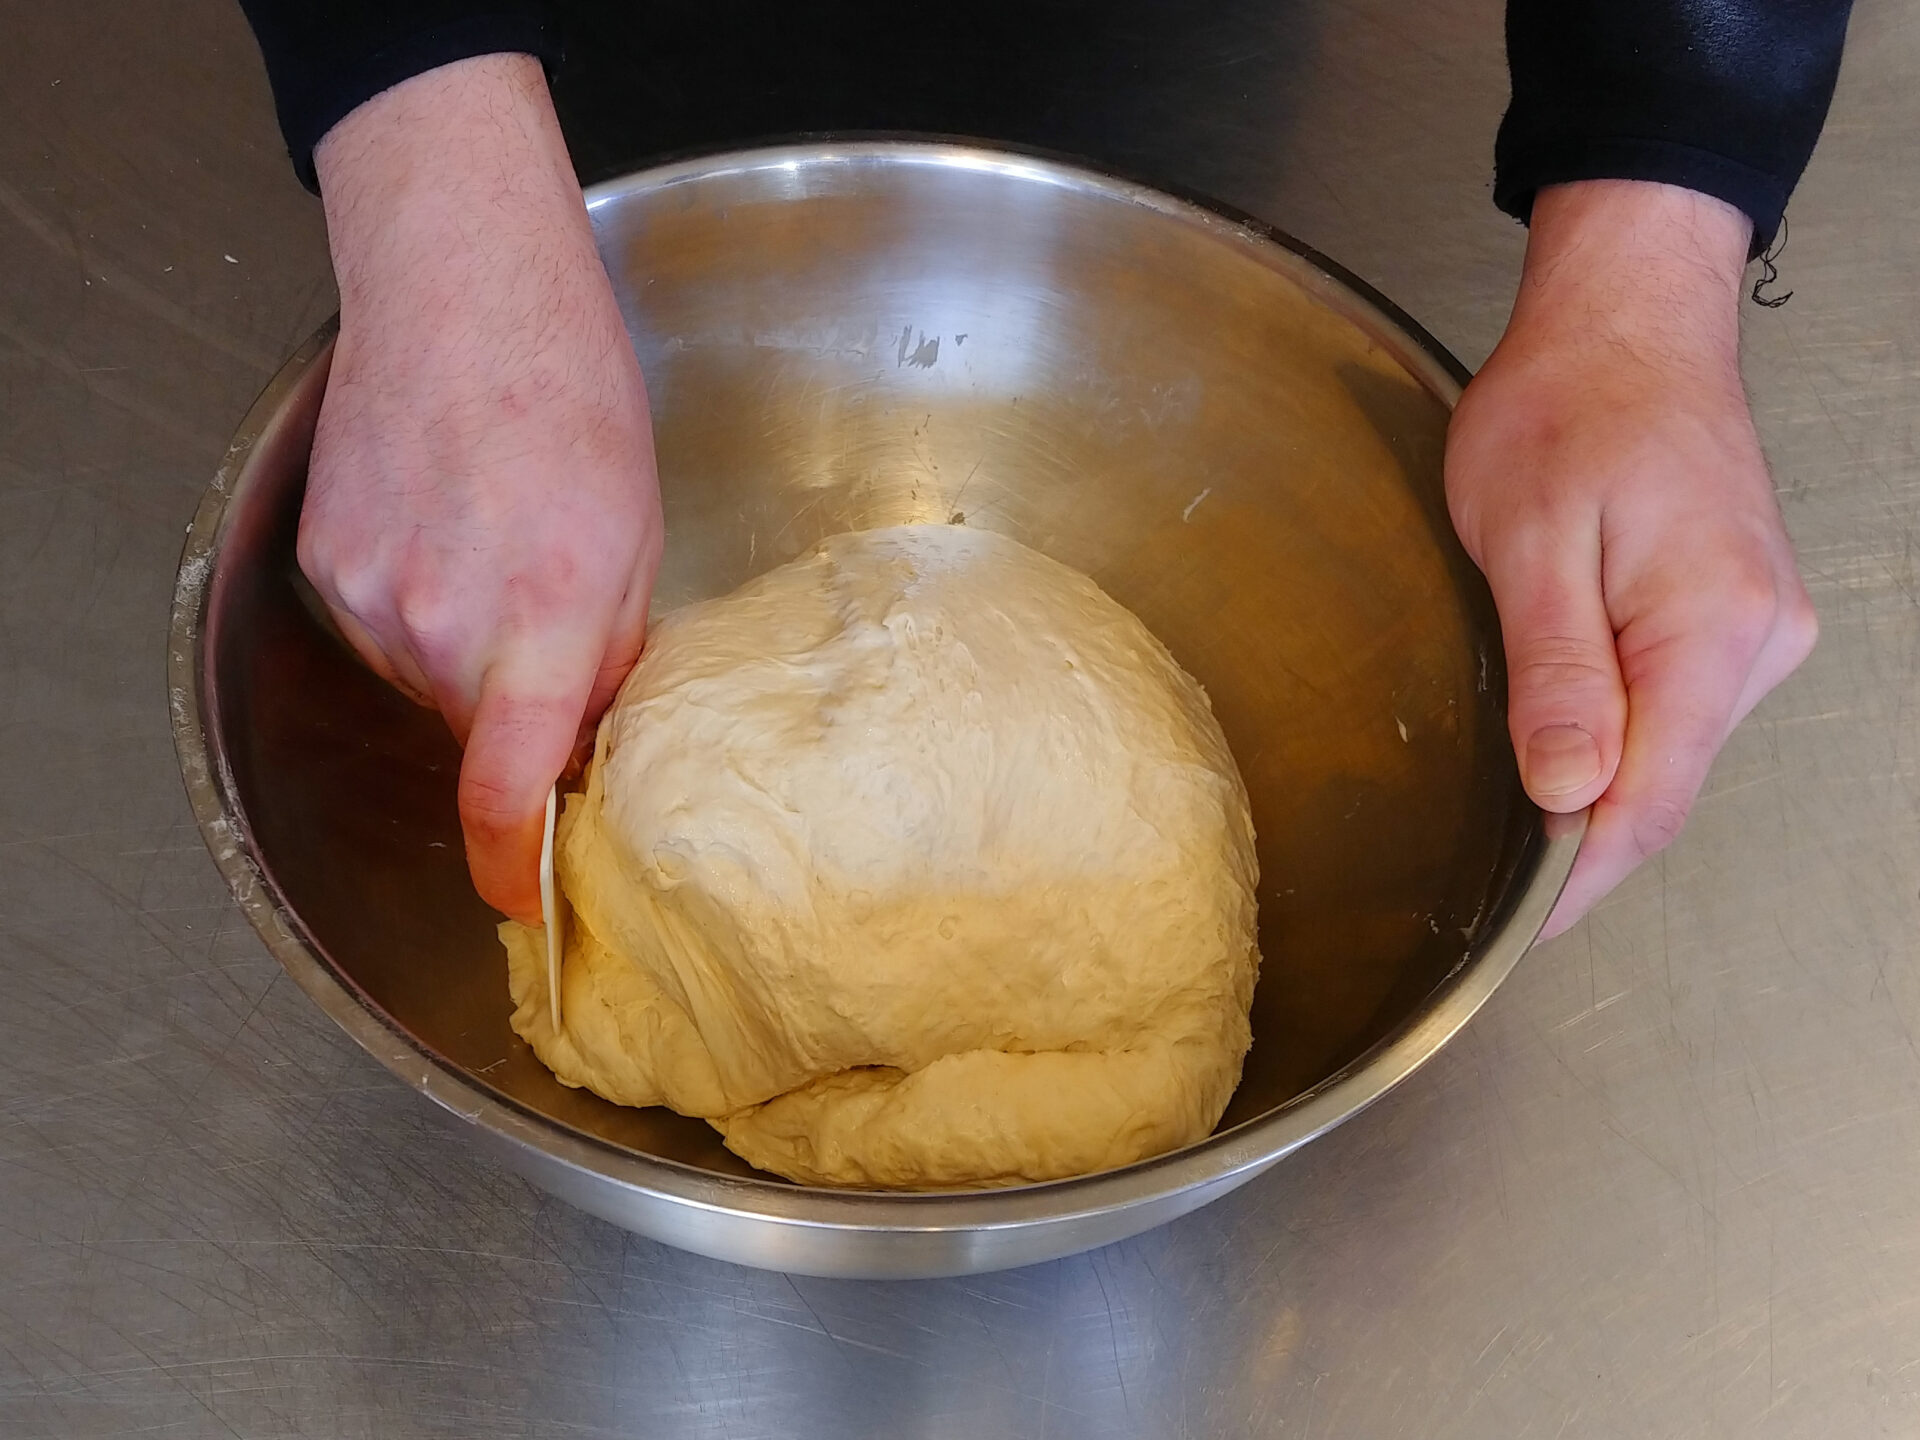
2.3. Deflate the dough right in the bowl using a dough scraper, folding the dough from one side, then over the other side of the dough, and finally press it down. Repeat this process a few times from all sides of the dough. After deflating, let the dough rise until it doubles in size before another deflation (about 1 – 2 hours). The deflation process is best to repeat at least 3 times, but more would be even better.
Note:
Intervals between deflating can be even longer (even overnight), so it’s better to make it fit your schedule. If you want to rise your bread longer, keep it at room temperature (not in a warm place) and use a significantly larger bowl to provide the dough enough space while it’s rising. Make sure that the total rising time (including all deflations) won’t be longer than 24 hours.
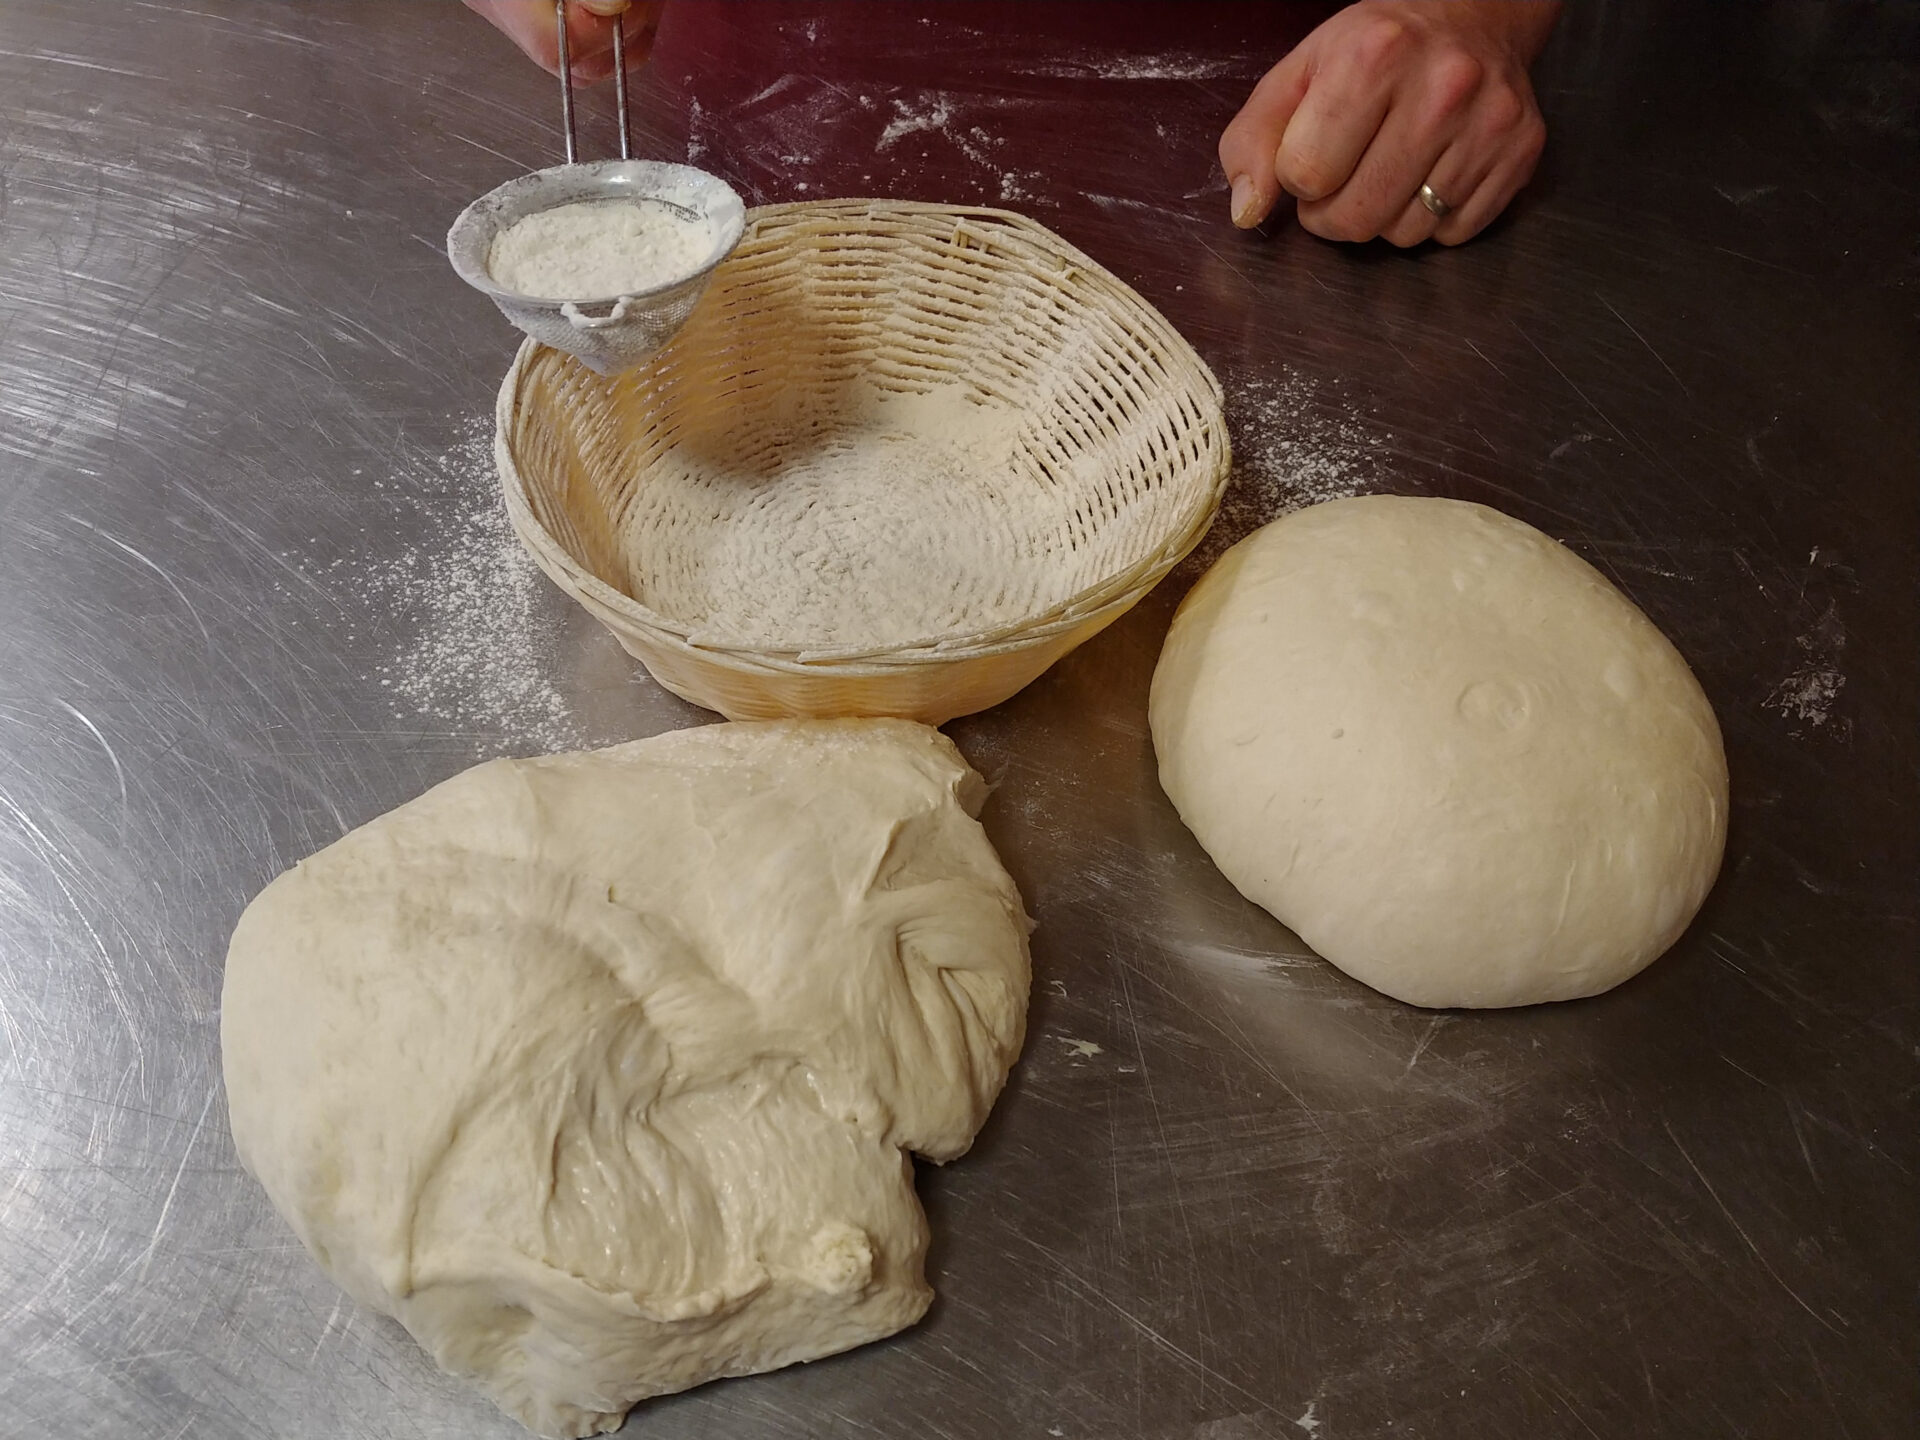
3. Shape bread:
Note:
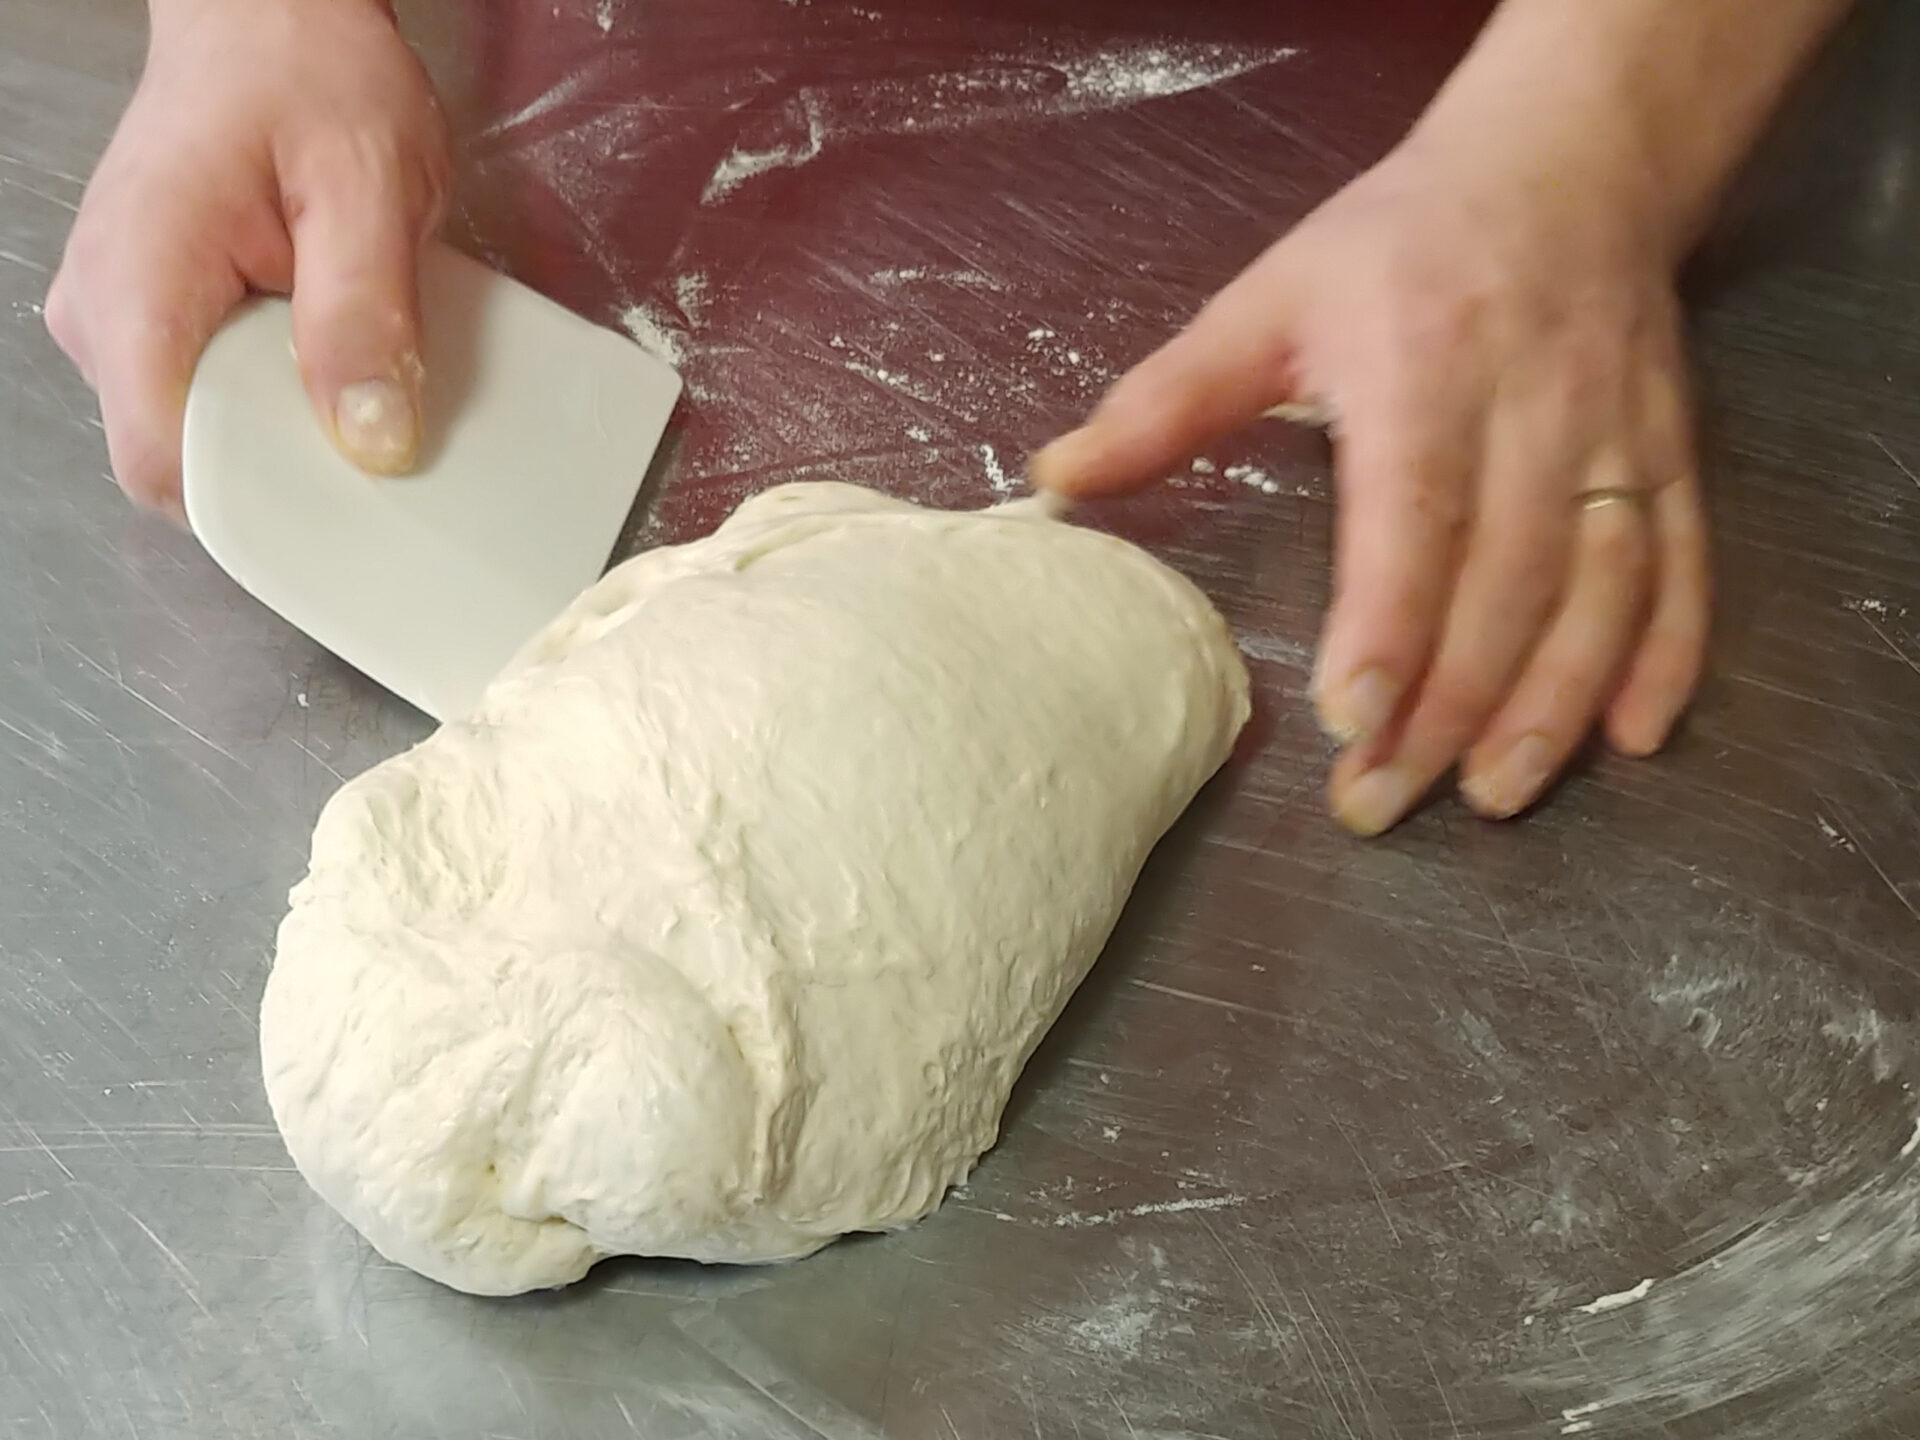
Work on a surface (countertop) that has no flour on it.
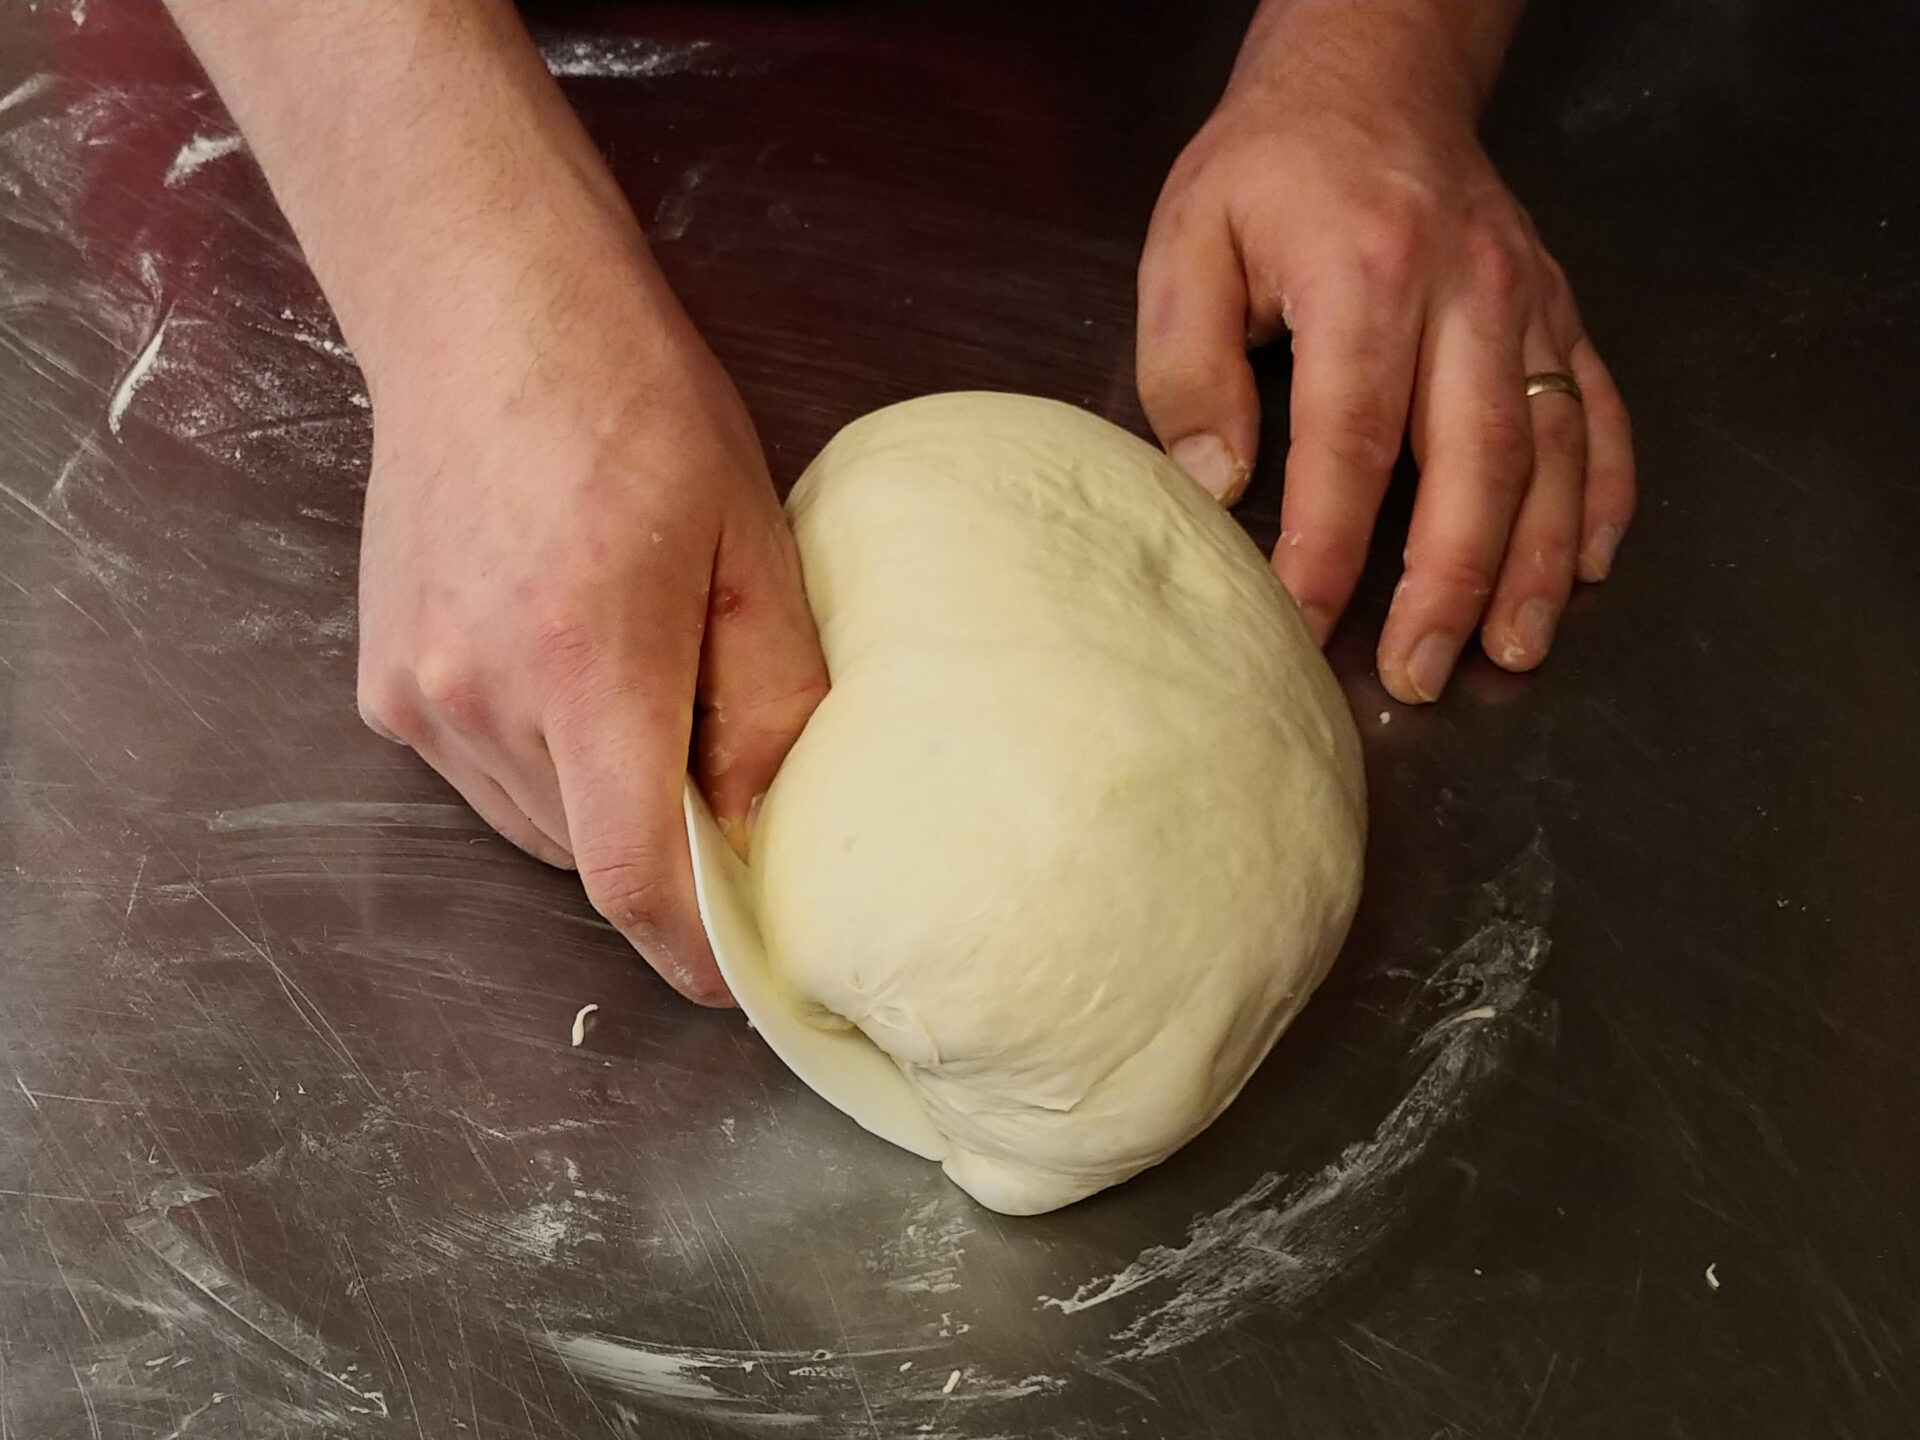
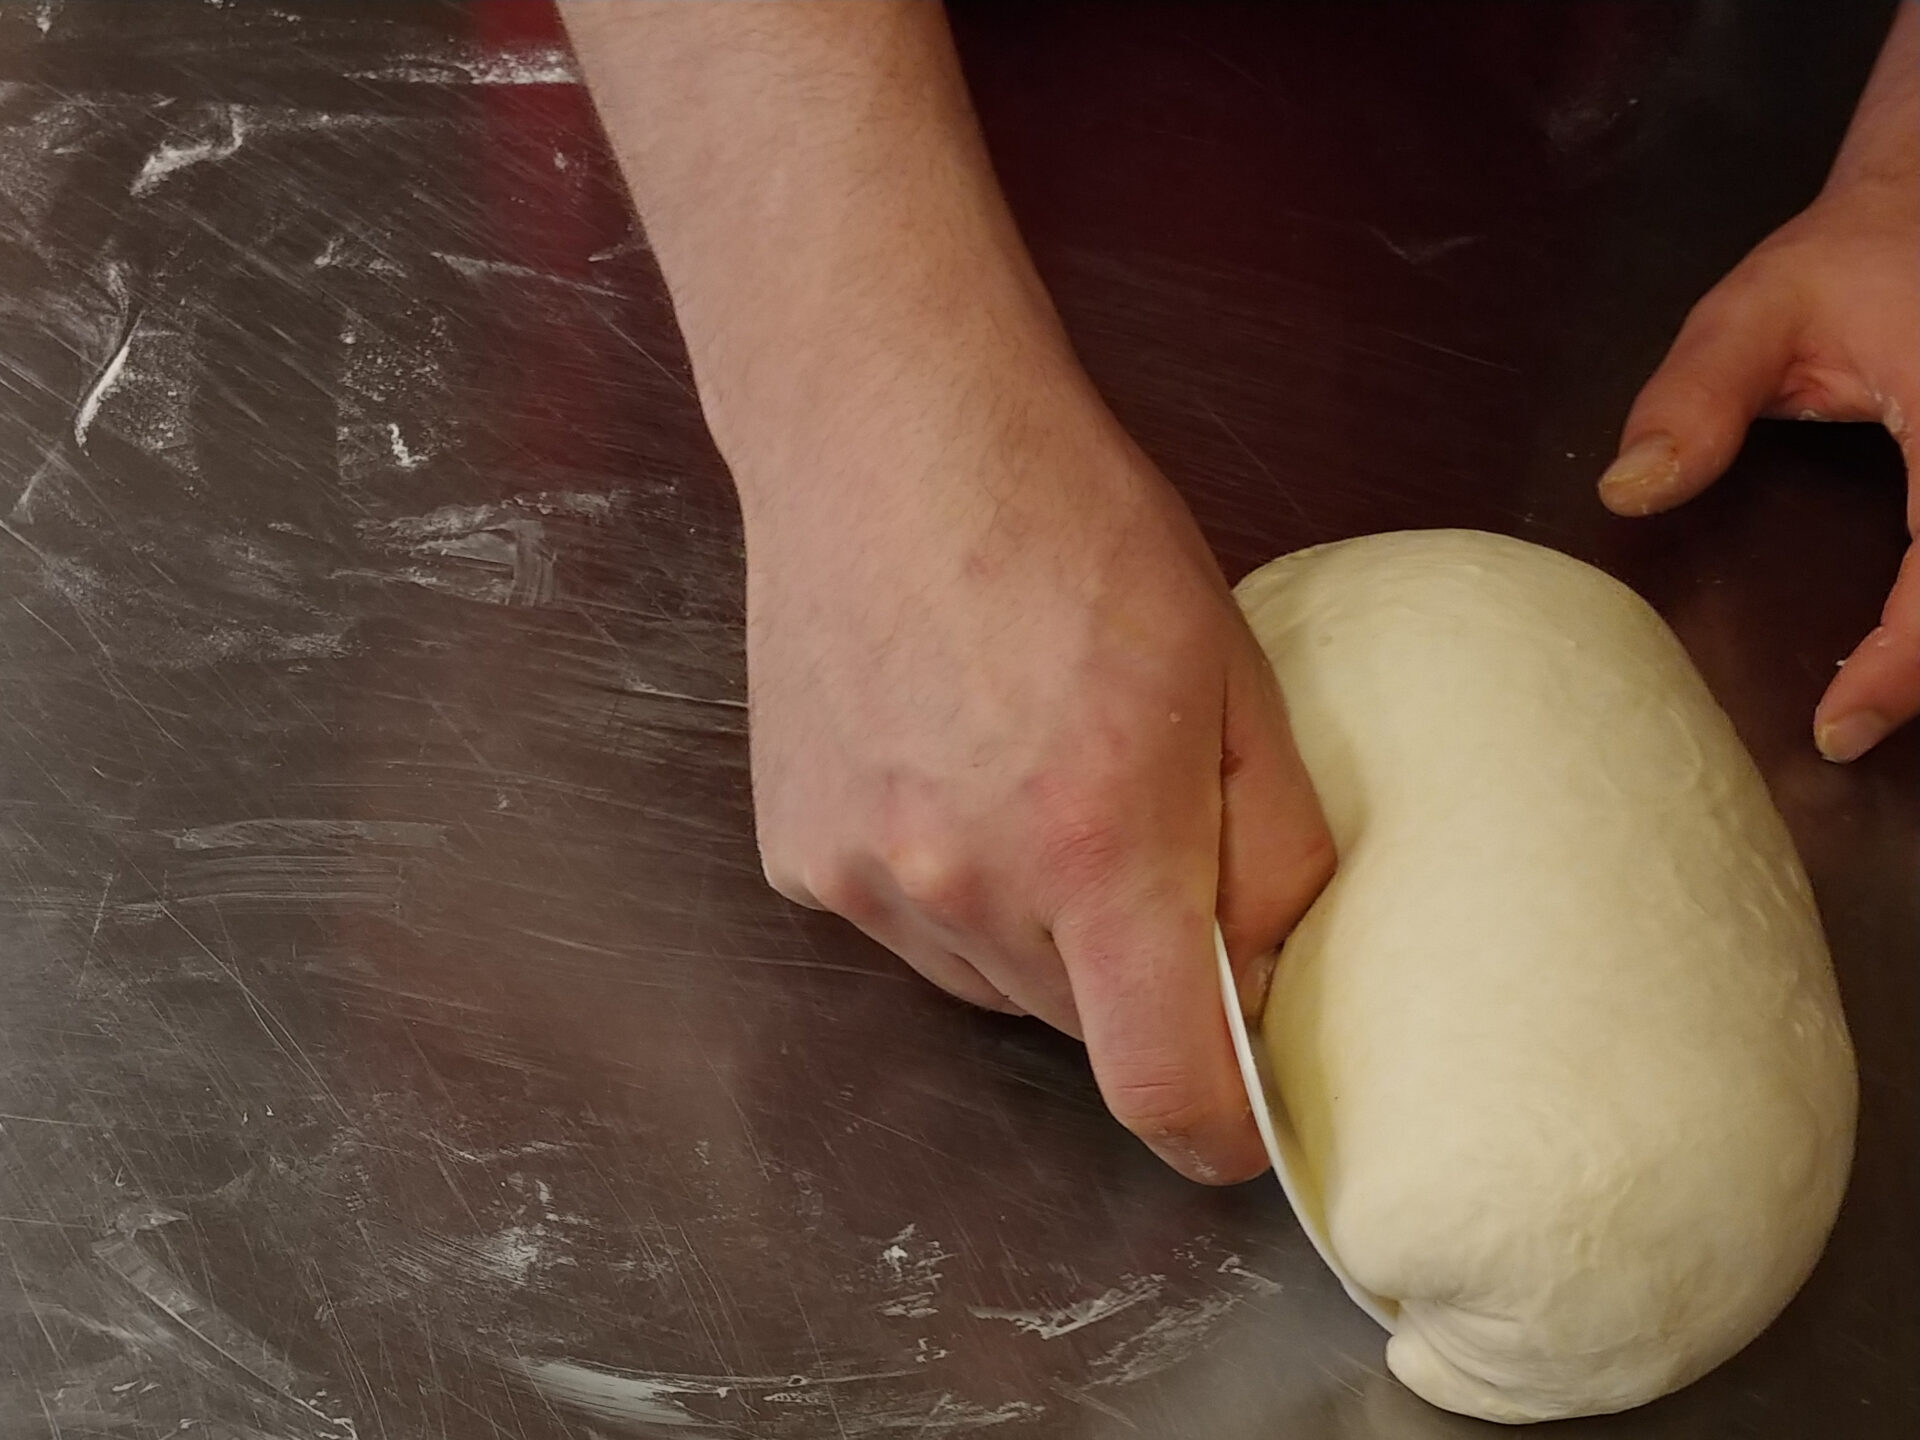
3.1.
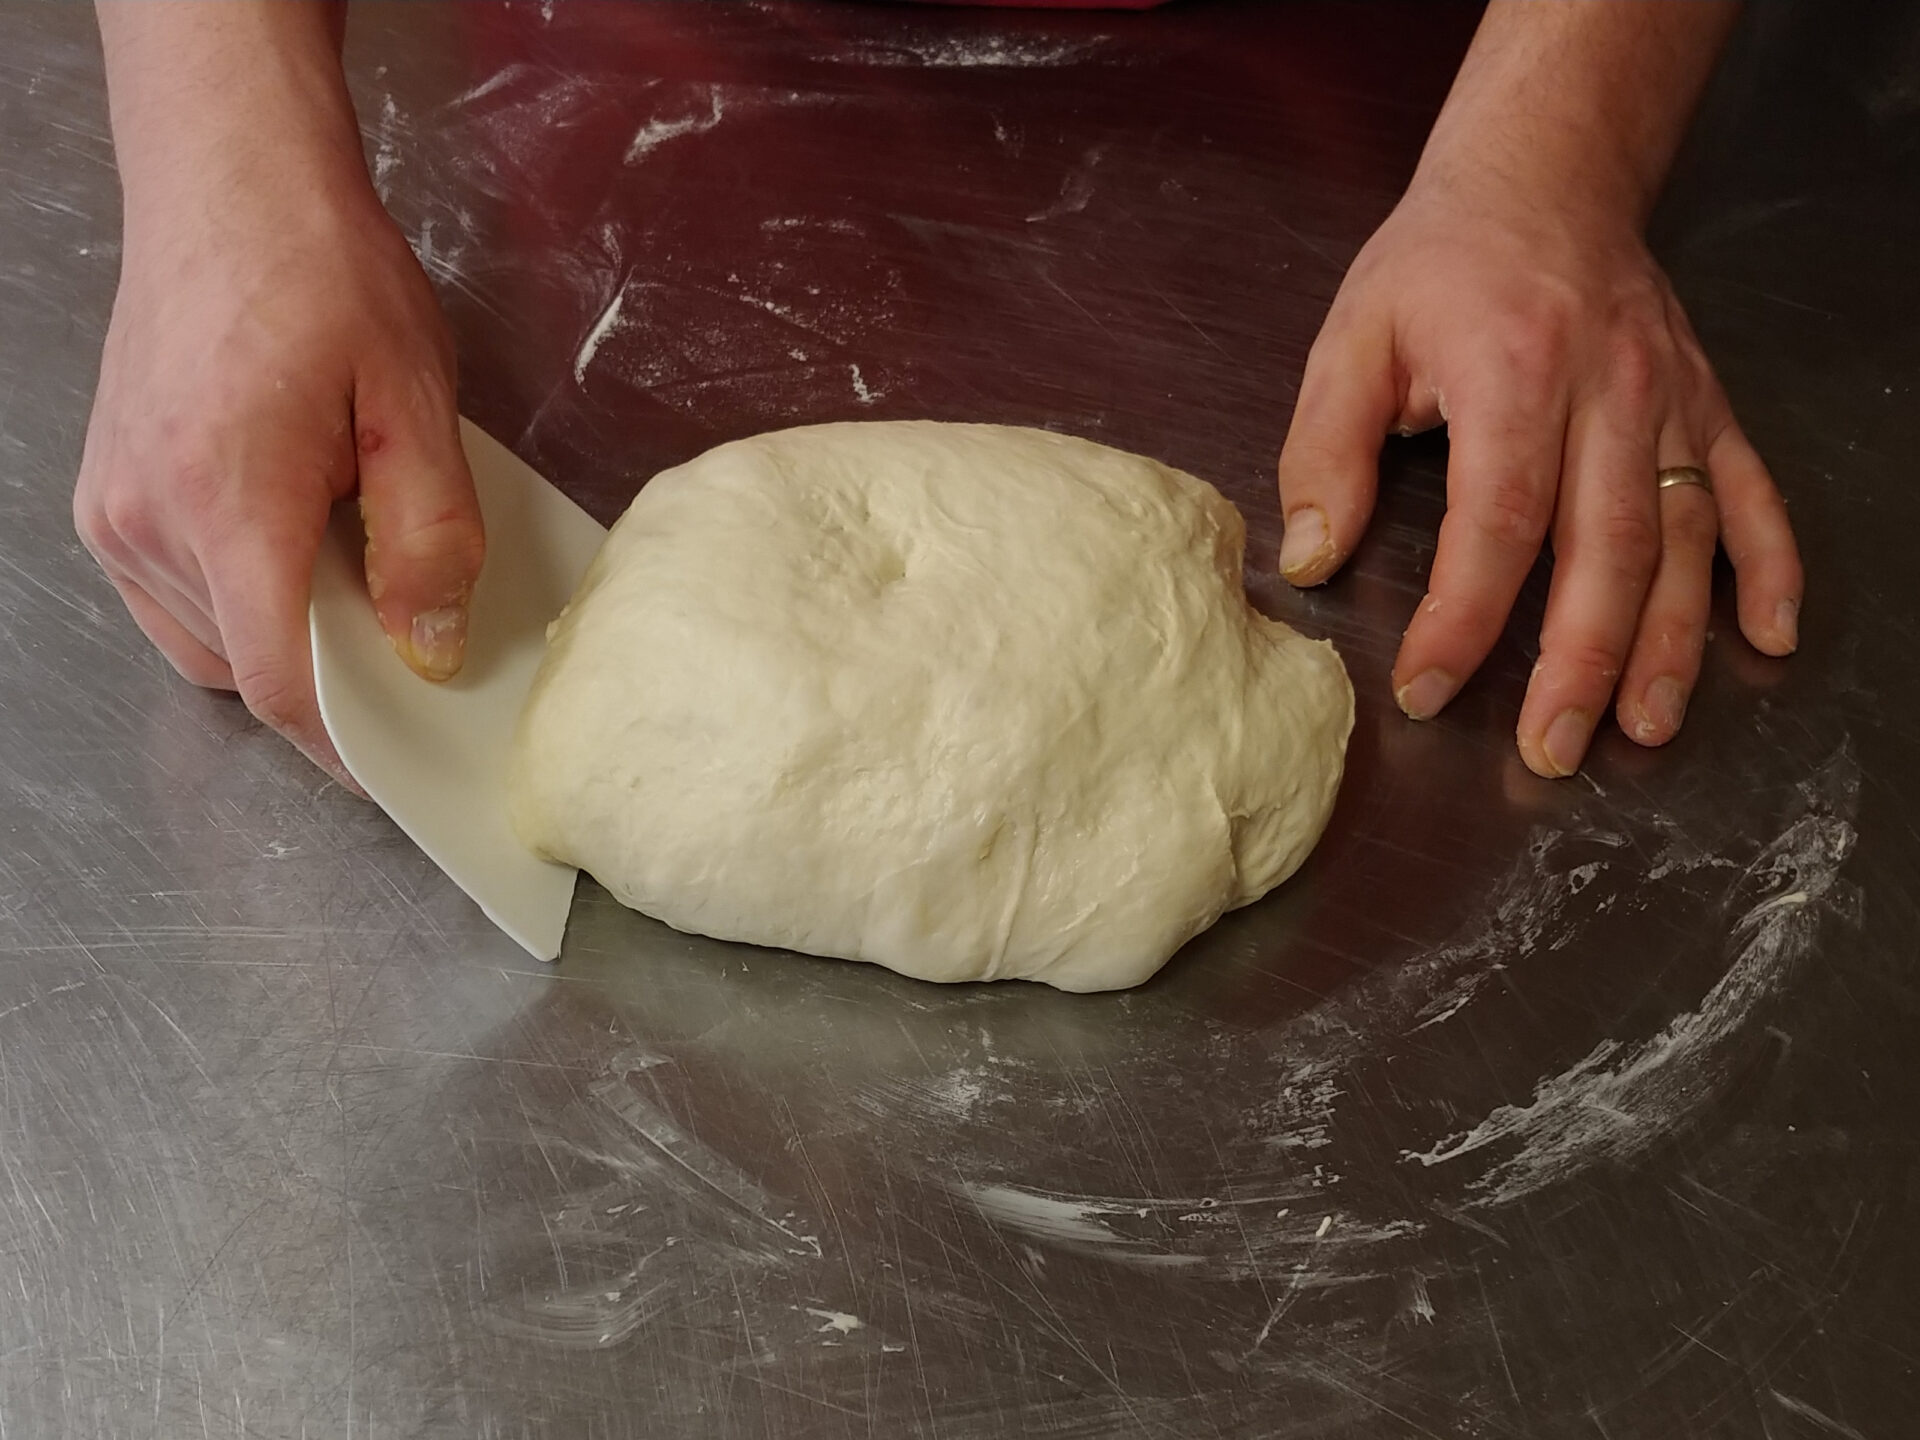
Place the dough on a surface and form the bread loaf by stretching the dough. To stretch the dough, place the bowl scraper at a slight angle against the bottom part of the dough while making sure that the bottom of the bowl scraper is touching the table.
3.2.
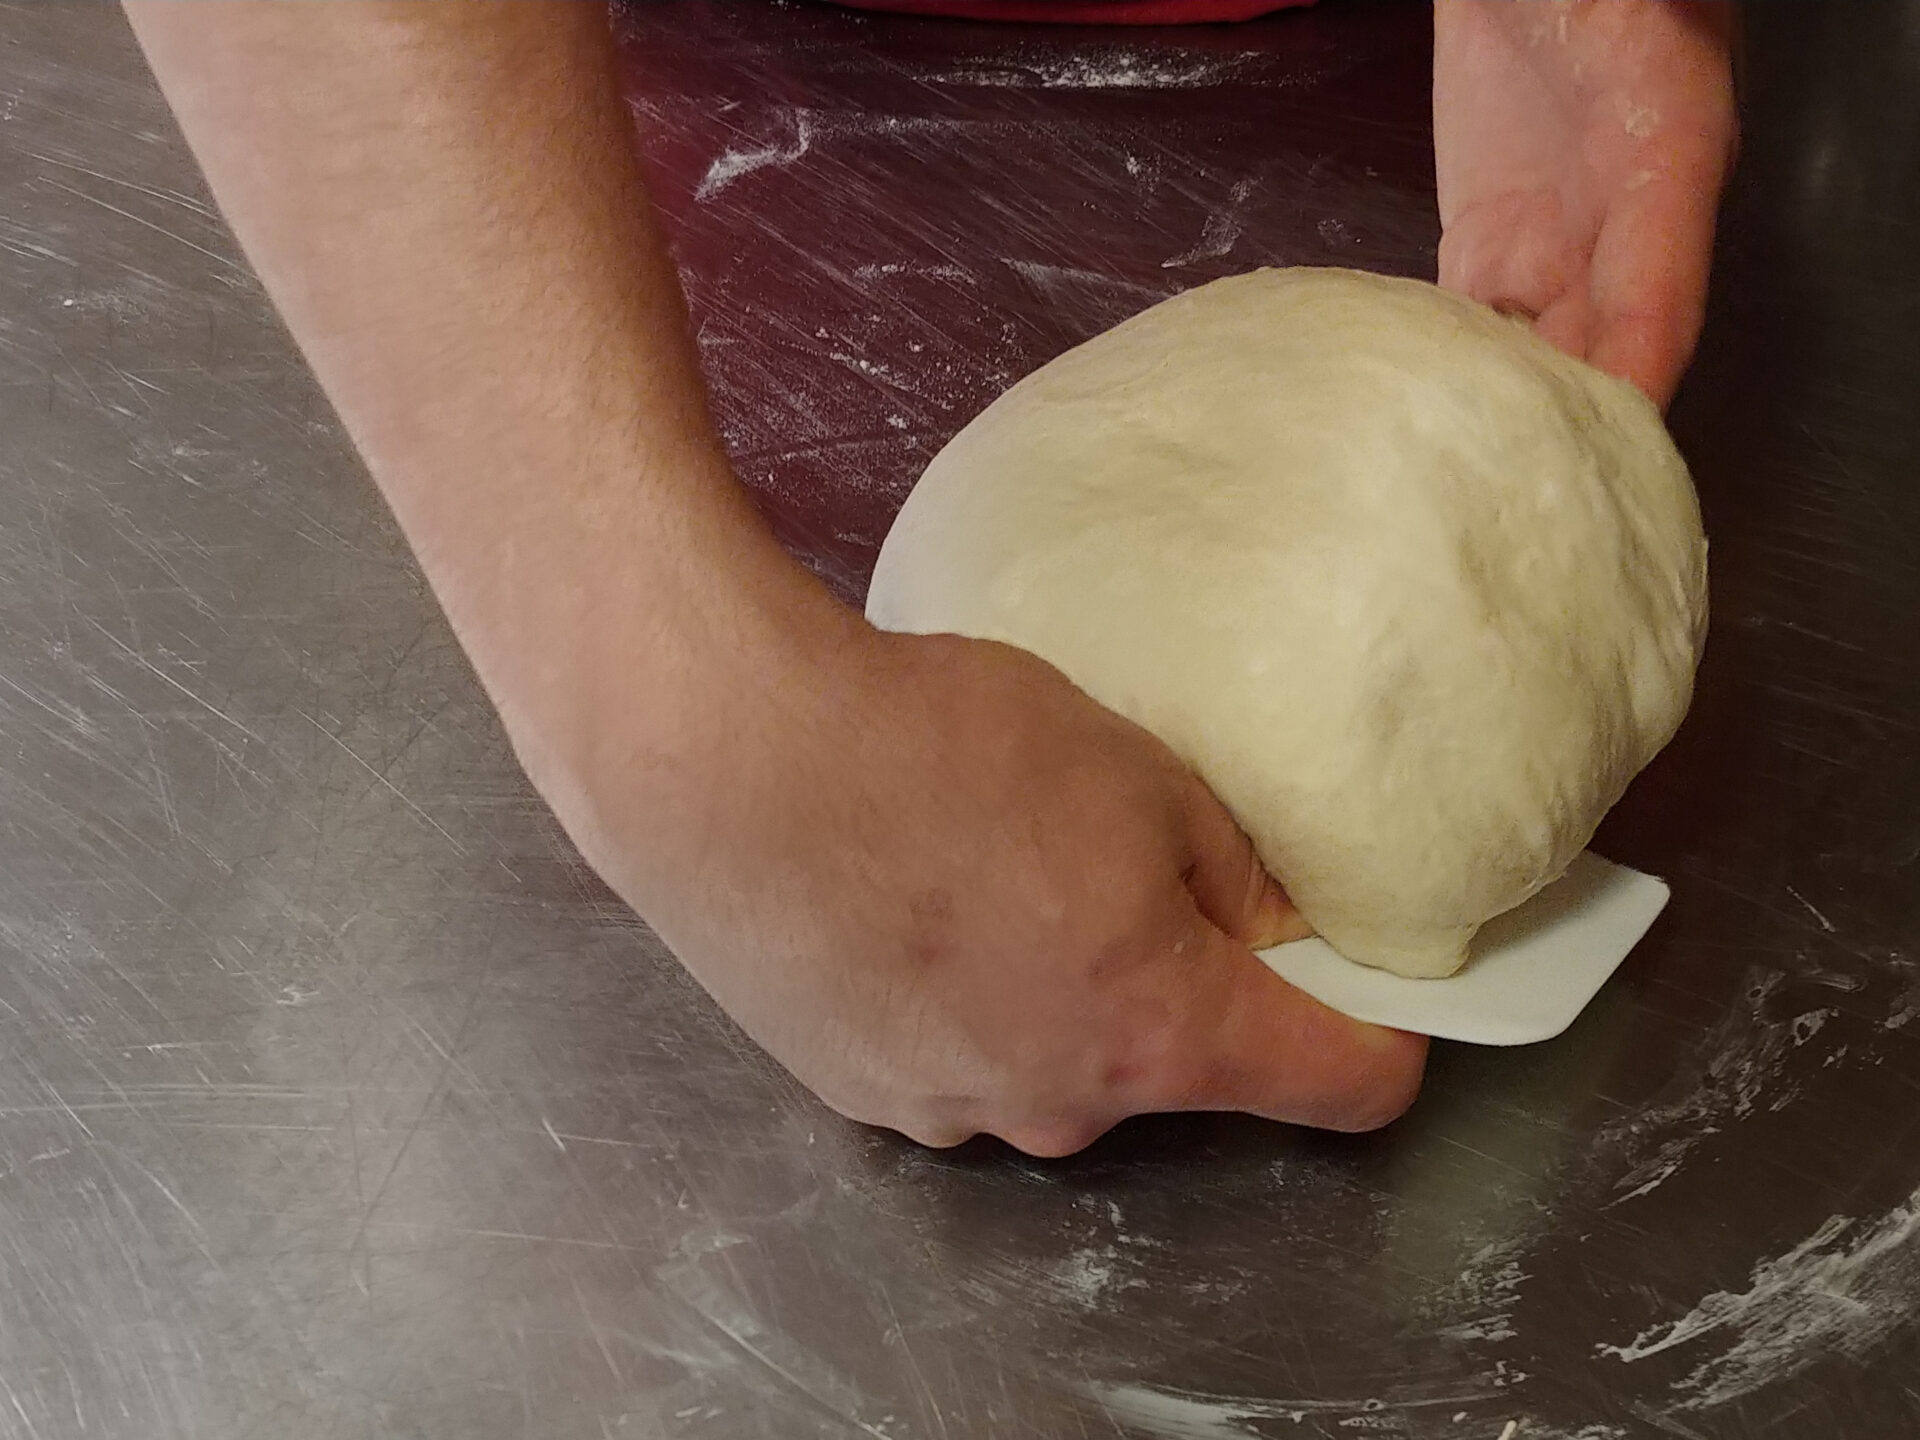
Then, keeping one hand on the top of the dough, push the scraper to move the dough slightly. The dough will roll slightly and stretch at the same time.
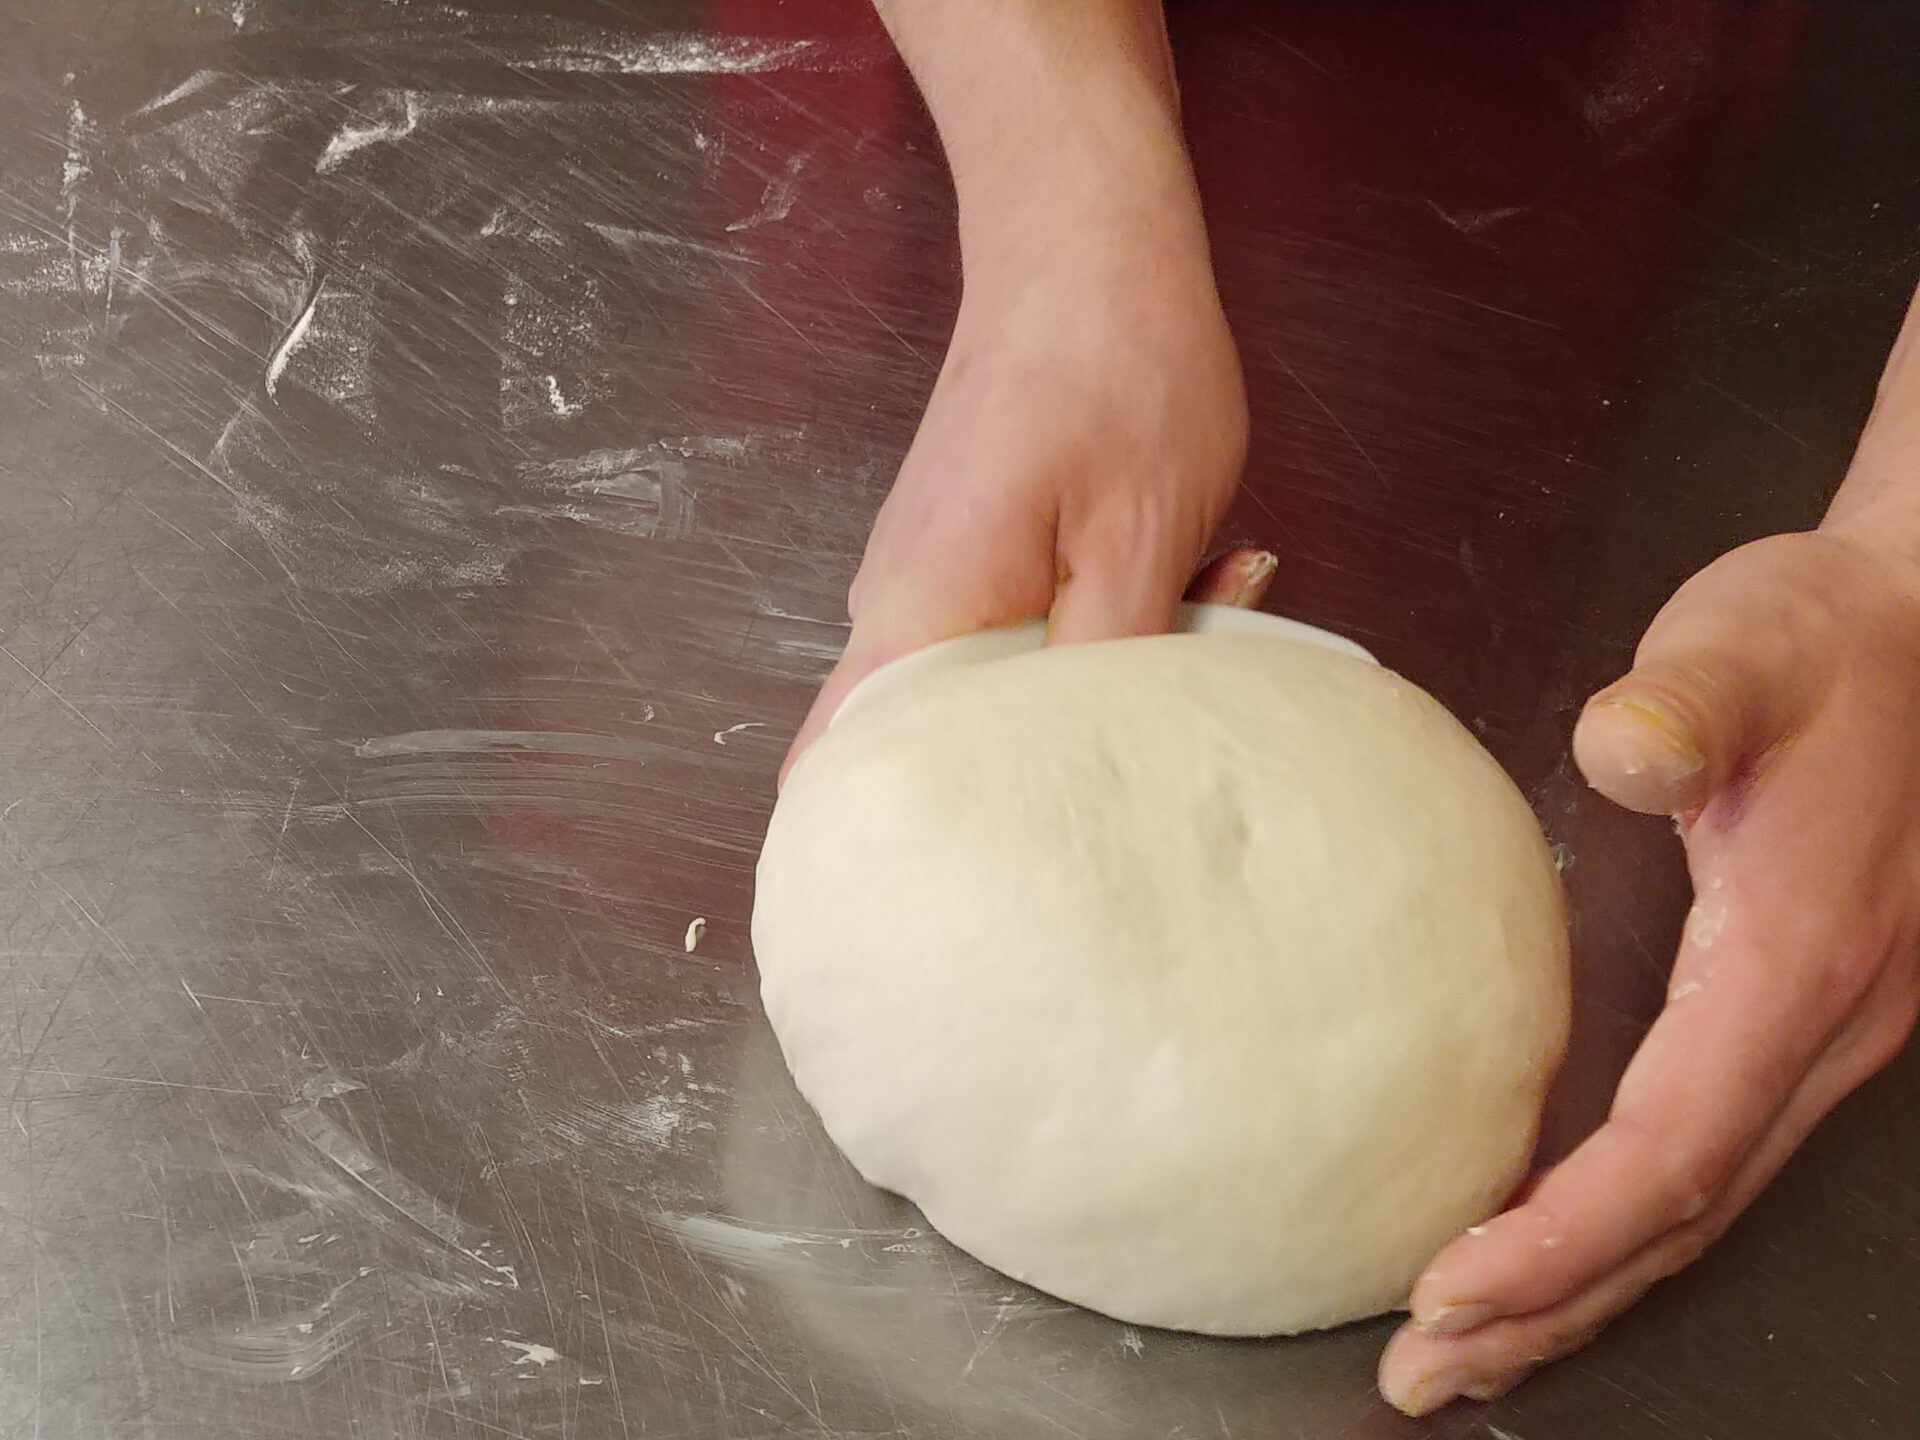
3.3.
Repeat this step a few times until a loaf of bread is shaped. Each time, turn the dough about 90° to the right (usually about 2 times from each of the four sides).
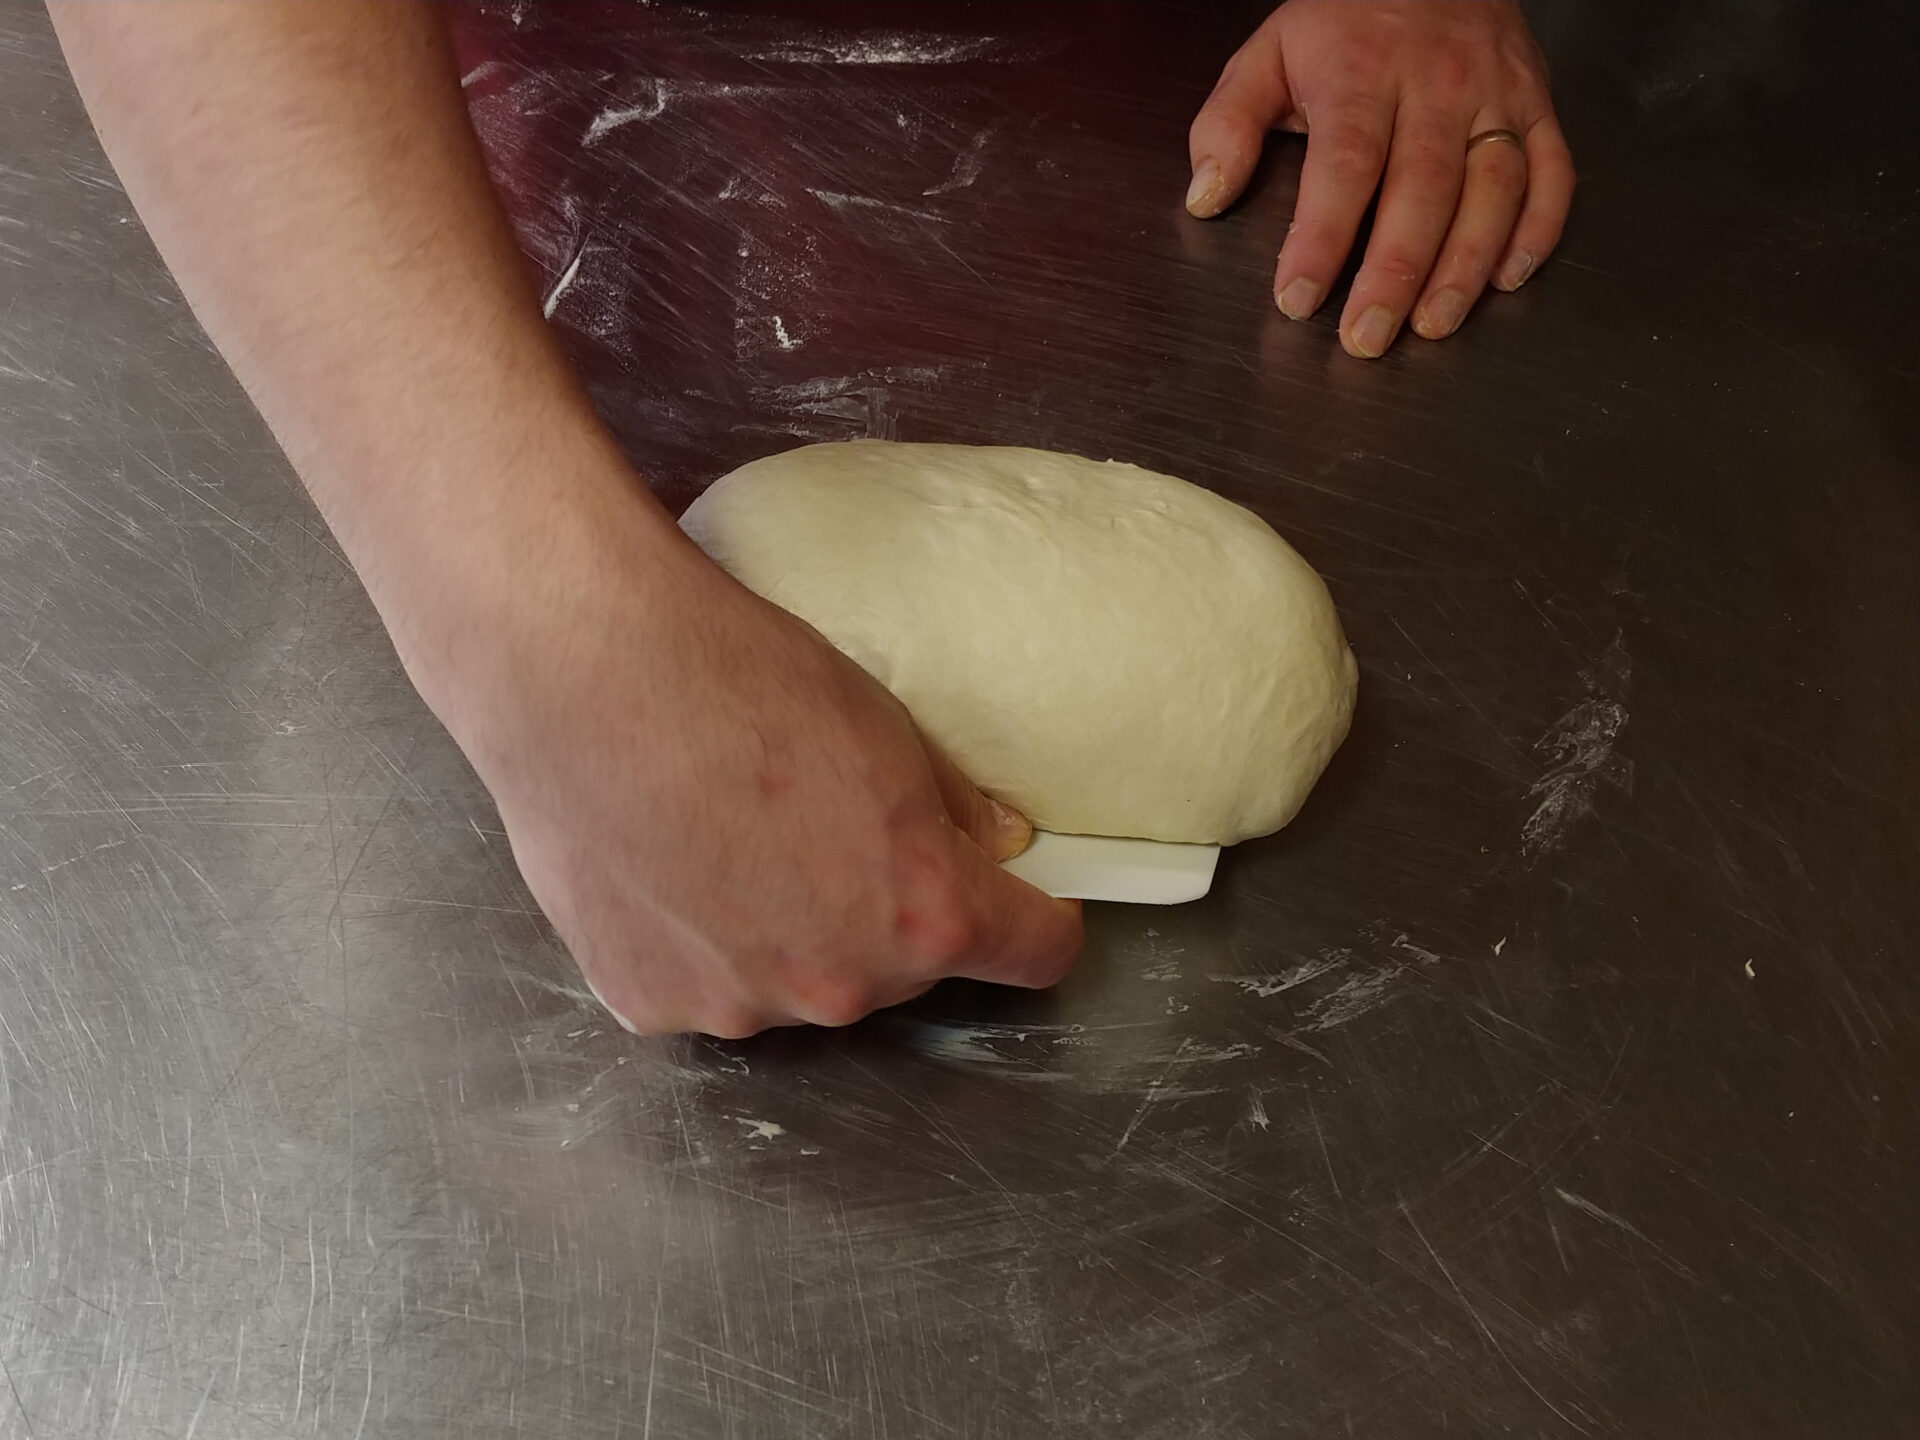
3.4.
Generously flour the proofing basket and place the shaped loaf in it.
3.5.
Flour the top of the loaf.


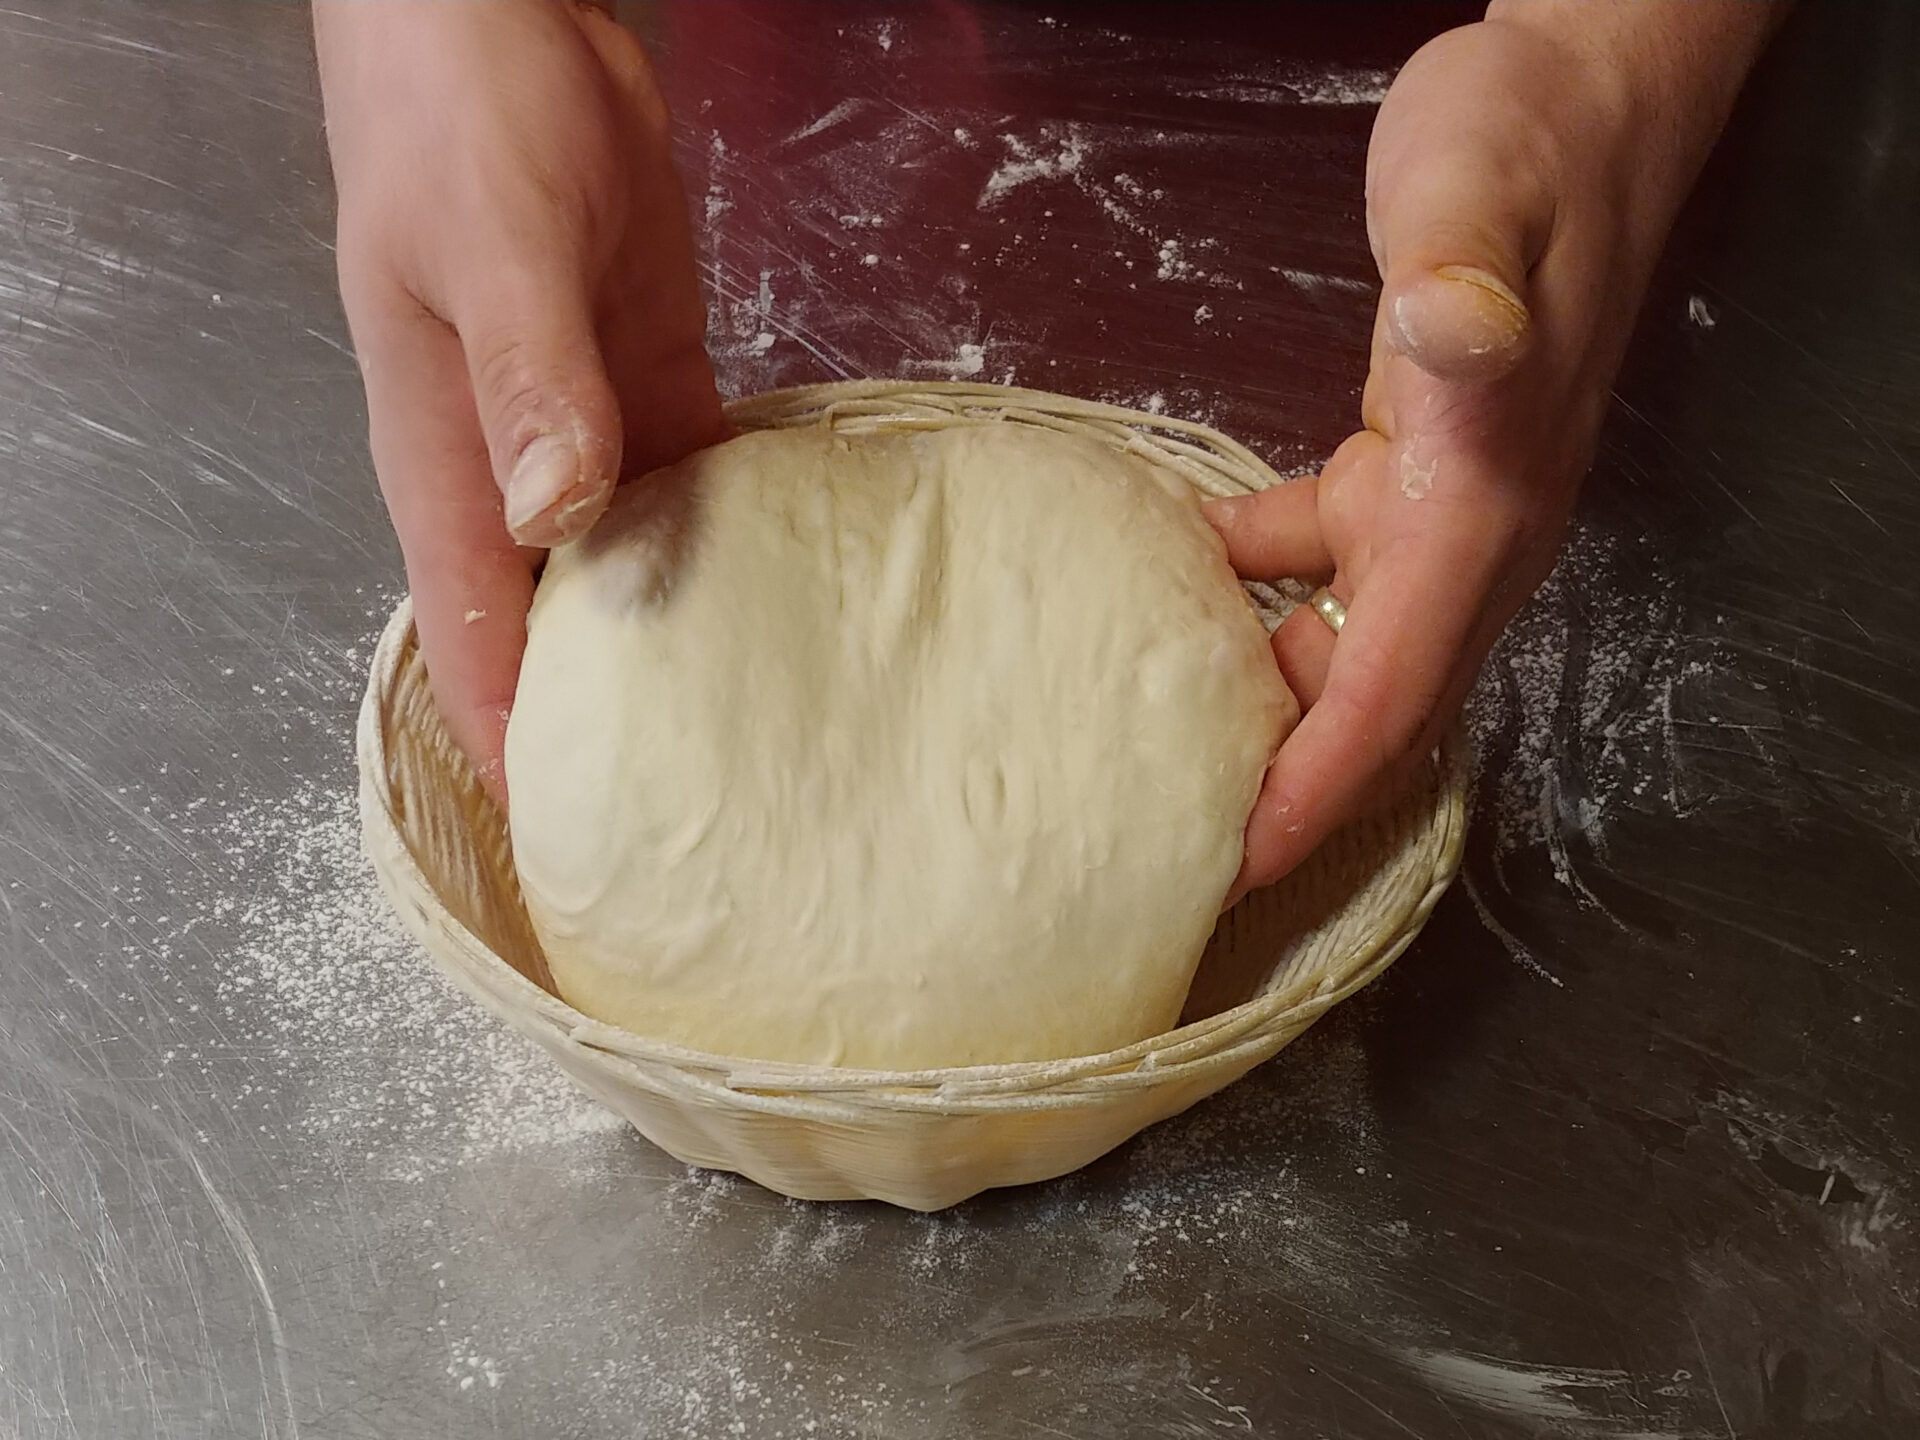
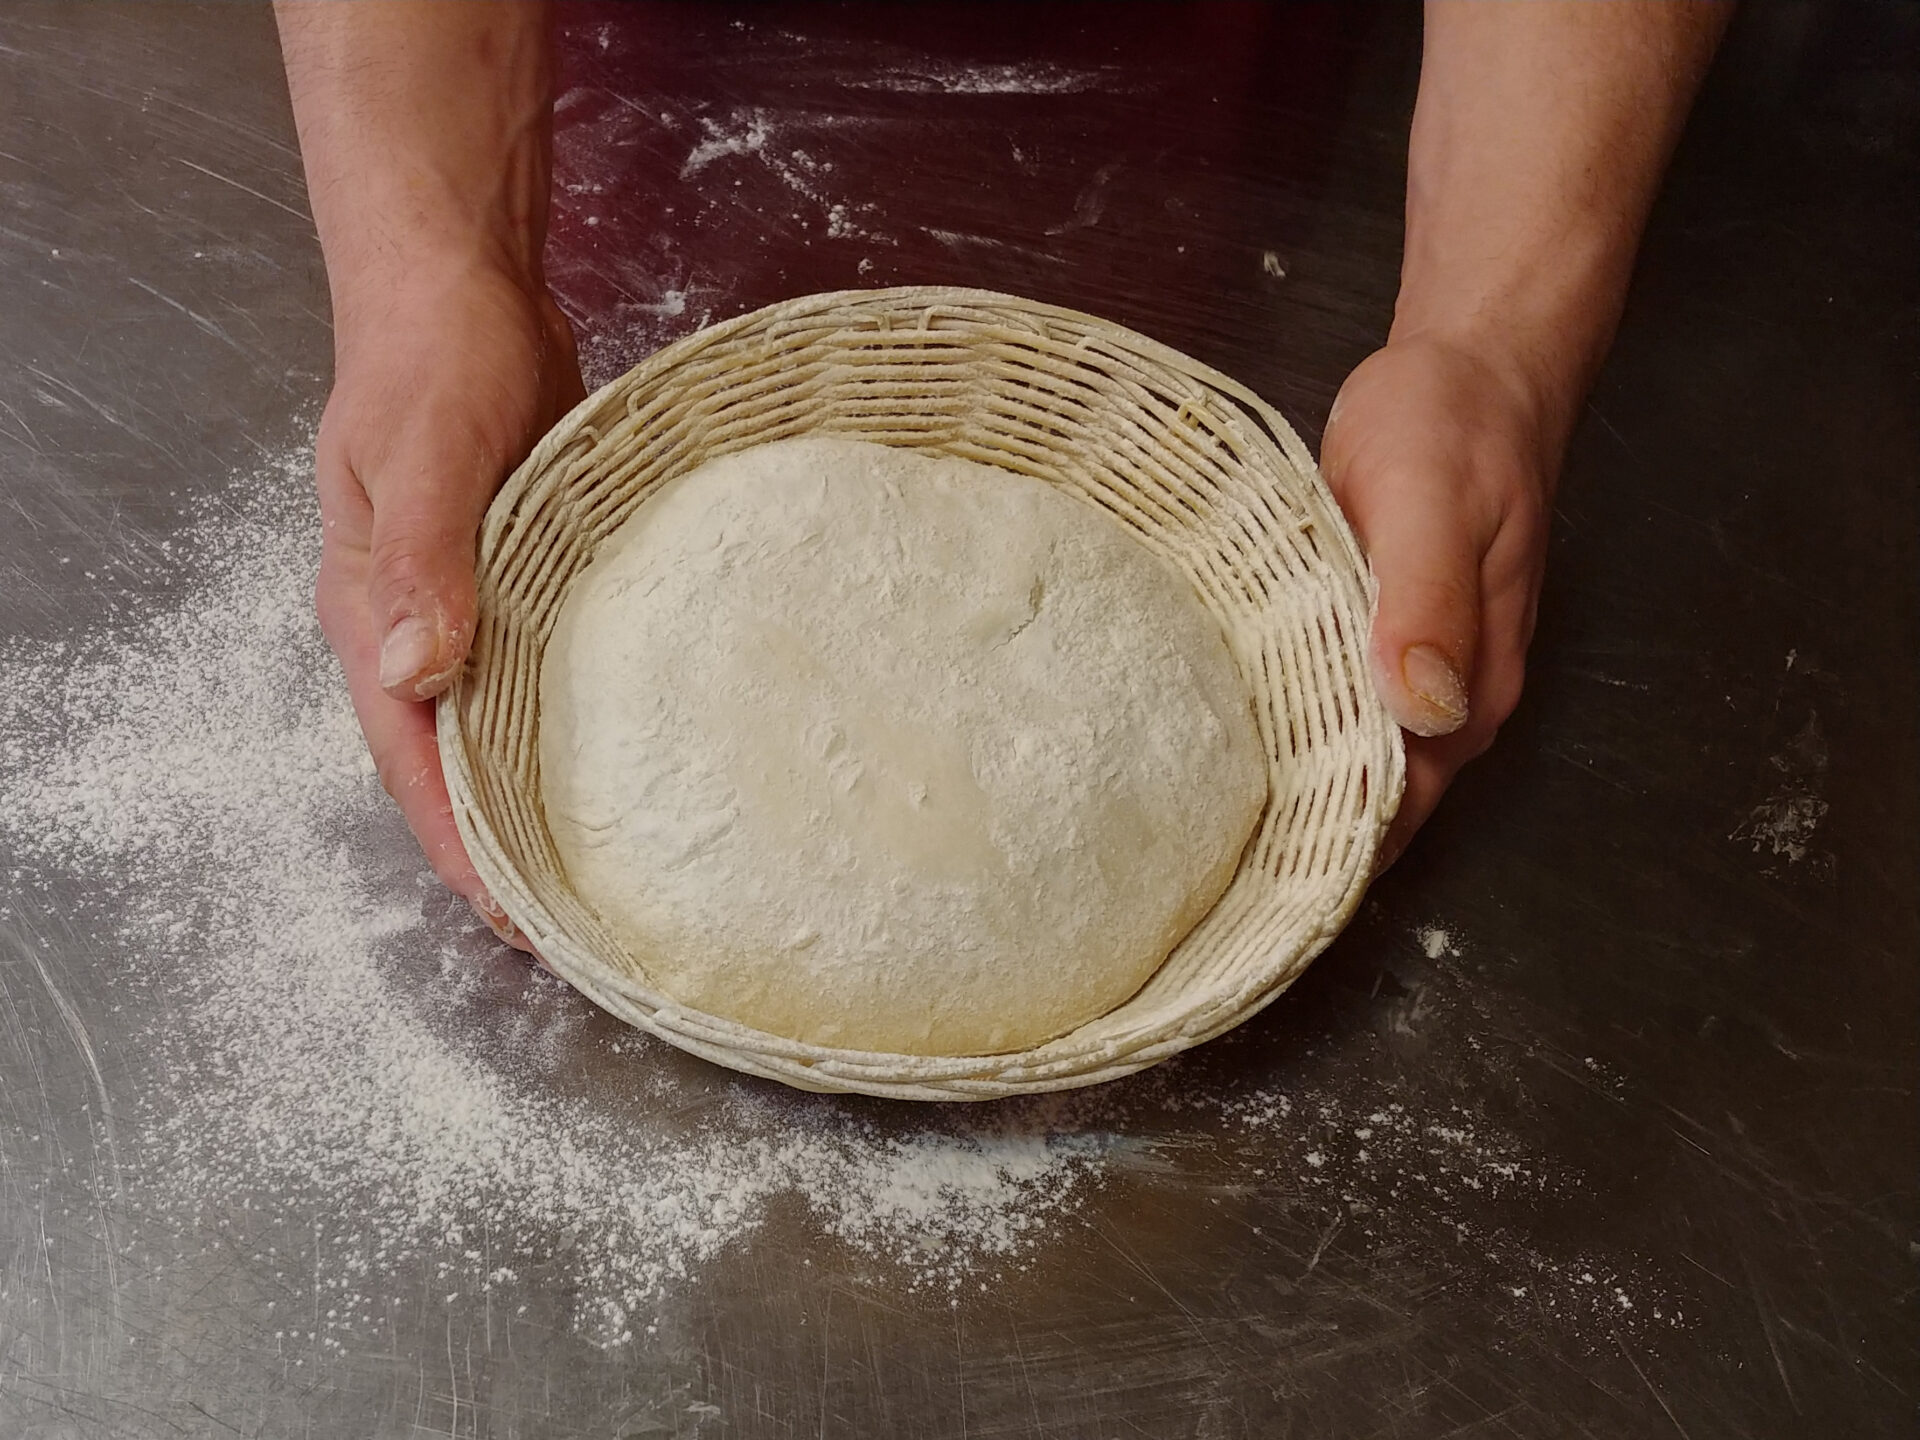
4. Proofing:
4.1.
Let your bread loaf proof in a proofing basket in a warm place for about 30 minutes before baking (do not go much longer than that).
5. Baking:
Bake in an oven or on a grill with a pizza stone and pizza paddle.
A.
Oven baking:
1.
Preheat oven to 450°F with the first upside-down baking sheet in the center of your oven (without parchment paper) and a small heatproof bowl with water (in the bottom of the oven).
2.
Flip the raised bread from the basket onto a second upside-down baking sheet that is covered with parchment paper.
3.
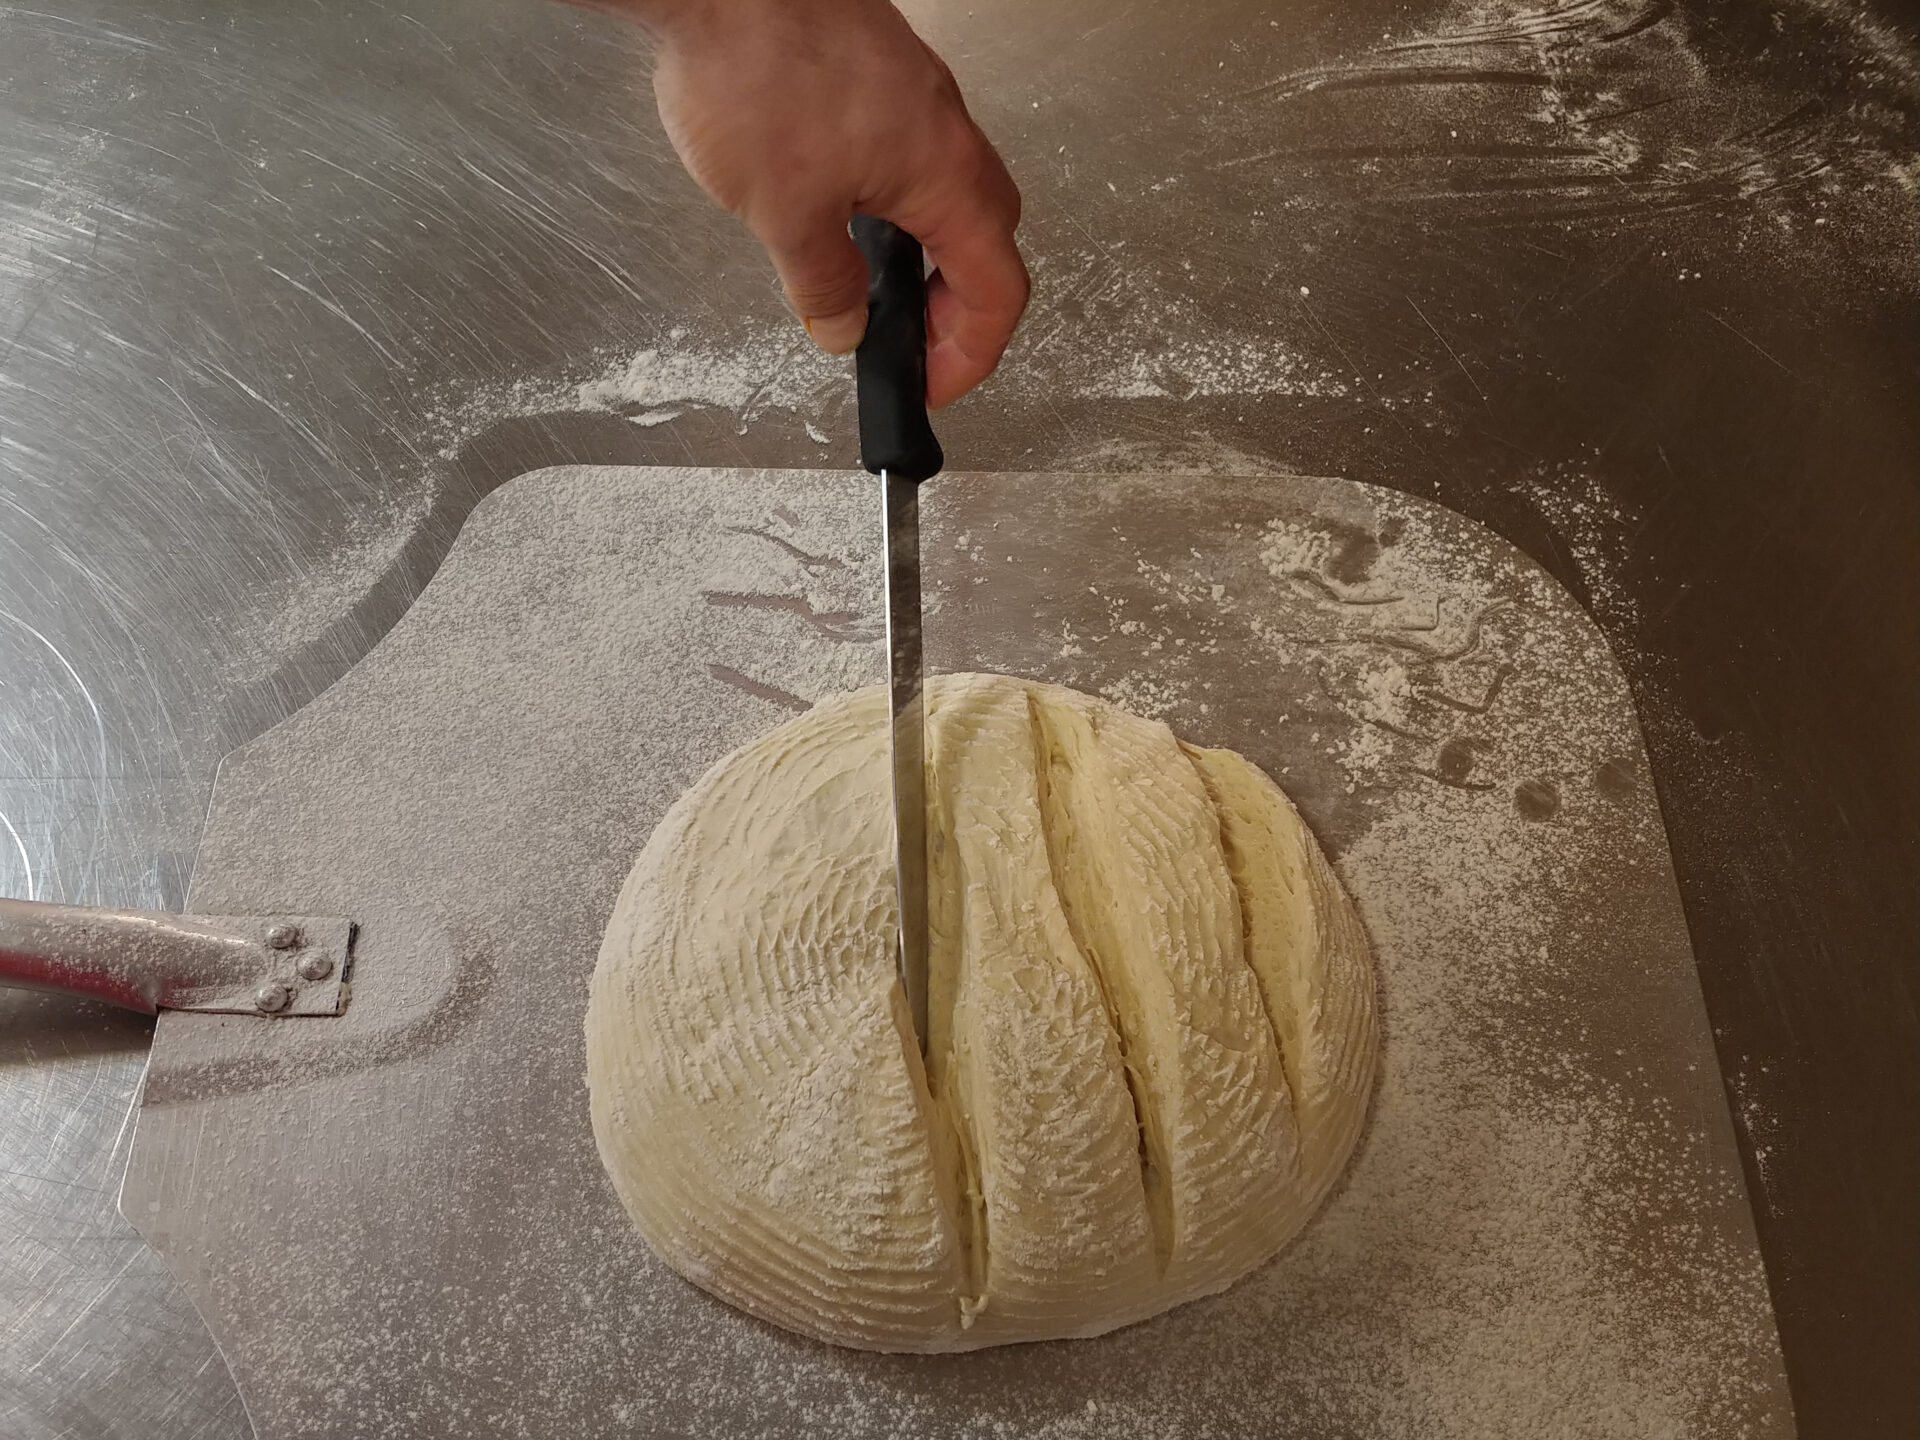
Score the top of the bread with a razor (4 – 6 cuts on the top of the bread).
4.
Carefully slide the parchment paper with the bread from the baking sheet to another baking sheet located in the oven.
5.
Add ice cubes to a small heatproof bowl with water. Optionally, add other ice cubes during baking for a crispier crust.
6.
Bake until done (about 20 – 40 minutes, depending on the thickness and shape of the bread. Test with a toothpick.
B.
B. Grill baking:
1.
Preheat the grill to 500°F. While preheating, keep a pizza stone on one side and a small heat-proof bowl with water on the other. Keep the temperature about 500°F, and if possible, focus on less direct heat with the fire, preferably on the side of a pizza stone.
2.
Flip the raised bread from the basket onto a lightly floured pizza paddle.
3.
Score the top of the bread with a razor (4 – 6 cuts on the top of the bread).
4.
Carefully slide the bread from the pizza paddle onto the pizza stone on the grill.
5.
Add ice cubes into a small heatproof bowl with water. Optionally, add other ice cubes during baking for a crispier crust.
6.
Bake until done (about 20 – 40 minutes, depending on the thickness). Test with a toothpick.
Bake Your Way to Bliss: Homemade Garlic-Herb Bread That Will Steal the Show
Read moreThere’s nothing quite like the aroma of freshly baked bread to fill your home with warmth and comfort. But what if we could take that sensory experience to the next level? Enter Garlic-Herb Bread, a culinary masterpiece that combines the simple pleasure of homemade bread with the aromatic allure of garlic and fresh herbs.
This recipe is your guide to creating a Garlic-Herb Bread that will have everyone singing your praises. It’s a step-by-step journey that demystifies the bread-making process, empowering you to craft a loaf that’s not just delicious but also a testament to your baking prowess.
More Than Just a Side: Garlic-Herb Bread as the Star
Often relegated to the sidelines, Garlic-Herb Bread deserves its moment in the spotlight. This recipe elevates it to star status, infusing the dough with a medley of flavors that will tantalize your taste buds. Imagine the fragrant combination of garlic and your favorite herbs, mingling with the warm, yeasty aroma of freshly baked bread. It’s a sensory symphony that will have your kitchen smelling like a bakery and your dinner table looking like a feast.
A Symphony of Flavors: Customizing Your Garlic-Herb Bread
One of the beauties of this Garlic-Herb Bread recipe lies in its versatility. You’re the conductor of this flavor orchestra, choosing the herbs that best suit your palate. Whether you prefer the classic combination of rosemary and thyme or a more adventurous blend of basil, oregano, and chives, the choice is yours. Feel free to experiment and create a Garlic-Herb Bread that’s uniquely your own.
The Journey Begins: From Simple Ingredients to Extraordinary Bread
Our journey starts with a humble collection of ingredients: bread flour, yeast, salt, water, fresh herbs, and garlic. These simple components, when combined with care and patience, will transform into a Garlic-Herb Bread that’s far greater than the sum of its parts.
We’ll begin by activating the yeast, awakening its leavening power that will give our bread its characteristic airy texture. Then, we’ll combine the dry ingredients, incorporating the fragrant herbs and sliced garlic into the mix. The addition of warm water will bring the dough together, forming a shaggy mass that’s ready for kneading.
Kneading Nirvana: Developing Strength and Flavor
Kneading is a crucial step in the bread-making process, and this Garlic-Herb Bread is no exception. Whether you’re using a stand mixer or your own two hands, the goal is to develop the gluten in the dough, creating a strong and elastic structure that will hold its shape as it rises.
As you knead, the dough will transform from a sticky mass into a smooth, supple ball. This is where the magic happens, where the flavors meld and the gluten strands align, creating the foundation for a perfect loaf.
The Waiting Game: Patience and the Power of Proofing
Once kneaded, our Garlic-Herb Bread dough needs time to rest and rise. This process, known as proofing, allows the yeast to ferment the sugars in the dough, producing carbon dioxide gas that creates air pockets and gives the bread its light and airy texture.
We’ll let the dough rise in a warm place, covered to prevent it from drying out. As it rises, the dough will double in size, becoming puffy and full of life. This is a testament to the power of yeast and the patience required in bread baking.
Shaping the Dream: From Dough to Defined Loaf
With the dough properly proofed, it’s time to shape our Garlic-Herb Bread. We’ll gently deflate the dough, releasing the built-up gas, and then shape it into a loaf. This process requires a gentle touch, ensuring that we don’t overwork the dough and deflate its airy structure.
Baking to Perfection: Oven or Grill, the Choice is Yours
The final step in our Garlic-Herb Bread journey is baking. Whether you choose the controlled heat of an oven or the rustic charm of a grill, the goal is to bake the bread until it’s golden brown and cooked through.
A key tip for achieving a crisp crust is to introduce steam into the baking environment. This can be done by adding ice cubes to a heatproof bowl in the oven or grill. The steam creates a moist environment that helps the crust develop its characteristic crunch.
A Feast for the Senses: Enjoying Your Garlic-Herb Bread
Once baked, your Garlic-Herb Bread will emerge from the oven or grill, its crust crackling and its aroma filling the air. Allow it to cool slightly before slicing into it, revealing the soft, airy crumb studded with fragrant herbs and garlic.
This Garlic-Herb Bread is a delight on its own, perfect for tearing and sharing with loved ones. It also pairs beautifully with soups, salads, and pasta dishes, adding a touch of homemade goodness to any meal.
More Than Just a Recipe: A Baking Adventure
This Garlic-Herb Bread recipe is more than just a set of instructions; it’s an invitation to embark on a baking adventure. It’s a chance to connect with the time-honored tradition of bread making, to experiment with flavors, and to create something truly special with your own hands. So gather your ingredients, embrace the process, and bake your way to bliss with this delicious Garlic-Herb Bread.
Read lessYou can freeze bread for later usage (it stays great in a freezer for up to a half year). Defrost in only 3 – 4 hours.
About the Author:
Tom the ChefFounder
# 1
210 Followers
- Published Recipes: 270
- Av. Recipe Evaluation:
- Location: Iowa, USA
- Member since: 2023-02-02
Recipes
Try Other Recipes from Same Category!
Multigrain Bread
Tom the Chef FounderCzech Rye Bread
Tom the Chef FounderRustic Bread or Baguettes
Tom the Chef FounderDisclaimer
- General Information Content on this page above, including the content provided on www.CookingHub.com, including all recipes, articles, and other materials, is for general informational purposes only. This content reflects the personal opinions and experiences of its authors and is not intended to provide professional dietary, medical, legal, or political advice. Please consult a qualified professional before making any decisions based on the information presented here.
- Content Ownership and Use Content on this page above, including content published on CookingHub.com is owned by the individual authors who created it. Only the authors can access, modify, or delete their content from the platform. Our content may be embedded on third-party websites and blogs without modification. No reimbursement will be provided for this use. If an author removes content from CookingHub.com, it will no longer be available through any embedded links.
- Limitation of Liability Neither www.CookingHub.com (operated by the CookingHub Foundation) nor content authors are responsible for any outcome or consequence resulting from the use of information on this site. This includes, but is not limited to:
- Food Safety: Any health risk related to food handling, food quality, or failure to follow USDA recommendations (including minimum safe cooking temperatures).
- Preparation Safety: The proper and safe handling of cooking equipment or its suitability for any given task.
- Recipe Outcomes: The final look, taste, or success of following a recipe.
- Ingredients and Equipment: The sourcing of ingredients, tools, equipment, or anything else related to the preparation and consumption of food.
- Nutritional and Dietary Information: The accuracy of nutritional data. This information is provided as a courtesy and should not replace advice from a medical provider. You are responsible for verifying that a diet is suitable for your personal health needs.
- Errors and Omissions: Any potential errors, typos, or unclear directions in articles and recipes.
- User Responsibility All readers, visitors, and users of embedded content are solely responsible for evaluating recipes and articles. You must make your own decisions about whether to follow the steps and recommendations provided. It is your responsibility to ensure that ingredients and preparation methods are safe and appropriate for your personal dietary restrictions and health conditions.
Share
Click on the icons below to share "Title of the item to share"