Crispy Parmesan Ranch Onion Chips
6 - 8 servings
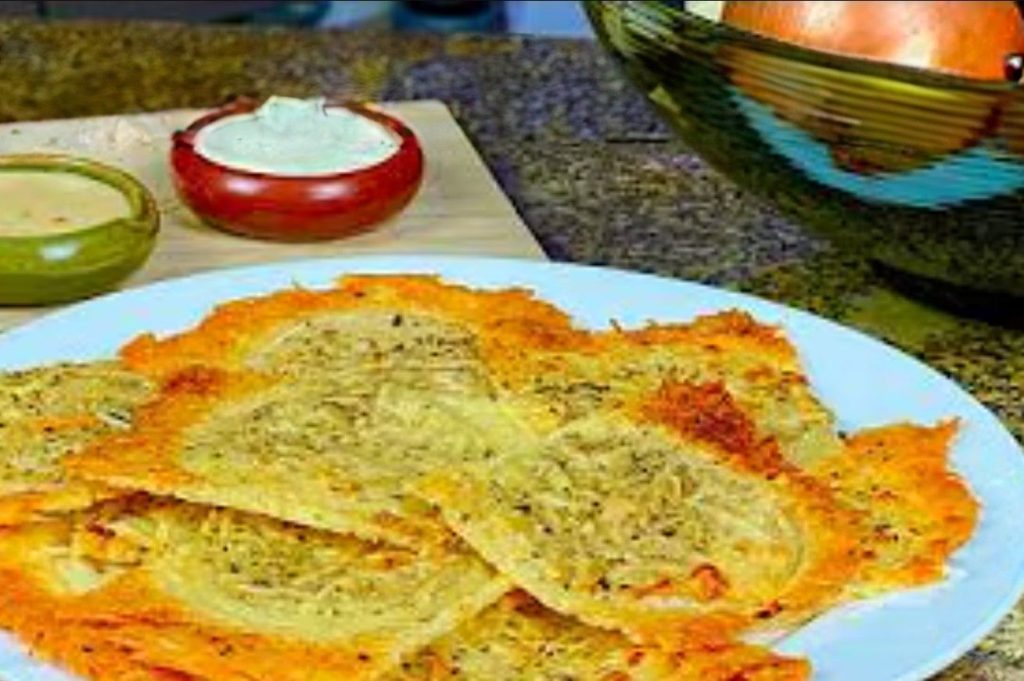
Create the viral sensation, Crispy Parmesan Ranch Onion Chips, on a single sheet pan for a fun, shareable snack. By layering thin onion slices on a bed of Parmesan and baking until deeply golden, you get an irresistibly savory and crunchy treat. This simple recipe is perfect for parties or...
Read more... anytime you crave a cheesy, flavorful bite.
Read lessx saved
 ChefLynn Cool Cook
July 10, 2025
Ingredients:
Chips:
- 1 of sweet onion - peeled and sliced (1/8" or less)
- 12 OZ of parmesan cheese - grated
- 2 - 3 TSP of Ranch seasoning powder - powder (Or your favorite savory seasoning)
- Cooking Spray (Duck fat or avocado or canola oil)
- 1 Pinch of flaky sea salt (adjust if needed, to taste)
- 1 Pinch of black pepper - freshly cracked (adjust if needed, to taste)
For Serving:
- Optionally: 1 of Your favorite dip (adjust if needed, such as ranch dressing, onion dip, or a creamy ginger dressing)
Tools:
- 1x Measuring Spoons
- 1x Cutting Board
- 1x Chef’s knife
- 1x Mandoline Slicer (optional, but very helpful for uniform, thin onion slices)
- 1x Baking Sheet with Parchment Paper or Silicone Matt
Directions:
1. Preheat Oven
Let’s start the preparation of Crispy Parmesan Ranch Onion Chips by preheating the oven.
- Place an oven rack in the middle position and preheat to 400°F (200°C).
2. Prepare the Baking Sheet:
- Line a large baking sheet with parchment paper.
Important:
This is crucial to prevent the cheese from sticking and helps achieve a crispier result than a silicone mat.
3. Create the Cheese Base:
- Sprinkle the grated Parmesan cheese evenly over the parchment paper, creating a solid, thin layer from edge to edge.
4. Arrange the Onions:
- Prepare your onion by slicing it as thinly as you can. A mandoline is best for this. It is very important to keep the onion slices intact; do not separate them into individual rings.
- Carefully lay the whole onion slices in a single layer over the bed of cheese.
- You can gently press and piece them together if they fall apart.
5. Season the Onions:
- Generously spray the tops of the onions with your cooking spray (like the flavorful duck fat spray). This helps them cook and brown.
- Sprinkle the Ranch seasoning powder evenly over the onions.
- Add a light sprinkle of black pepper.
- Taste your seasoning blend first. If it already contains a lot of salt, you may not need to add more, as Parmesan is also quite salty. If needed, add a very small pinch of salt.
6. Add Final Cheese Layer (Optional):
- For extra cheesiness, you can sprinkle any remaining Parmesan over the top of the seasoned onions.
7. Bake until Golden and Crispy
- Place the baking sheet in the preheated oven and bake for 20 to 25 minutes.
- Don’t be afraid to let it get deeply browned!
- The goal is a rich, golden-brown color across the cheese.
- This extended time is what makes the chips crispy rather than soft.
- The onions should be tender and cooked through.
8. Cool Completely:
- Remove the baking sheet from the oven and place it on a wire rack.
- Let it cool for at least 10-15 minutes.
- This step is essential; as the cheese cools, it will harden and become crispy.
9. Serve:
- Once cooled, break the sheet of onion crisps into pieces of your desired size.
- Serve immediately on its own or with your favorite dip.
Tips:
- For Maximum Crispiness: To achieve the best crunch, using parchment paper instead of a silicone mat is recommended, as it allows for better heat transfer to the bottom layer of cheese. Be sure to bake for the full 20-25 minutes, or until the cheese is a deep, uniform golden brown, not just lightly melted.
- Fixing a Soft Batch: If your chips aren’t as crisp as you’d like after cooling, you can place the pieces in a dry, non-stick skillet over medium heat. Cook for a few minutes to further brown and crisp up the bottom.
- Flavor Customization: Get creative with the flavors. For a “pizza” variation, try adding a layer of pepperoni on top of the onions before baking.
About the Author:
ChefLynnCool Cook
# 3
49 Followers
- Published Recipes: 23
- Av. Recipe Evaluation:
- Location: Florida, USA
- Member since: 2024-09-08
Recipes
Try Other Recipes from Same Category!
Potato Pancakes Bramboraky
 Tom the Chef Founder
Shrimp Cocktail
Tom the Chef FounderTuna Cakes
Tom the Chef FounderHomemade Nachos and Fresh Guacamole
 Faceless Chef Resident Chef
Chilled Potato Leek Soup
ChefLynn Cool CookFalafel Recipe
ChefLynn Cool CookFried Cauliflower Smažený Květák
Tom the Chef FounderFrench Onion Soup Pinwheels
ChefLynn Cool CookKeto Red Pepper & Spinach Egg White Bites
 olivia.wyles Resident Chef
Classic Cheese Fondue
Disclaimer
- General Information Content on this page above, including the content provided on www.CookingHub.com, including all recipes, articles, and other materials, is for general informational purposes only. This content reflects the personal opinions and experiences of its authors and is not intended to provide professional dietary, medical, legal, or political advice. Please consult a qualified professional before making any decisions based on the information presented here.
- Content Ownership and Use Content on this page above, including content published on CookingHub.com is owned by the individual authors who created it. Only the authors can access, modify, or delete their content from the platform. Our content may be embedded on third-party websites and blogs without modification. No reimbursement will be provided for this use. If an author removes content from CookingHub.com, it will no longer be available through any embedded links.
- Limitation of Liability Neither www.CookingHub.com (operated by the CookingHub Foundation) nor content authors are responsible for any outcome or consequence resulting from the use of information on this site. This includes, but is not limited to:
- Food Safety: Any health risk related to food handling, food quality, or failure to follow USDA recommendations (including minimum safe cooking temperatures).
- Preparation Safety: The proper and safe handling of cooking equipment or its suitability for any given task.
- Recipe Outcomes: The final look, taste, or success of following a recipe.
- Ingredients and Equipment: The sourcing of ingredients, tools, equipment, or anything else related to the preparation and consumption of food.
- Nutritional and Dietary Information: The accuracy of nutritional data. This information is provided as a courtesy and should not replace advice from a medical provider. You are responsible for verifying that a diet is suitable for your personal health needs.
- Errors and Omissions: Any potential errors, typos, or unclear directions in articles and recipes.
- User Responsibility All readers, visitors, and users of embedded content are solely responsible for evaluating recipes and articles. You must make your own decisions about whether to follow the steps and recommendations provided. It is your responsibility to ensure that ingredients and preparation methods are safe and appropriate for your personal dietary restrictions and health conditions.
Share
Click on the icons below to share "Title of the item to share"