Cook, Learn, and Share to Fight Hunger.
Bagels baked accoriding my Bagel Recipe on the rustic wooden cutting board. Close up to 3 bagels from top side.
  • 30 min.
  • 3+ h.
  • 3/5

Ingredients:

Bagel dough:

Boiling Bath:

Brushing:

  • ¼ cup of milk (adjust if needed)

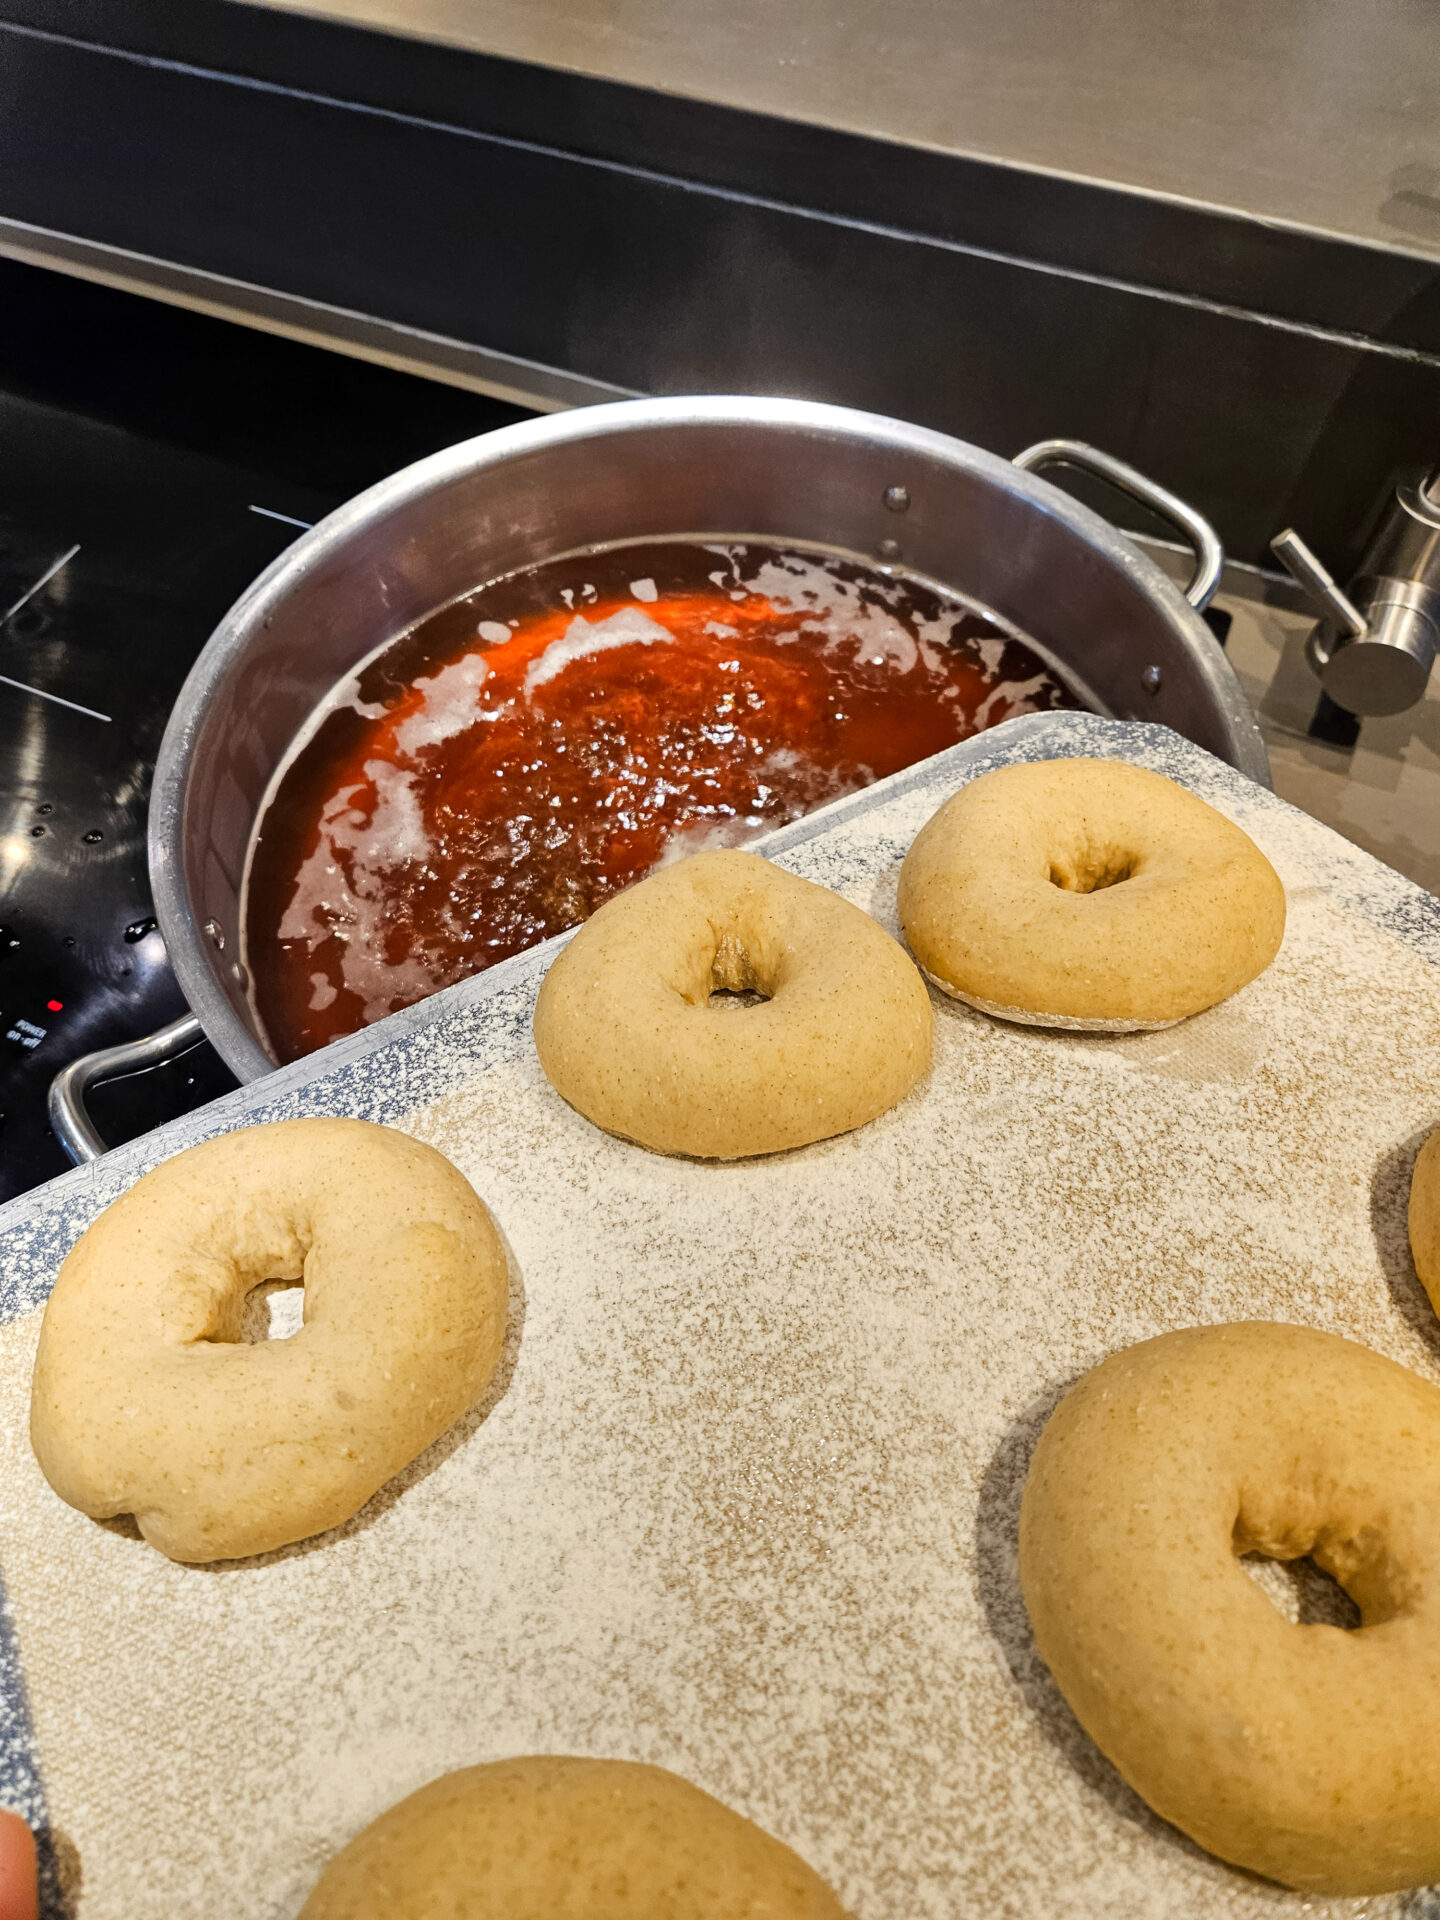
* You can use any rye flour you have available.
** You can optionally substitute barley malt syrup for the more cost-effective alternative, molasses.

Optionally sprinkle with:

  • Black and/or white sesame seeds
  • Crushed pepper flakes
  • Poppyseeds
  • Sunflower seeds or any other kind of seeds
  • Sea salt (do not use if you are going to freeze or refrigerate – this makes them soggy)
Recipes

Best served with:

Directions:

1. Dough for Bagel Recipe:

Let’s start the preparation of the bagel recipe.

1.1. Place into a kitchen mixer with hook attachment:

4 cups of bread flour
½ cup of rye flour
1 TBSP of active dry yeasts
1 TBSP of granulated sugar
2 TSP of salt

Briefly stir with a hand whisk just enough to combine all ingredients (about 1 minute).

1.2. Add:

2 cups of water – warm, about 80 to 90°F (preheat in a kettle or microwave)
1 TBSP of barley malt syrup

Knead on low speed until all ingredients are partially incorporated (about 1 – 2 minutes).

1.3.

Then increase speed to medium-high and knead until the dough is compact and stops sticking to the bowl (usually about 2 – 3 minutes).

2. Rising the Dough:

2.1.

Remove the bowl from the mixer and cover with plastic wrap.

2.2.

Let it rise in a warm place until it’s doubled in size (about 2 – 3 hours).

3. Form Dough Balls:

Important:
Work on a non-floured surface (countertop).

3.1. Place the dough on a work surface and, using a bowl scraper, separate the dough into 12 even pieces for regular-sized bagels (about 3.5 OZ each).

Tip:
If you prefer jumbo bagels, separate the dough into 8 even pieces (about 5 OZ each).

3.2. Form each piece of dough into a dough ball by stretching it:

Important:
Work one by one.

3.2.1.

To stretch the dough, place the bowl scraper at a slight angle against the bottom part of the dough while making sure that the bottom of the bowl scraper is touching the table.

3.2.2.

Then, keeping one hand on the top of the dough, push the scraper to move the dough slightly. The dough will roll slightly and stretch at the same time.

3.2.3. Repeat this step a few times until a nice dough ball is shaped. Each time, turn the dough about 90° to the right (usually about 2 times from each of the four sides).

Note:
Optionally, you can form each piece of the dough into a dough ball another way (rolling between two hands), but the method mentioned above is recommended.

4. Form Bagels:

Important:

  • To make sure that formed bagels will not stick and will be easy to release for boiling, place them on an upside-down baking sheet with a generously floured silicone mat.
  • Make sure that bagels have at least 1” space between each other – I usually place no more than 6 of them on each baking sheet.

4.1.

To form the bagel, take a dough ball and penetrate it in the middle with your thumb.

4.2. Leaving the thumb in the center of the dough ball, start rotating the dough ball around your thumb and at the same time, start gently stretching it into a bagel shape until you reach a center hole with approximately a 1” diameter.

Important:
If you rip the dough ball during shaping, you need to form it into the dough ball again and repeat the steps – this doesn’t happen very often.

4.3.

Place the formed bagel on an upside-down baking sheet with a floured silicone mat and continue forming each ball.

5. Proofing:

5.1. Then, let all bagels proof at room temperature for about 30 minutes (keep the tray uncovered).

Note:
Each ball will increase its’ size. Do not focus on how much; just make sure that they are resting for about 30 minutes. Most important is that the balls recover from shaping and are ready to be boiled.

6. Boiling Bath:

6.1. While the bagels are proofing, prepare your boiling bath. Place into a large pot:

4 – 6 QT of water
3 TBSP of barley malt syrup 

And briefly stir.

6.2.

Bring to a boil with occasional stirring and boil until the water and syrup are fully combined (usually a couple of minutes).

7. Set Oven to Preheat:

7.1.

Set oven to preheat to 400°F.

8. Boil Bagels:

Important:
Since bagels will expand during boiling, it is important to boil them in batches. I use a pot with a 14” top diameter that can accommodate 6 bagels being boiled at the same time. With a pot with a smaller diameter, you may have to split boiling into more than 2 batches.

8.1.

When the bagels have reached the end of their proofing time, place them into the boiling bath for 2 minutes and 30 seconds.

Bagel Recipe - Prearation for the boilingBagel Recipe - bagels are boiling

8.2.

In the meantime, dust off all flour from the silicone mats – it doesn’t need to be perfect, but it is important to bake the bagels on non-floured silicone mats.

8.3.

After the bagels are precooked for 2 minutes and 30 seconds, place them for about 15 seconds on a paper towel to partially dry. Then place them on a baking sheet with a silicone mat.

9. Brush and Optionally Sprinkle:

9.1.

Brush the boiled bagels with milk.

9.2.

Optionally, immediately sprinkle them with sesame seeds, poppy seeds, other kinds of seeds, crushed pepper flakes, or sea salt.

10. Baking:

10.1

Bake in a preheated oven until done (about 20 minutes). Rotate the baking sheets in the middle of baking.

10.2.

Test with a toothpick.

10.3.

Then, cool on a cooling grate.

11. Bagel Recipe Complete And Ready to Be Served:

11.1.

Serve while still warm or when fully cooled.

Ingredients

The bagel, a humble ring of dough, holds a special place in the culinary world. Its chewy texture, glossy crust, and endless flavor possibilities have made it a beloved breakfast and lunch staple. From the classic sesame seed bagel with cream cheese to innovative creations like the everything bagel with avocado and smoked salmon, the bagel’s versatility knows no bounds. Read more about delicious bagels here.

About the Author:
Tom the ChefFounder
# 1
  • Published Recipes: 269
  • Av. Recipe Evaluation:
  • Location: Iowa, USA
  • Member since: 2023-02-02

Disclaimer

  1. General Information Content on this page above, including the content provided on www.CookingHub.com, including all recipes, articles, and other materials, is for general informational purposes only. This content reflects the personal opinions and experiences of its authors and is not intended to provide professional dietary, medical, legal, or political advice. Please consult a qualified professional before making any decisions based on the information presented here.
  2. Content Ownership and Use Content on this page above, including content published on CookingHub.com is owned by the individual authors who created it. Only the authors can access, modify, or delete their content from the platform. Our content may be embedded on third-party websites and blogs without modification. No reimbursement will be provided for this use. If an author removes content from CookingHub.com, it will no longer be available through any embedded links.
  3. Limitation of Liability Neither www.CookingHub.com (operated by the CookingHub Foundation) nor content authors are responsible for any outcome or consequence resulting from the use of information on this site. This includes, but is not limited to:
    • Food Safety: Any health risk related to food handling, food quality, or failure to follow USDA recommendations (including minimum safe cooking temperatures).
    • Preparation Safety: The proper and safe handling of cooking equipment or its suitability for any given task.
    • Recipe Outcomes: The final look, taste, or success of following a recipe.
    • Ingredients and Equipment: The sourcing of ingredients, tools, equipment, or anything else related to the preparation and consumption of food.
    • Nutritional and Dietary Information: The accuracy of nutritional data. This information is provided as a courtesy and should not replace advice from a medical provider. You are responsible for verifying that a diet is suitable for your personal health needs.
    • Errors and Omissions: Any potential errors, typos, or unclear directions in articles and recipes.
  4. User Responsibility All readers, visitors, and users of embedded content are solely responsible for evaluating recipes and articles. You must make your own decisions about whether to follow the steps and recommendations provided. It is your responsibility to ensure that ingredients and preparation methods are safe and appropriate for your personal dietary restrictions and health conditions.