Knife Handling & Cutting Techniques
October 6, 2023Before you start cooking (or letting your kids cook), make sure that everyone is aware of proper knife cutting techniques and also proper knife handling.
 Tom the Chef Founder
Fruit and vegetables are nutritious, full of vitamins, and are very flavorful. Even if you are not interested in gaining the health benefits or appreciate the initial taste, fruit and vegetables are often very important for creating a final flavor in many meals (creating important flavor elements). The following are ways to wash, peel, and cut your produce. In this section, I’m not able to cover all fruits and vegetables but have chosen the most common ones. In this section I’m not able to cover all fruits and vegetables but have chosen the most common ones.
Tom the Chef FounderSee section “Knife Handling and Cutting Techniques” here to get a full understanding of the general usage of knives before you start reading this section.
Always wash (rinse) your fruit and vegetables under cold water to remove dirt, bacteria, and pesticides (with the exception of bananas, onions, garlic, and shallots) right before processing or consuming. Let the water run and gently but thoroughly scrub by hand (do not use any sponges or other tools).
Fruit and vegetables that need to be peeled need to be washed always before peeling. If you want to take it one step further (for example, when using a lemon zest for your baking), immerse the produce into cold water for a half hour (or preferably overnight) before rinsing.
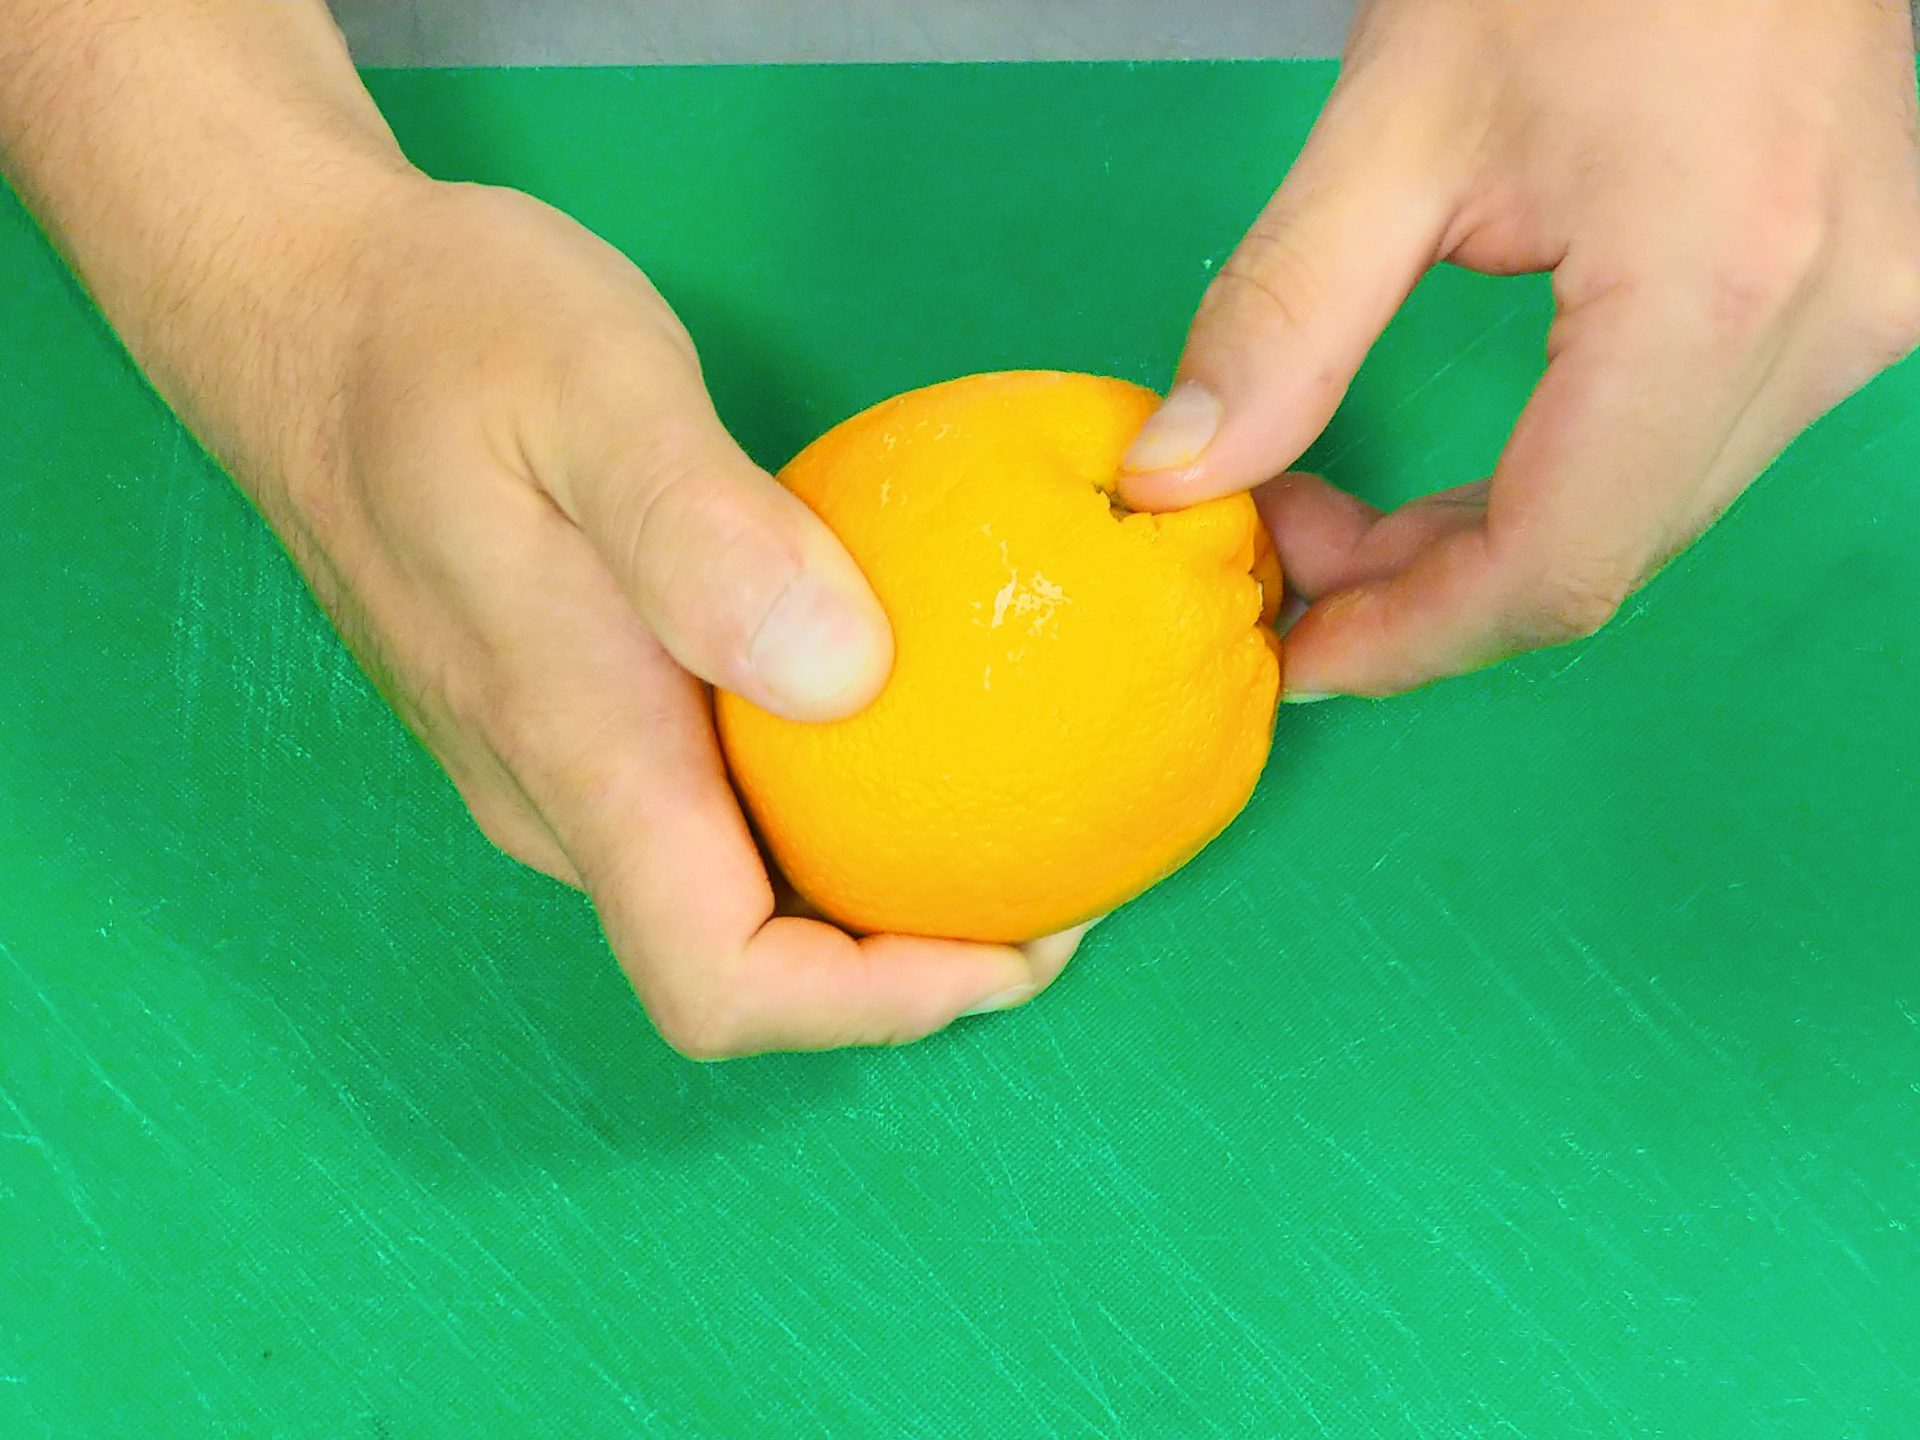
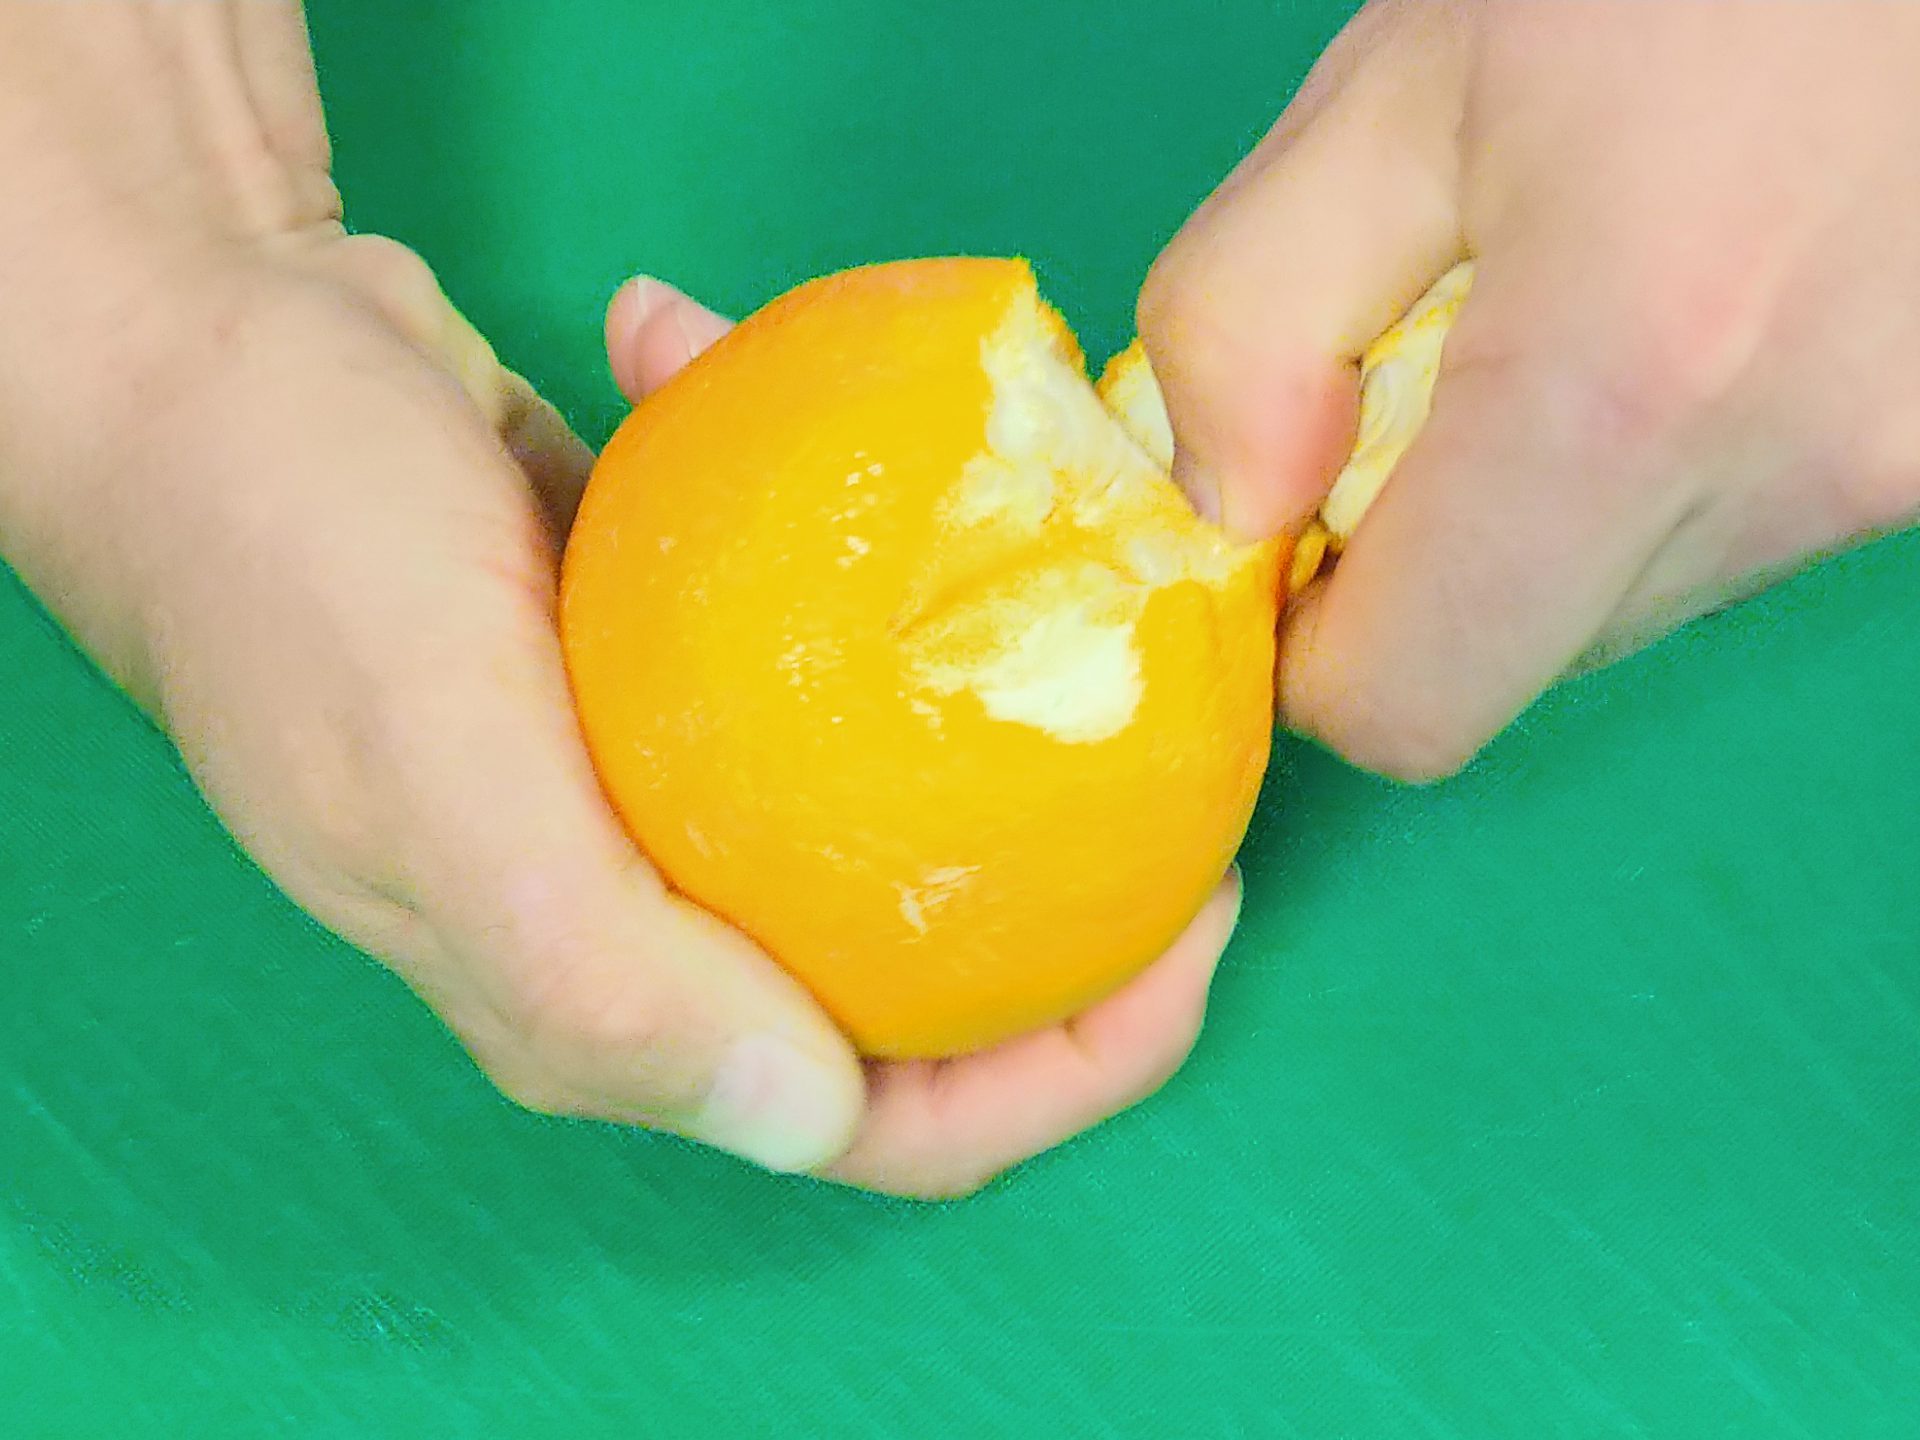
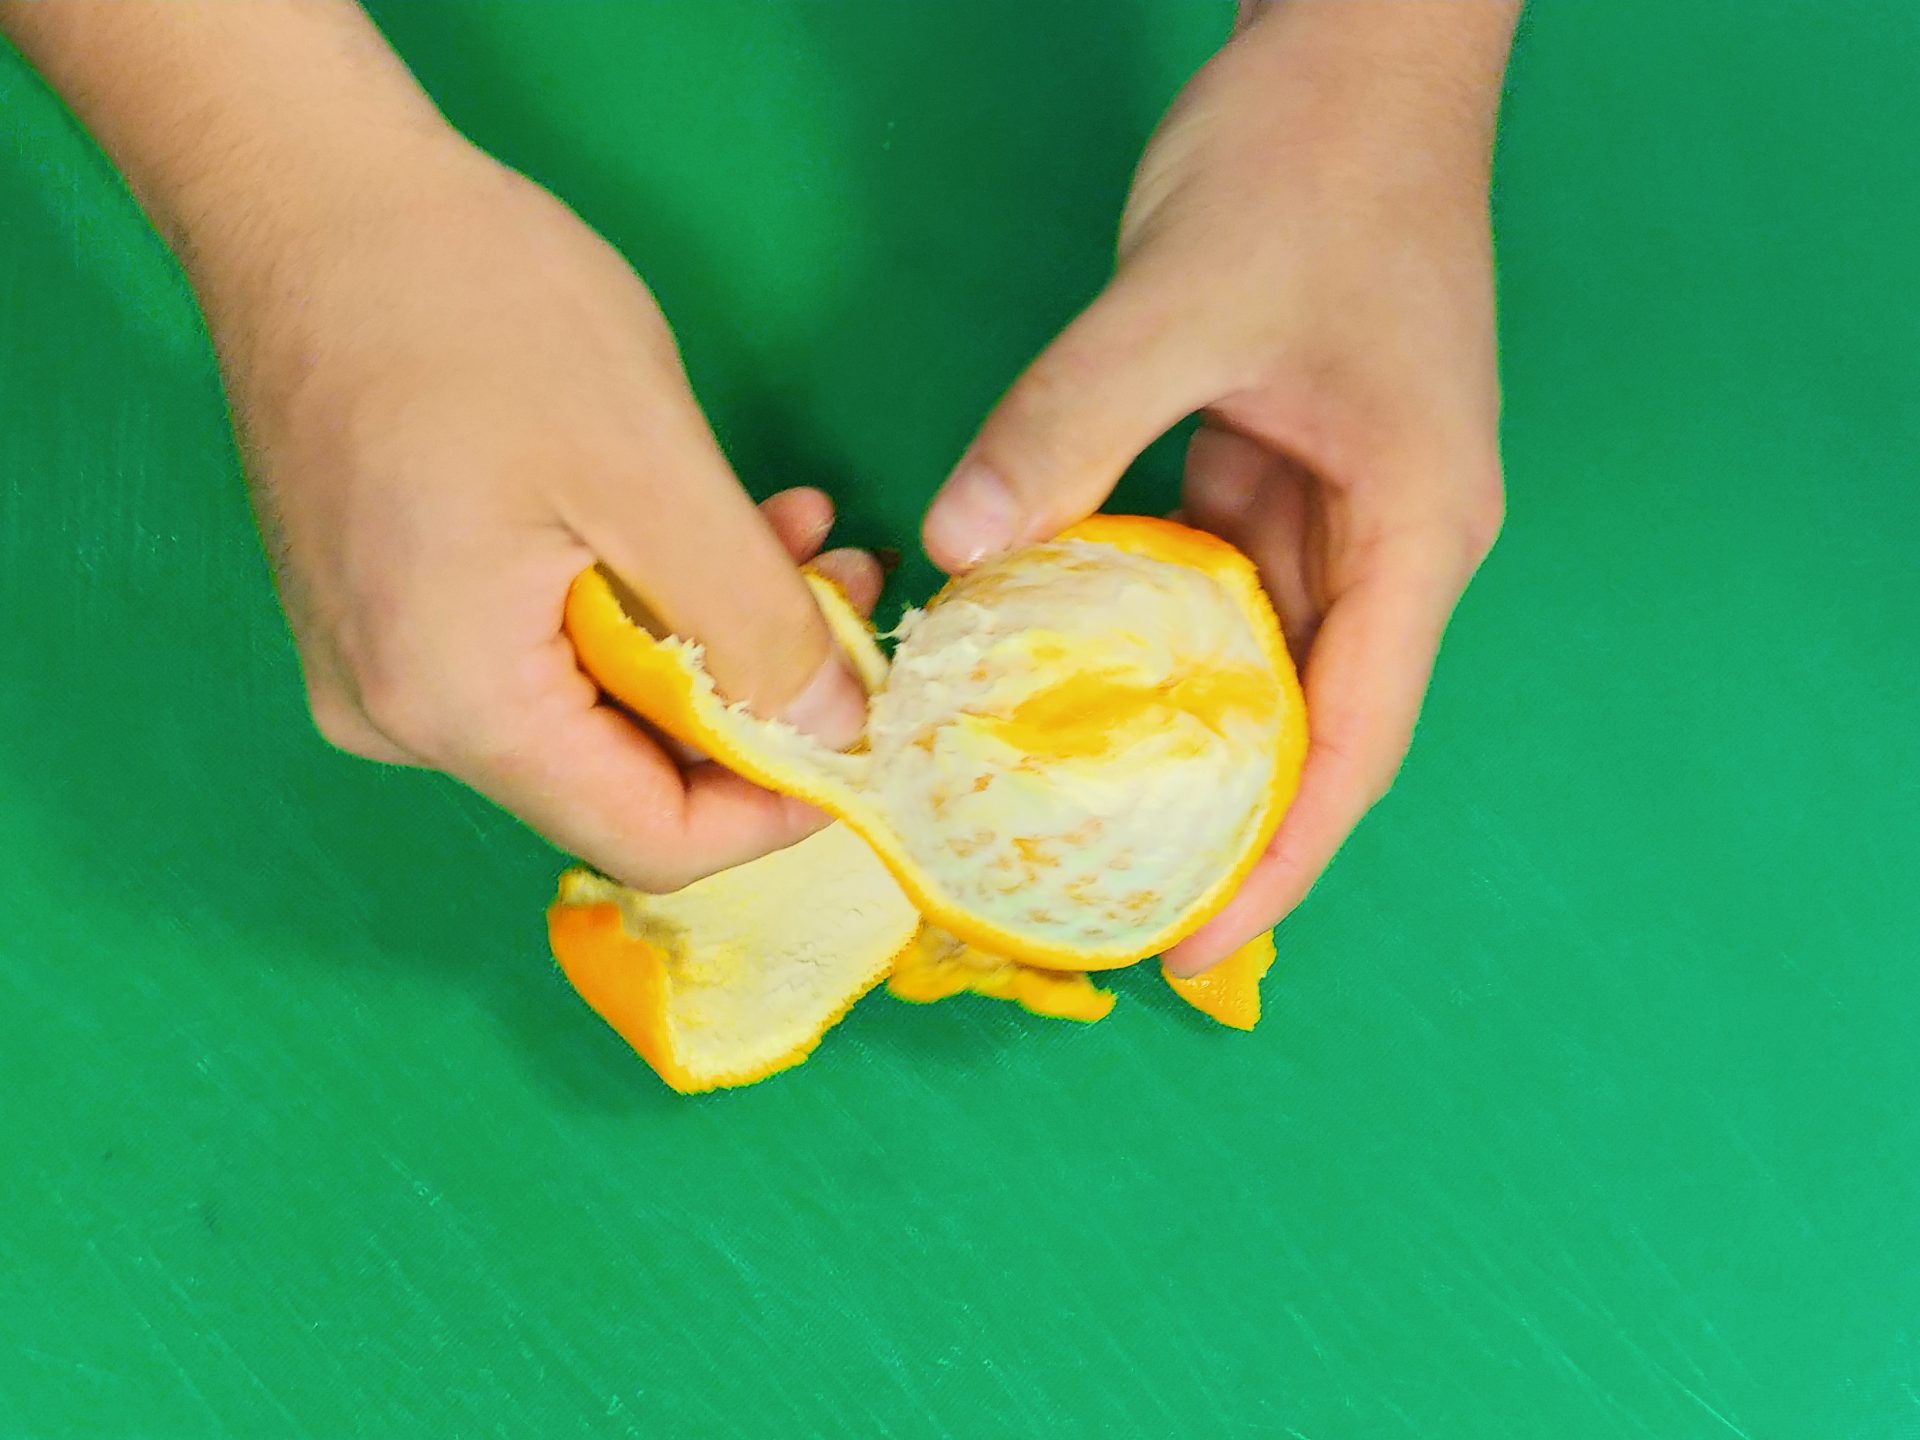
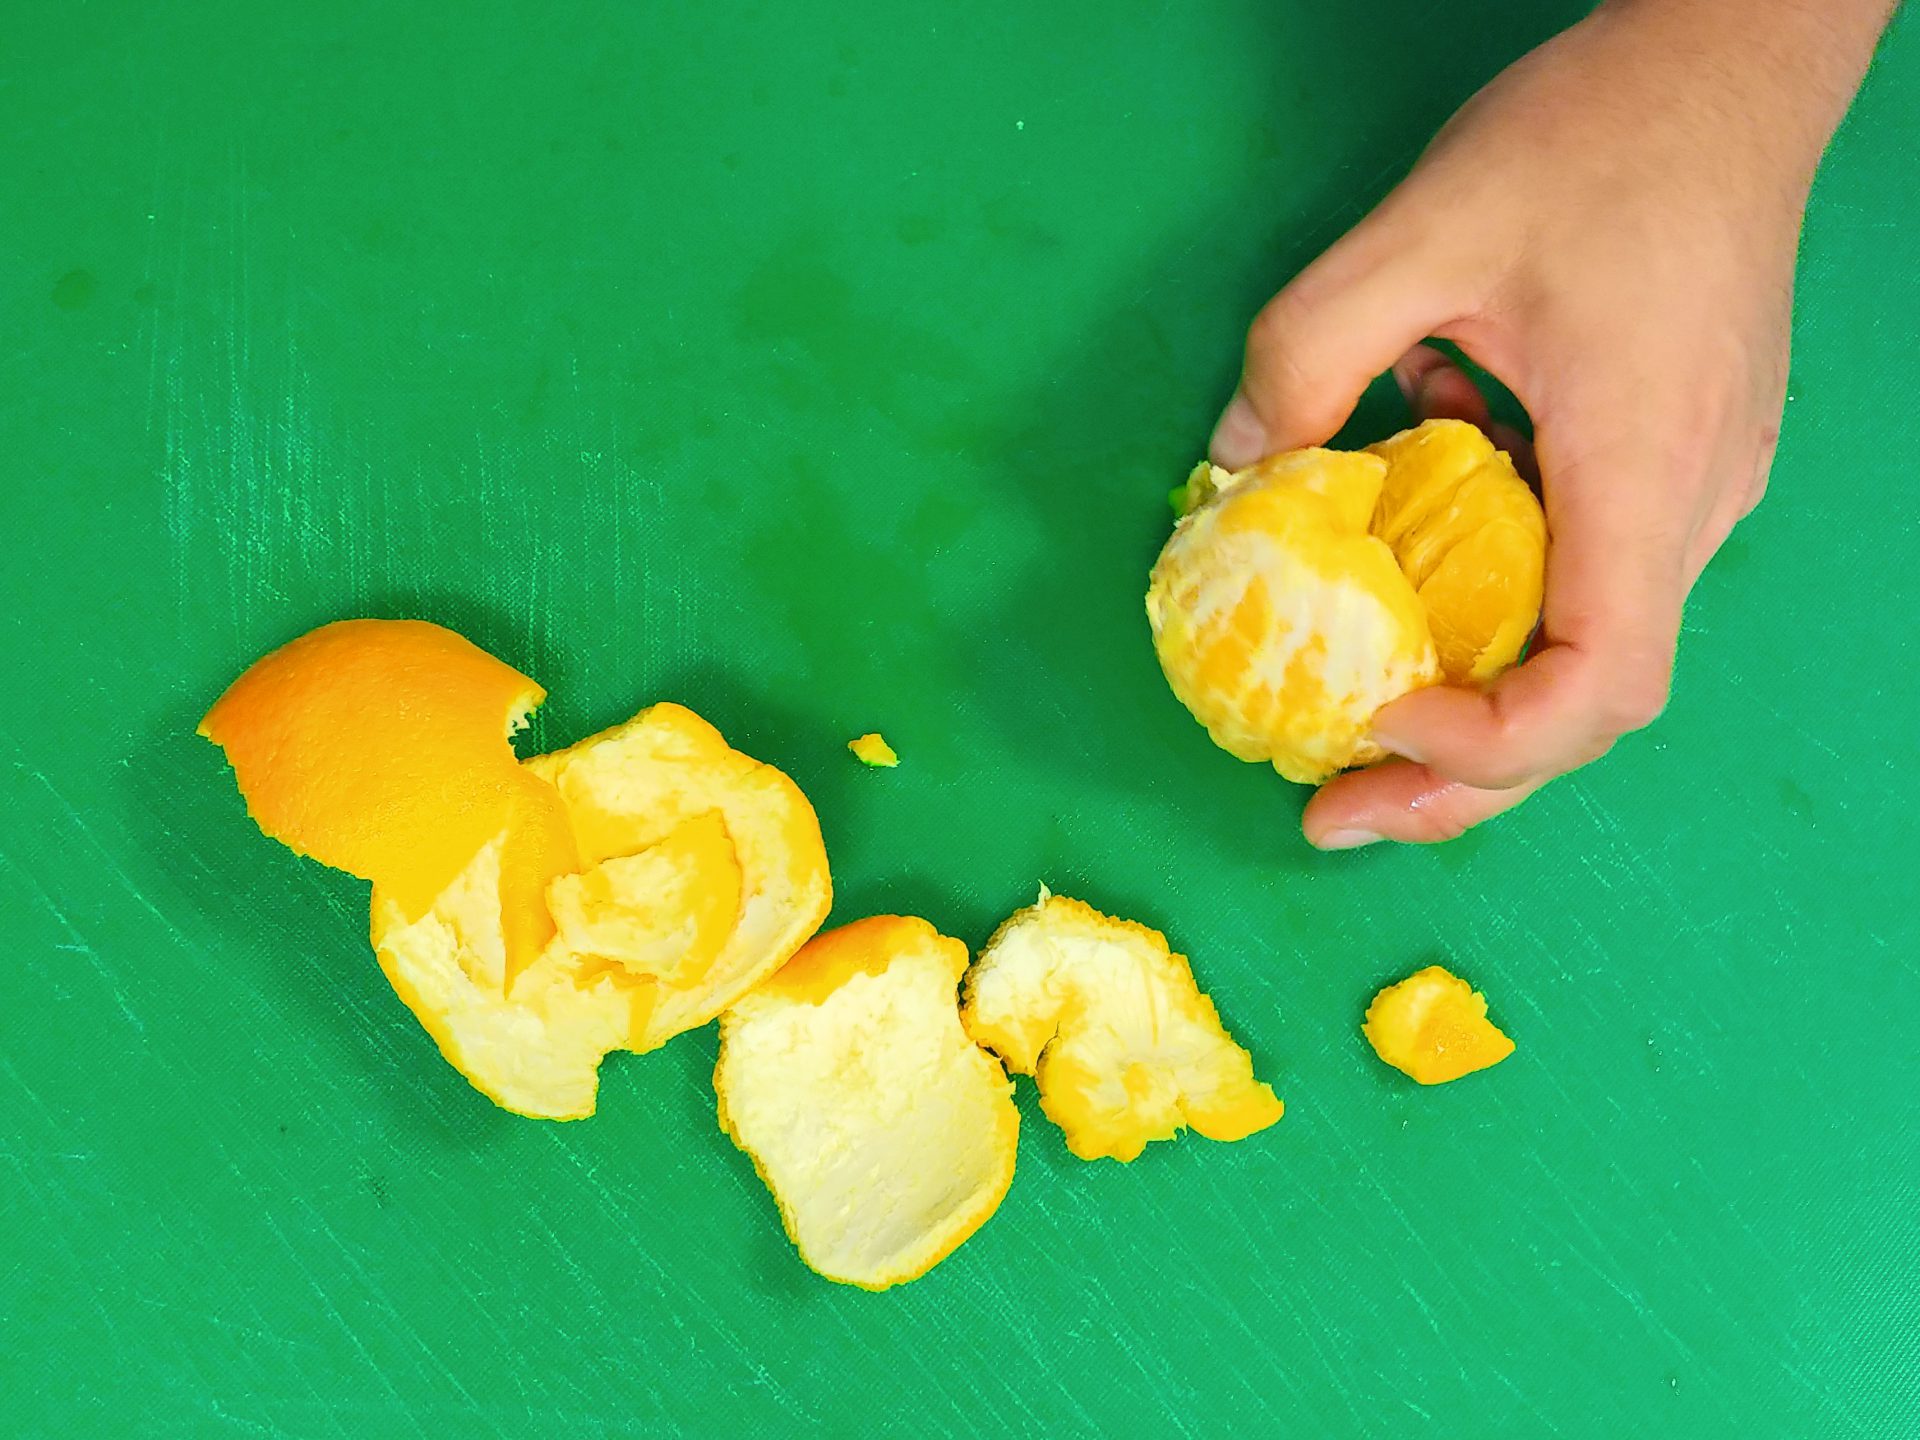
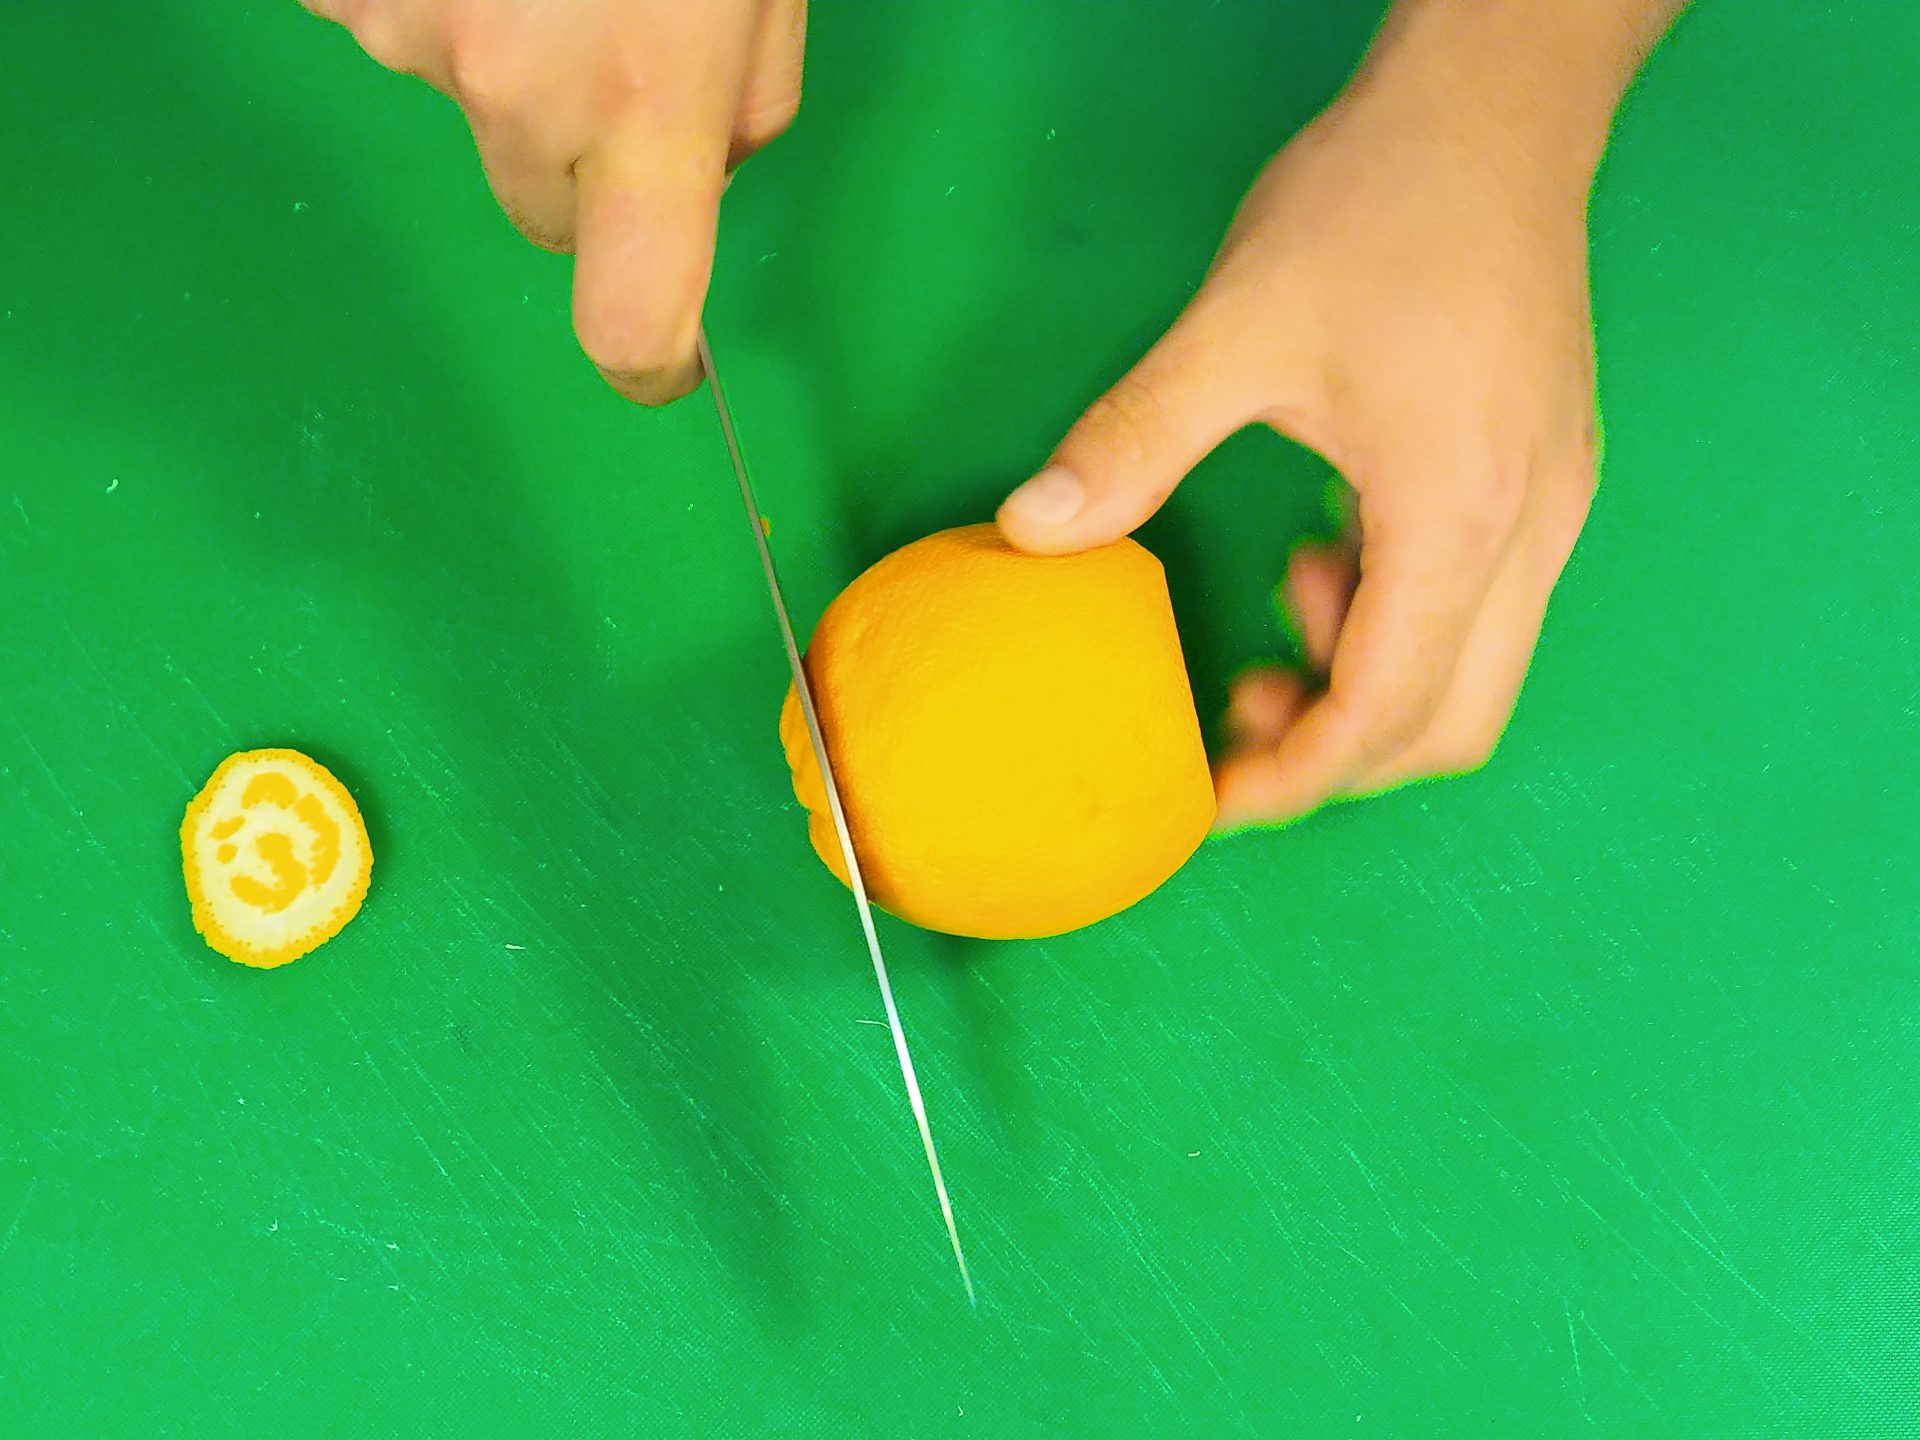
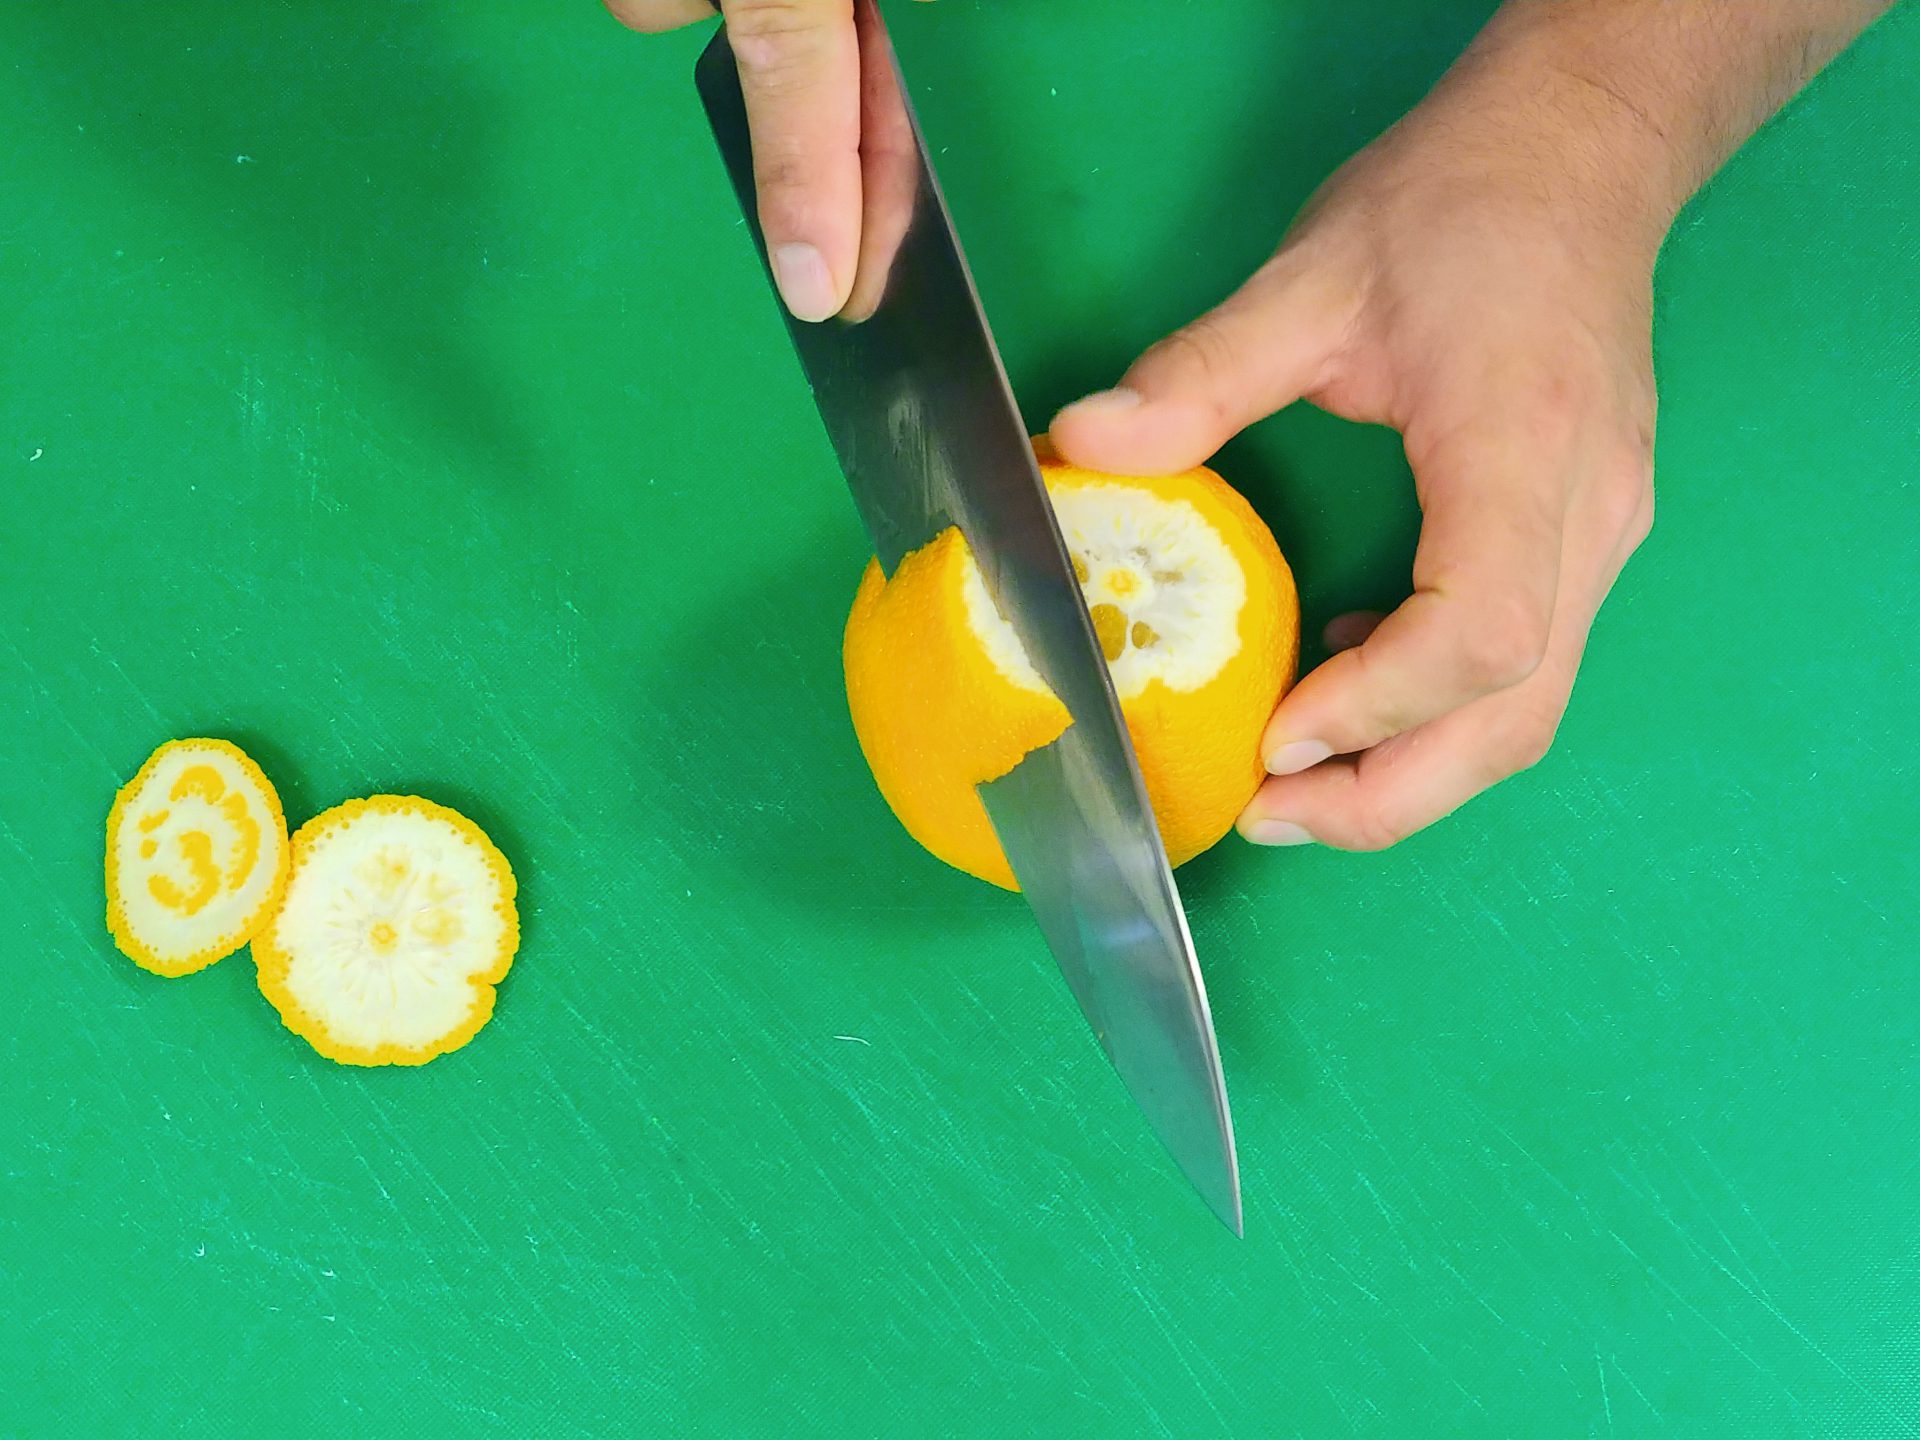
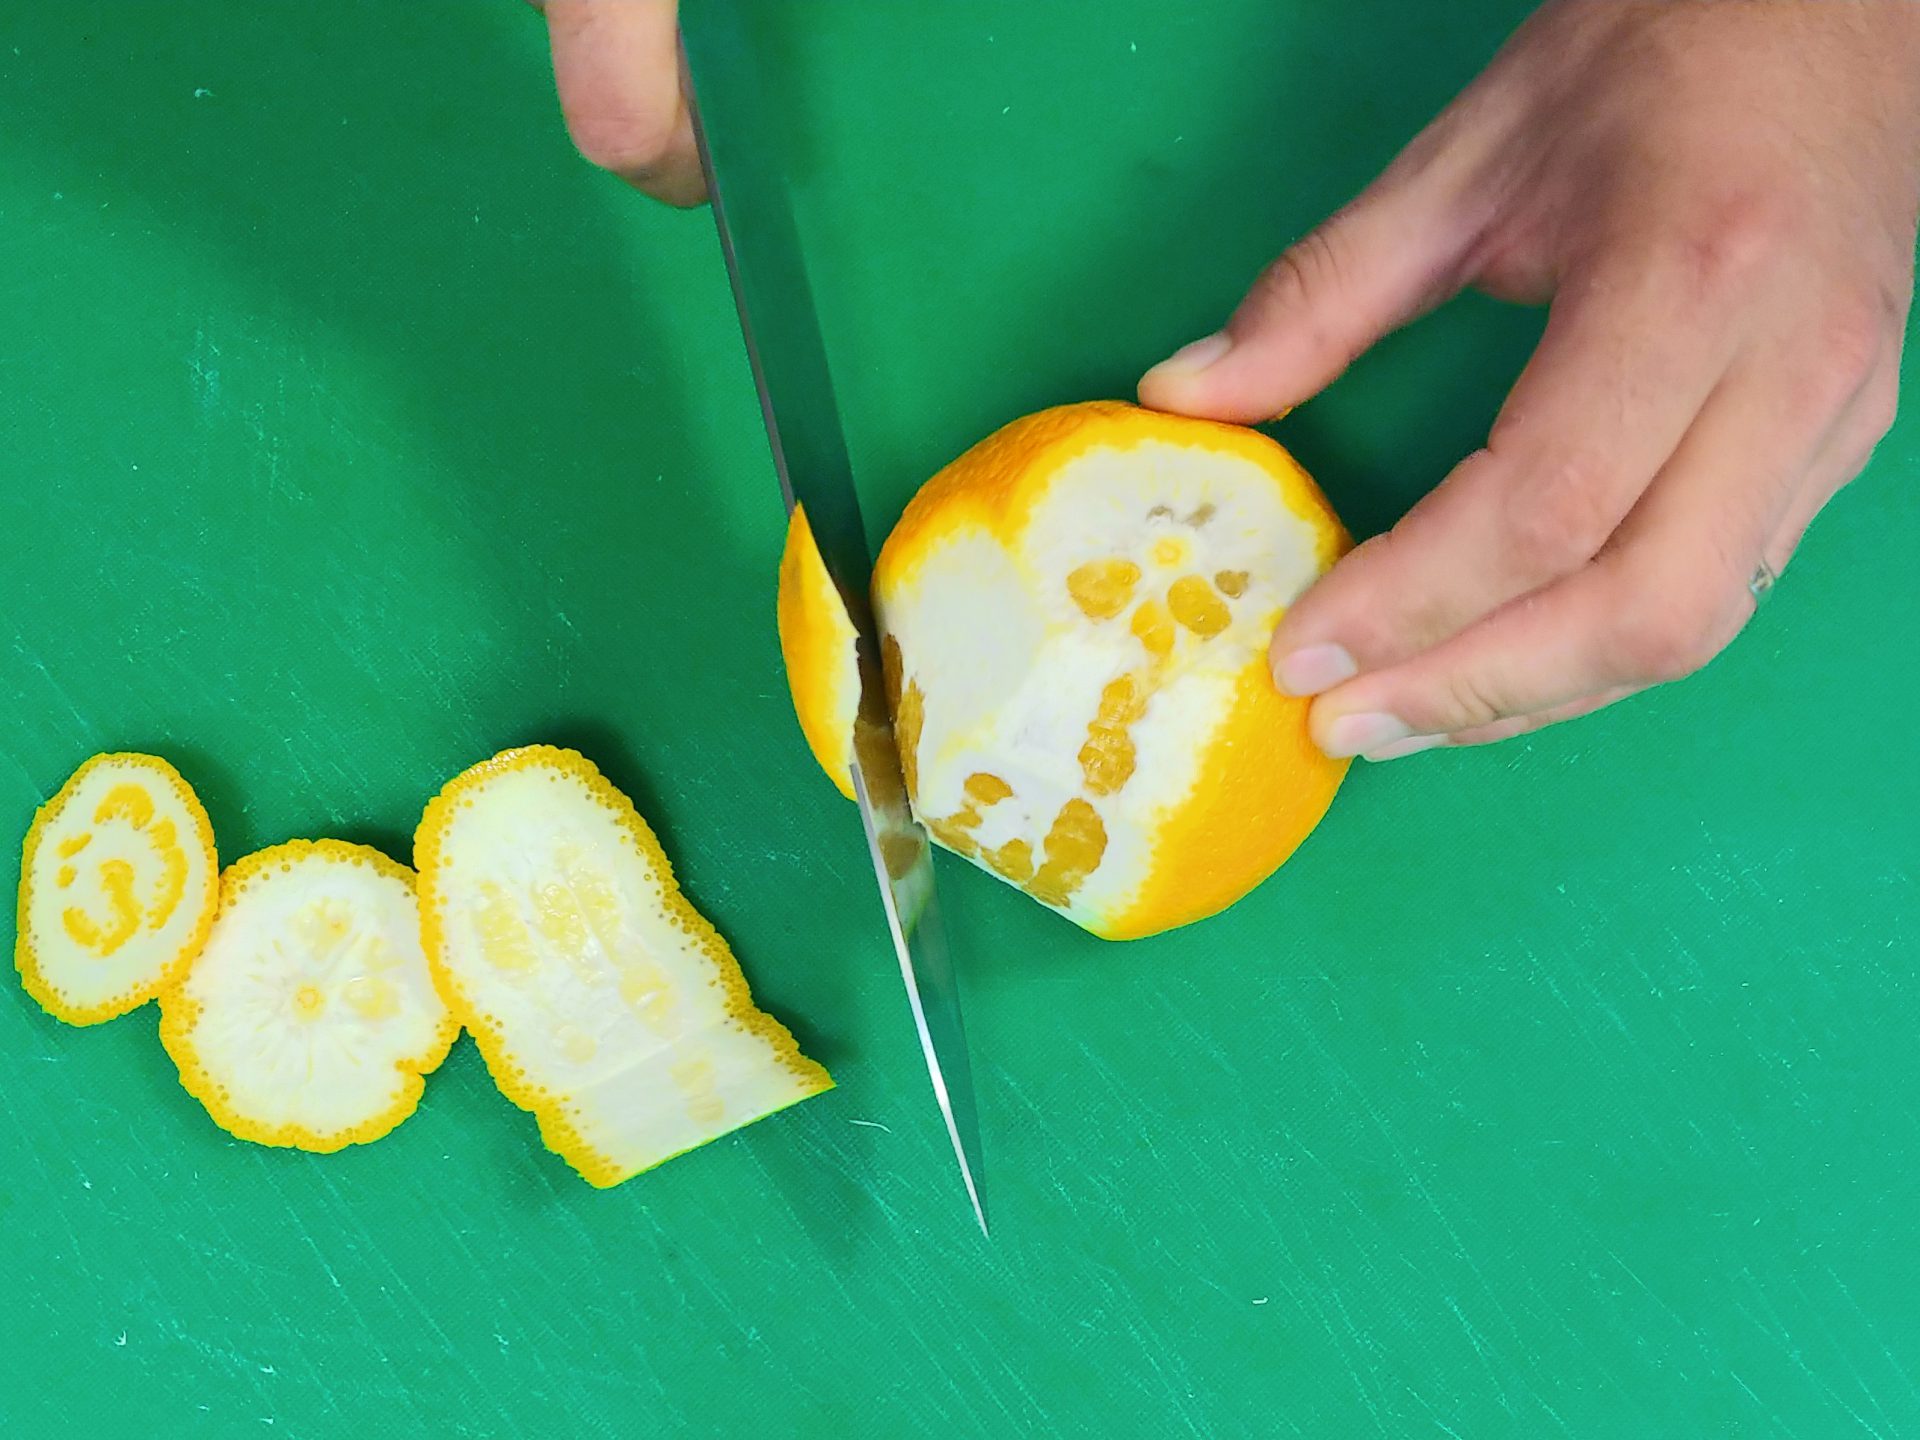
Peel your citrus:
Use any peeler for citrus (follow the enclosed instructions).
Or, peel it by hand (this works great, especially with thicker citrus skin). For peeling by hand, penetrate the skin close to the top, and then work through the rest of the peel until all the peel is removed.
Or, peel by cutting the top and bottom off, and then slice the rest of the peel off.
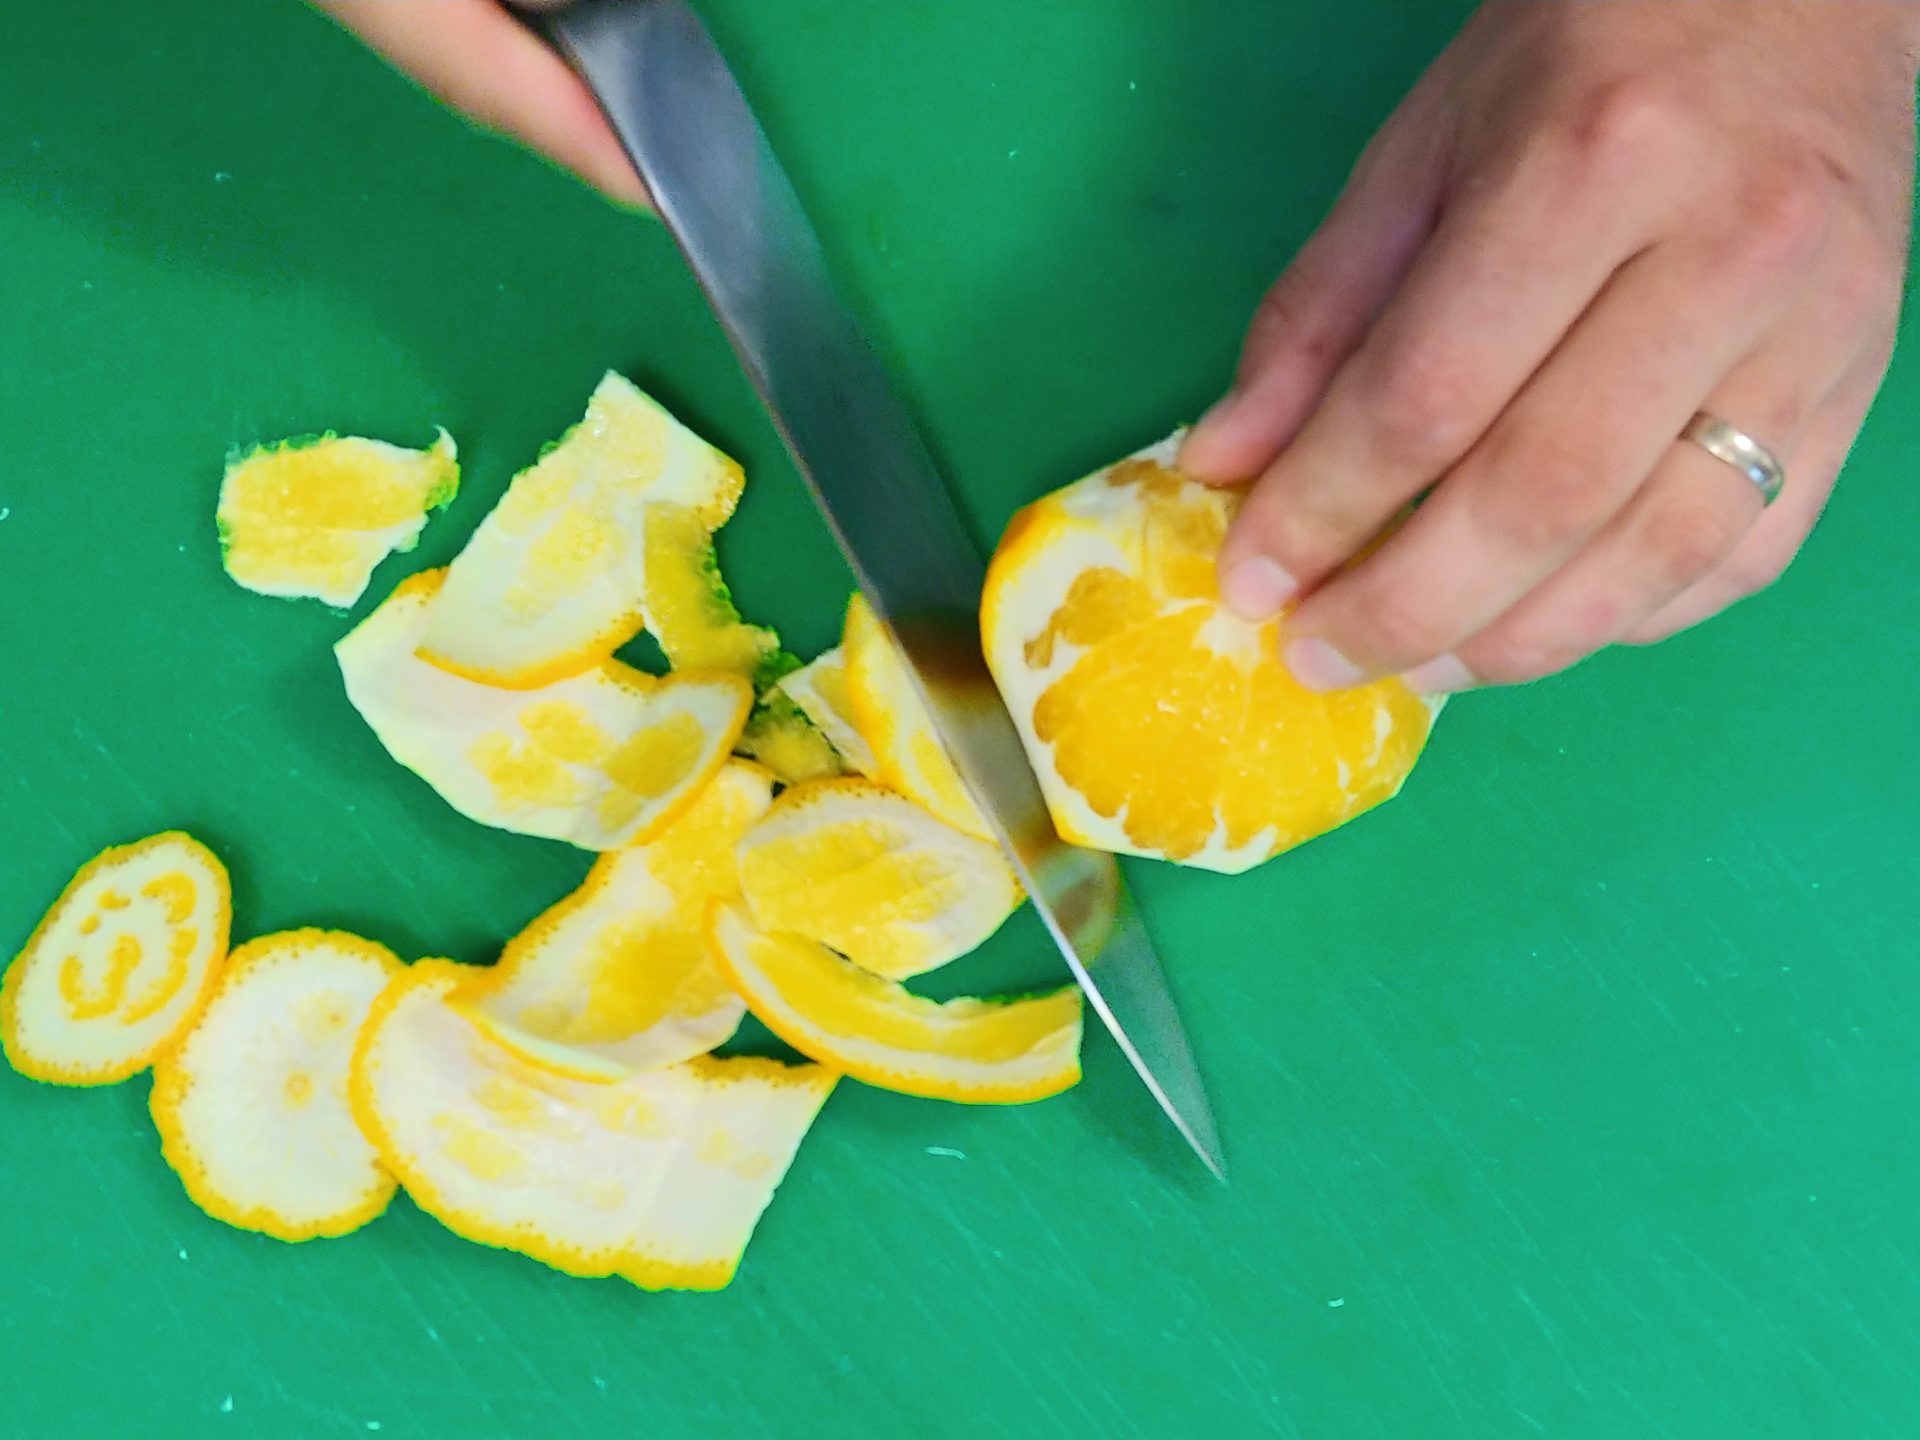
When peeled, you can easily separate into individual sections by hand or use a knife to cut each section out.
If you prepare a platter, you can consider cutting the citrus into triangles with the skin on.
The easiest way to enjoy grapefruit is by simply cutting it in half horizontally, optionally sprinkle with confectioners’ sugar, and then dig it out with a spoon. You can purchase serrated grapefruit spoons to make it easier.
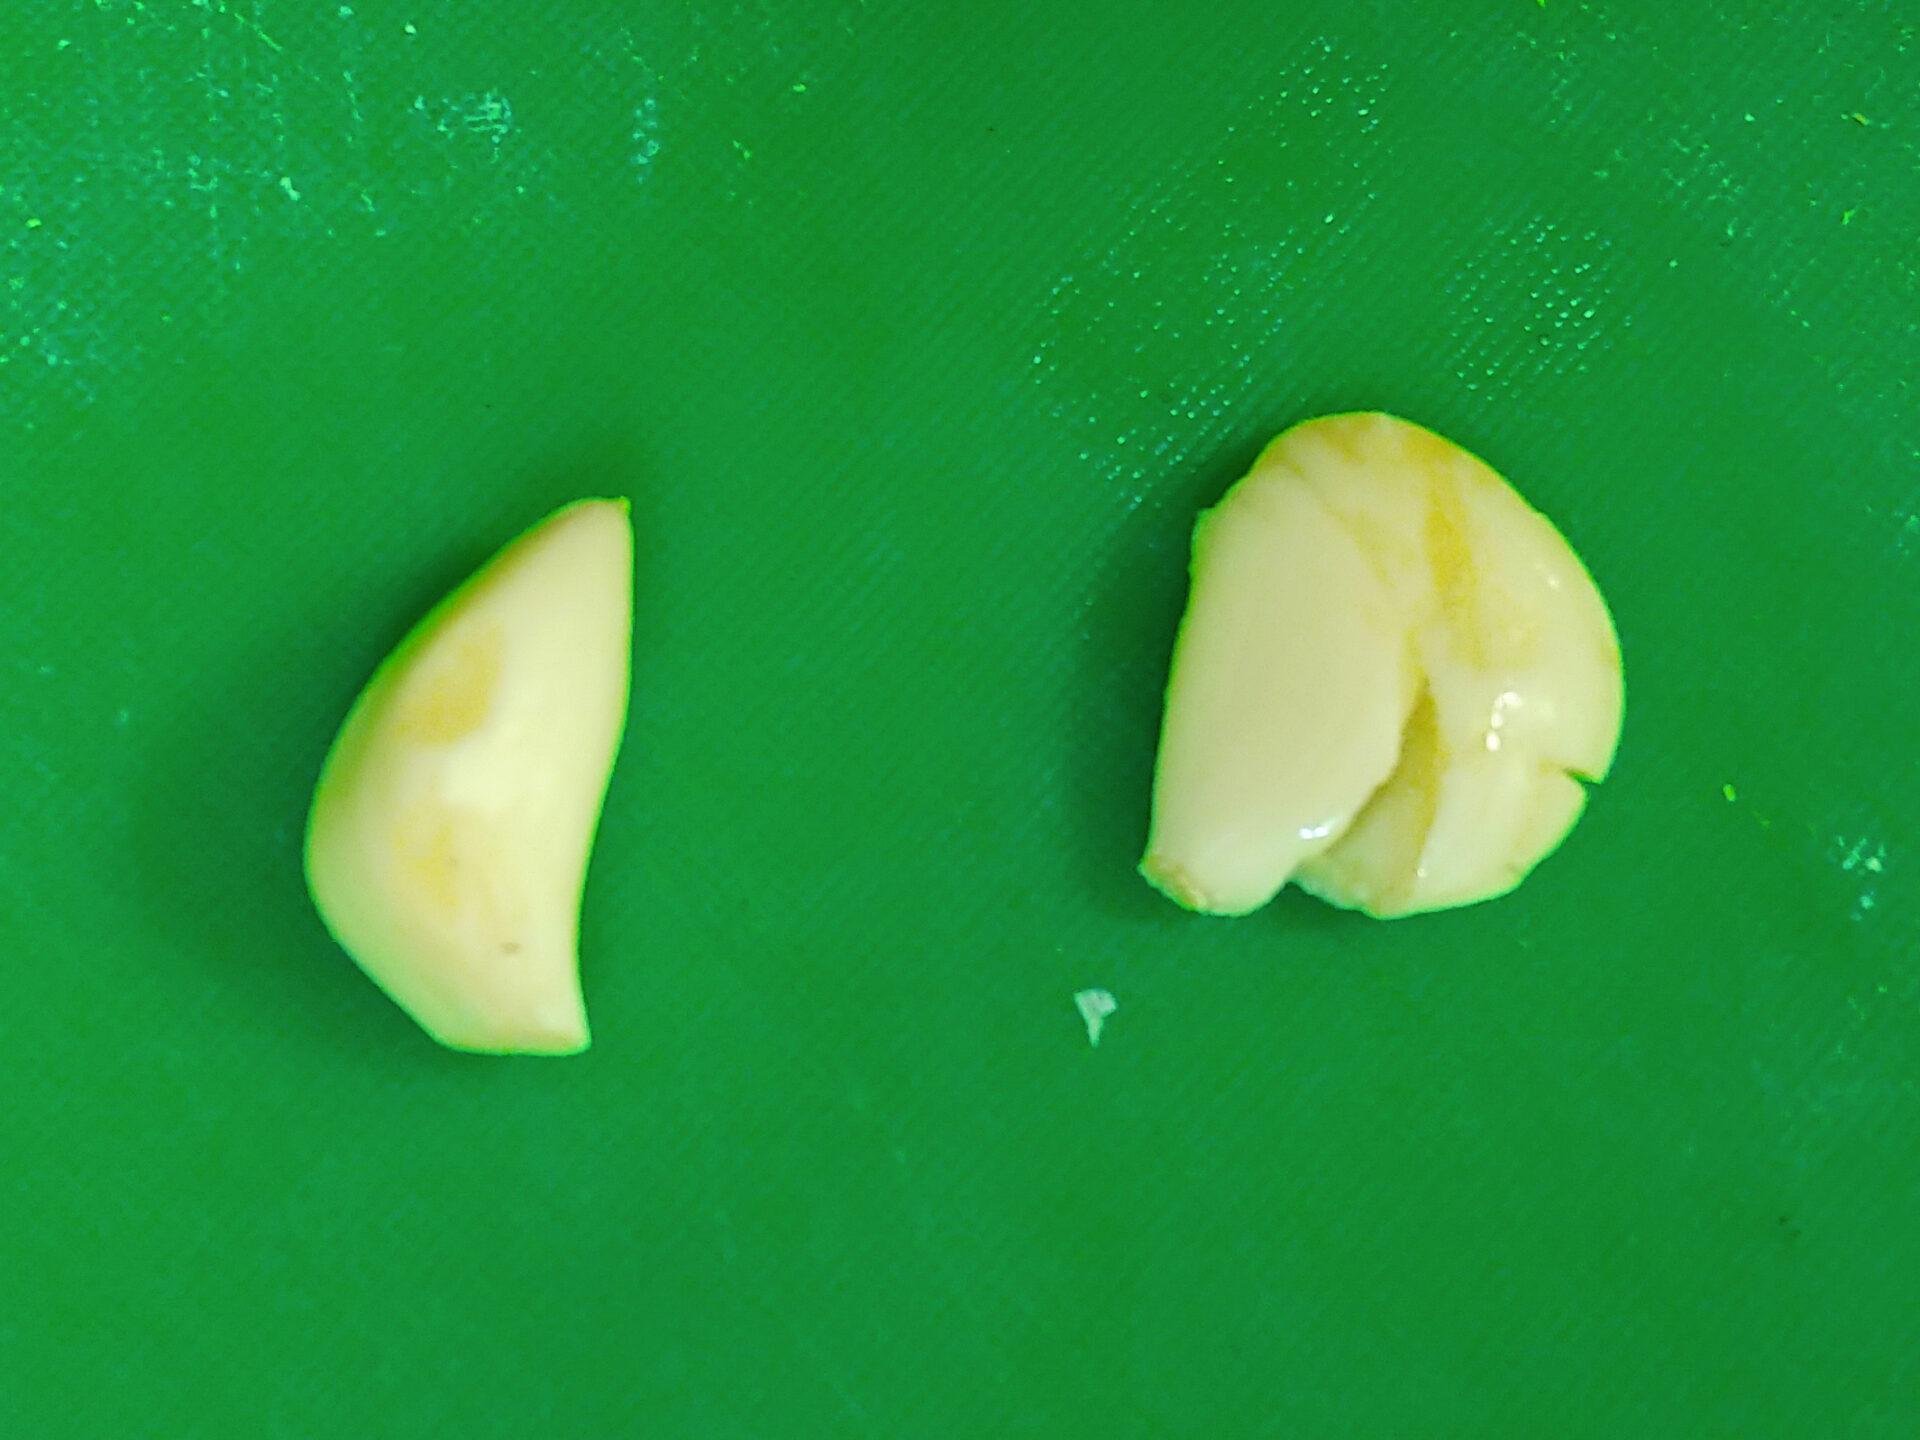
Some people may disagree, but I don’t see the peeling of apples or pears as a necessity in most cases, but you can do so using a peeler or a paring knife. You can use a special peeler for this kind of fruit or you can use a regular universal potato peeler.
It is always important to cut the center off:
Use a special cutter that cuts out the center by pushing the cutter through the fruit from the top to the bottom and then back.
Or, you can use a special cutter that cuts the whole fruit into even sections, and at the same time, separates the center (when done, simply remove by hand).
Or you can just use a chef’s knife to cut around the center (leave about ¾” of the center), and then adjust each piece into the same size or shape.
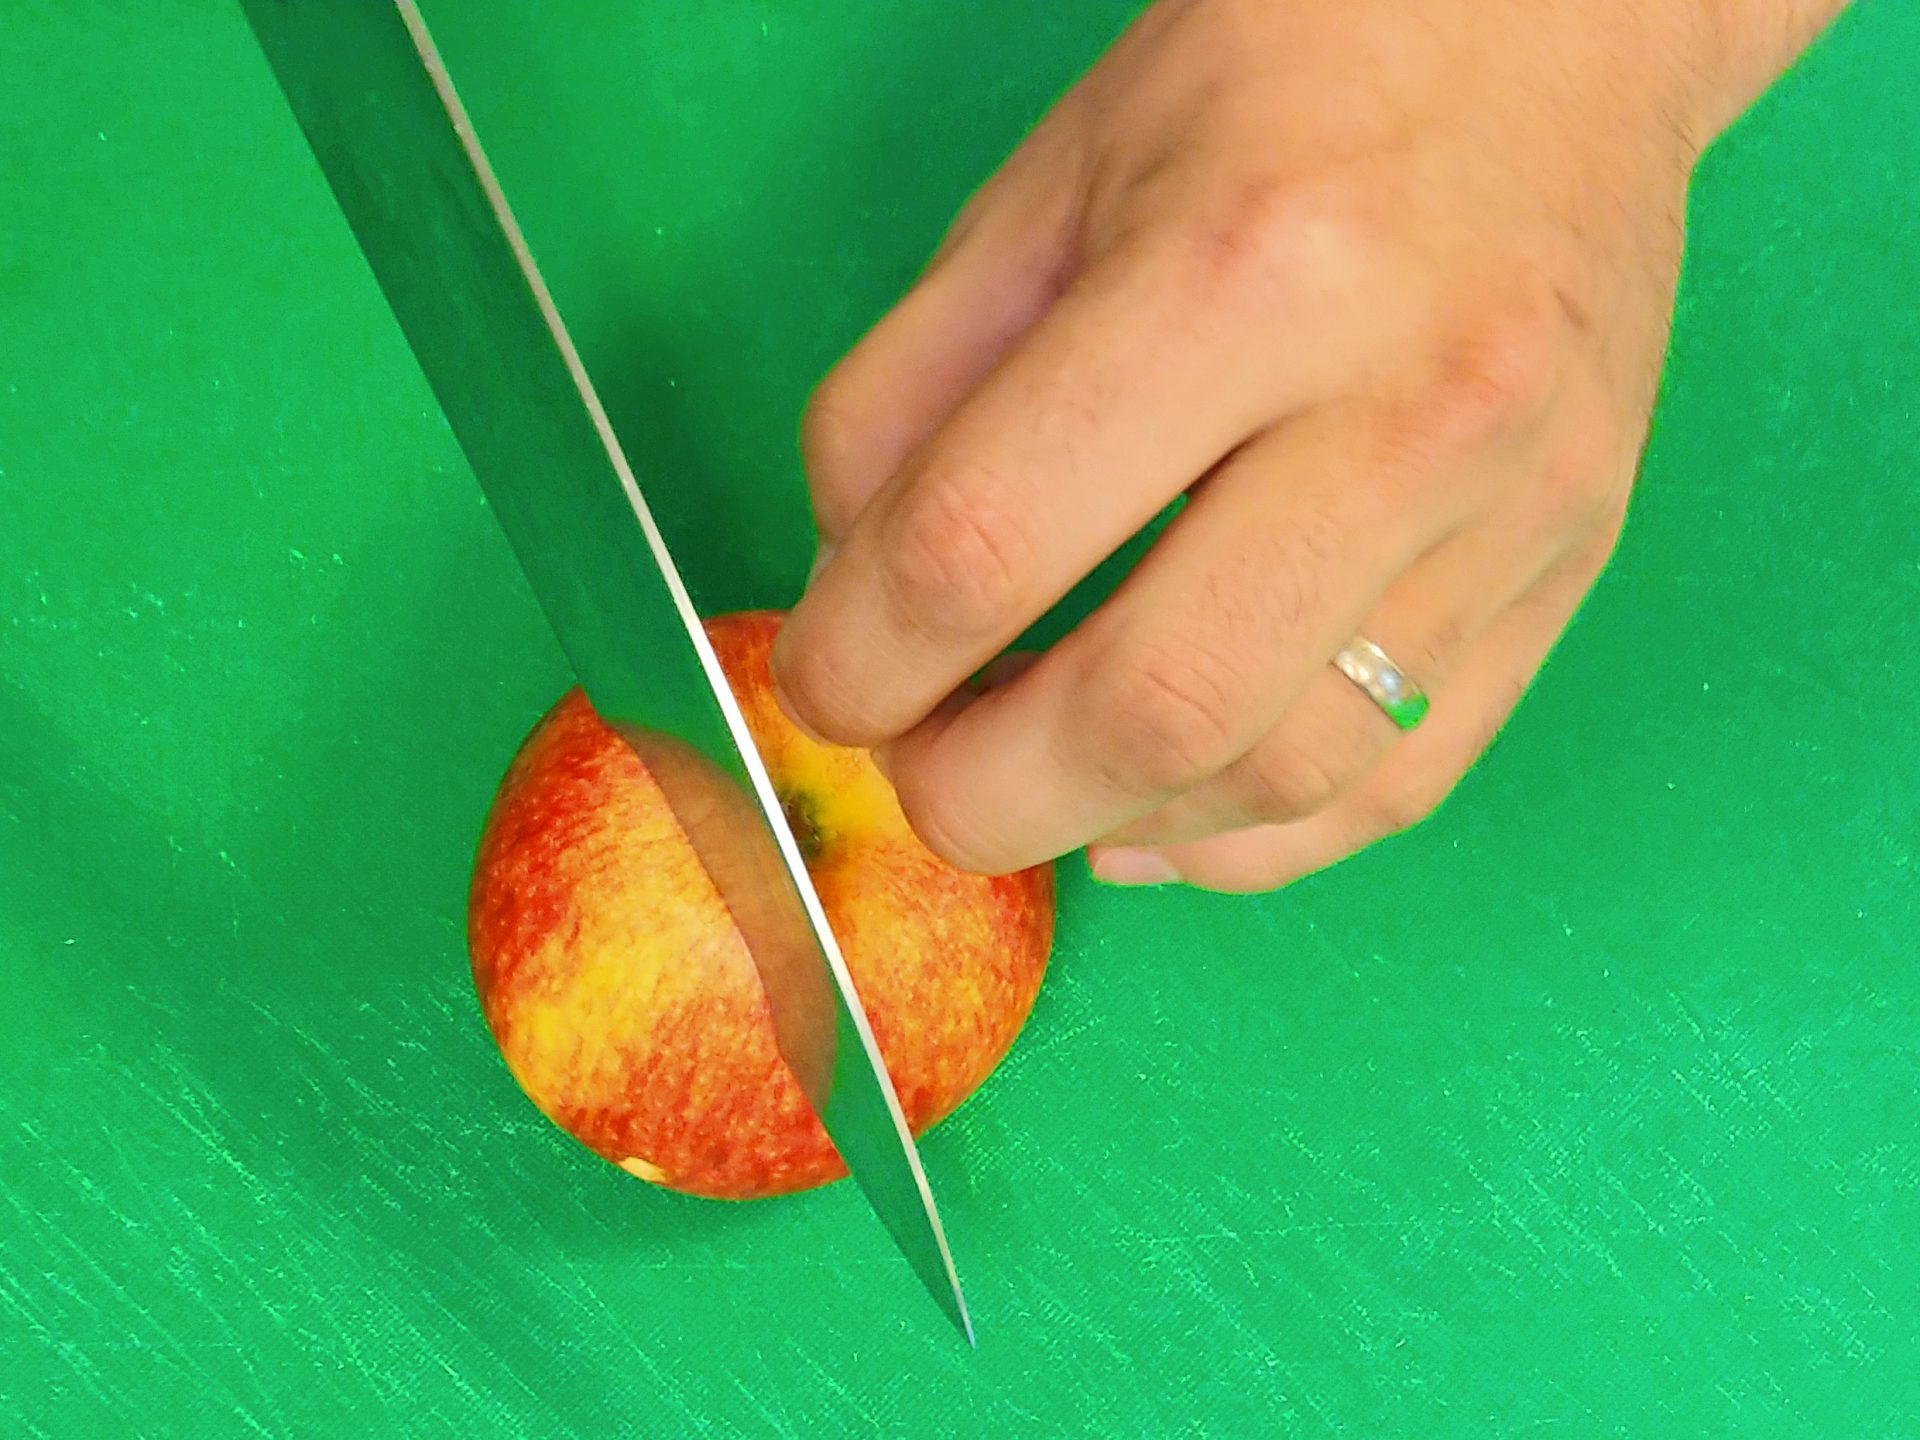

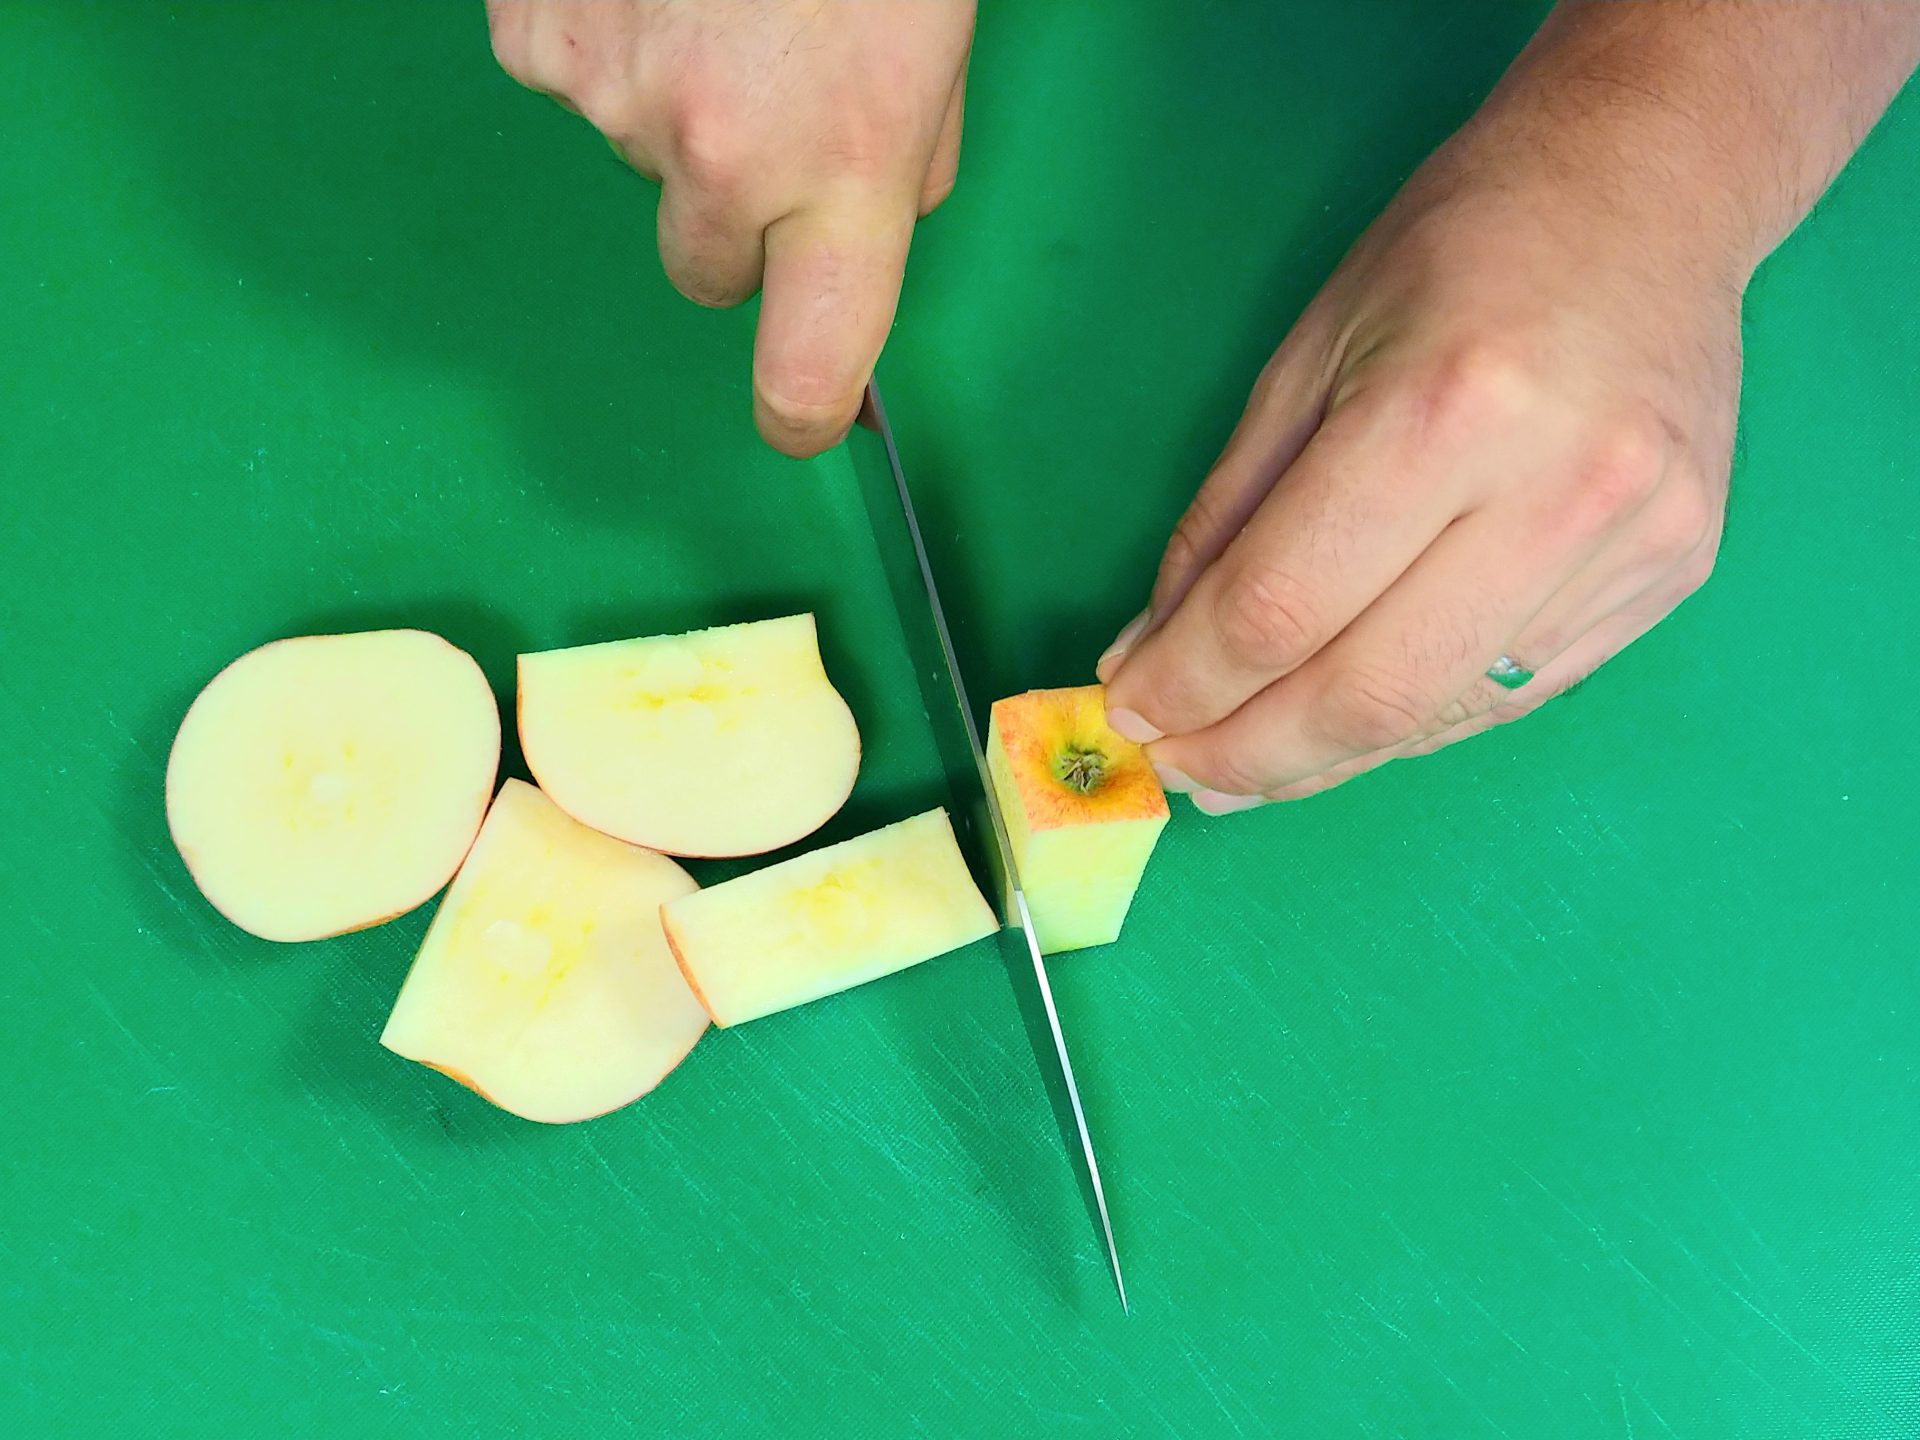
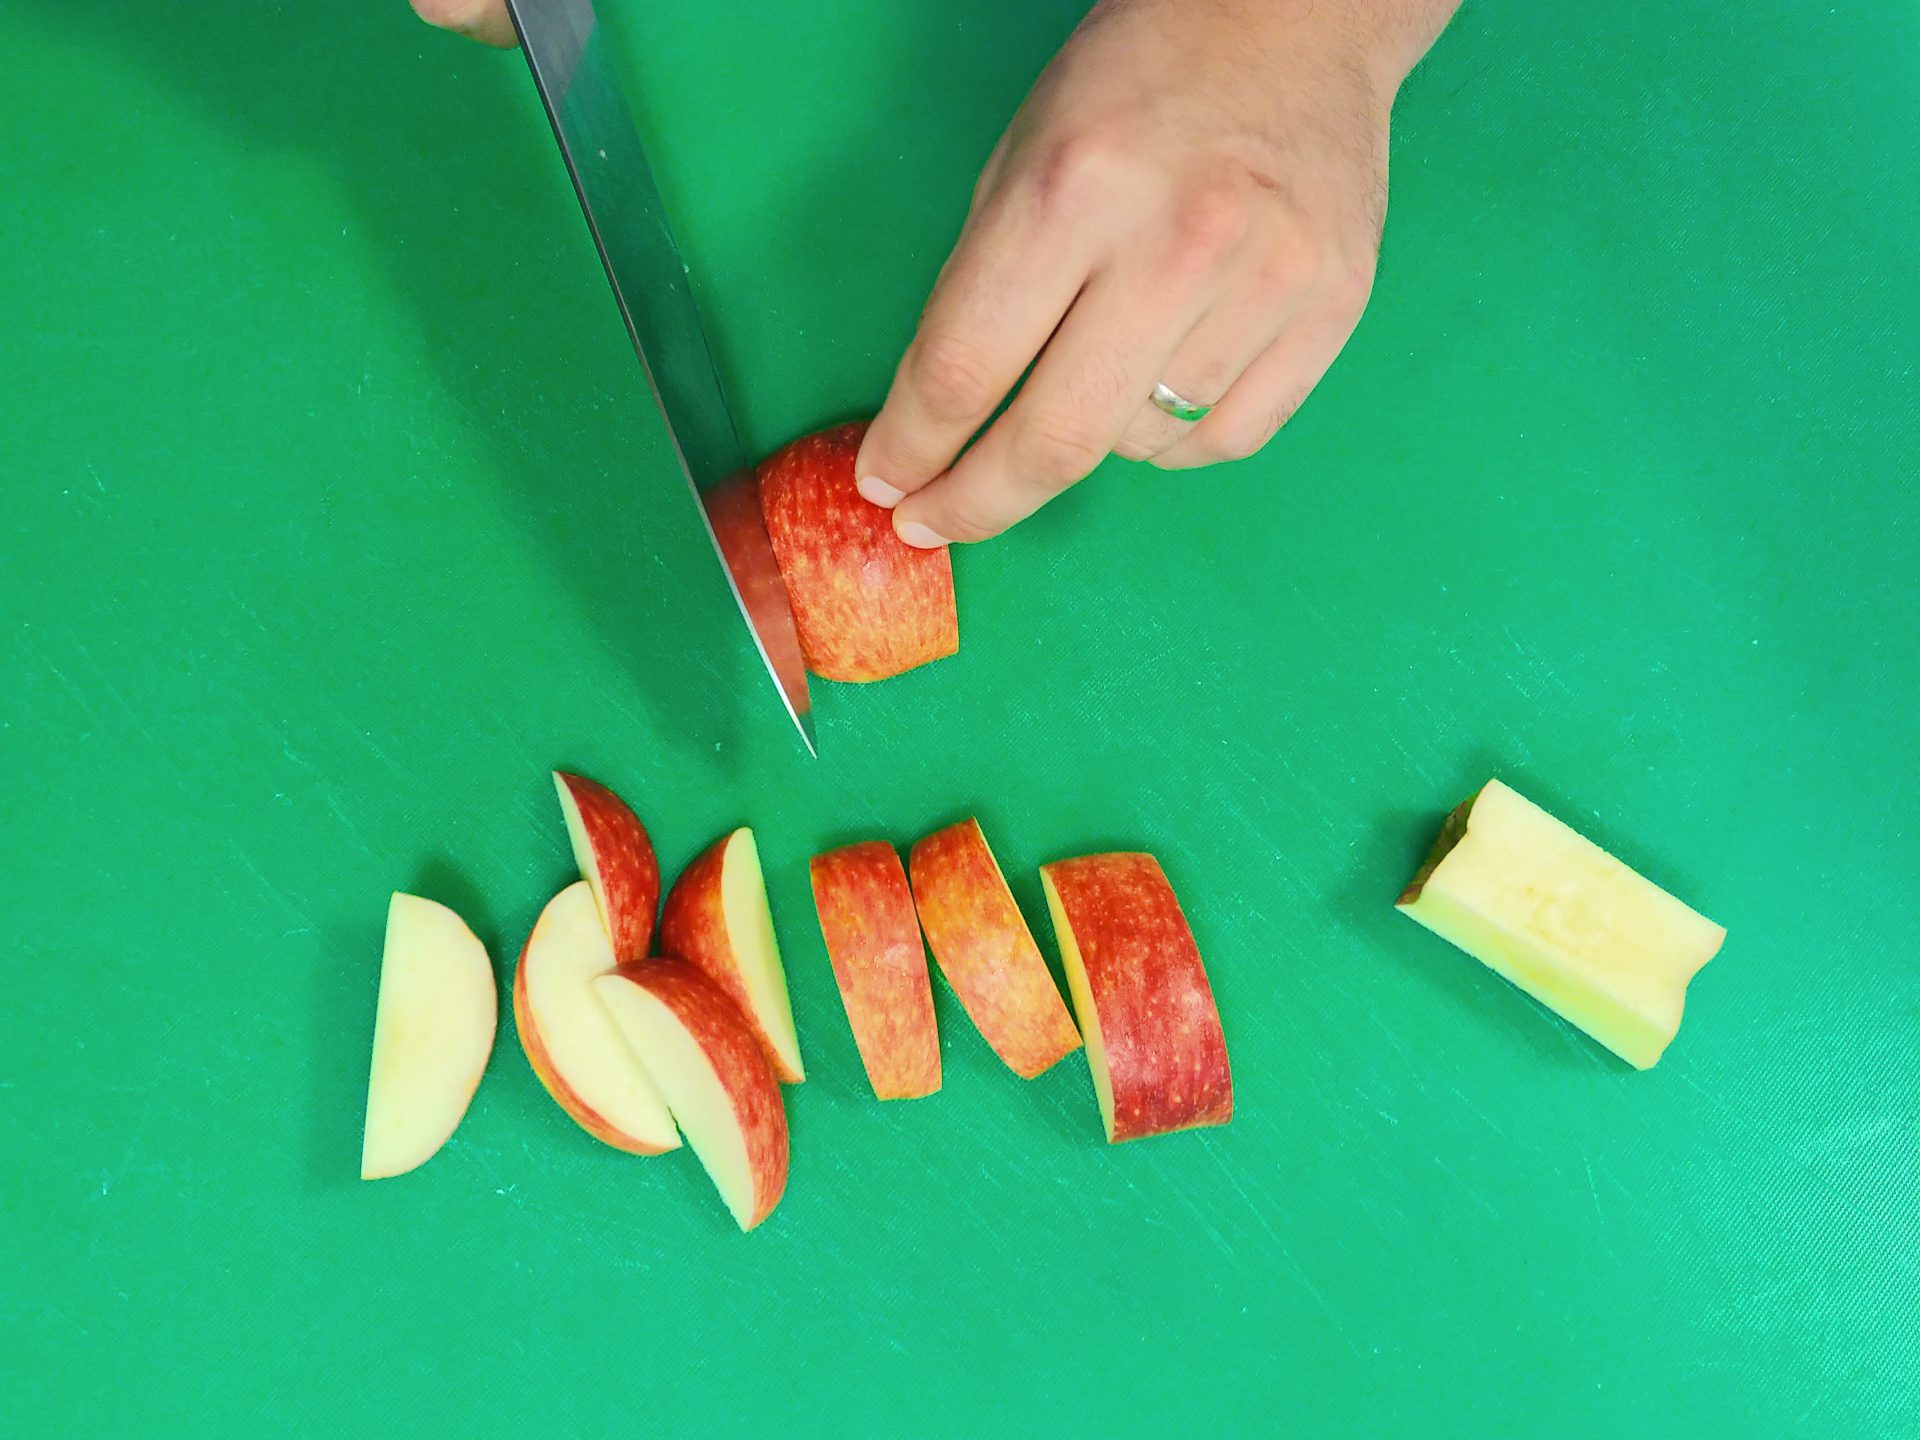
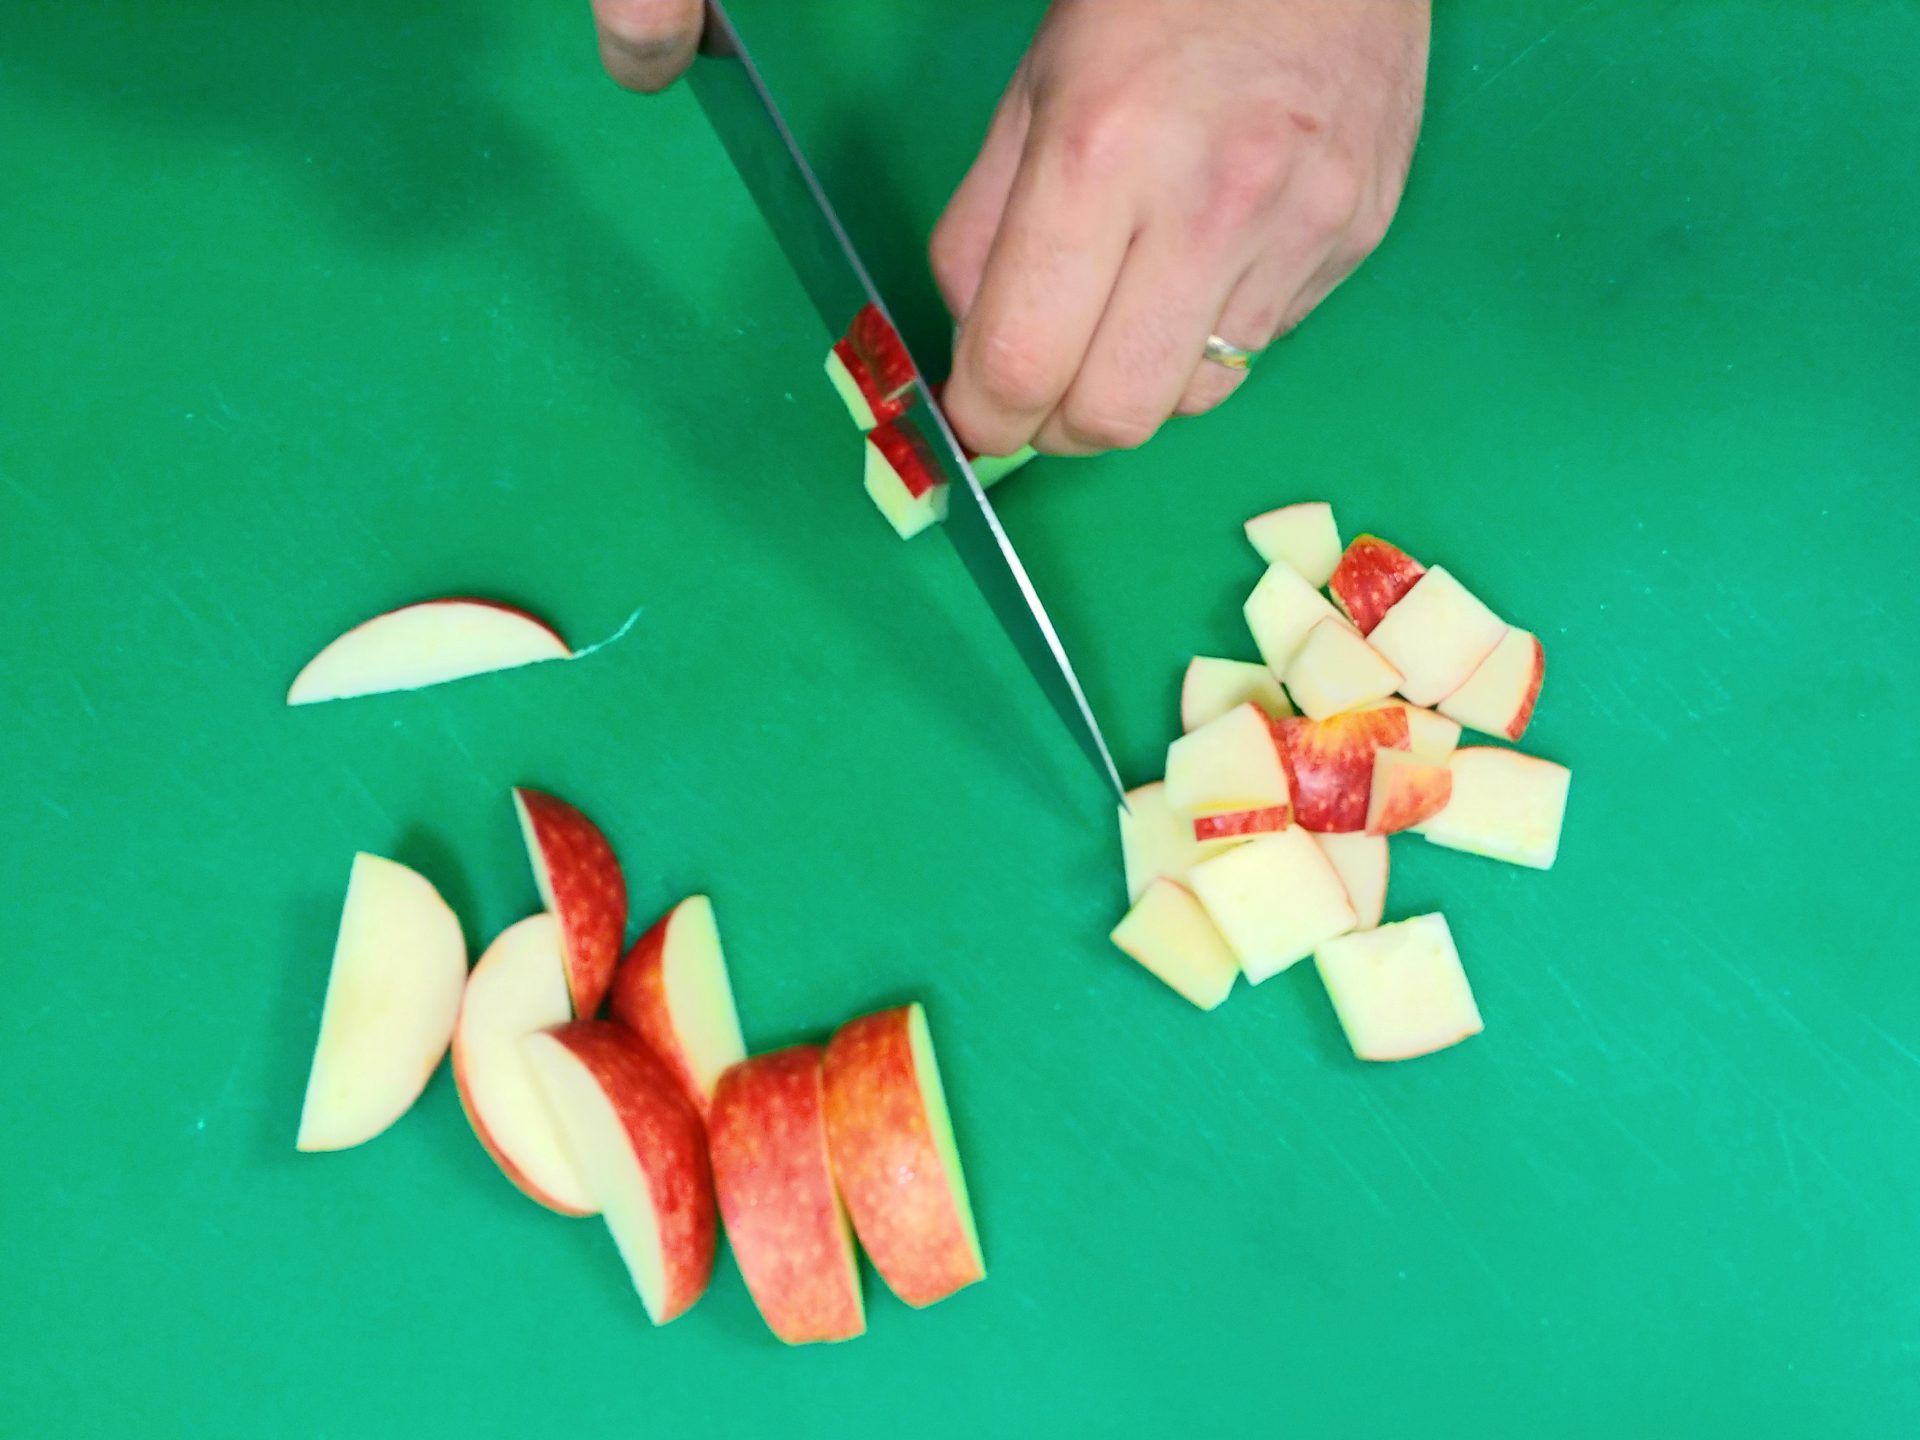
When the center is out, simply cut the fruit into your desired shape.
Since these types of fruit start turning black after peeling, consider brushing them with lemon or citrus juice to slow down that process.
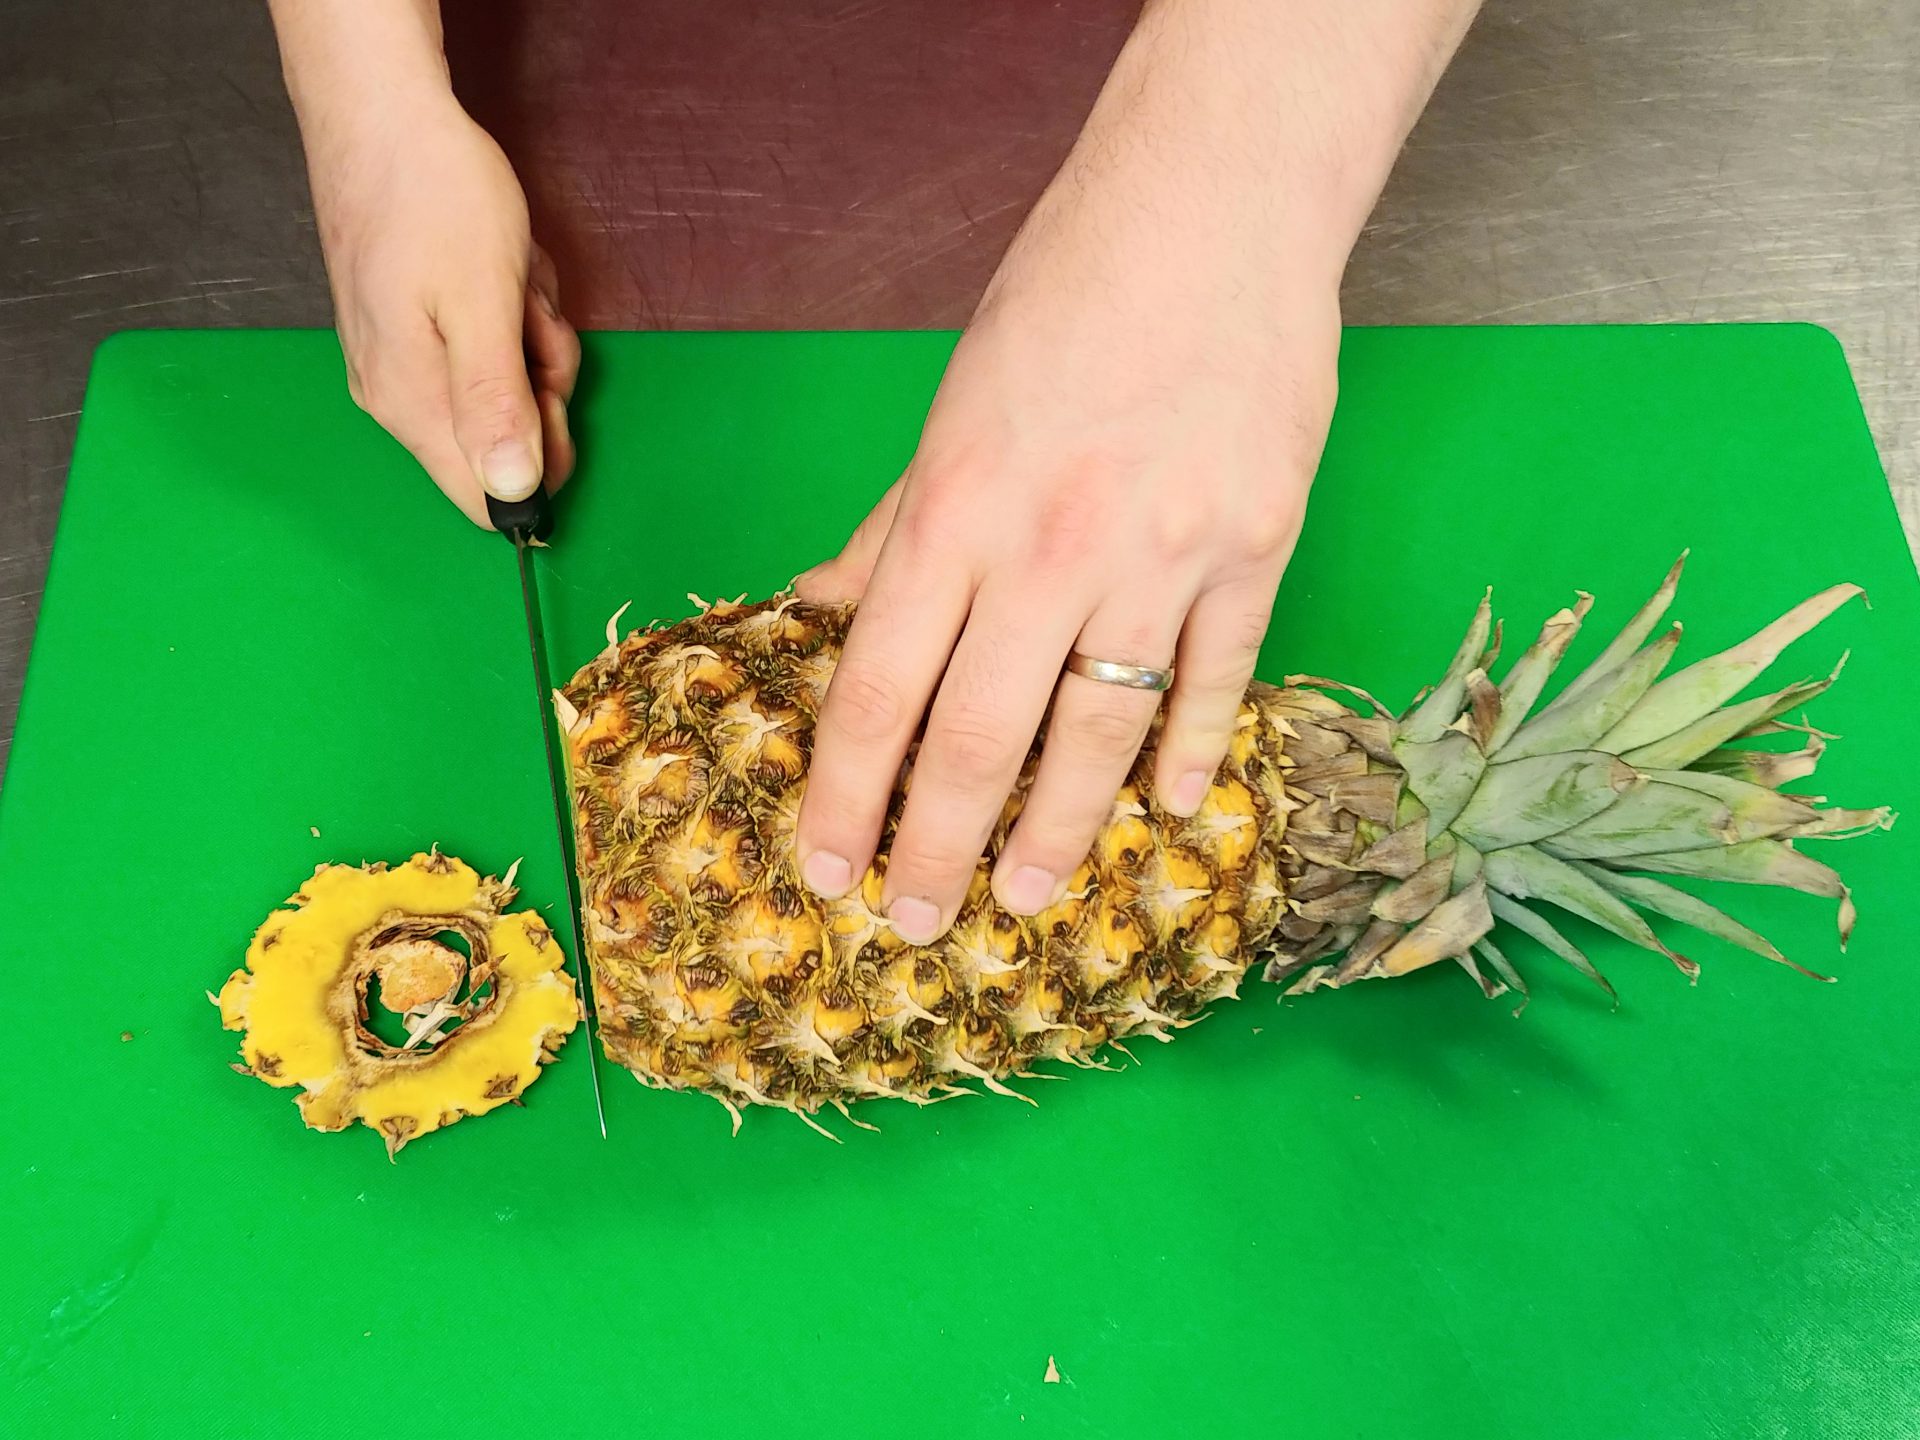
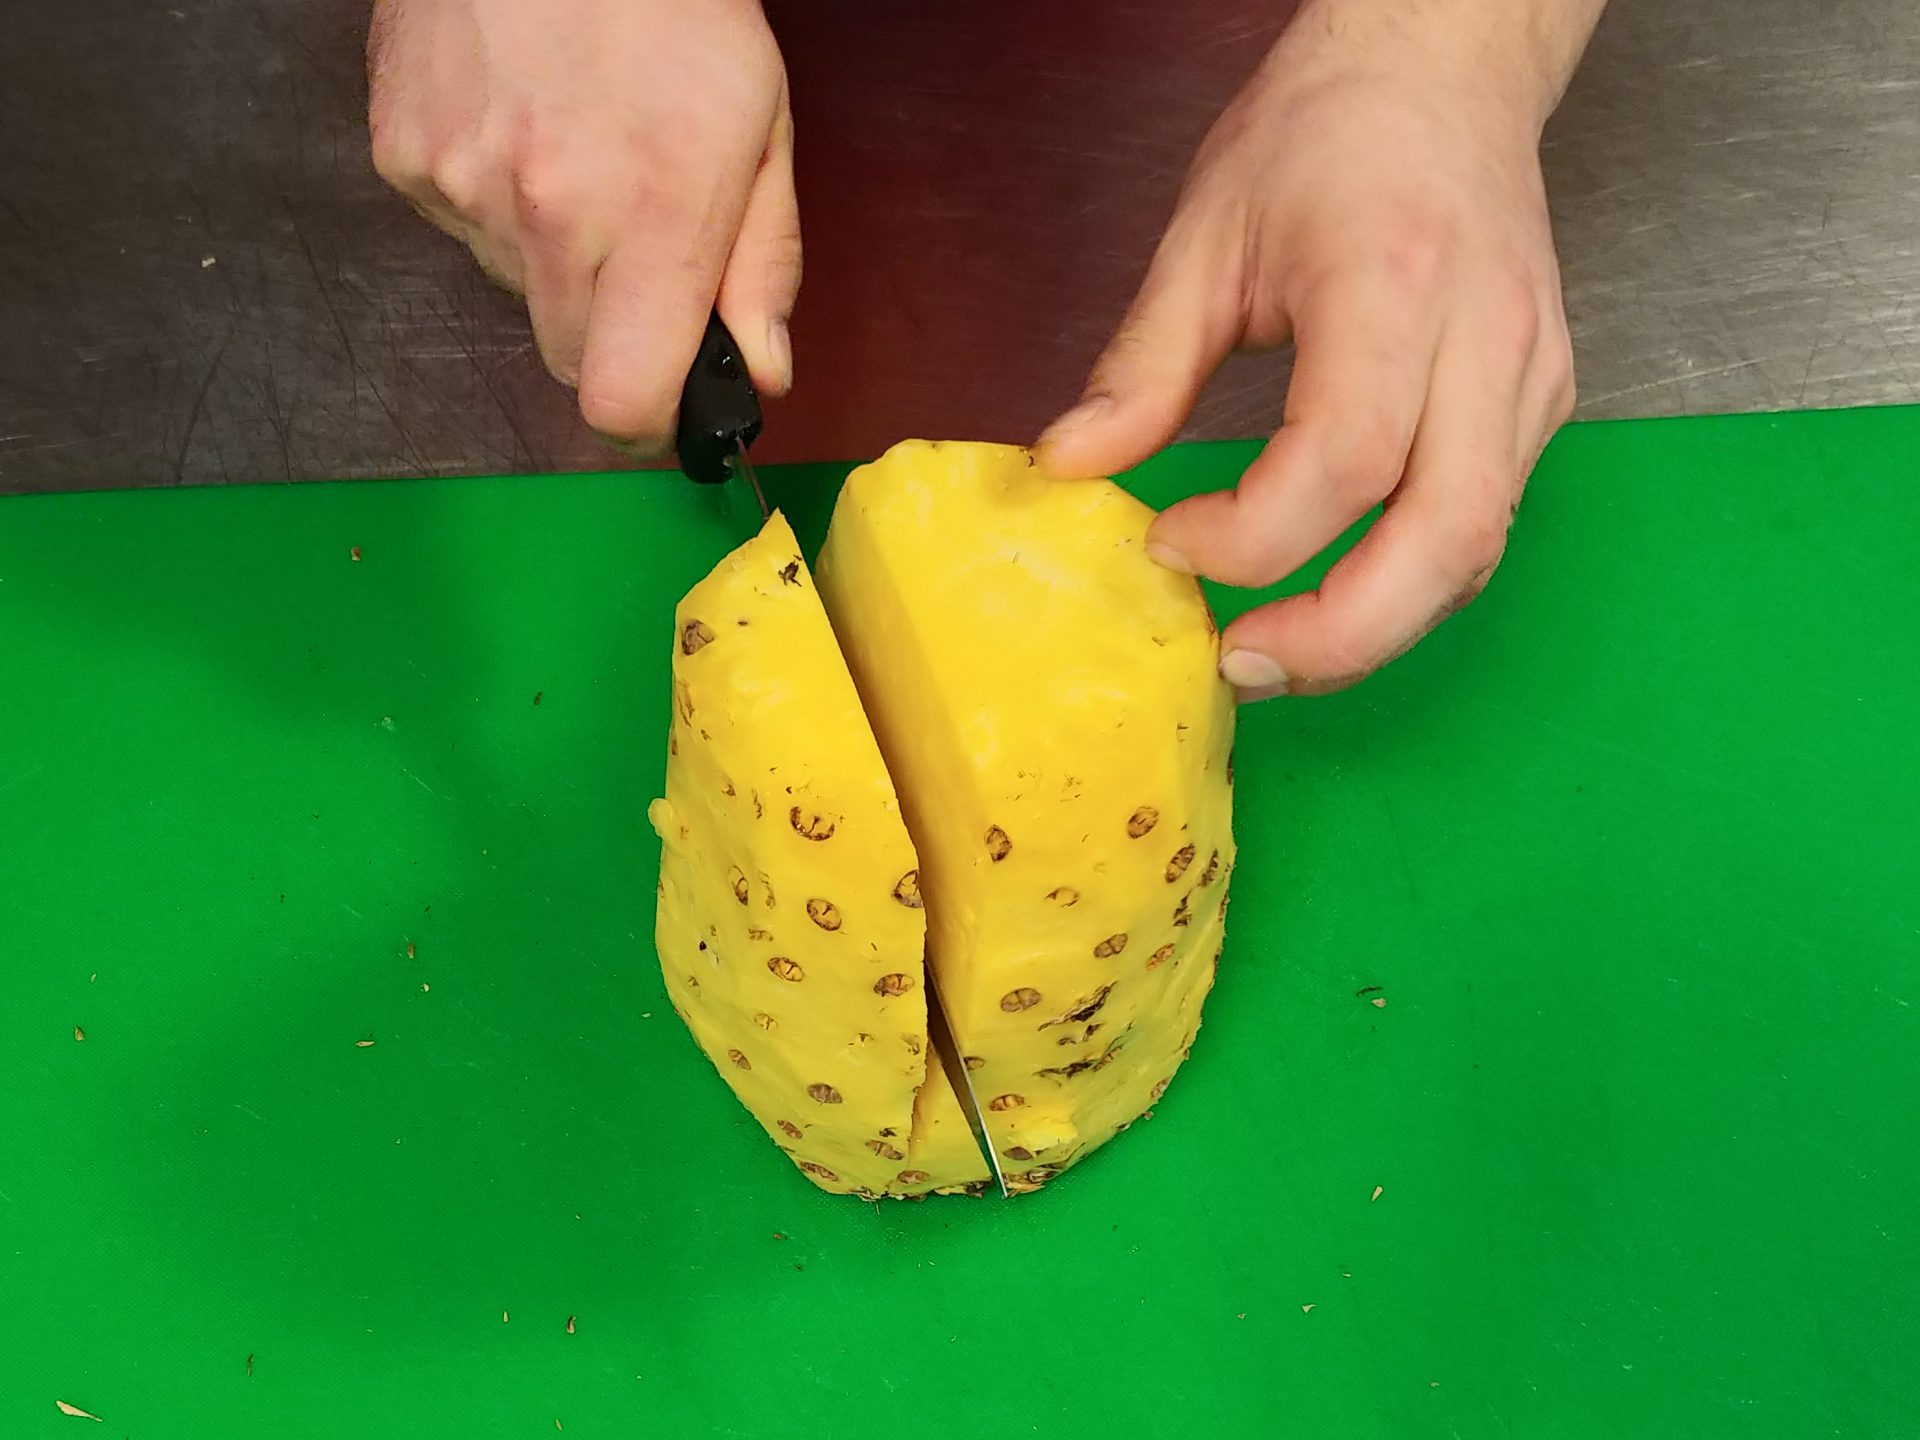
Pineapple is one of the types of fruit that a lot of people find hard to cut, but it is actually very easy!
To prepare pineapple, it is best to use a chef’s knife or a cleaver.
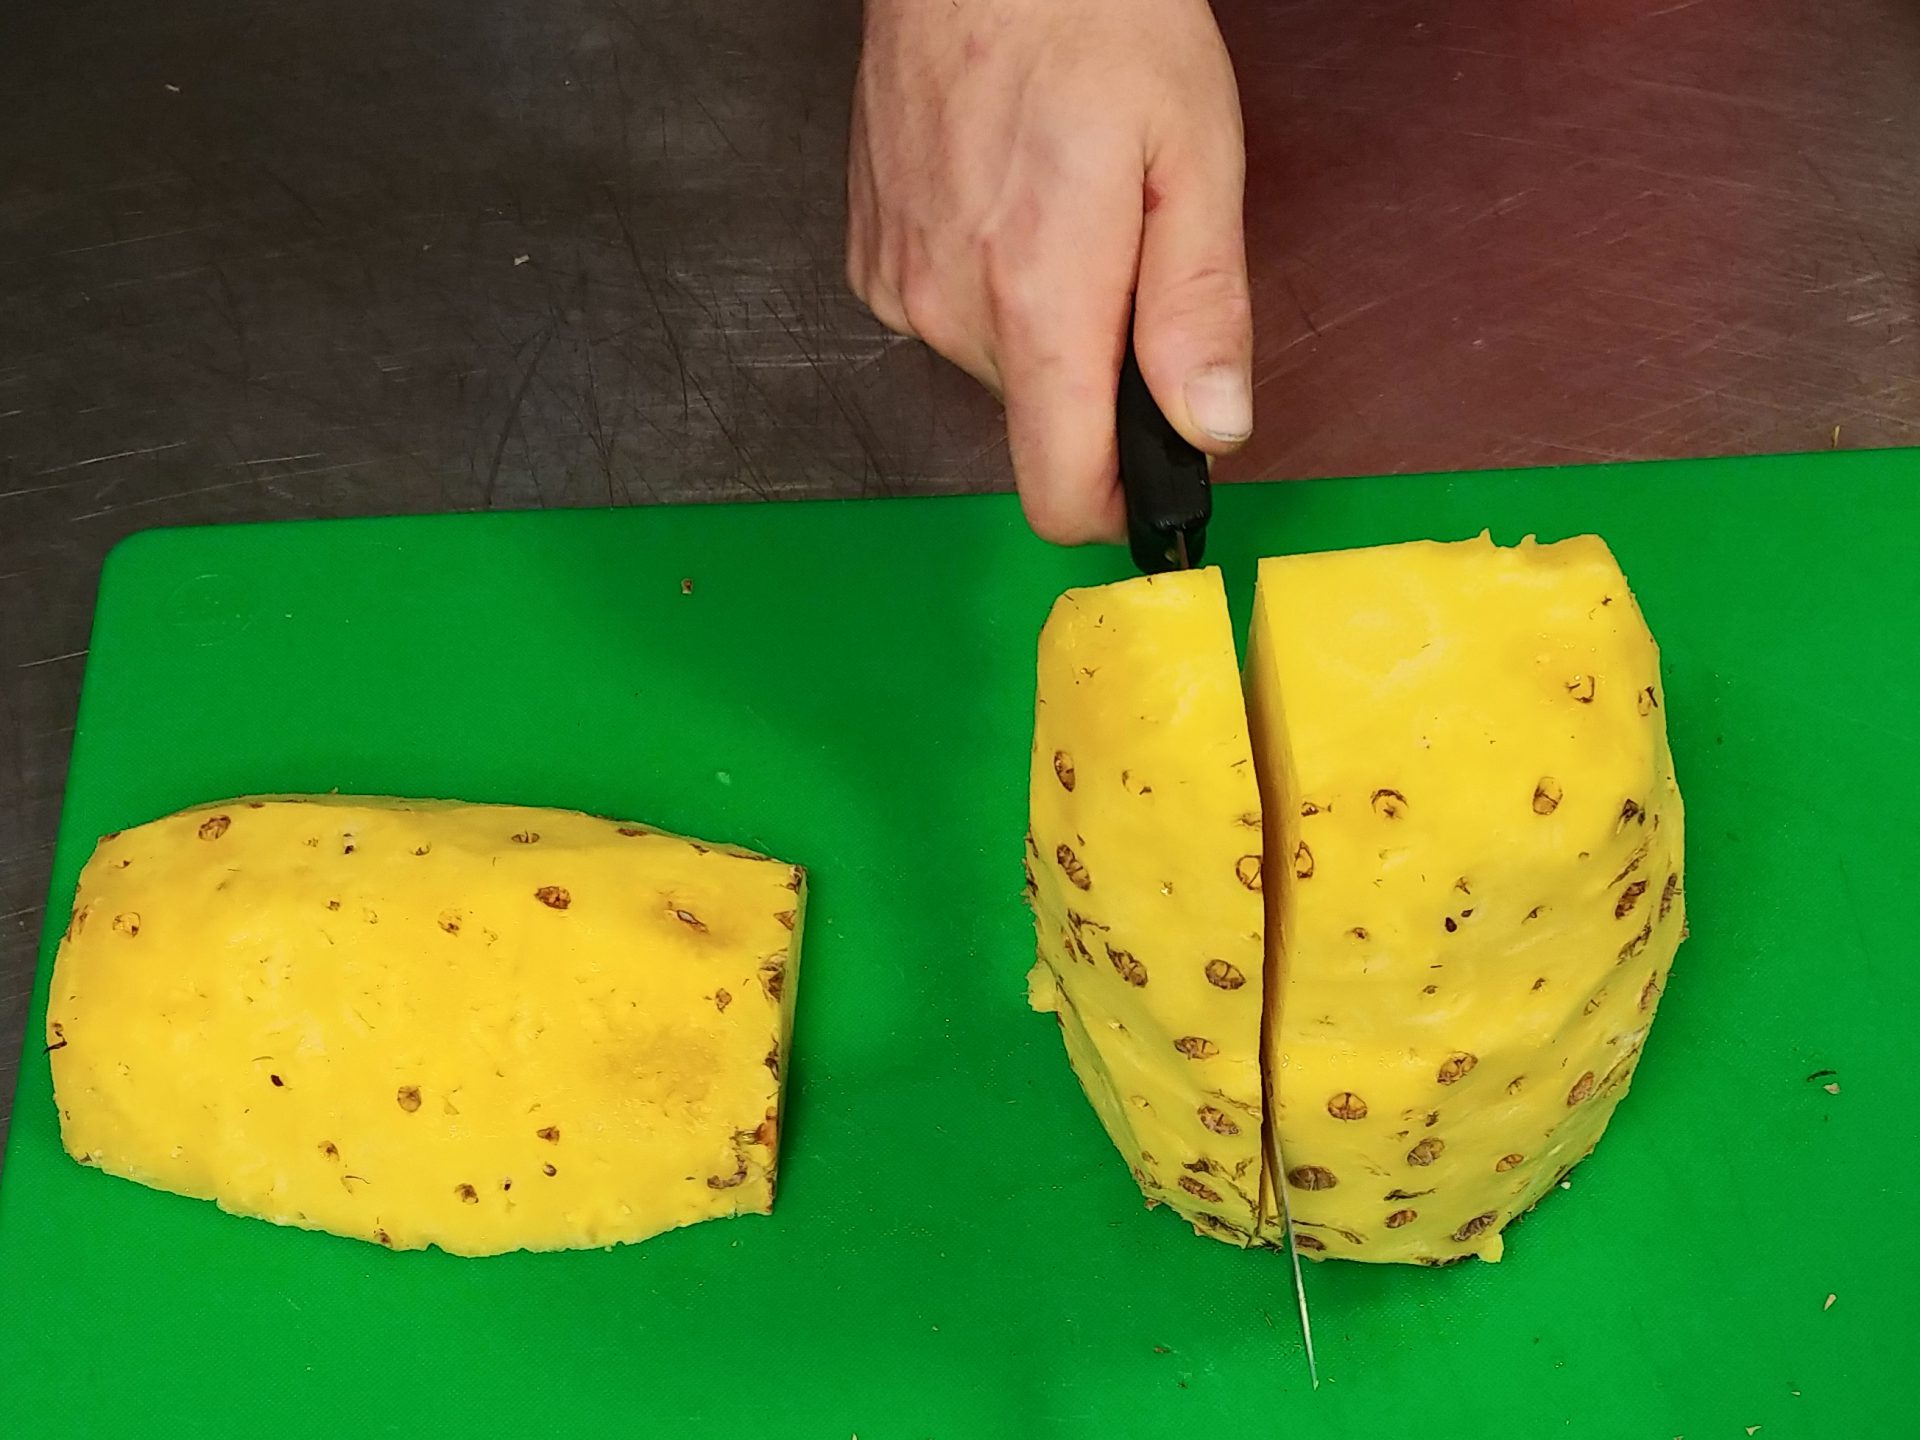
First, cut off the bottom part and then the top part with the leaves.
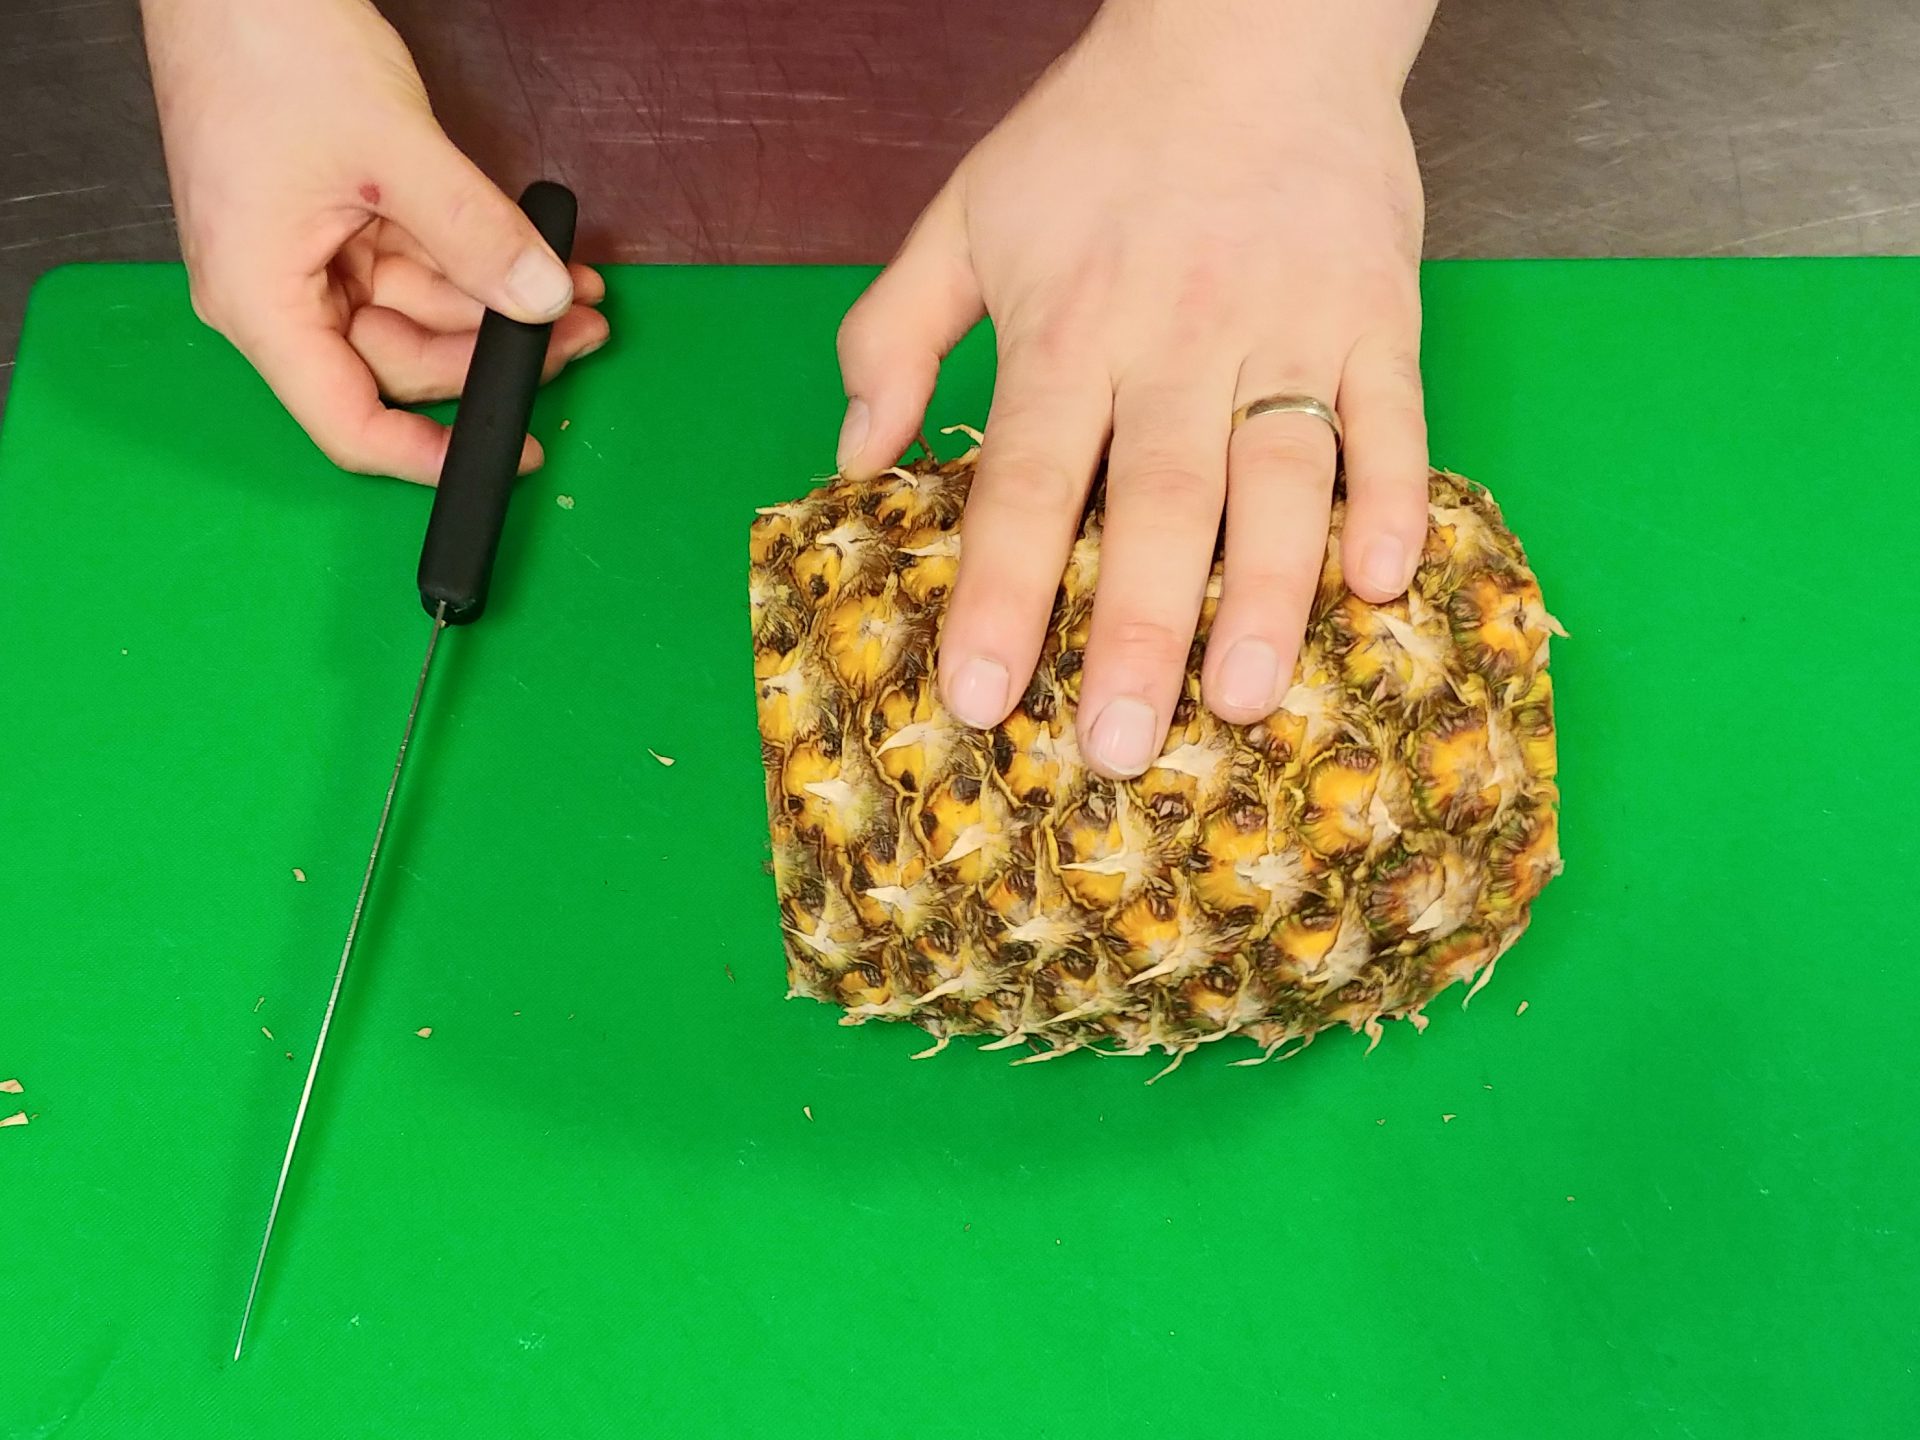
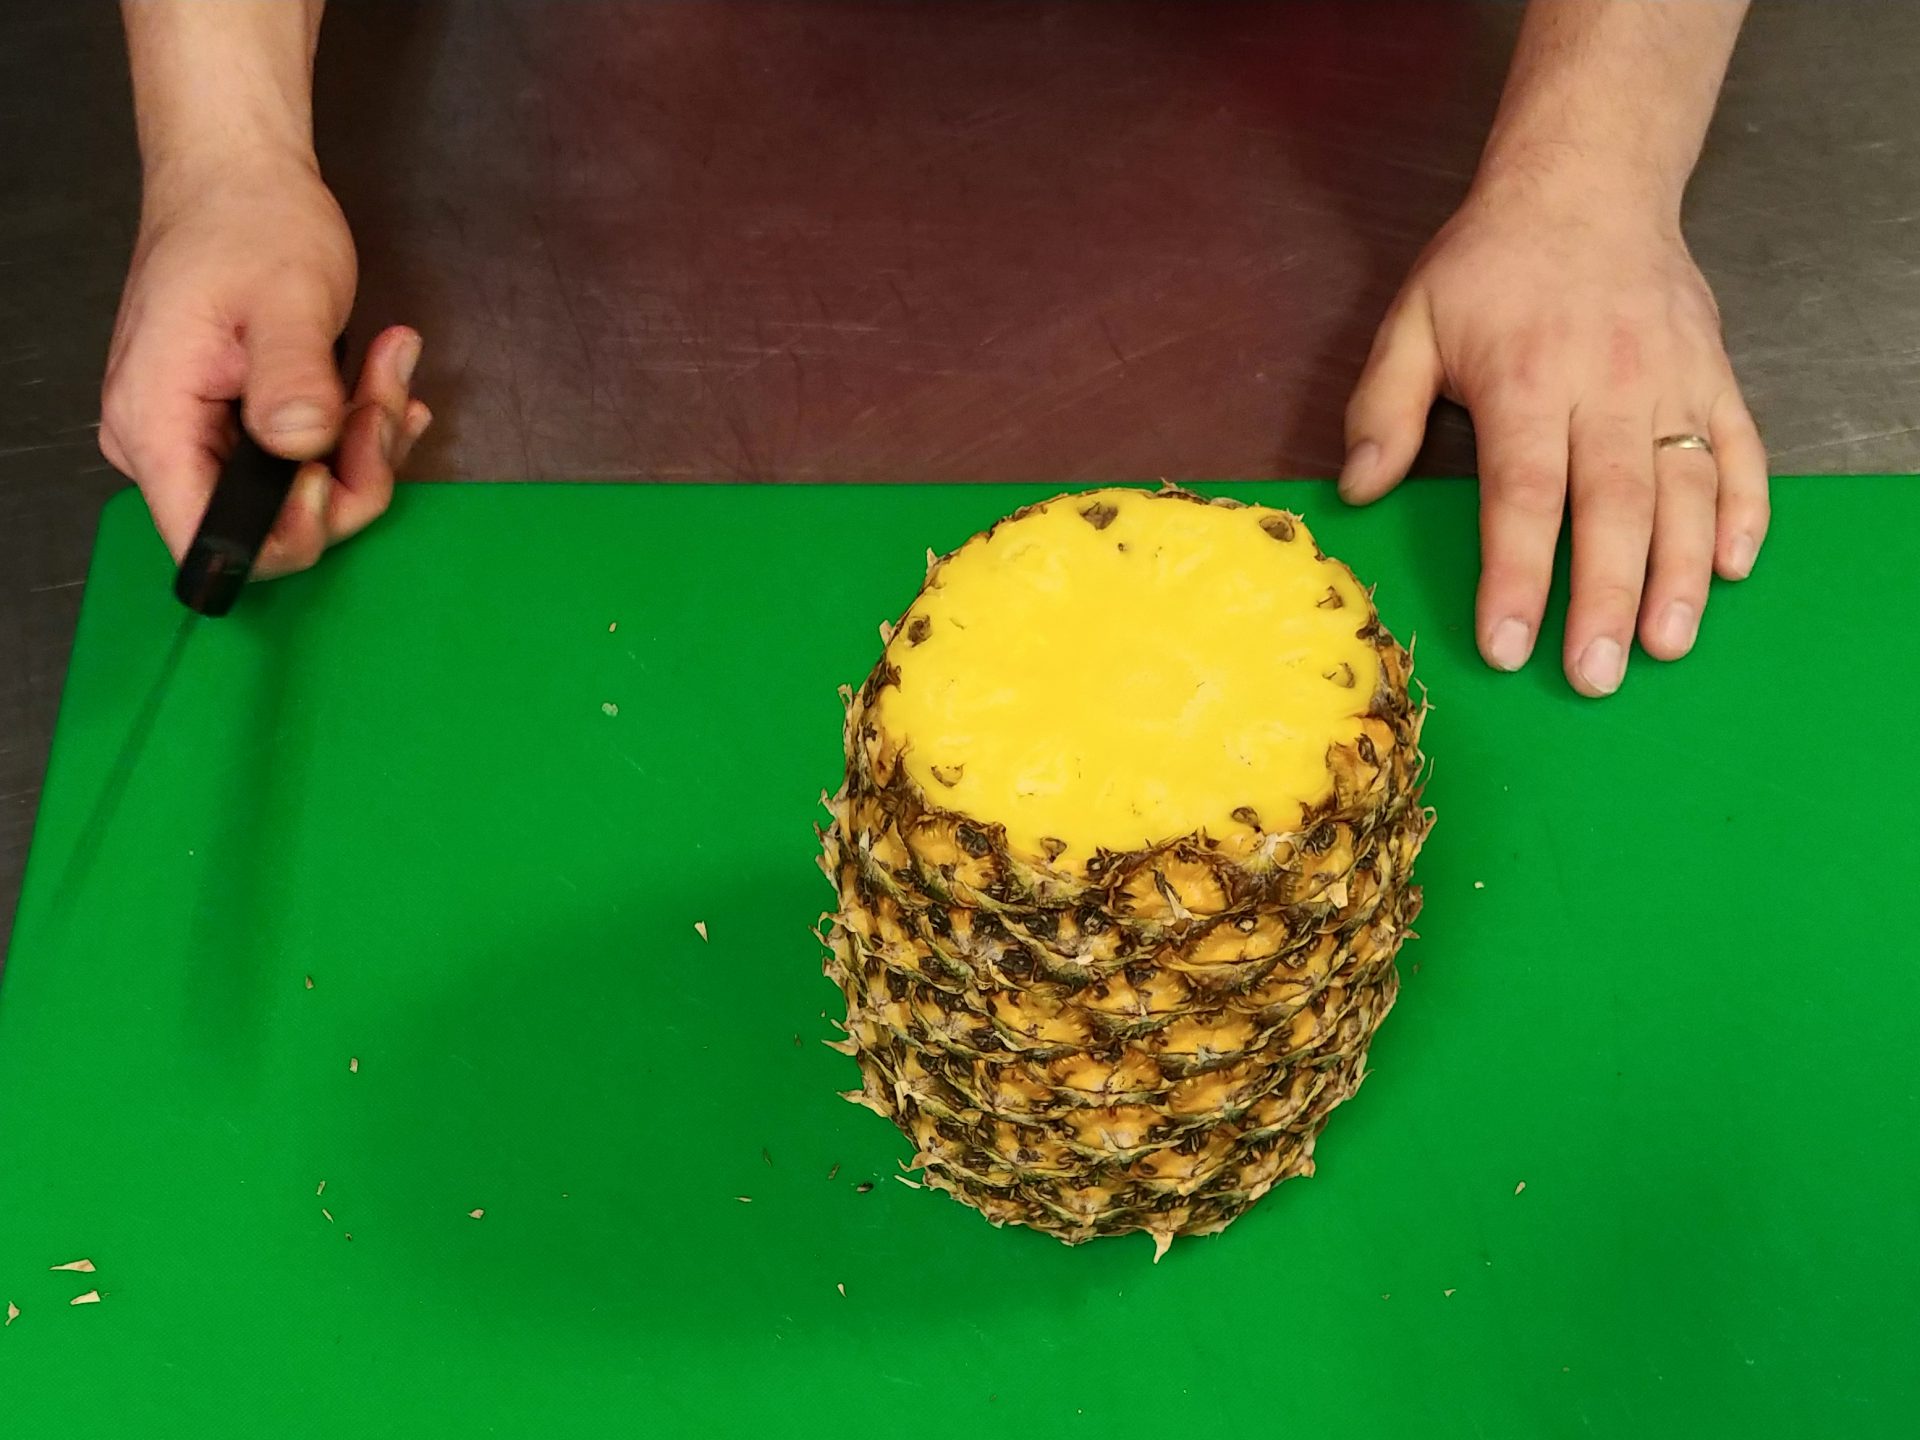
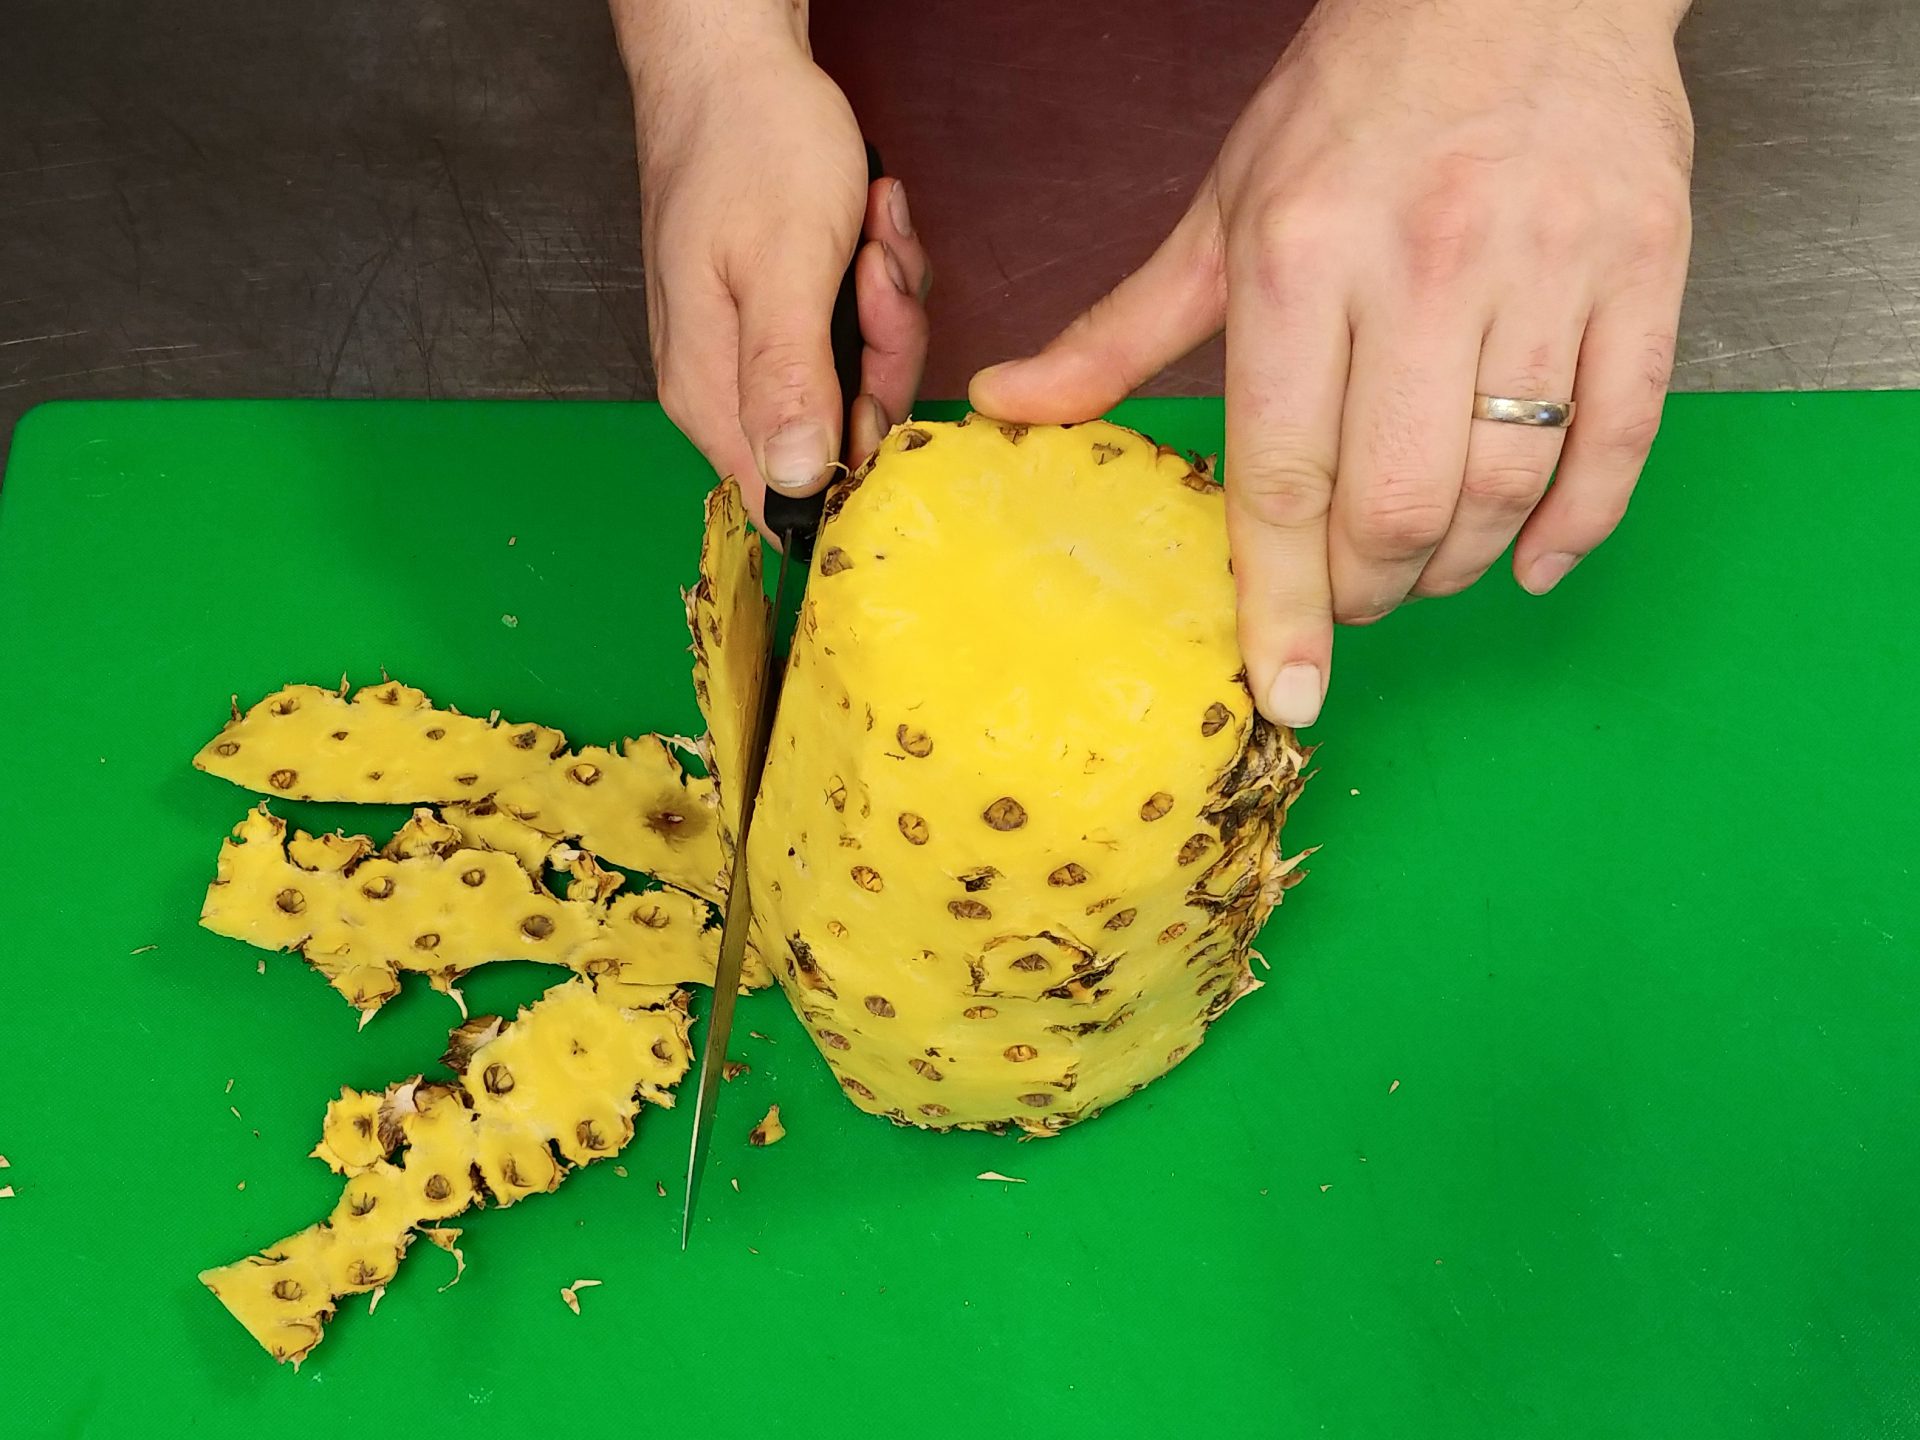
Let the pineapple sit and stay on one of the cut sides and carefully slice off the side peel (part by part).
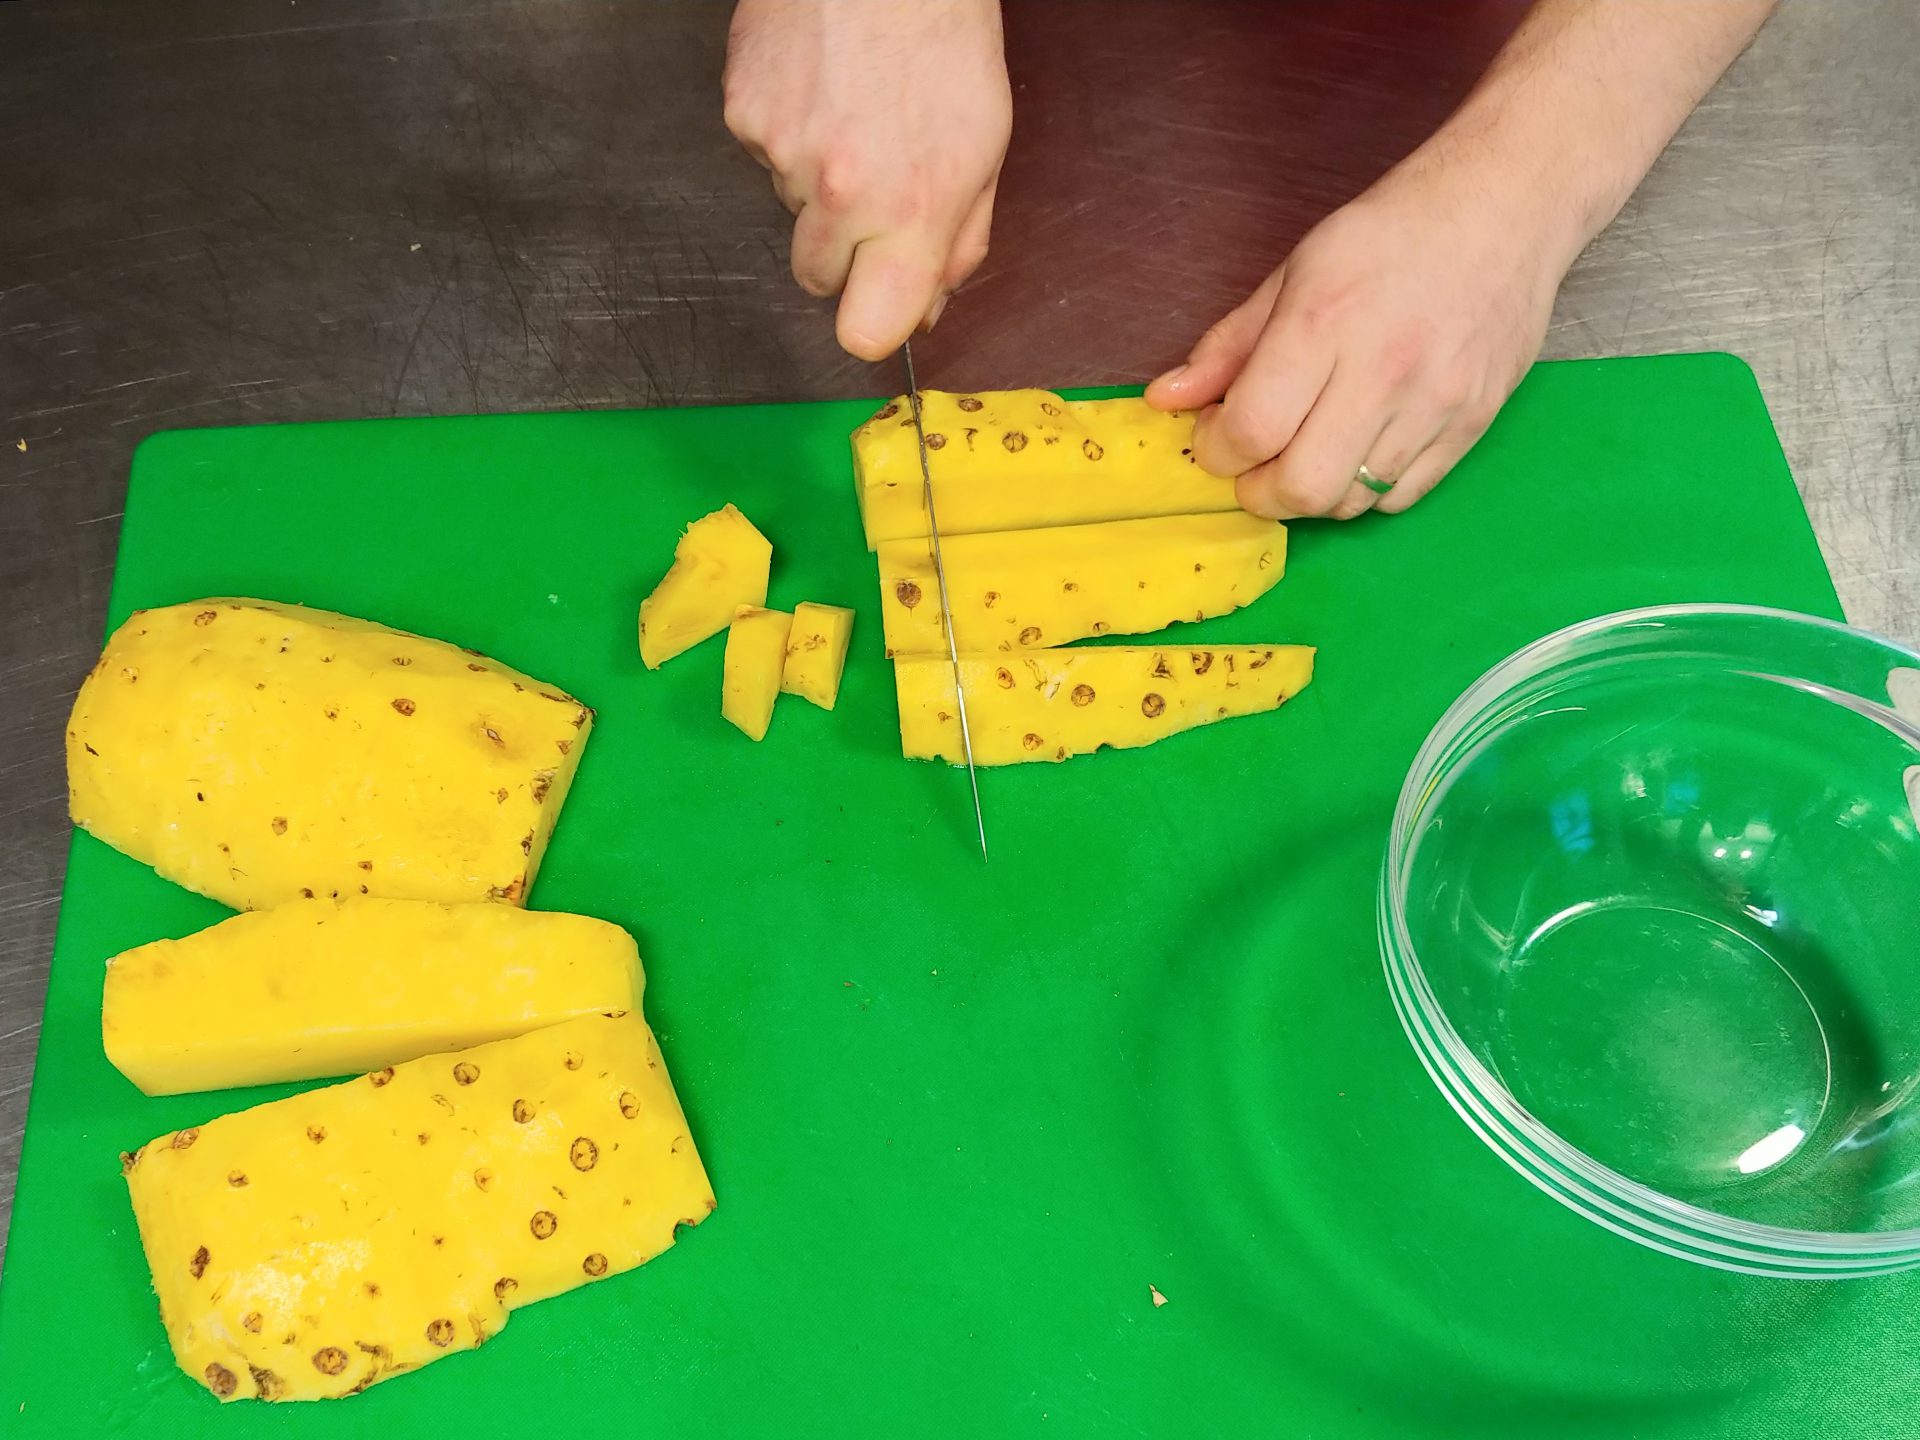
For diced: Since the center is about 1”, it is not meant to be eaten, so use a chef’s knife to cut around the center and then adjust each piece into the same size and then dice.
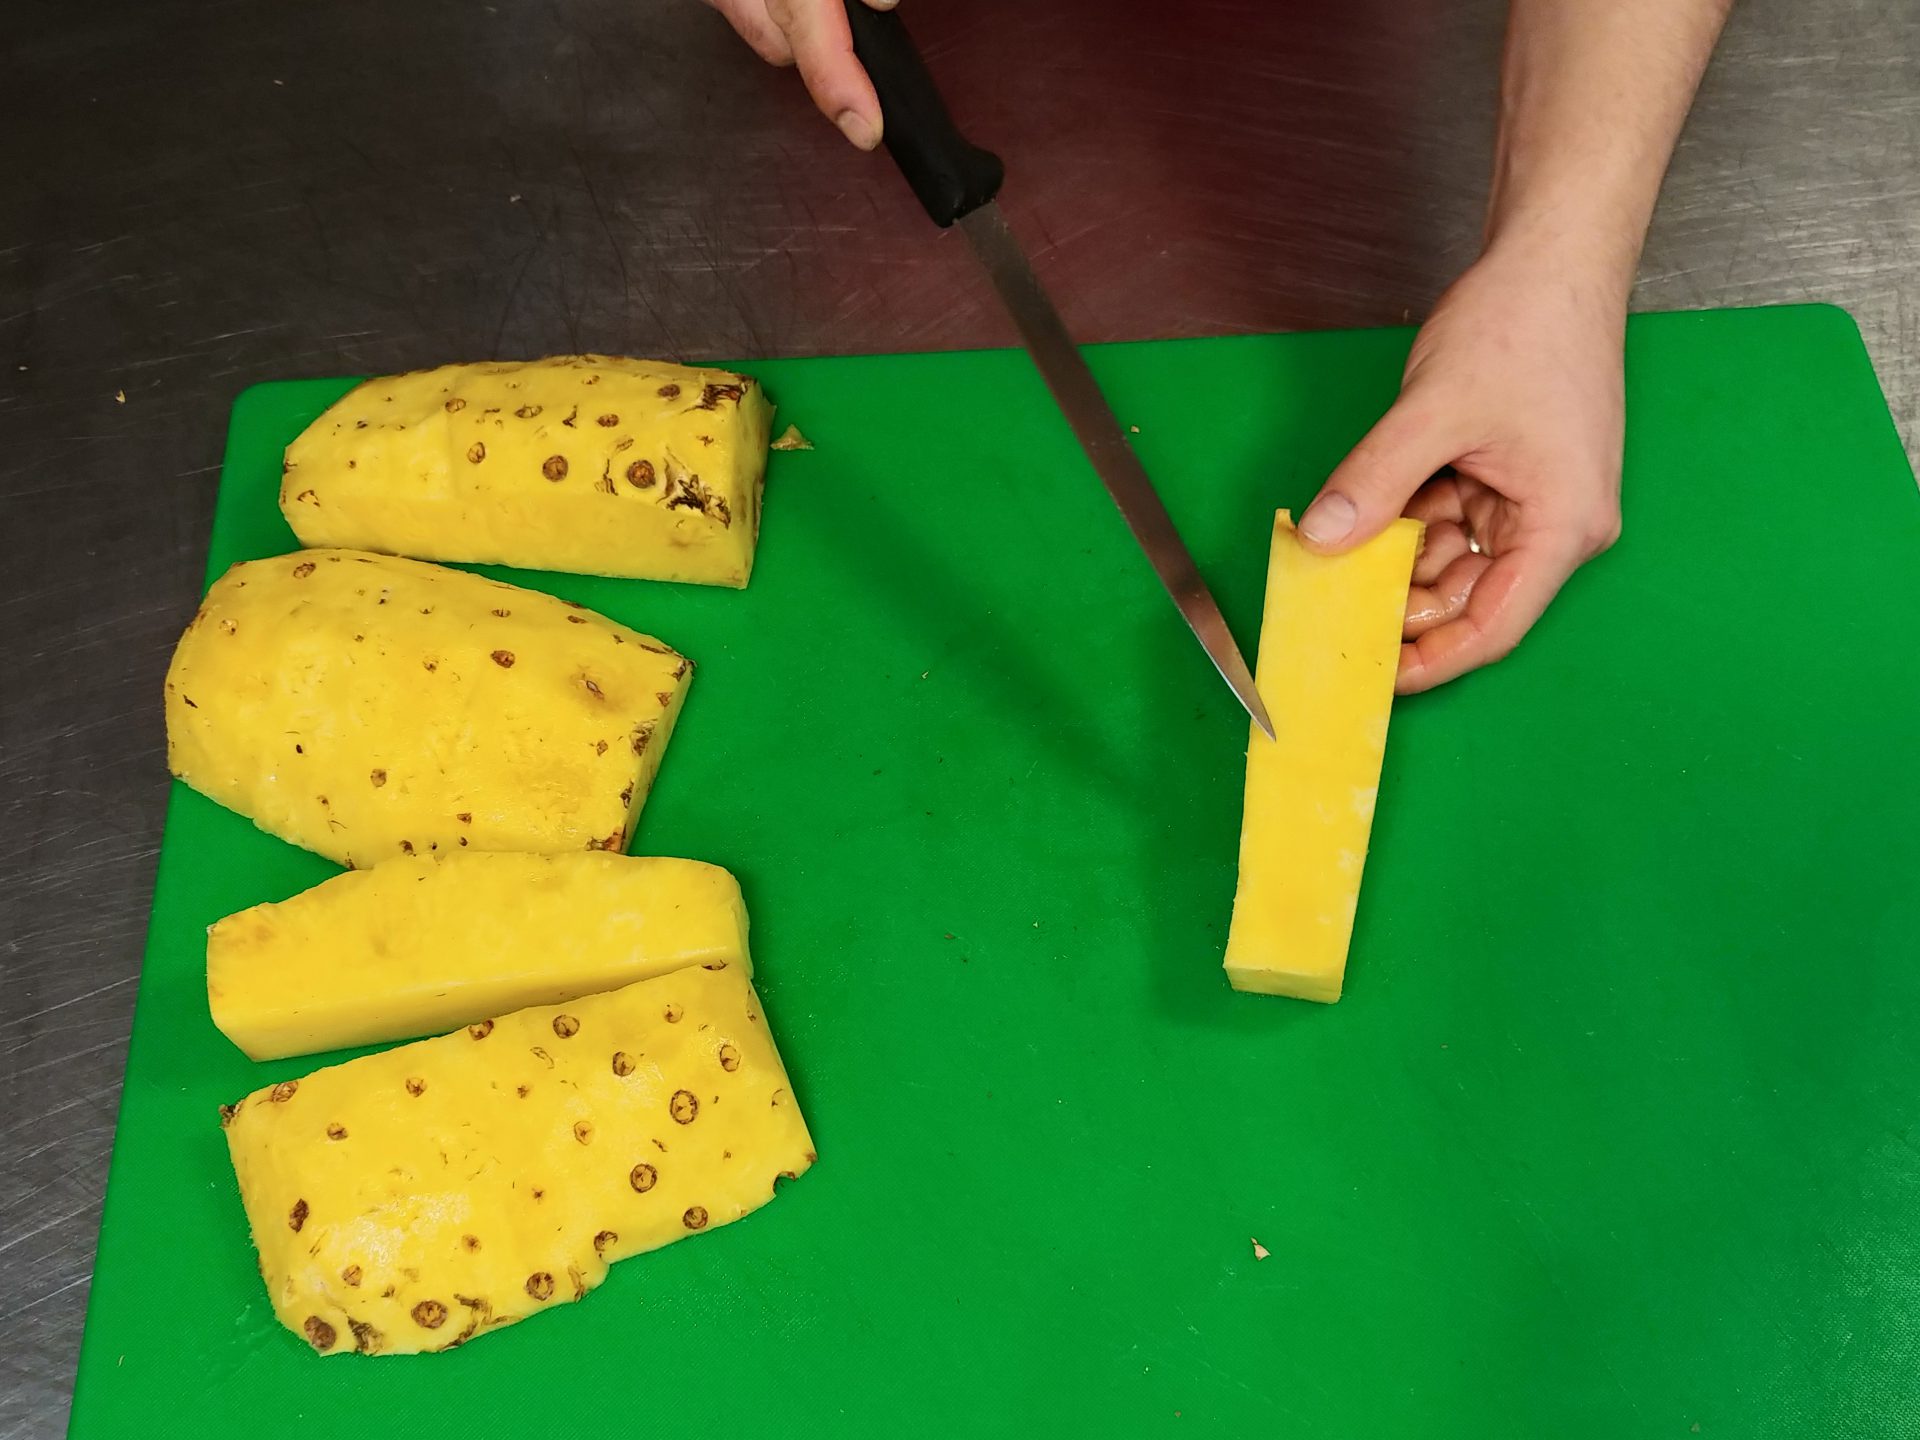
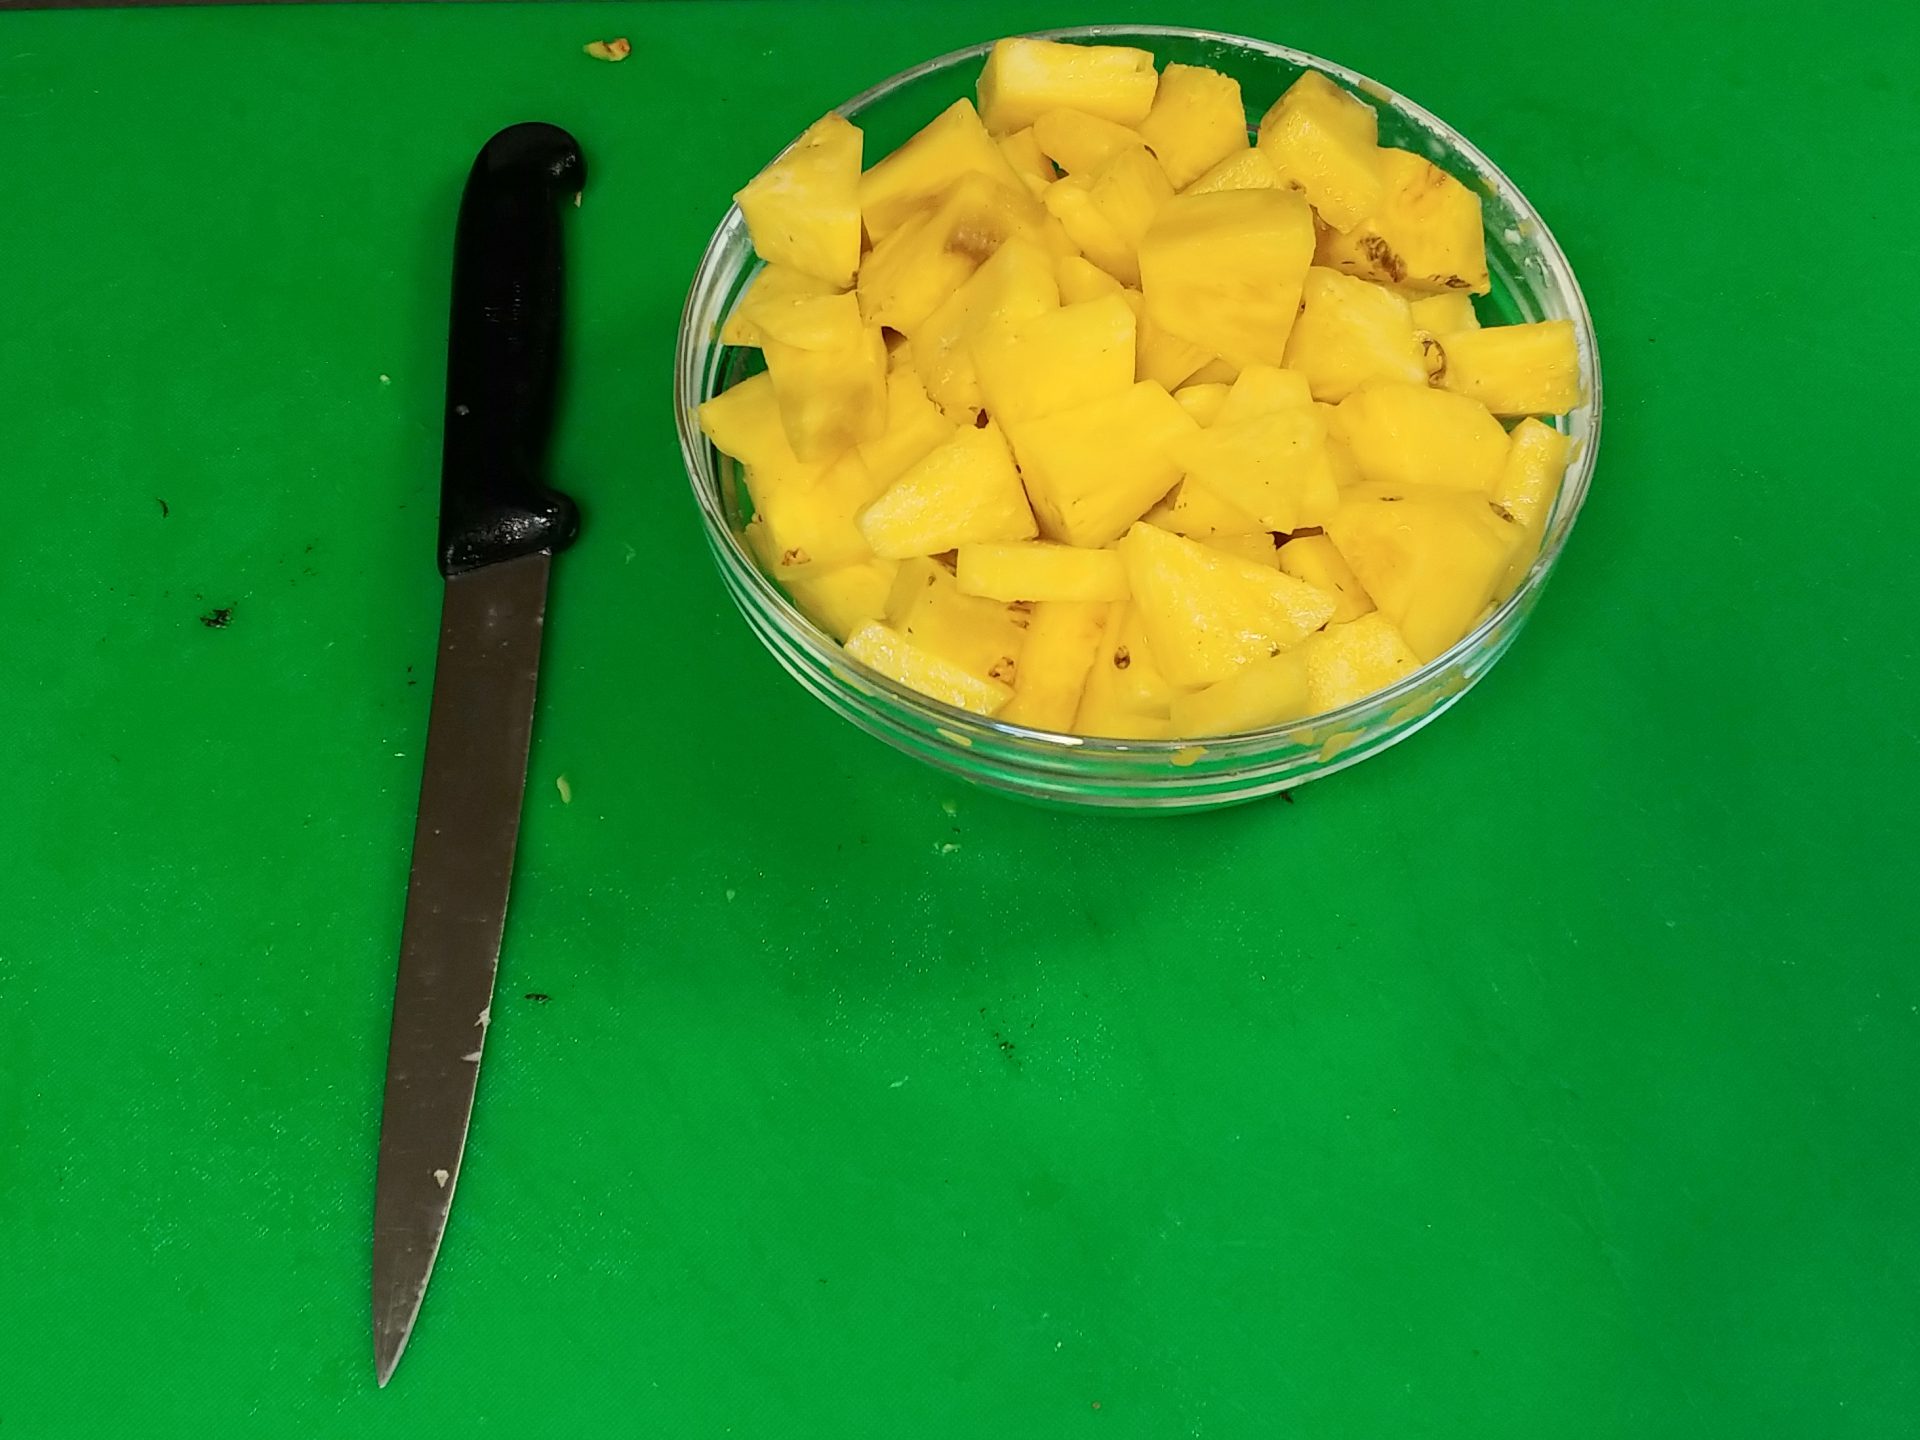
For round slices: slice with a chef’s knife and then cut out the center using a 1″ cookie cutter.
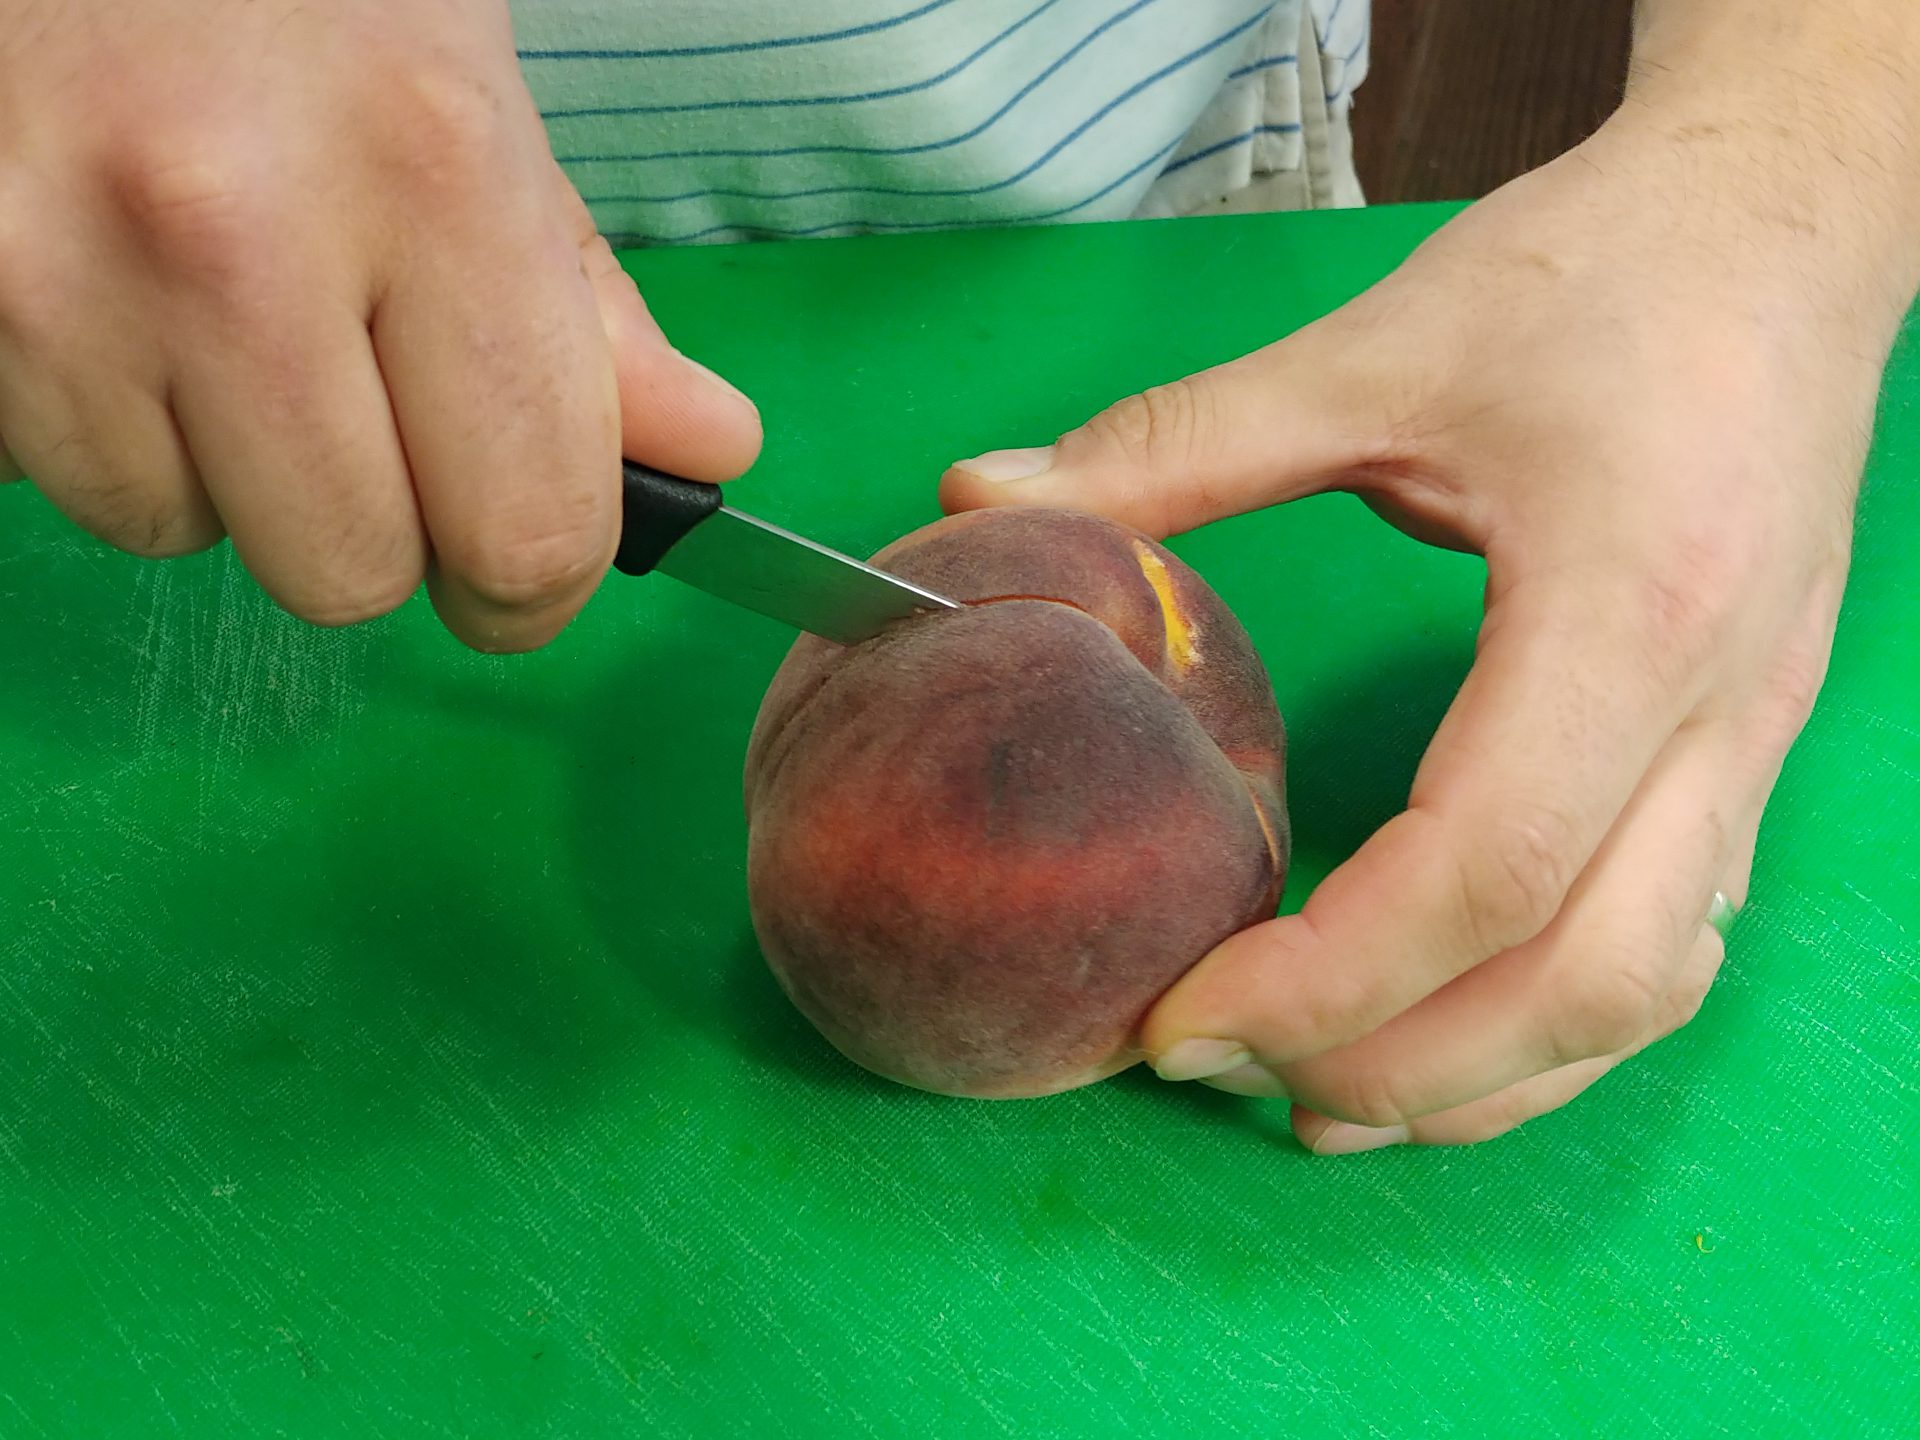
This fruit needs to be peeled and if you want to do so, it is best to use a small paring knife (since the peel is usually too soft for any peeler).
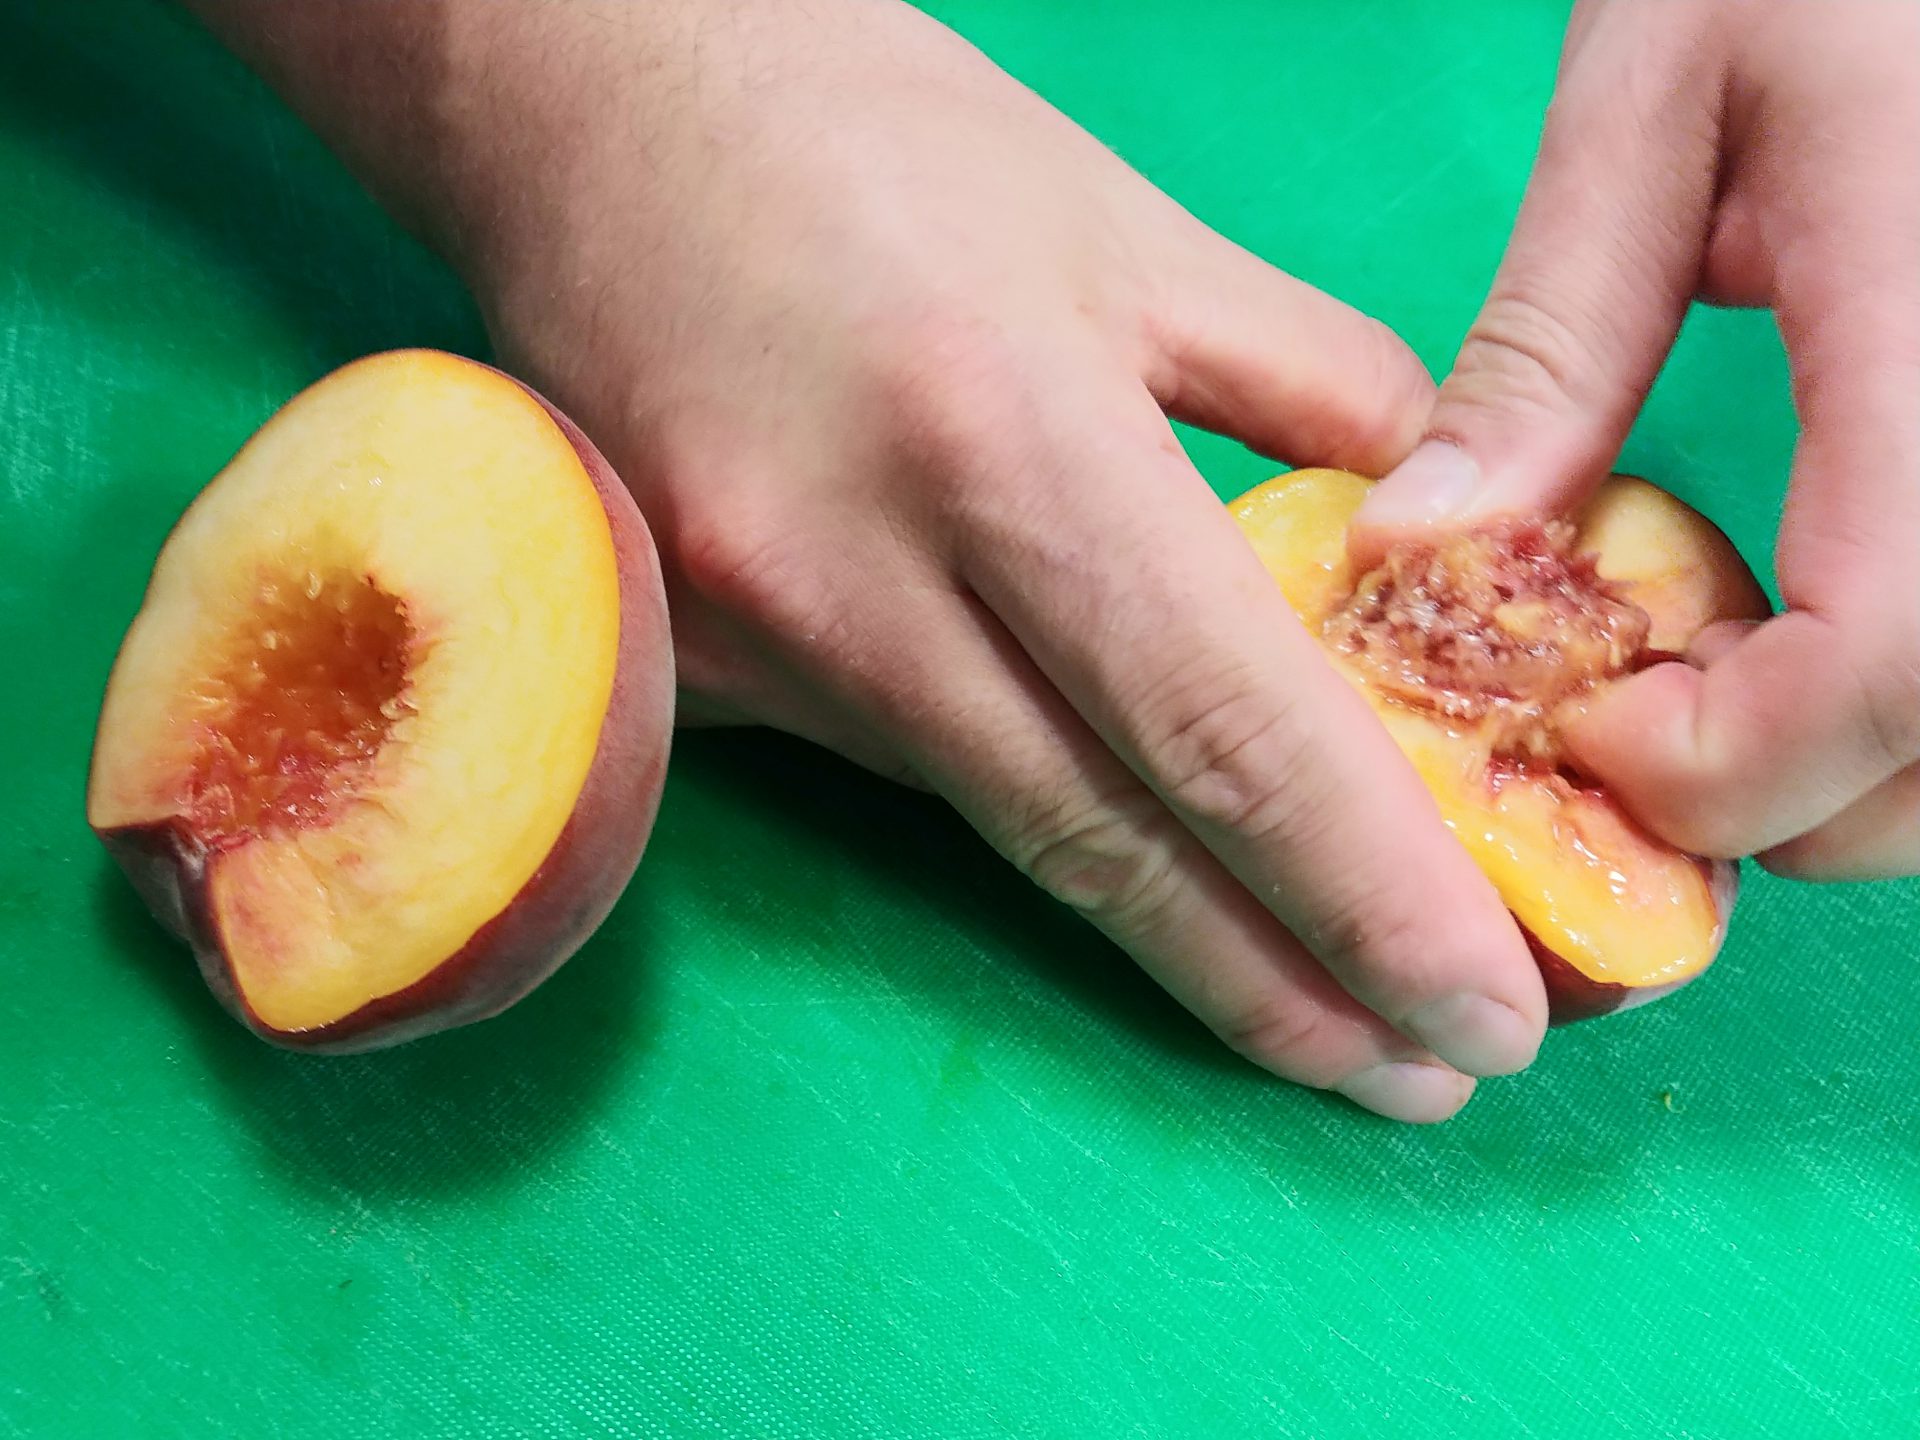
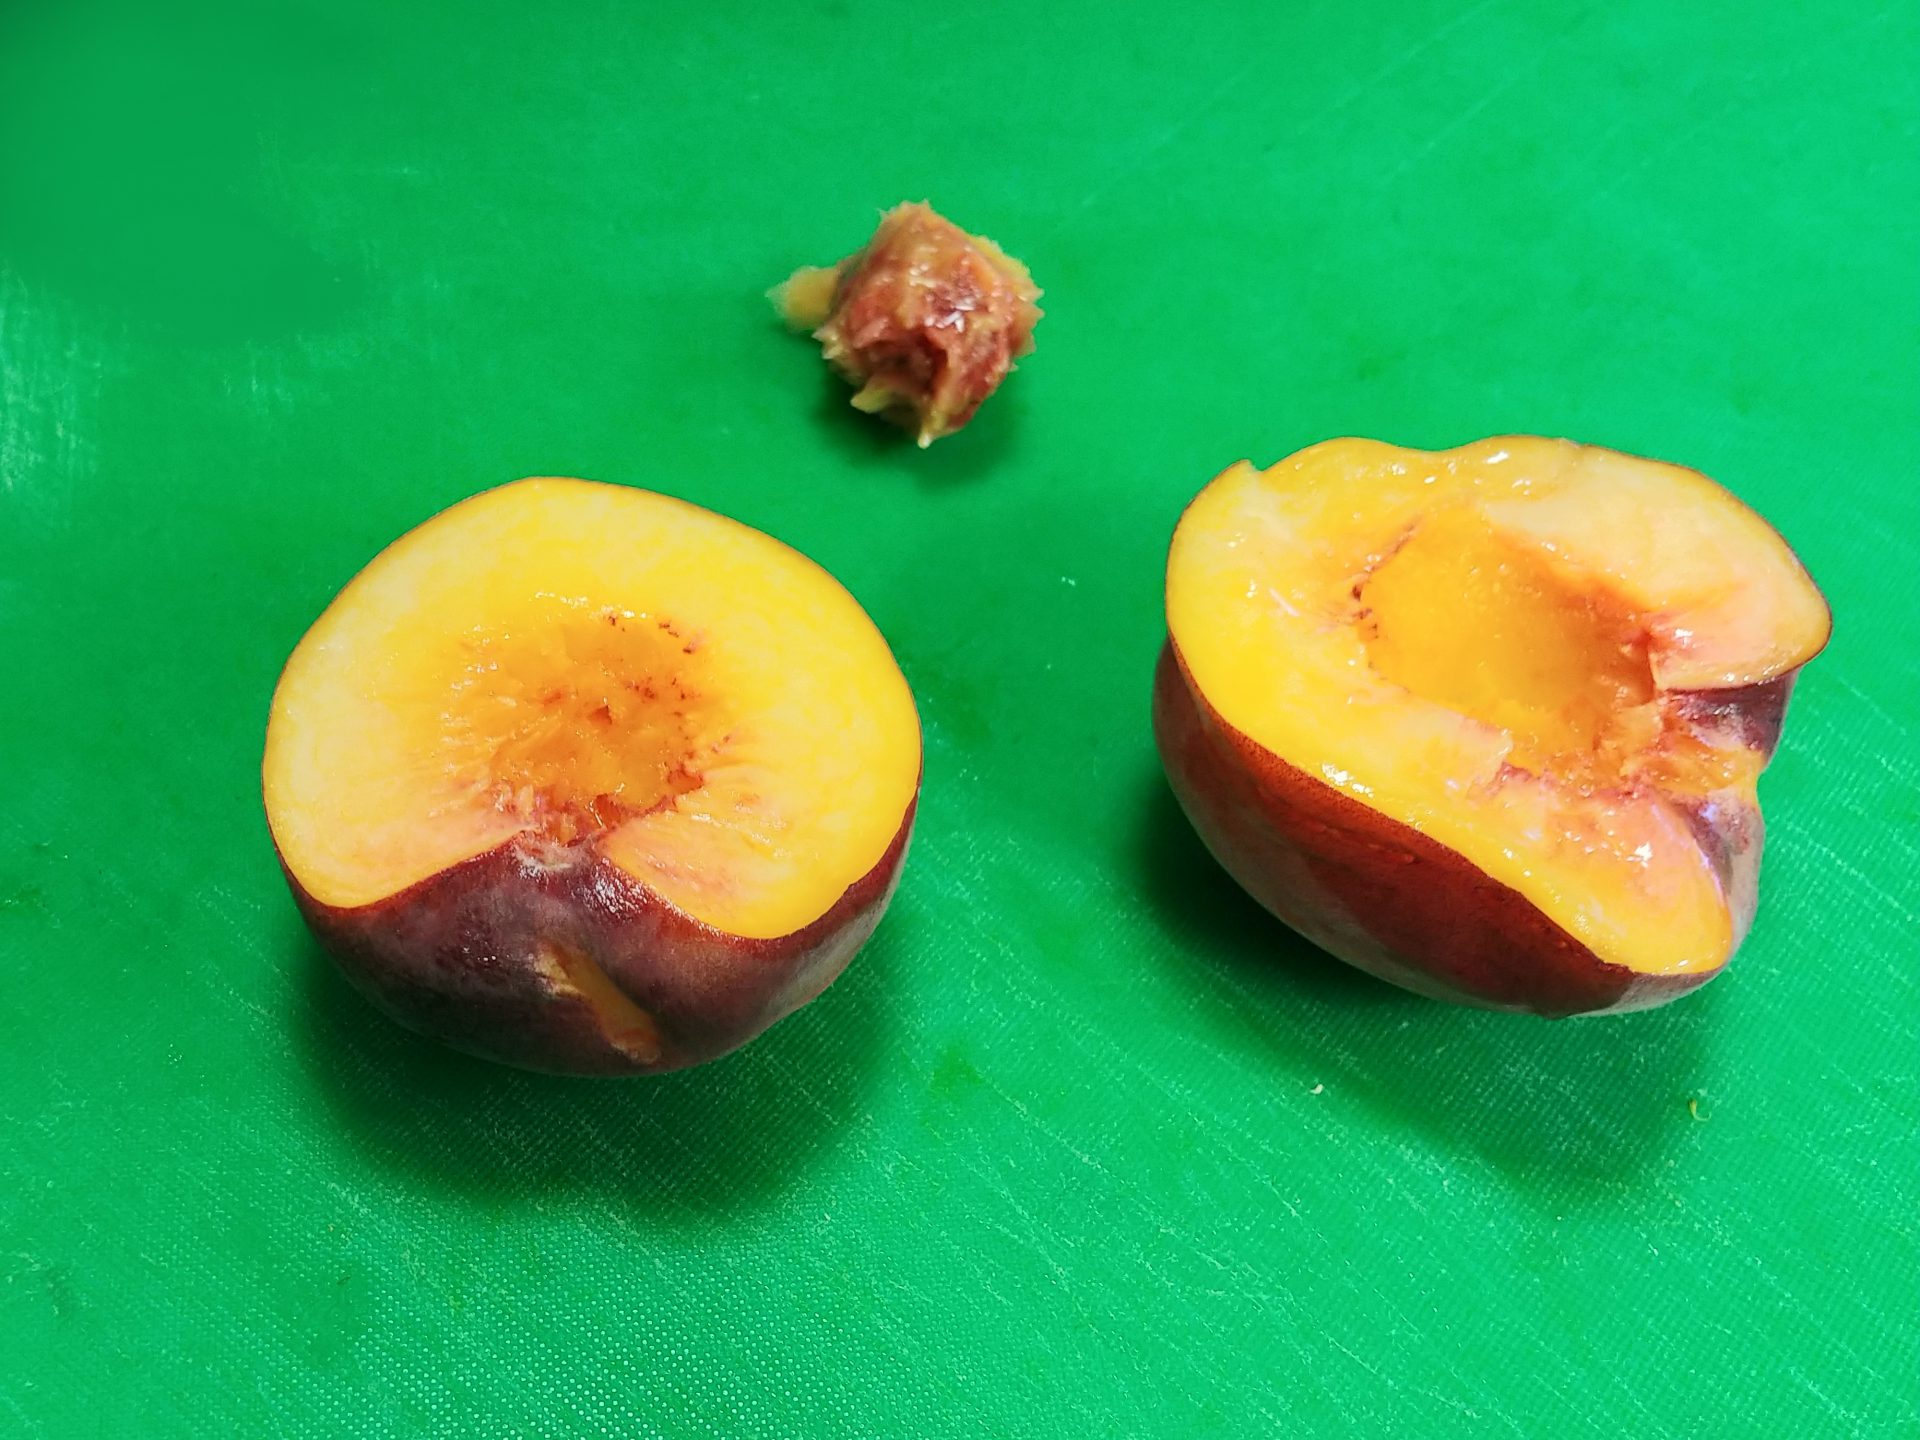
It can be harder to remove the pit if they are still hard. You can prevent this problem by buying them based on when you want to eat them.
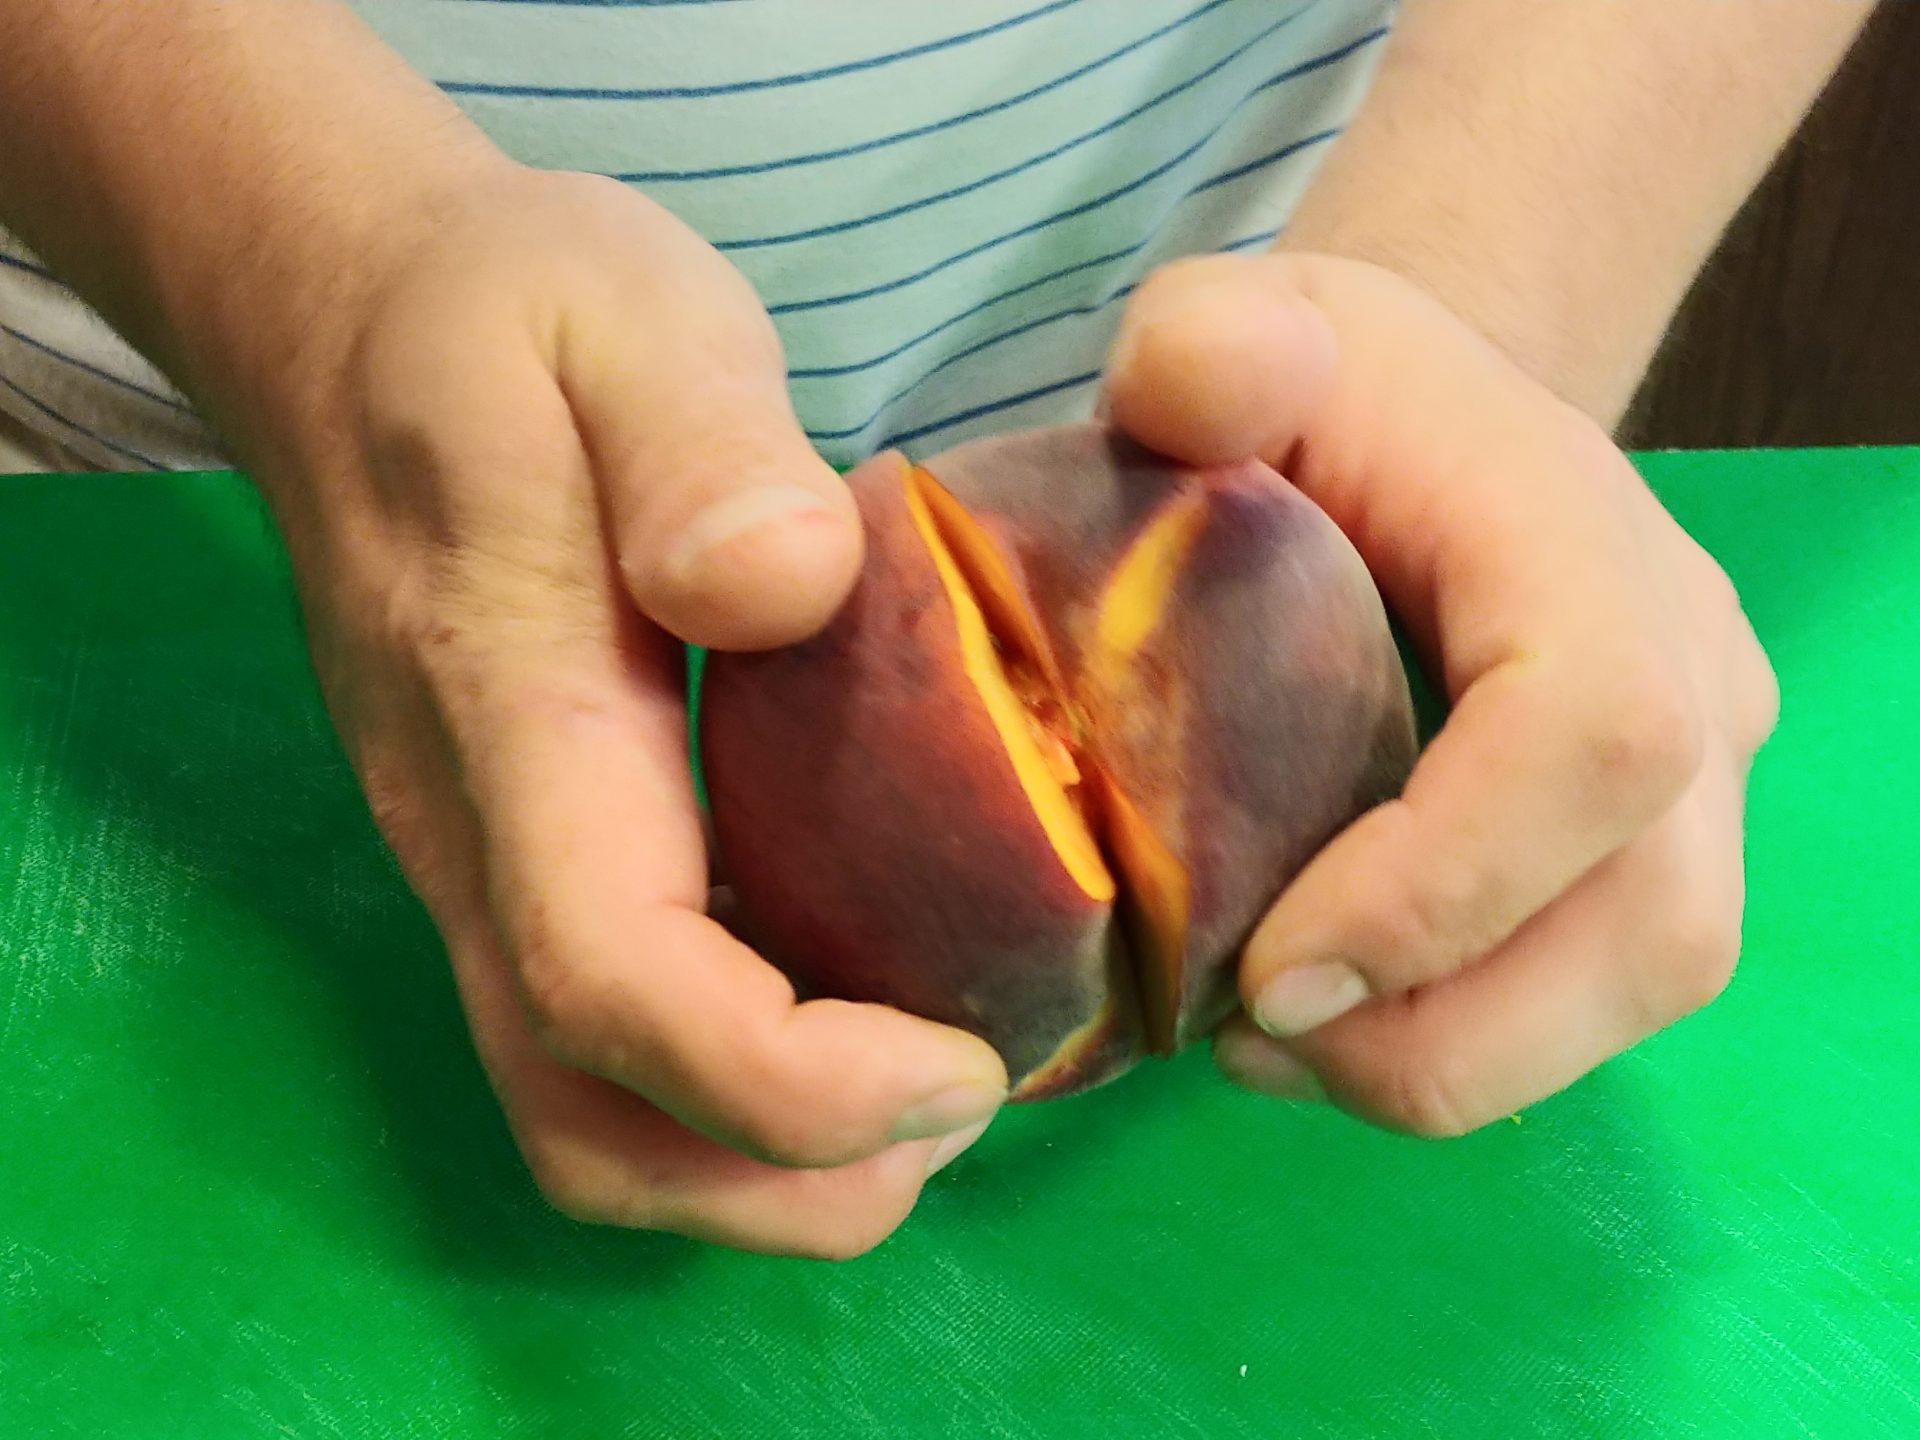
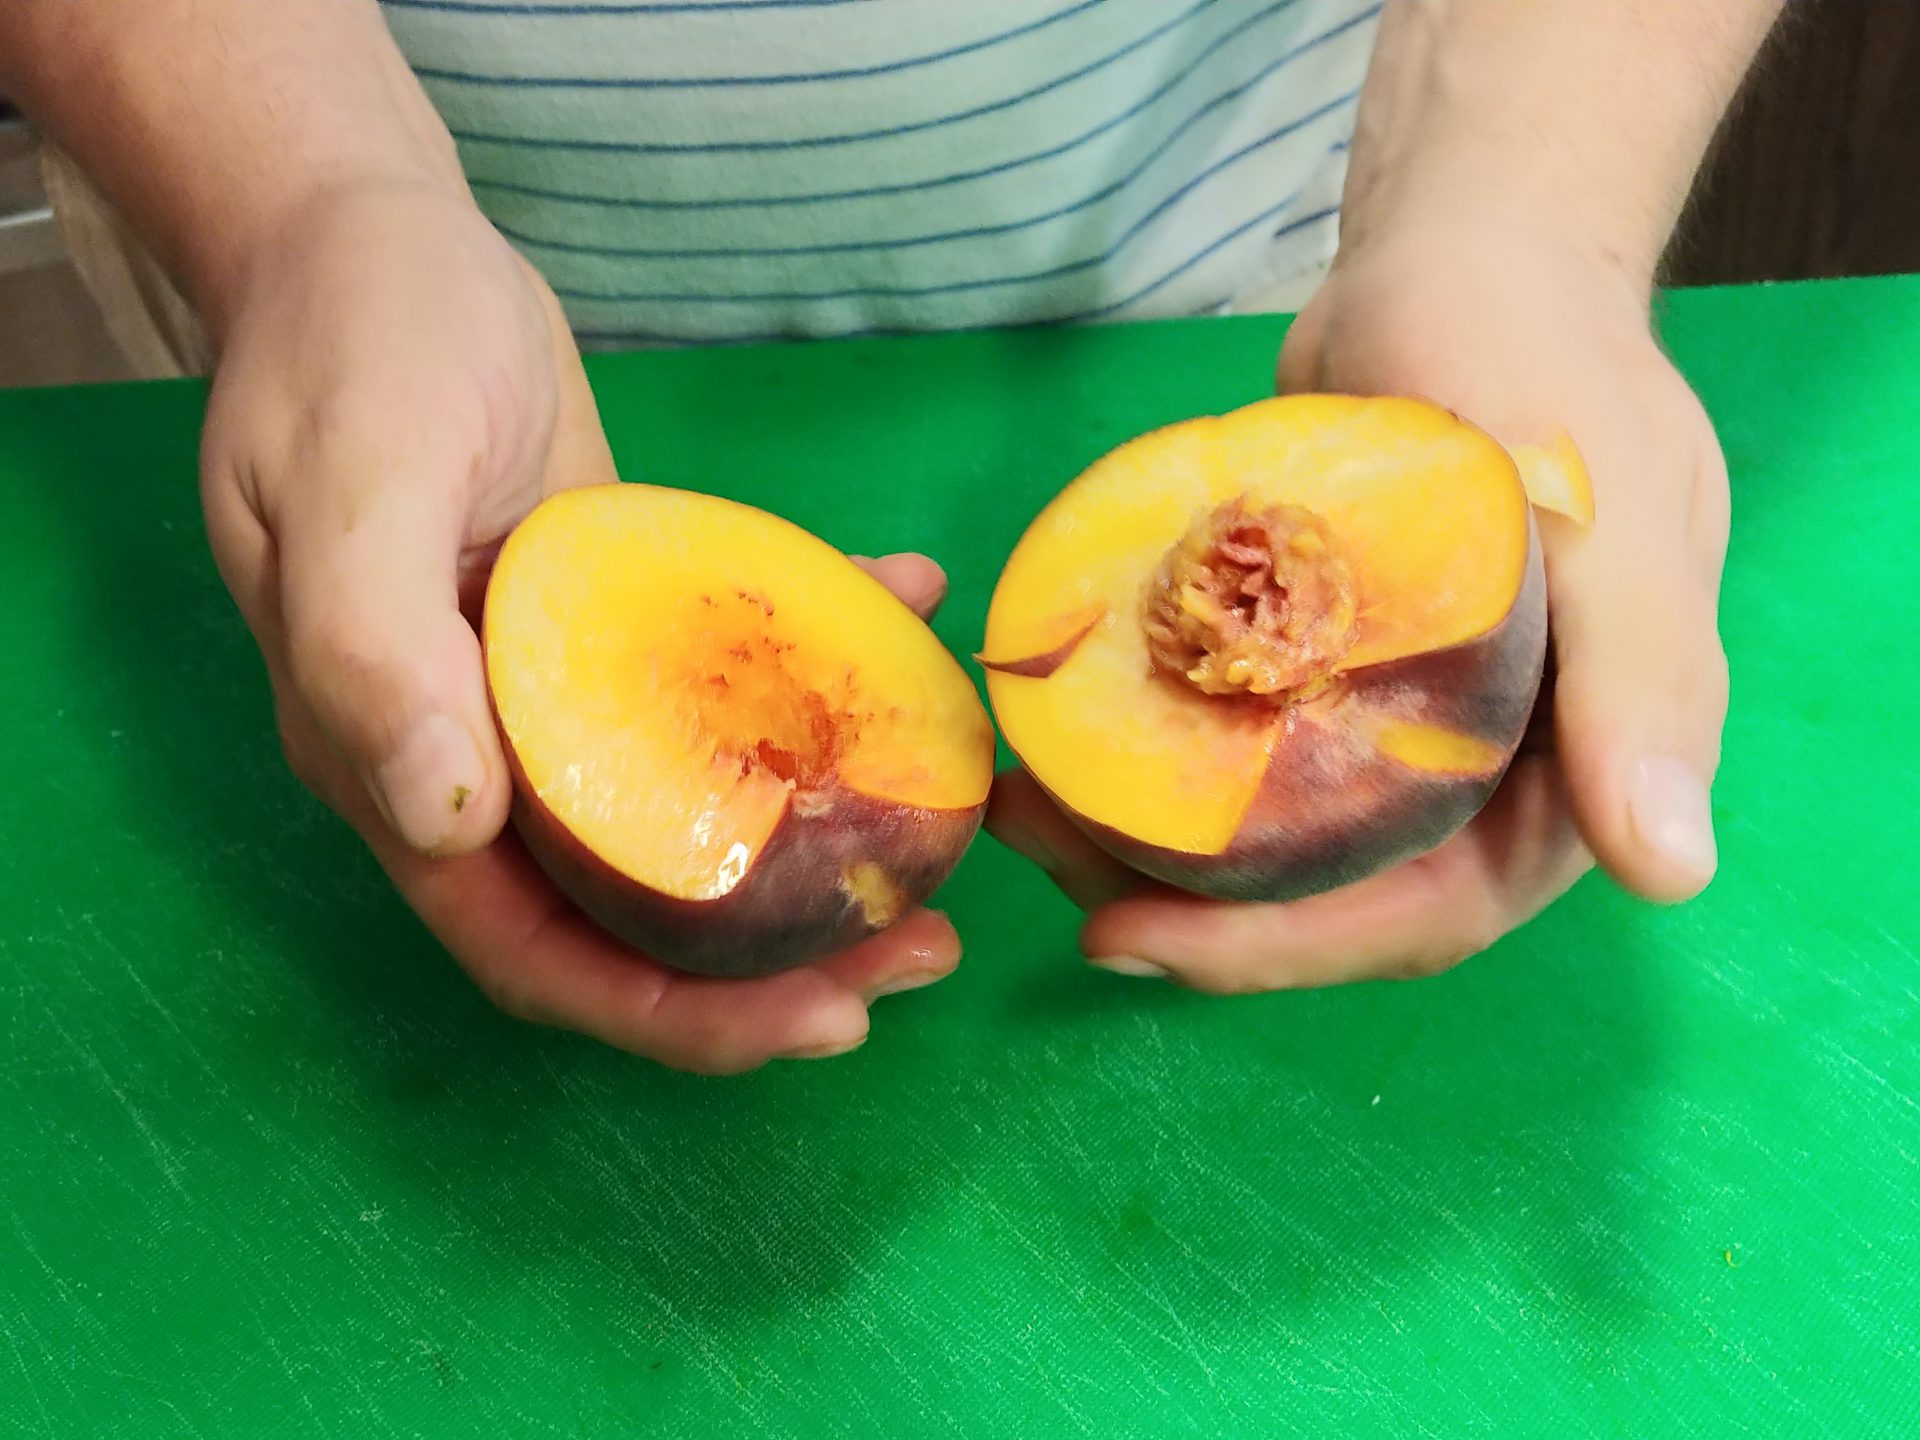
To remove the pit, place the fruit on a cutting board, and cut around the fruit from the bottom to top and back to create circles around the fruit (during the cutting, make sure that the knife is touching the pit). Then twist both halves to separate the fruit. The pit will stay in one of the halves, and then you must carefully remove by twisting or using a paring knife (if it’s not going out easily).
If you have a hard time separating the fruit, cut the fruit into quarters, and remove each piece quarter by quarter. If it is still not possible, consider cutting the flesh around the pit with a knife.
Berries are easy to work since you don’t have to (and even can’t) peel them.
Make sure to remove the stems.
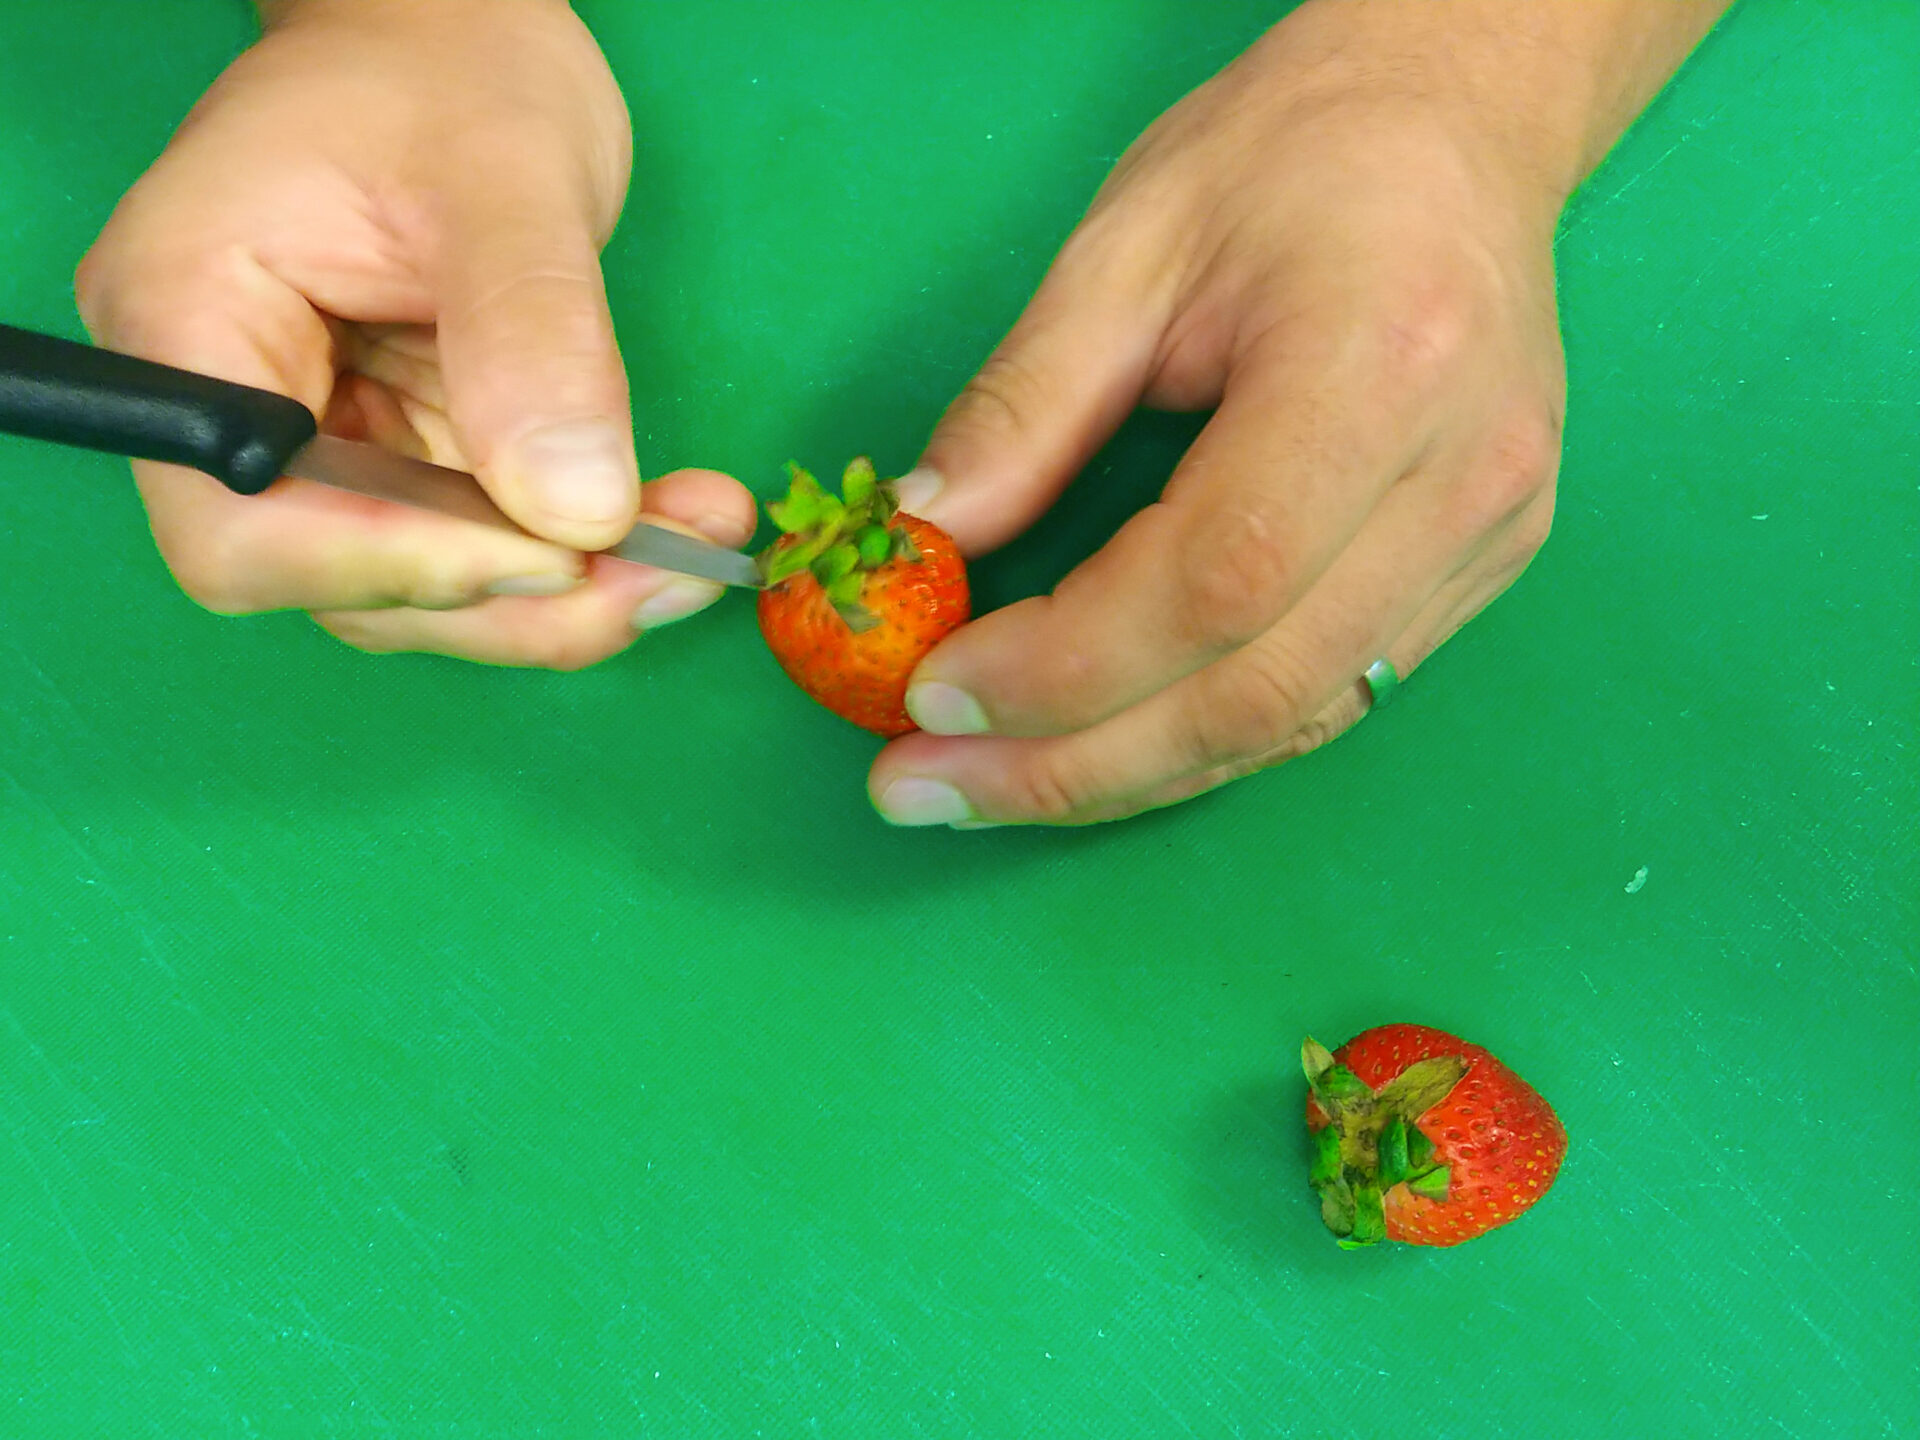
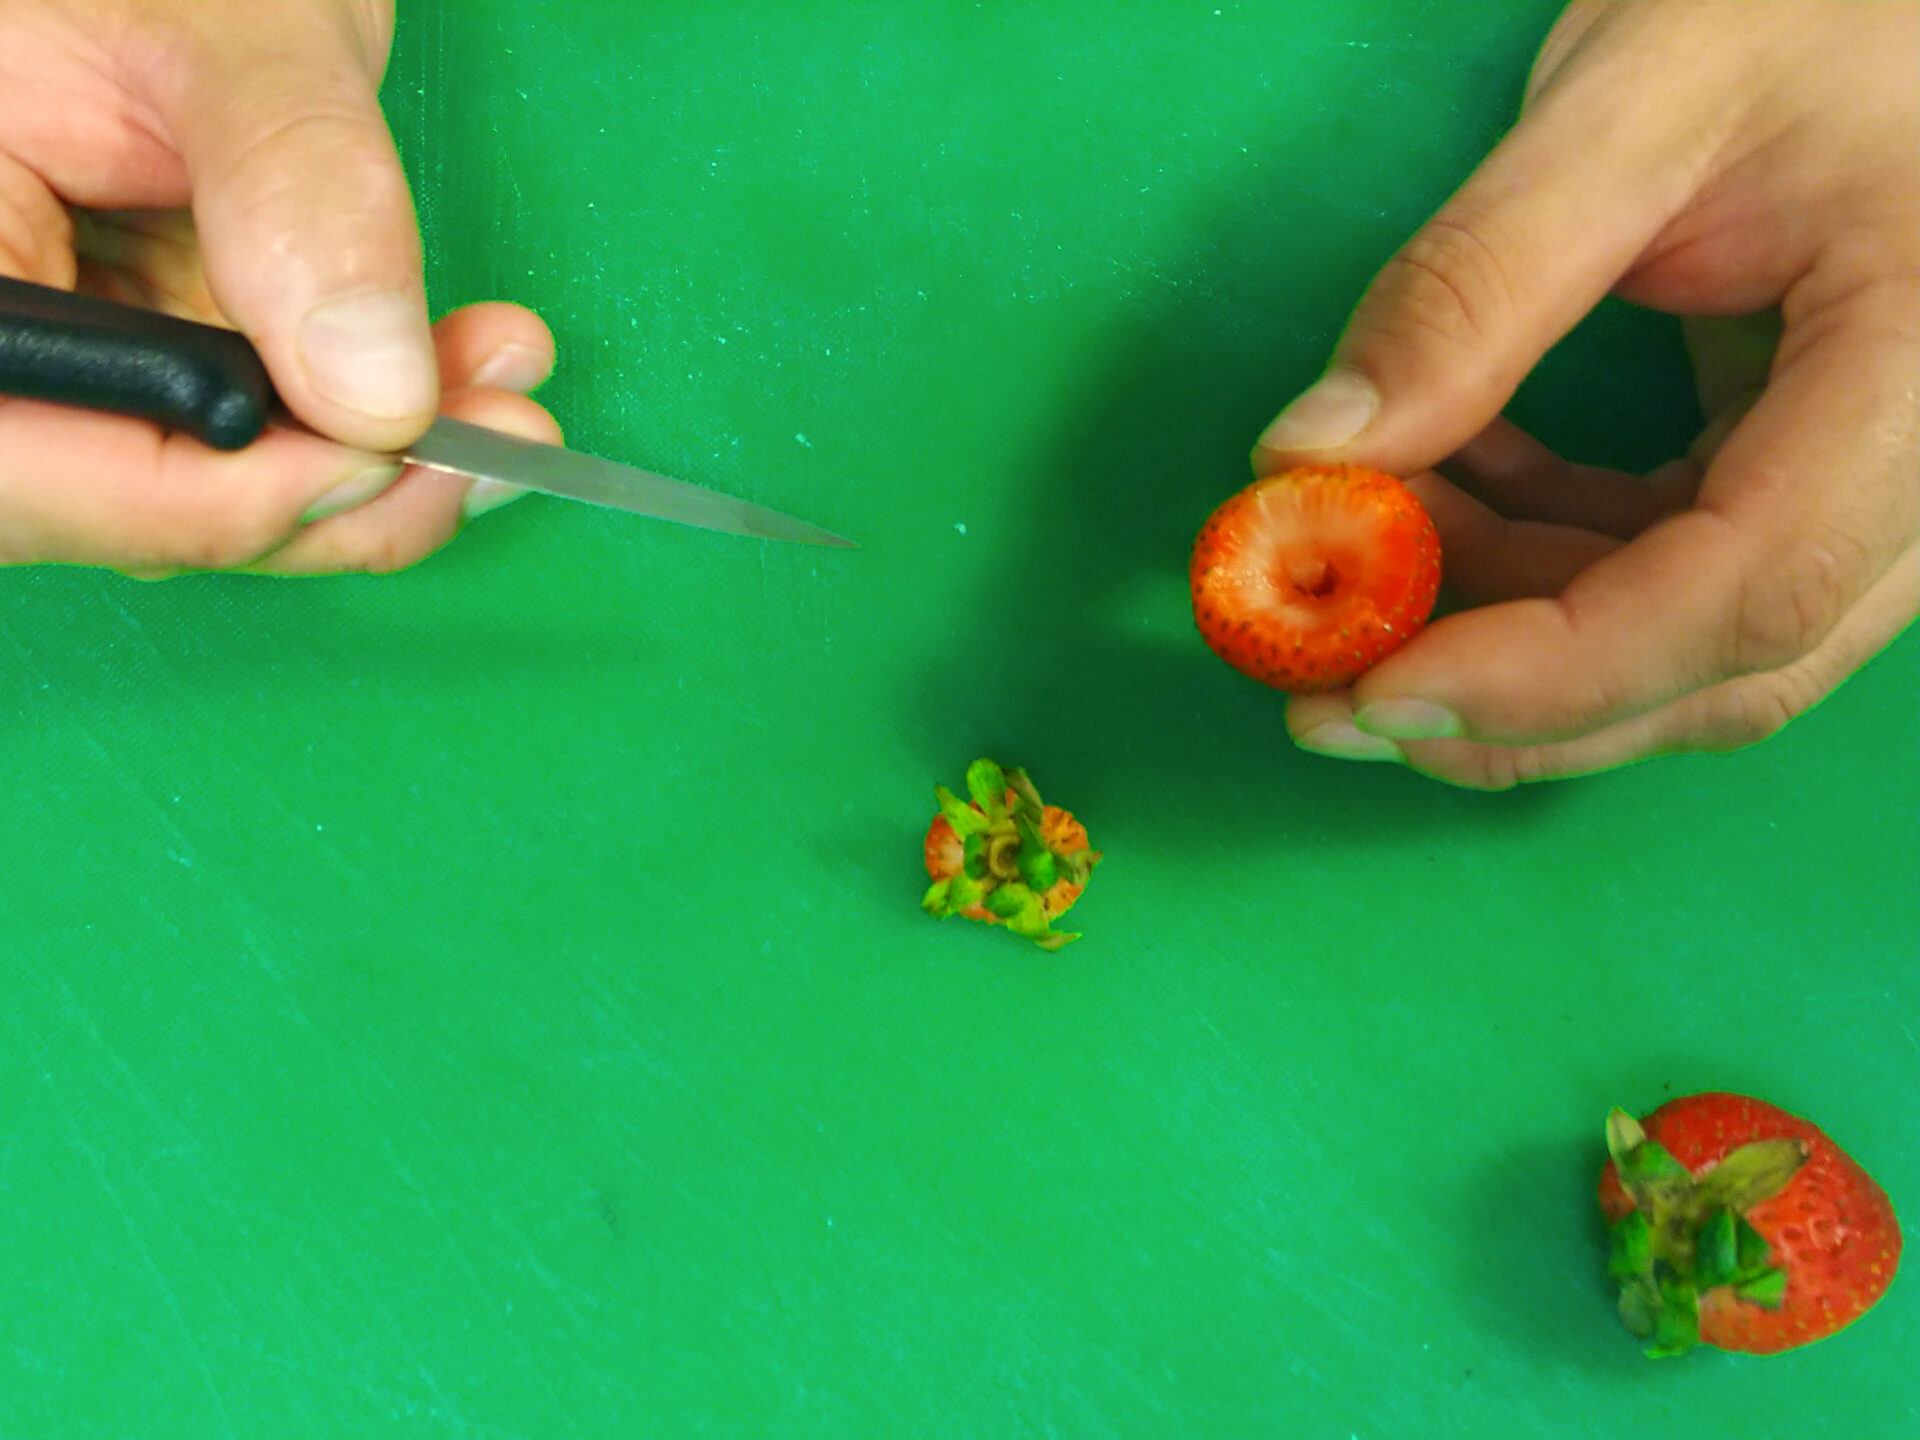
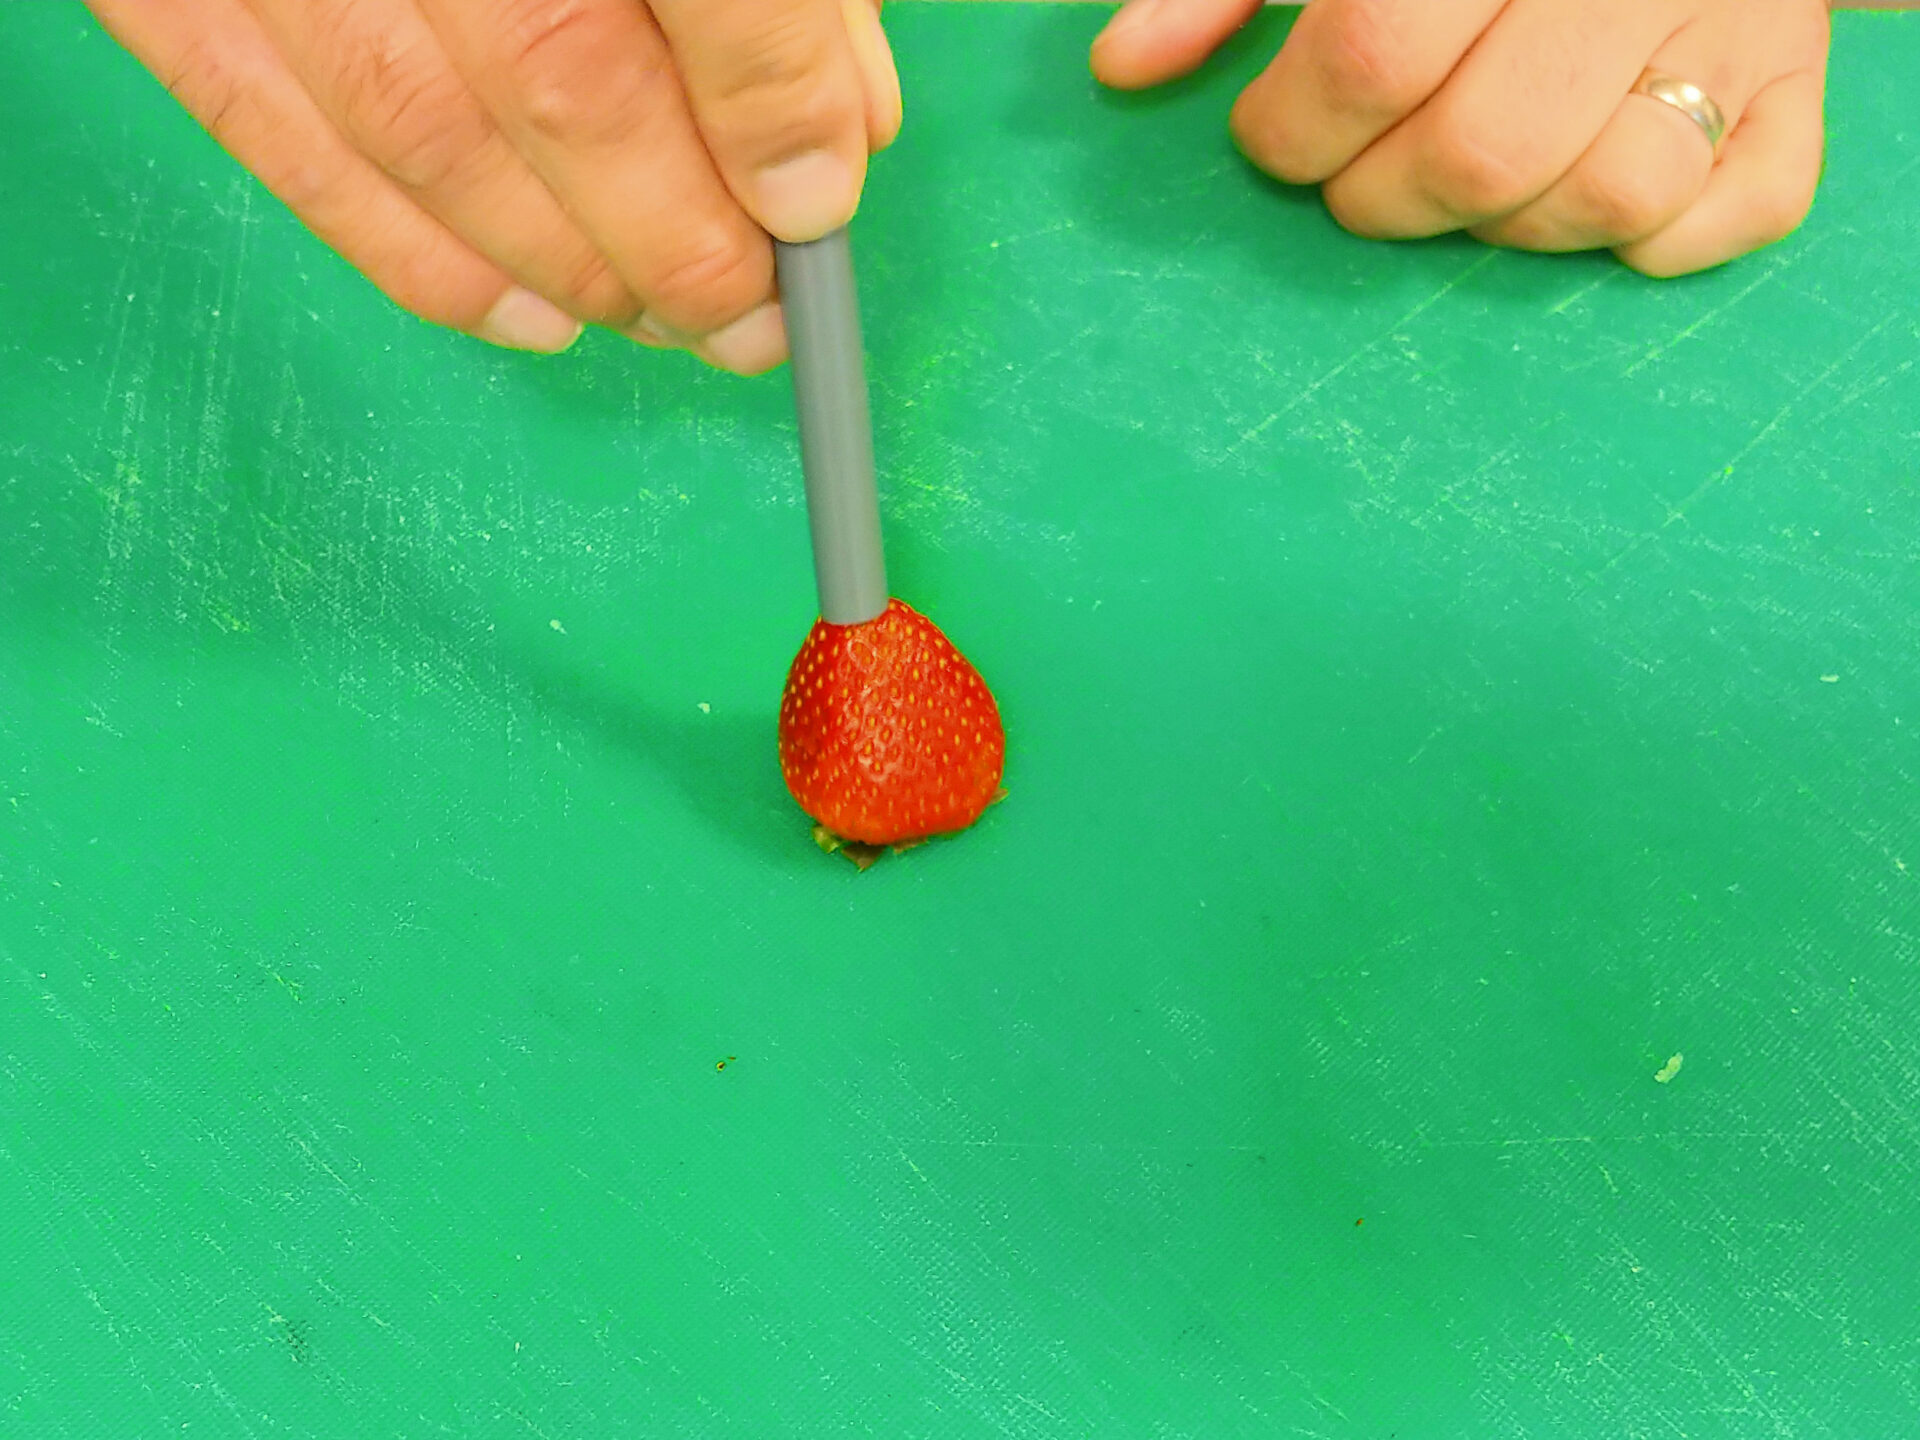
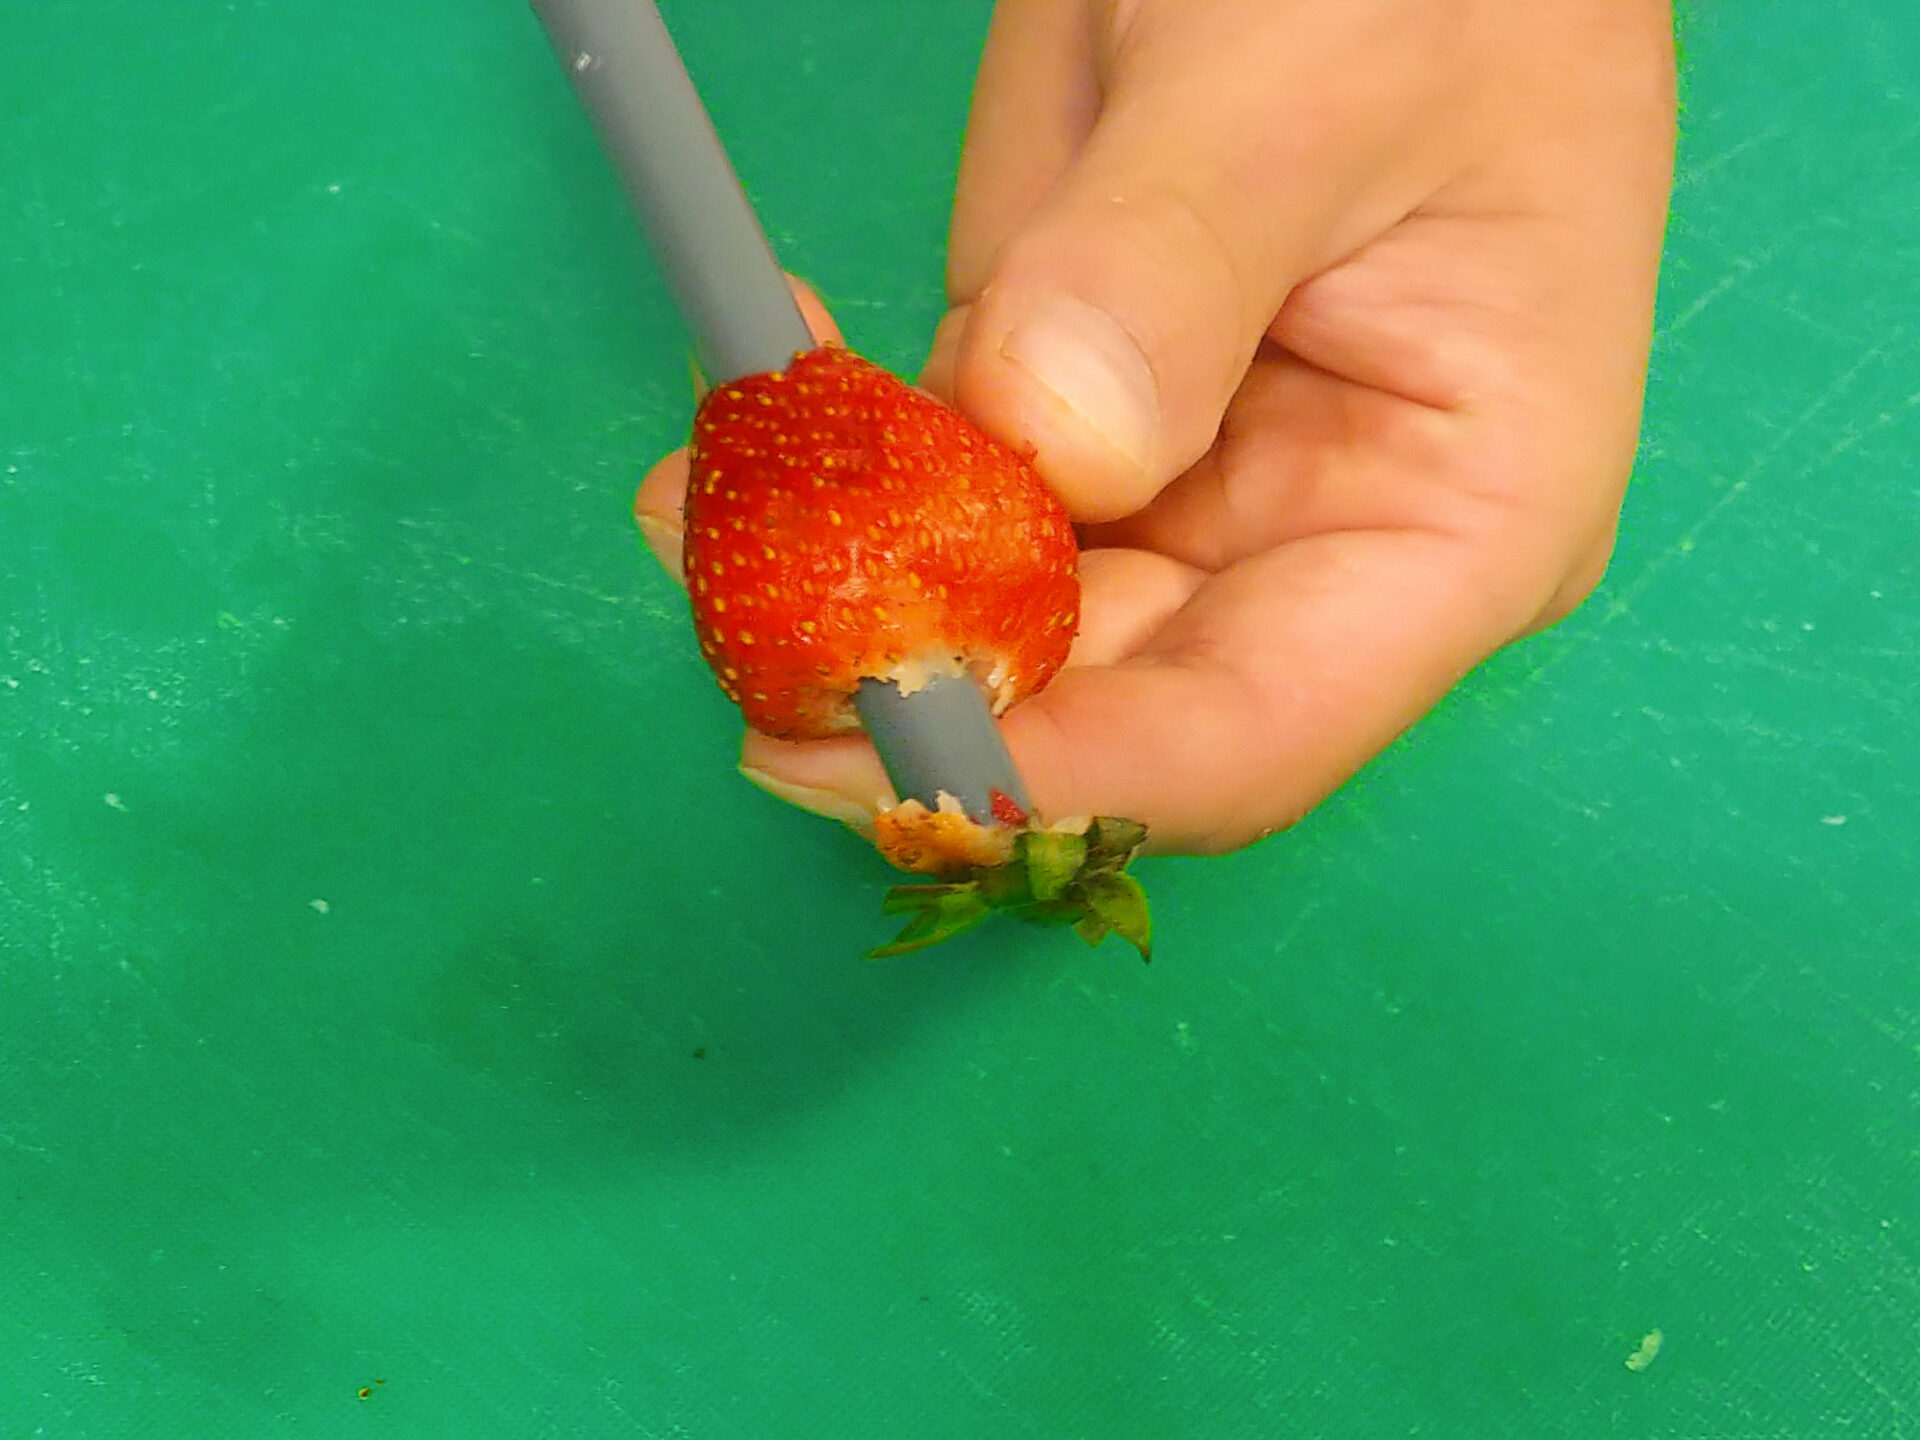
With strawberries you have two option how to remove the calyx (core):
Cut off the calyx by simply running a paring knife around at a 90°angle. You can consider leaving the calyx on strawberries for a great visual effect on platters and cakes.
A quick way to remove the calyx from the strawberry is to turn the strawberry upside down and push a straw all the way to the center of the strawberry.
An egg slicer can be used to cut strawberries into equal slices.
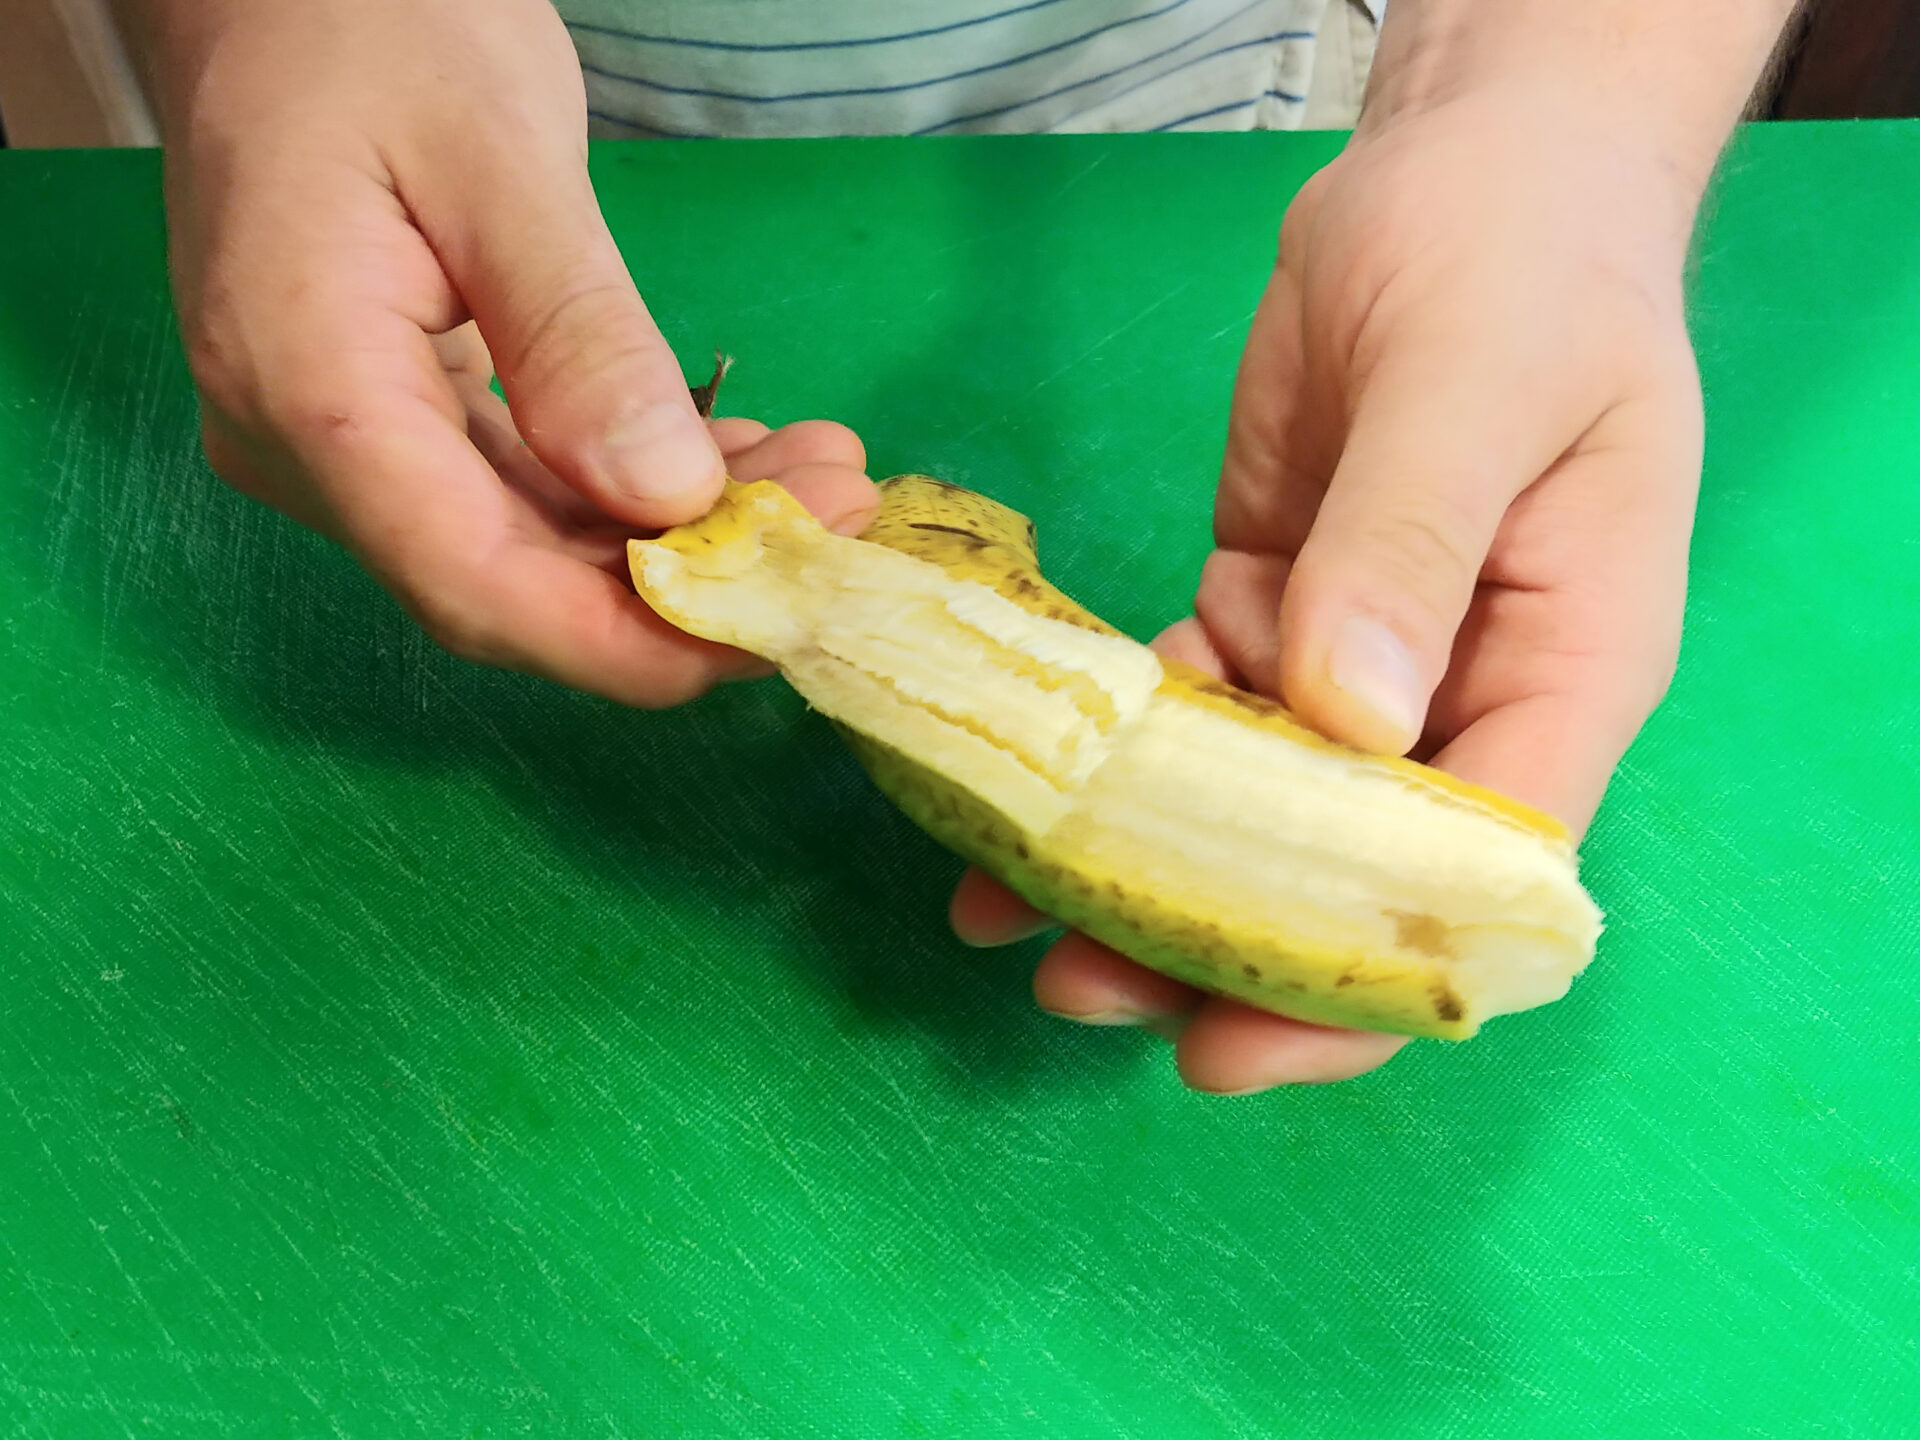
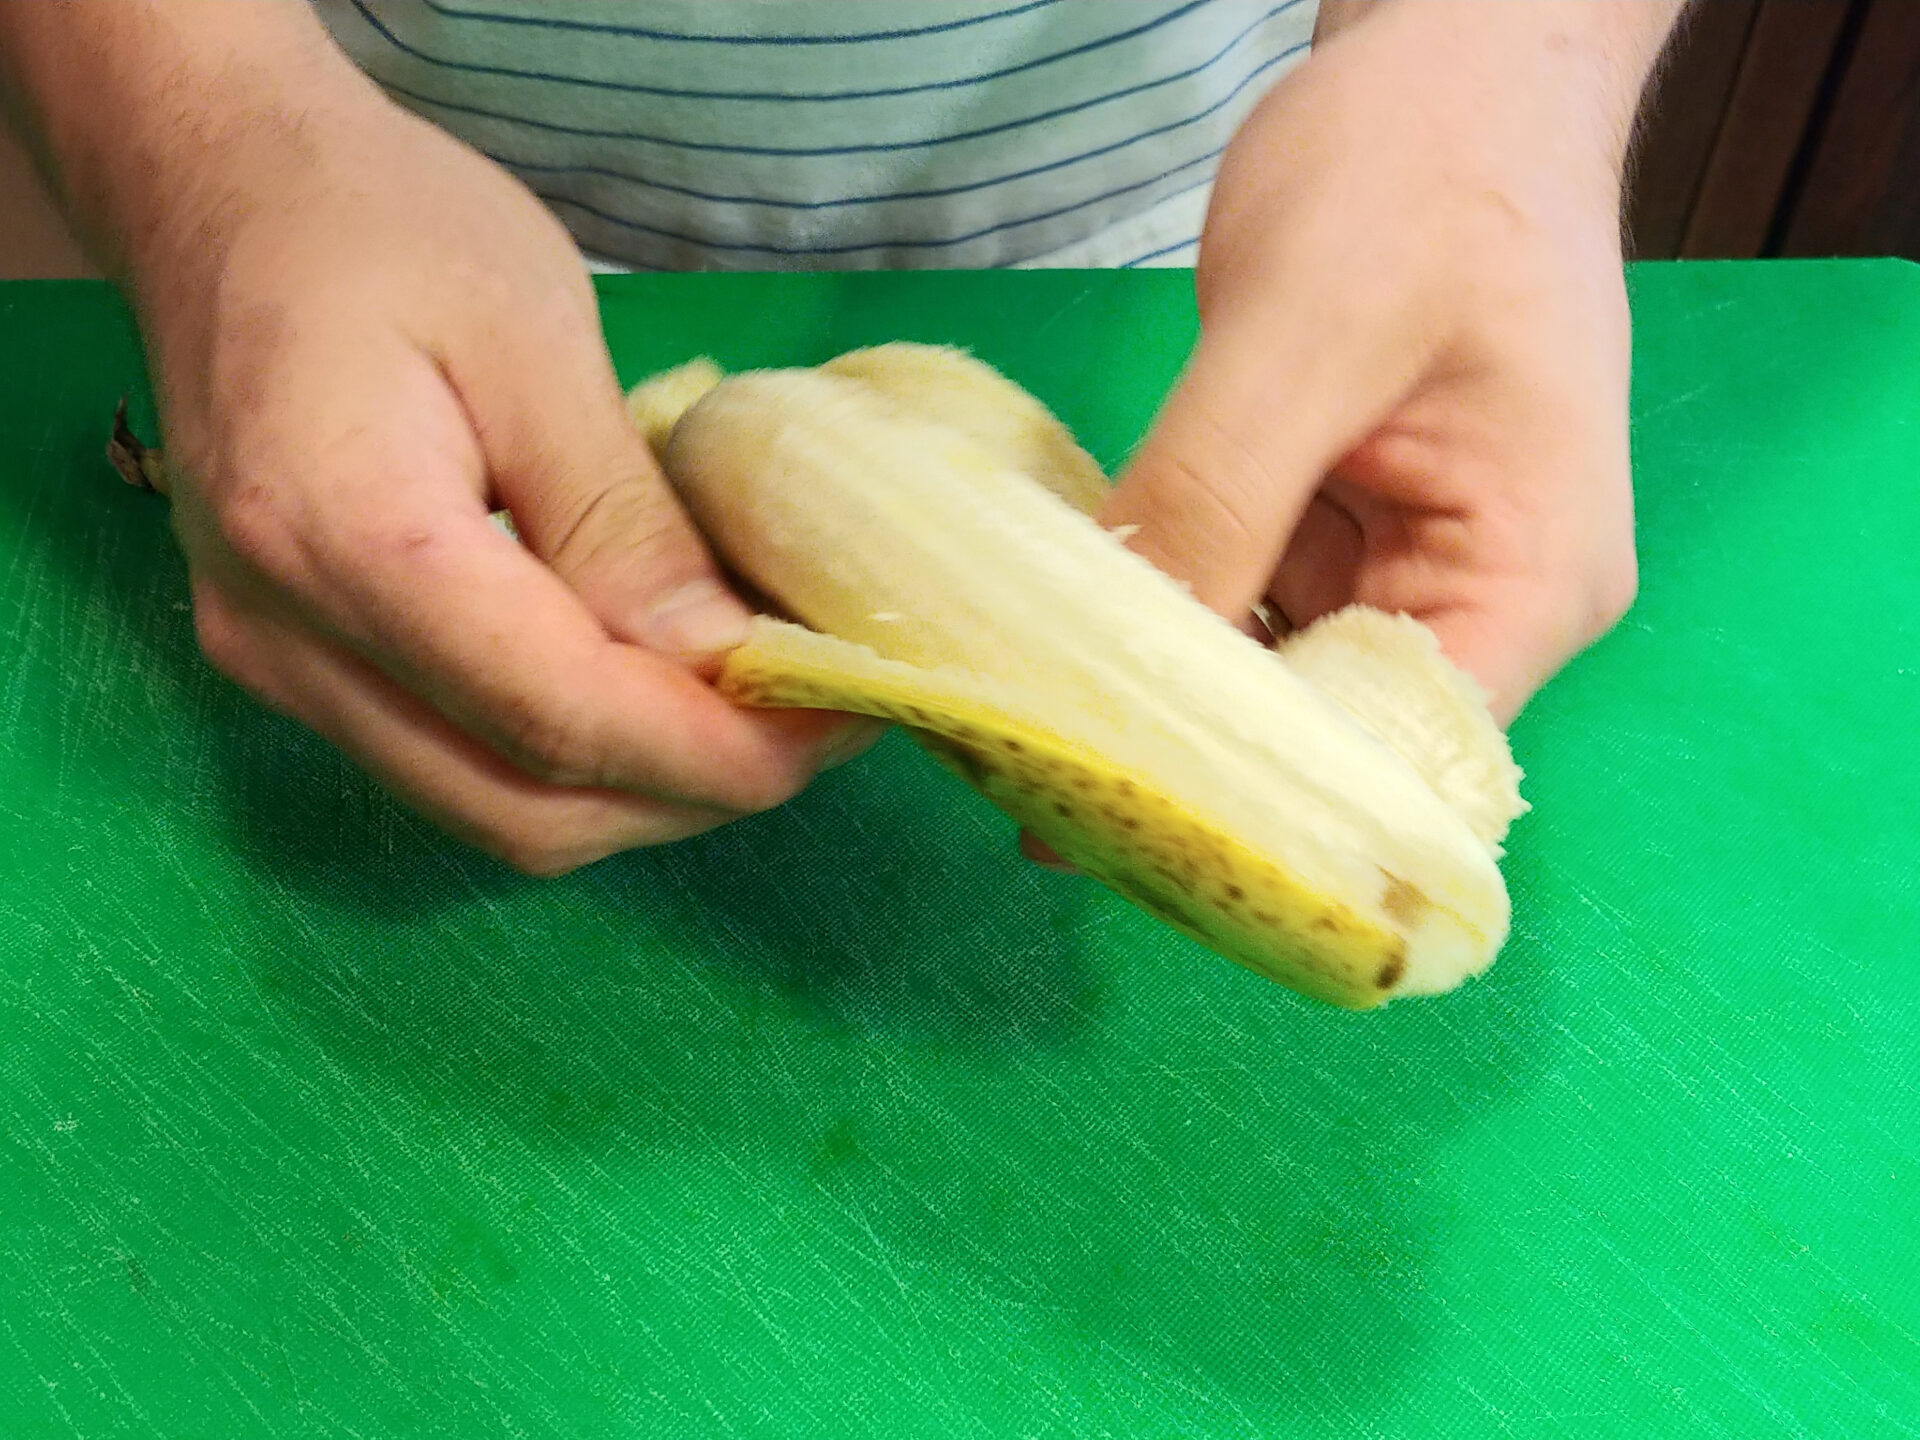
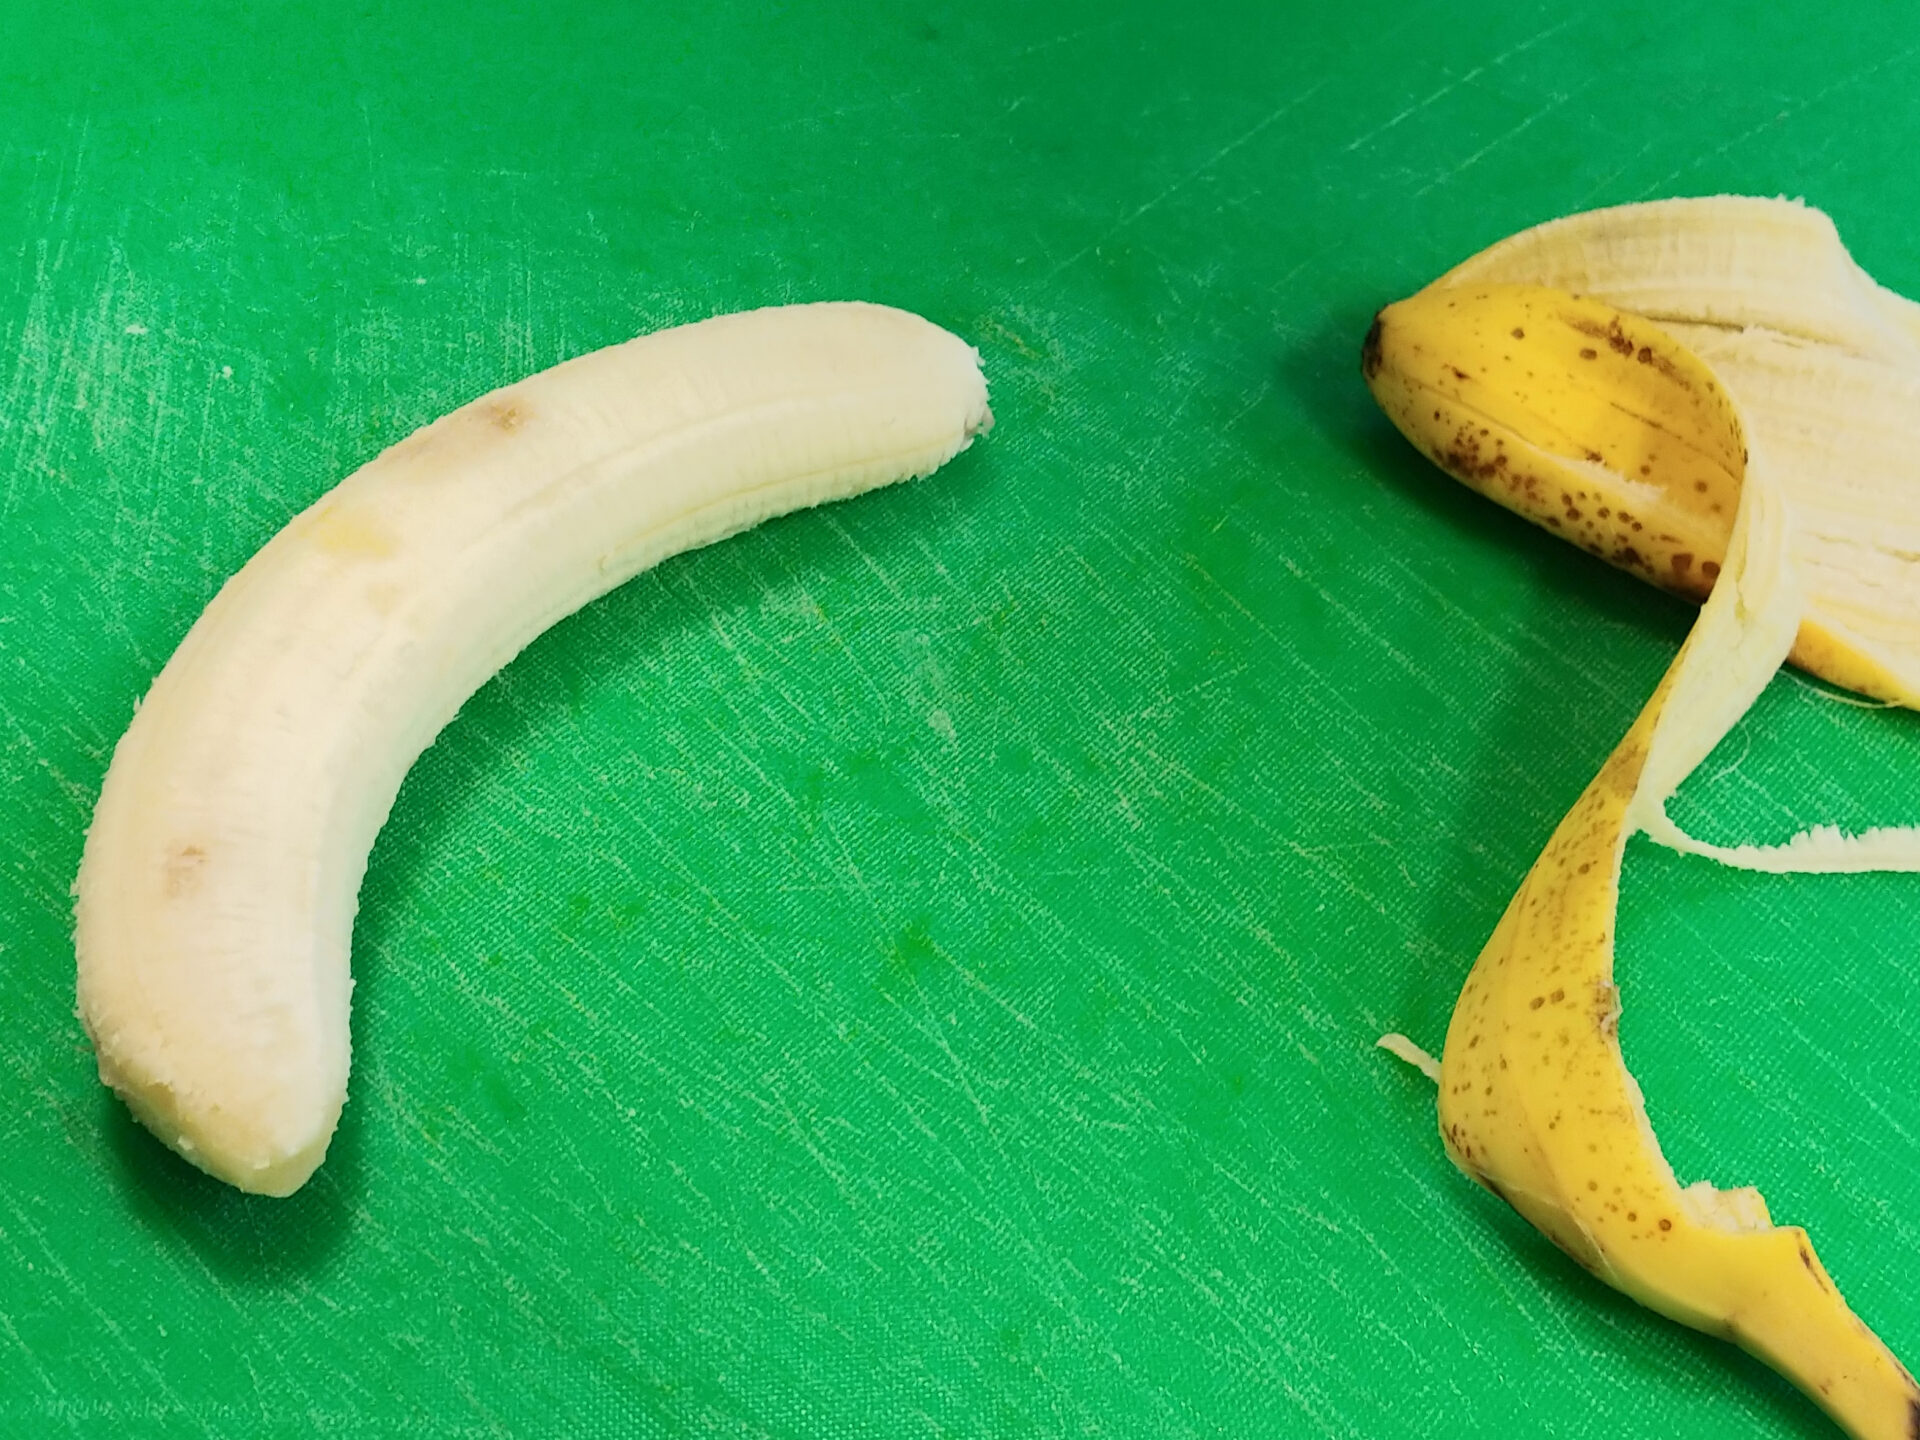
Peel by hand (start from the bottom or top to penetrate the peel, then peel the whole banana). To make it easier, you can cut off the top and bottom of the banana.
After peeling, the banana will start to turn black, so consider brushing it with lemon juice to slow down that process.
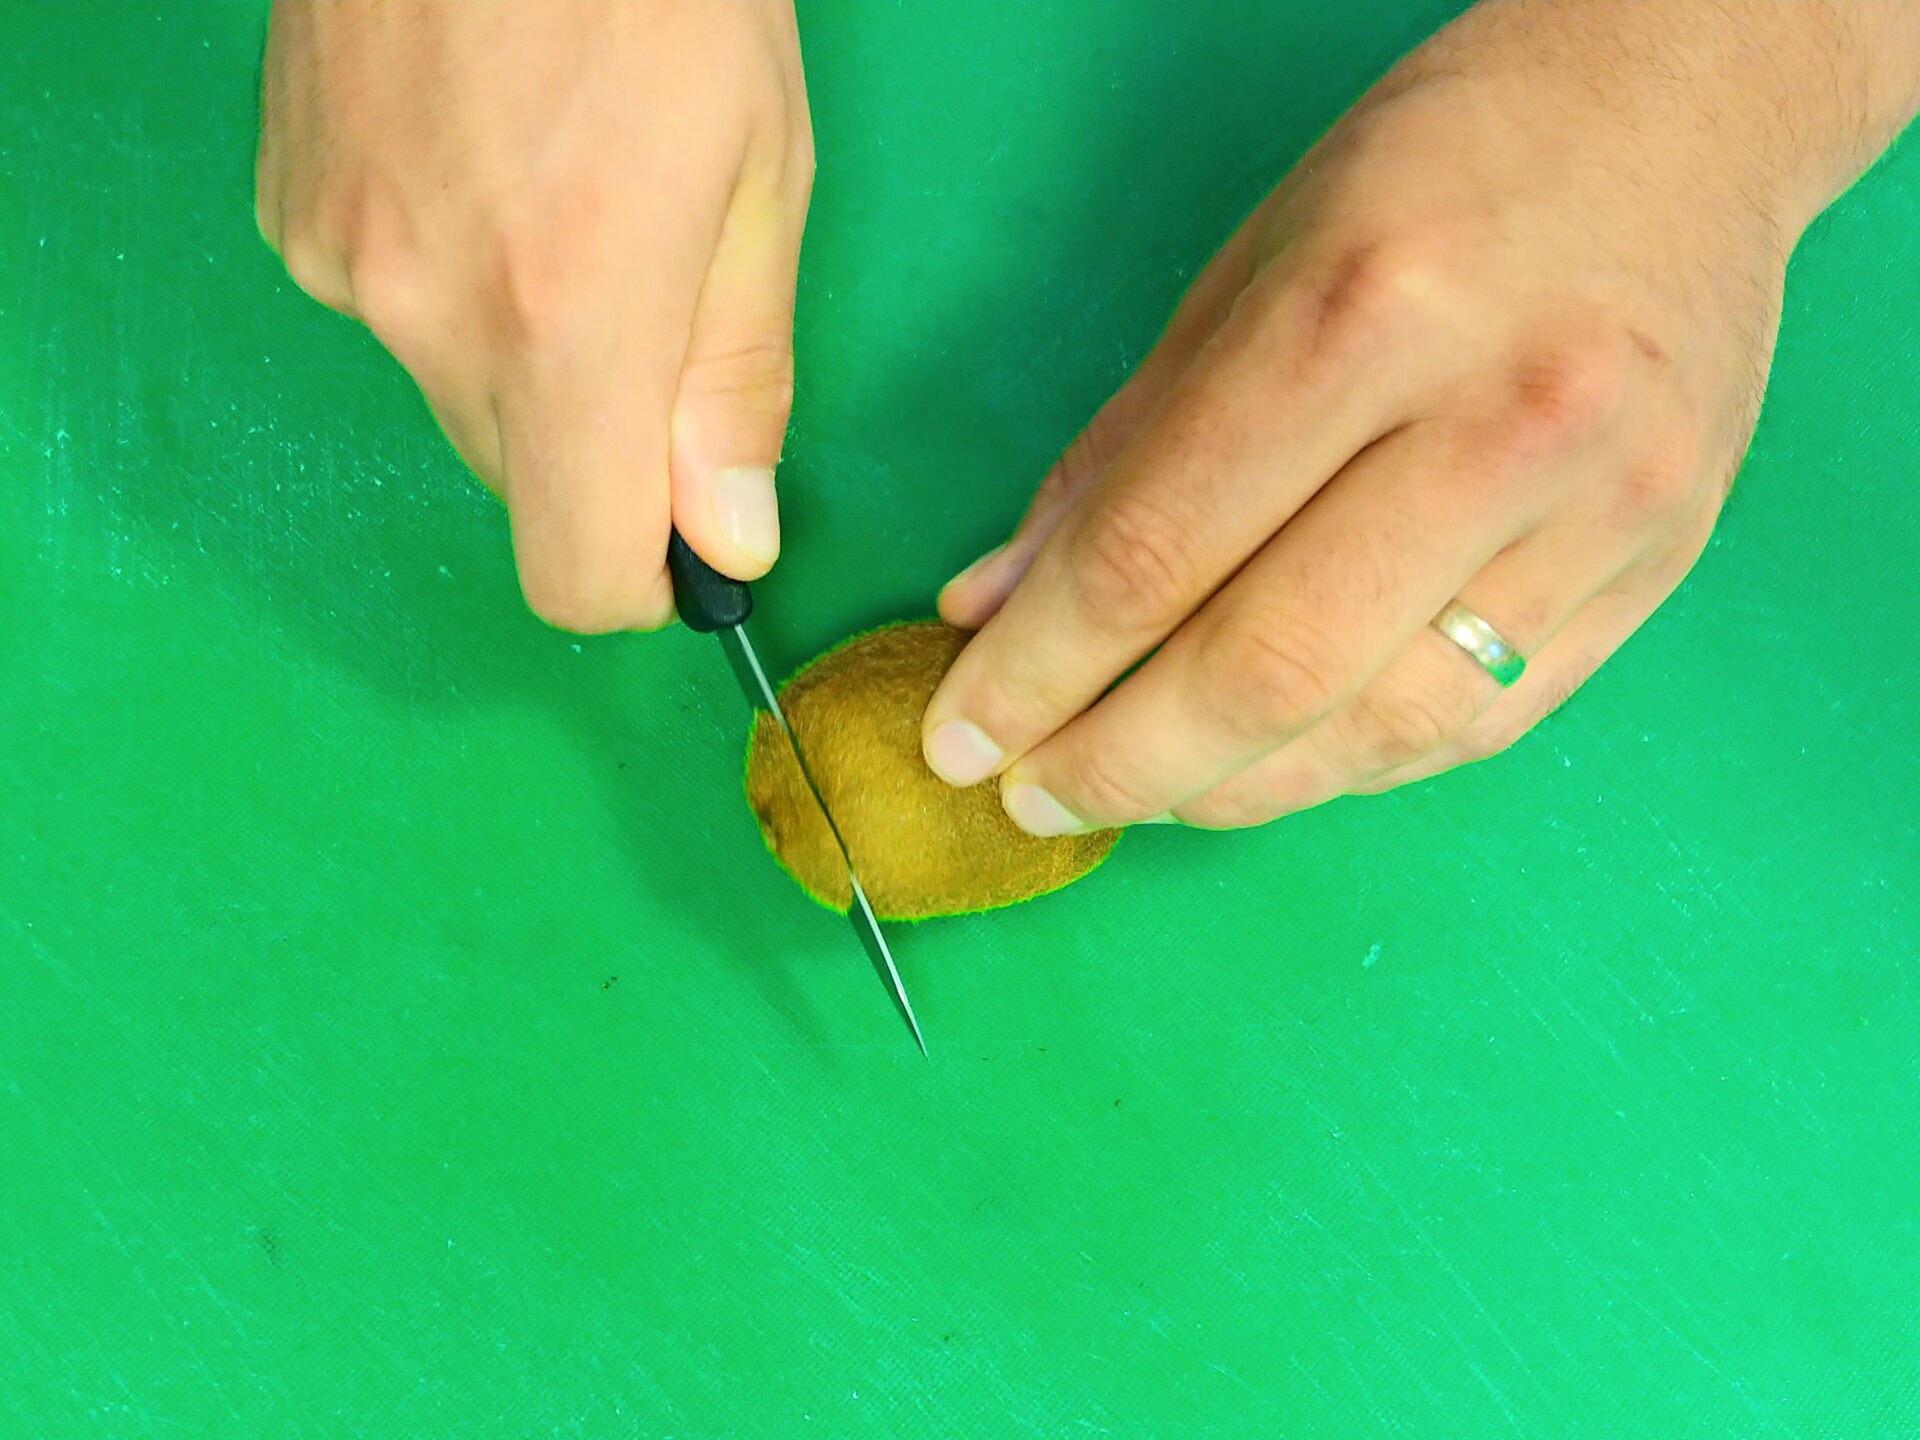
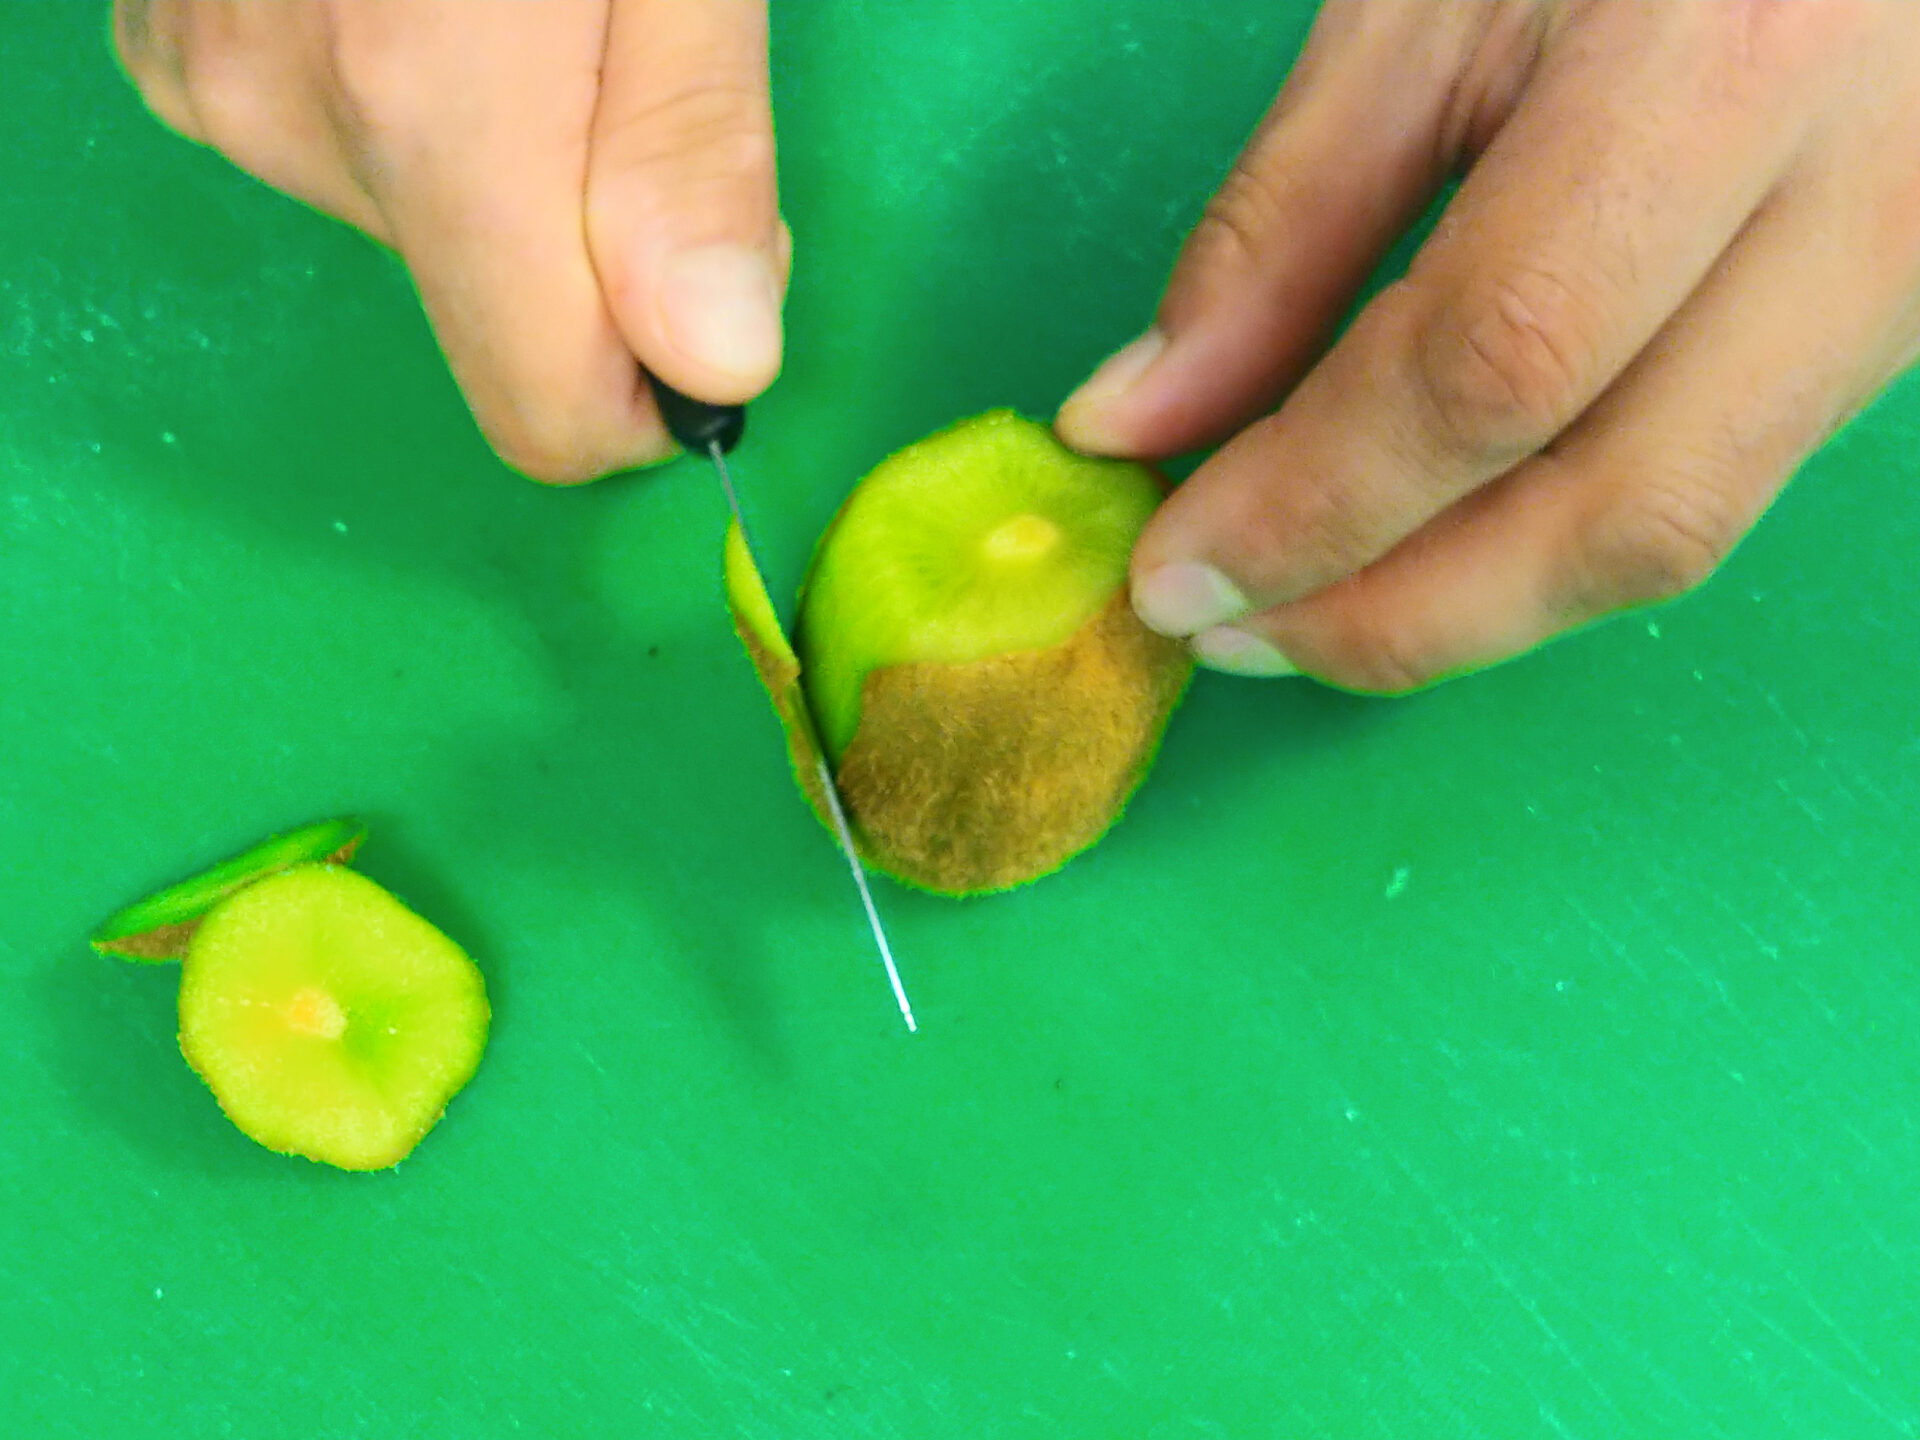
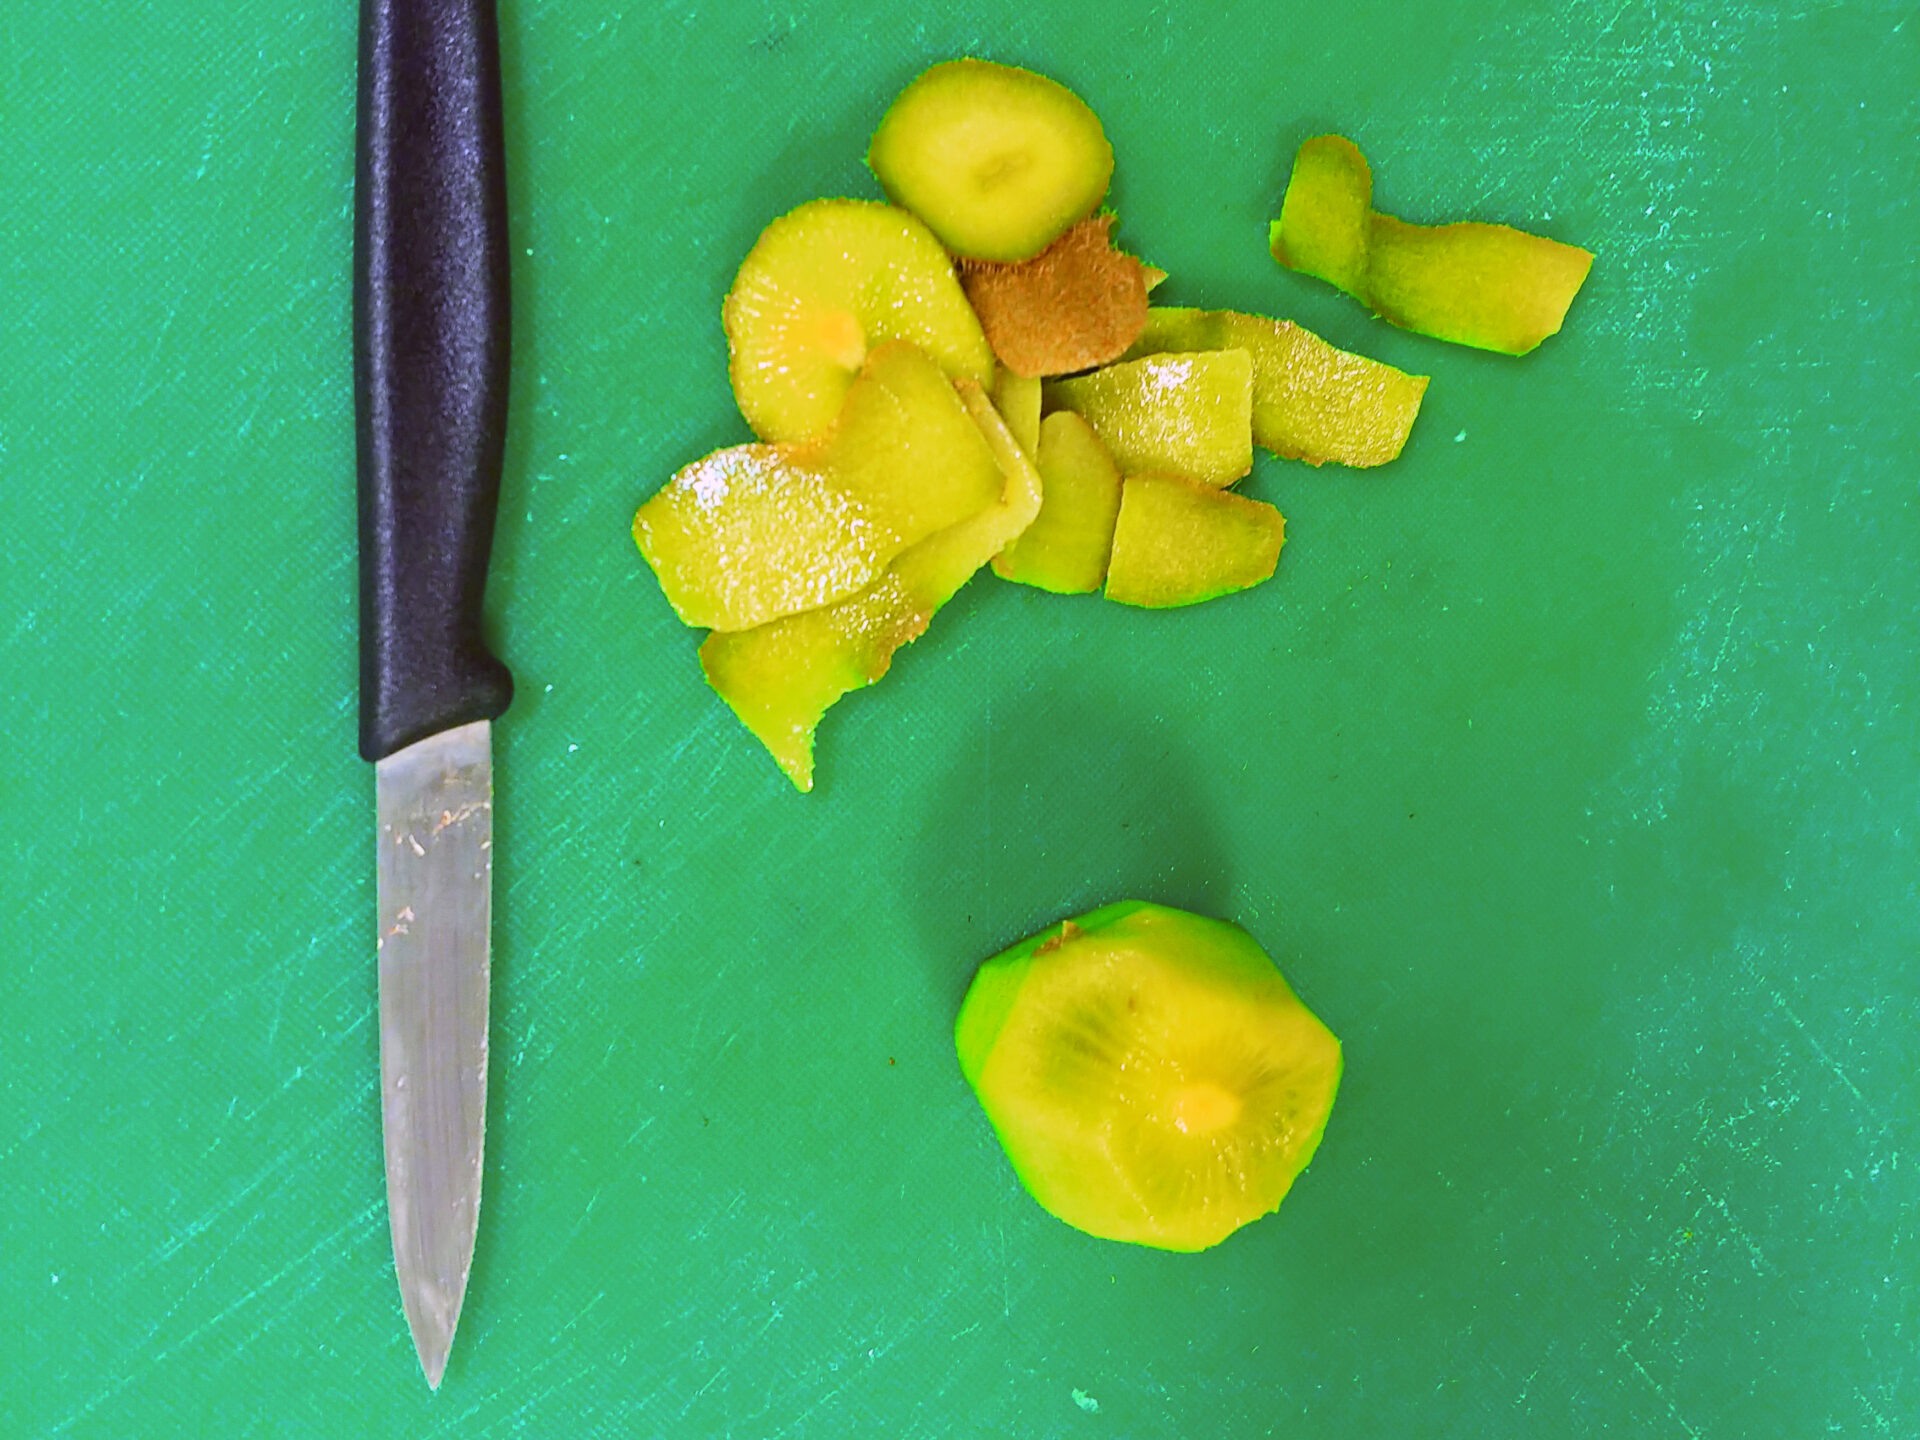
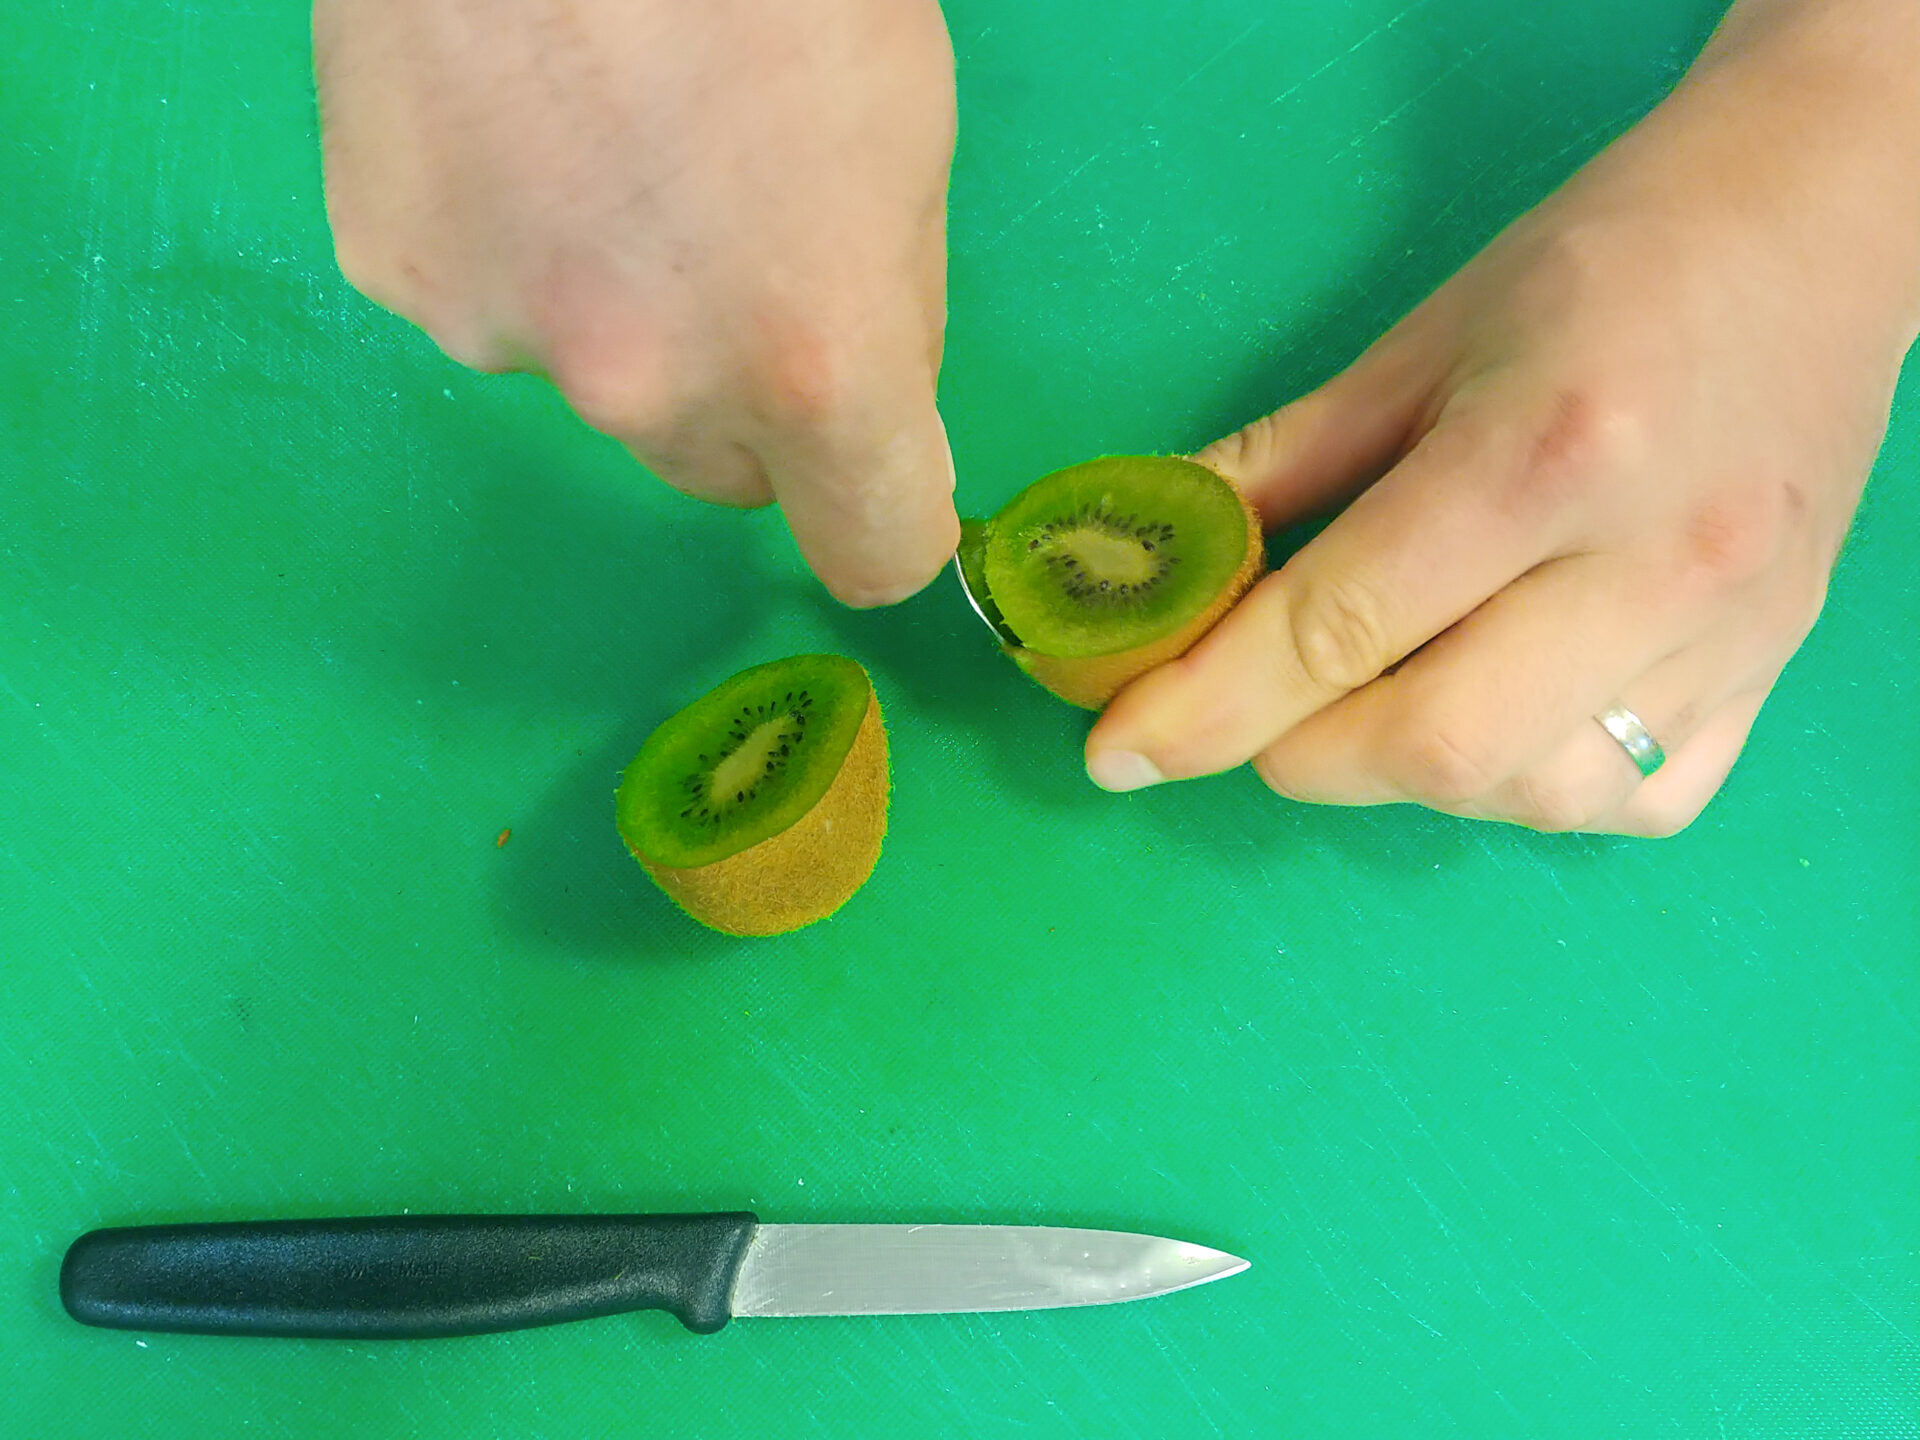
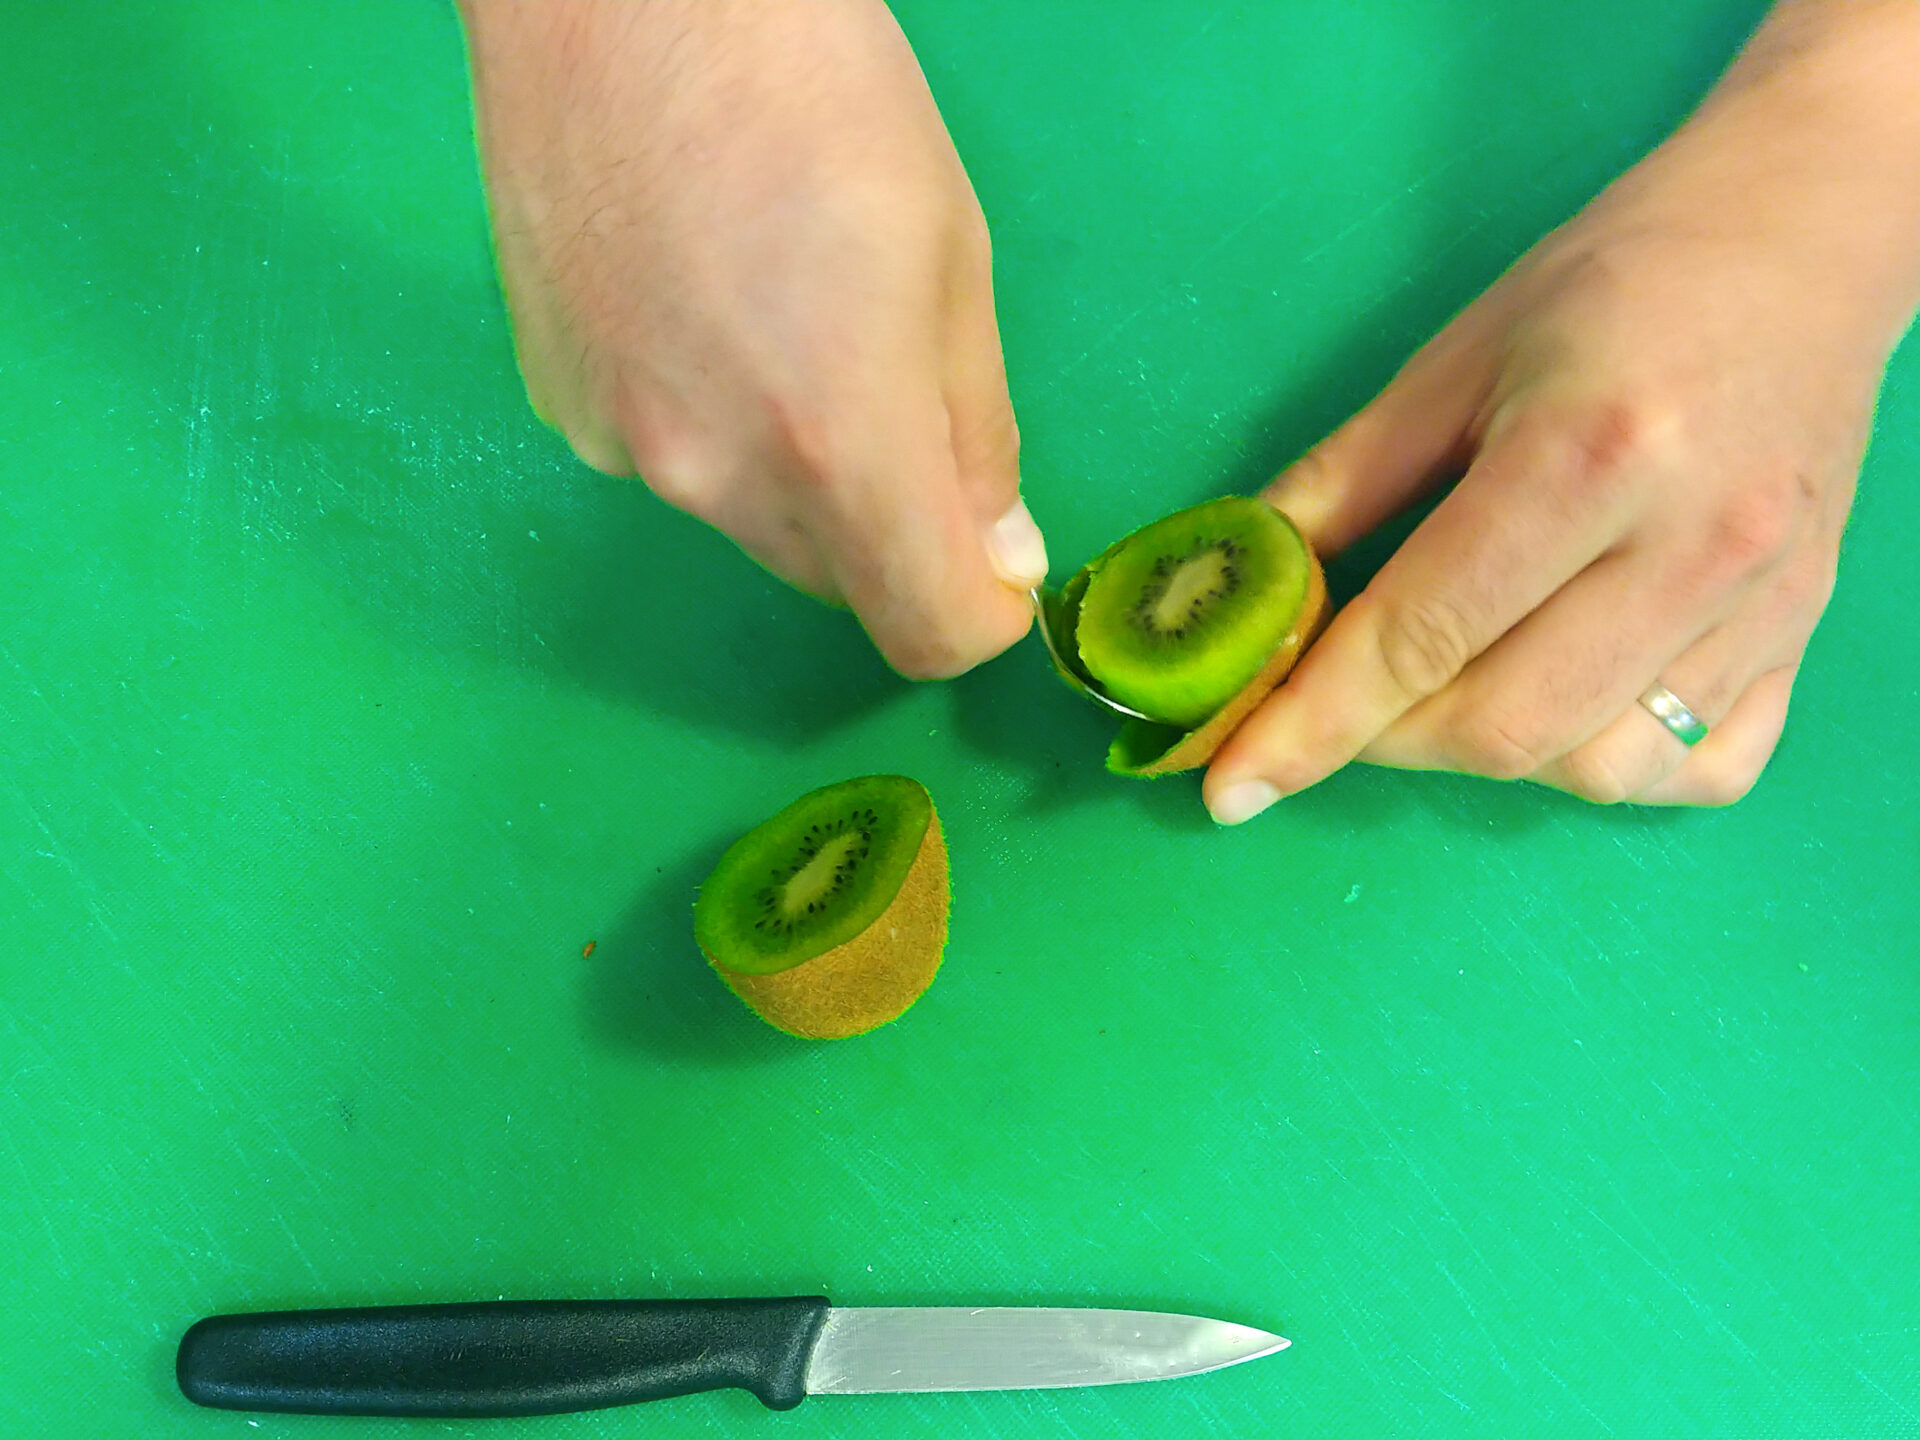
The kiwi peel is edible and very healthy since it has a concentration of the majority of the fruit’s fiber, but not everyone appreciates the fuzzy texture, so the decision of eating the whole kiwi is totally up to you.
You can peel it with a small paring knife. Cut the top and bottom off. Then, cut off the rest of the peel while the kiwi is standing (part by part). Then, slice it or dice it. An egg cutter will cut it into equal slices.
If you have your kiwi for a quick snack, it is easiest to simply cut the kiwi into halves and dig out the flesh.
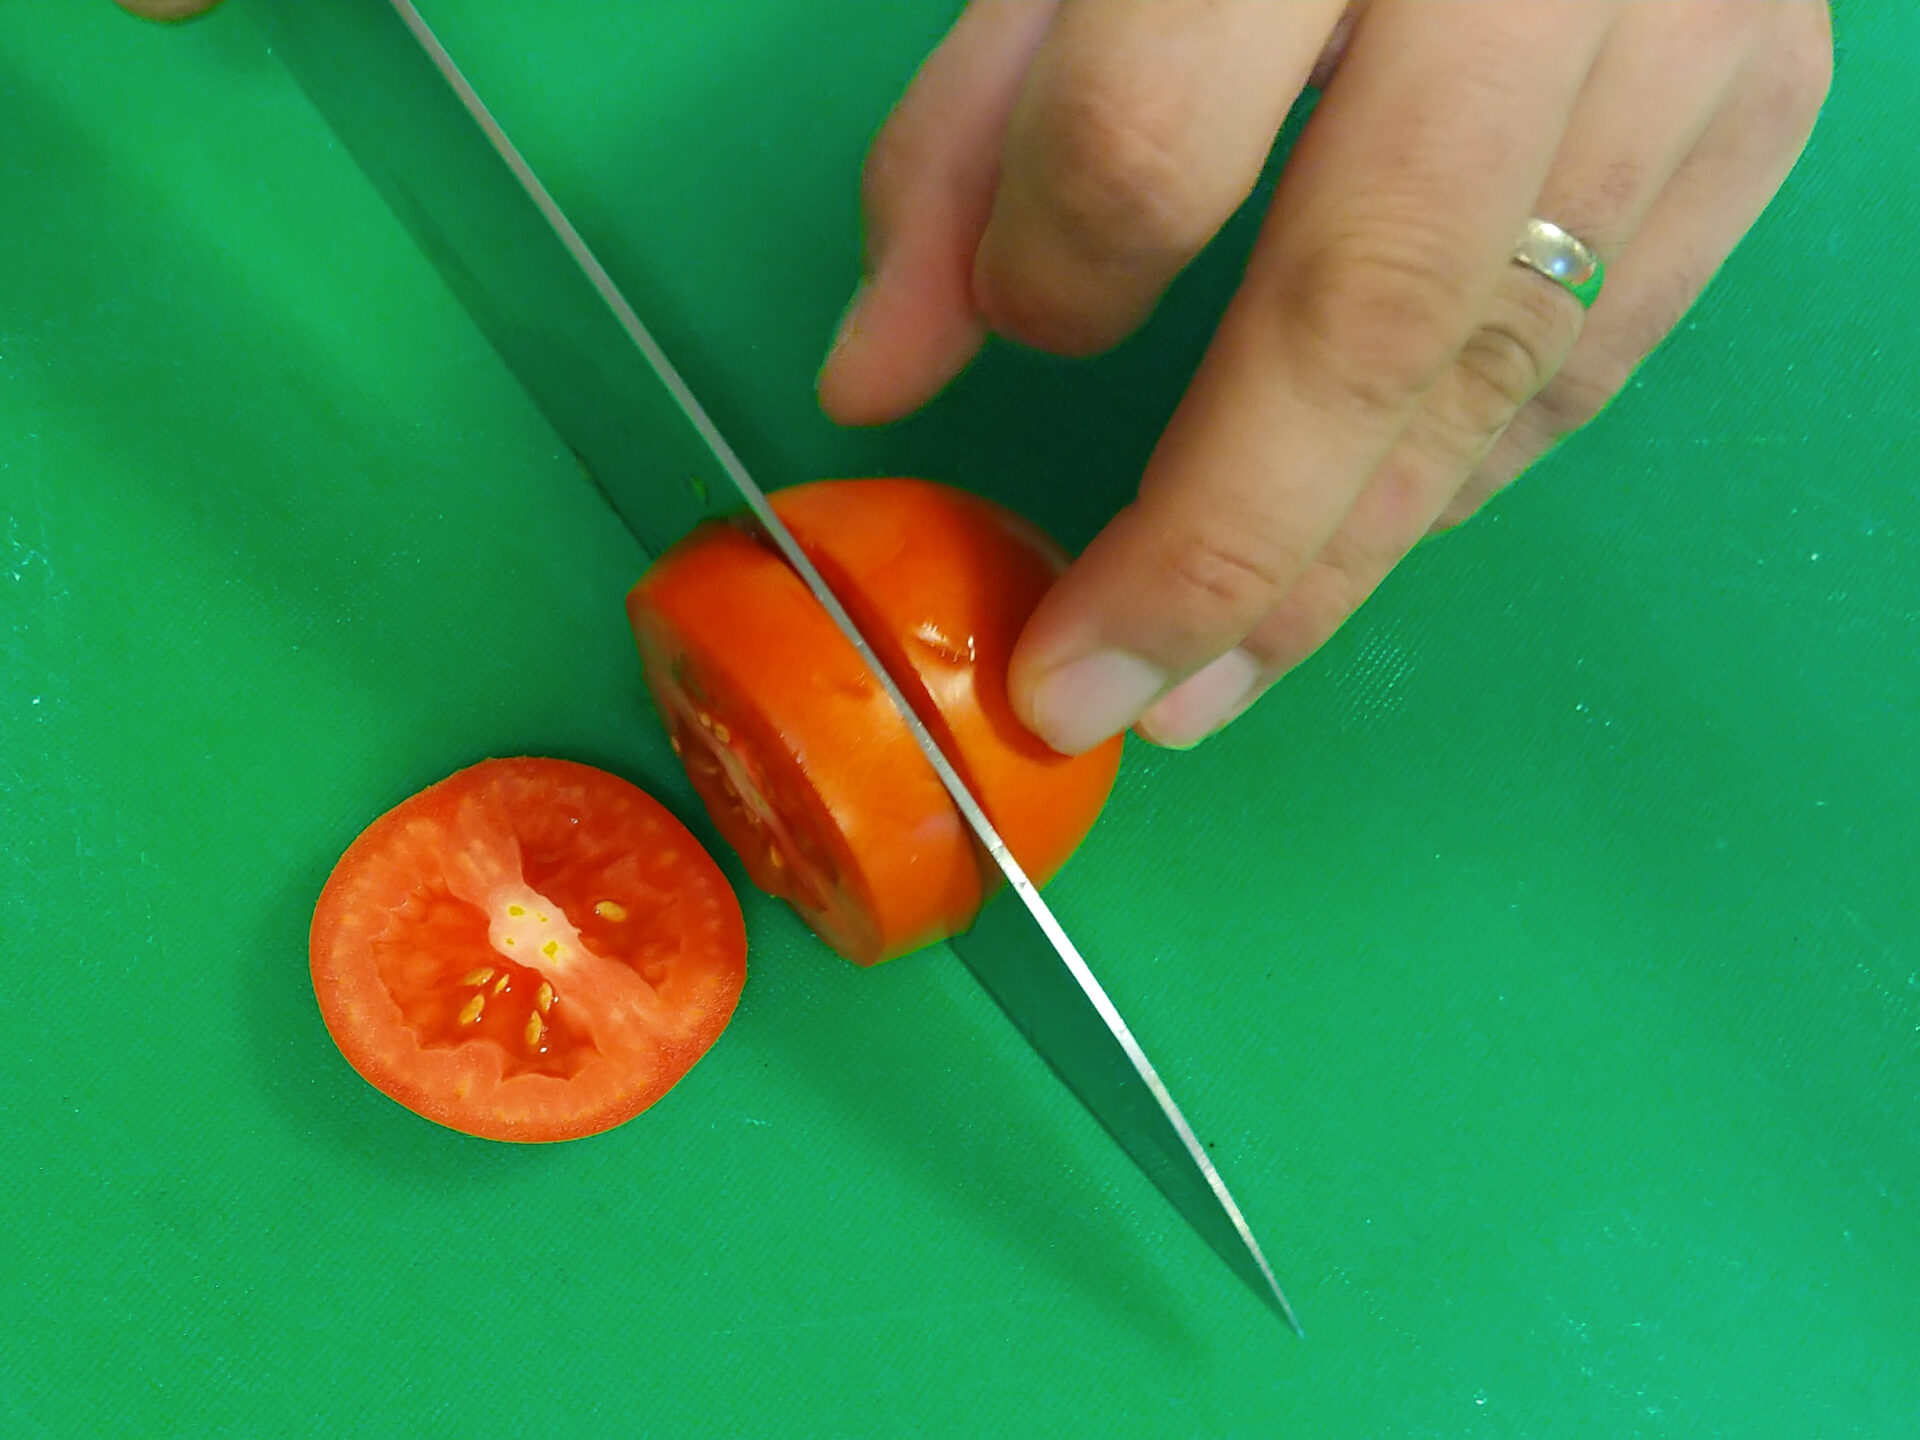
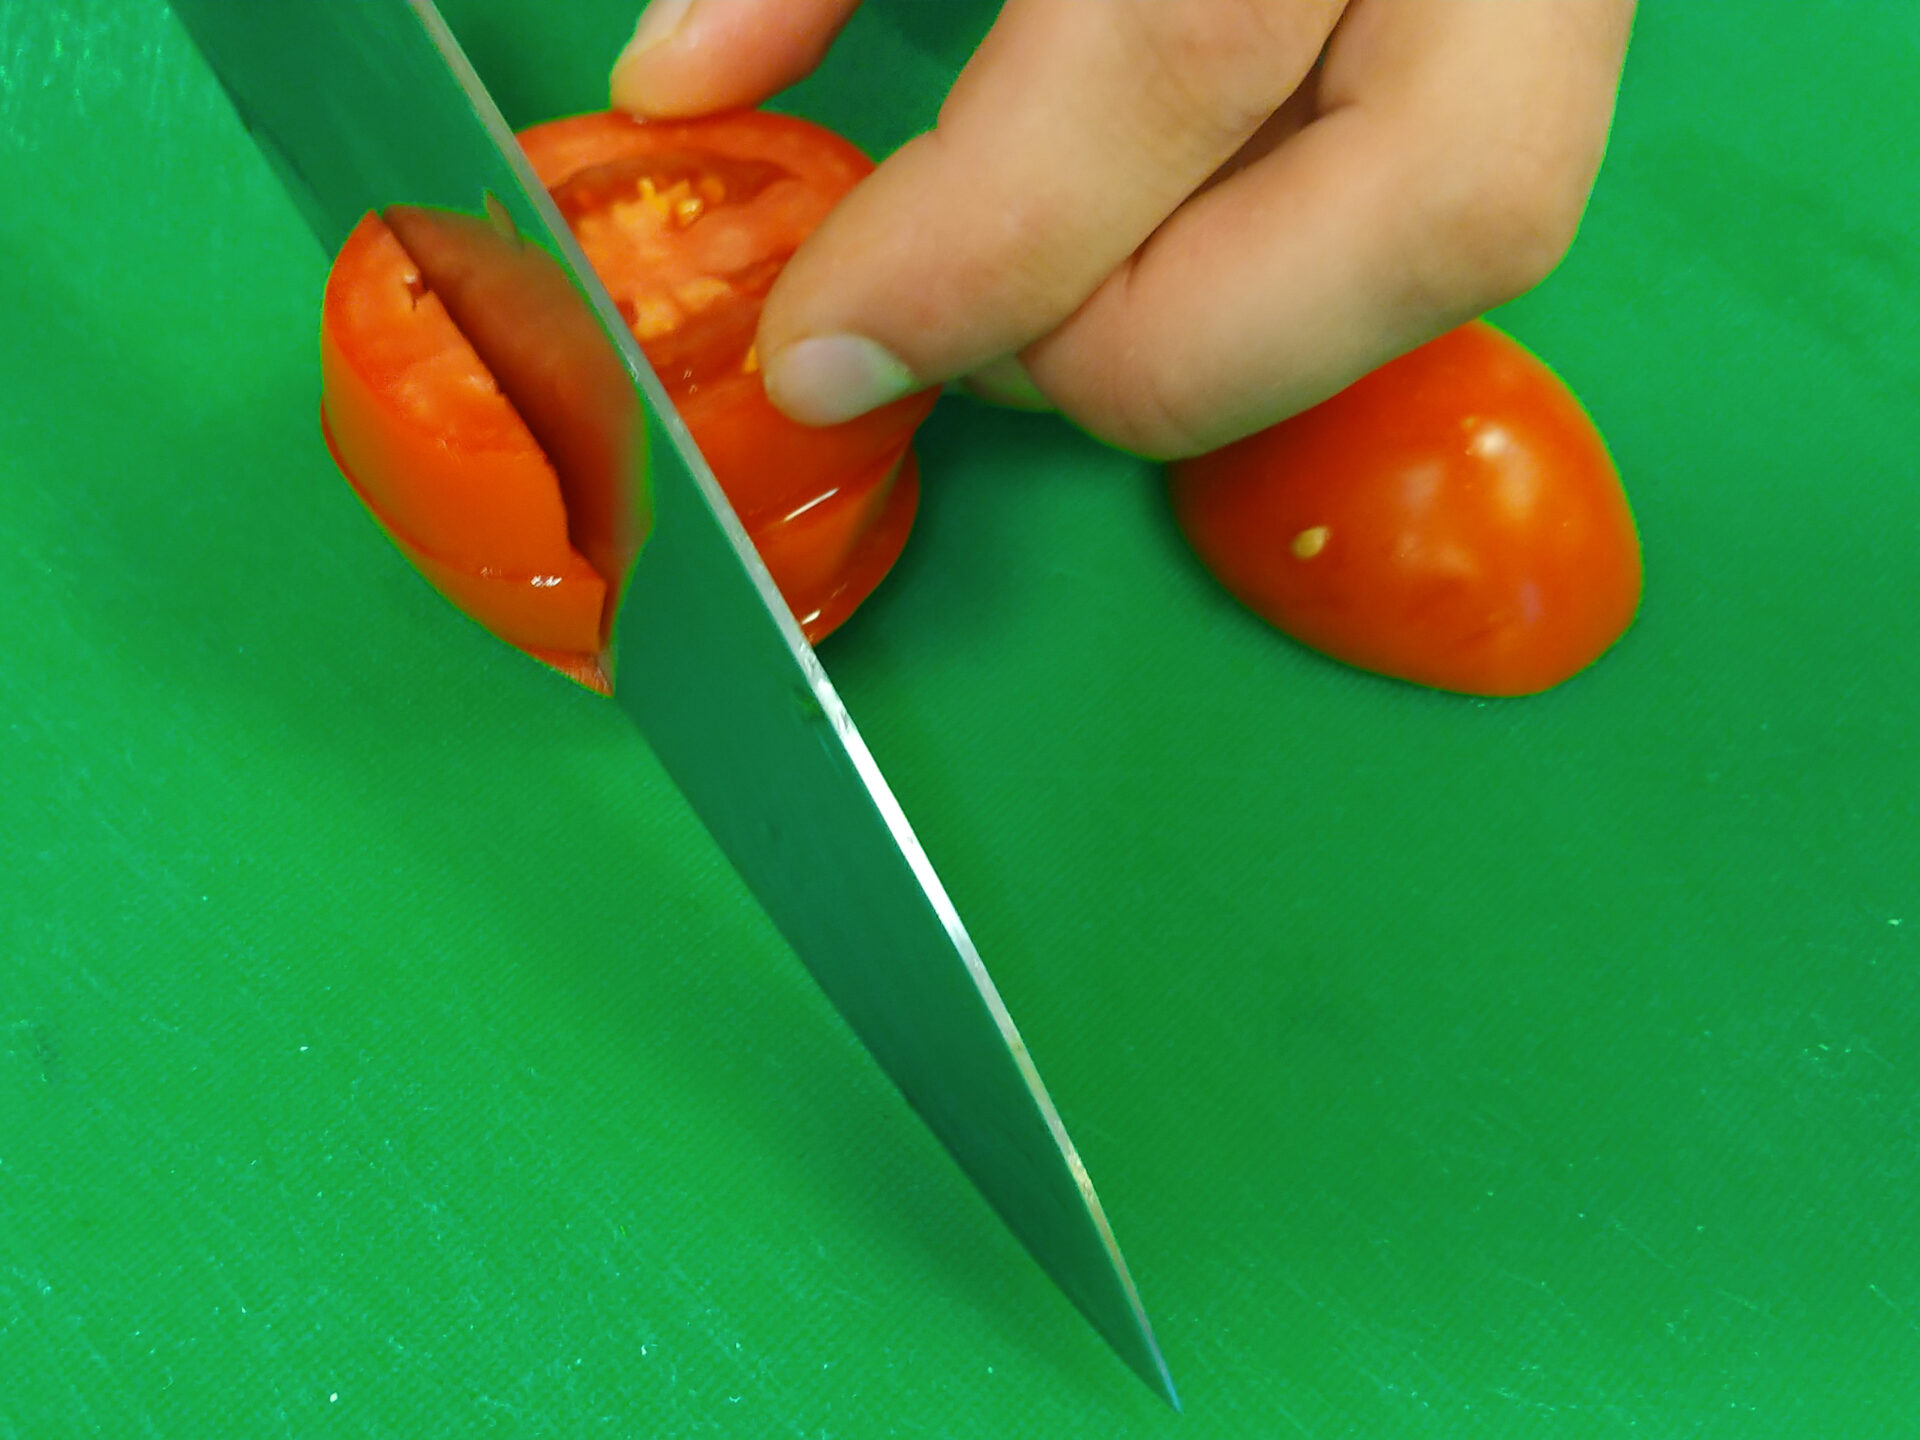
Tomatoes are optional to peel and if so, it is only for cooking purposes (not for salads). The easiest way is to perform a crosscut on the bottom and cut off the part after the stem. Then blanch them in boiling water for about 30 seconds. Place them into ice water to cool (about 1 – 2 minutes) and then simply peel them by hand.
If you decide not to peel them, just simply remove the center core by simply running a paring knife around at a 90°angle.
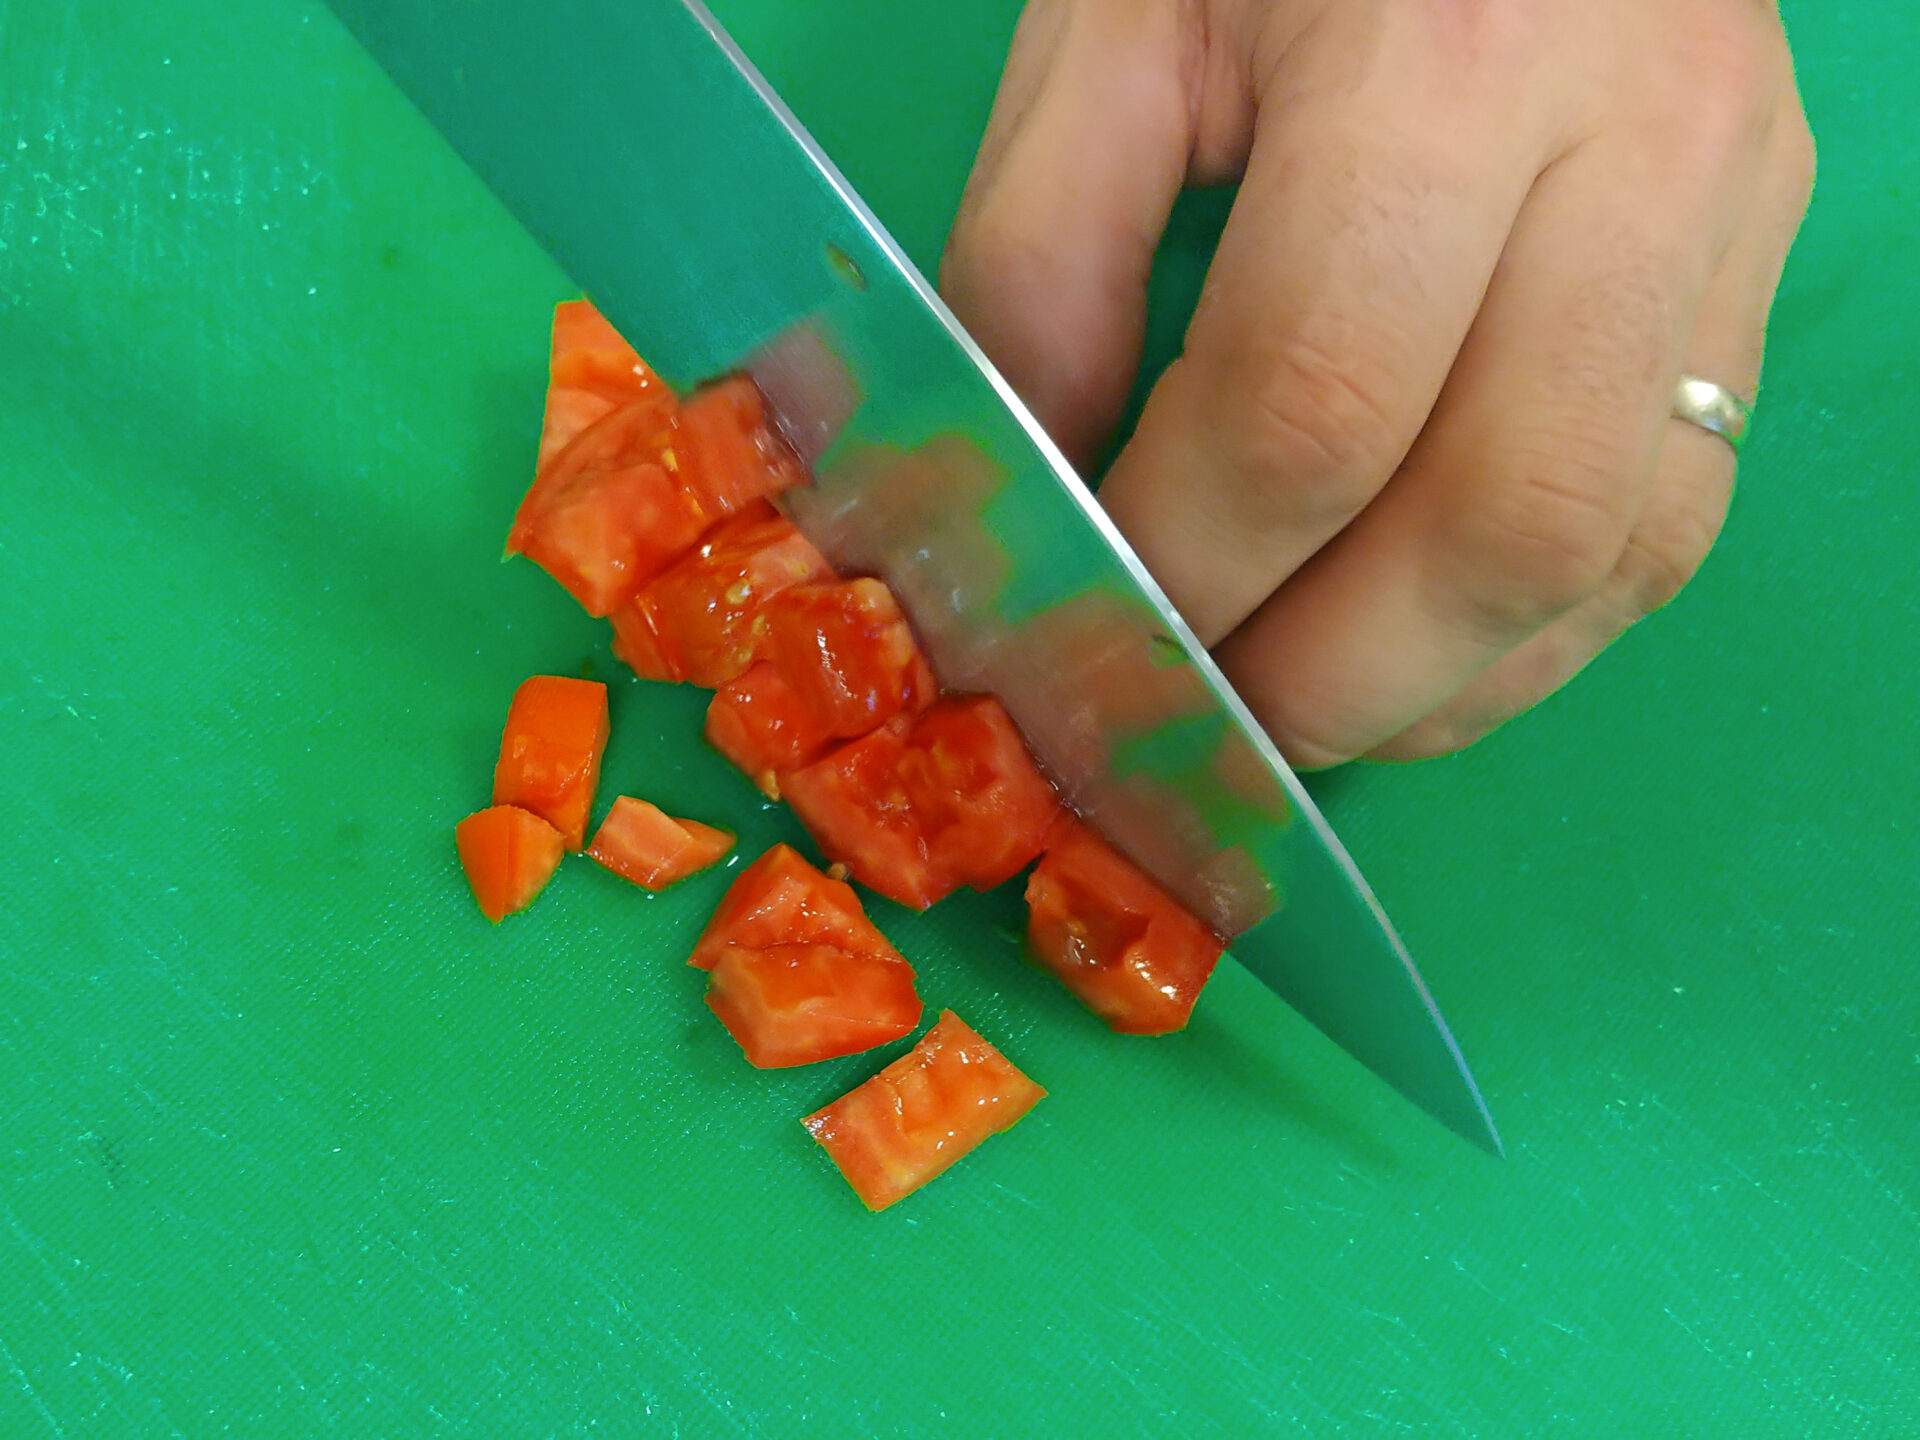
Then with a chef’s knife:
Cut into halves (through the area after the stem part), and then carefully cut each half into sections.
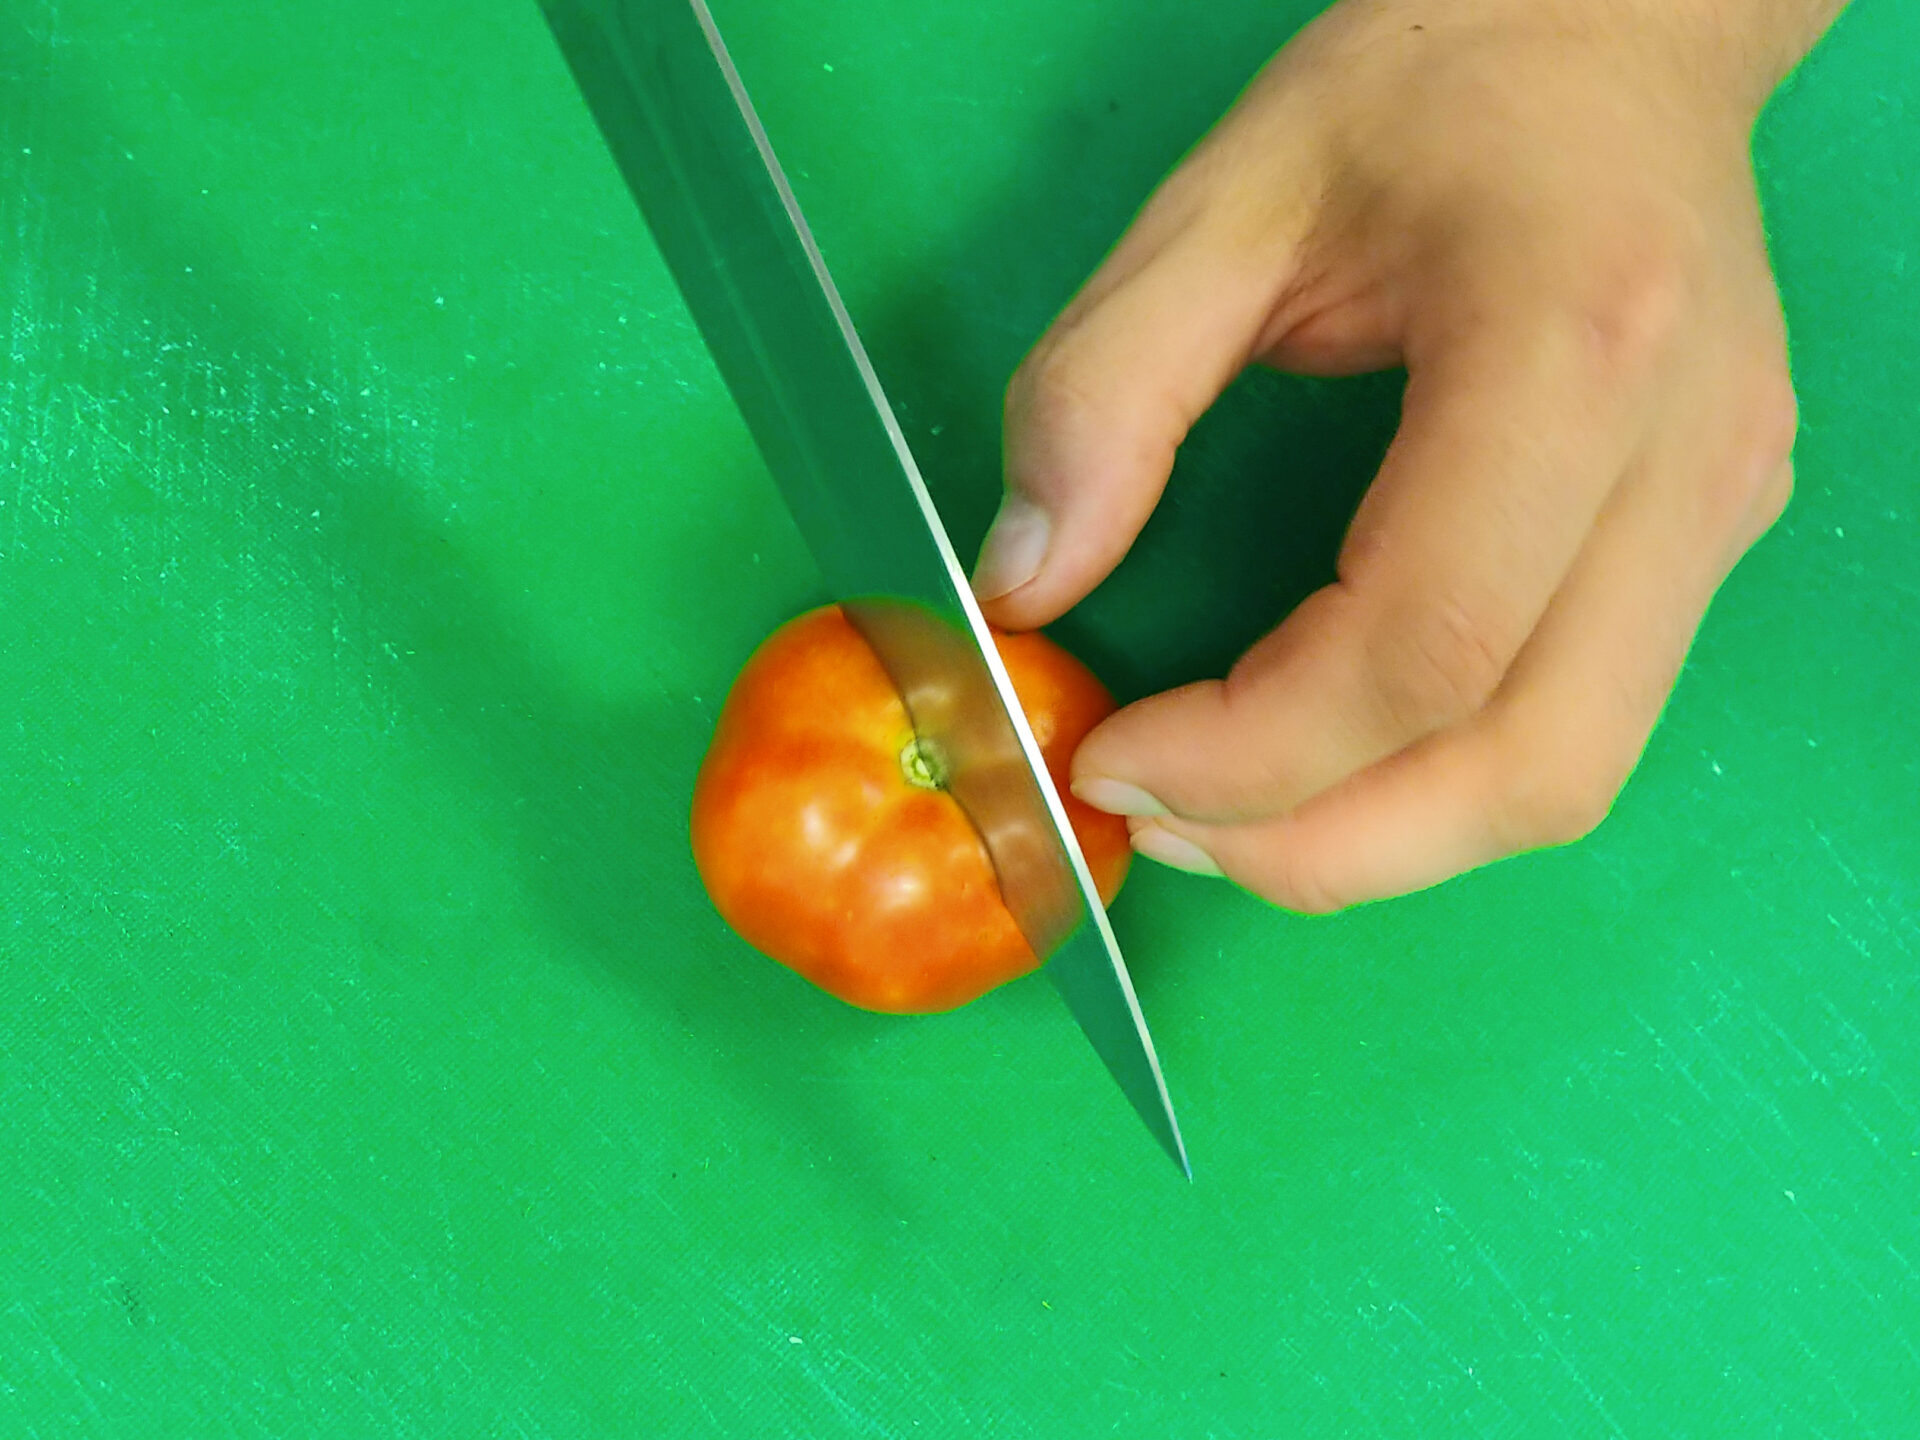
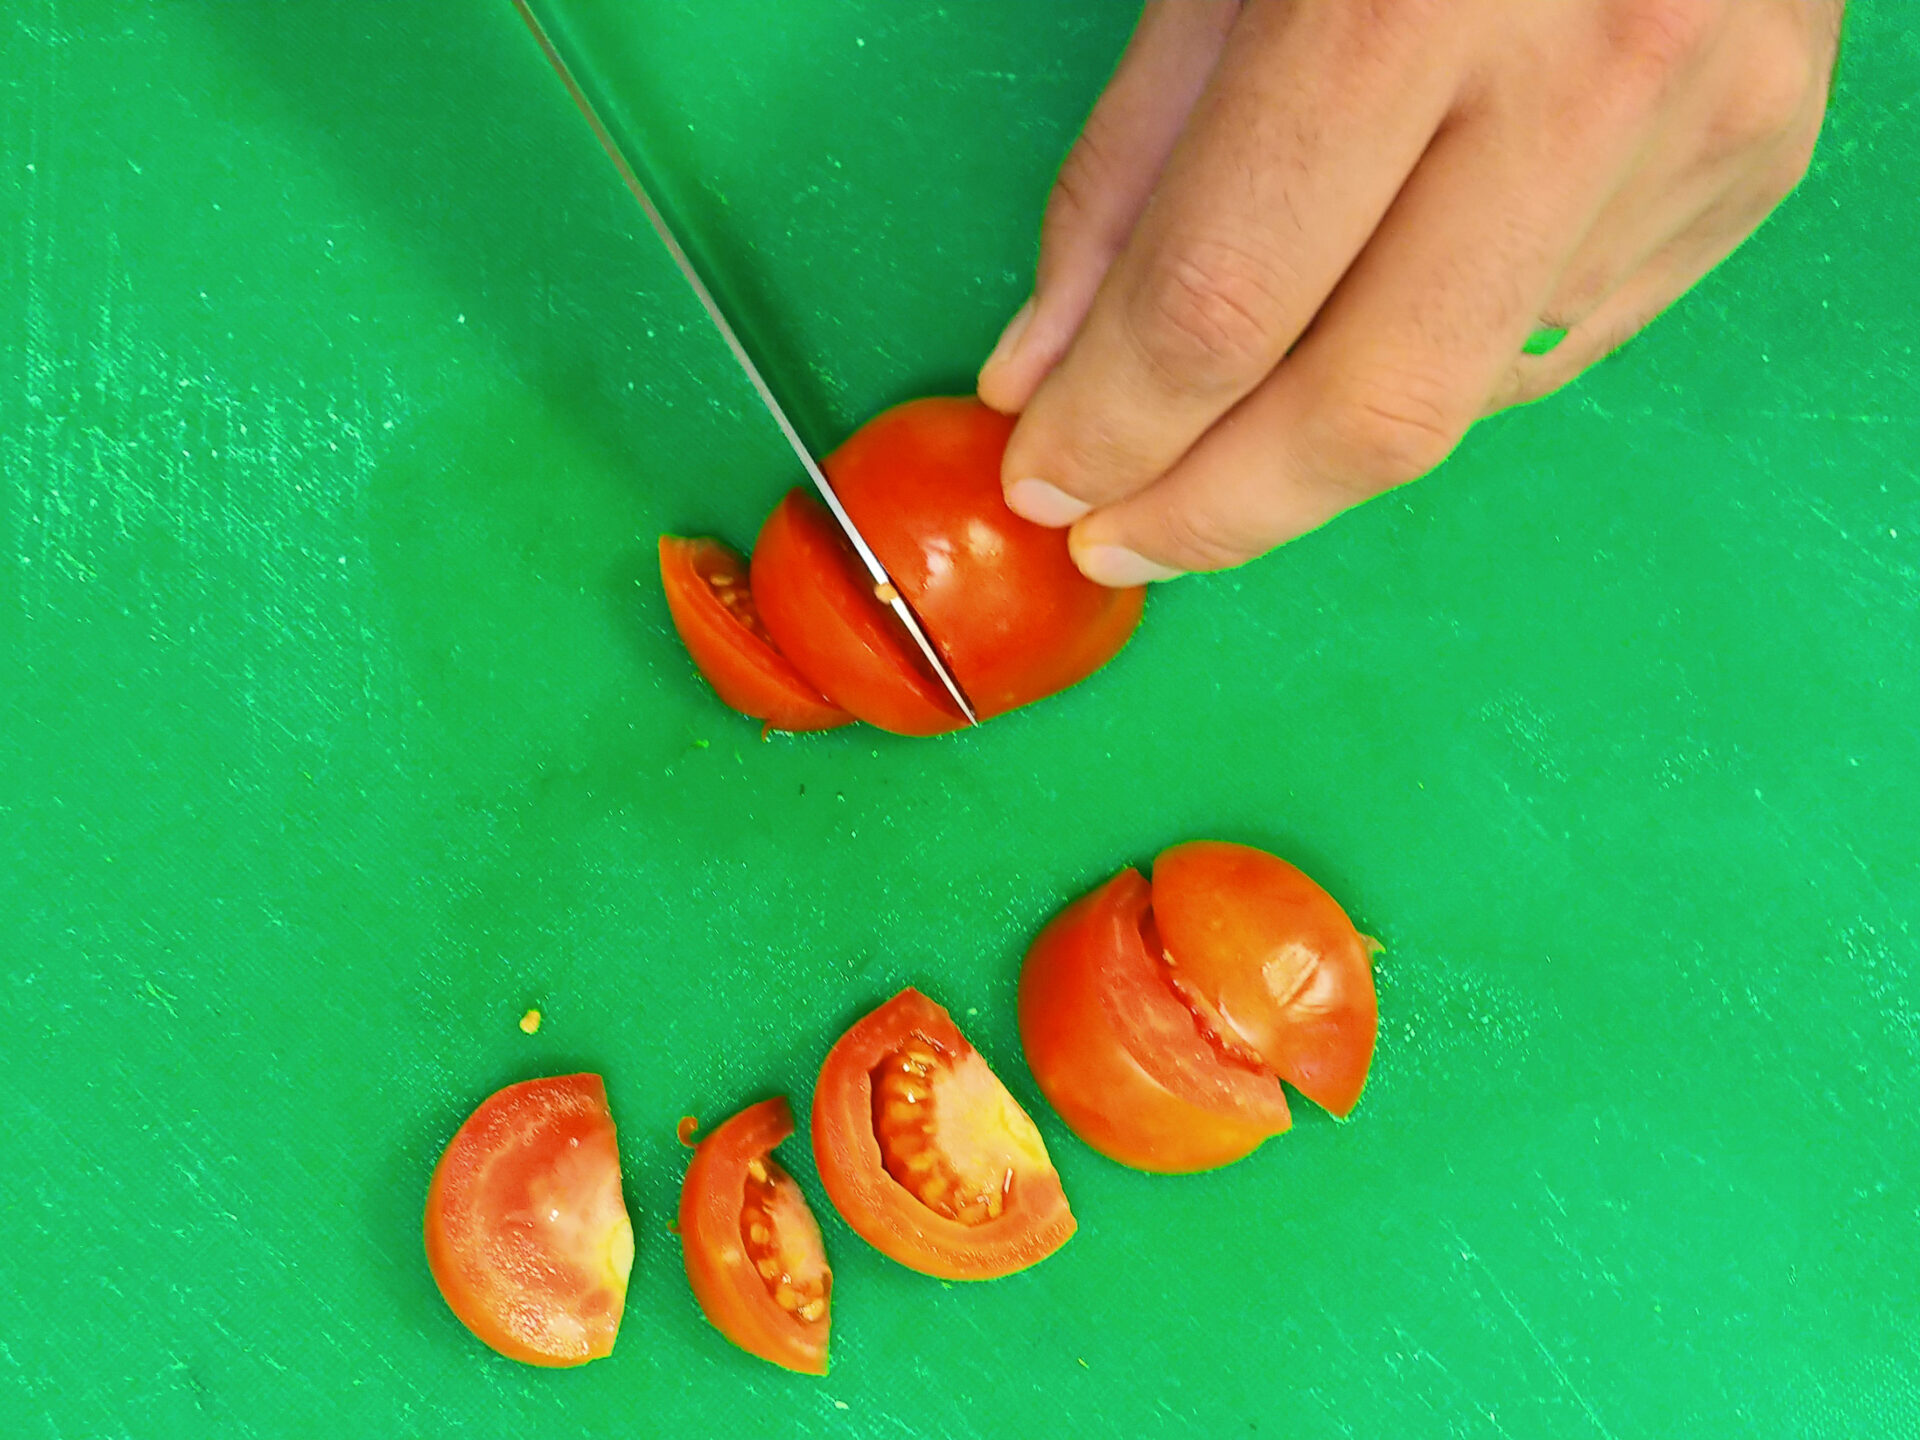
Or, cut horizontally for slices.
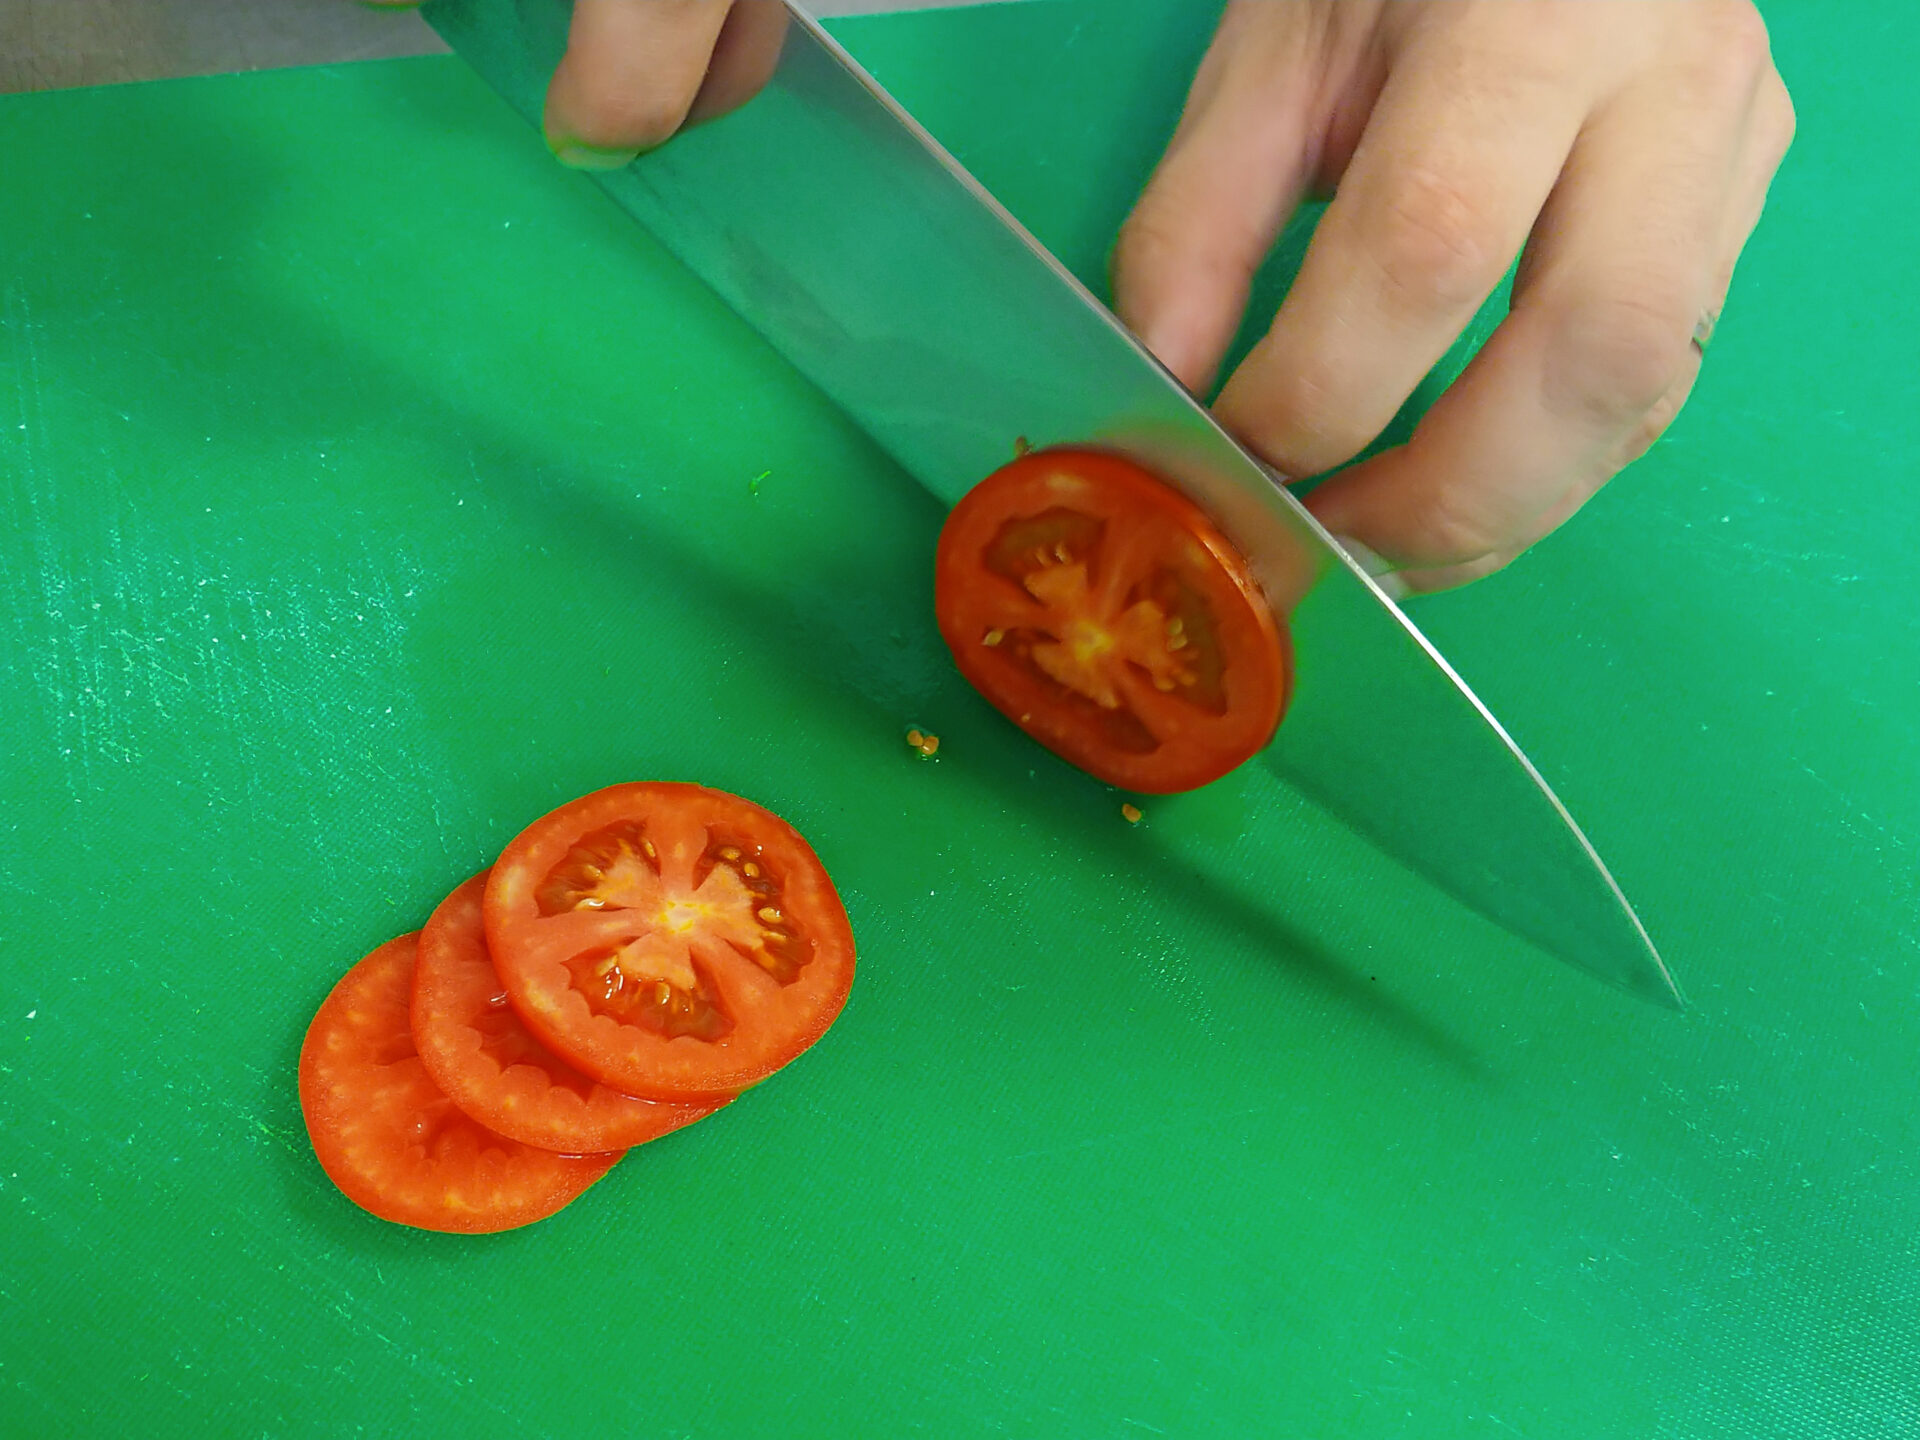
Slices (if about ½” thick) can be further cut to reach perfect dices.
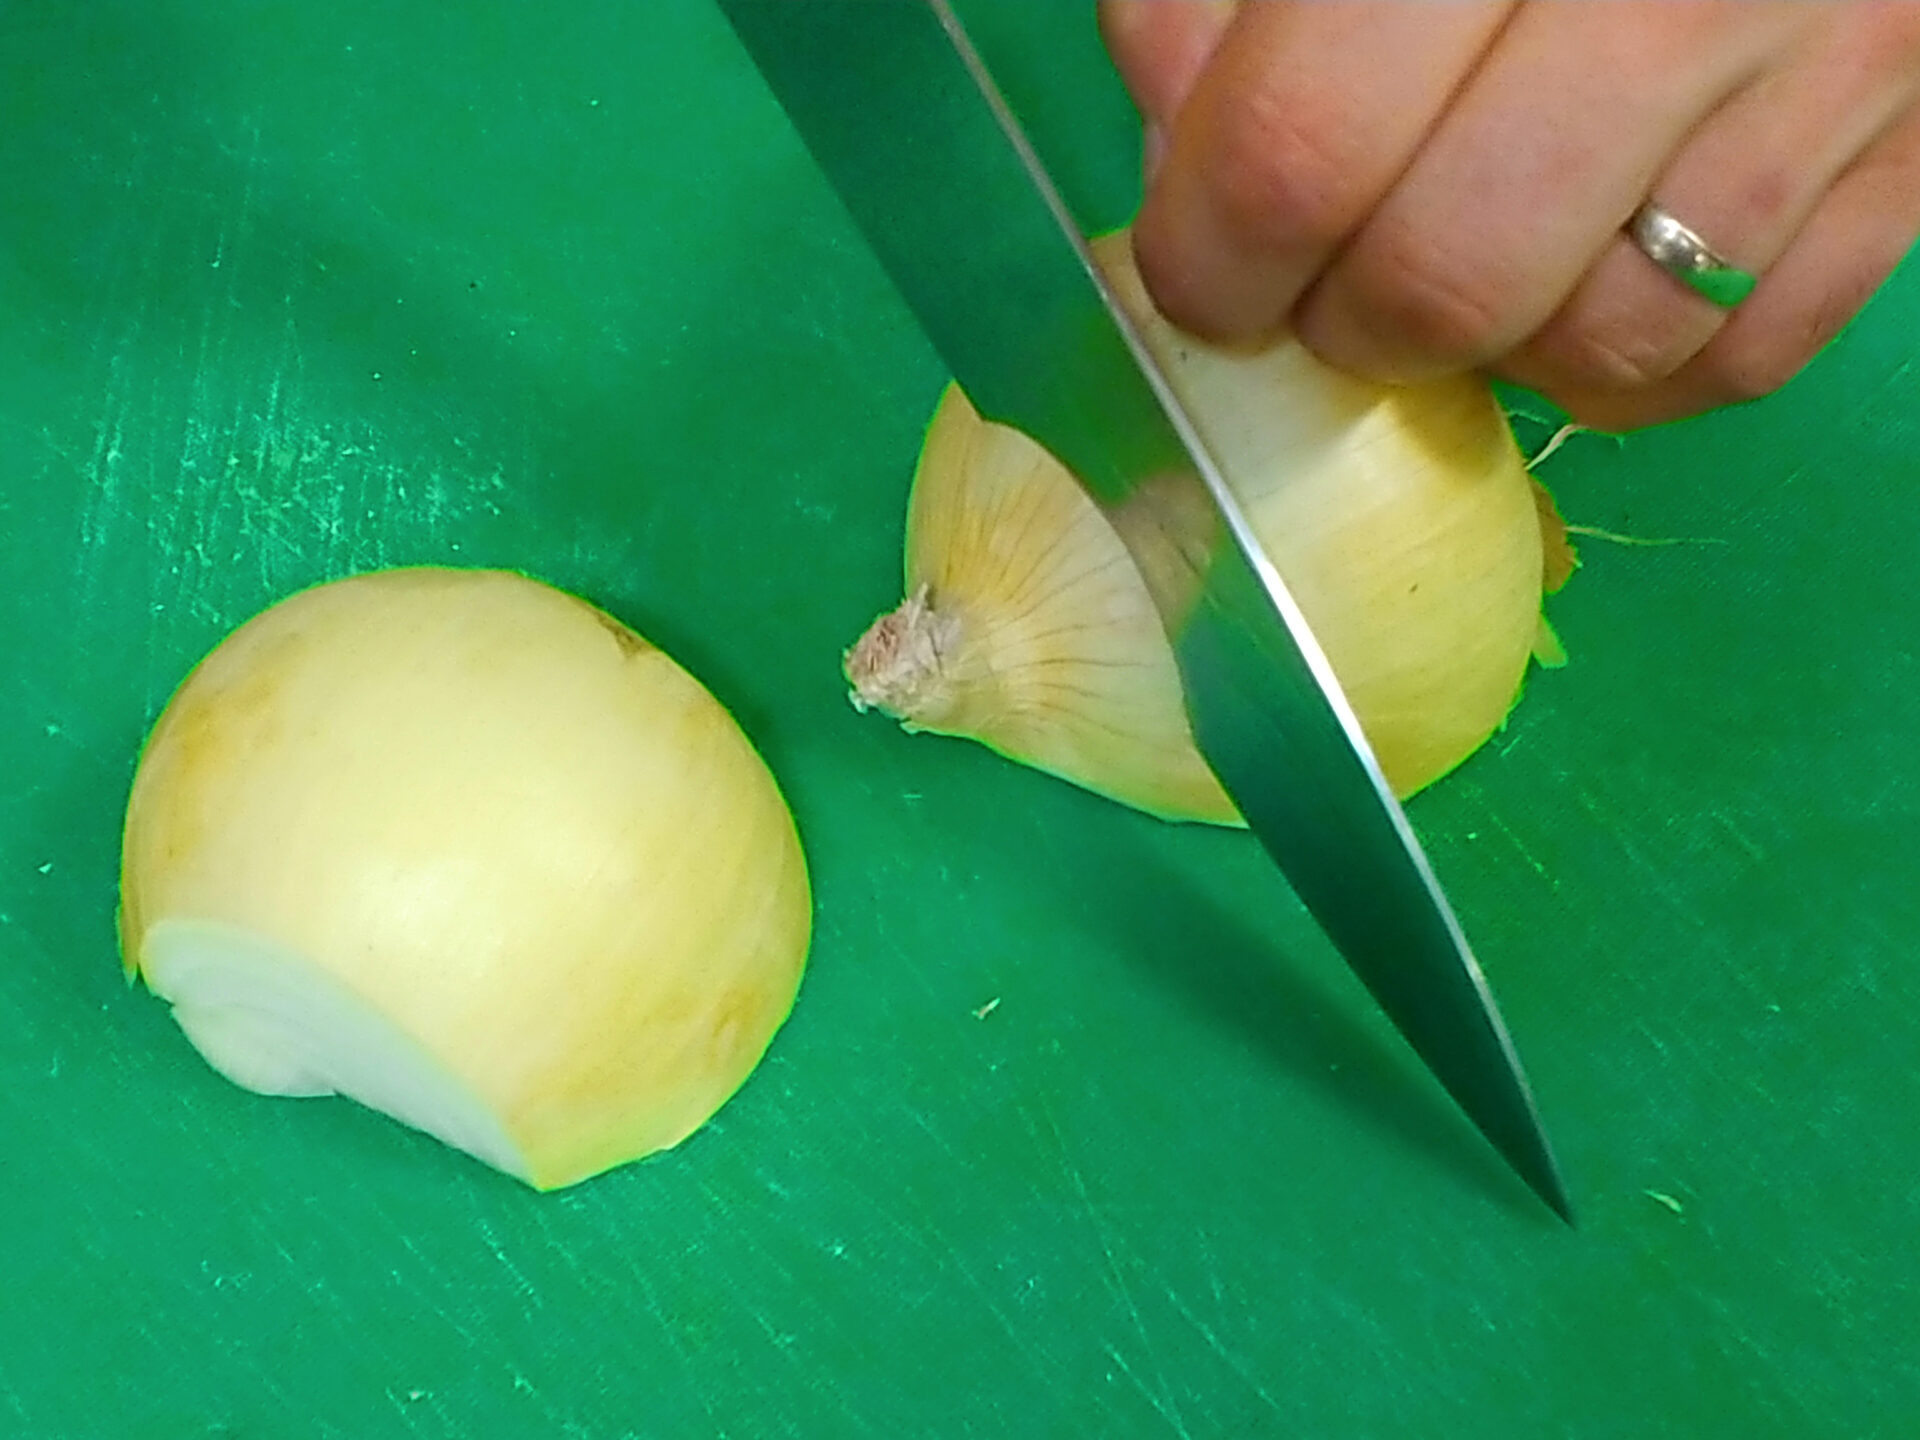
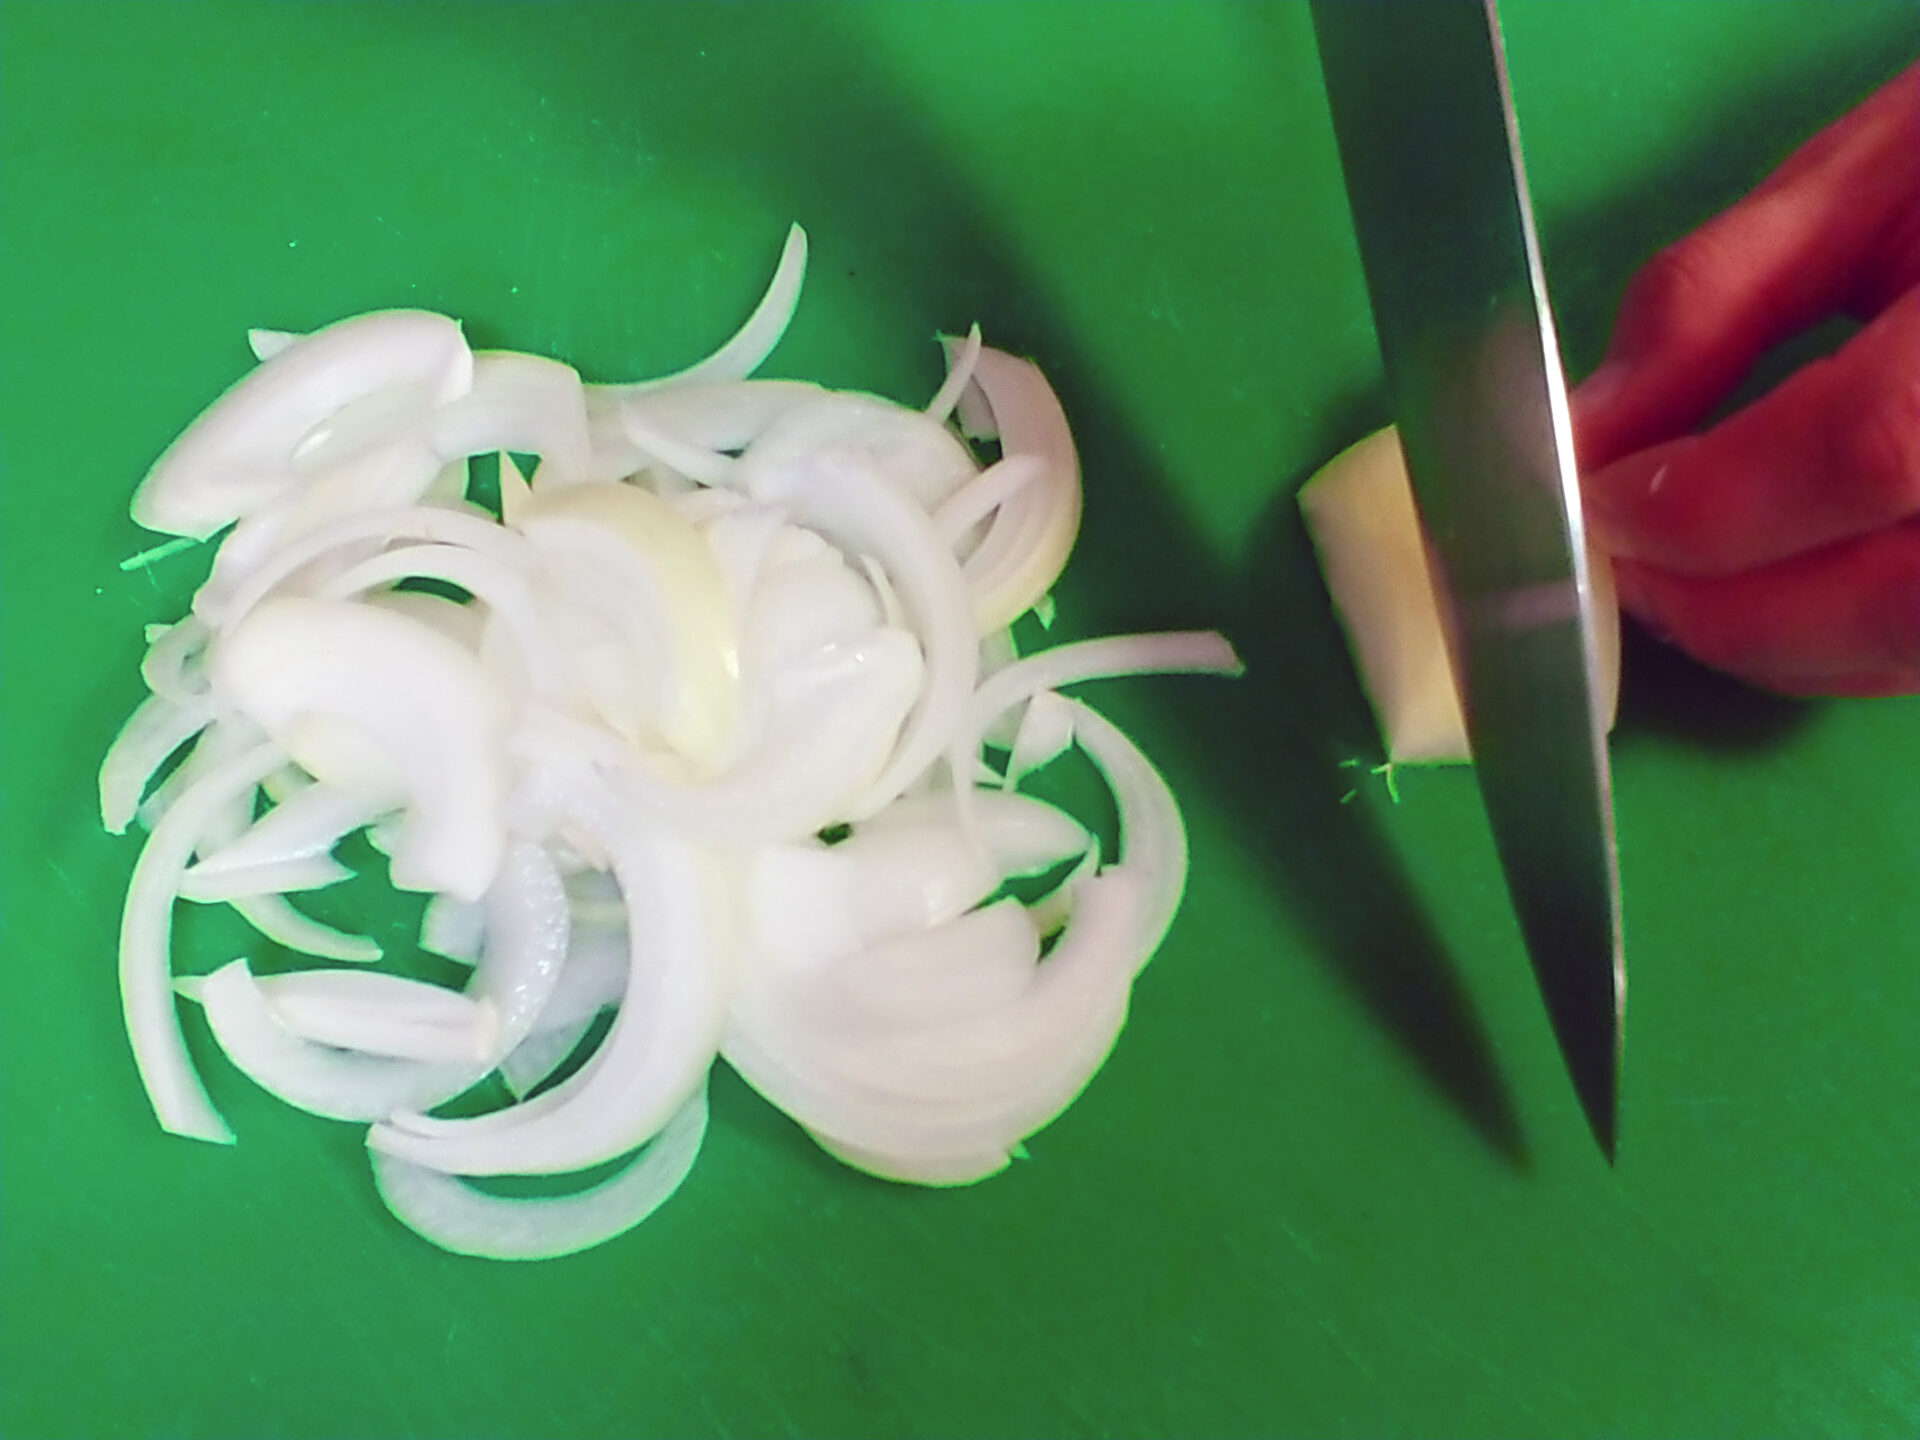
Onions and shallots are one of those vegetables that don’t need to be rinsed.
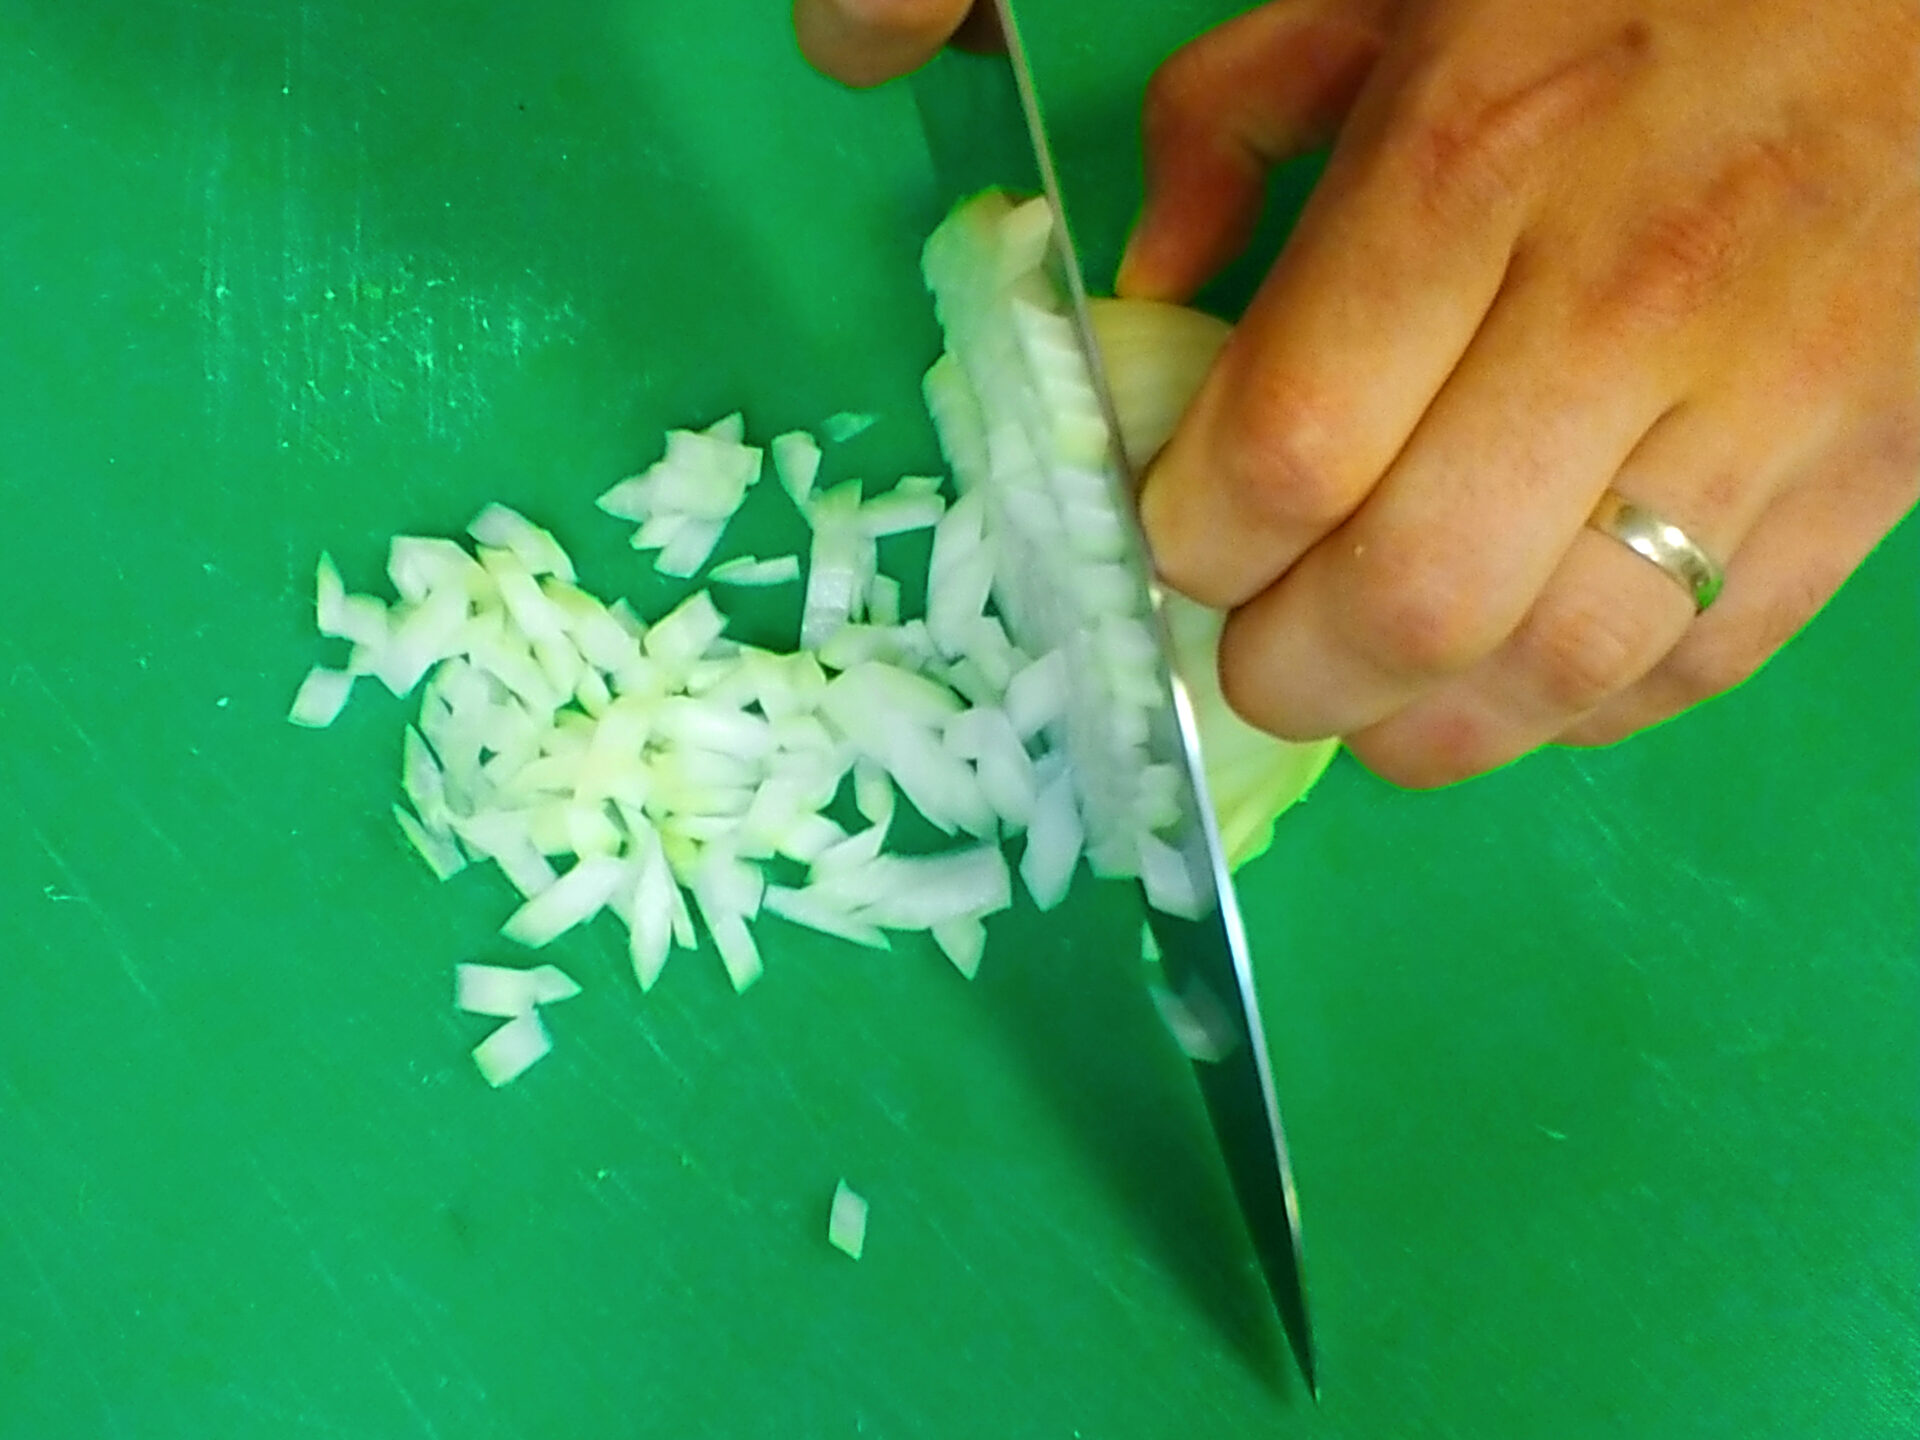
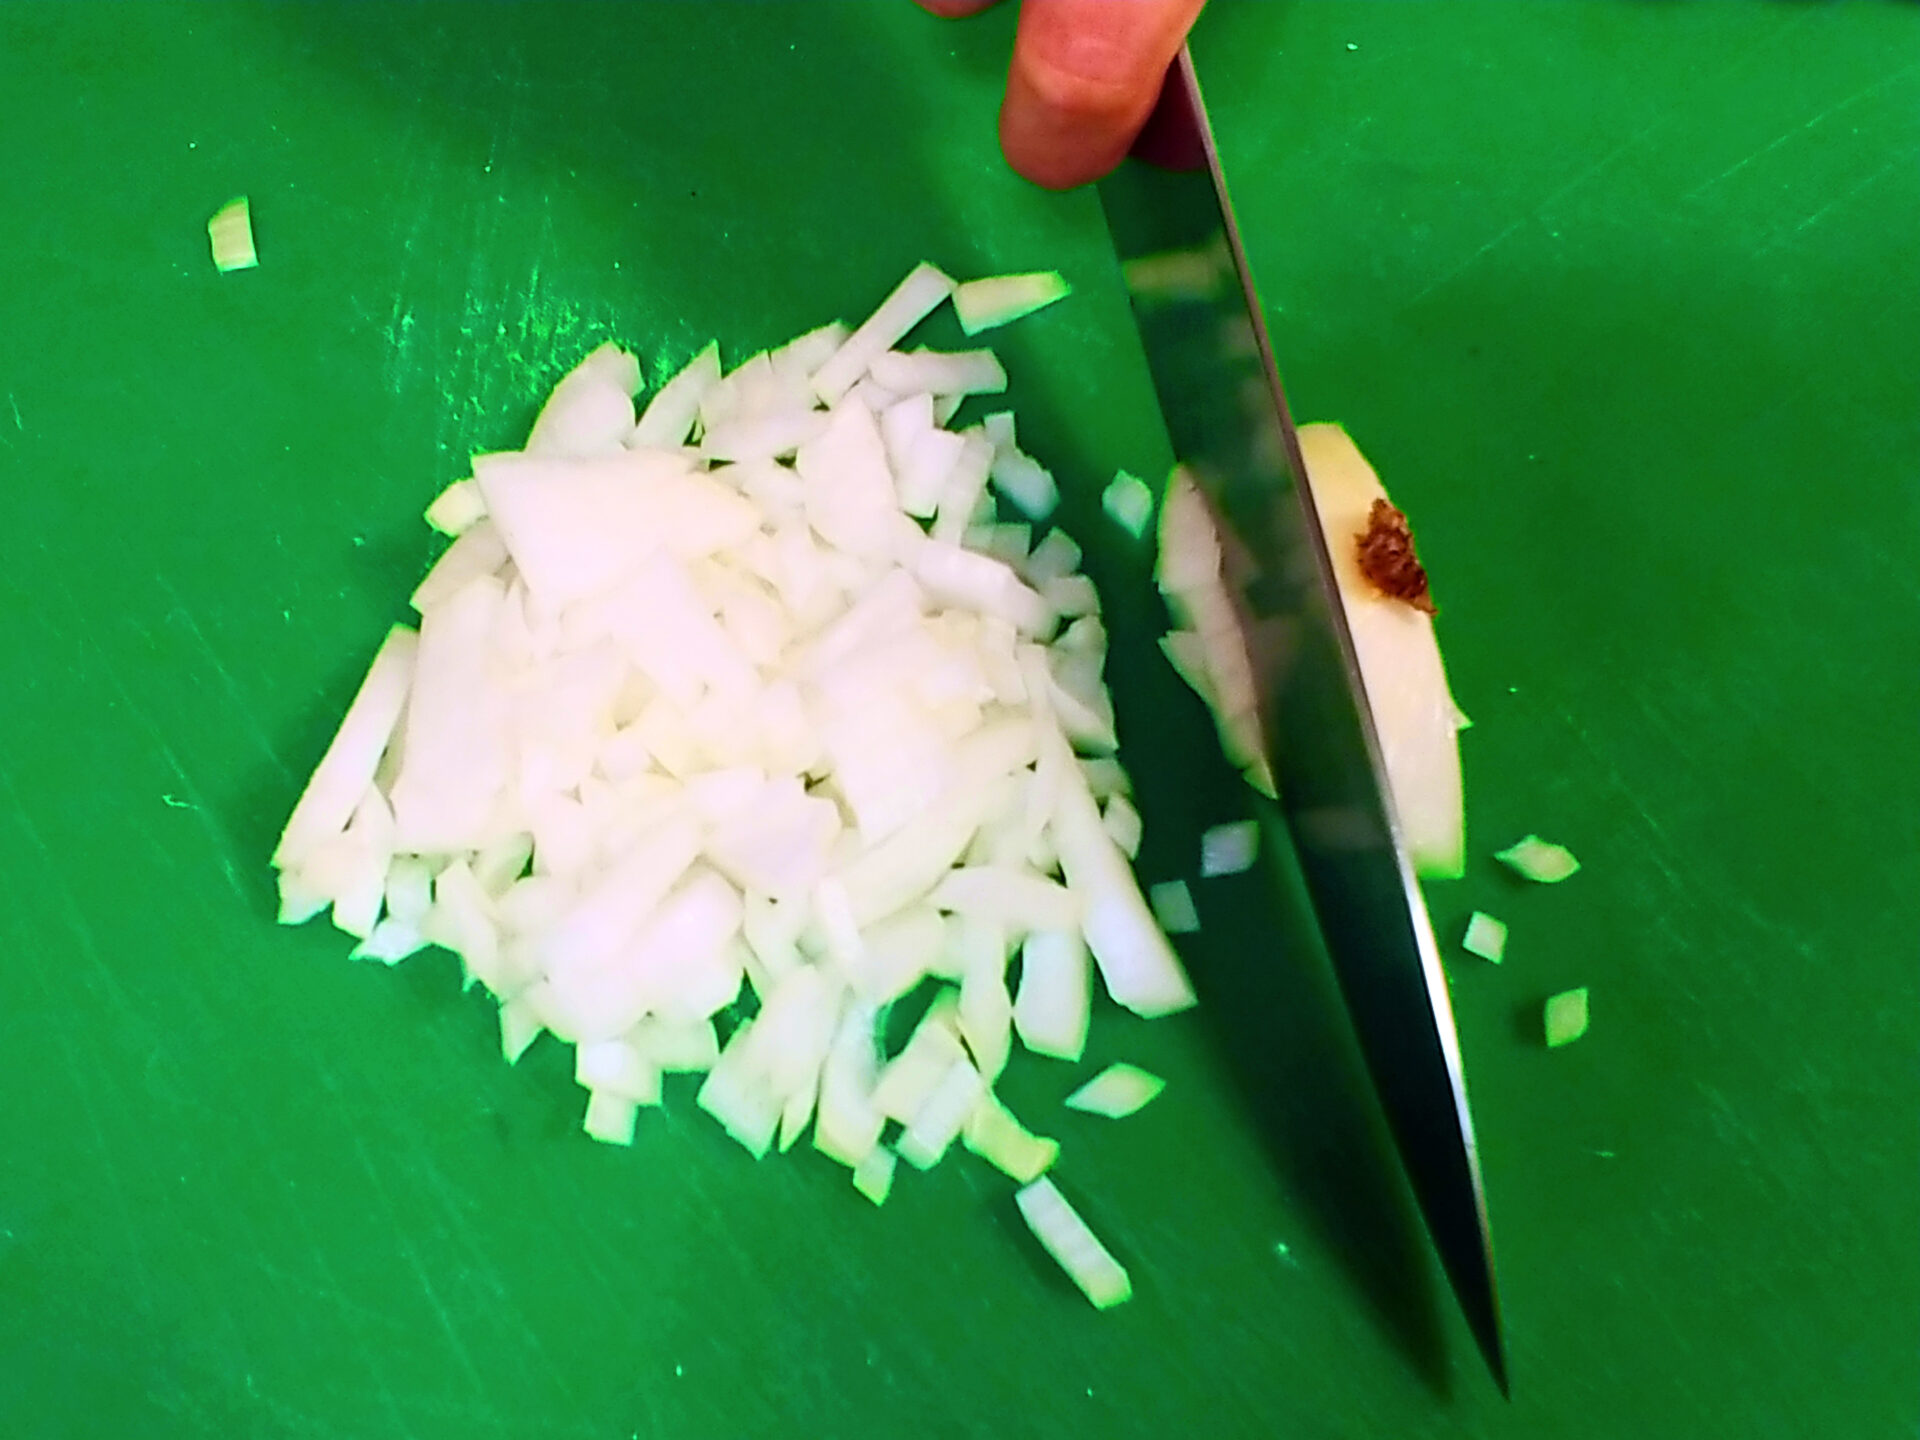
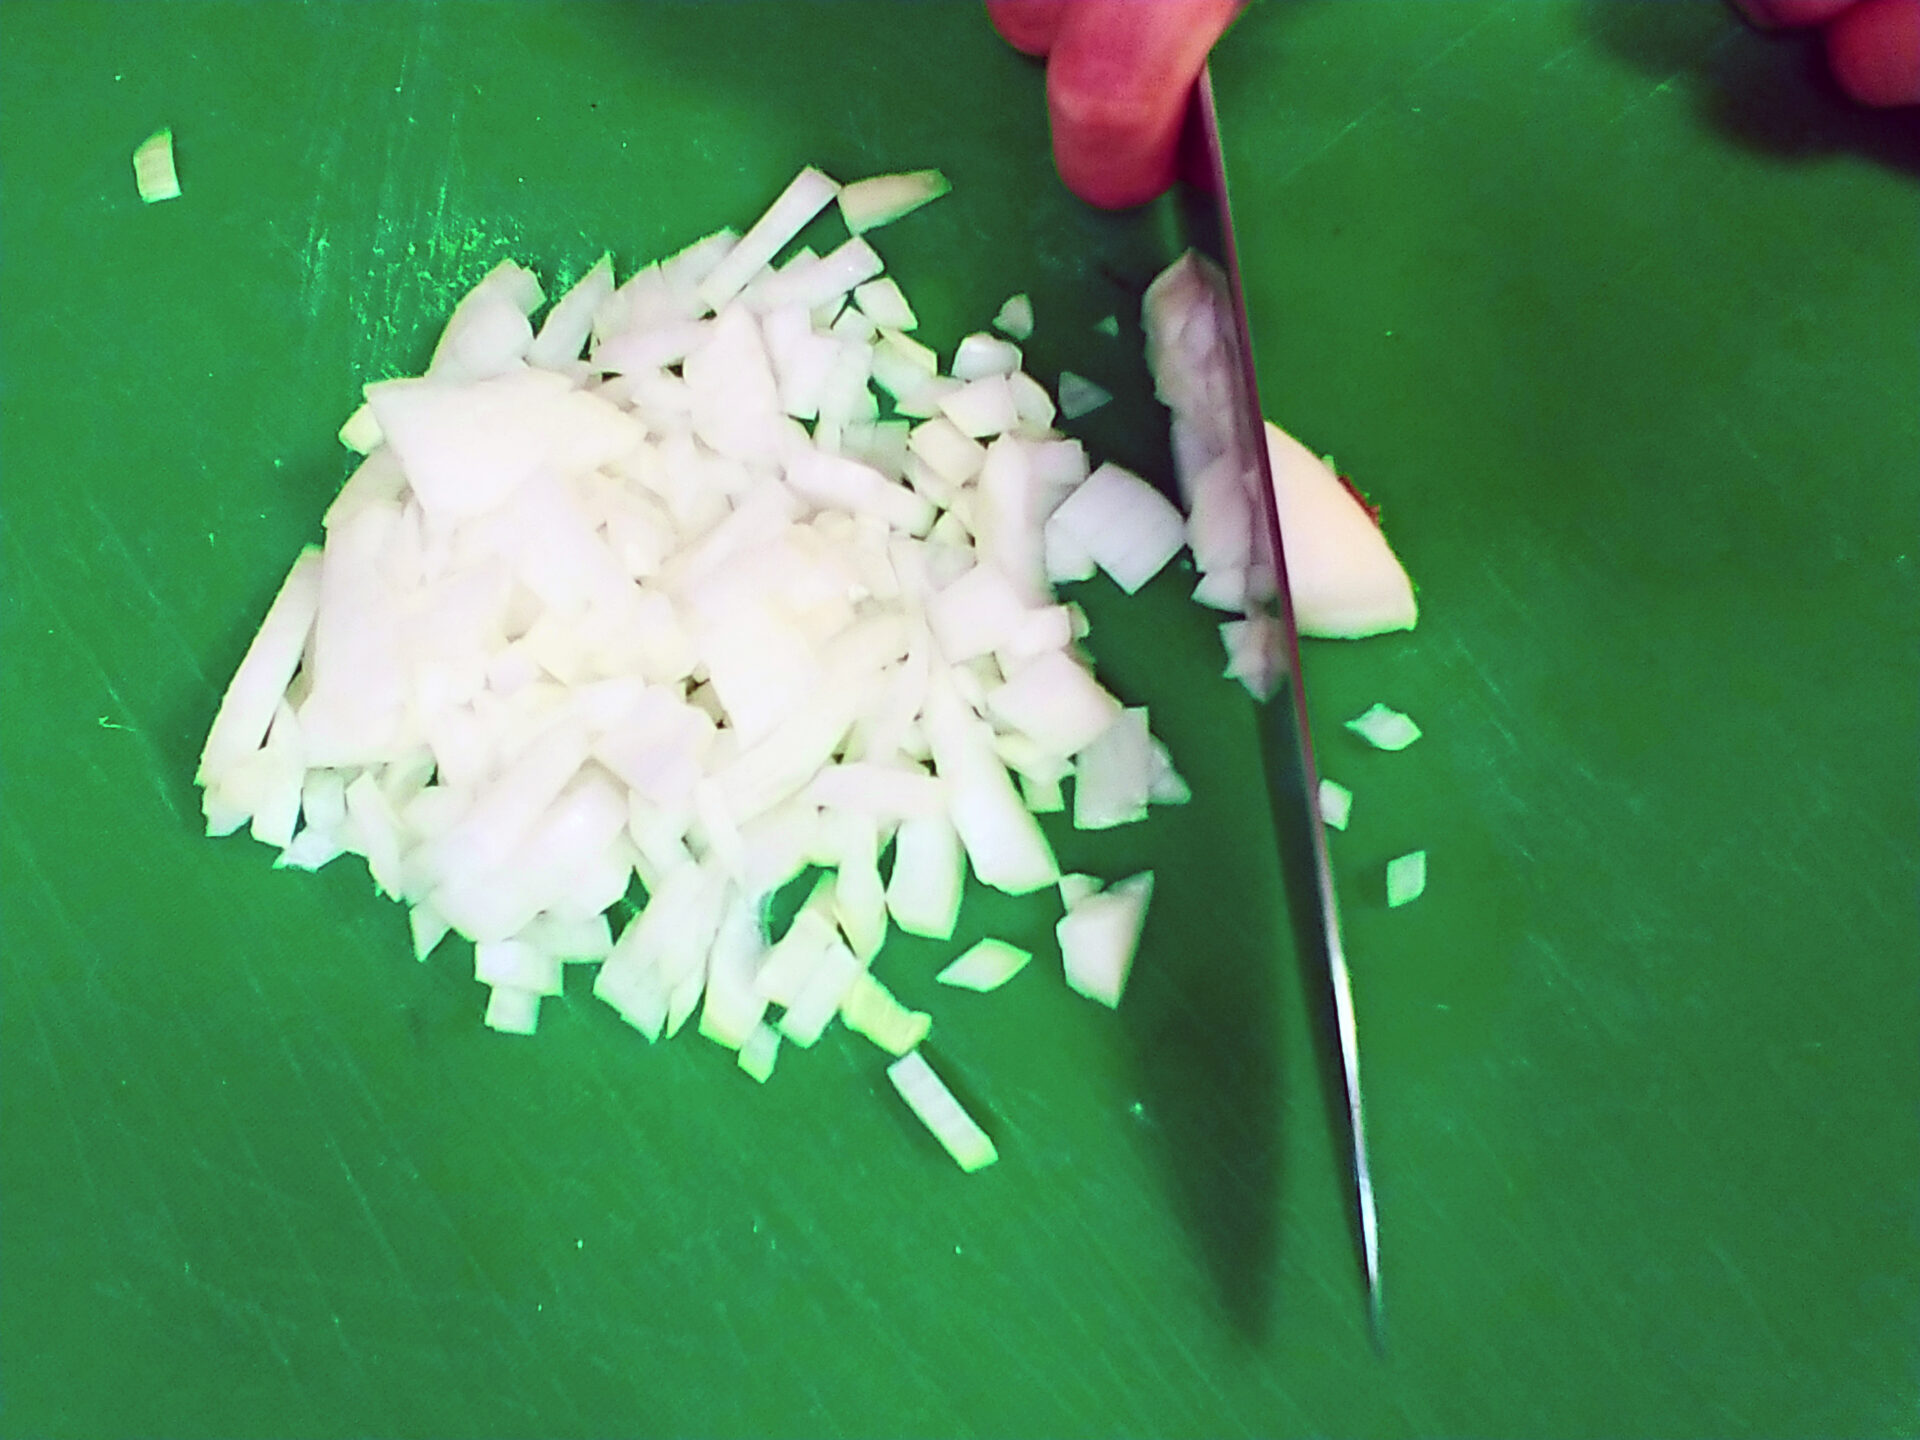
First, cut the onion into half before further peeling (cut through the root section to the other end).
Then, cut off the remains of the previous growth and leave the root part (this will hold the onion for dicing or chopping) or remove the root part for slicing. Then, peel the onion.


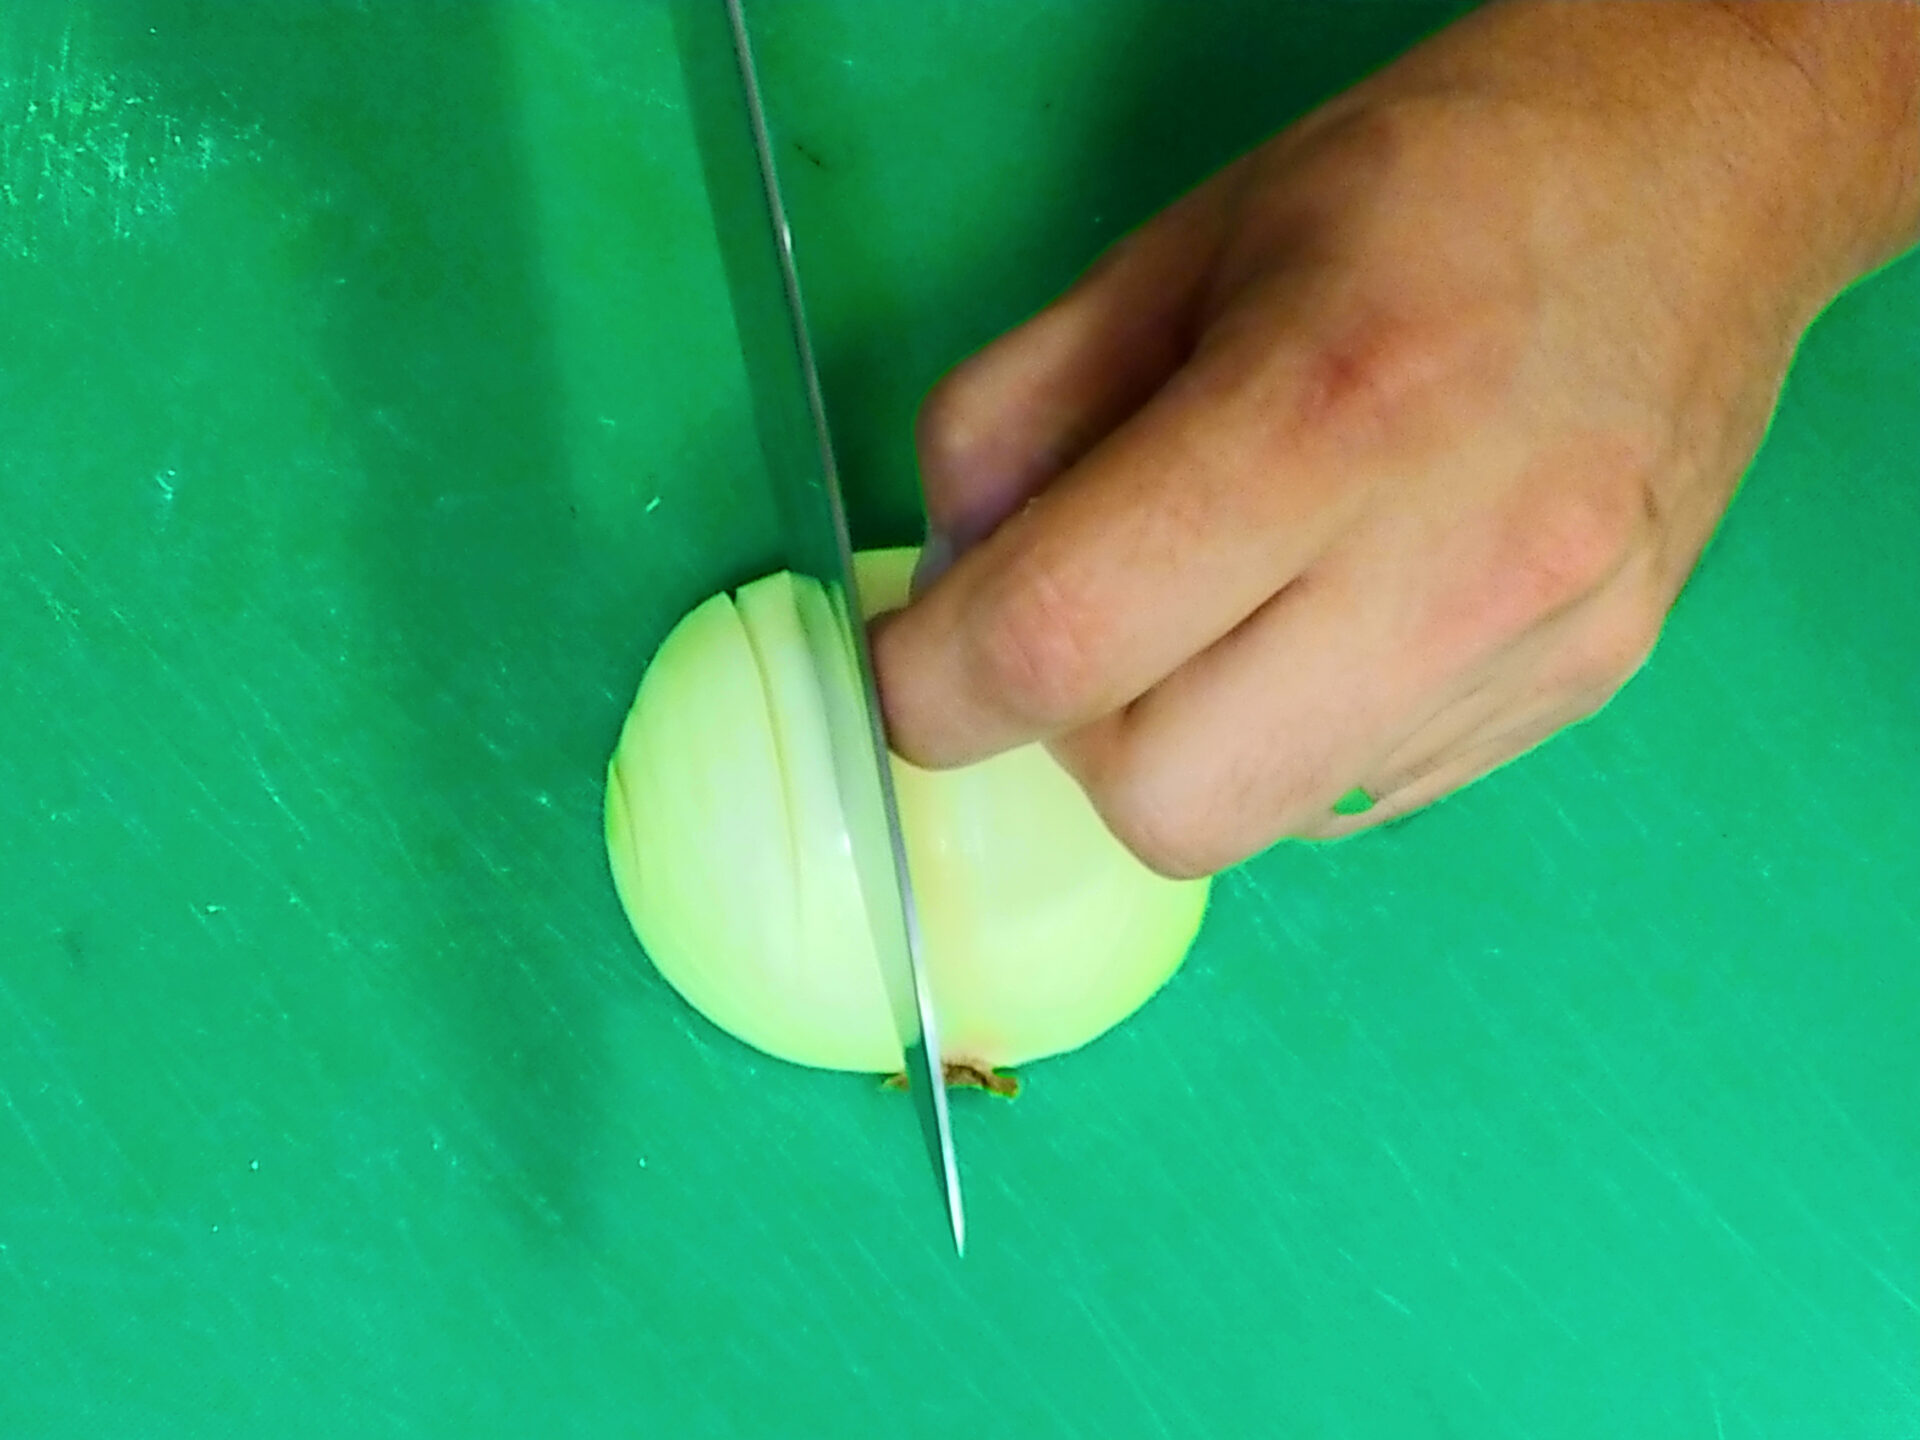
Cutting, chopping, or slicing
Dicing or chopping:
Turn the onion root part away from you.
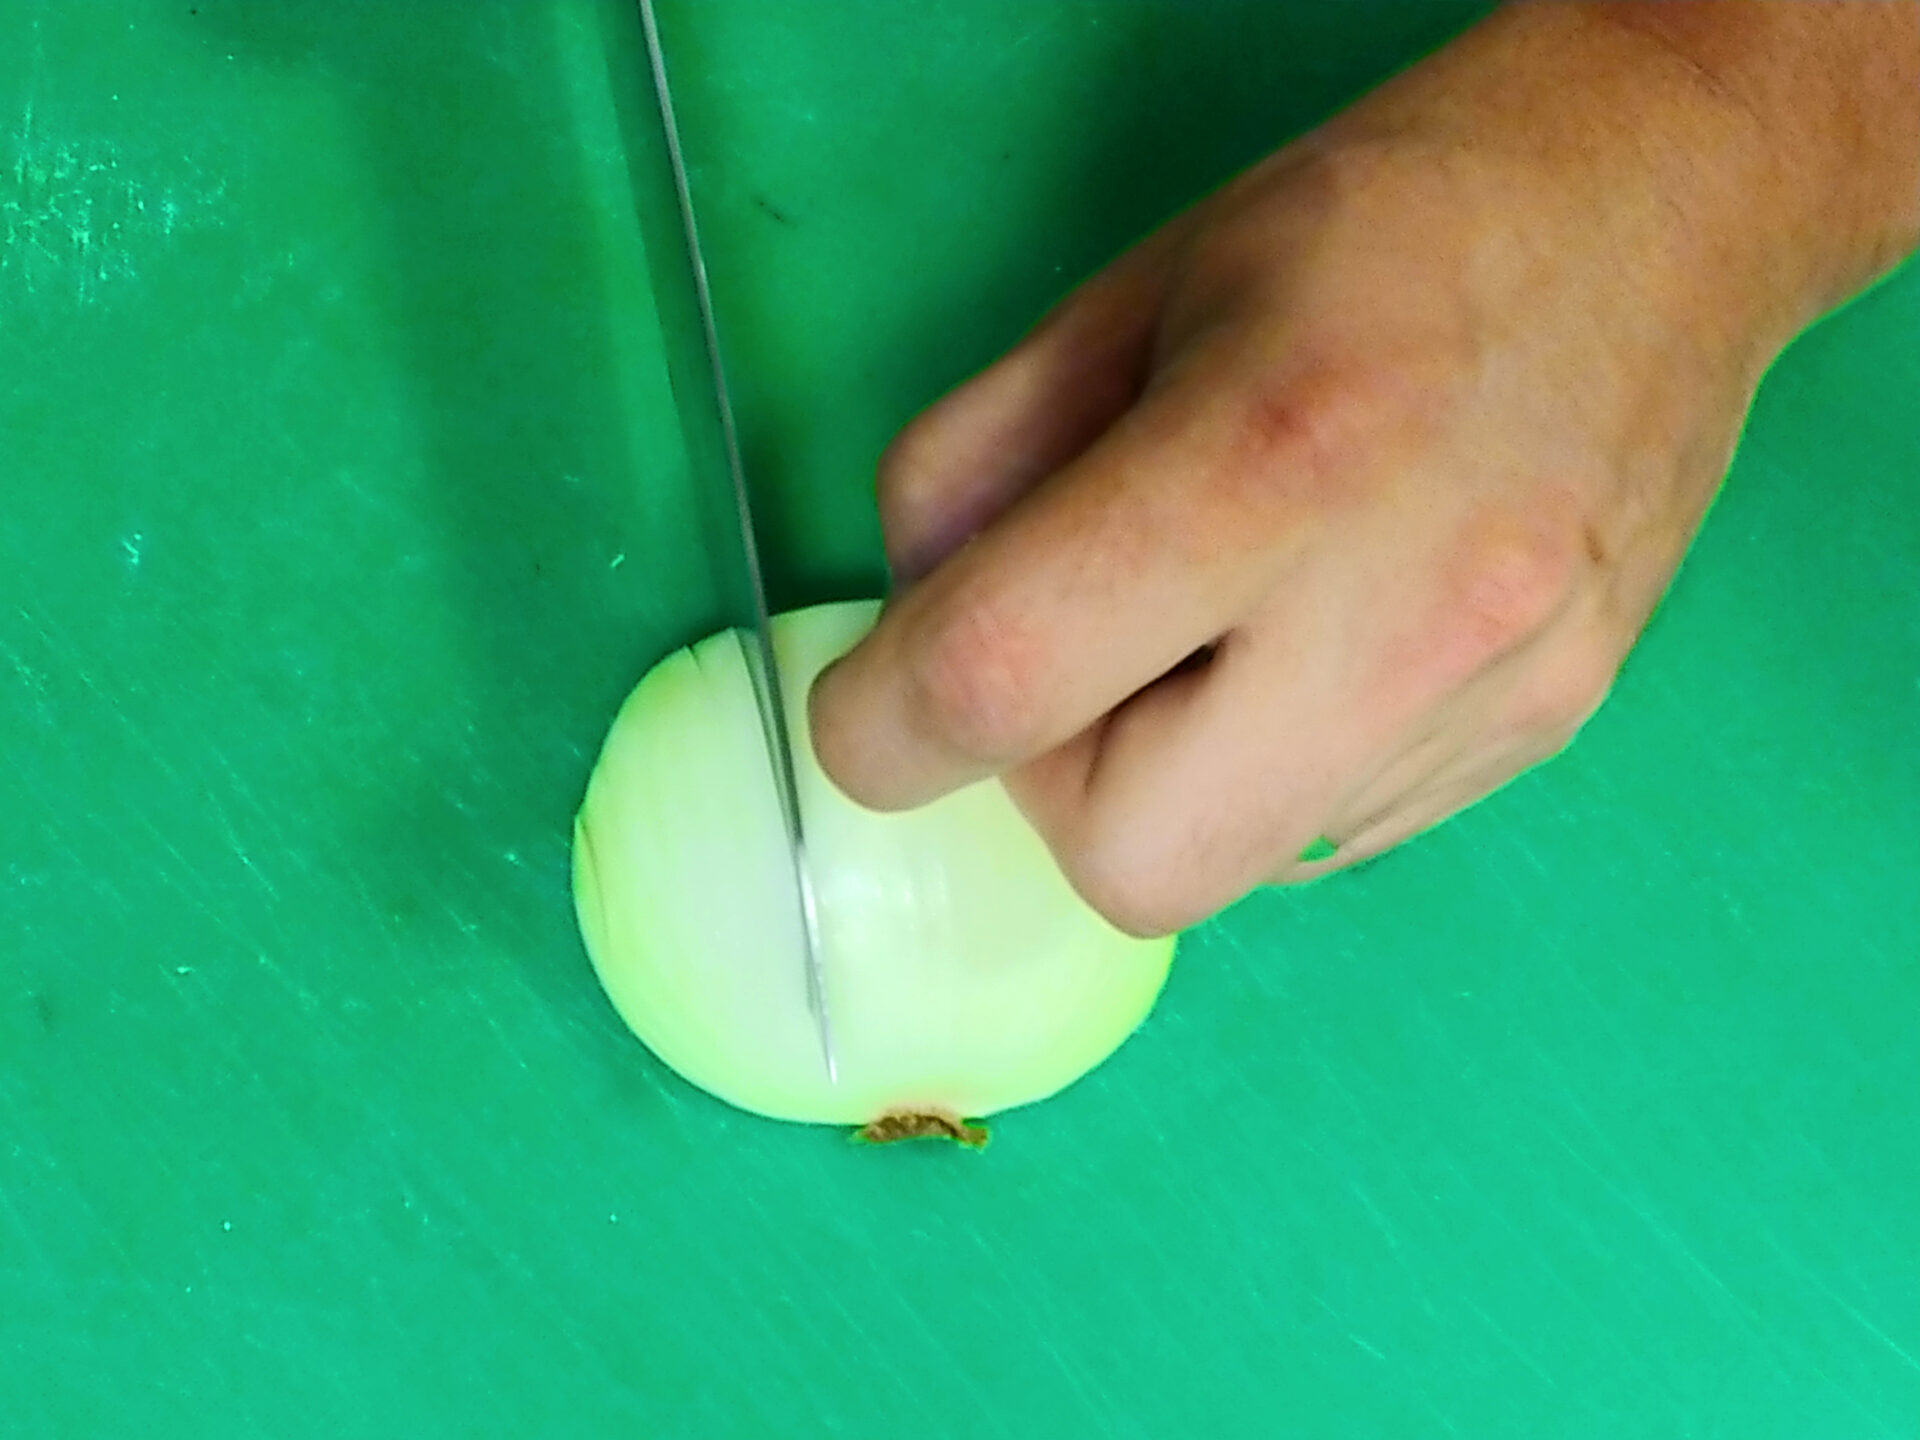
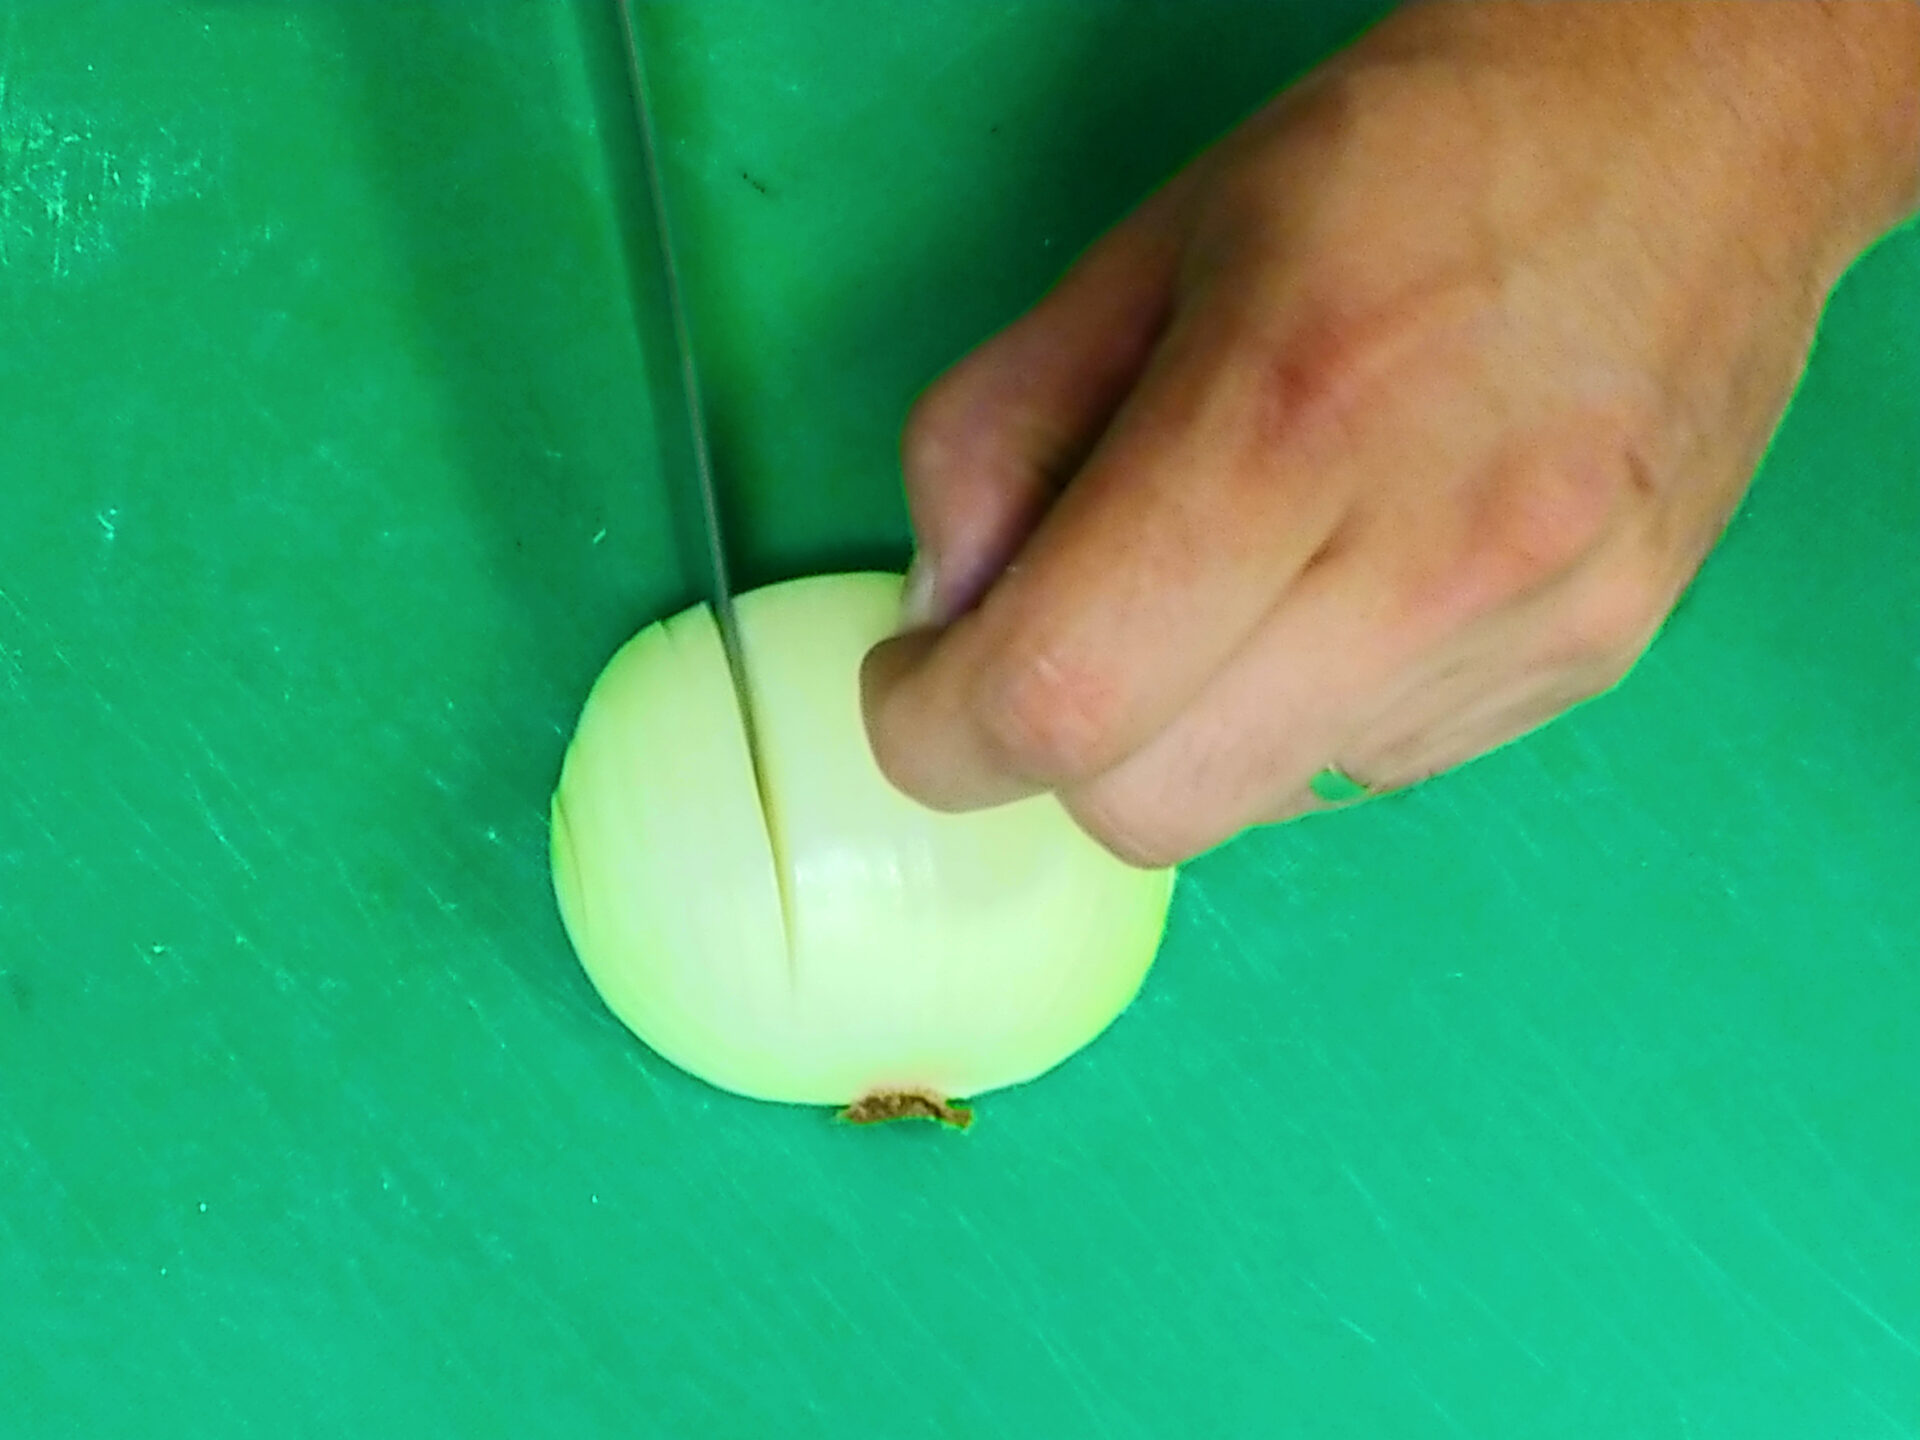
Chop the onion into slices (using a straight chopping cutting technique). Slices should be ¼” for dicing or thinner for chopping. While chopping, get as close to the root section as possible with the tip of the knife, but at the same time, make sure that the onion holds together for further cutting.
Then turn the onion pointing the cut side towards the knife and cut across the previous cut until you get to the root’s end (¼” distance between the cuts for dicing or less for chopping). When you get closer to the root’s end, you may want to flip the onion 90° towards the blade to get more stability (this especially applies for larger onions).
When done, dispose of the root end.
Then, if you want an even finer texture, chop through the already chopped onion using a rough chop.

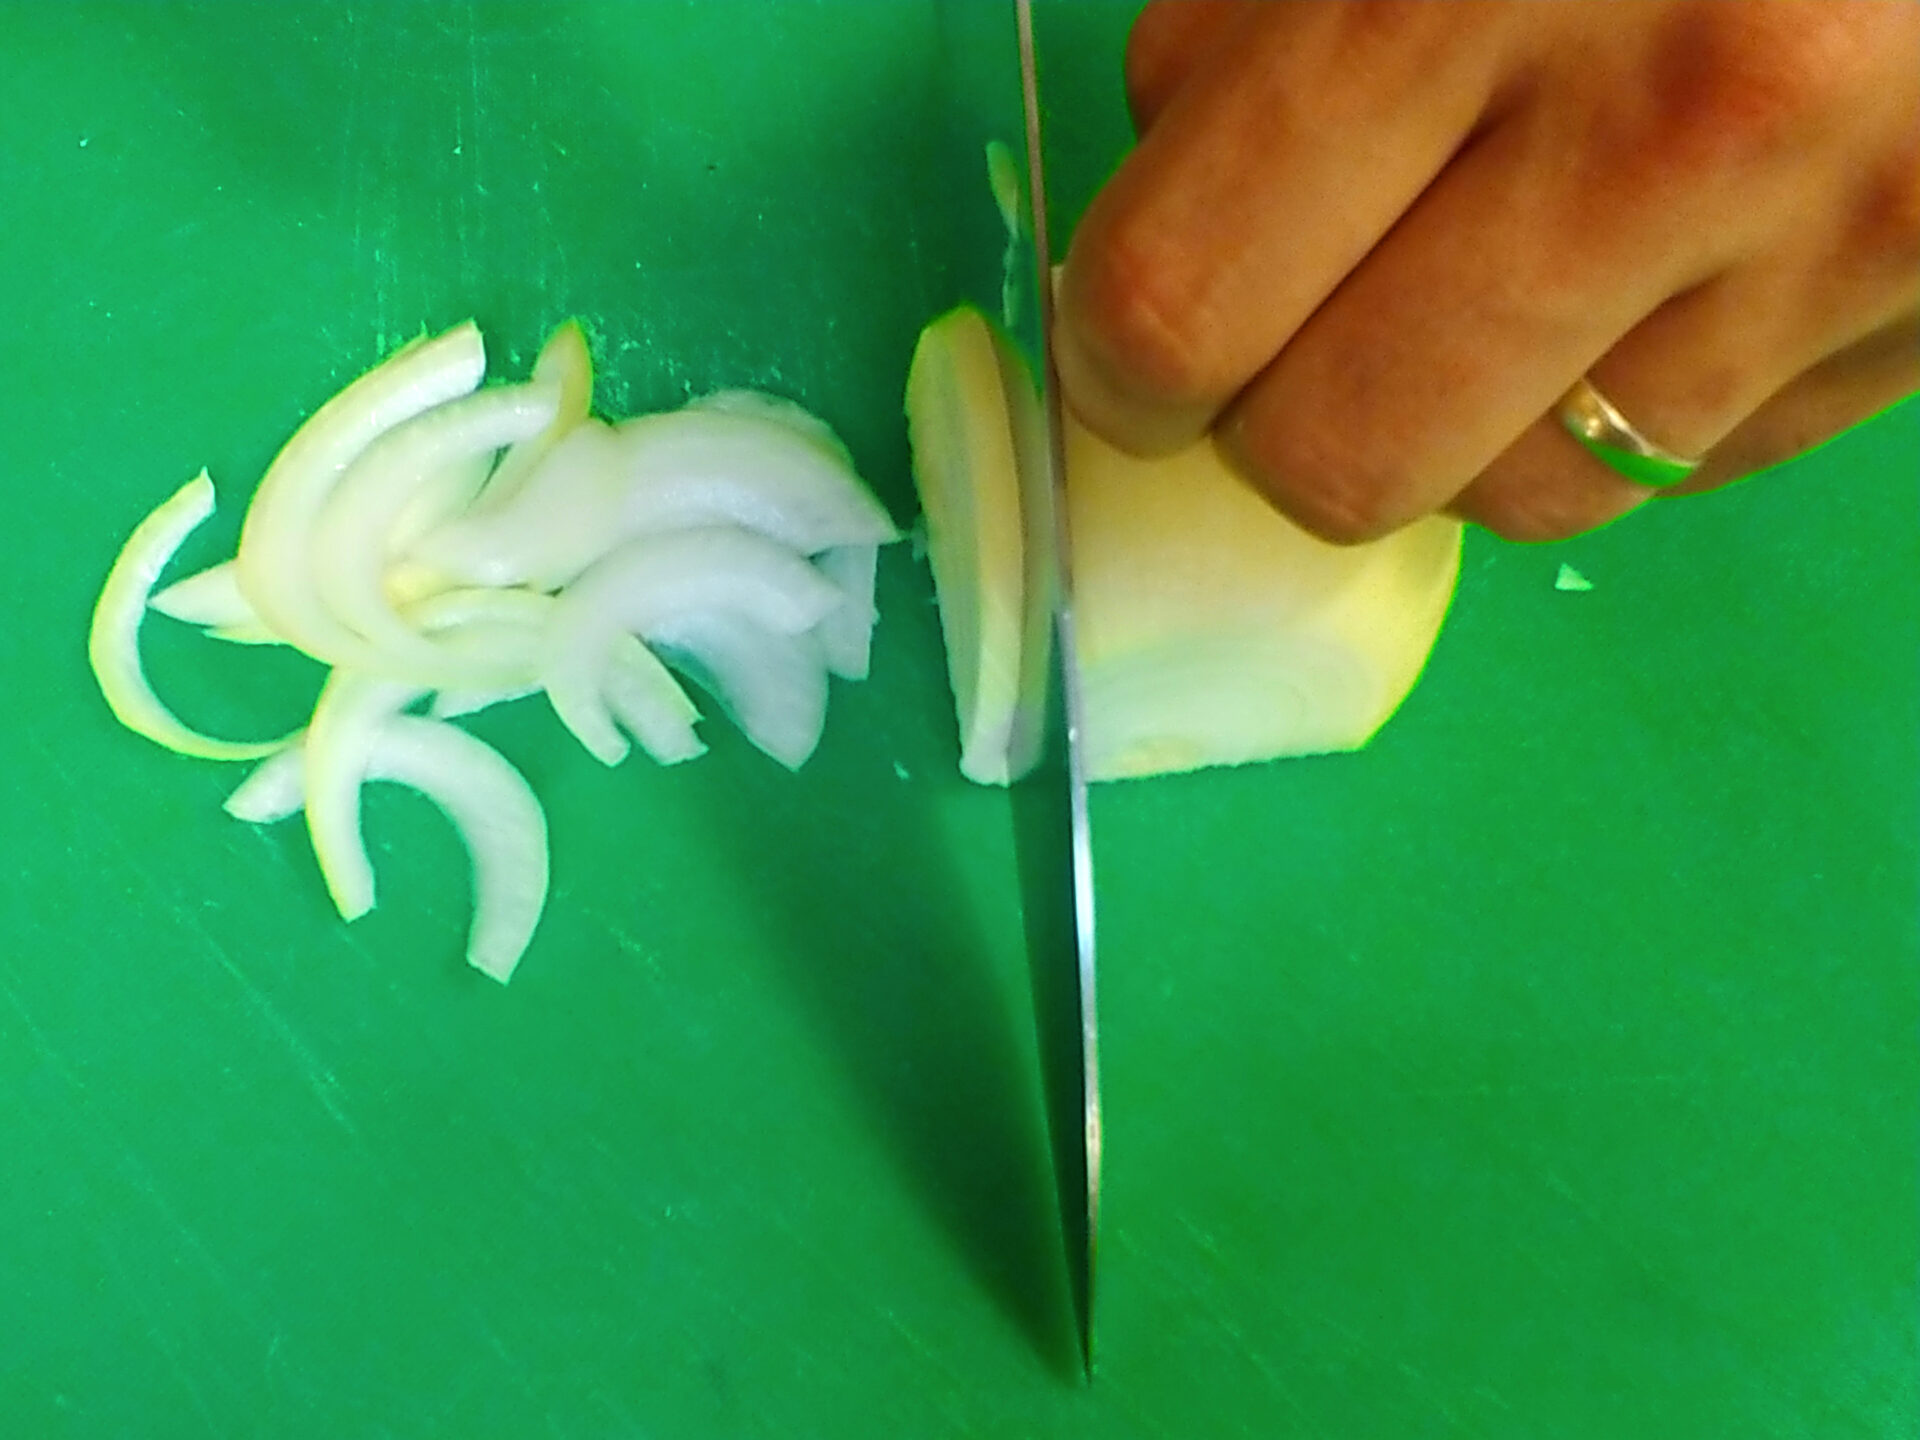
Slicing:
Use a straight chop for slicing an onion.
When you get to the last 1/5 of the onion, flip the onion 90° down, and finish cutting for better stability.

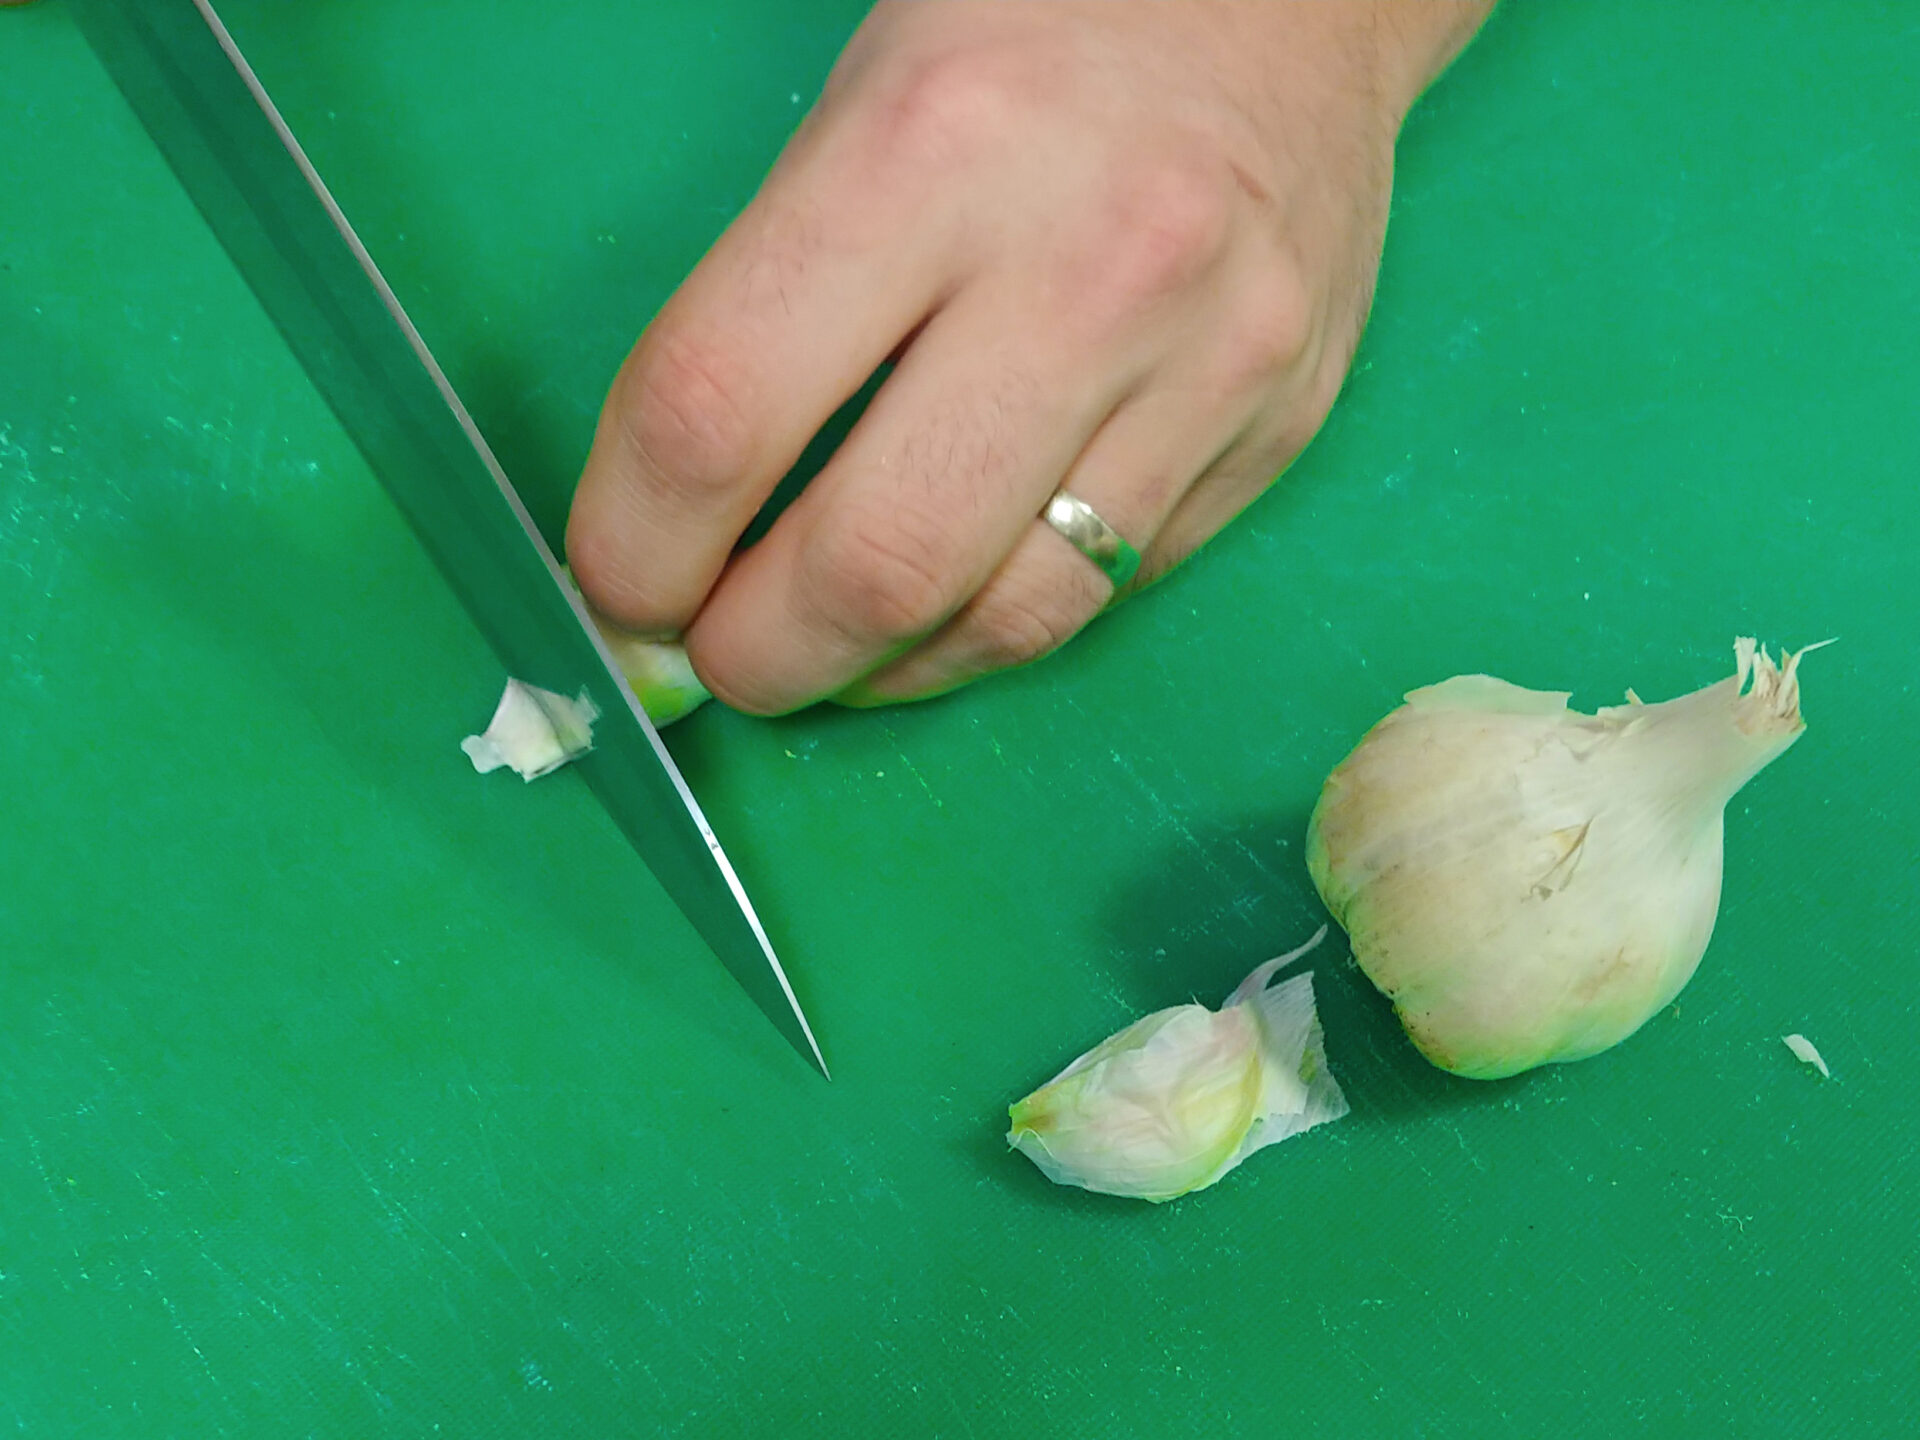
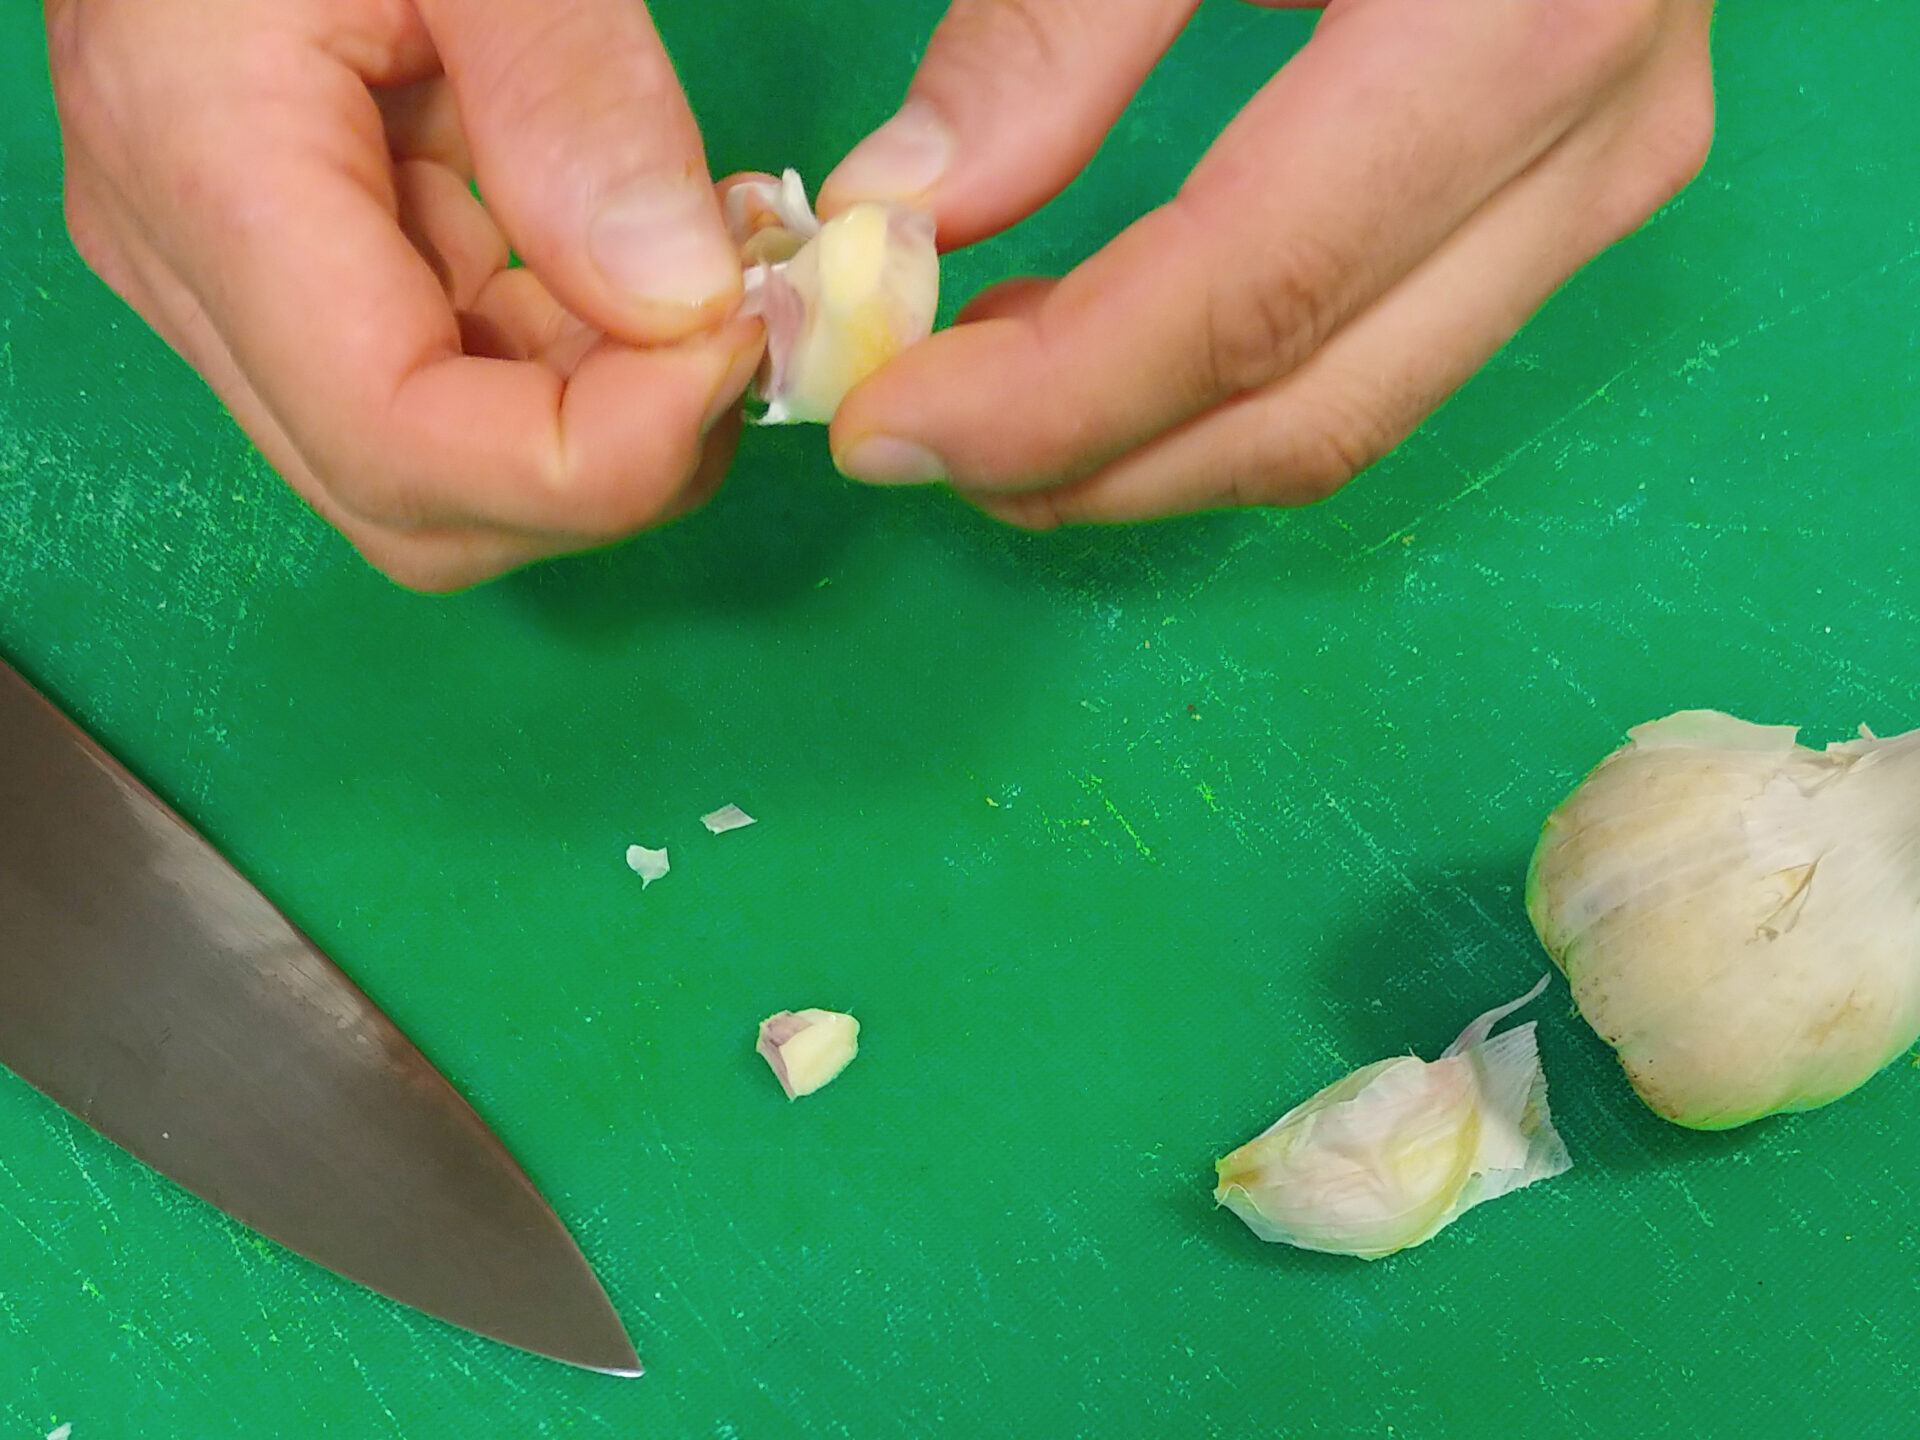
Before you start peeling, separate the garlic into single cloves by peeling the cloves off.
Peeling:
For chopping or using a garlic press, lightly crush each clove with the palm of your hand, then cut off the root part, and simply peel.
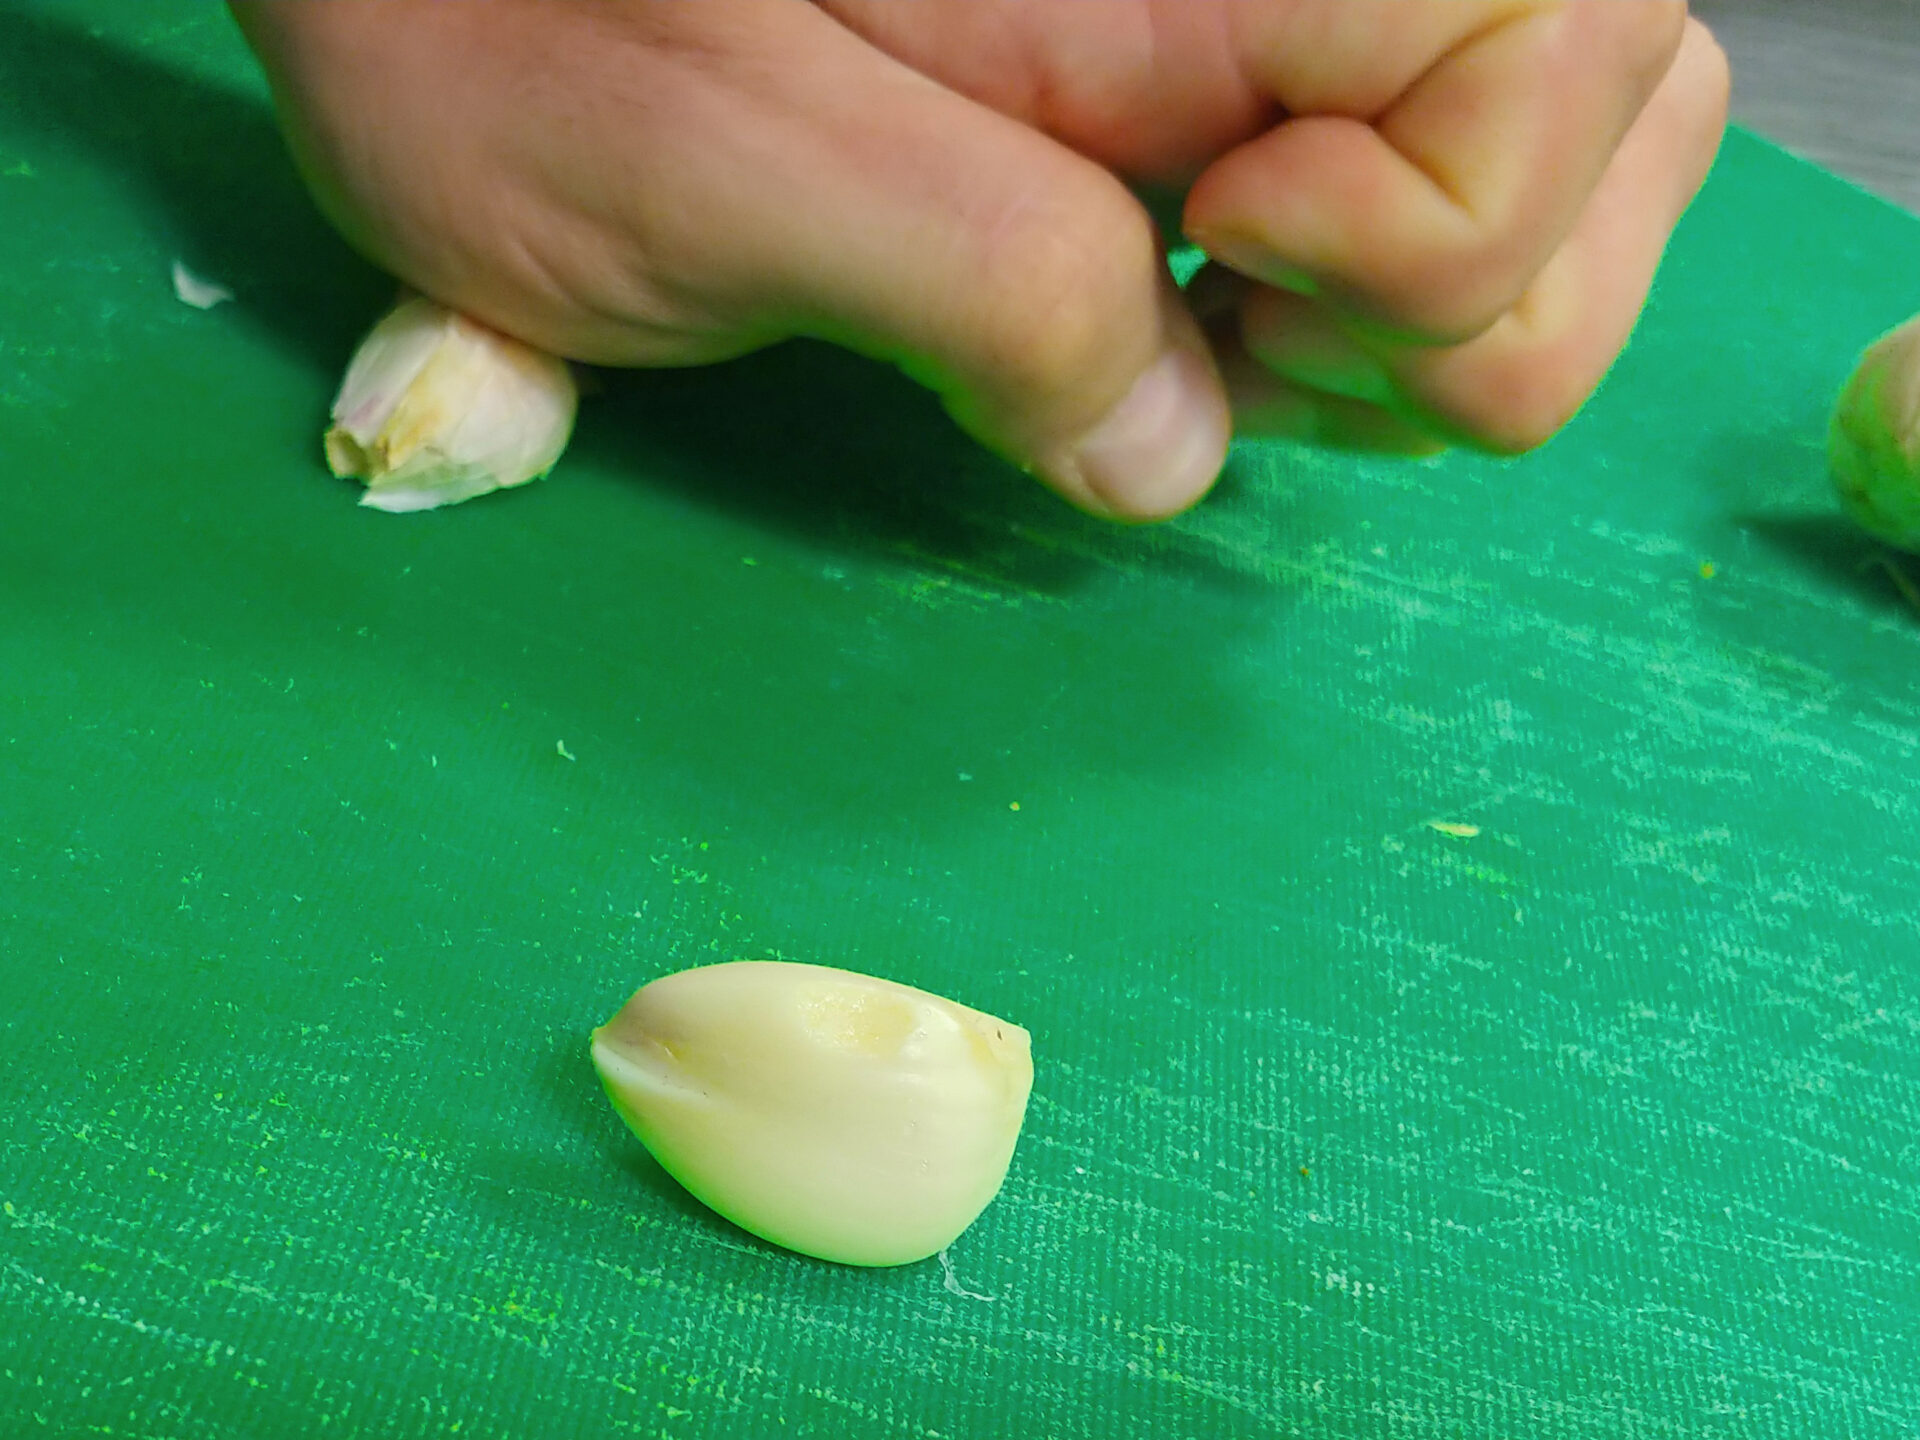
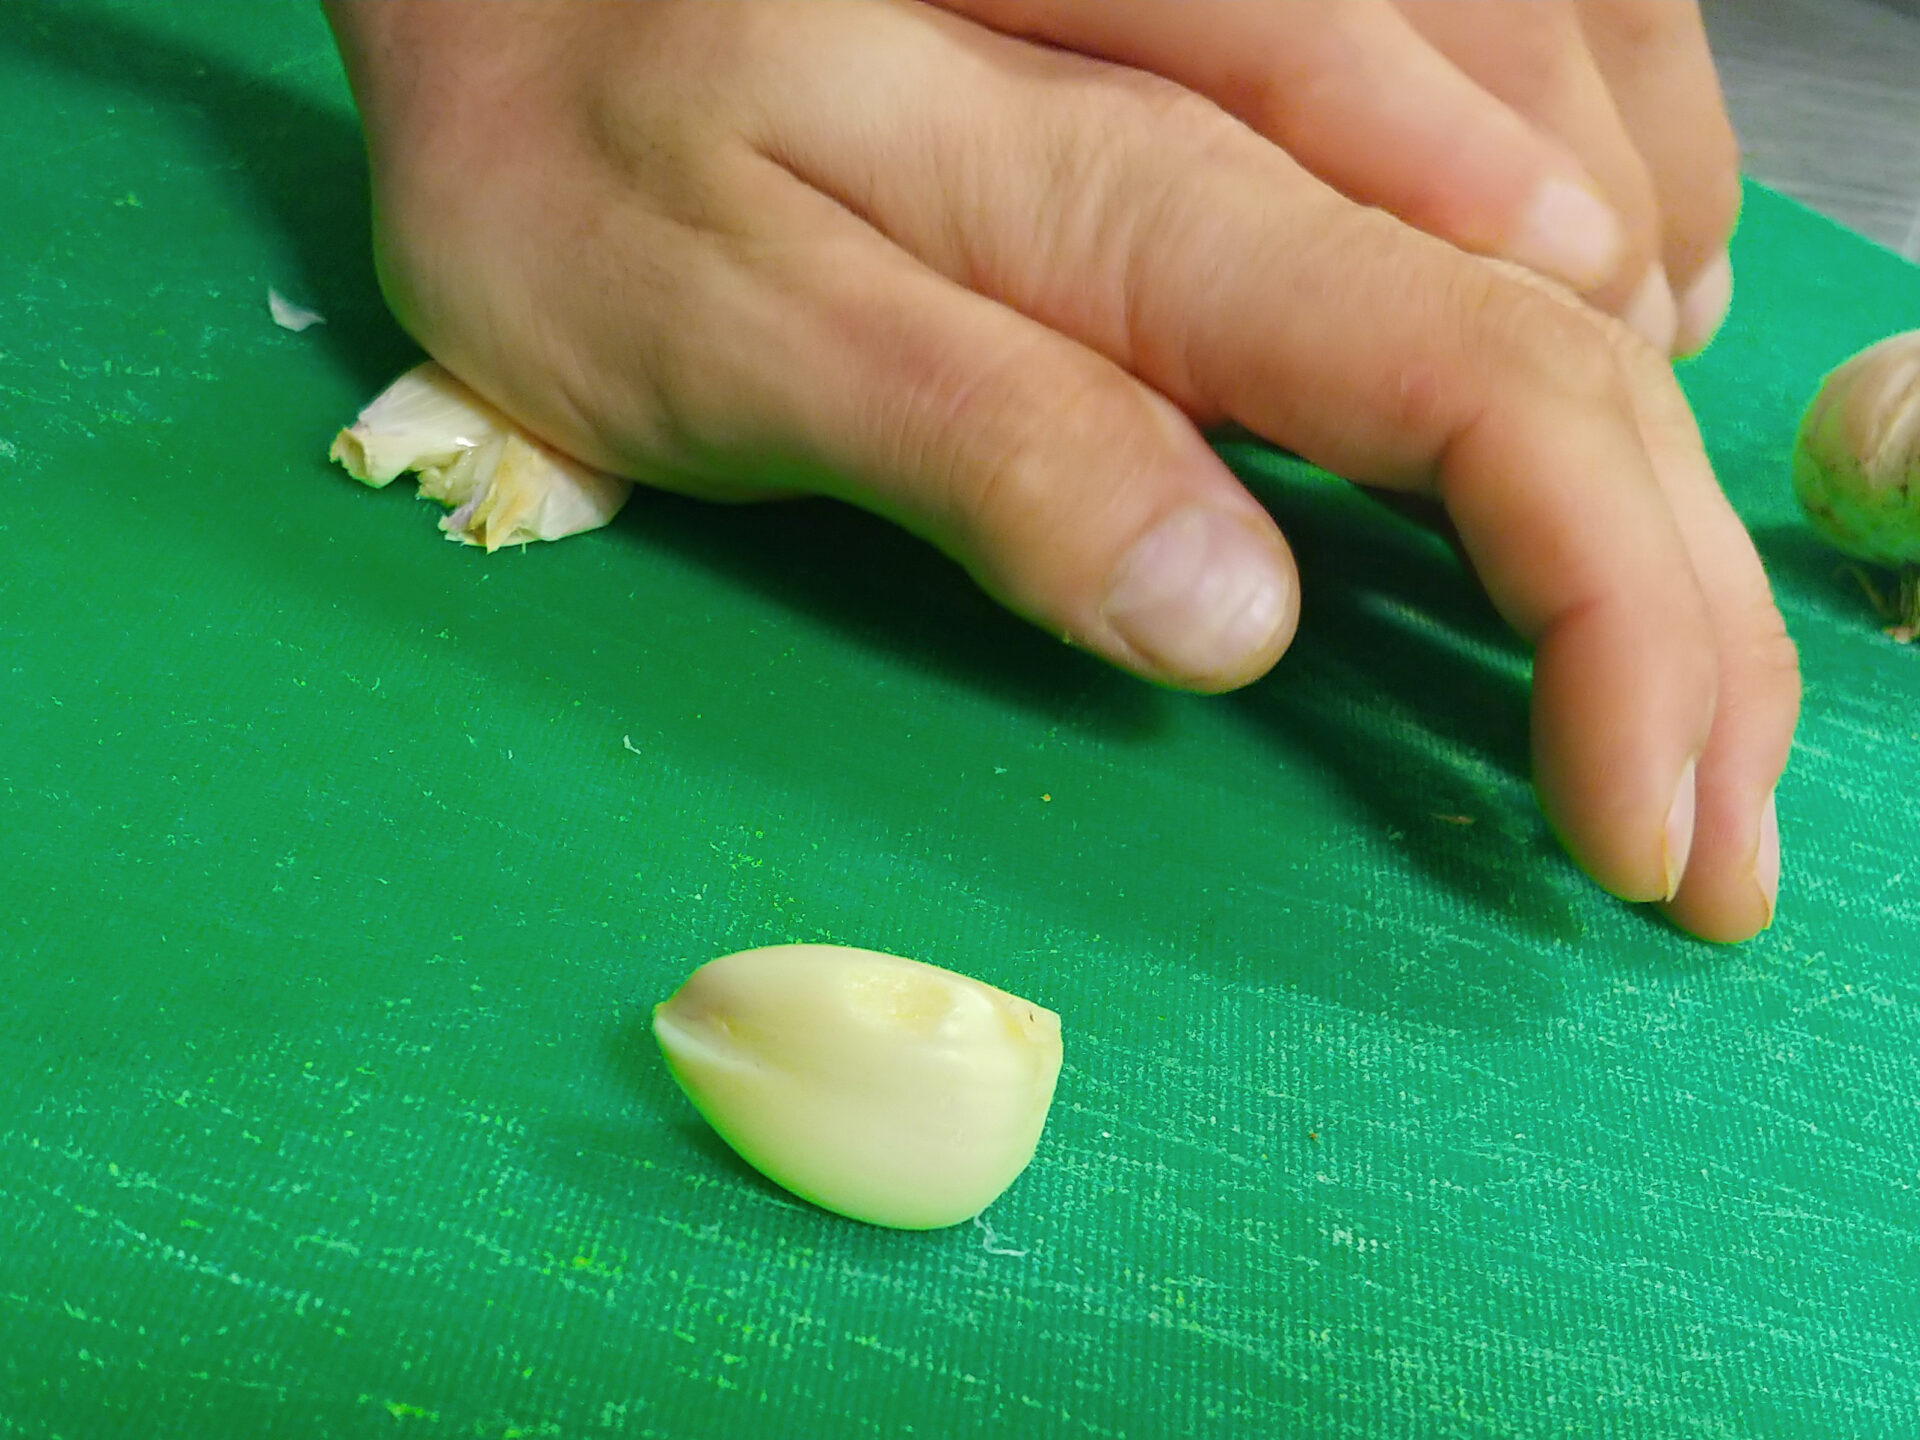
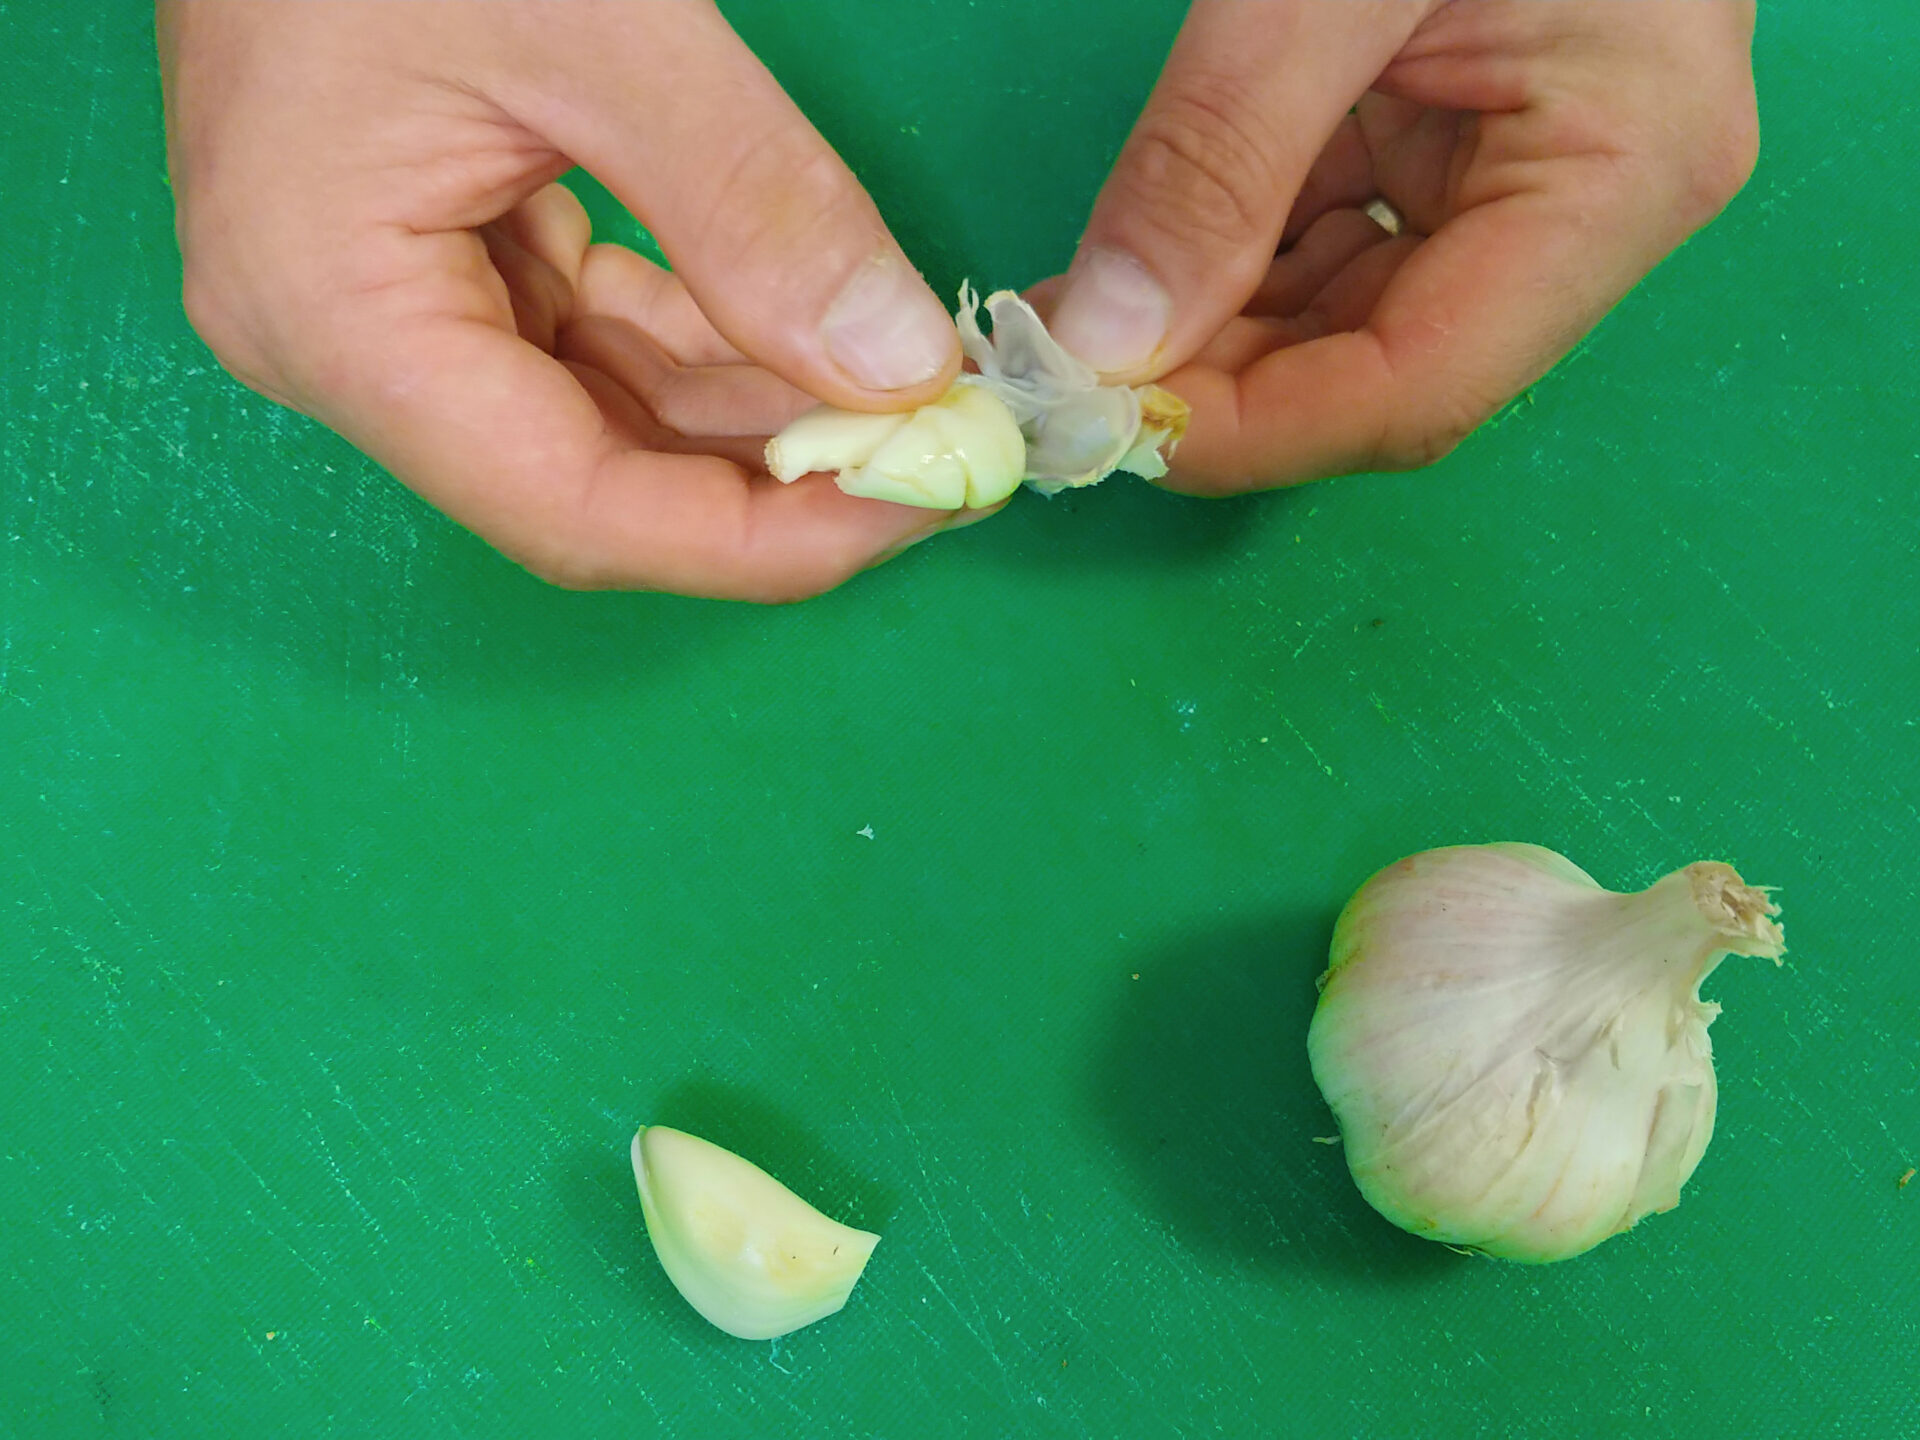
Or, for grating garlic, simply cut off the root part and then peel. Peeling will be a little harder if you crush it to peel it, but it will still be manageable to do so, and you will get a whole clove of garlic suitable for grating.

Peeling is not necessary if you are adding it to infuse oil while pan frying steak, etc.
Cut or process:
Slice using the claw effect with any knife you are comfortable with.
Or process using a grater/garlic press to create a paste.
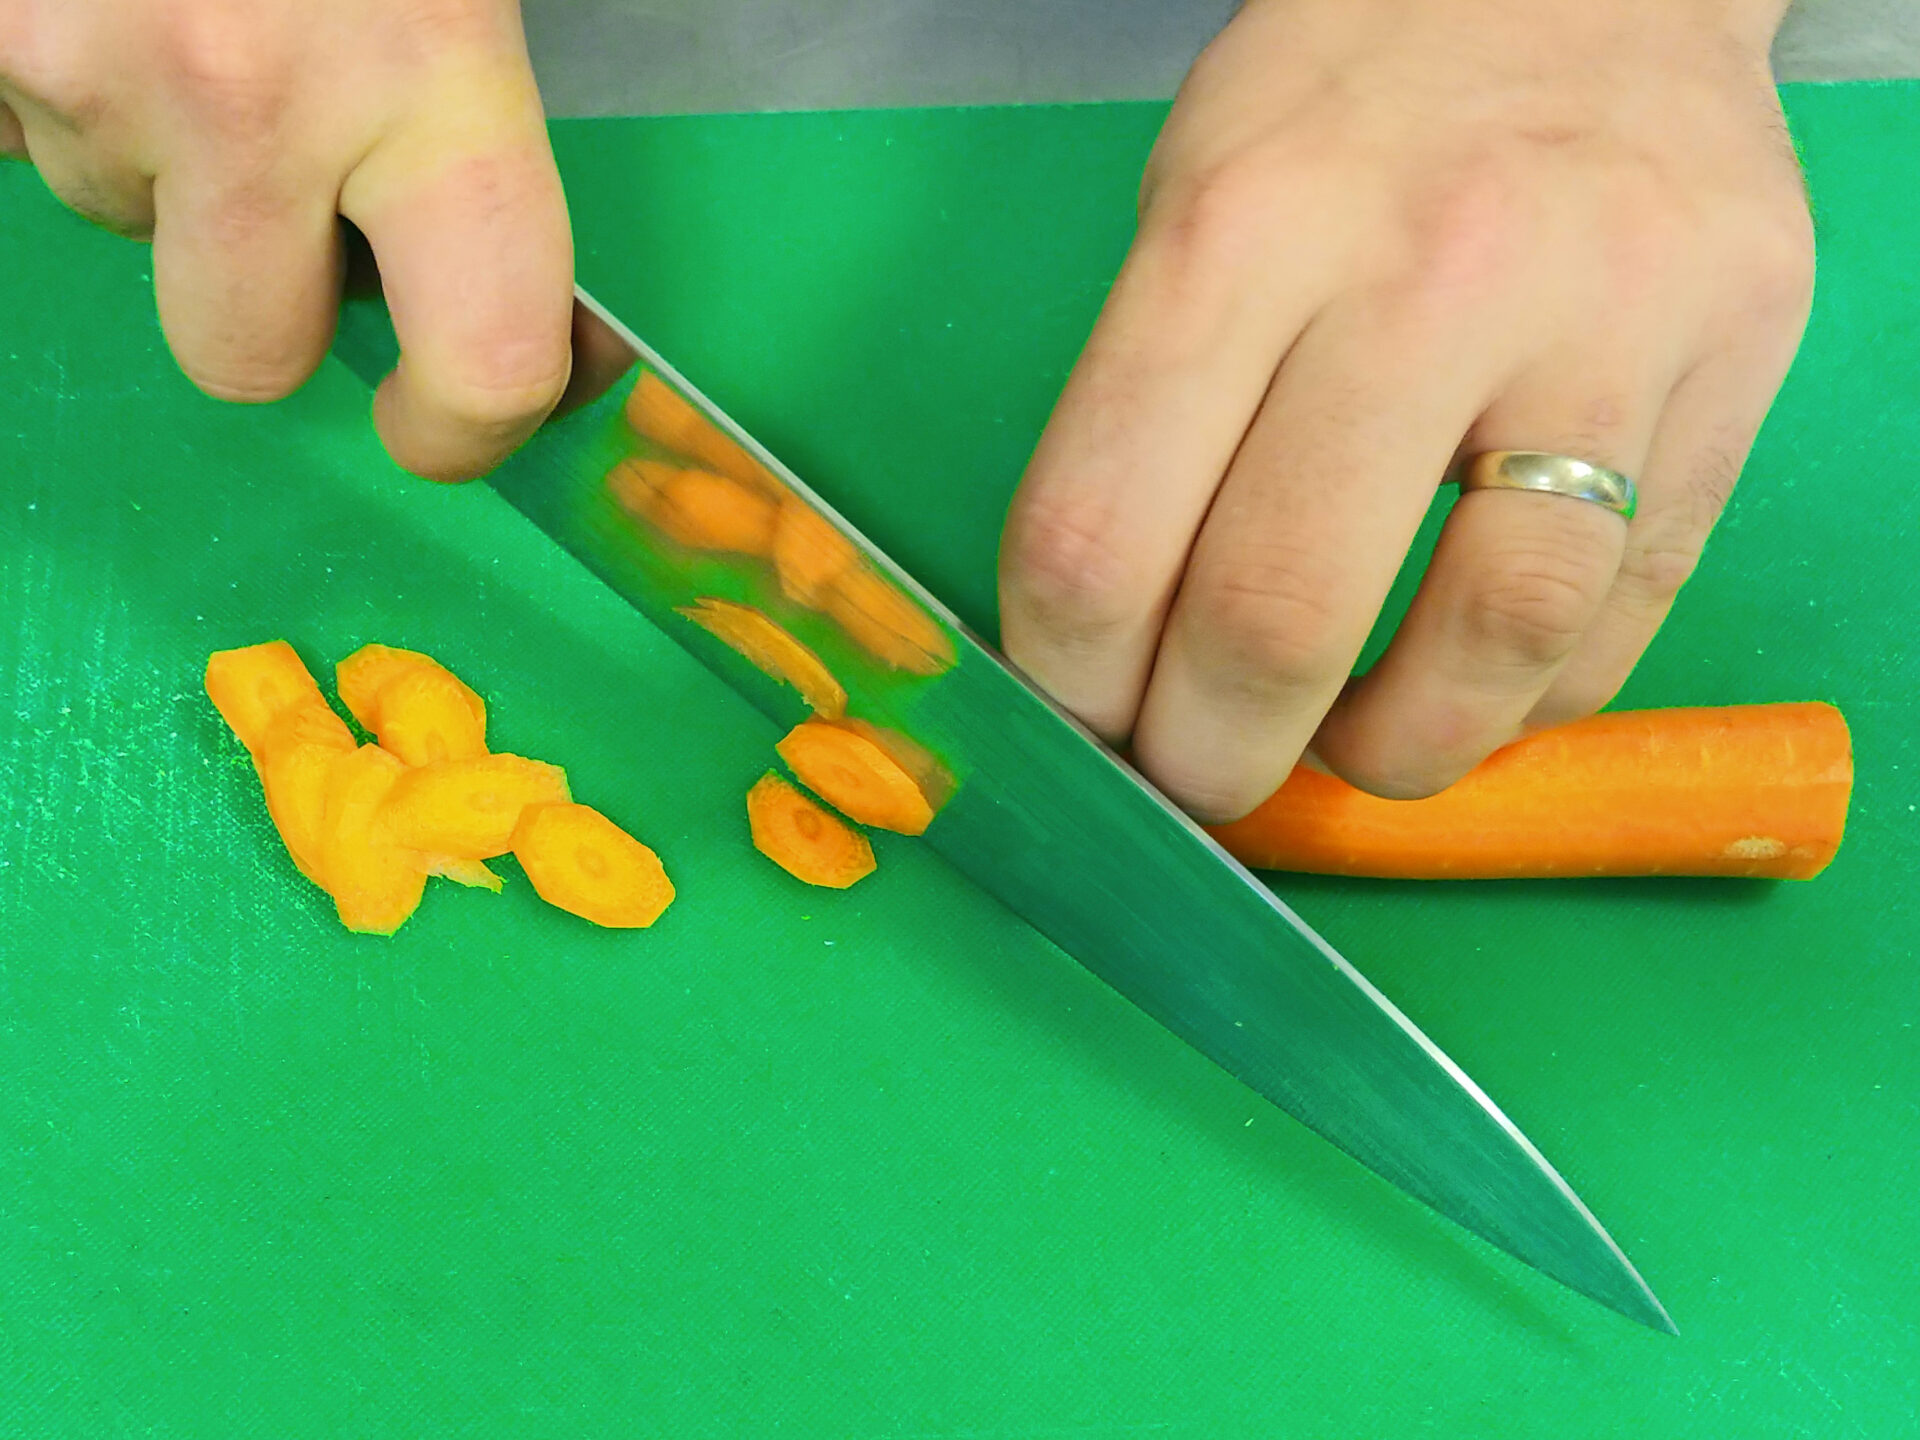
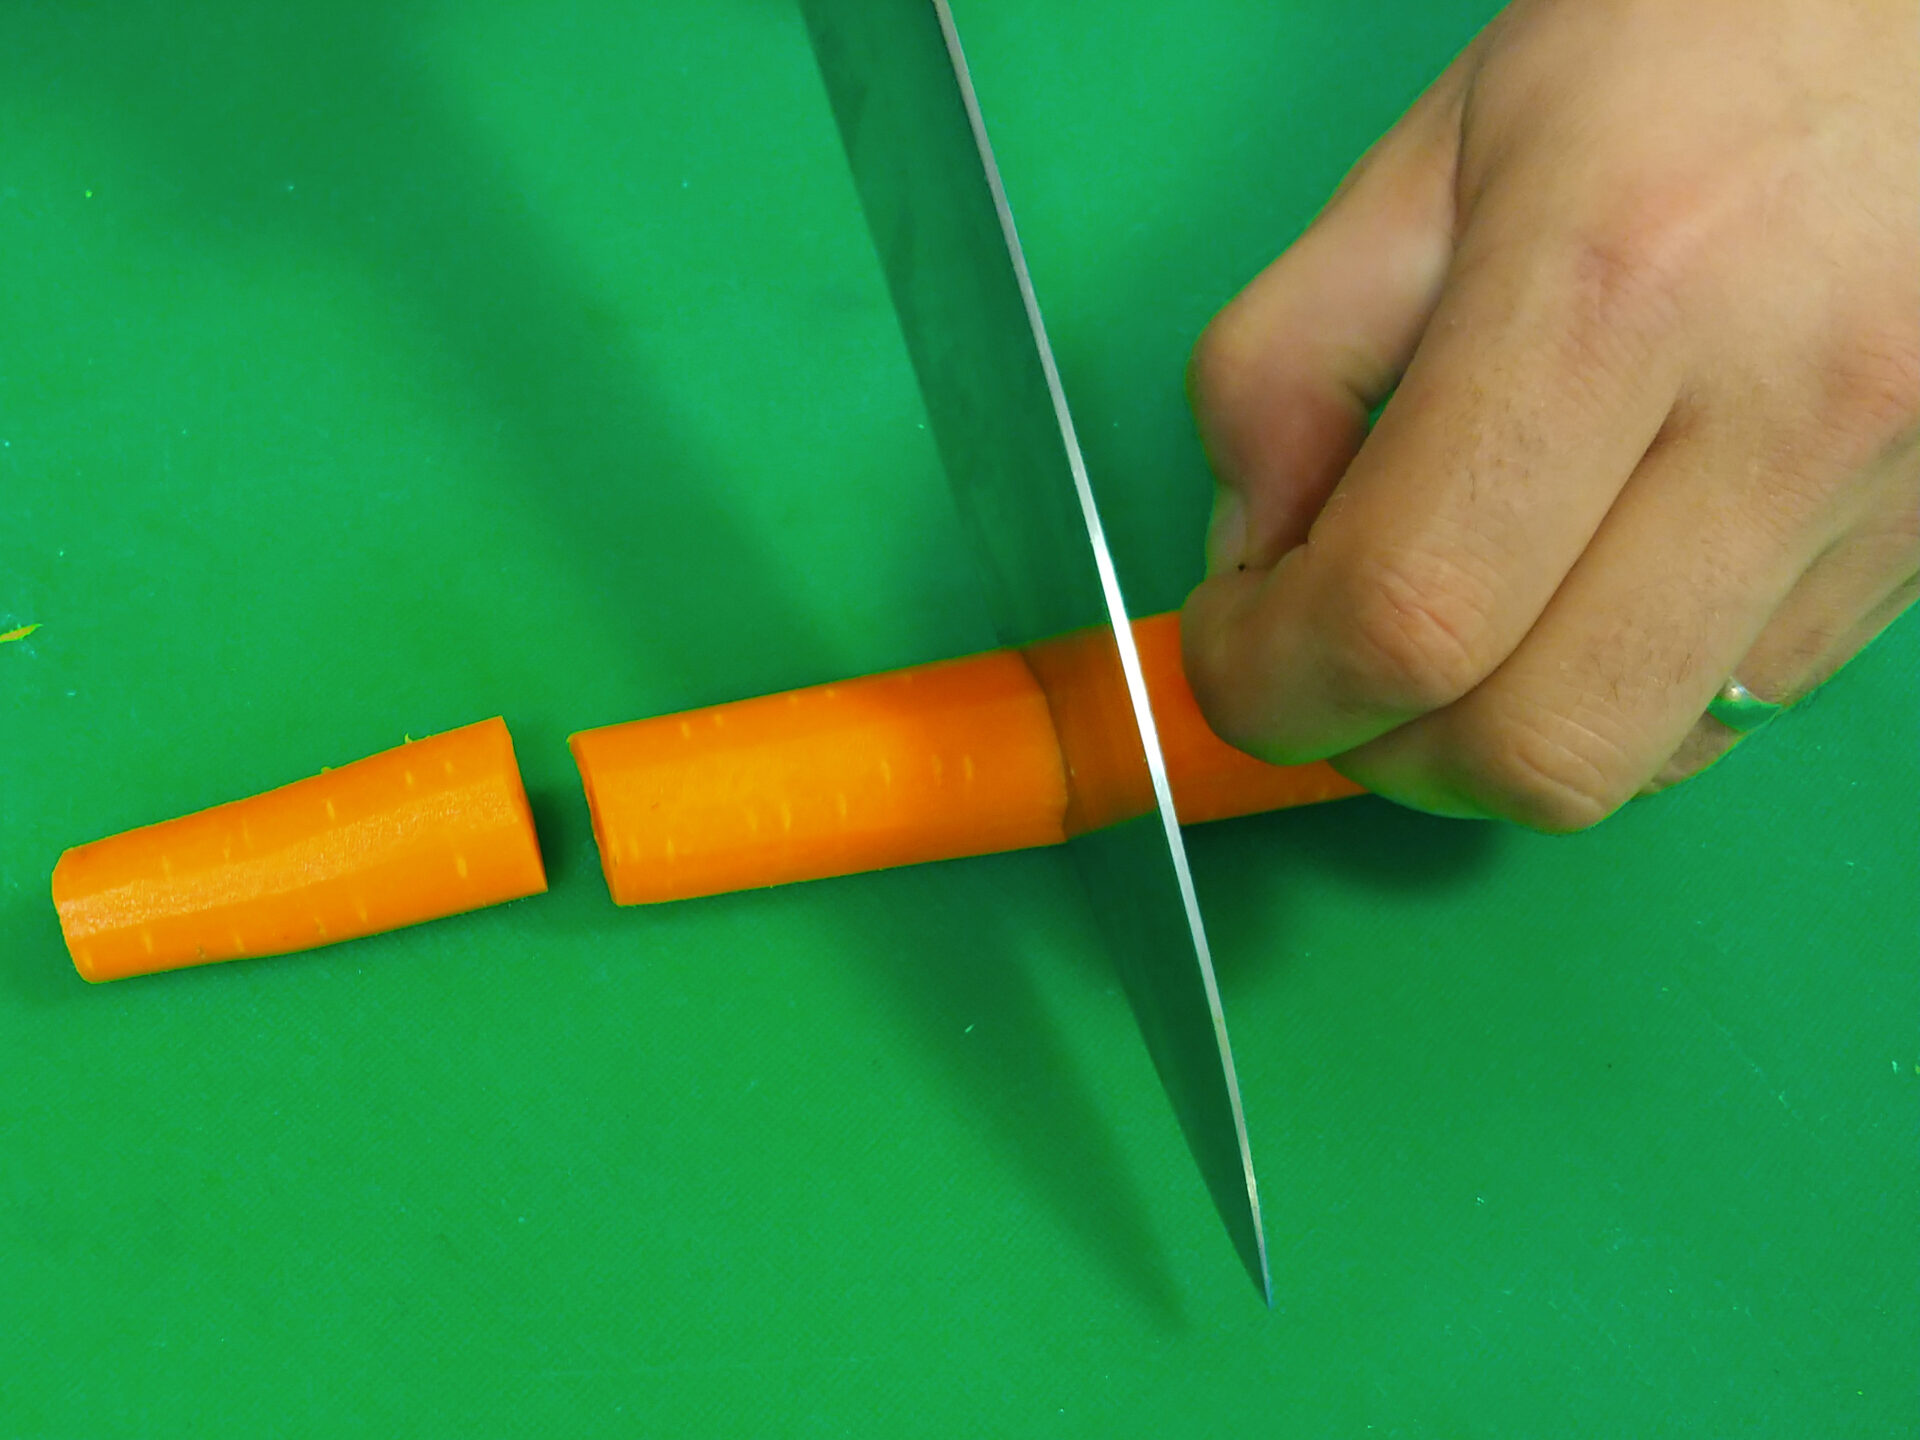
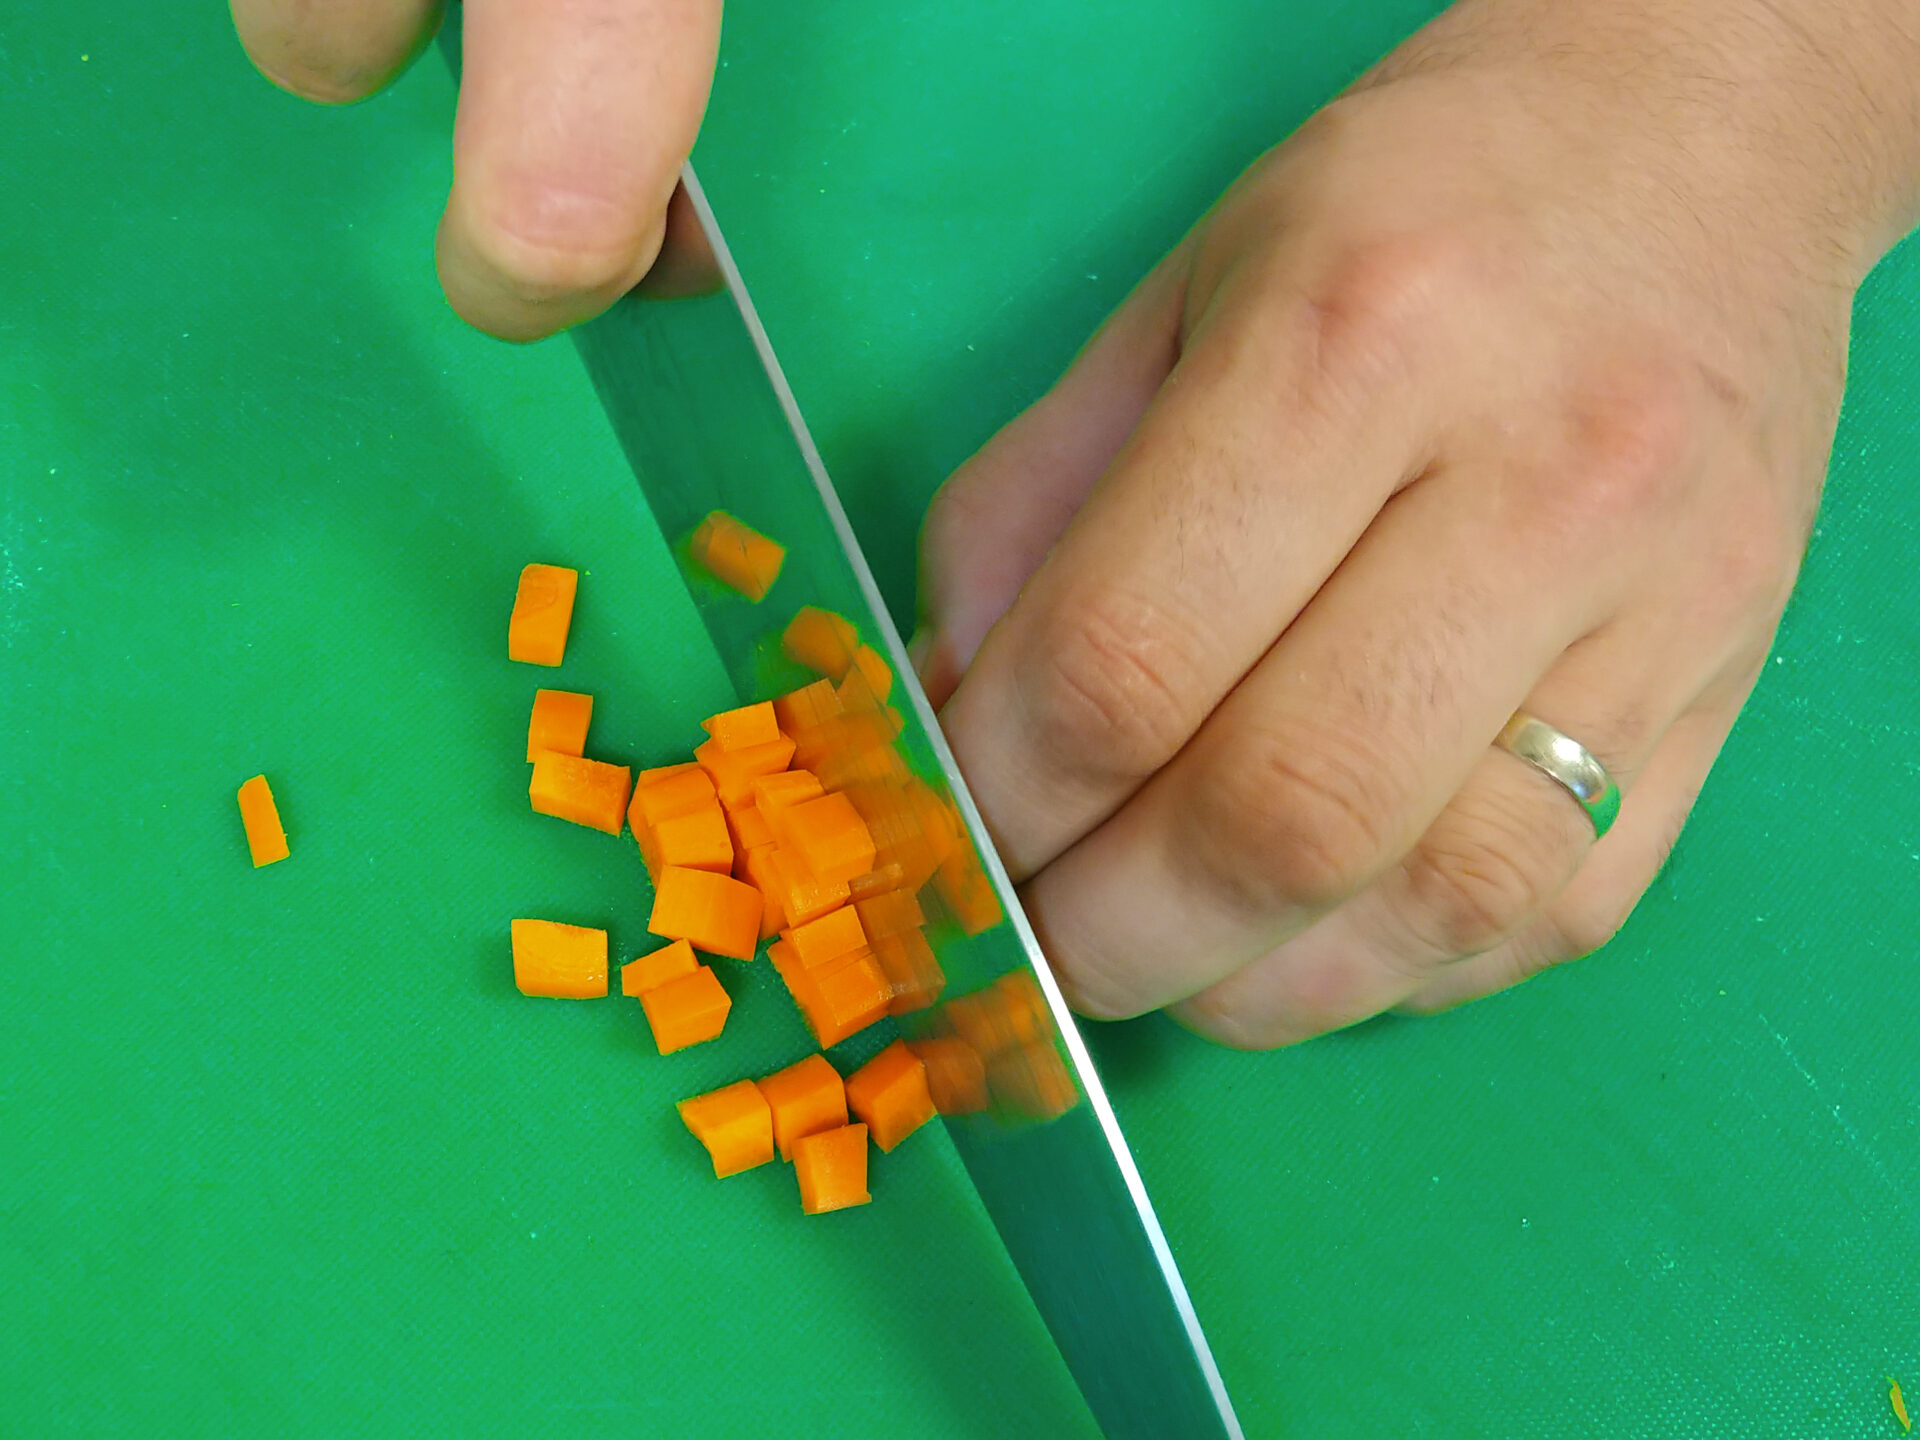
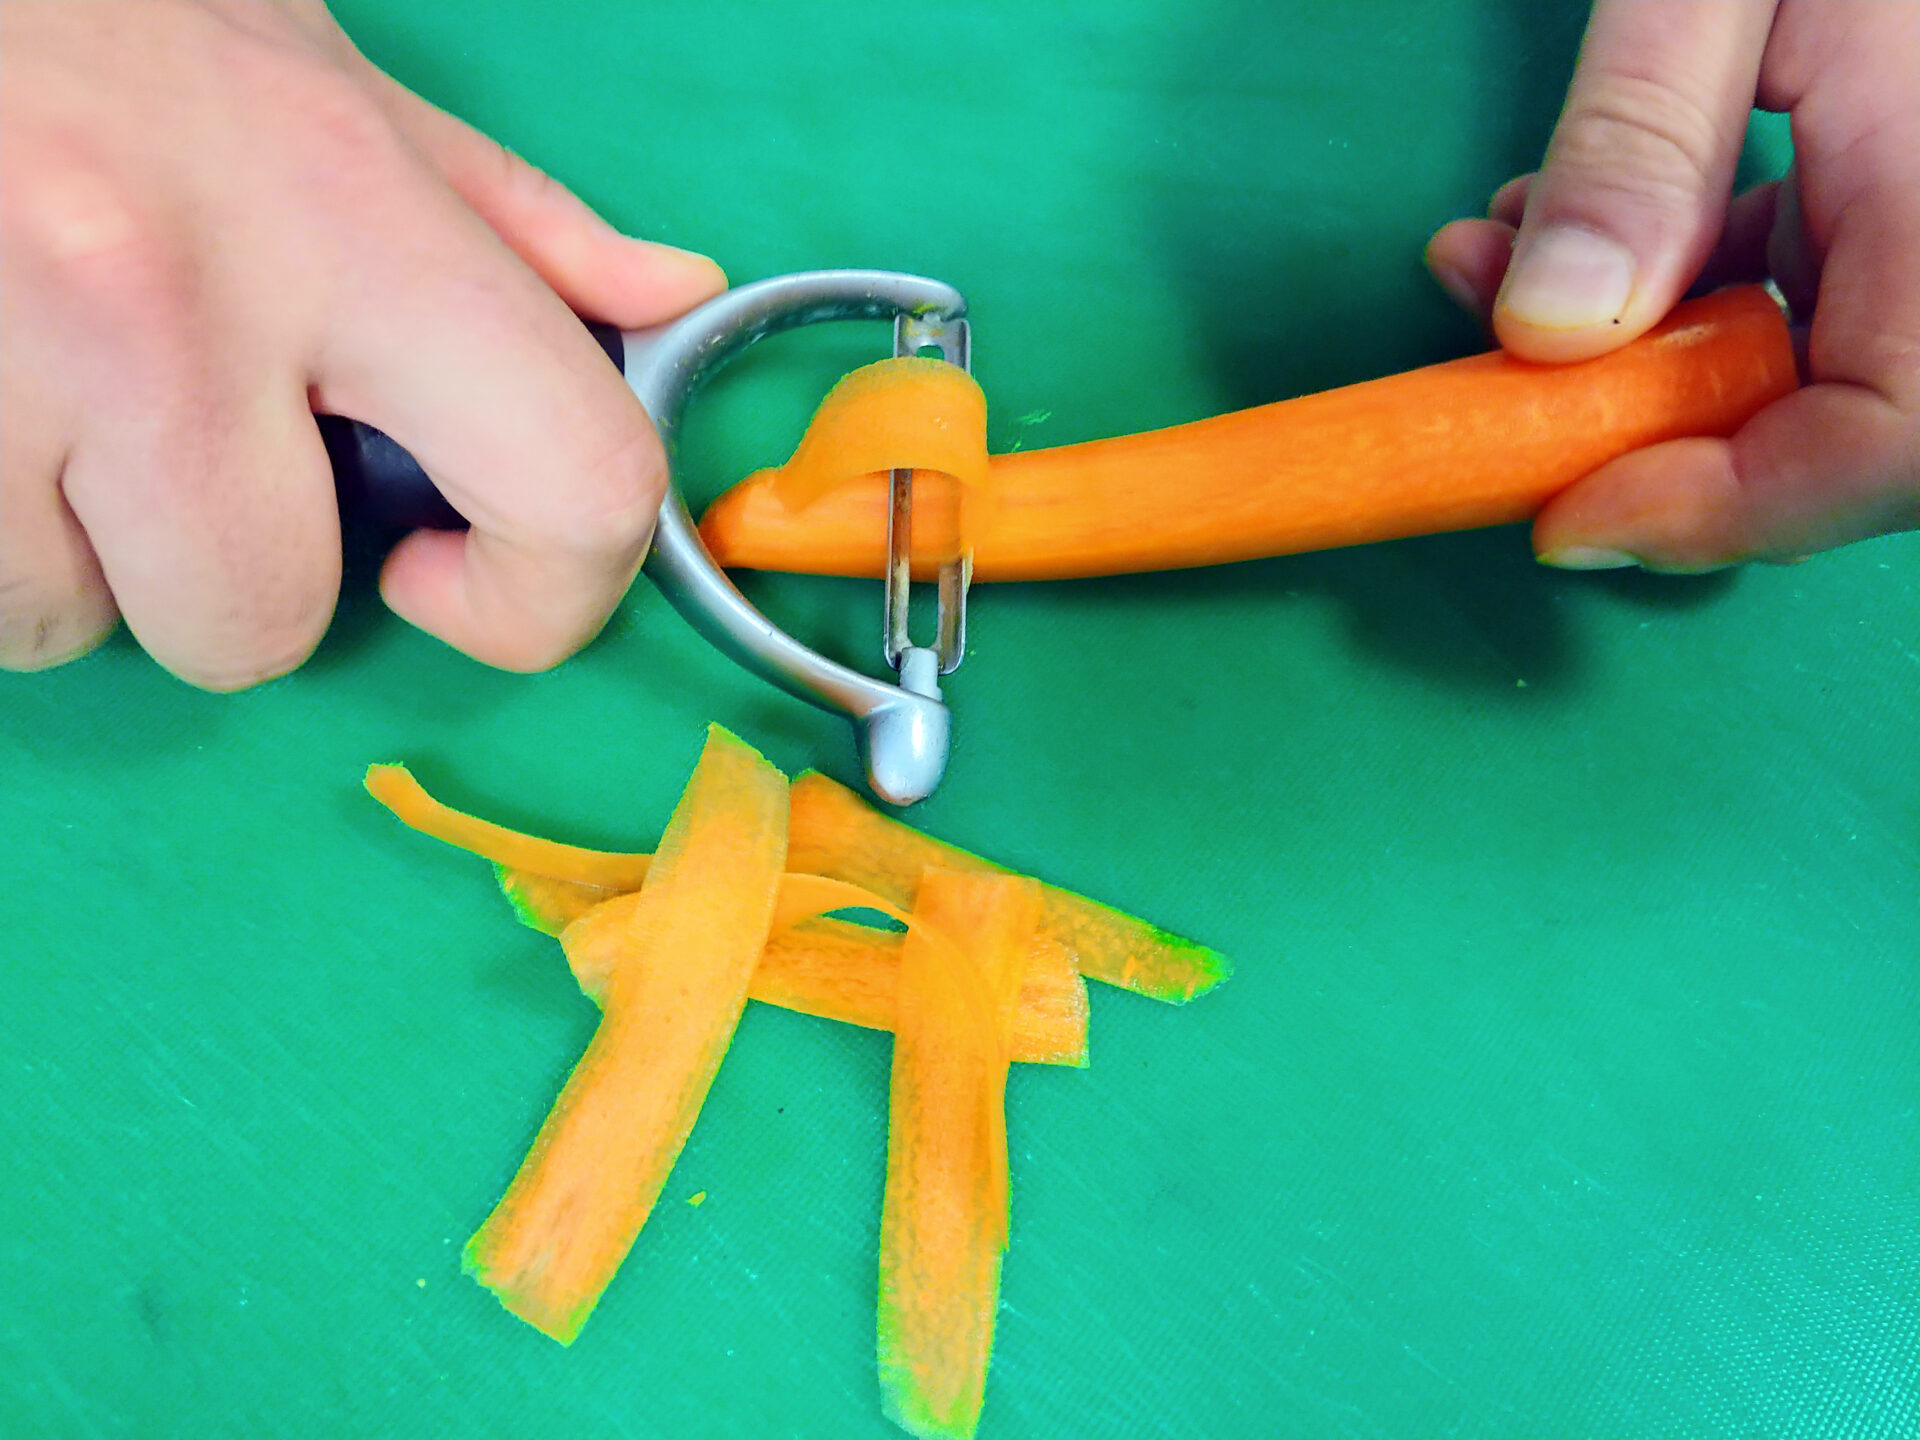
If you have carrots from a source which confirms that it doesn’t use pesticides, you don’t need to peel them, and instead of washing them, thoroughly clean with a vegetable brush. You will benefit from the nutrients found in the outer layer of the carrot.
Use a regular (potato) peeler to peel them and then cut the bottom and top and off.
Cutting:
Cut into slices:
Slice under a 45° angle with a chef’s knife (rock chopping or straight chopping) while the tip of the knife is pointing towards the leading hand.
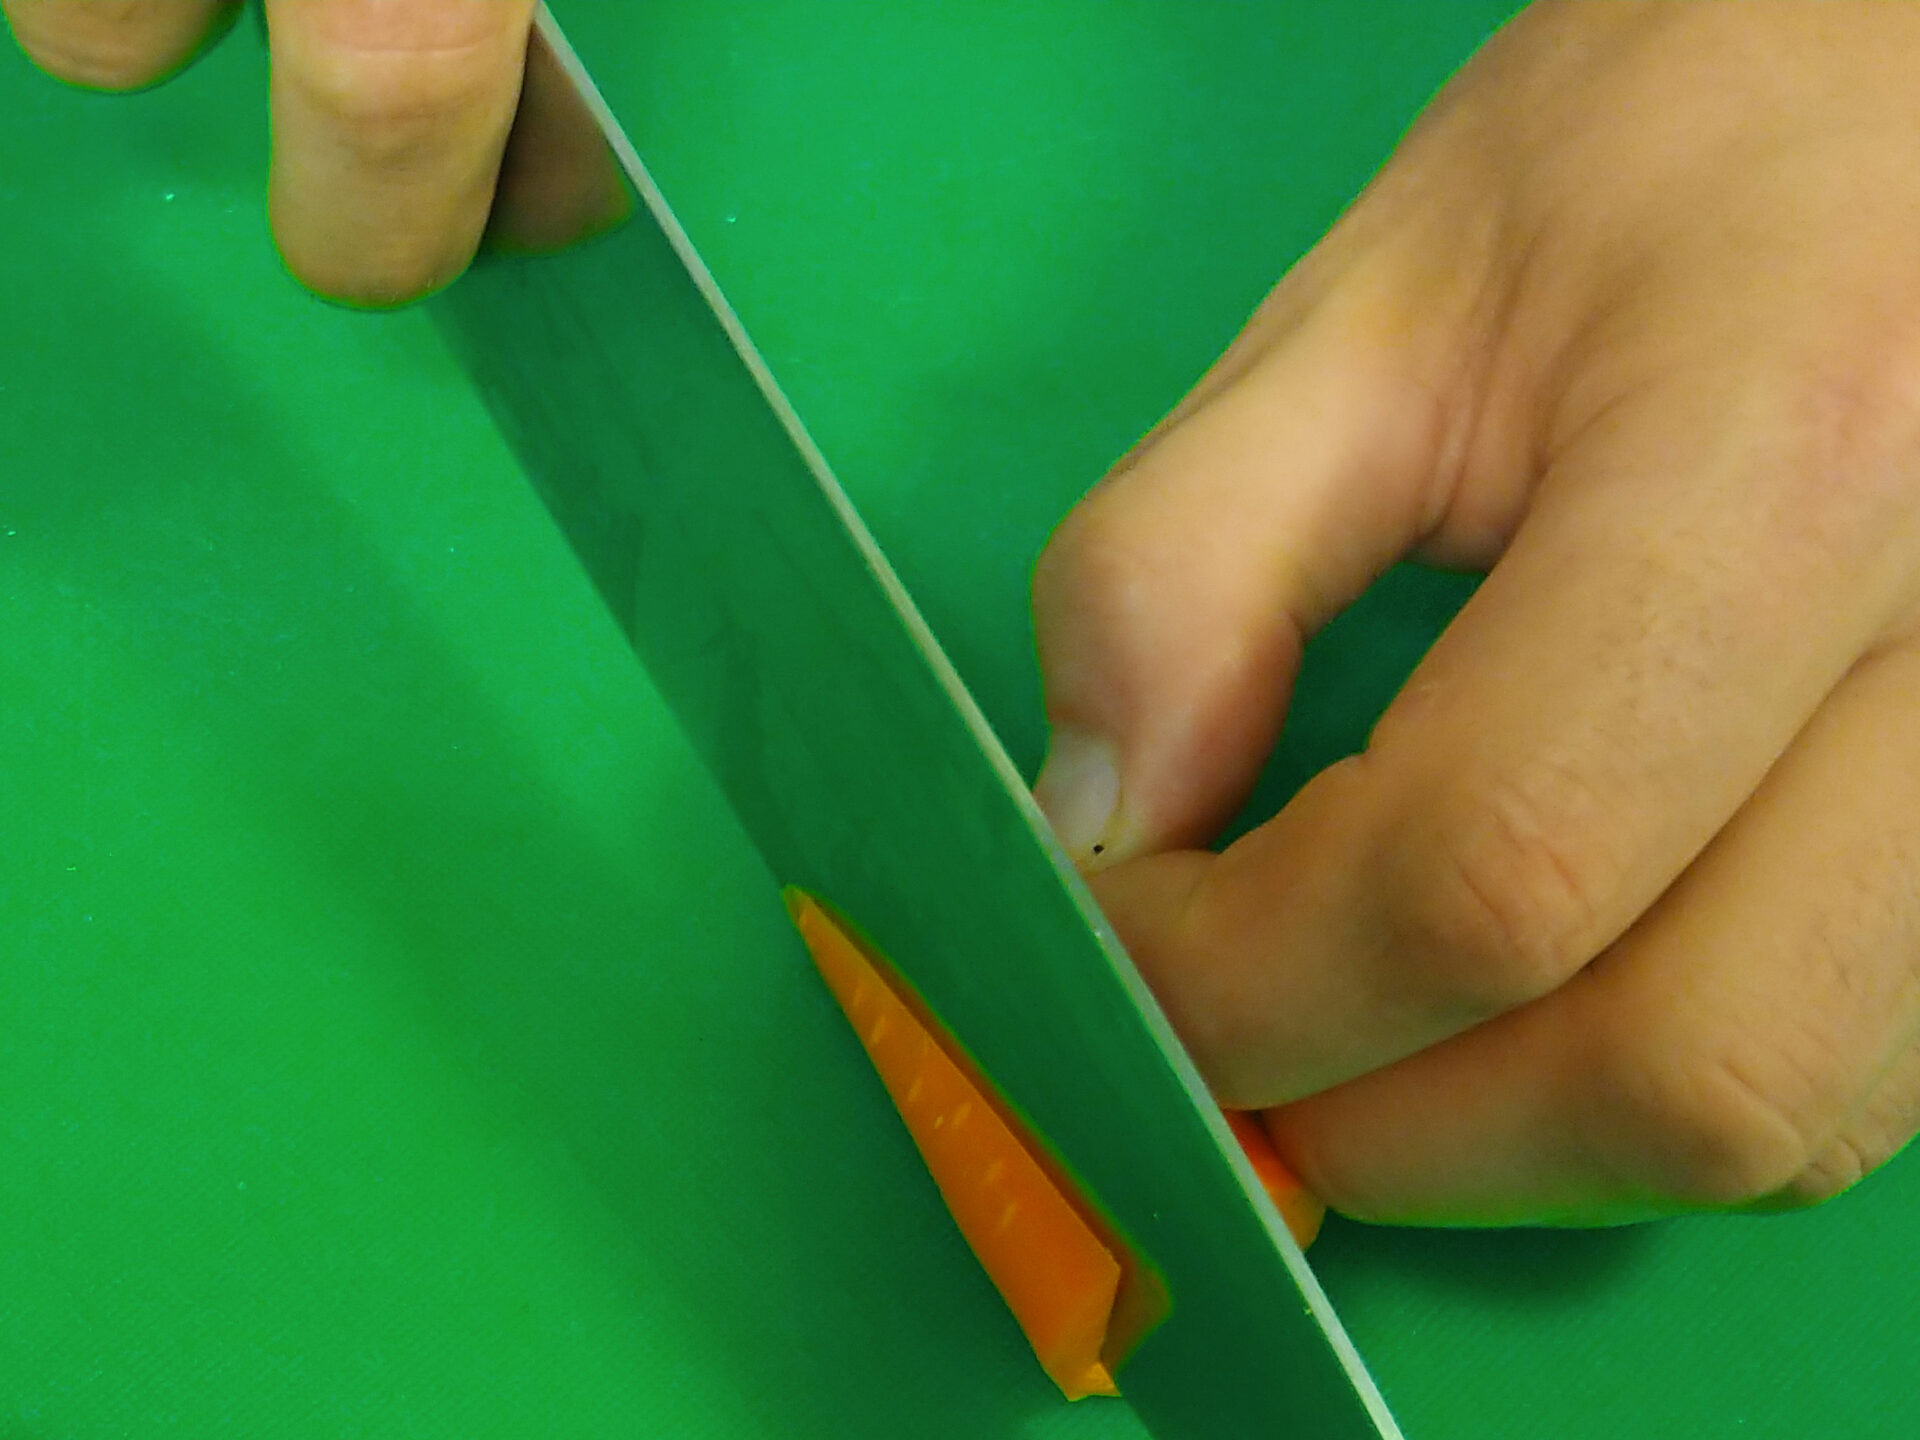
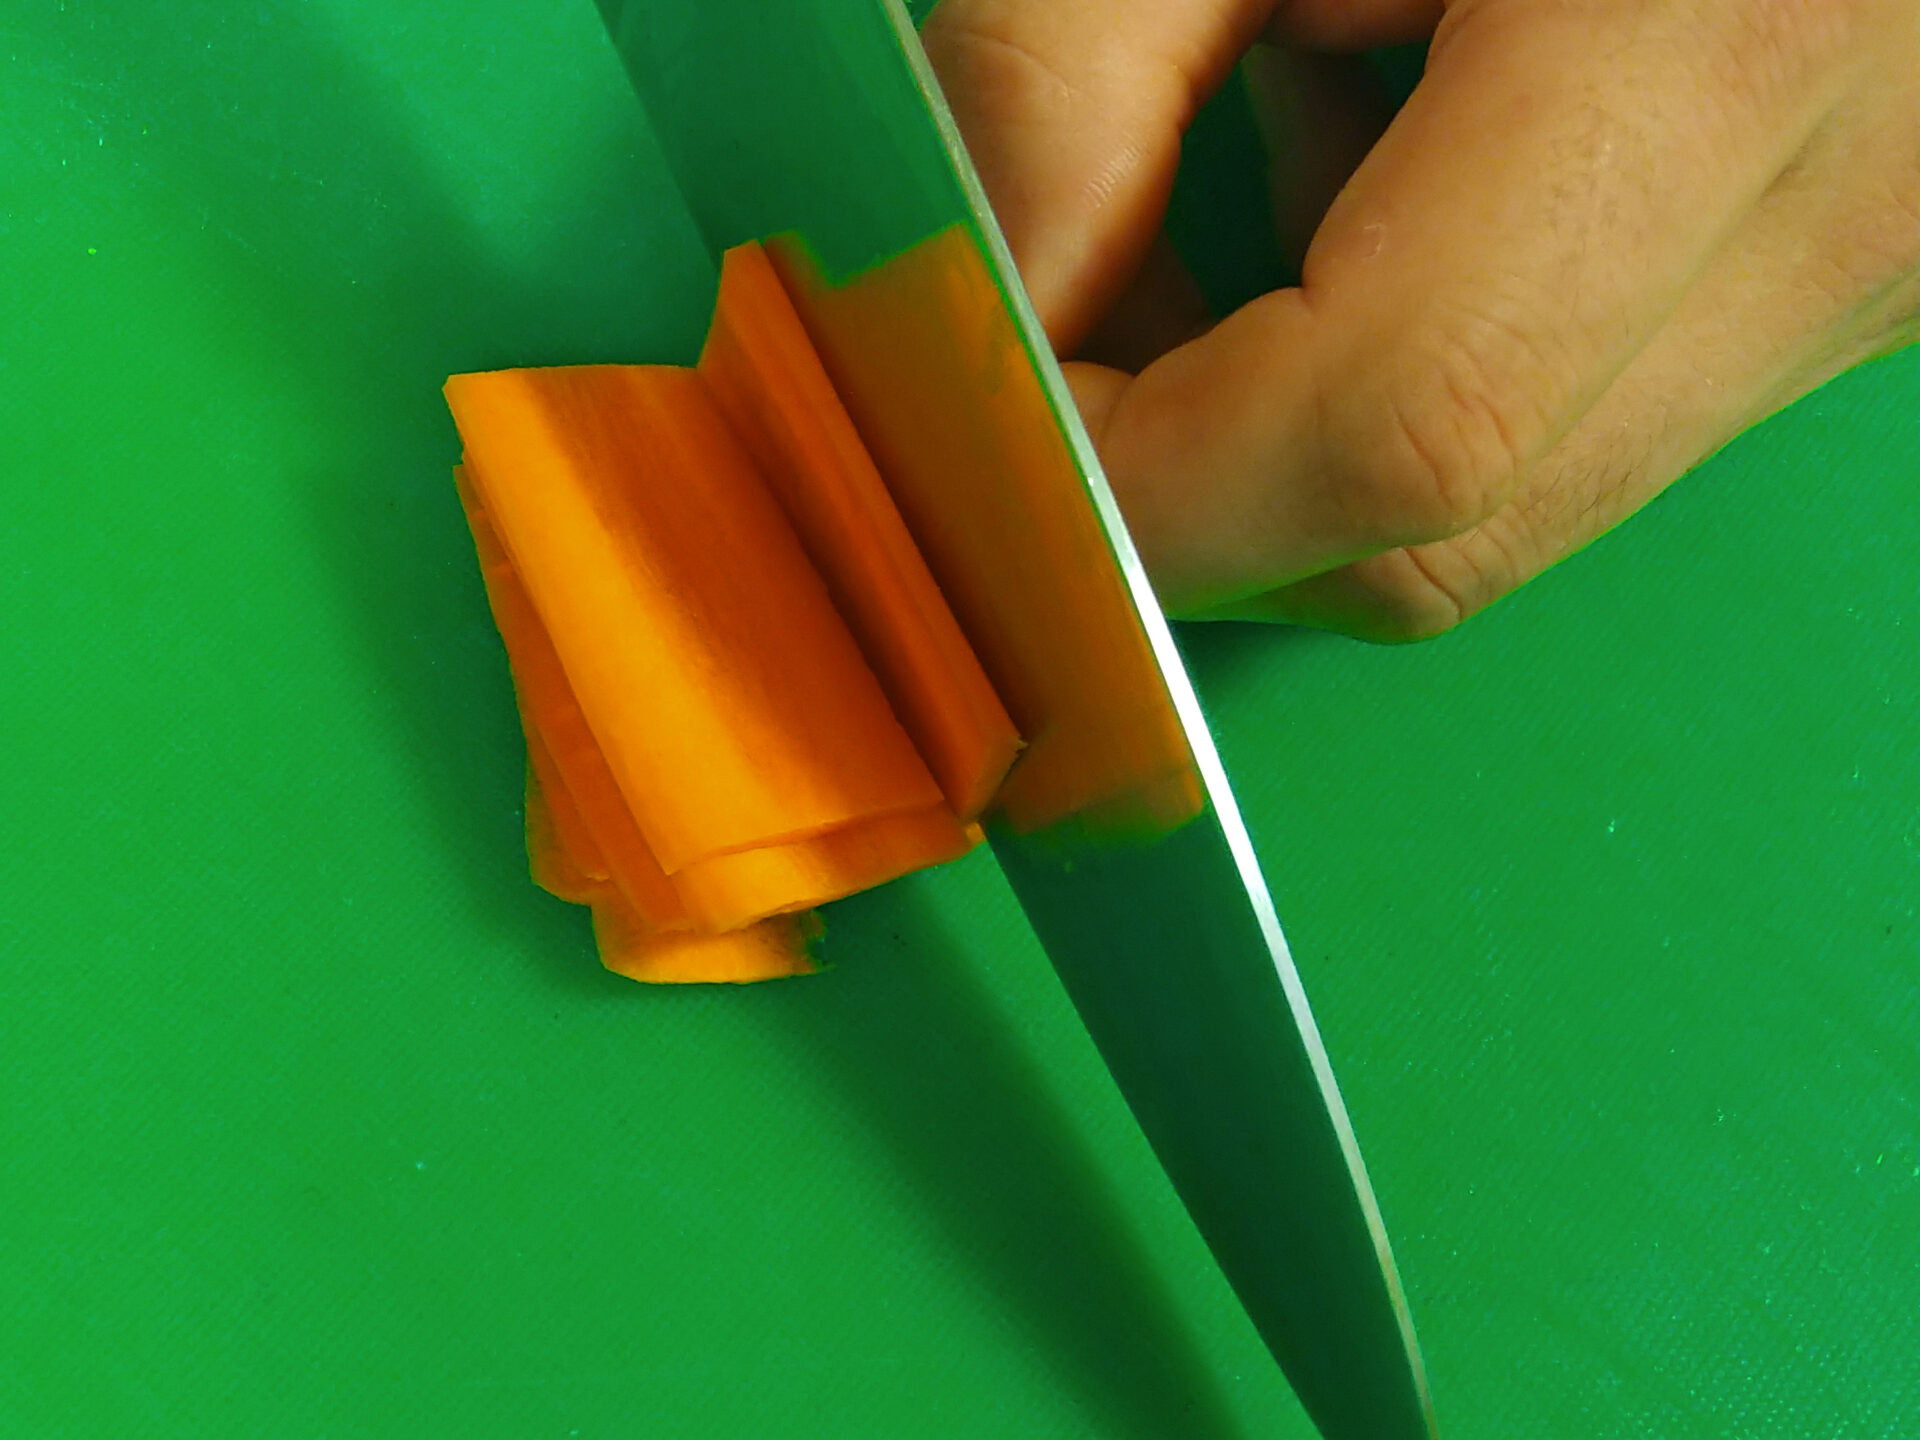
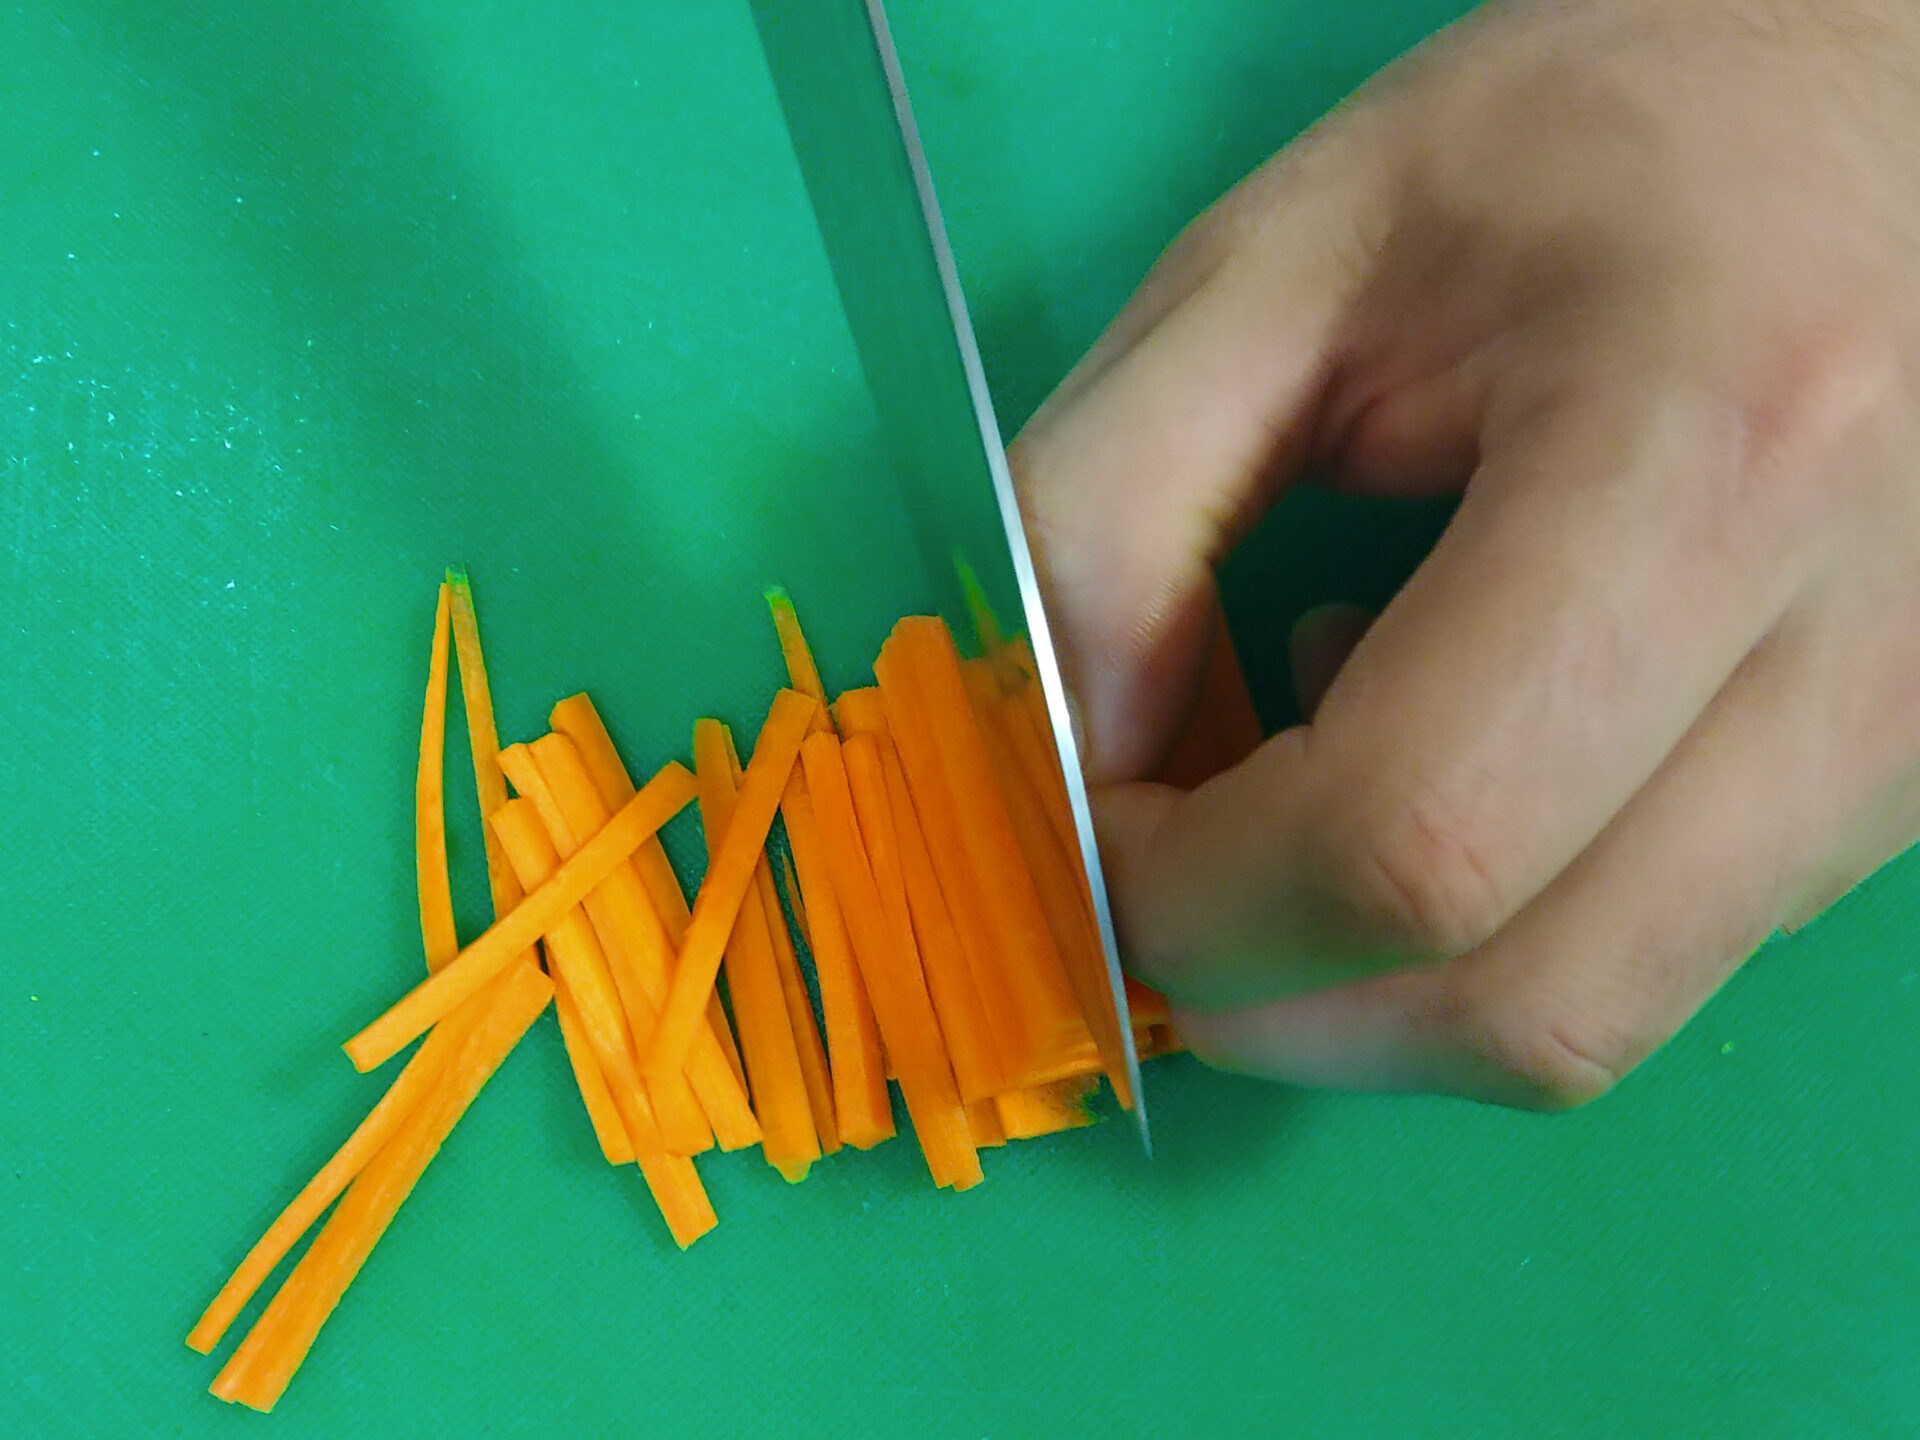
Cut into dices or noodle shapes
Cut carrots into 2 – 3 sections for cutting the shapes.
Cut off the bottom of each one to prevent rotating during cutting.
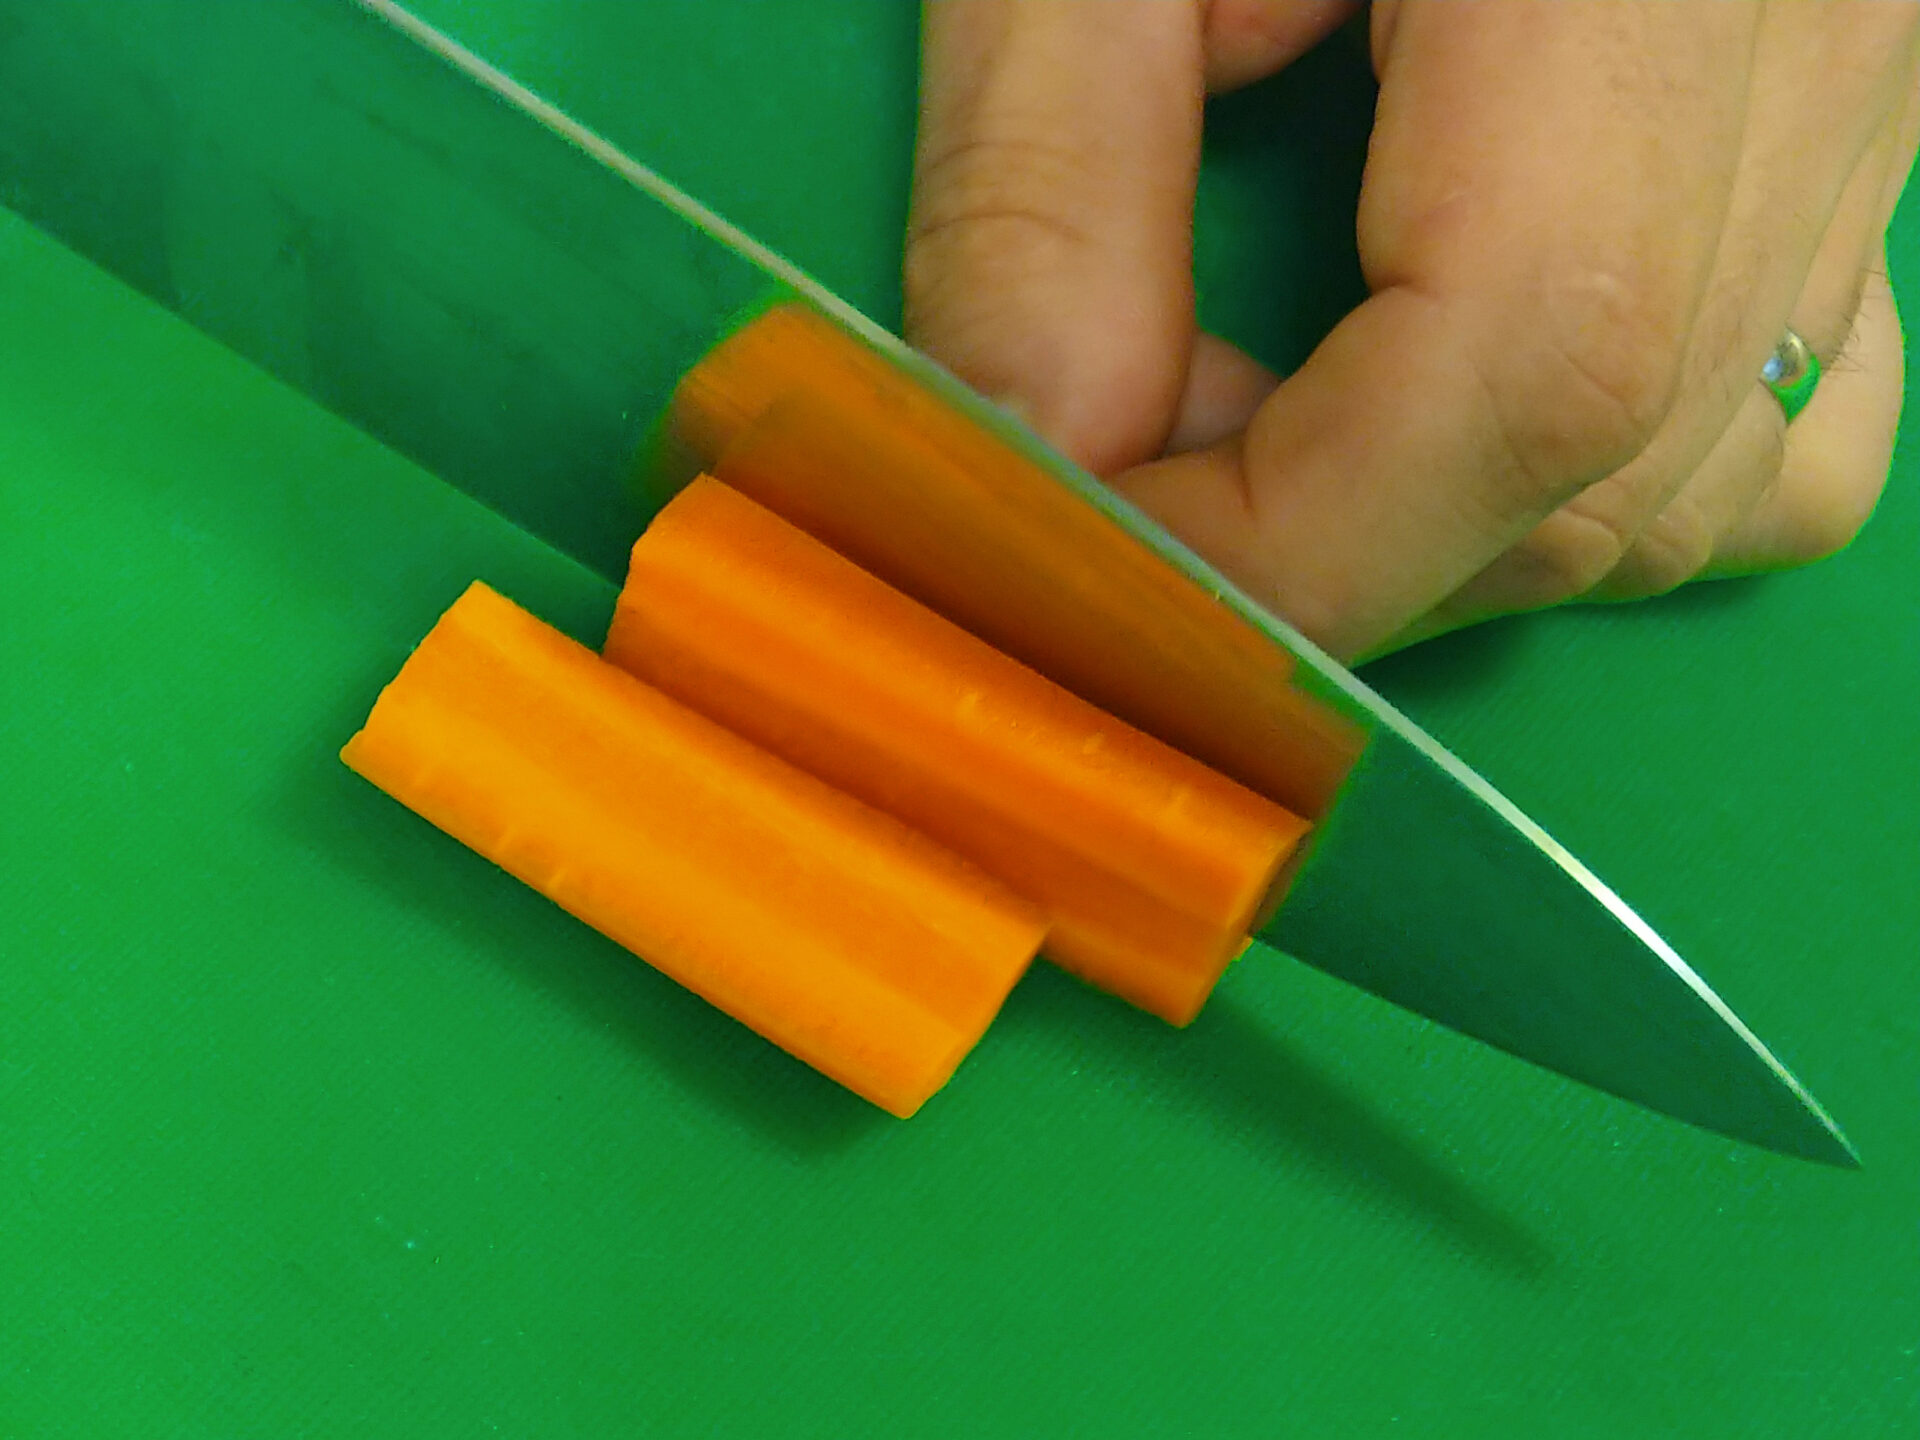
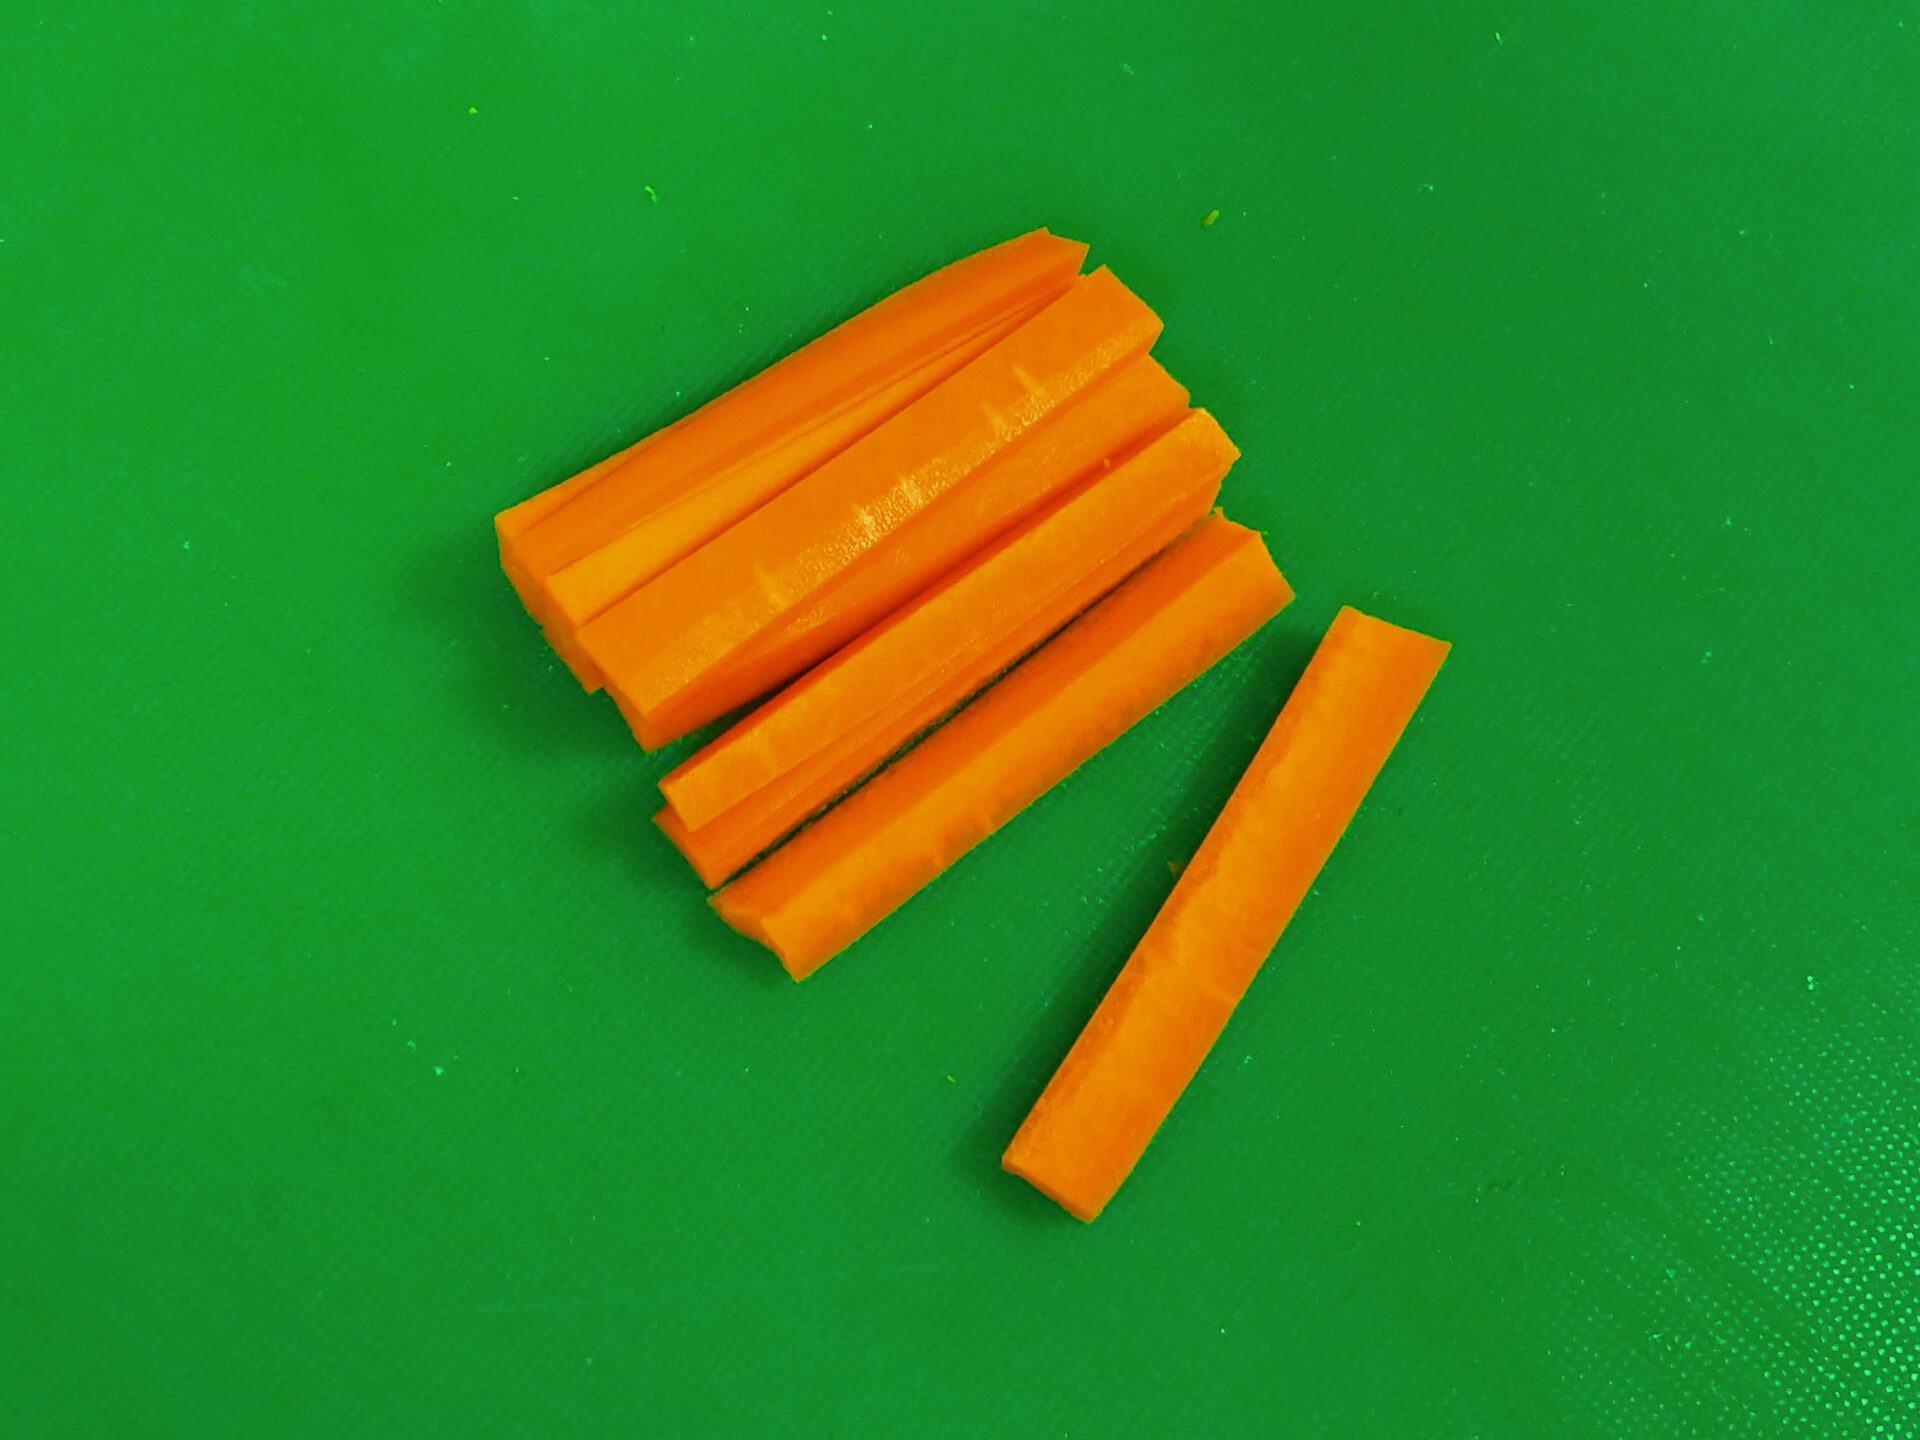
Cut into thick and long noodle shapes (great for dipping) and then optionally cut across the noodle shapes to reach dices (great for cooking, stir-fry, or salads).
Or cut into fine thin slices and then cut through to create noodle shapes (great for Asian dishes or salads).

Shave to slices
Using a peeler, shave to thin slices.
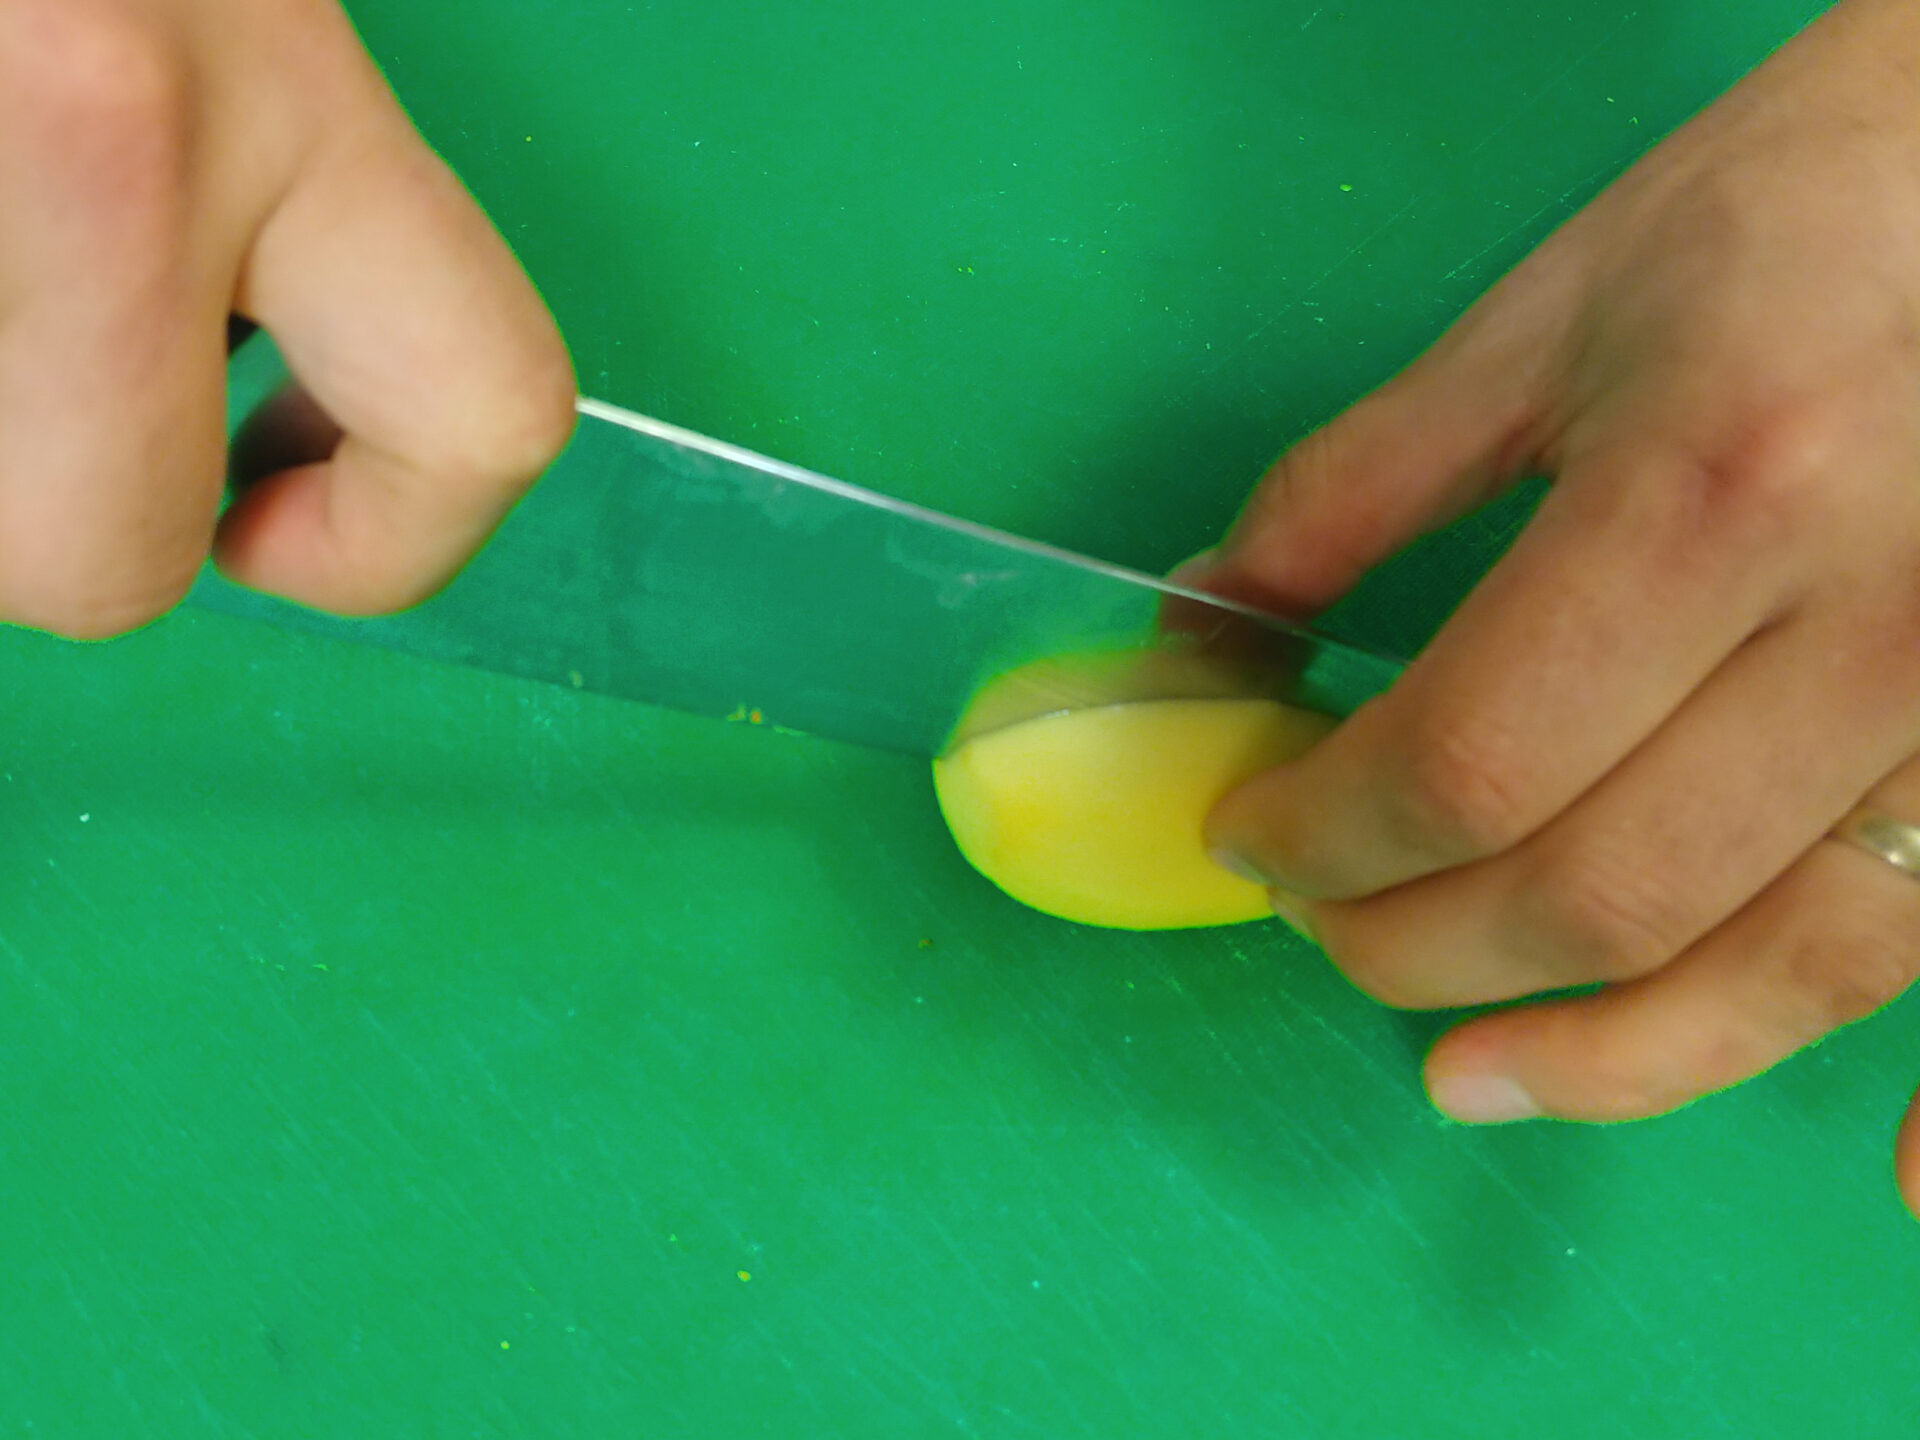
Similar to carrots, potatoes from a source that does not use pesticides don’t need to be peeled, and instead of washing them, thoroughly clean with a vegetable brush.
Use a regular potato peeler to peel them and then cut the bottom and top and off.
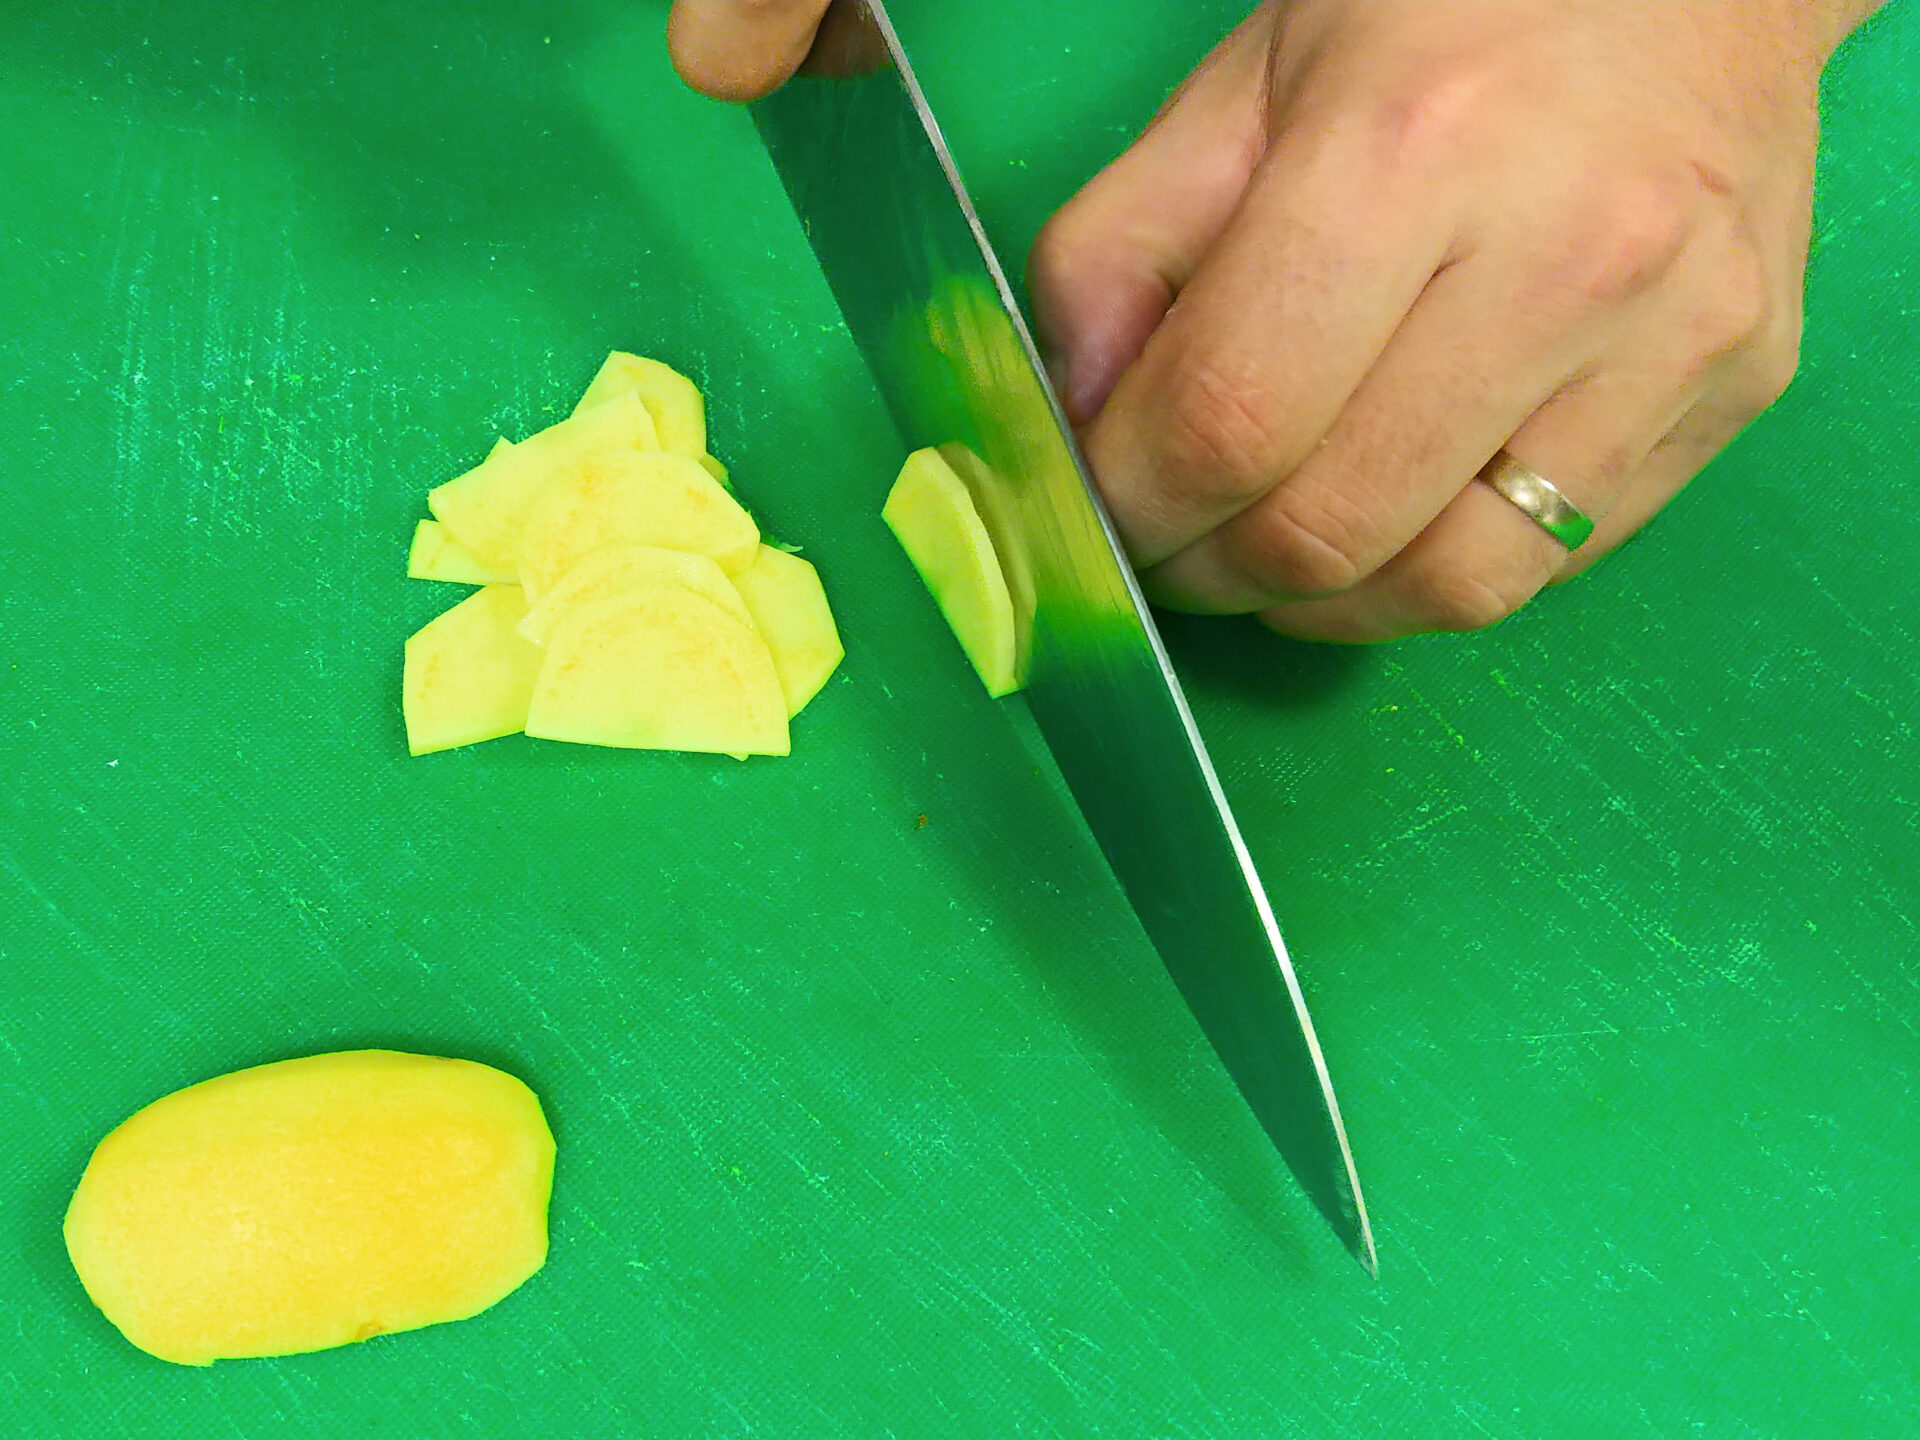
Cutting:
Cut into slices:
Cut into slices for potato chips or slightly thicker slices for gratinated potatoes using a straight chop.

Or cut lengthwise followed by slicing into half circles performed by a straight chopping or rock chopping cut.
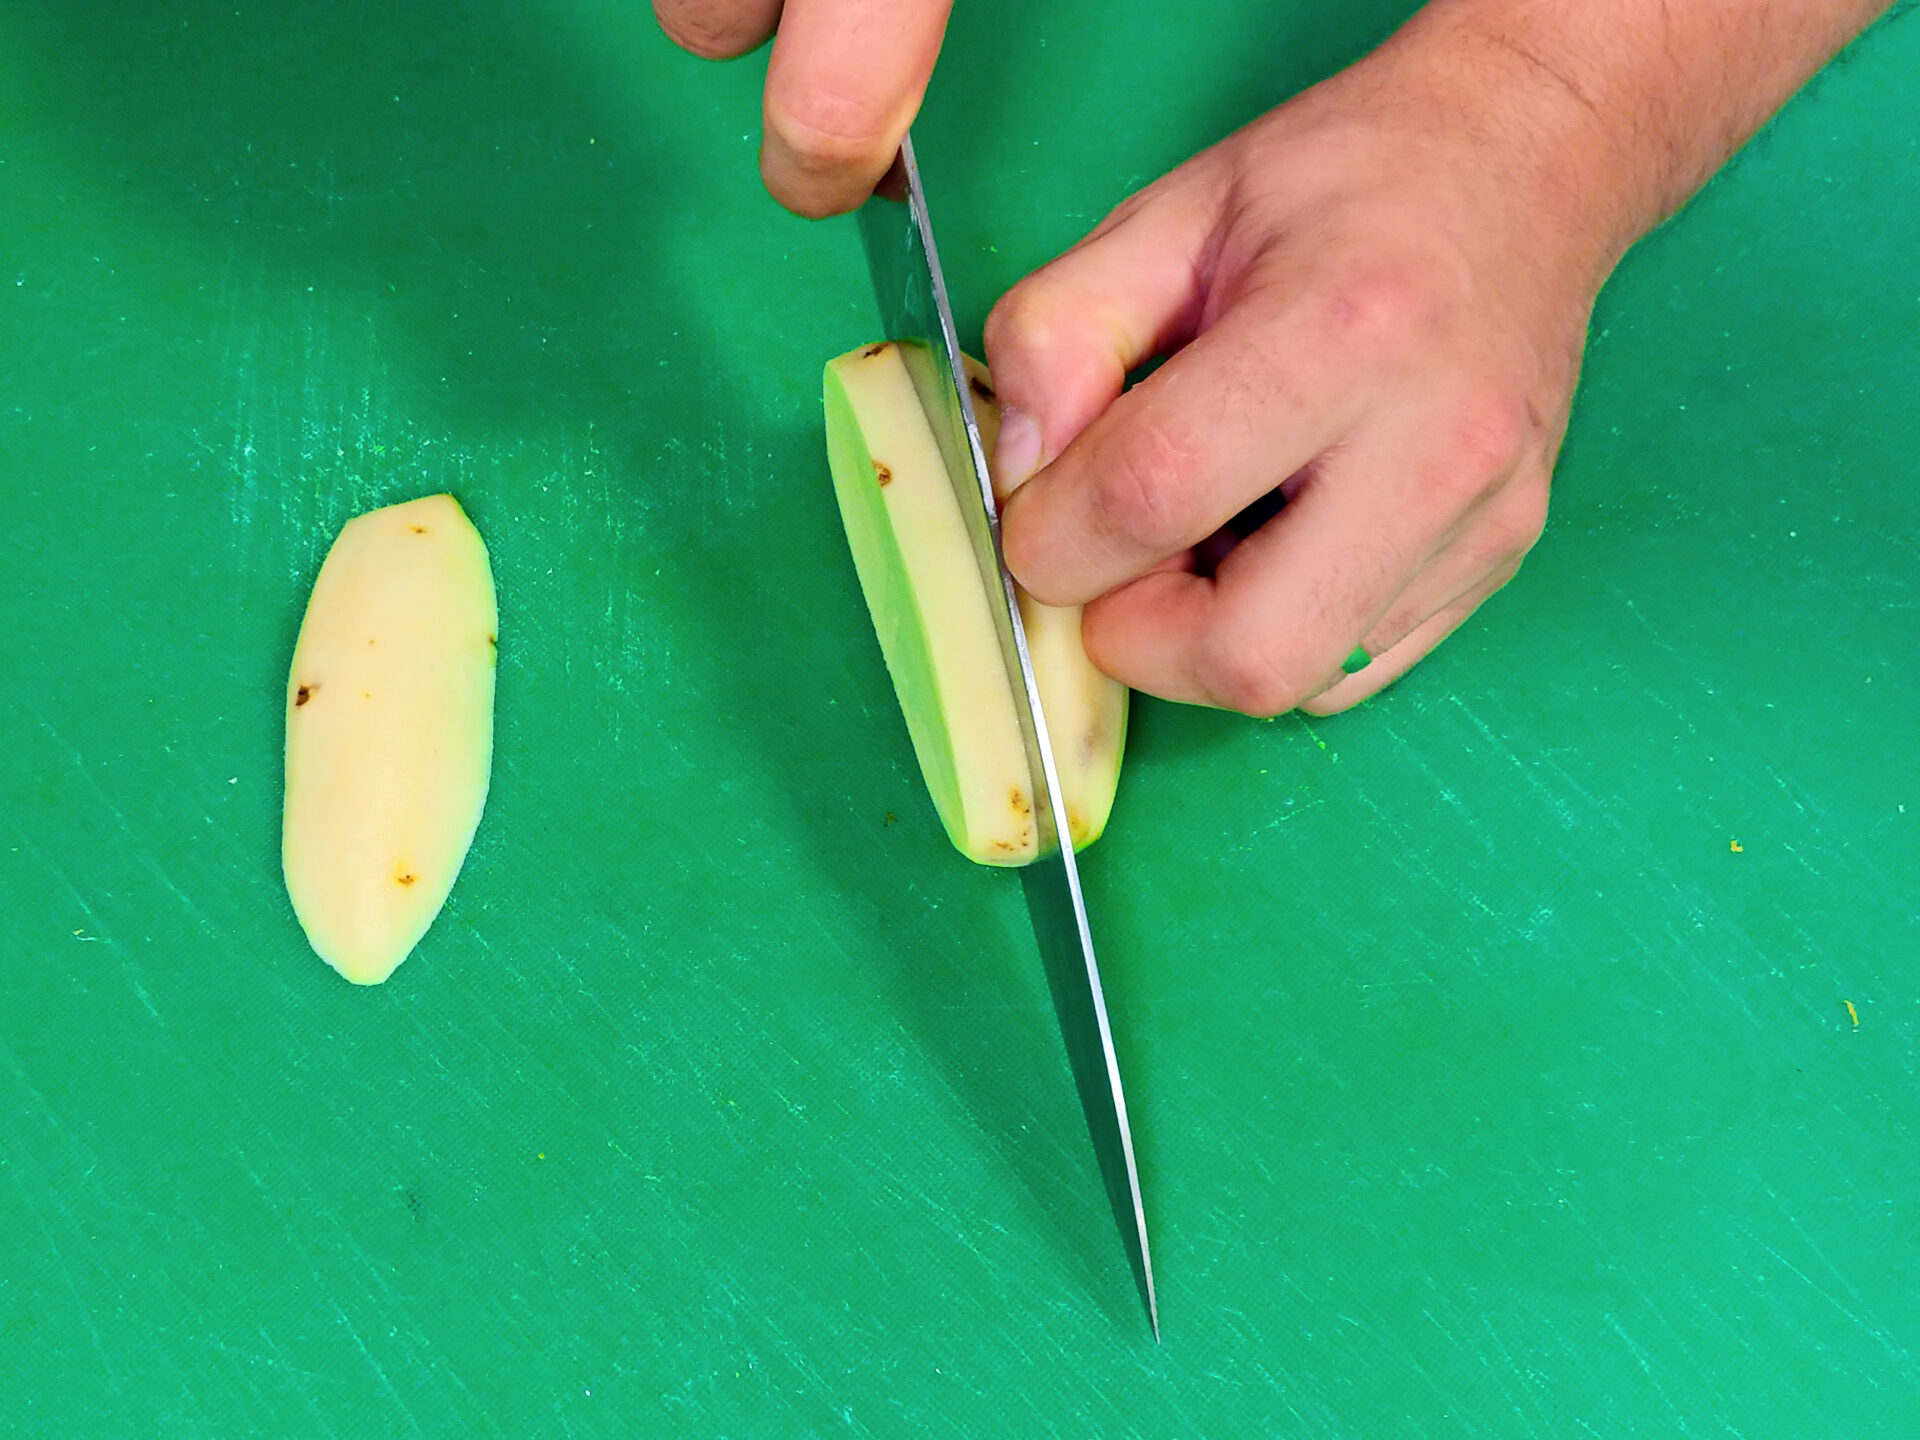
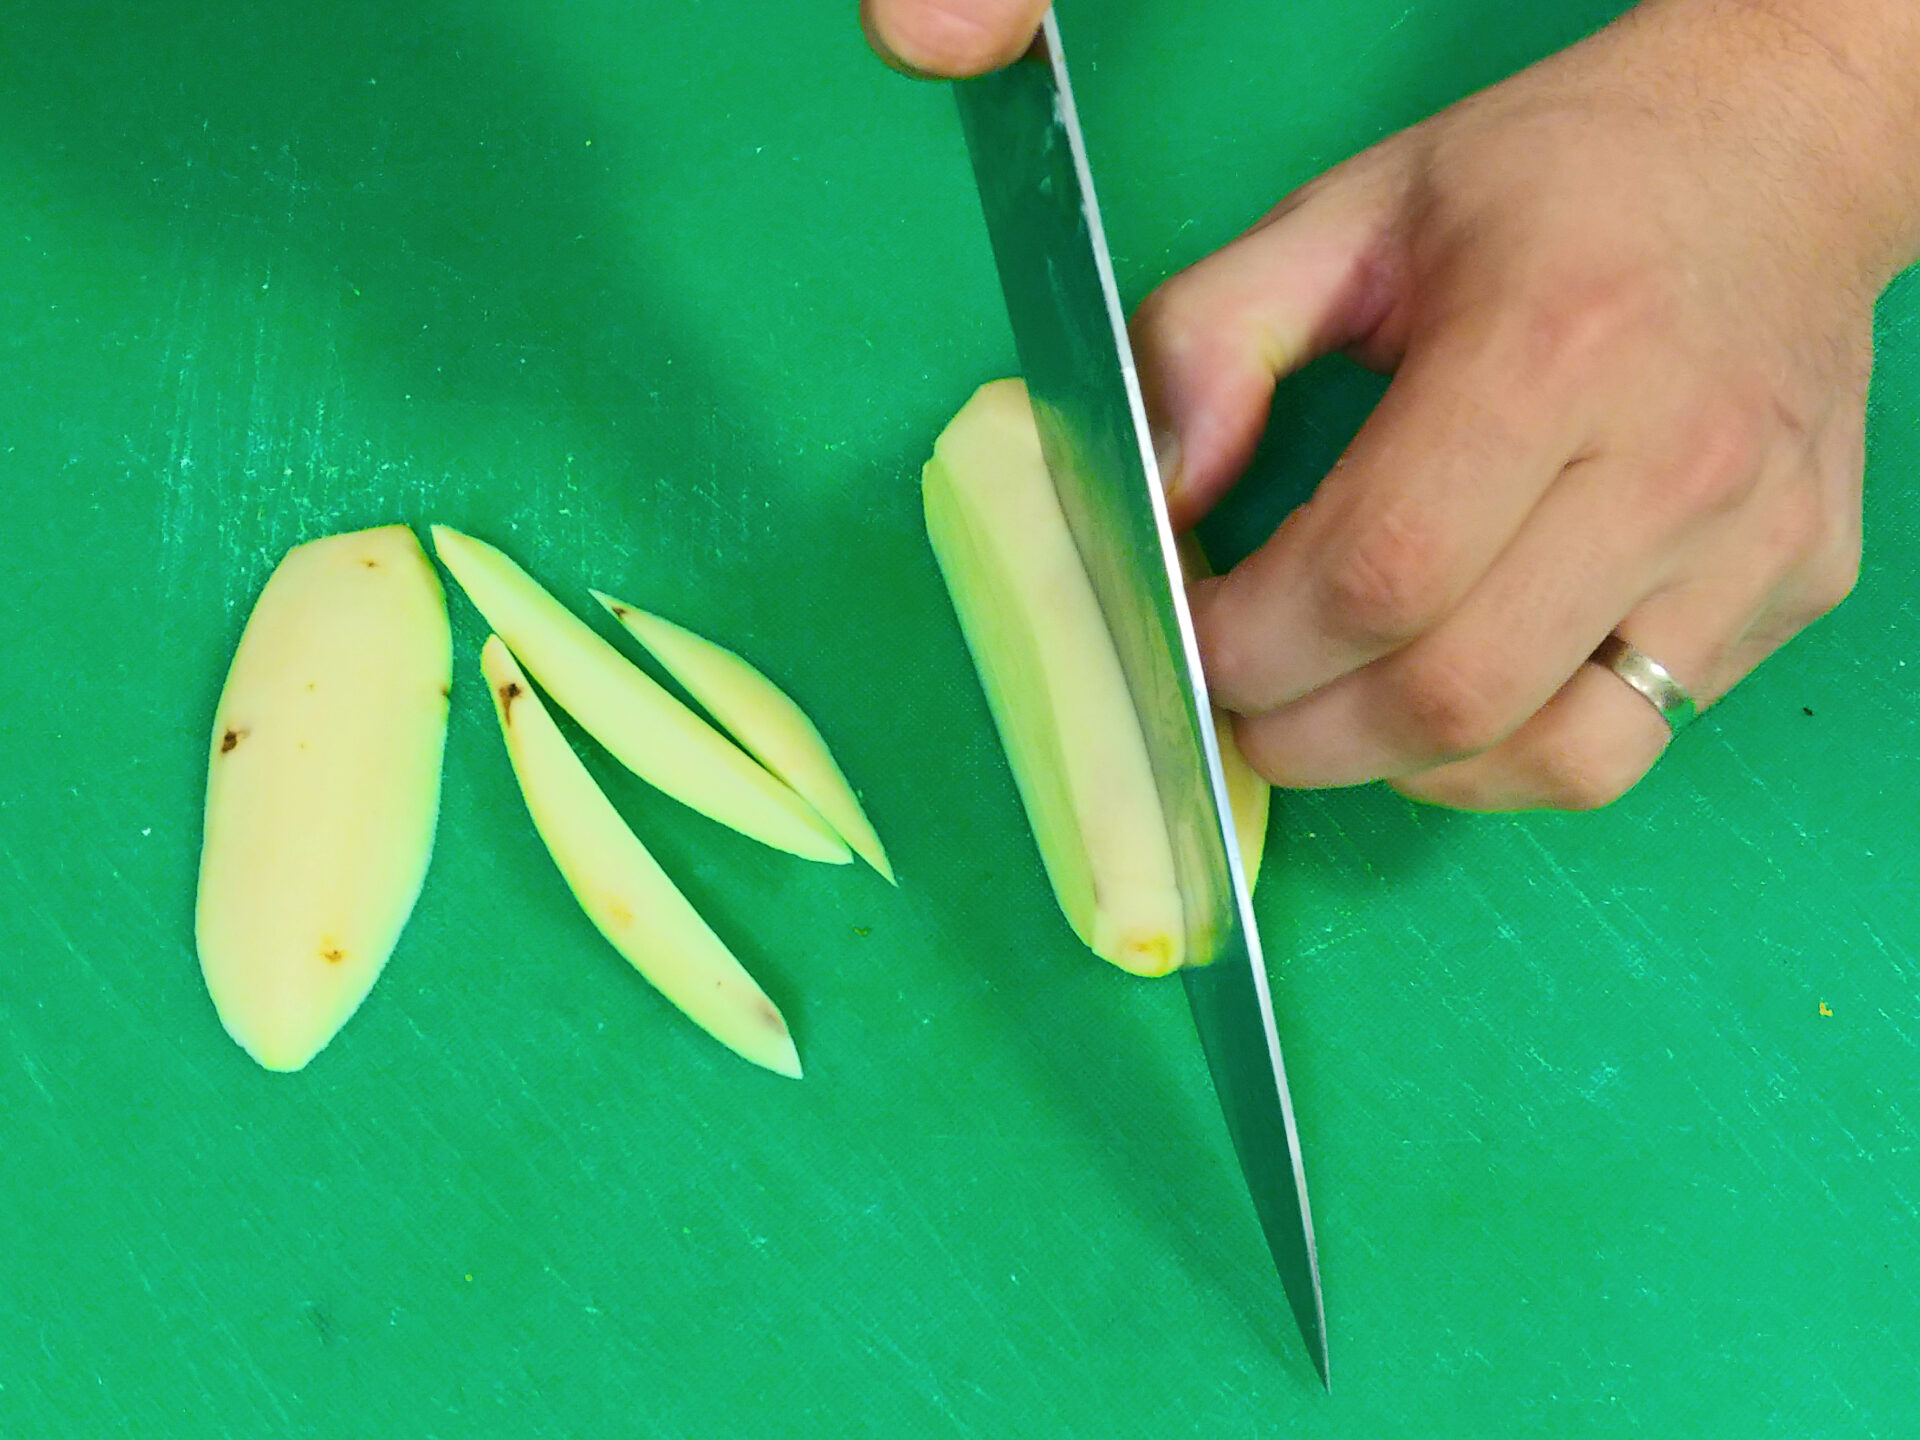
Fries or dices
Cut lengthwise into thick slices and then into individual fries.
If you want dices, cut across the fries.
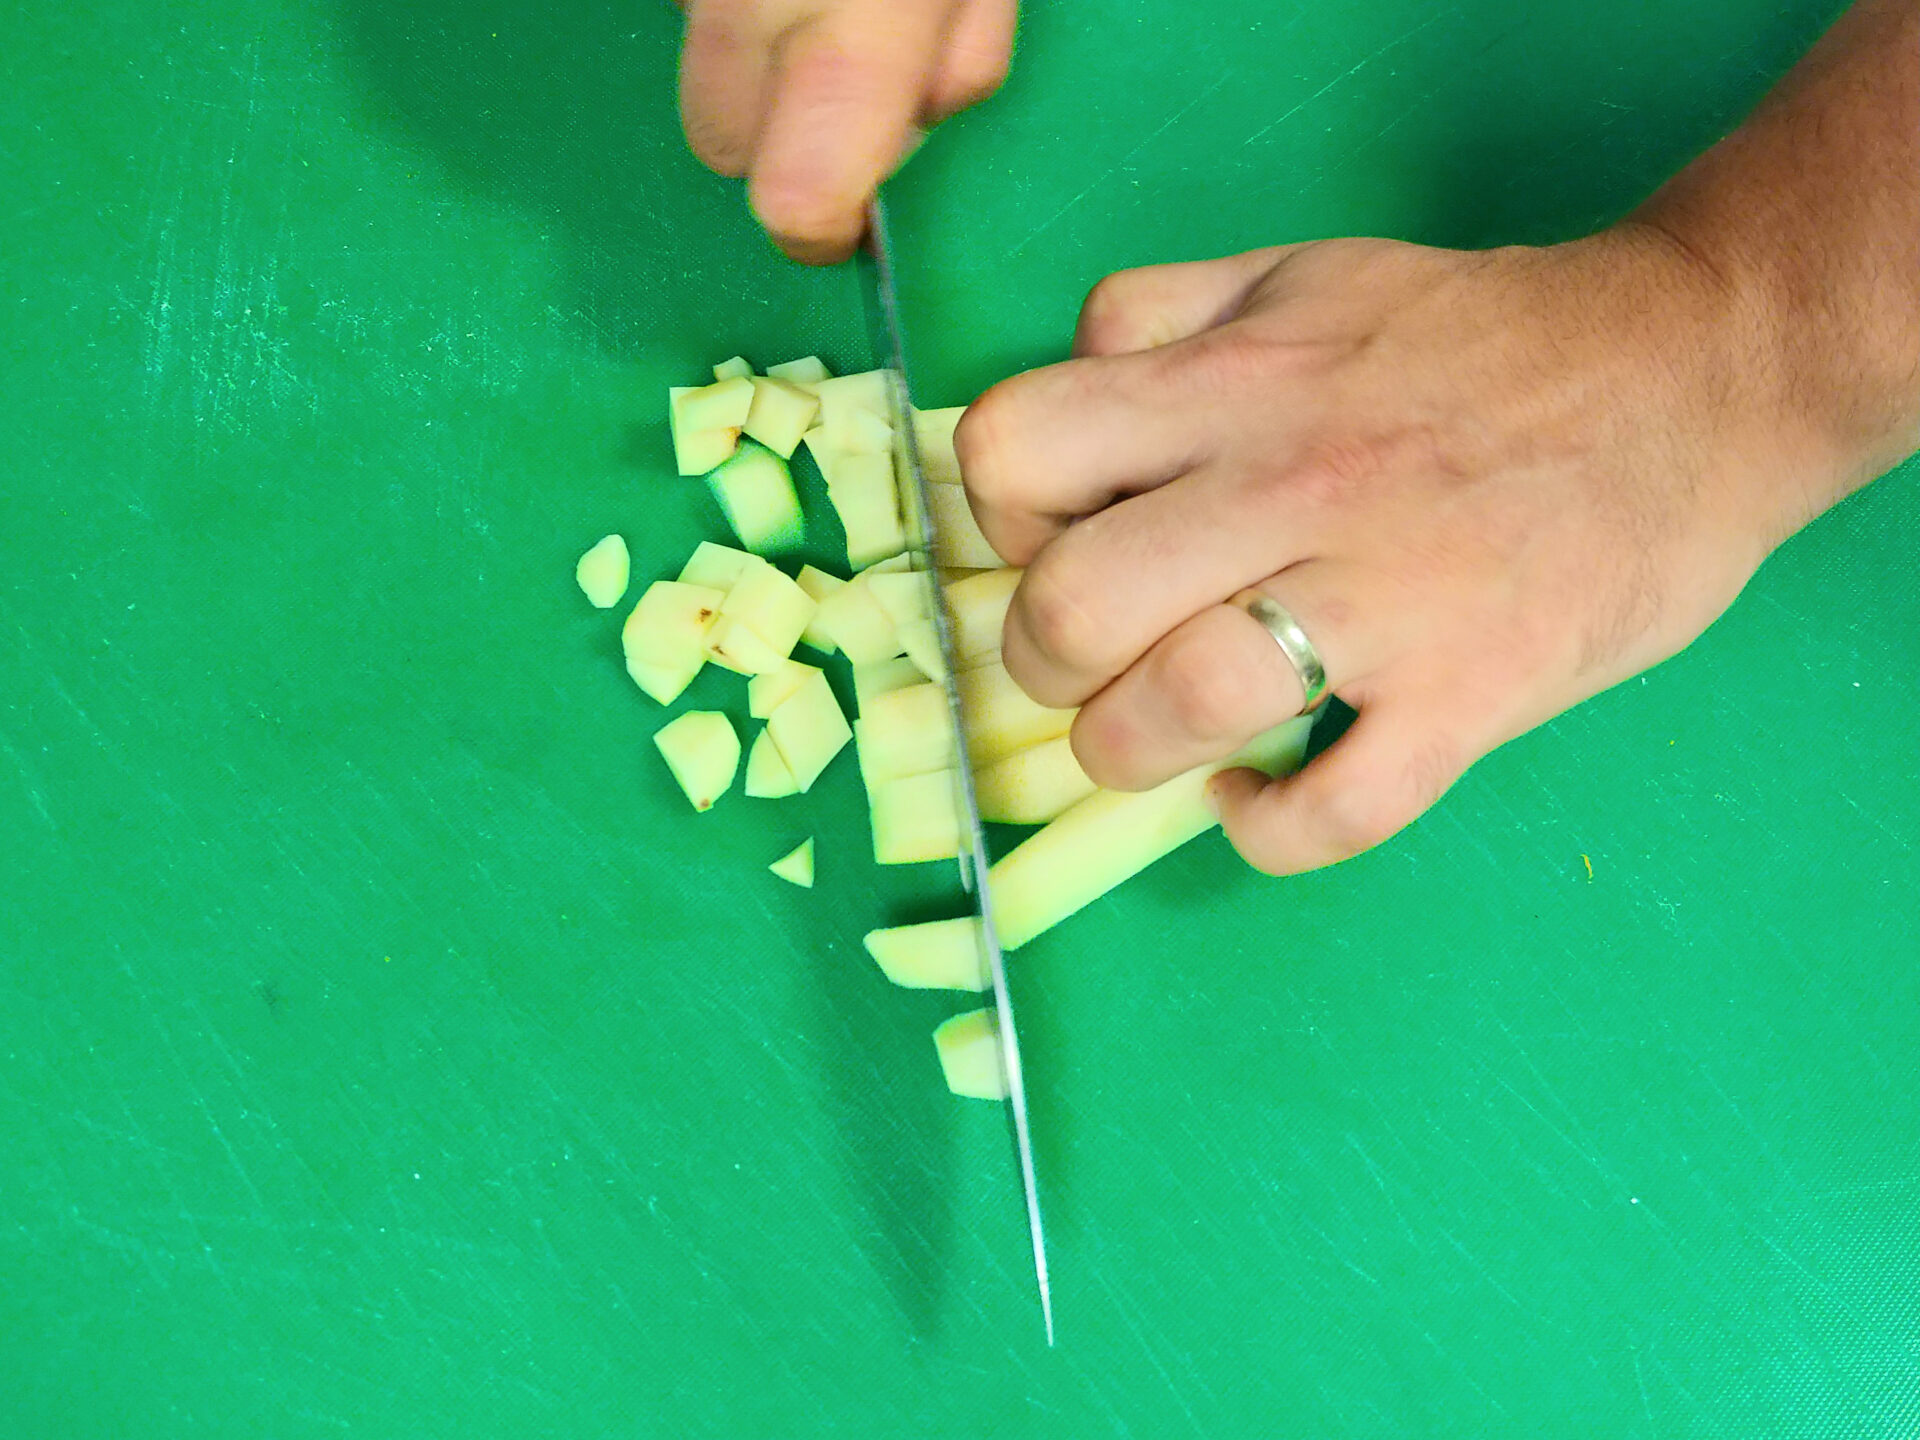
Since potatoes turn black after peeling and cutting, leave them in water before cooking.
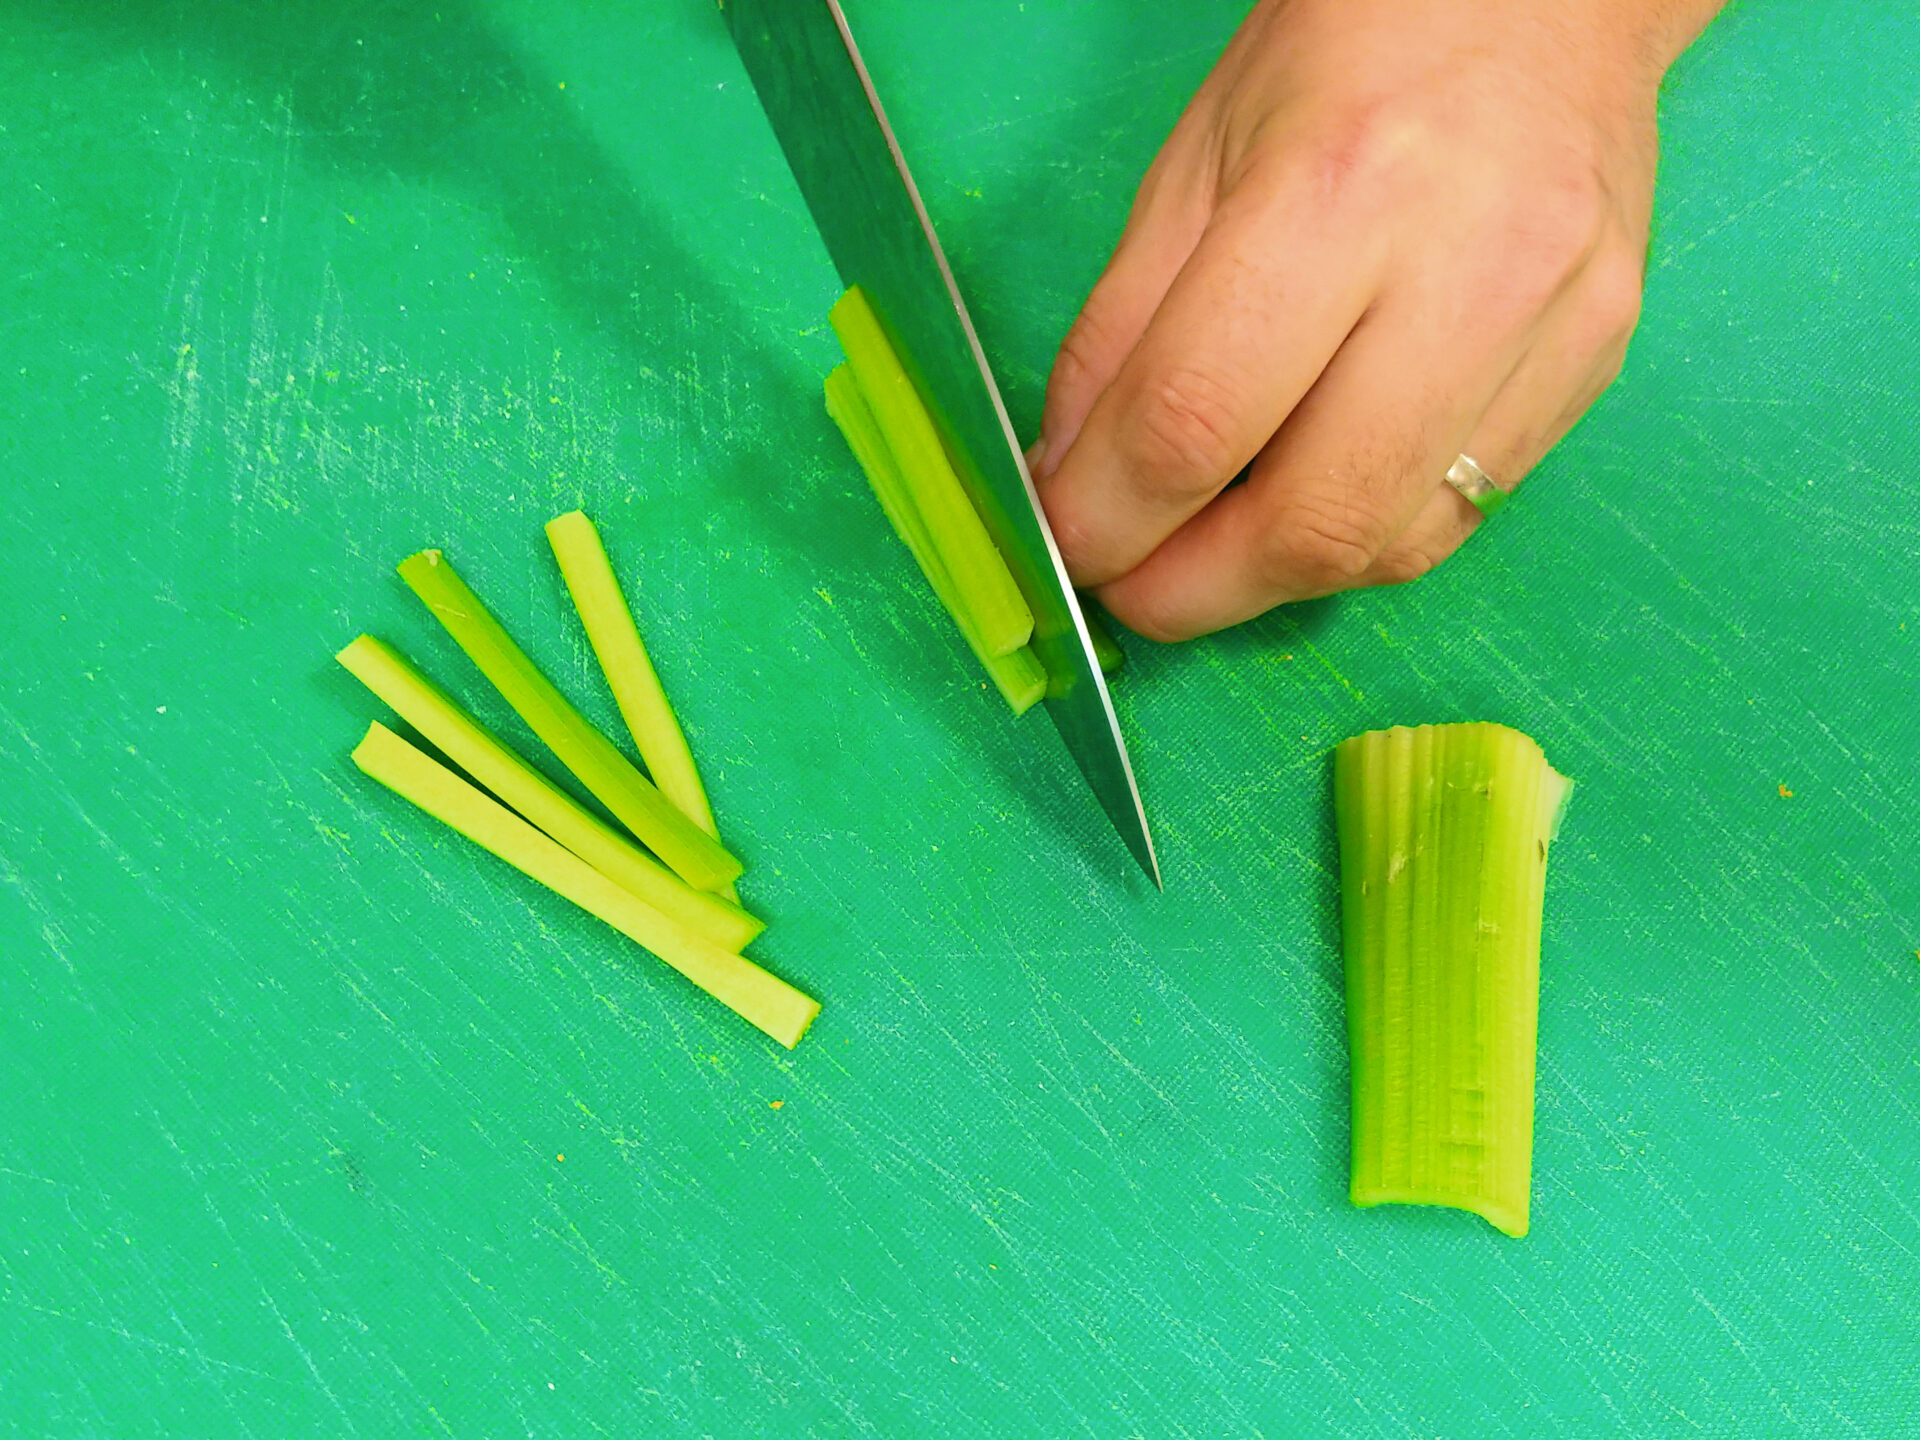
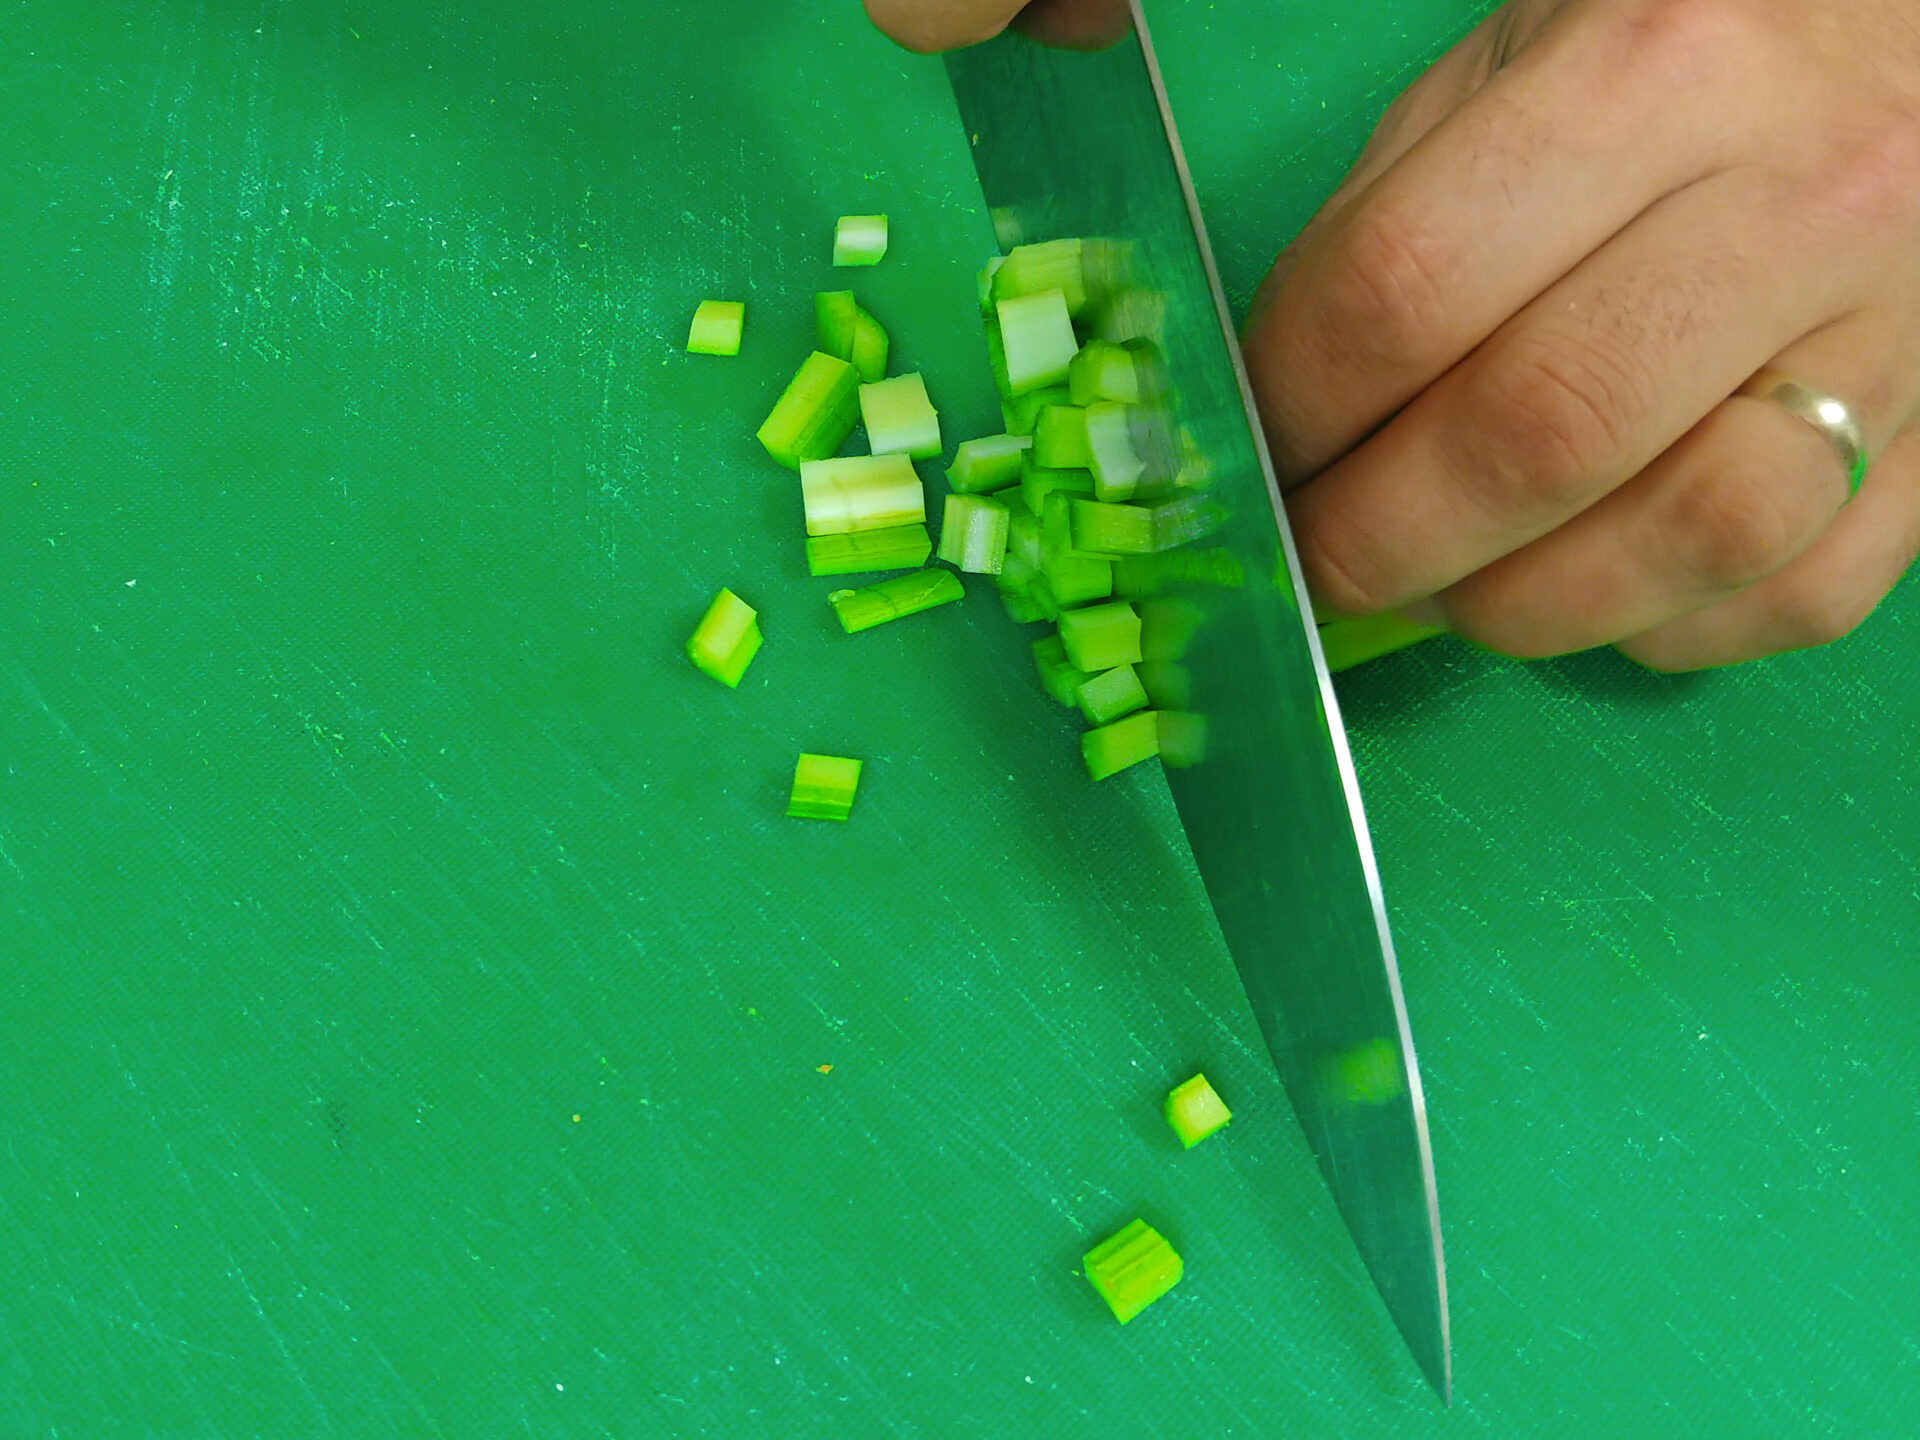
Celery is easy to prepare since it can’t be peeled. Rinse thoroughly and brush with a vegetable brush.
Separate celery into individual stems and then:
Cut into slices:
Slice using a straight chopping or rock chopping cut into slices.
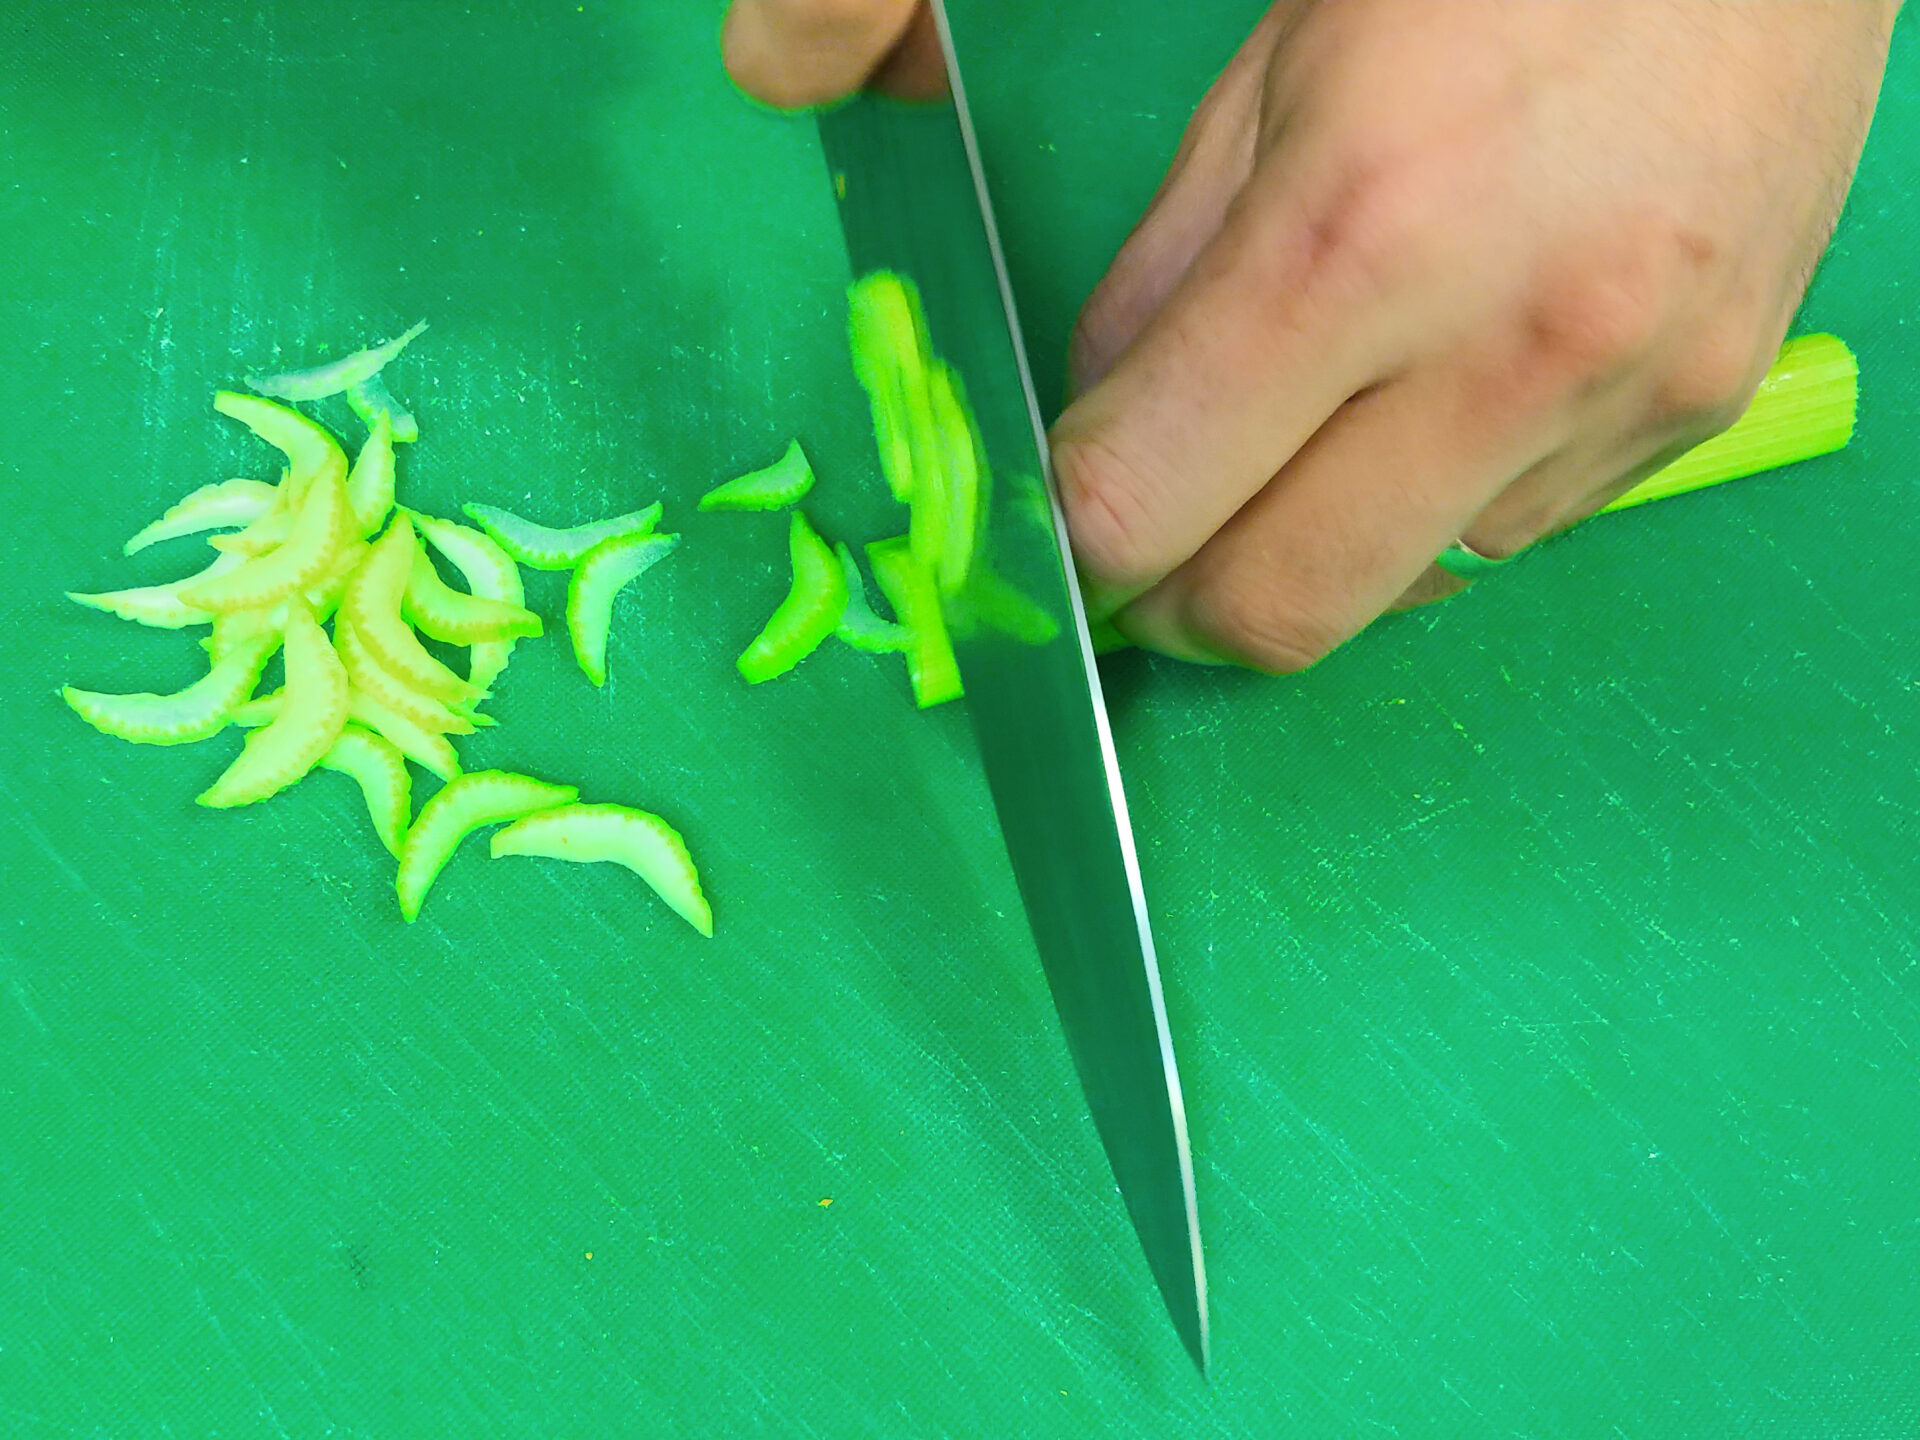
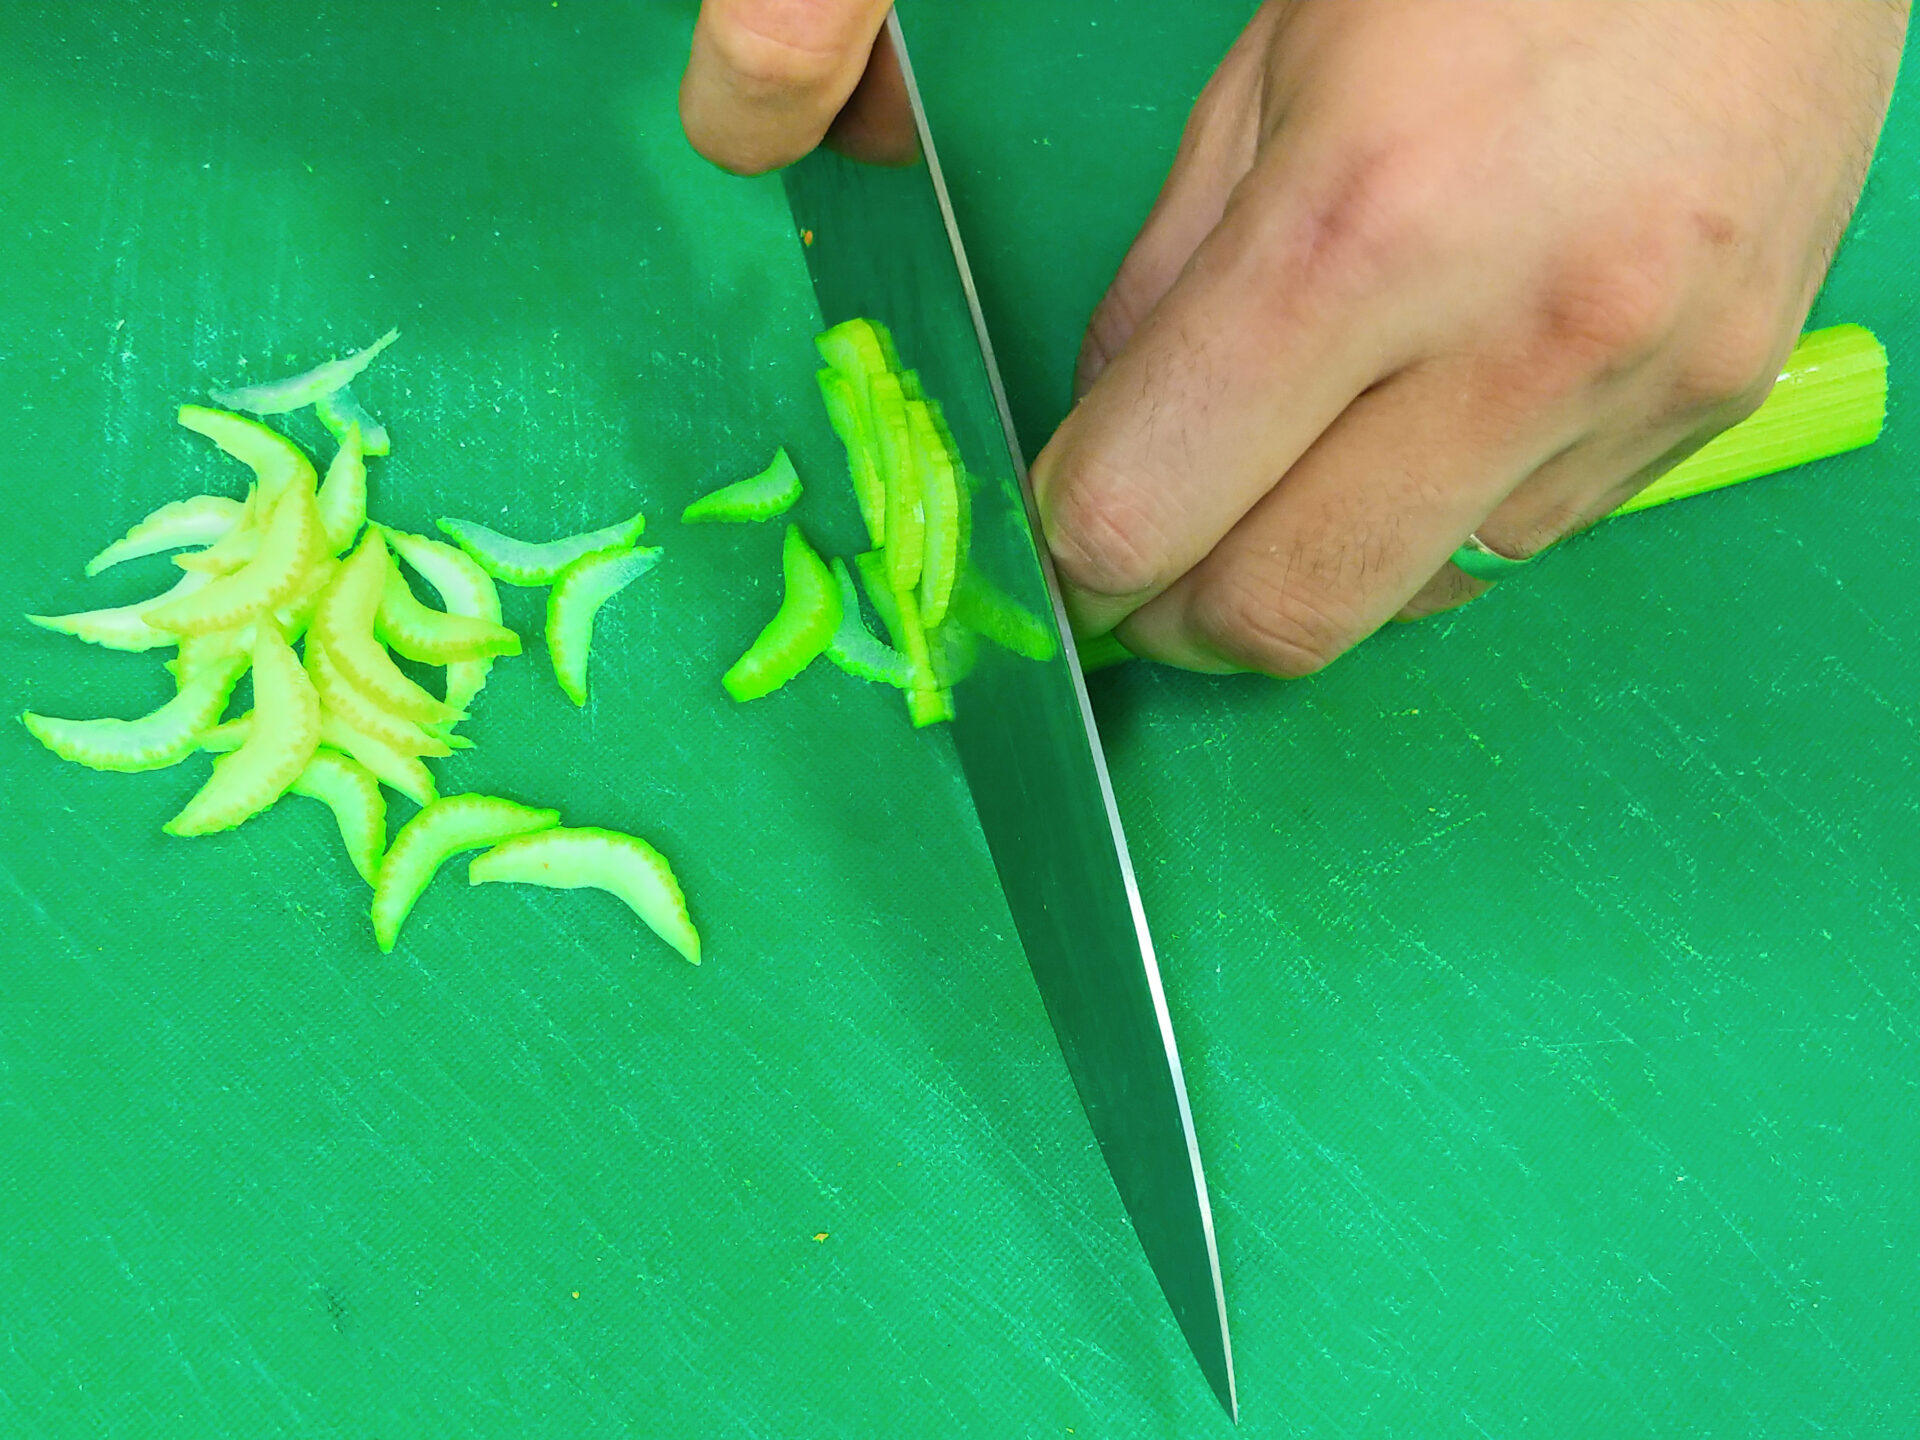
Cut into dices or noodle shapes:
Cut each stem into 2 – 3 sections for cutting shapes.
Cut into thick and long noodle shapes (great for dipping), and then optionally cut across the noodle shapes to reach dices (great for cooking, stir-fry, or salads).

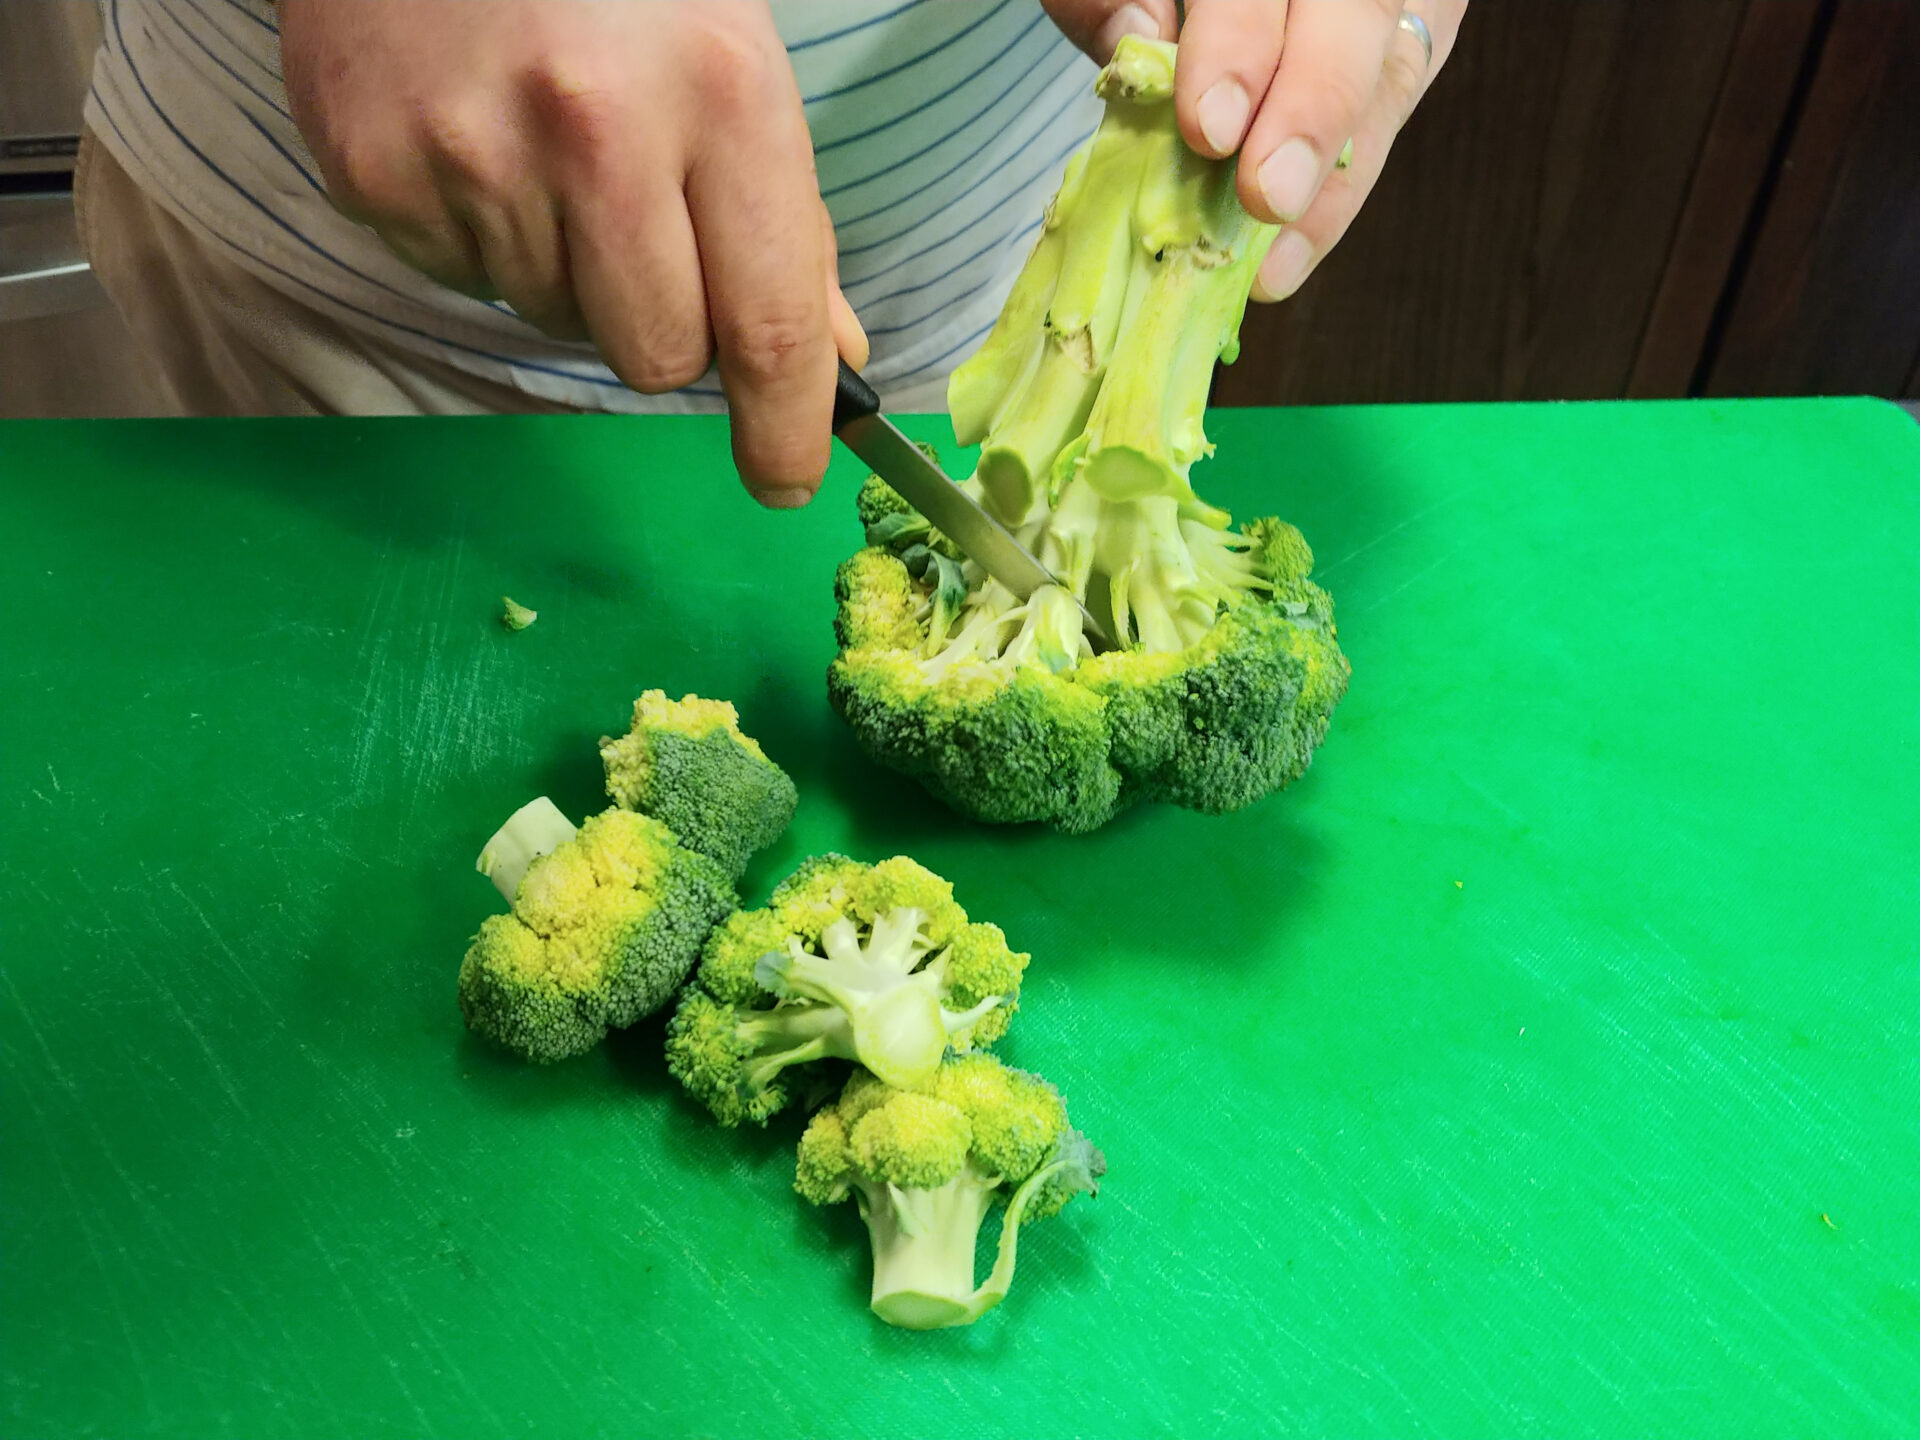
You can buy both of them already precut or you can portion them by yourself.
Using a small paring knife, simply cut individual parts off from the major stem.
The stem can be sliced and eaten raw or used for soup, stew, broth, mashed potatoes, and slaw.
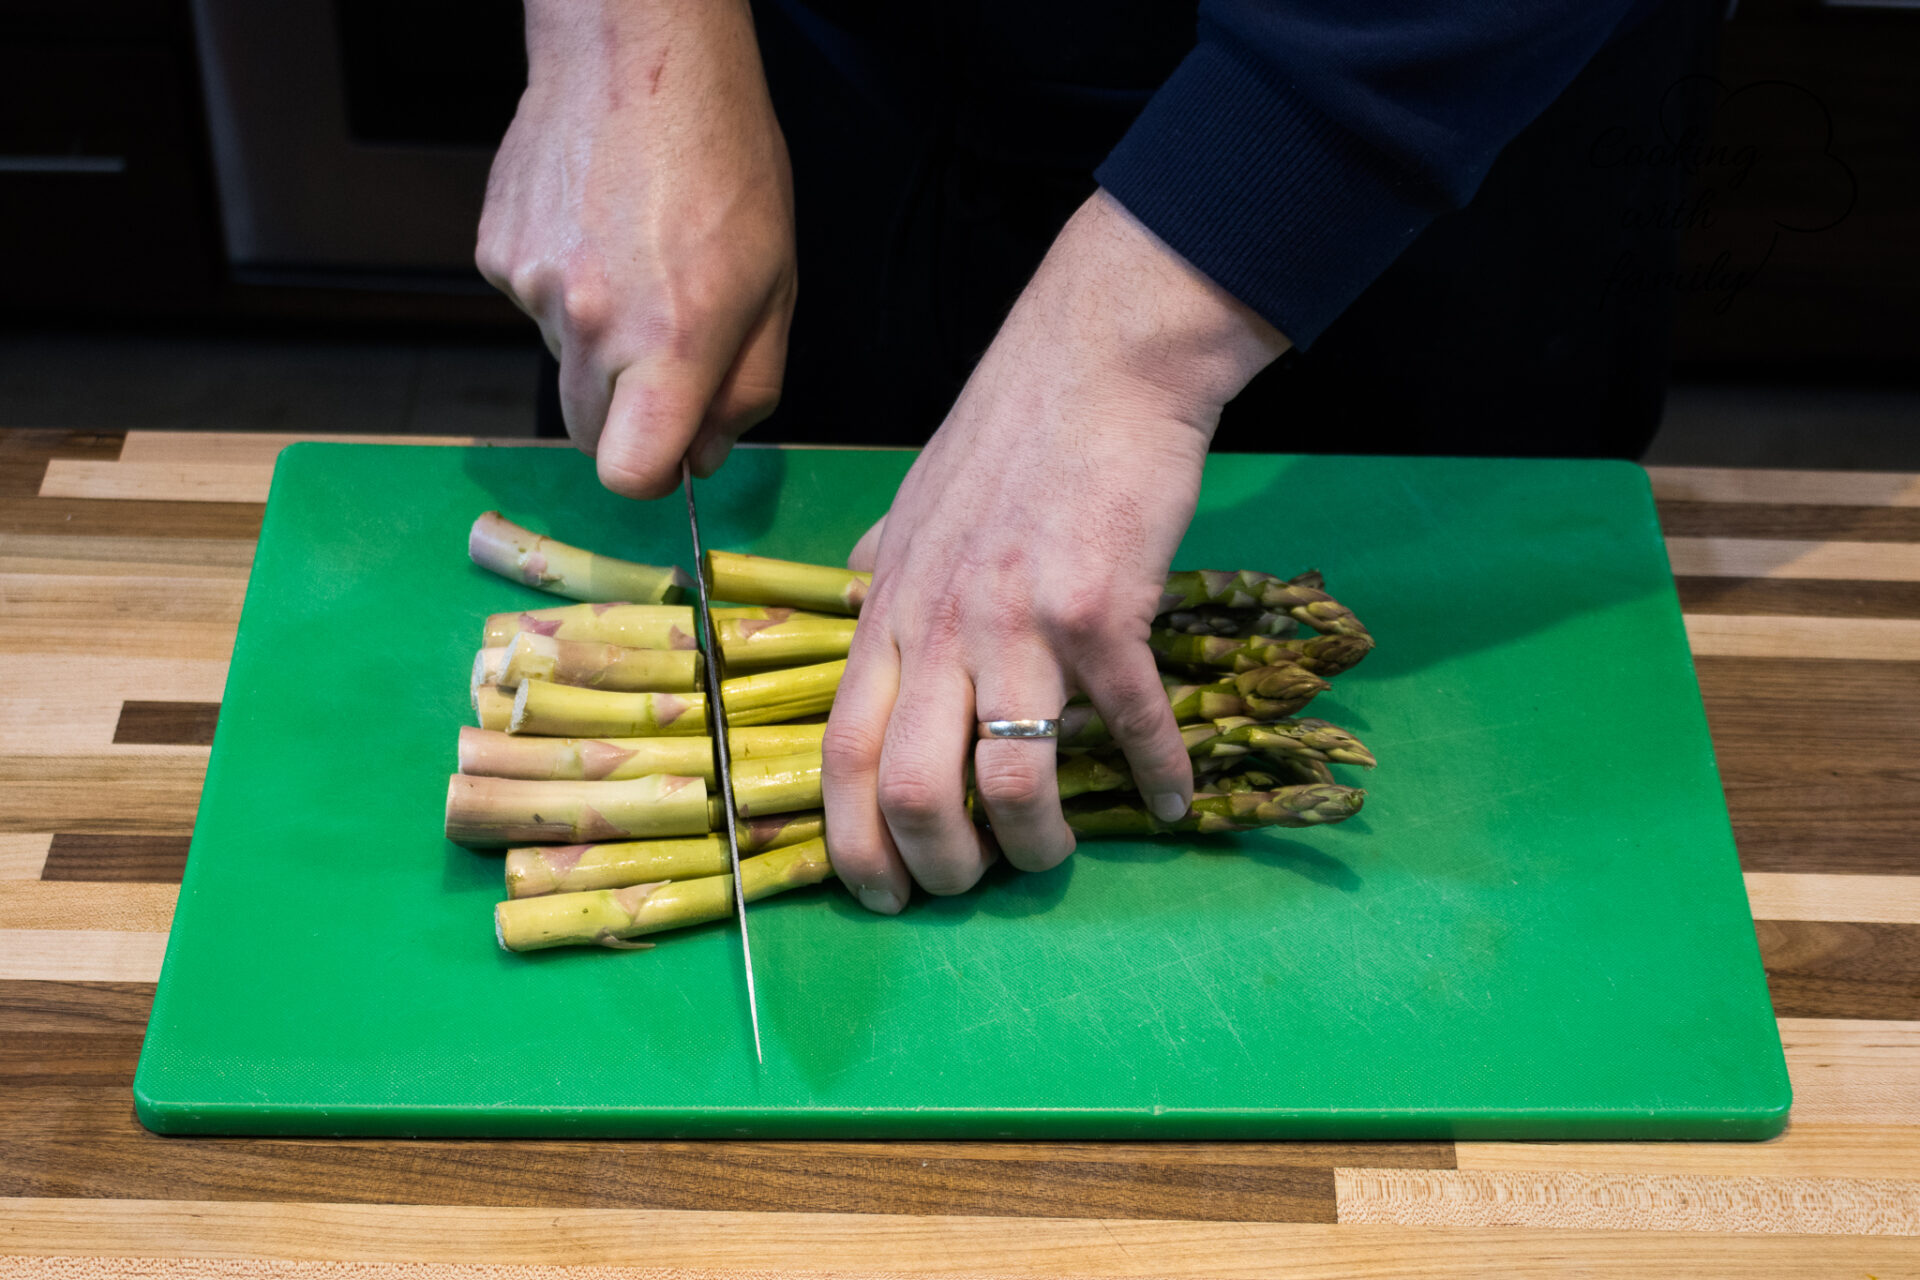
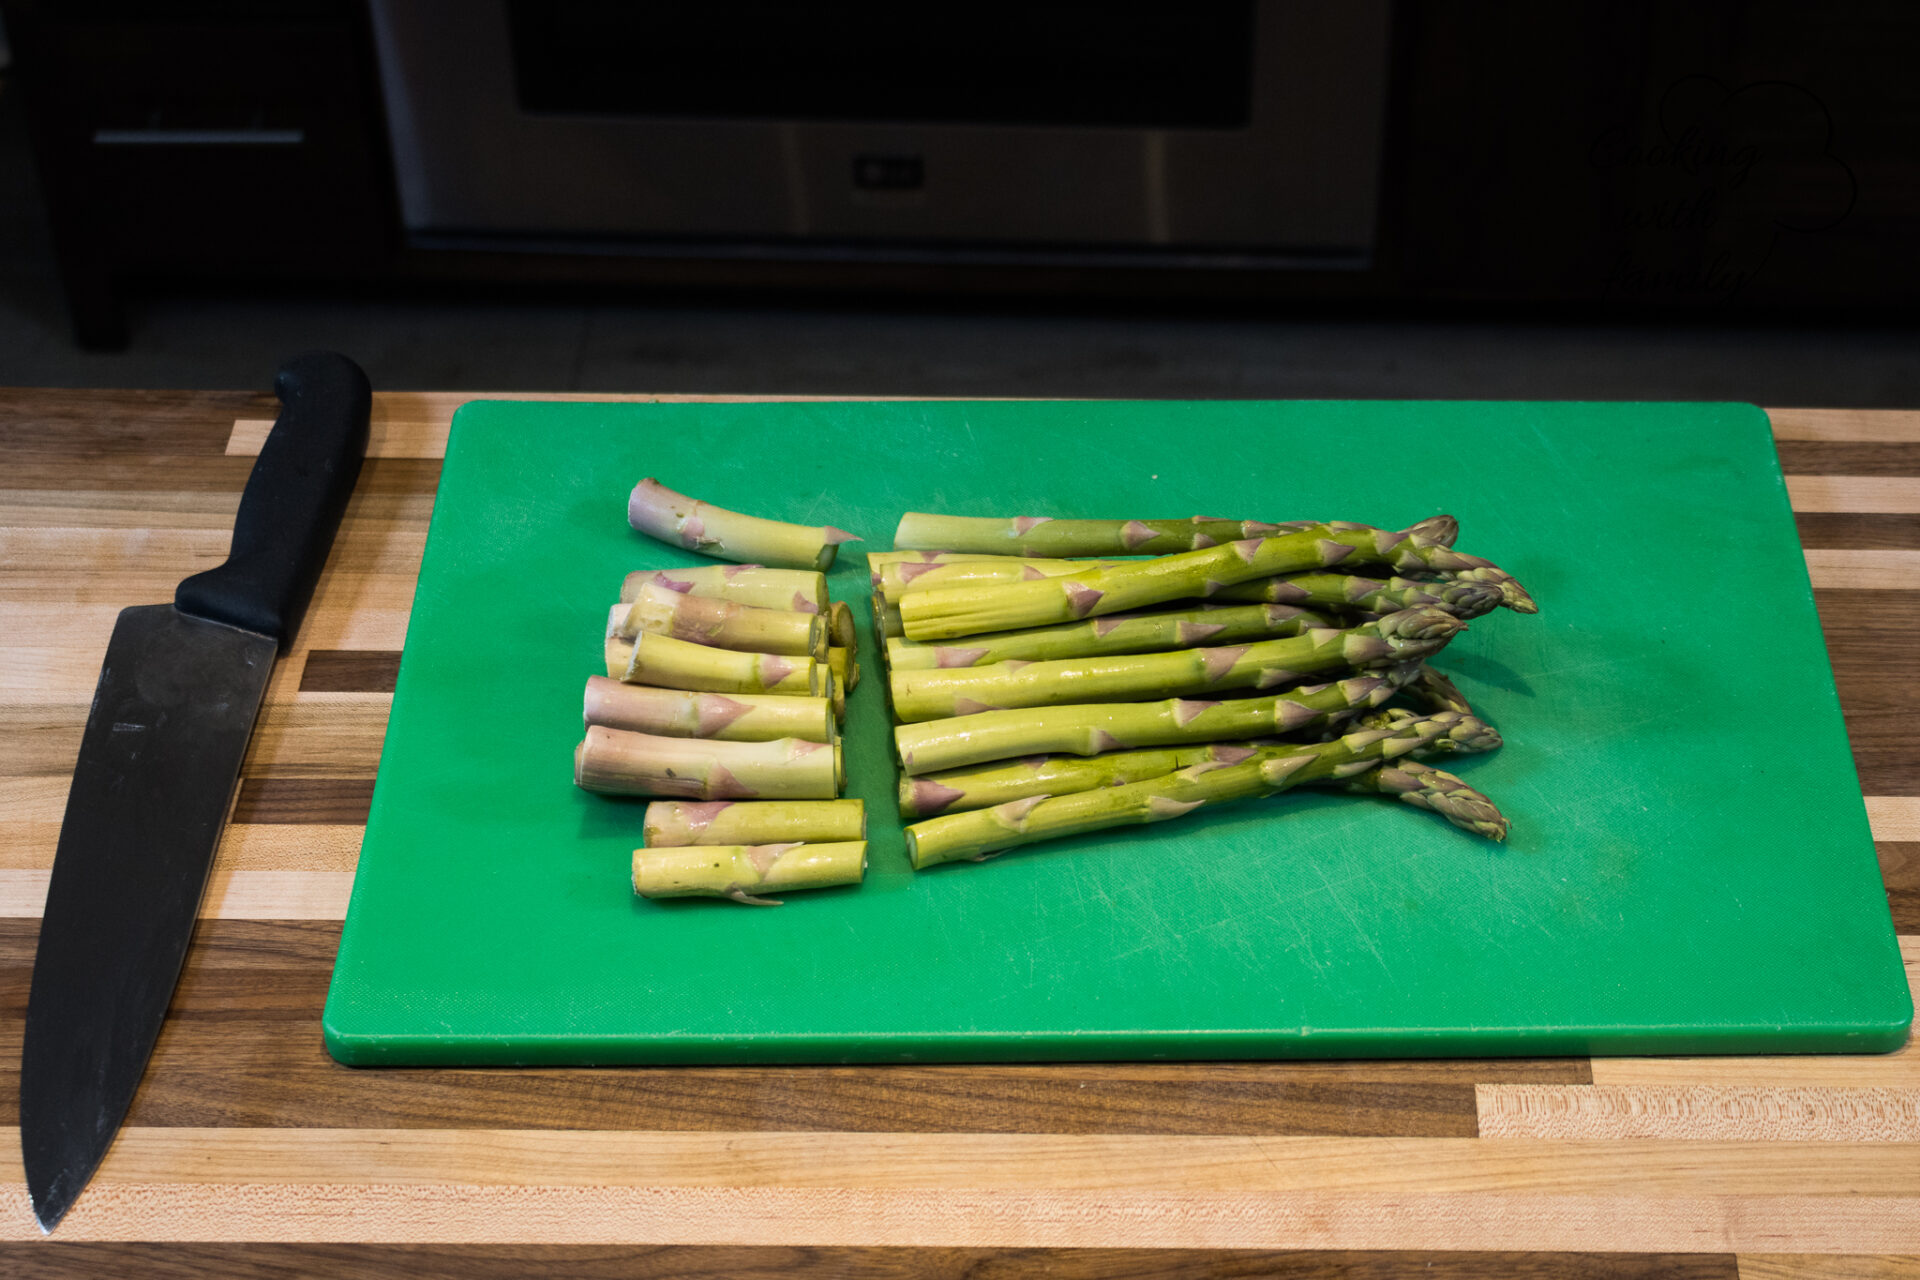
Asparagus as a whole is edible, but the closer you get to the bottom (away from the blooming part), the texture is woodier and more unpleasant.
This is why only the top ⅓ is served in fancy restaurants. In my opinion, the texture is fine in the first 2/3 of the plant, which is why I recommend utilizing that part for any meal.
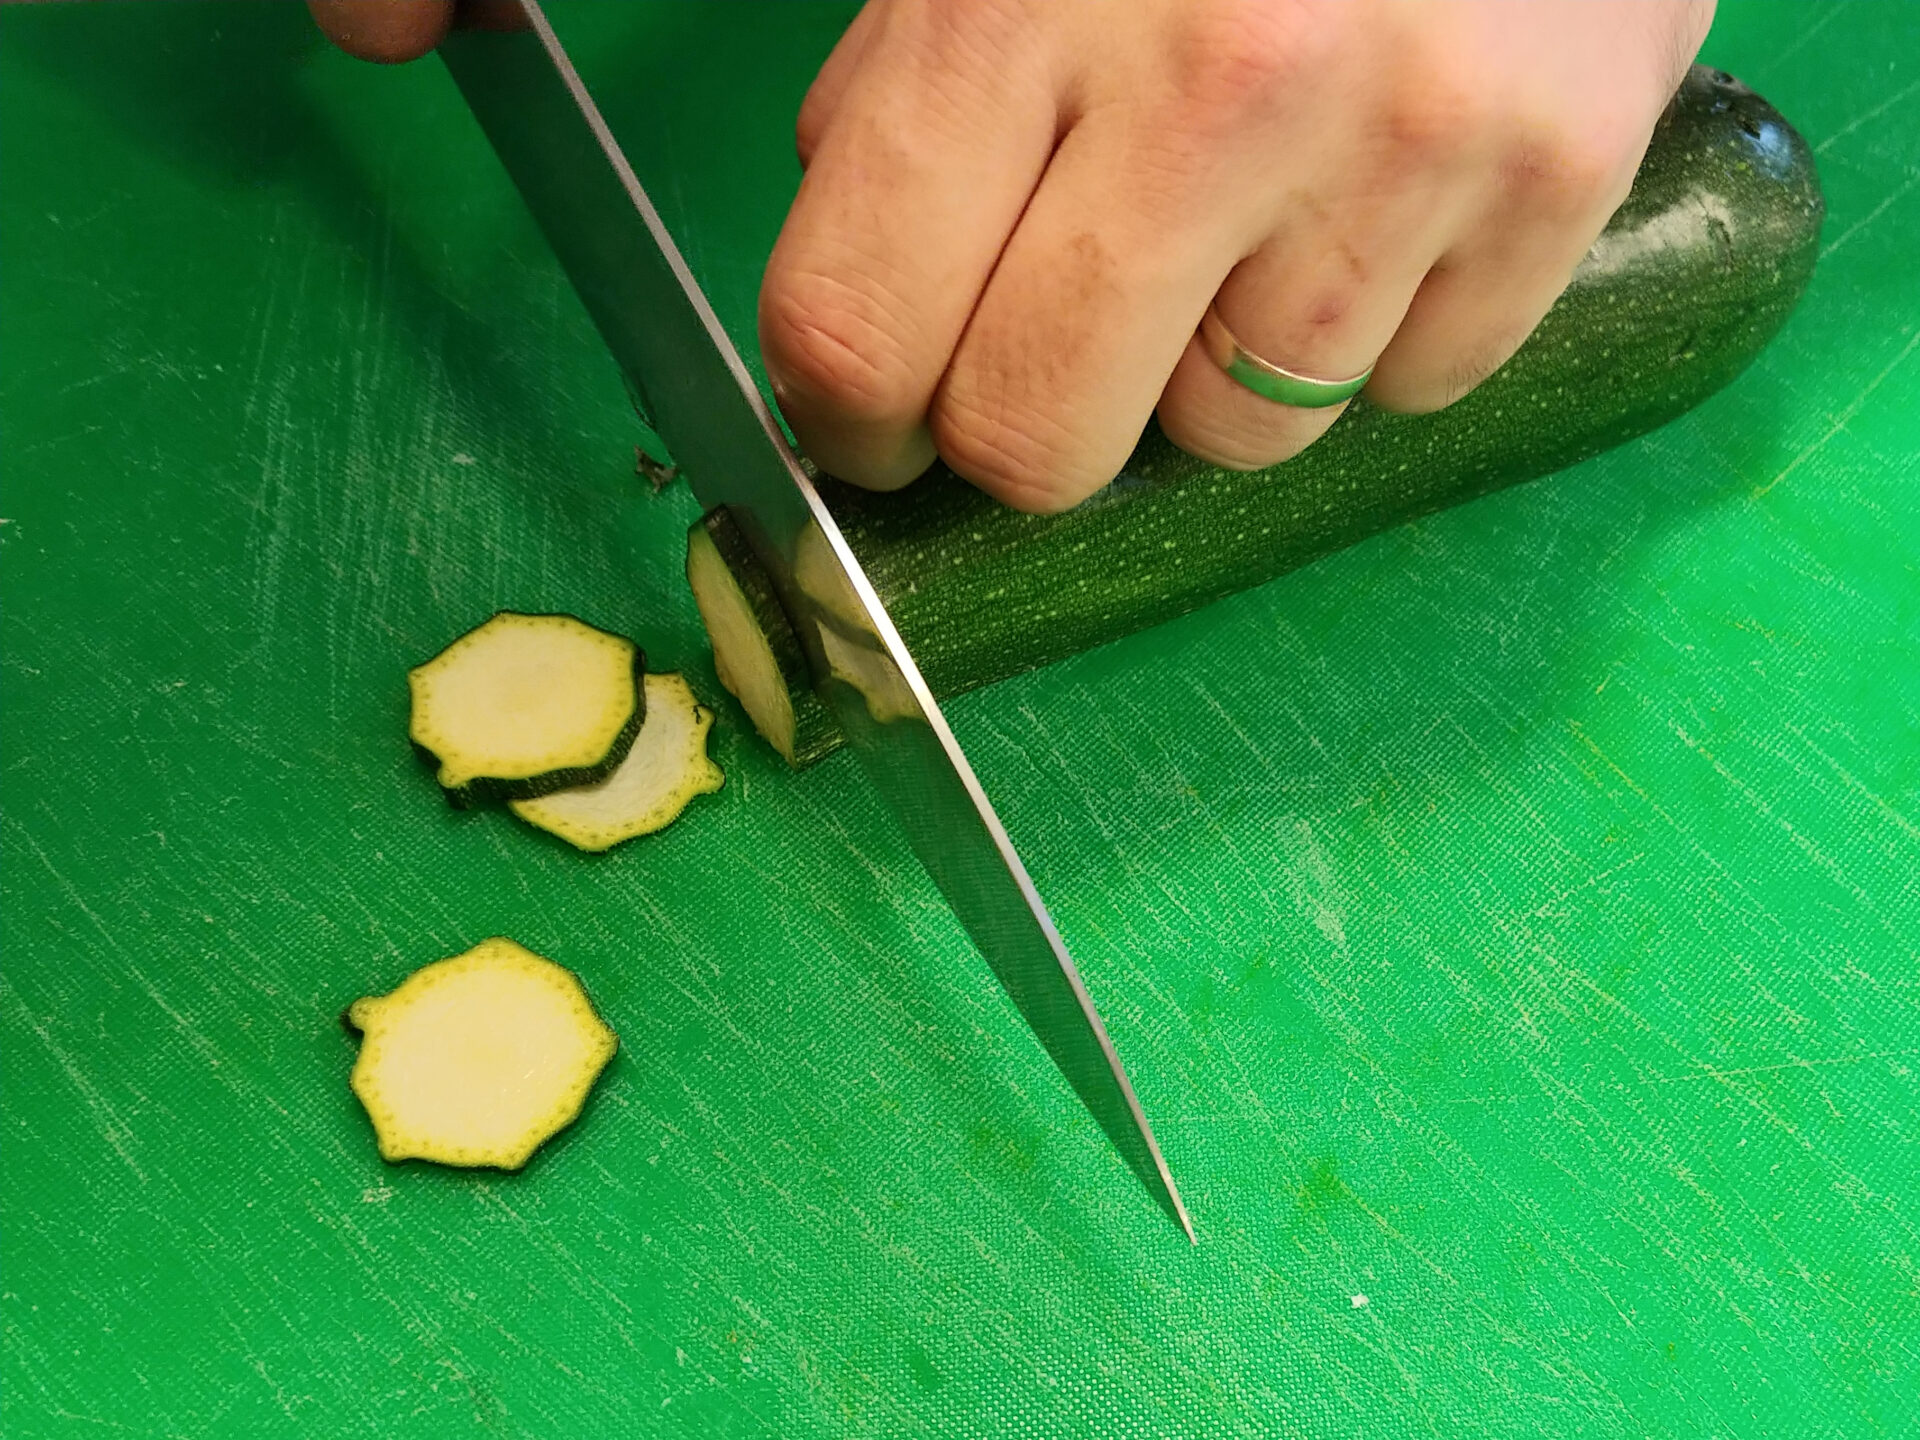
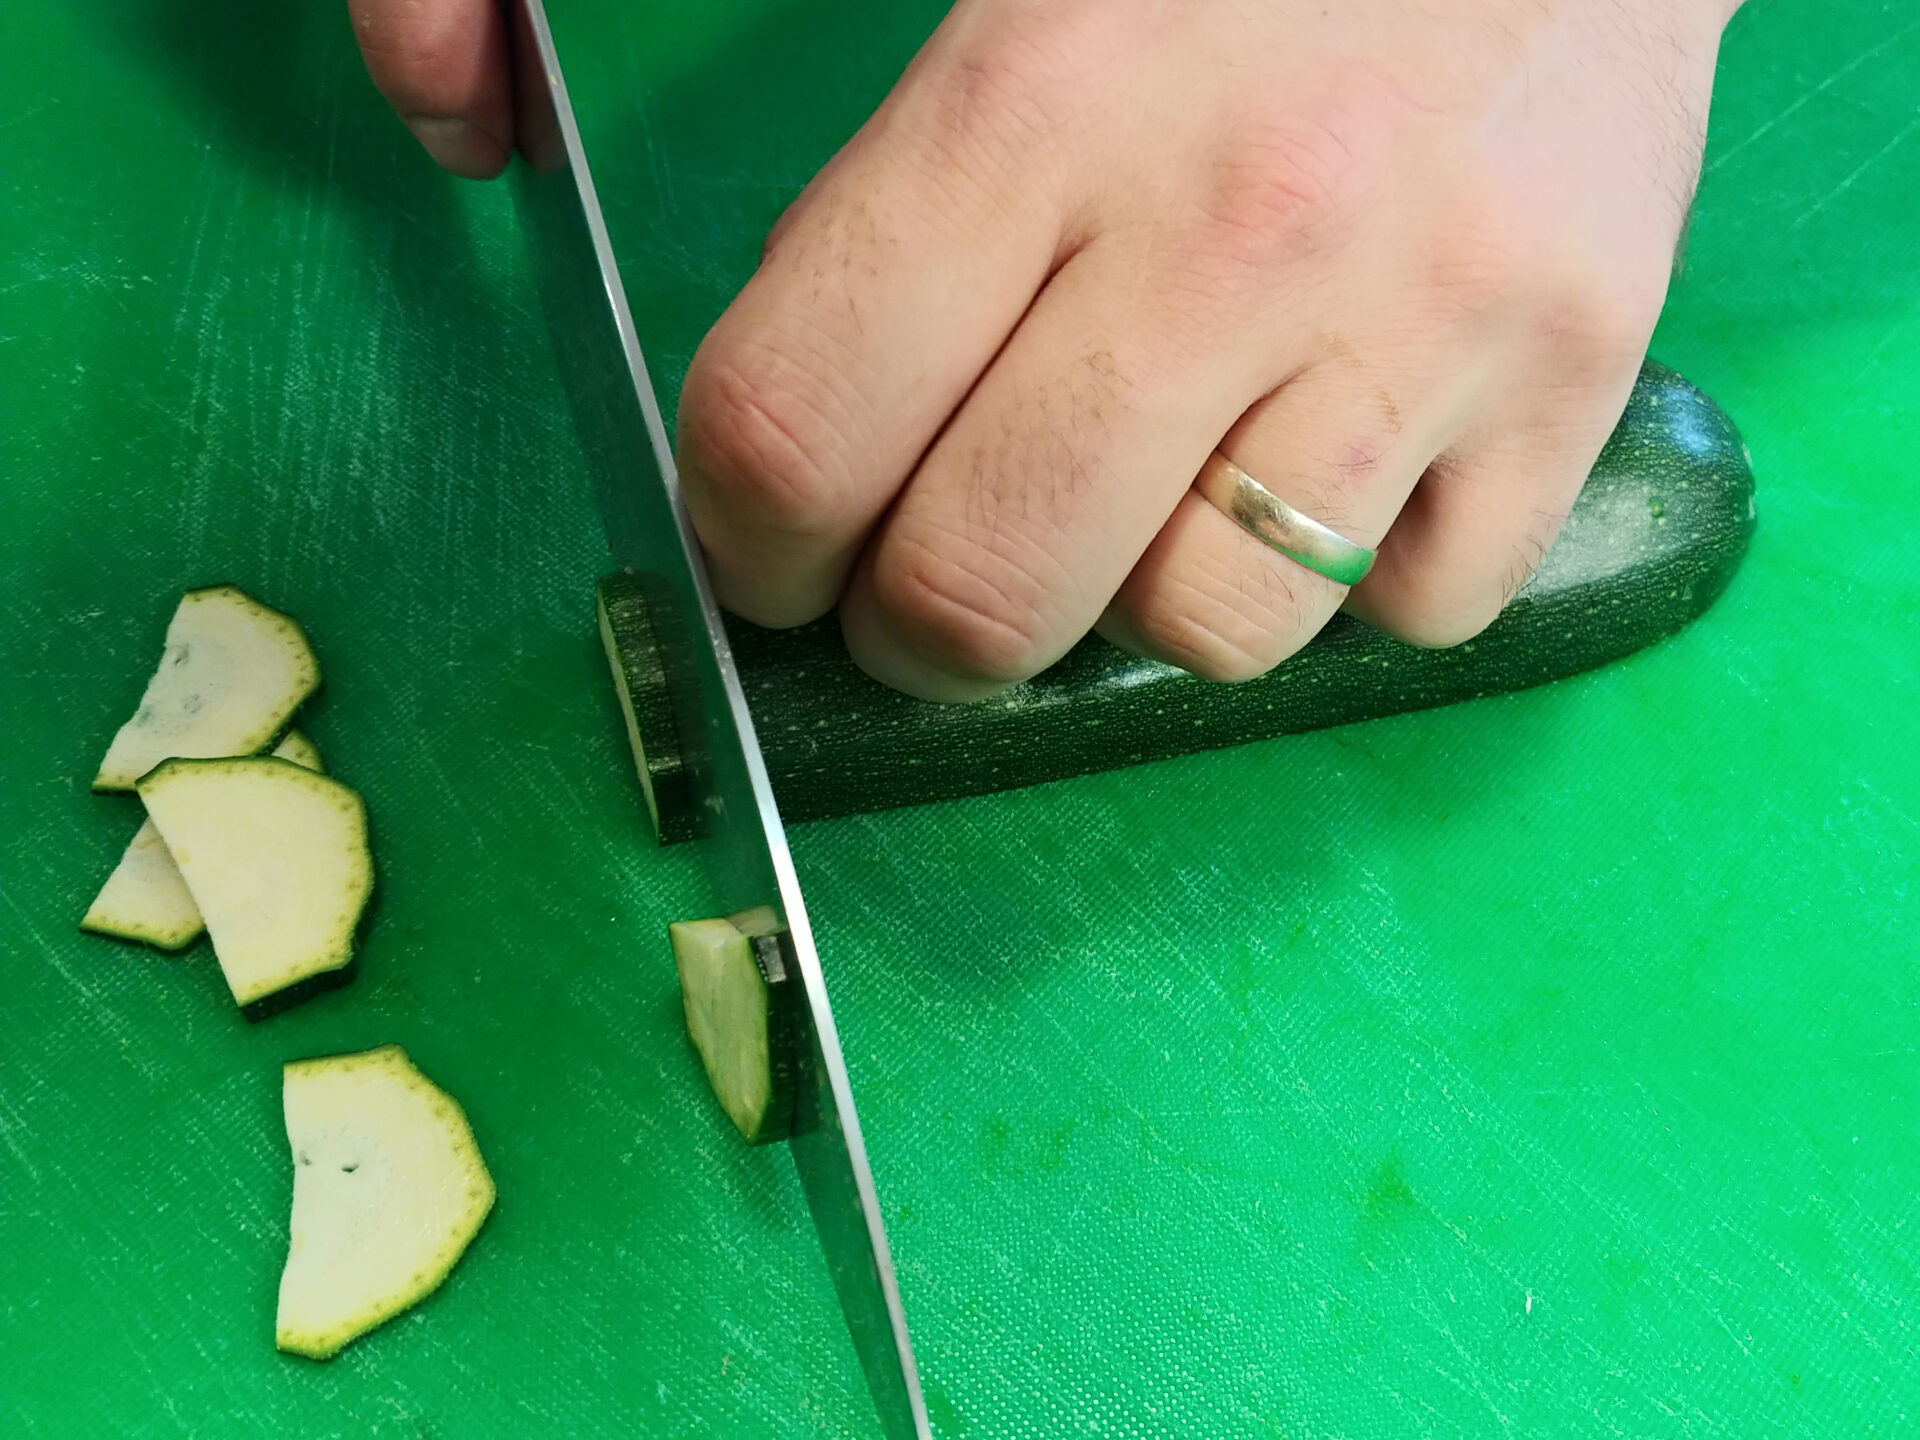
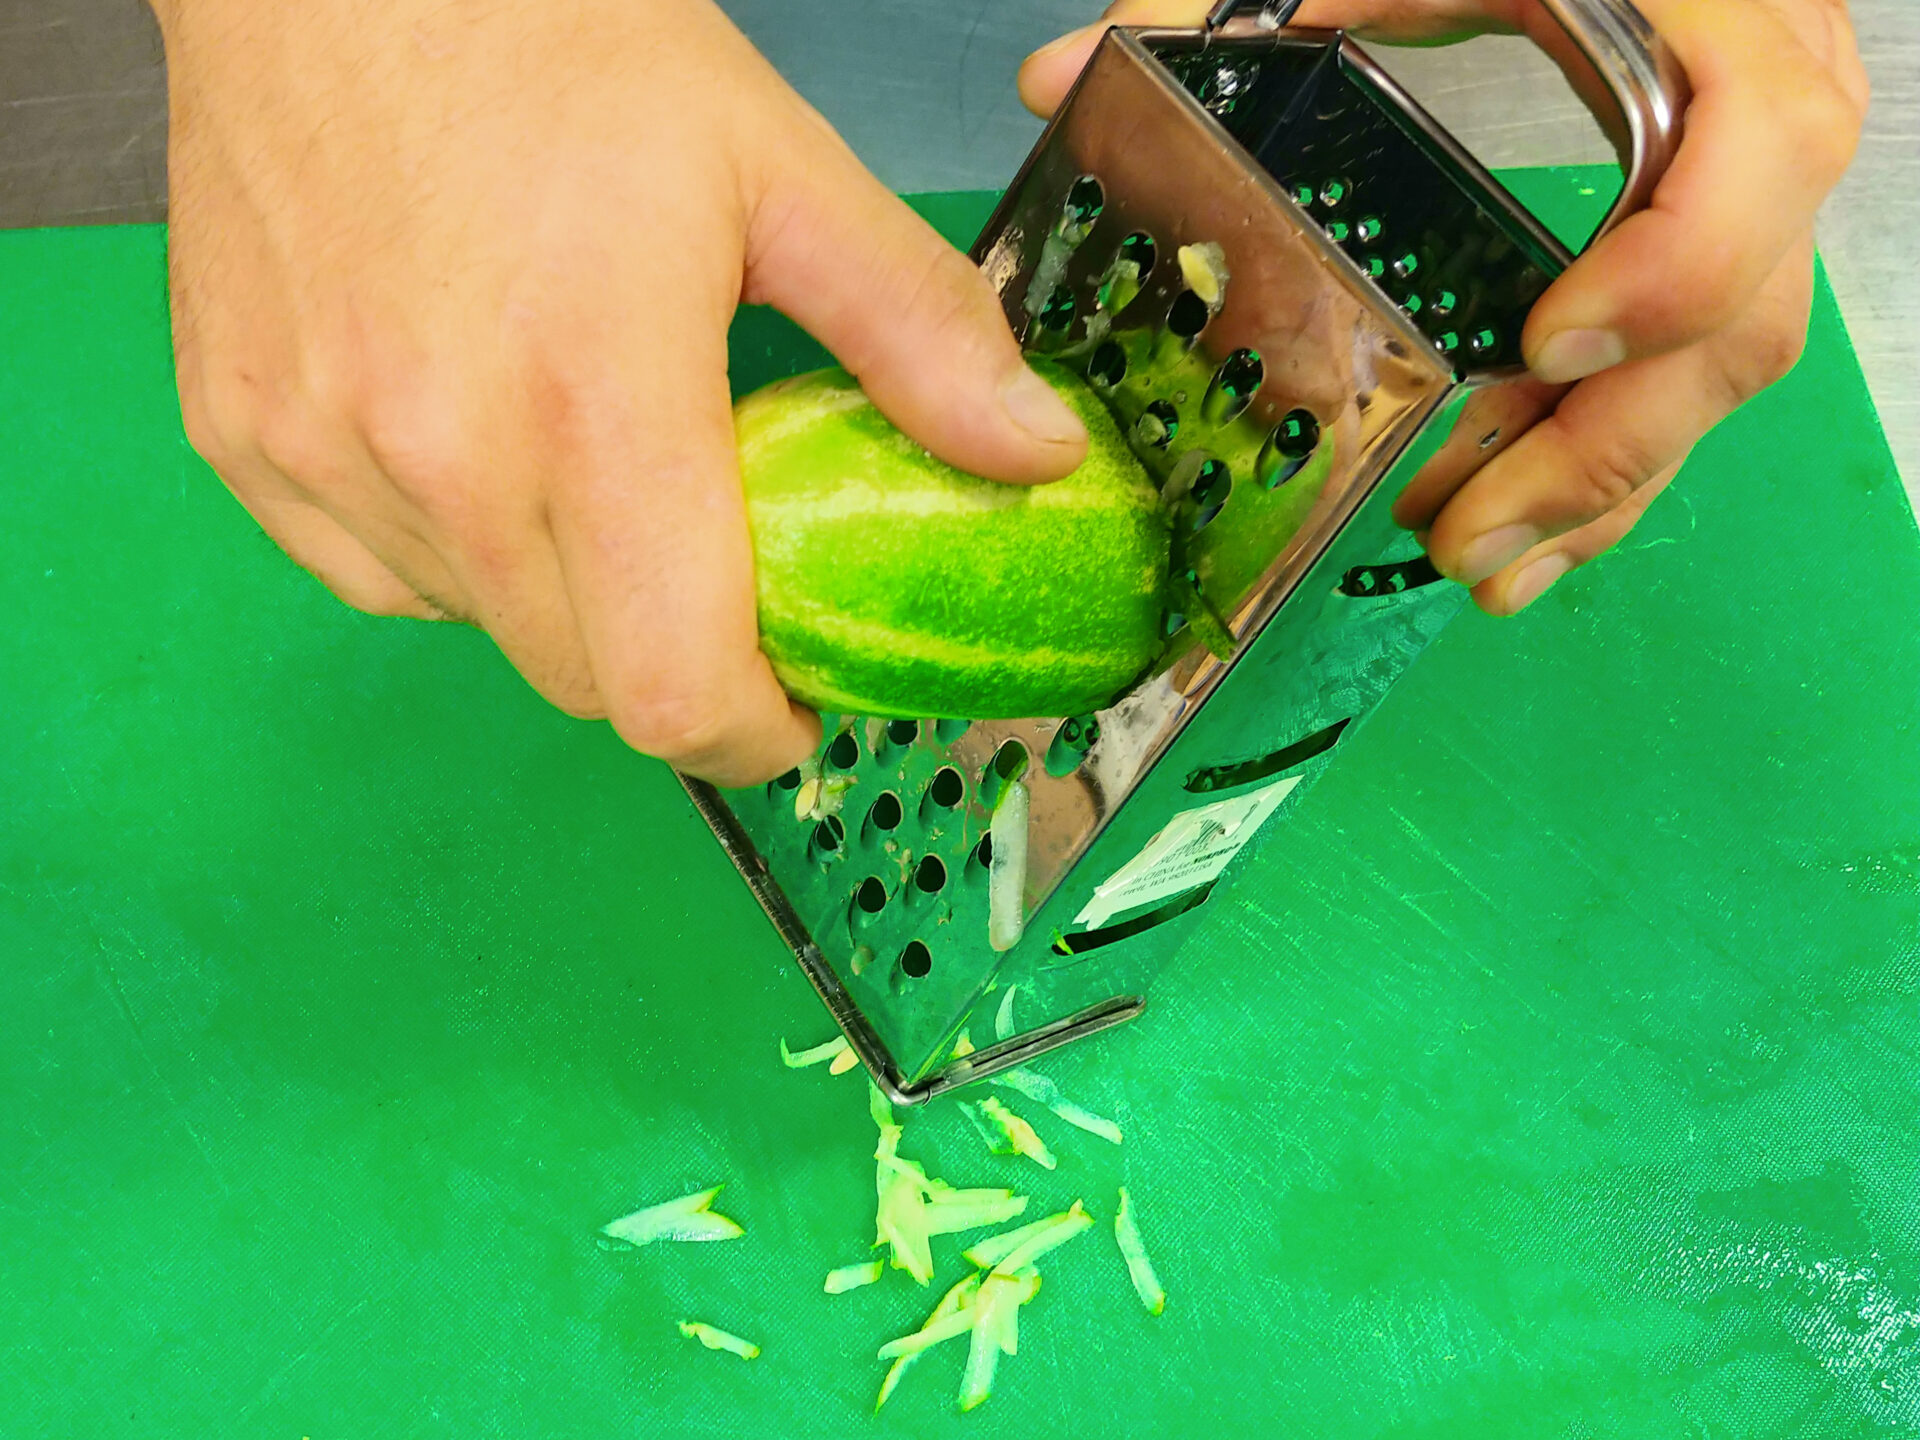
These vegetables are usually eaten with the skin. Make sure to thoroughly wash, especially since some kinds of zucchini can have a “fuzzy” texture and this is a way to soften it for consumption. Optionally, peel with a potato peeler.
Cut into half (lengthwise), and for squash, also remove the seeds in the middle by digging them out with a spoon.
Final chopping:
Simply slice with a knife using a rock chopping or straight chopping cut.
Or cut each half into halves and then cut into long noodle shapes (zucchinis can also be used for dipping) and roast them.
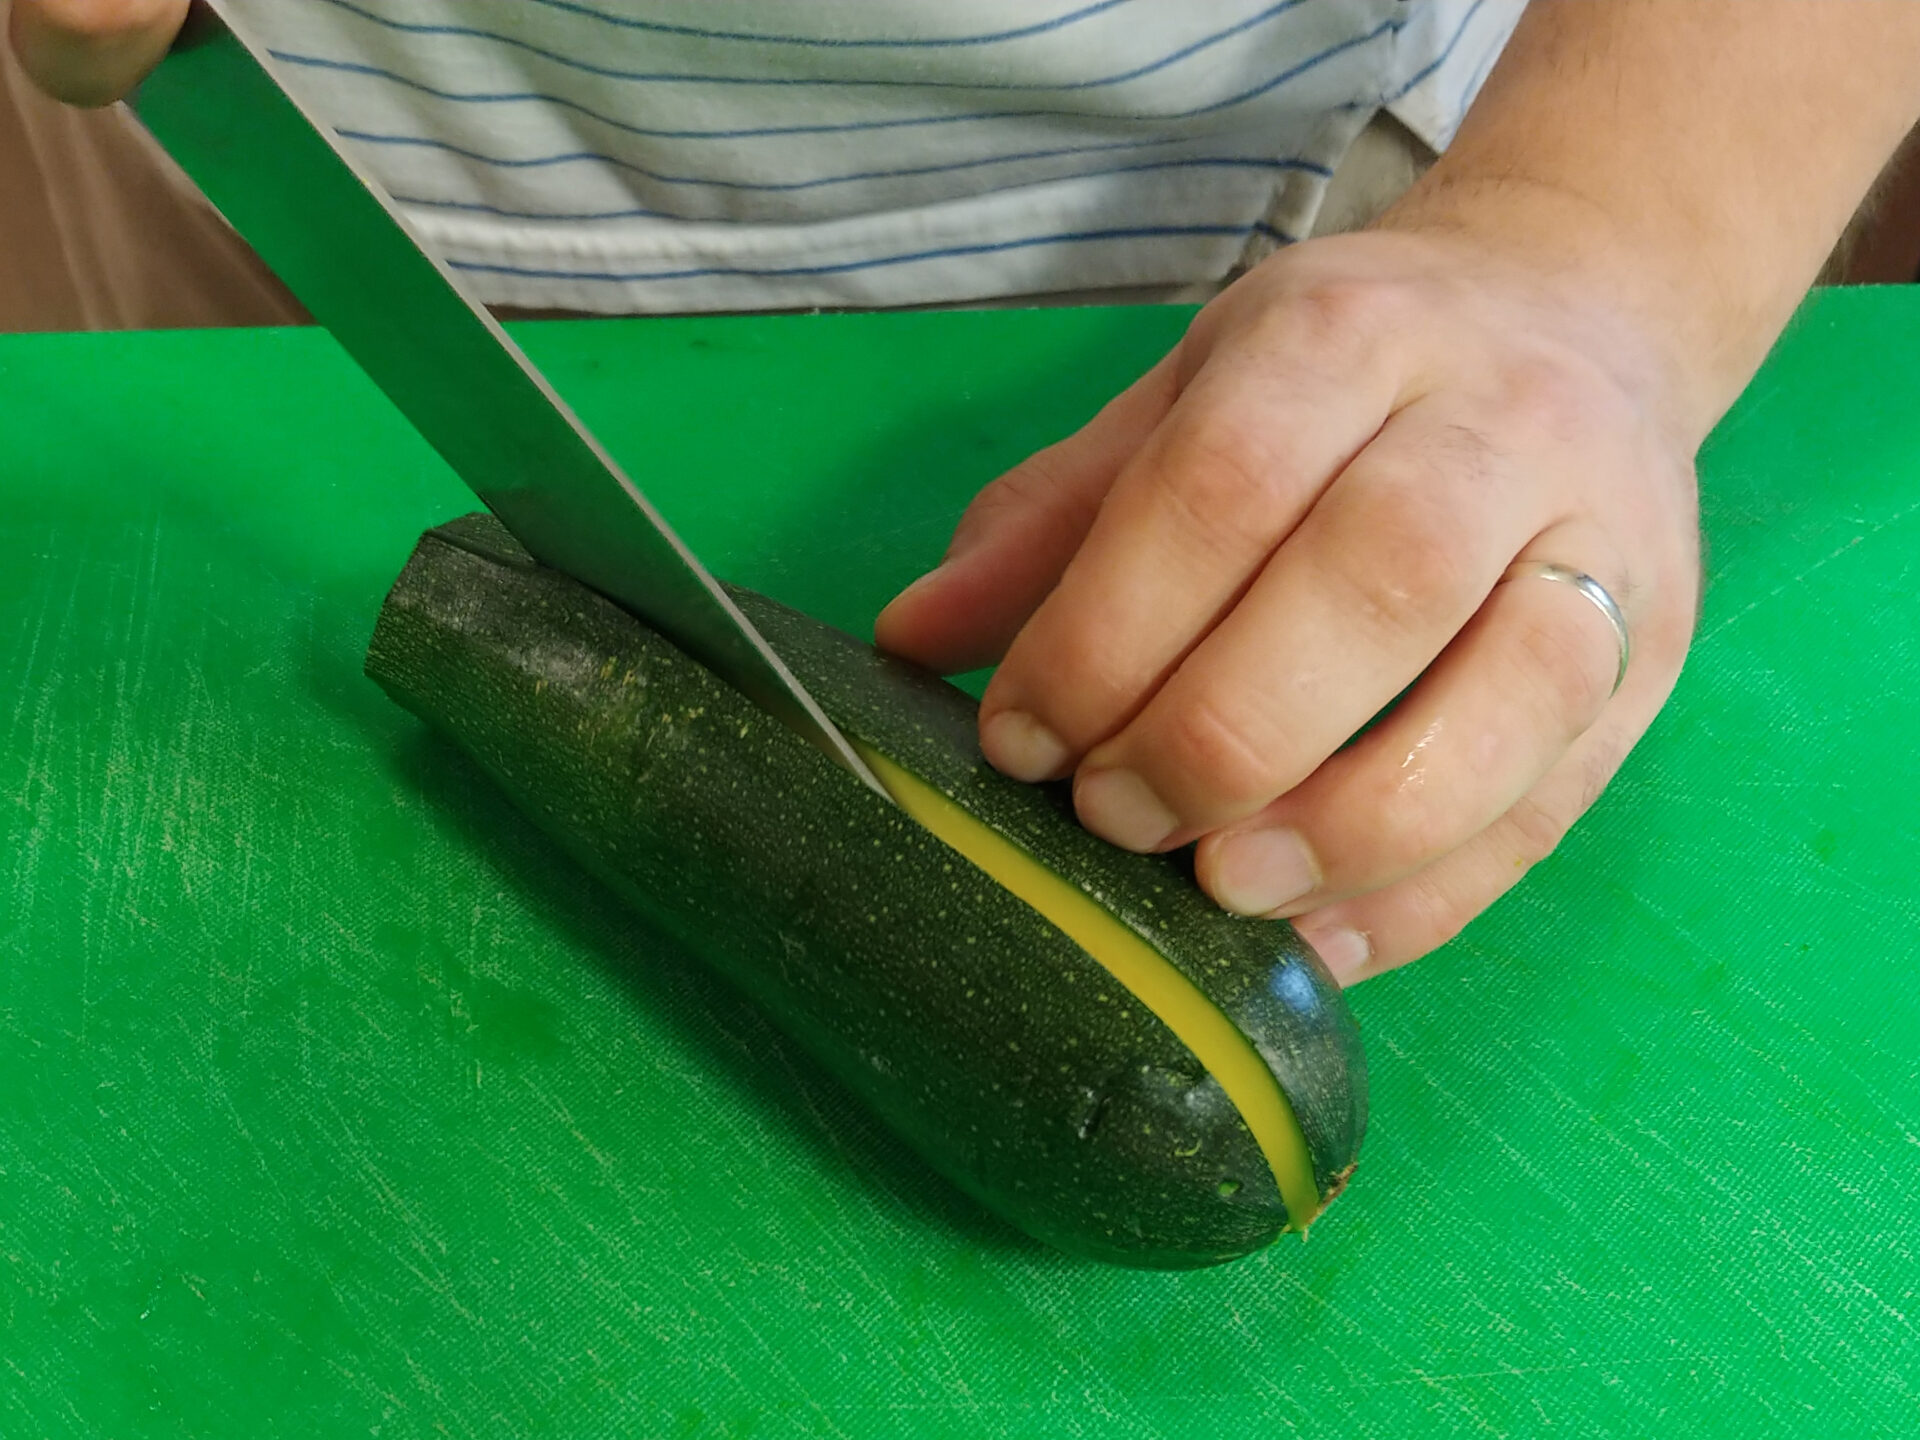
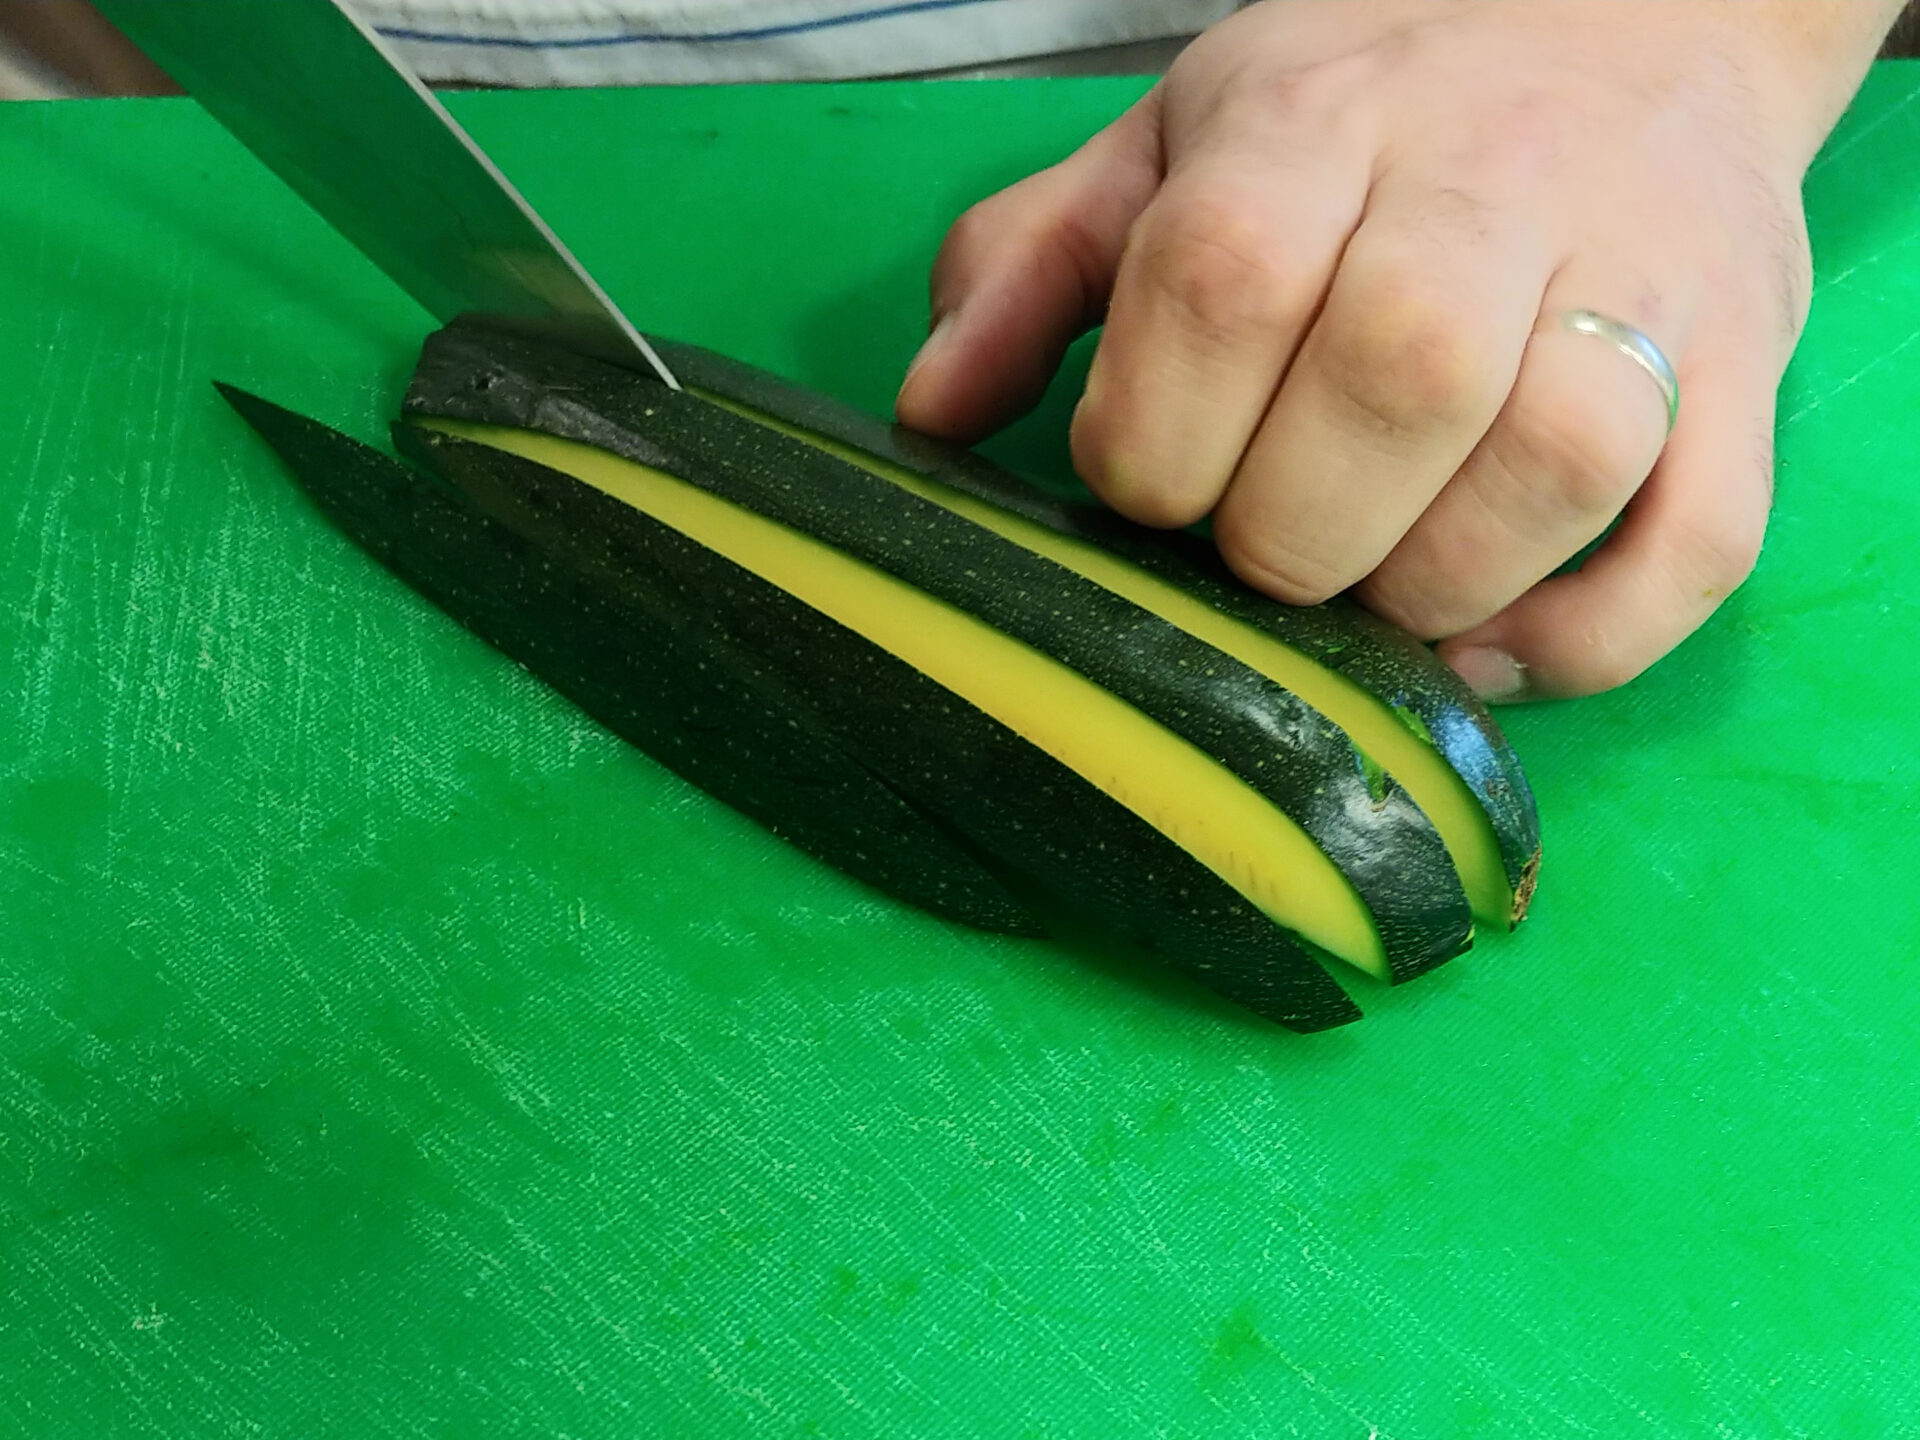
Or cut those noodle shapes into dices.

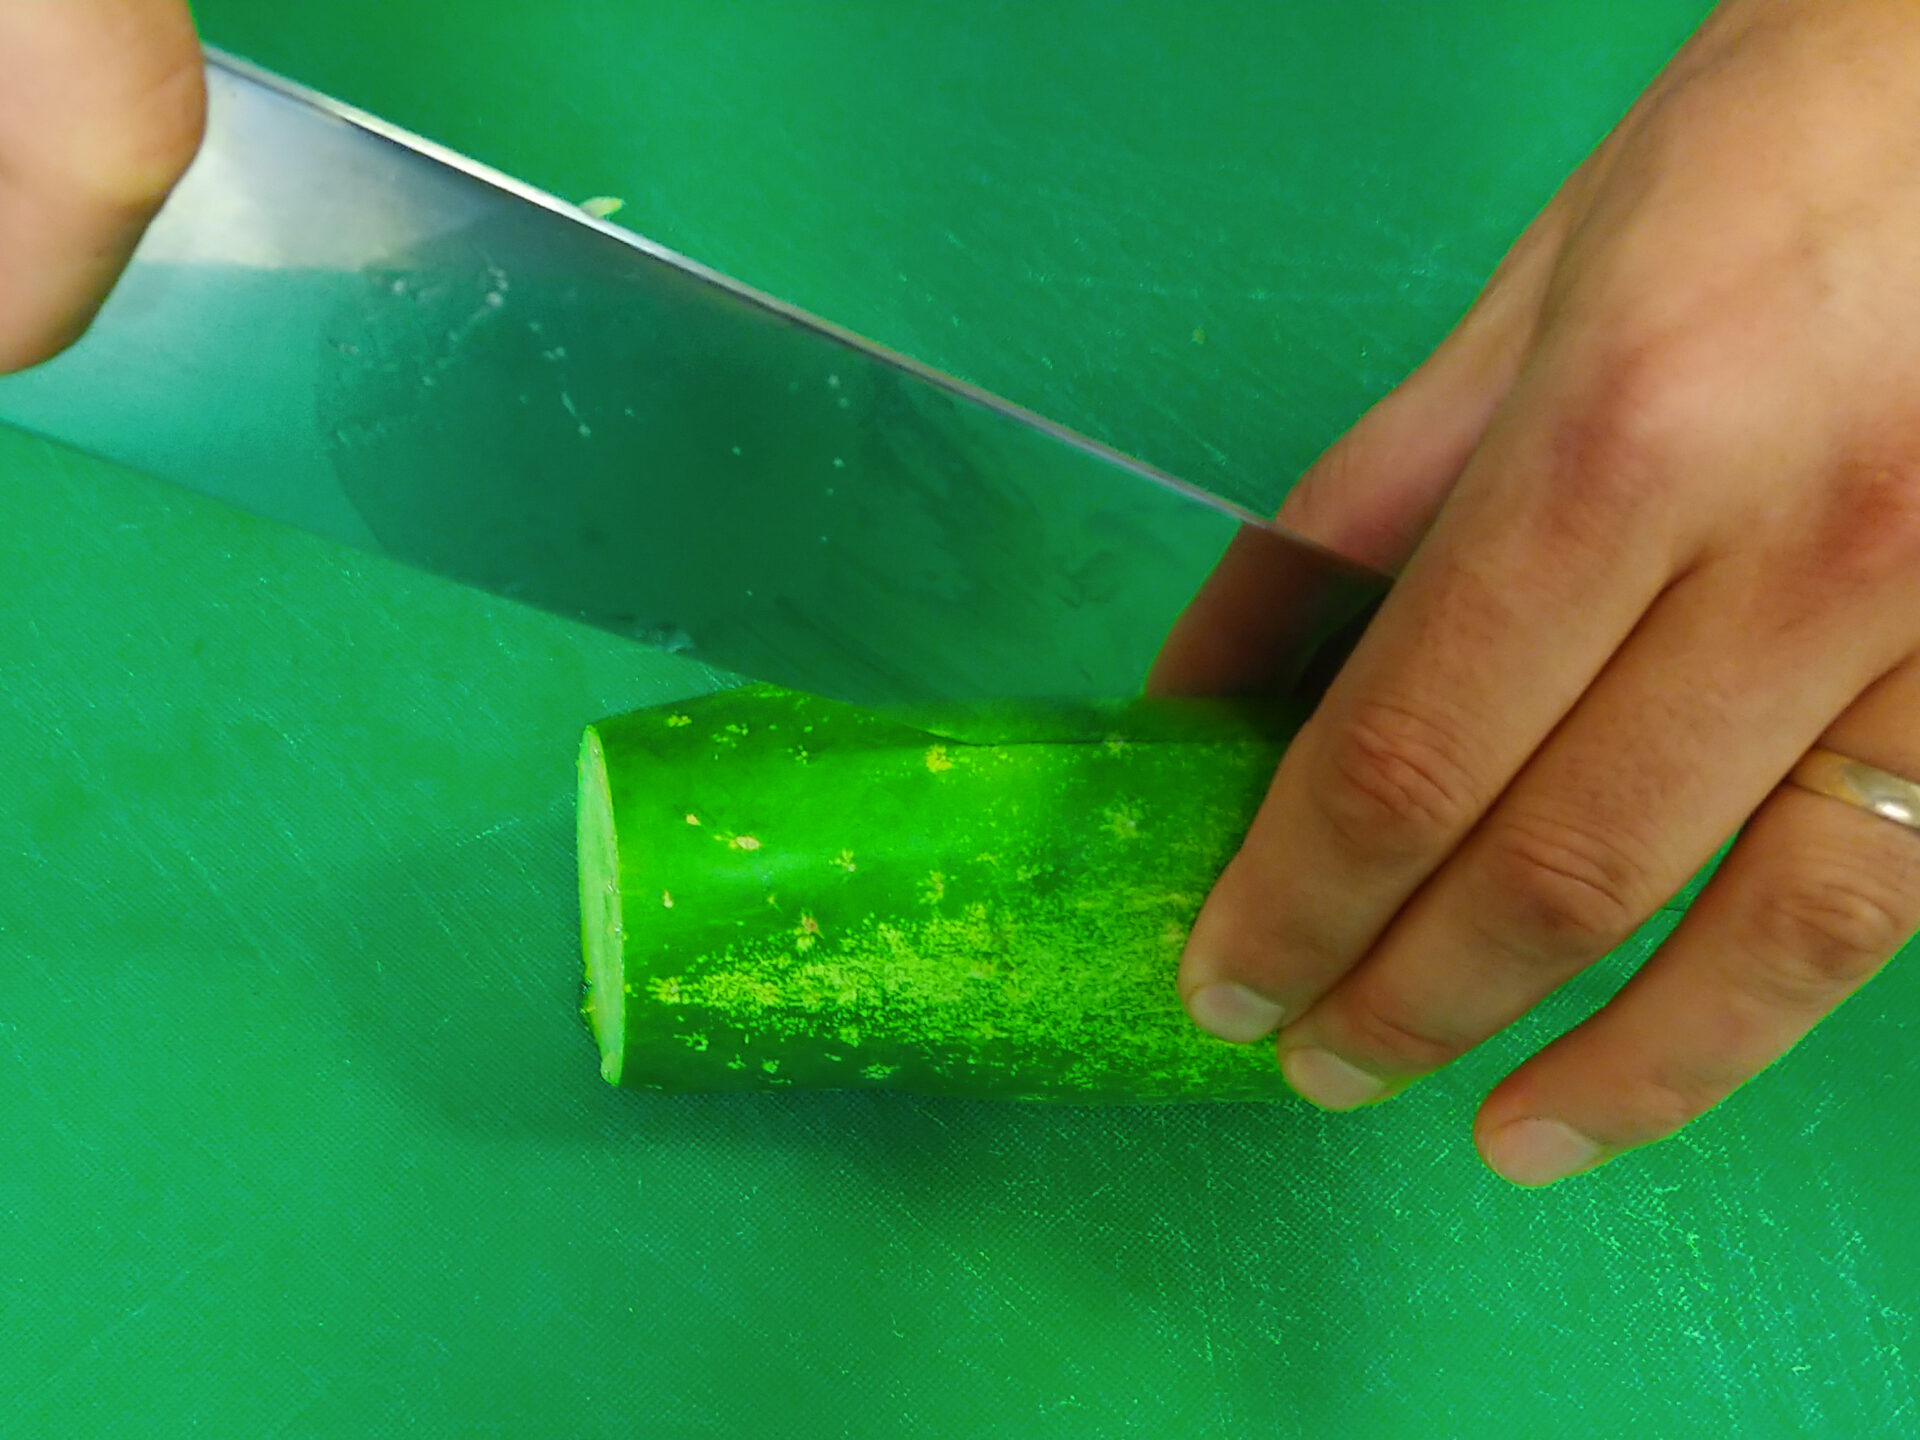
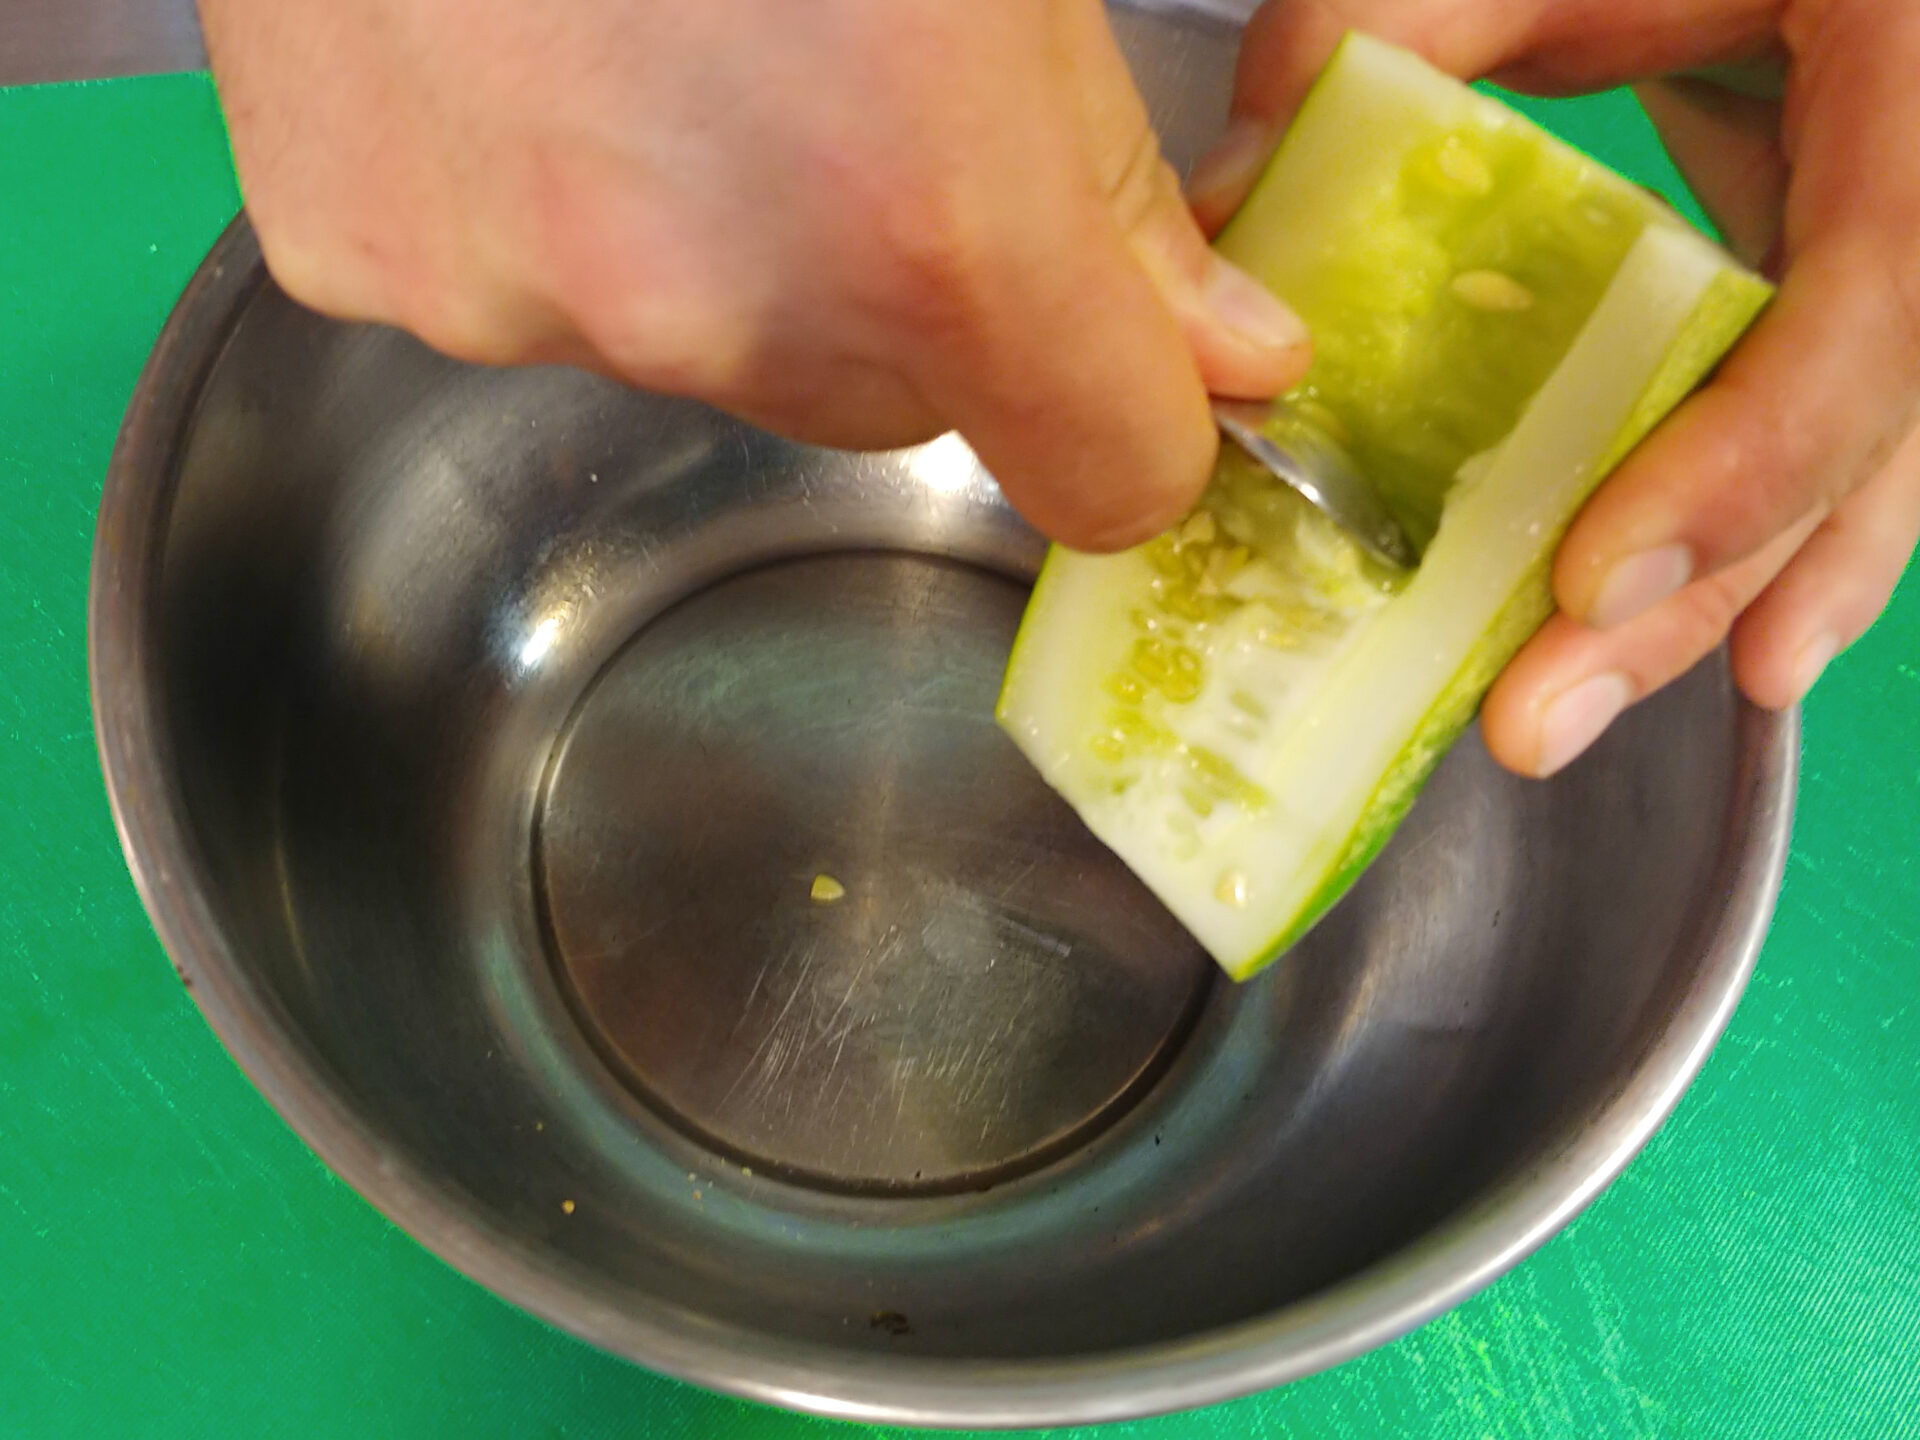
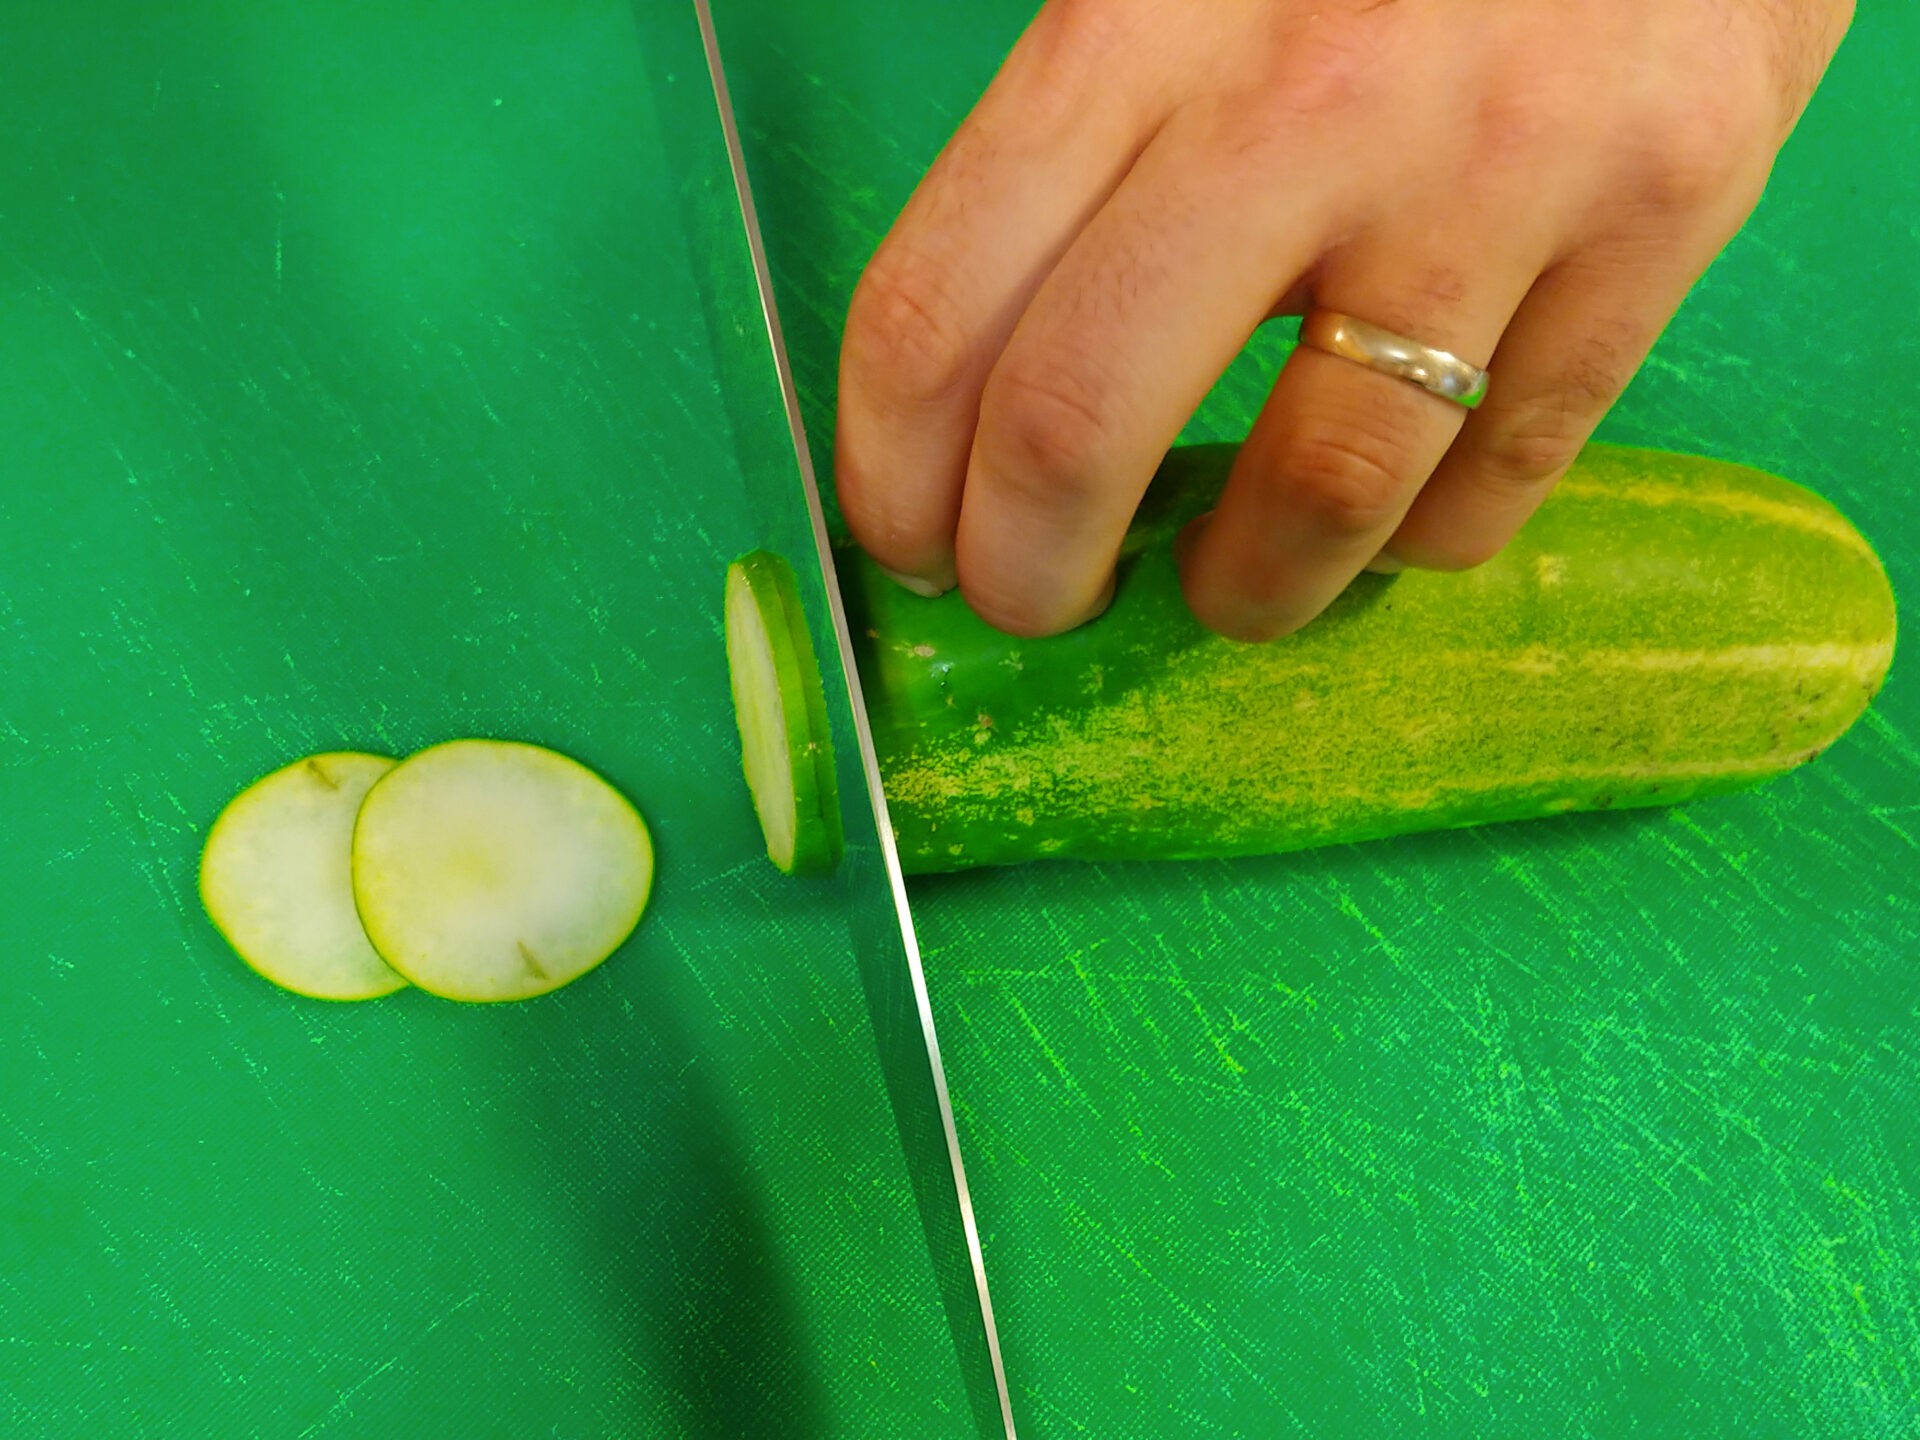
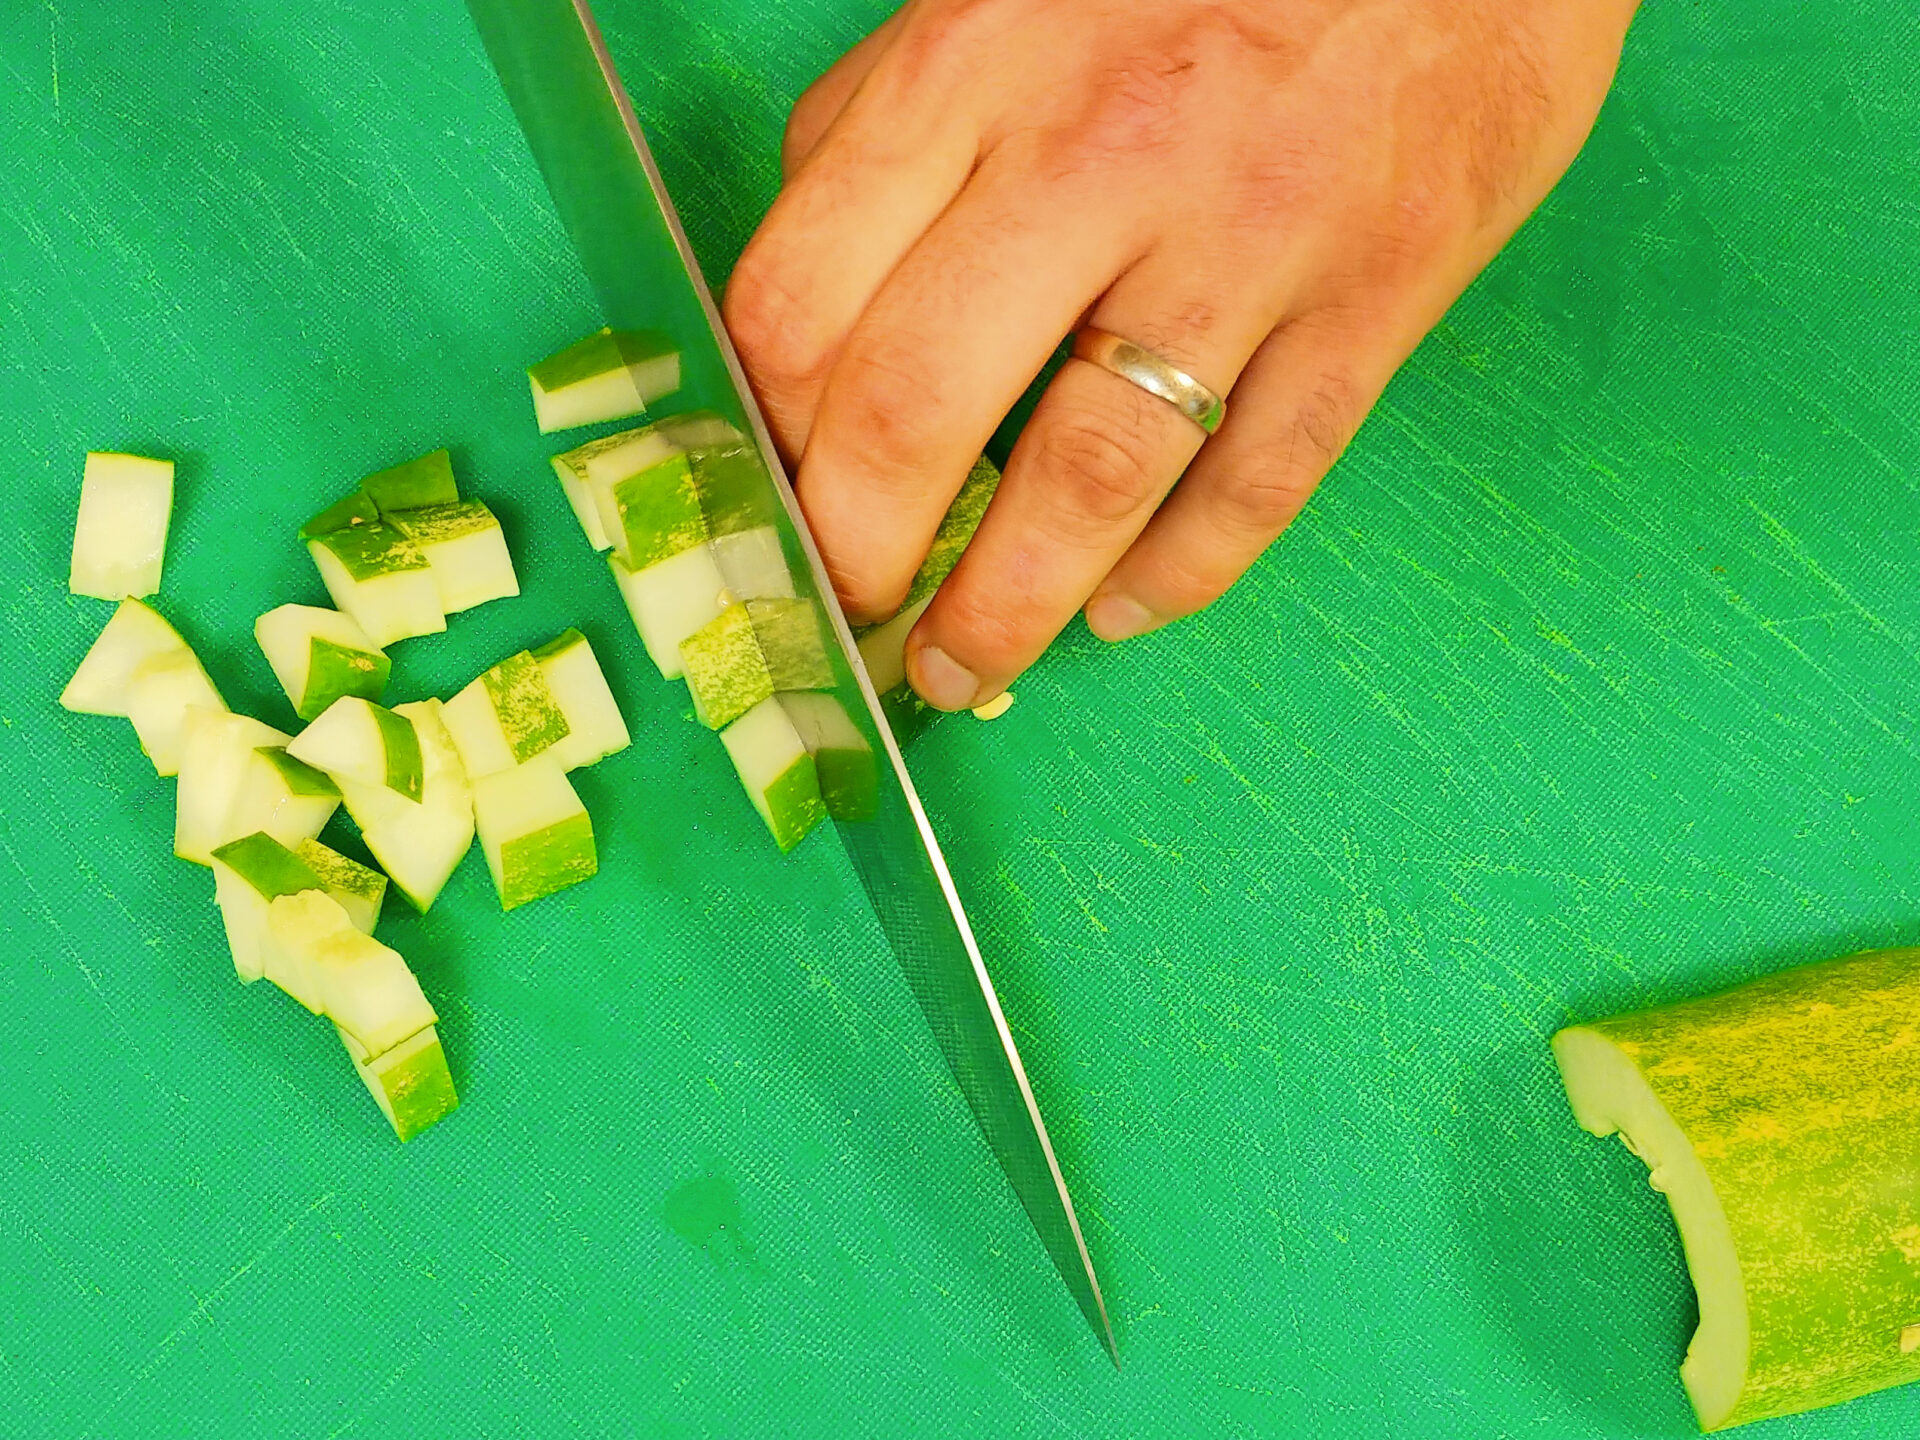
These can be eaten with or without the skin based on your personal preference (some people find the cucumber skin hard to digest). Optionally, peel with a potato peeler.
Cut into half and remove the seeds in the middle by digging them out with a spoon.
Final chopping:
Simply slice with a knife.
Or cut each half into halves, and then cut into long noodle shapes that are great for dipping.
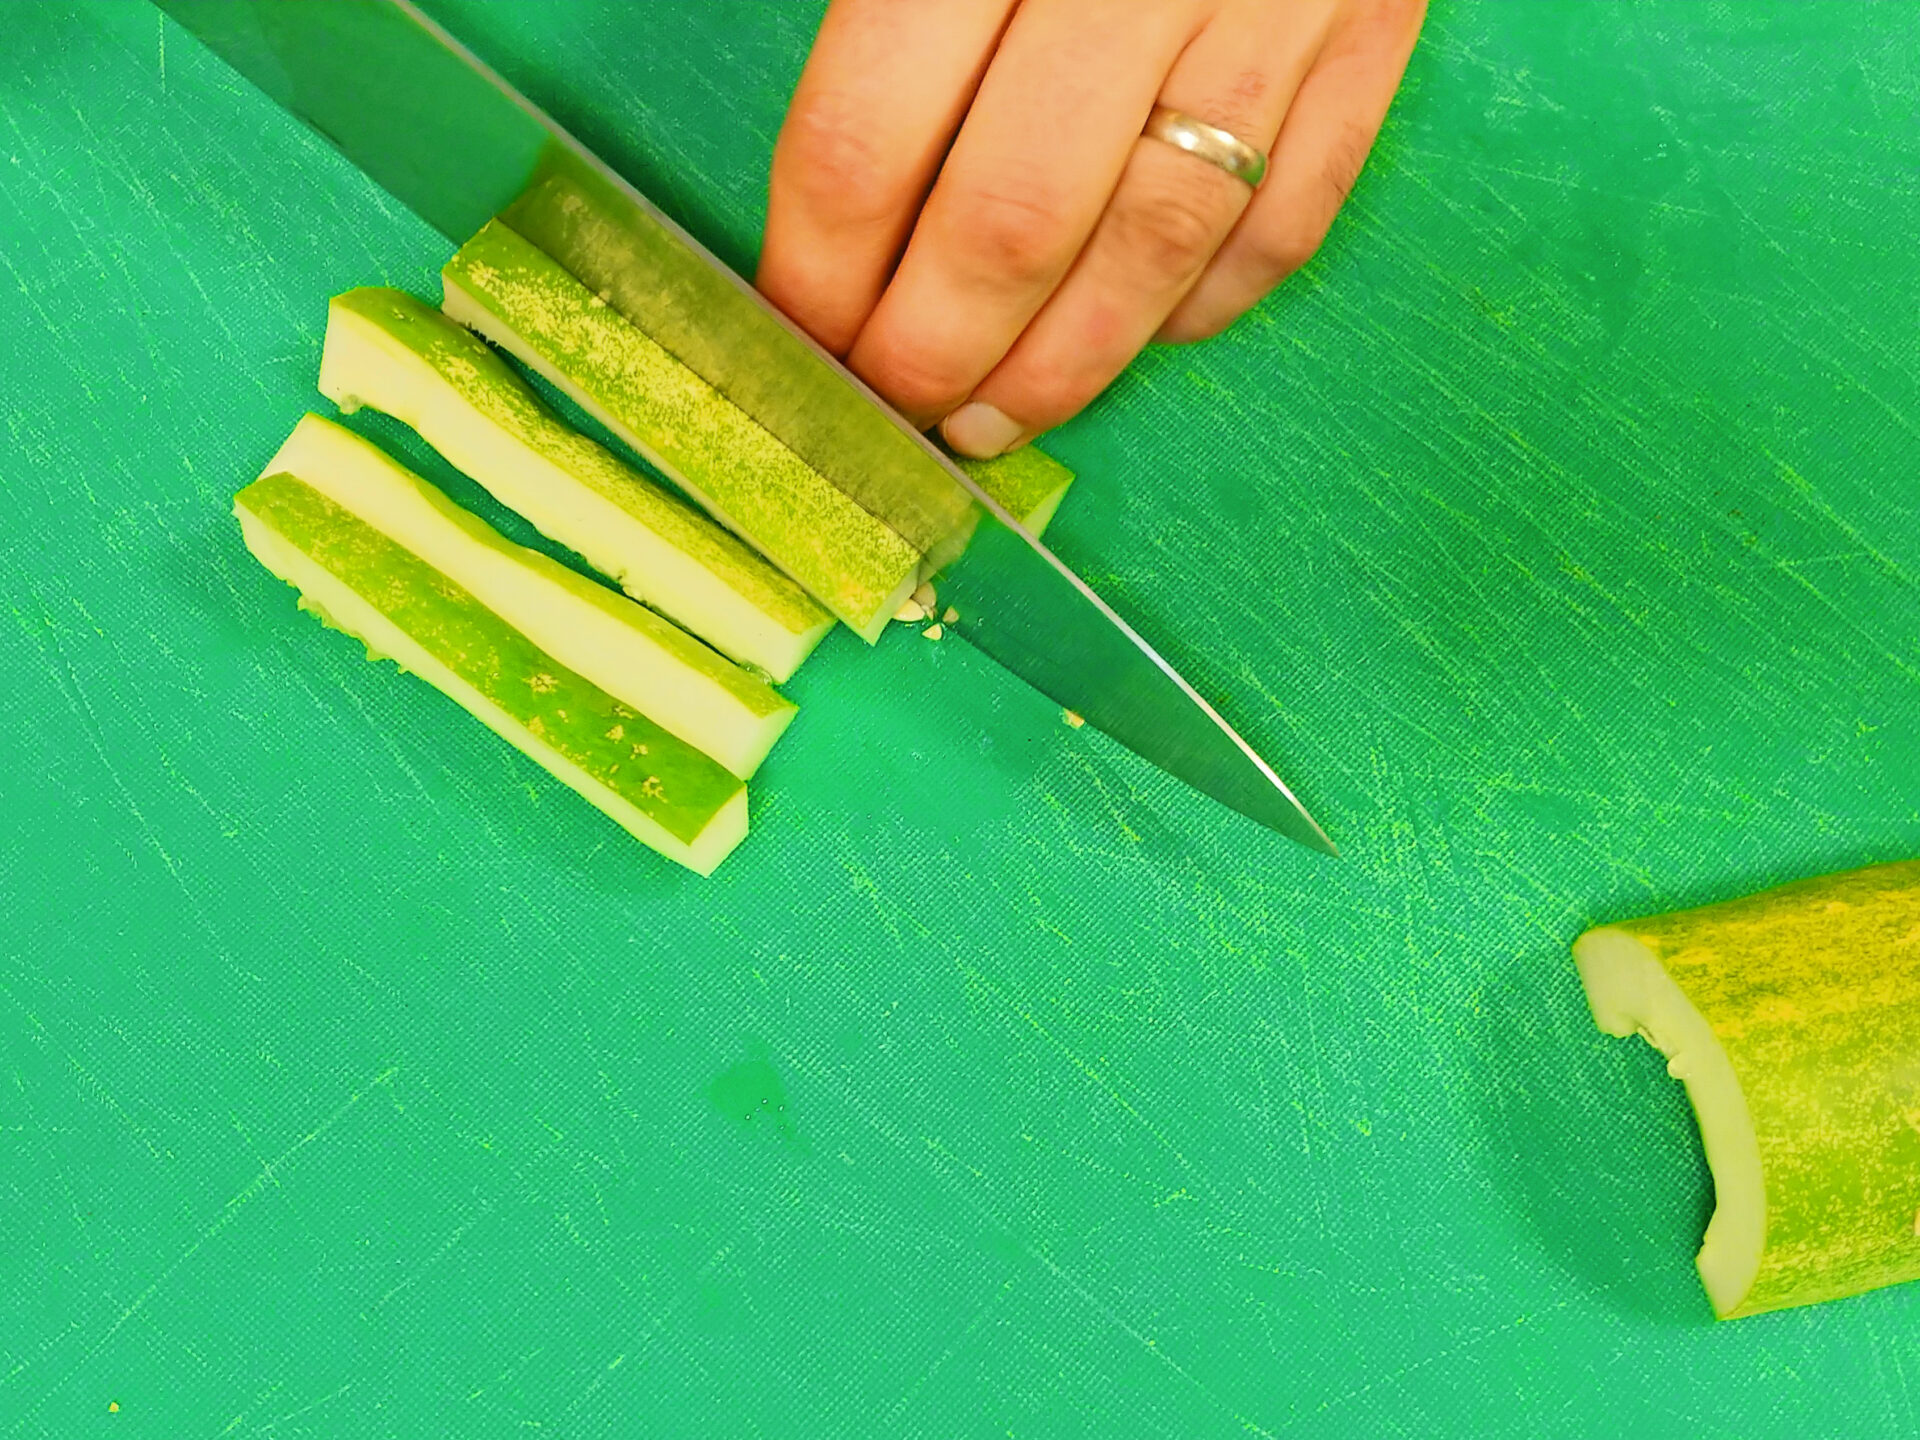
Or cut those noodle shapes to dices.
Or shred for Tzatziki and other vegetable salads (after shredding, place into a strainer to release liquids for at least 10 minutes).
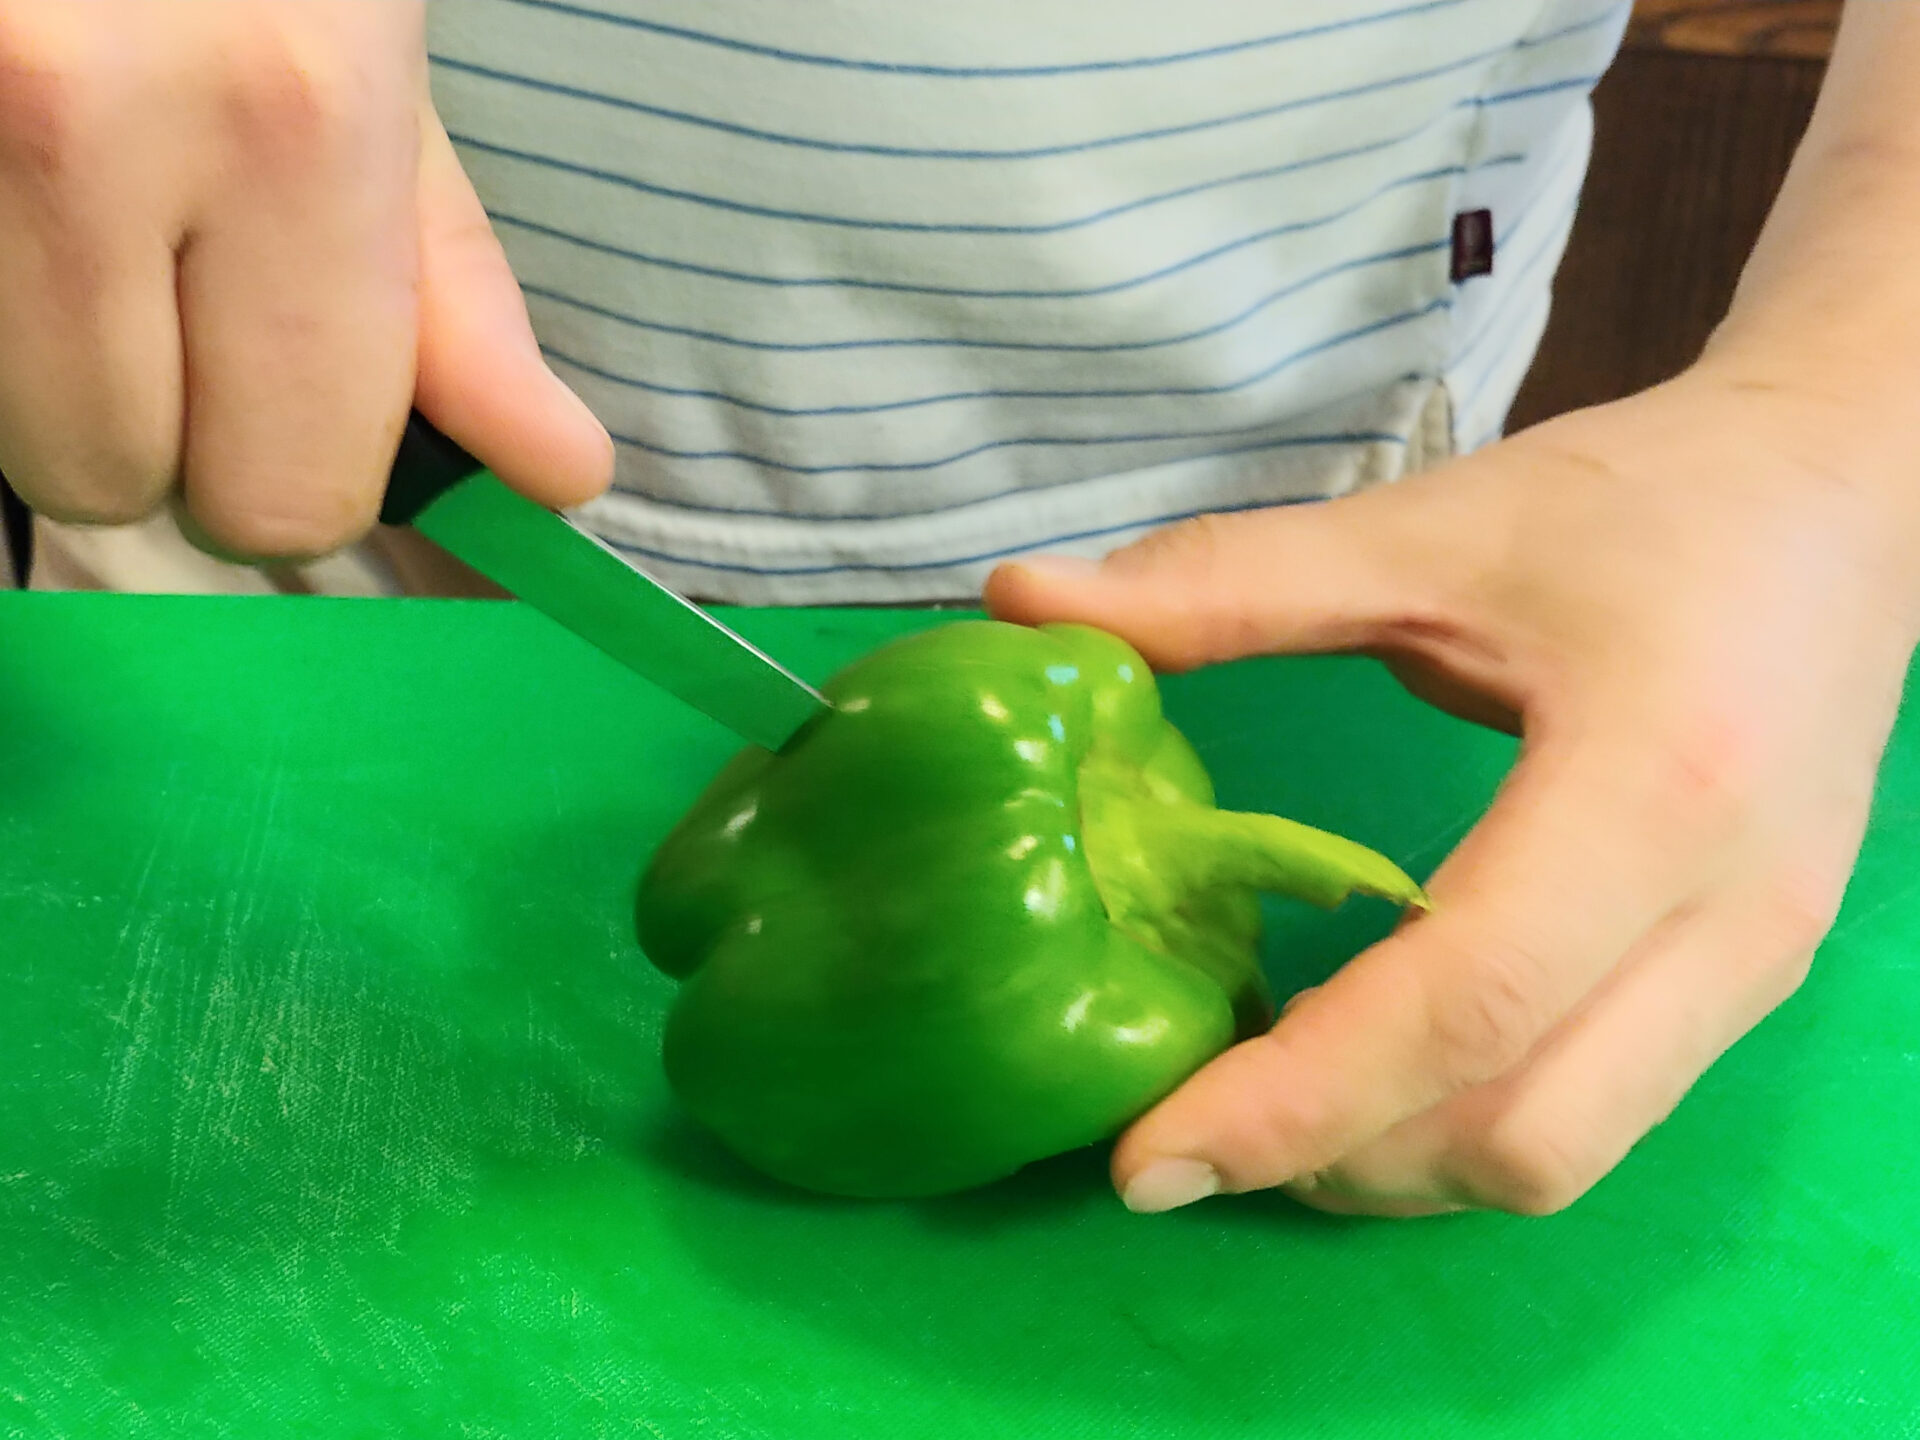
Peeling these is not necessary, but some recipes for spreads and salsas ask for it. Roast the peppers whole on a medium heat gas burner (watch carefully and remove if it starts steaming). Then, it will be very easy to peel by hand.
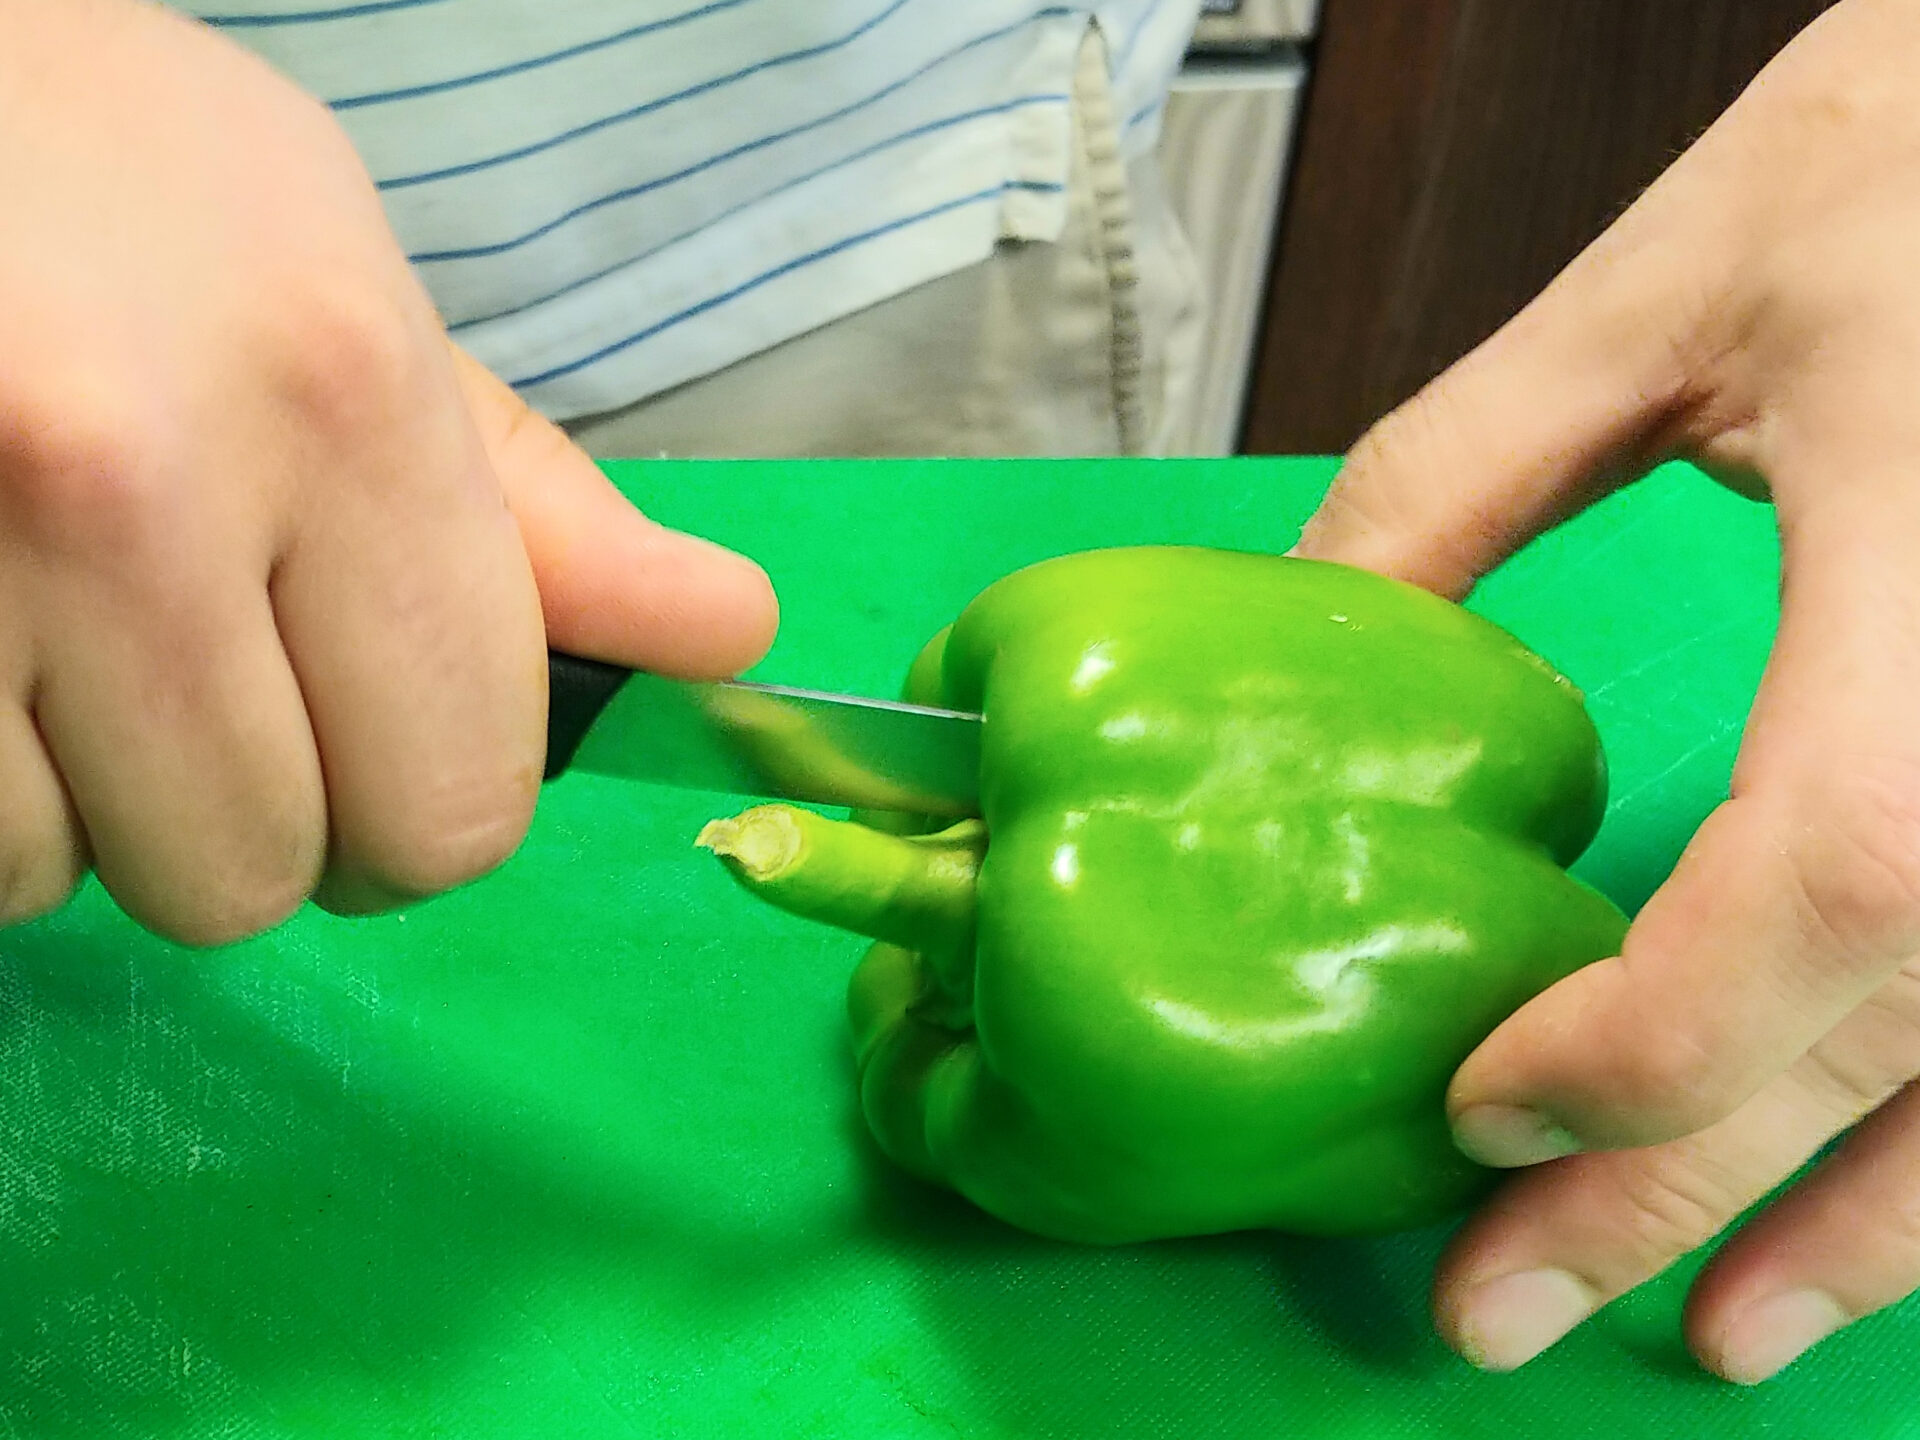
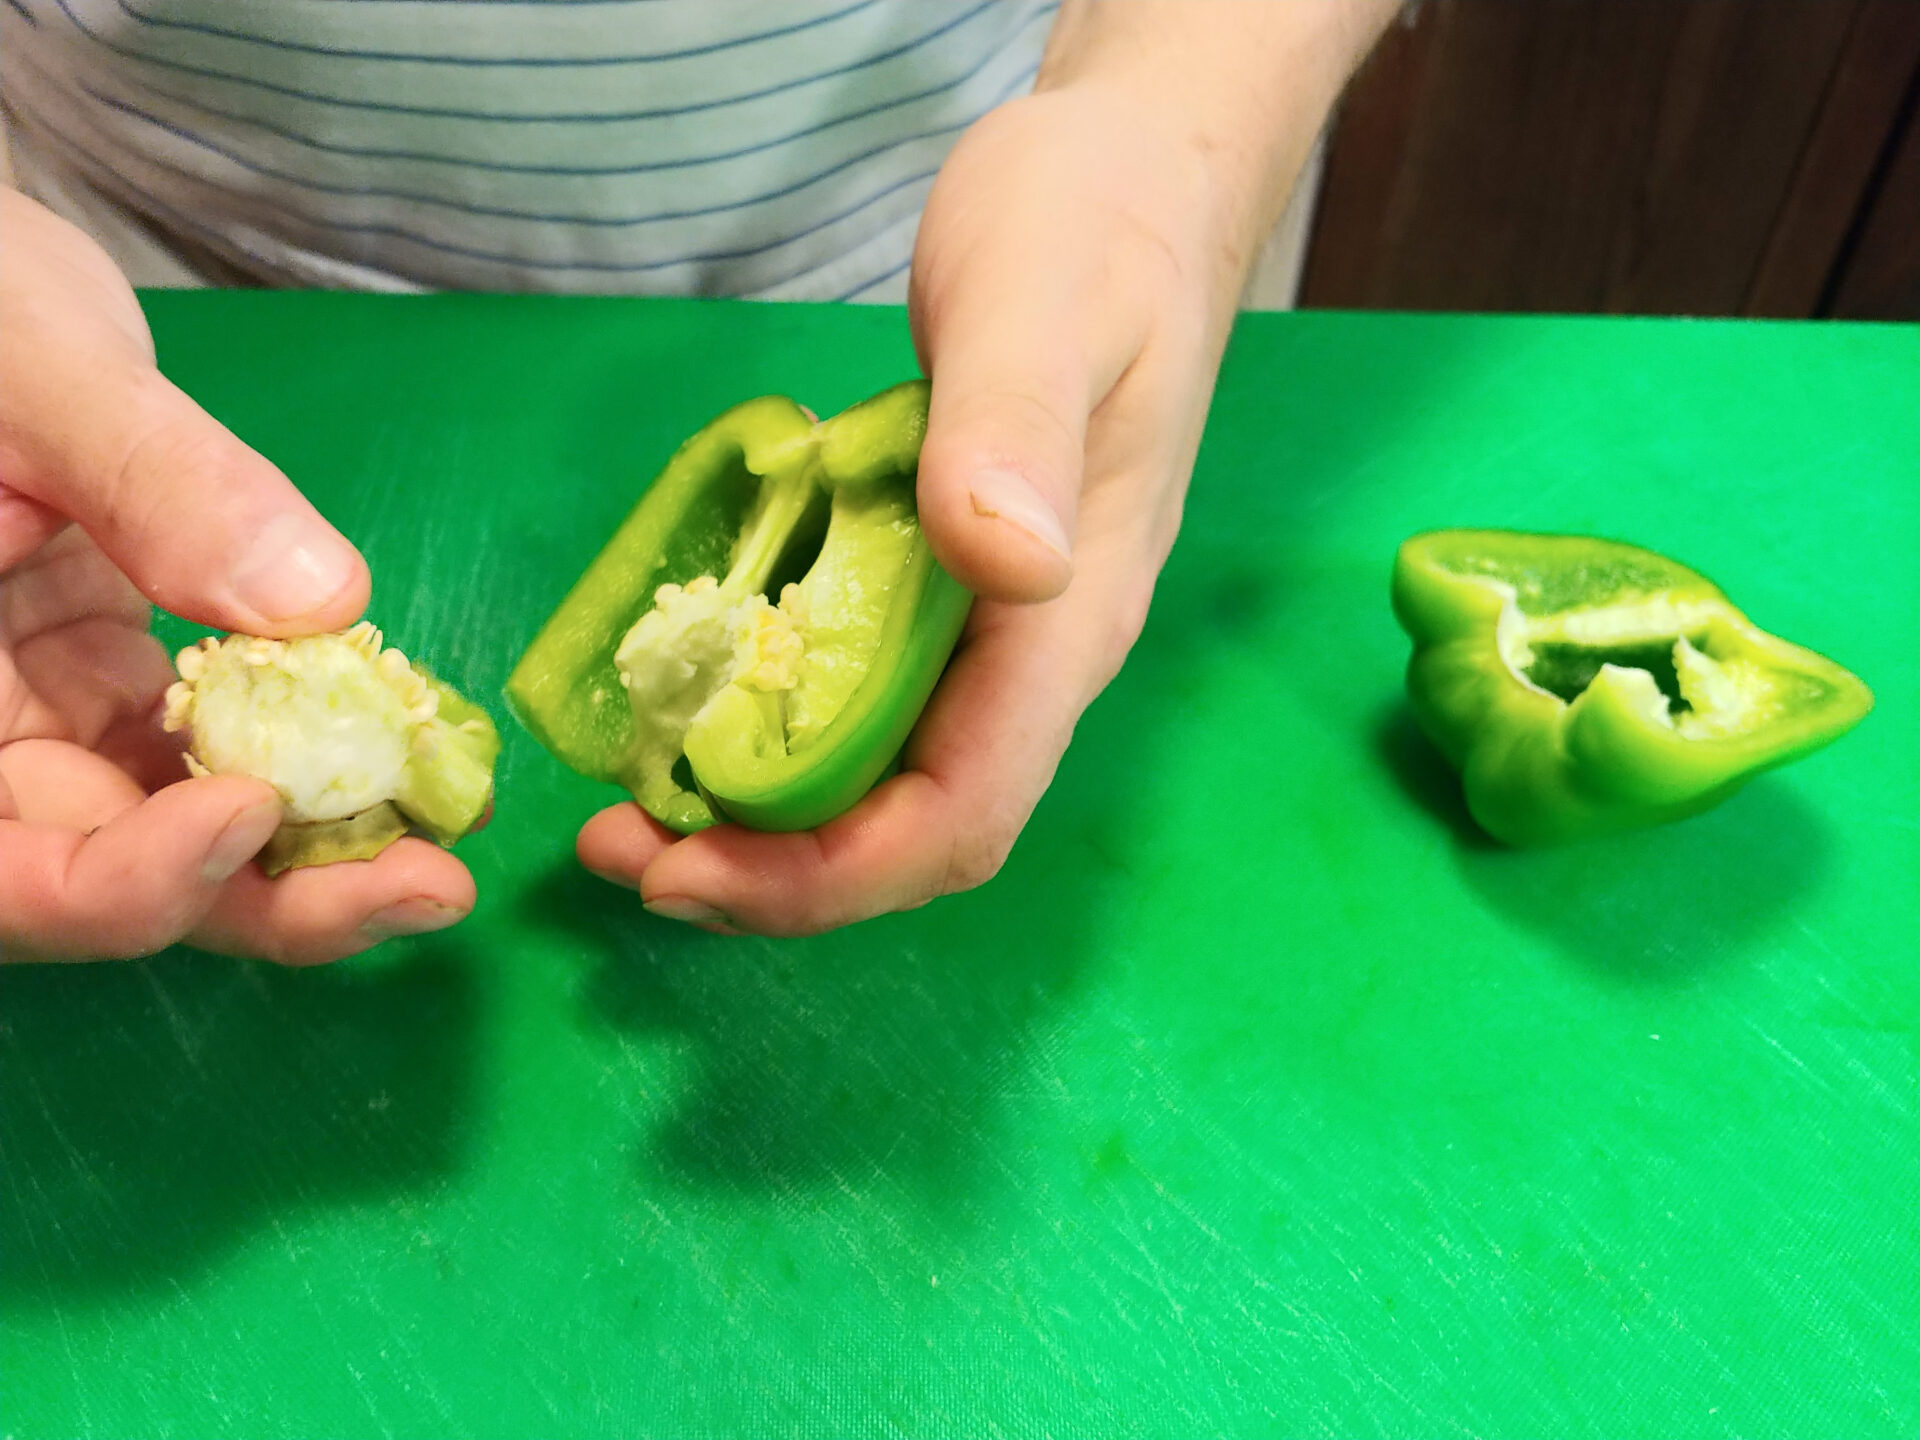
Remove the center and split into parts:
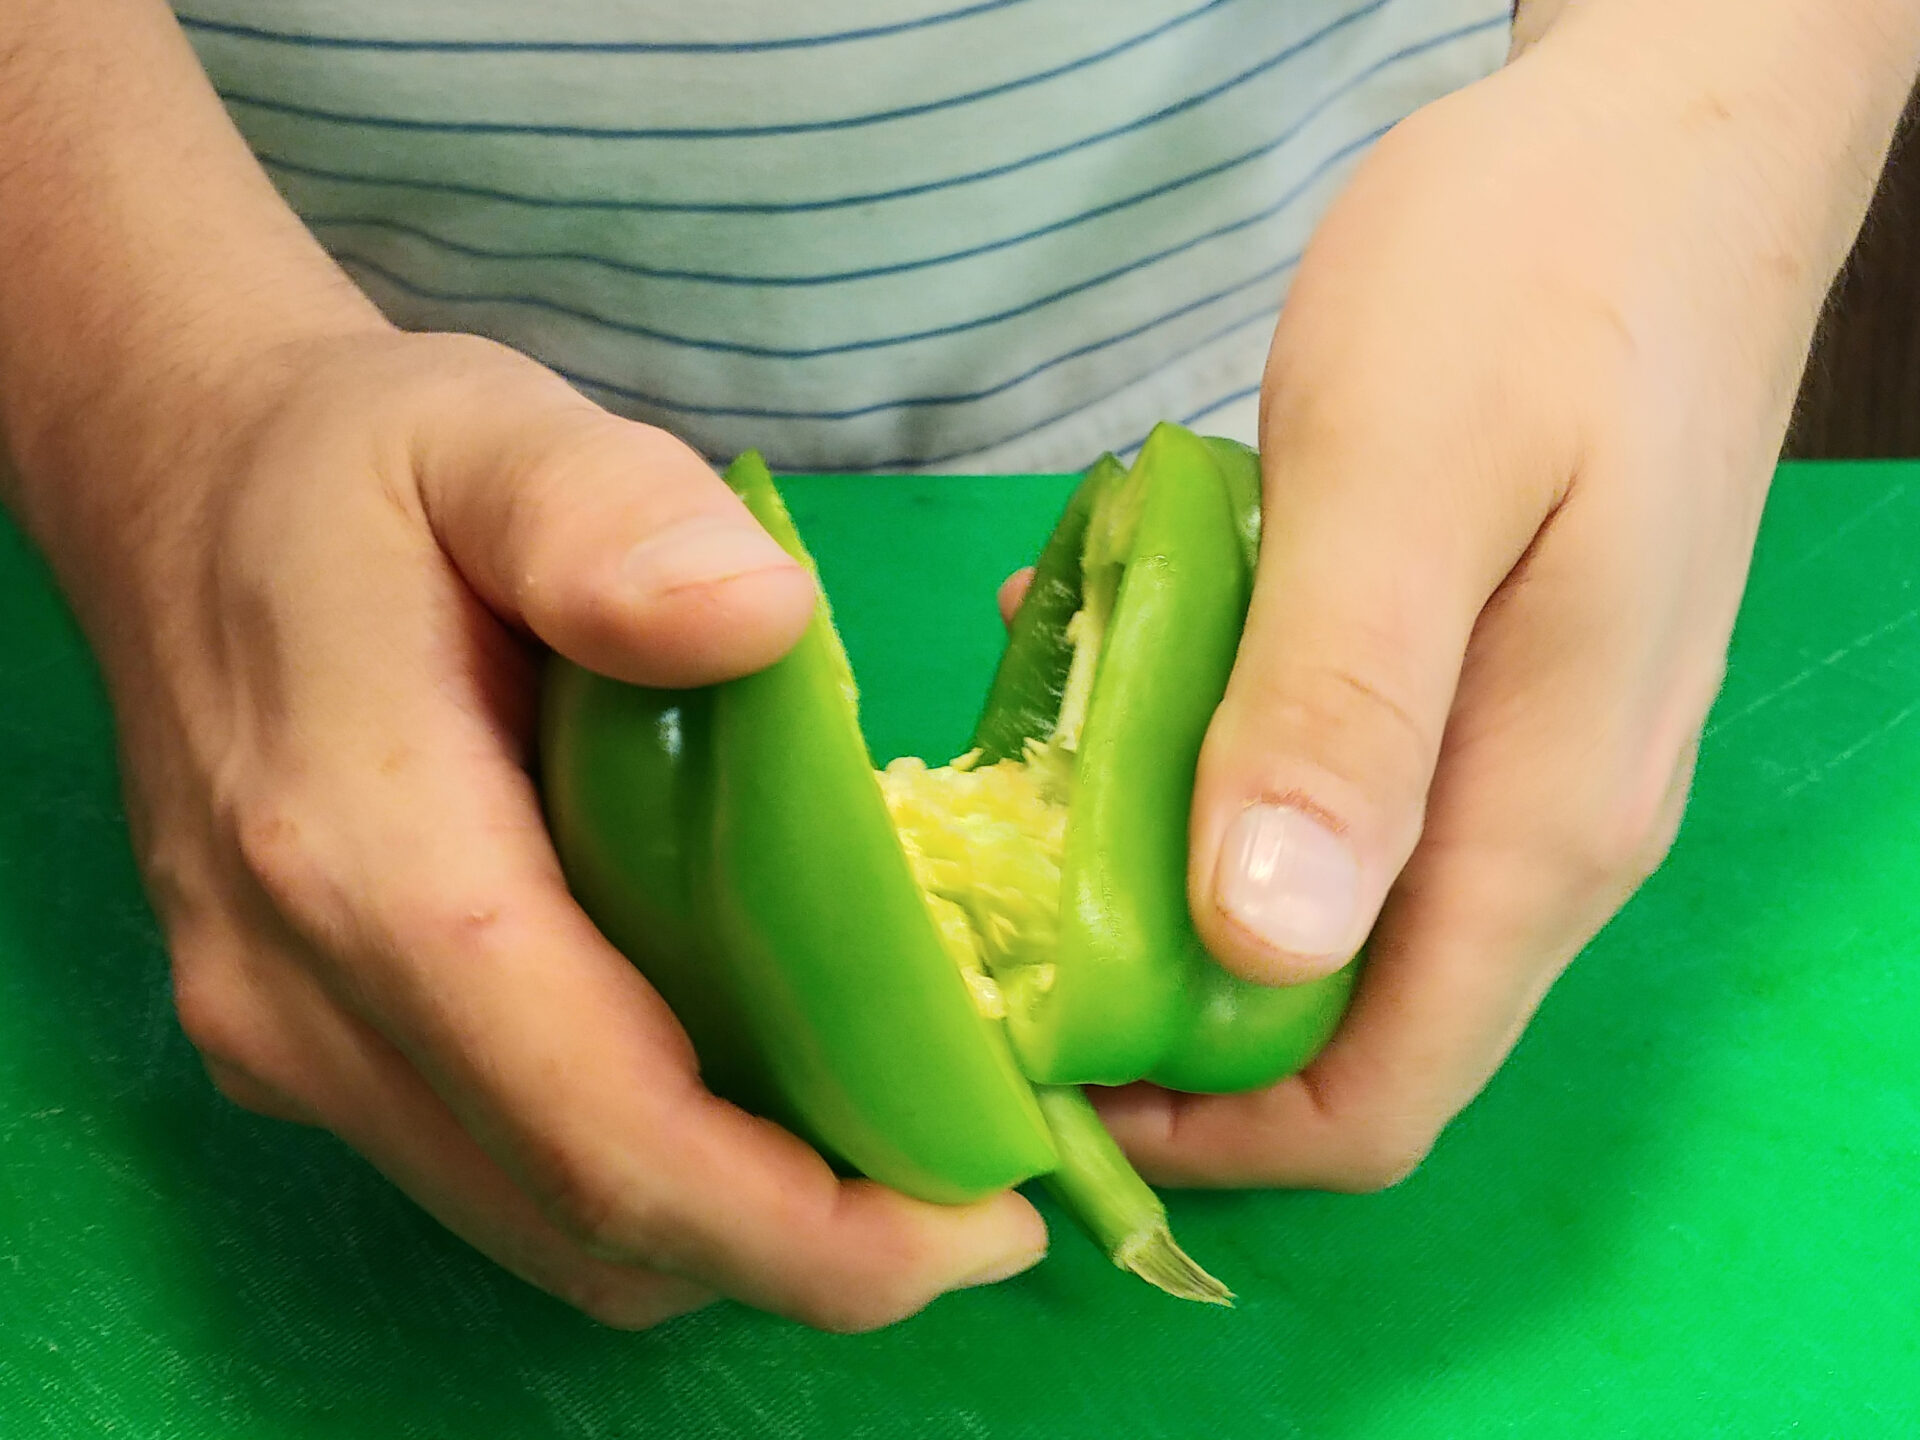
Cut the pepper into half using a small paring knife (from the stem to the bottom and then back to the stem).
Using your hands, separate in half.
Remove by hand the stem part with seeds, and then wash both parts of the pepper to remove the remaining seeds.
Some people also remove the white membranes (using your hands), but it is unnecessary since it is edible.
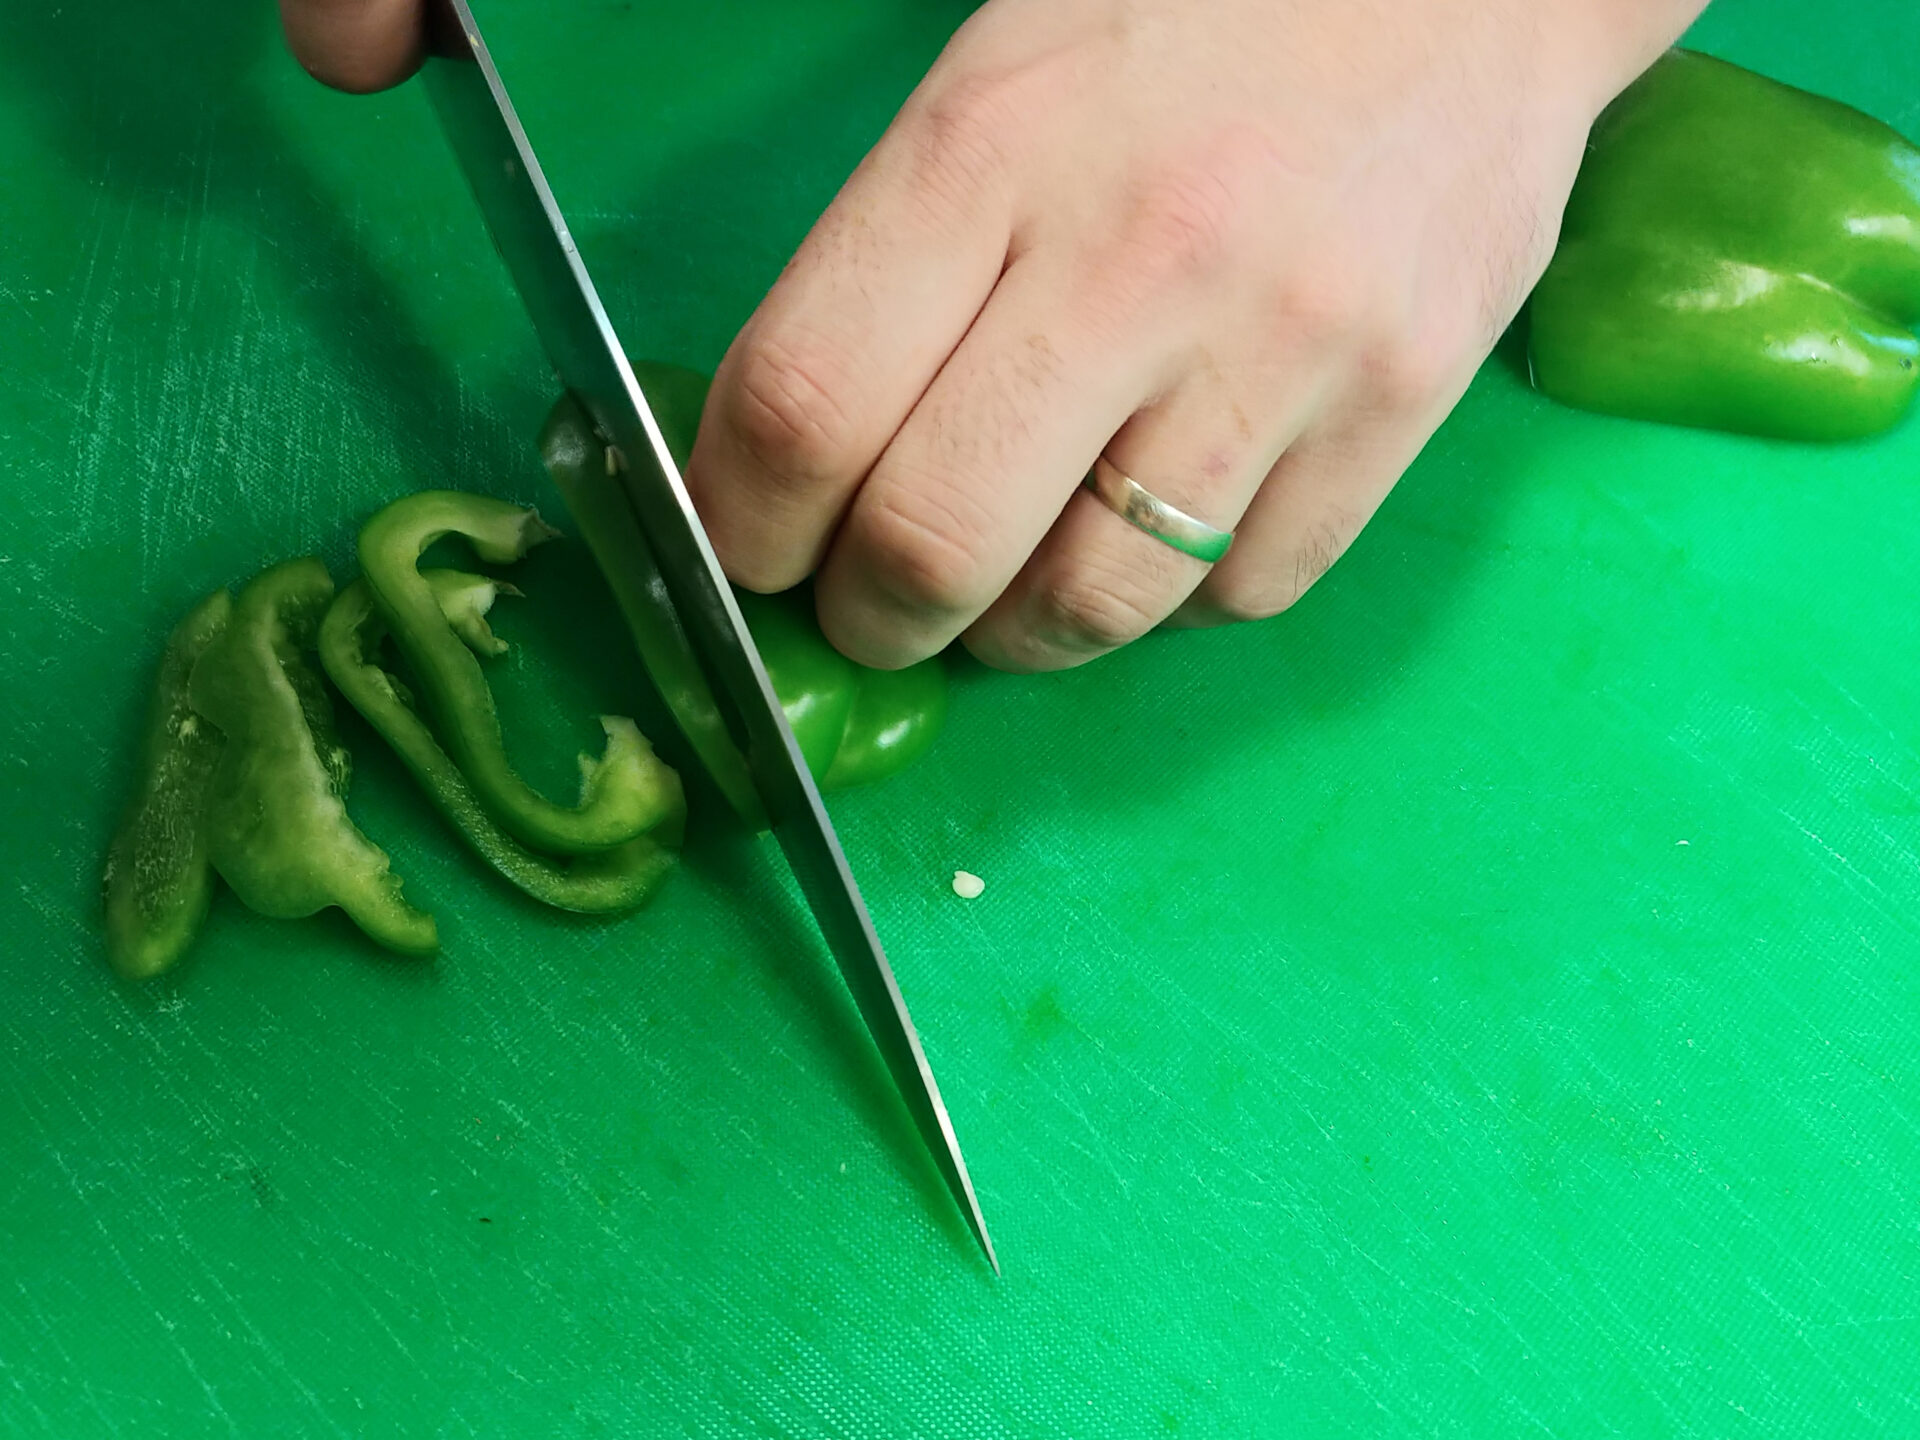
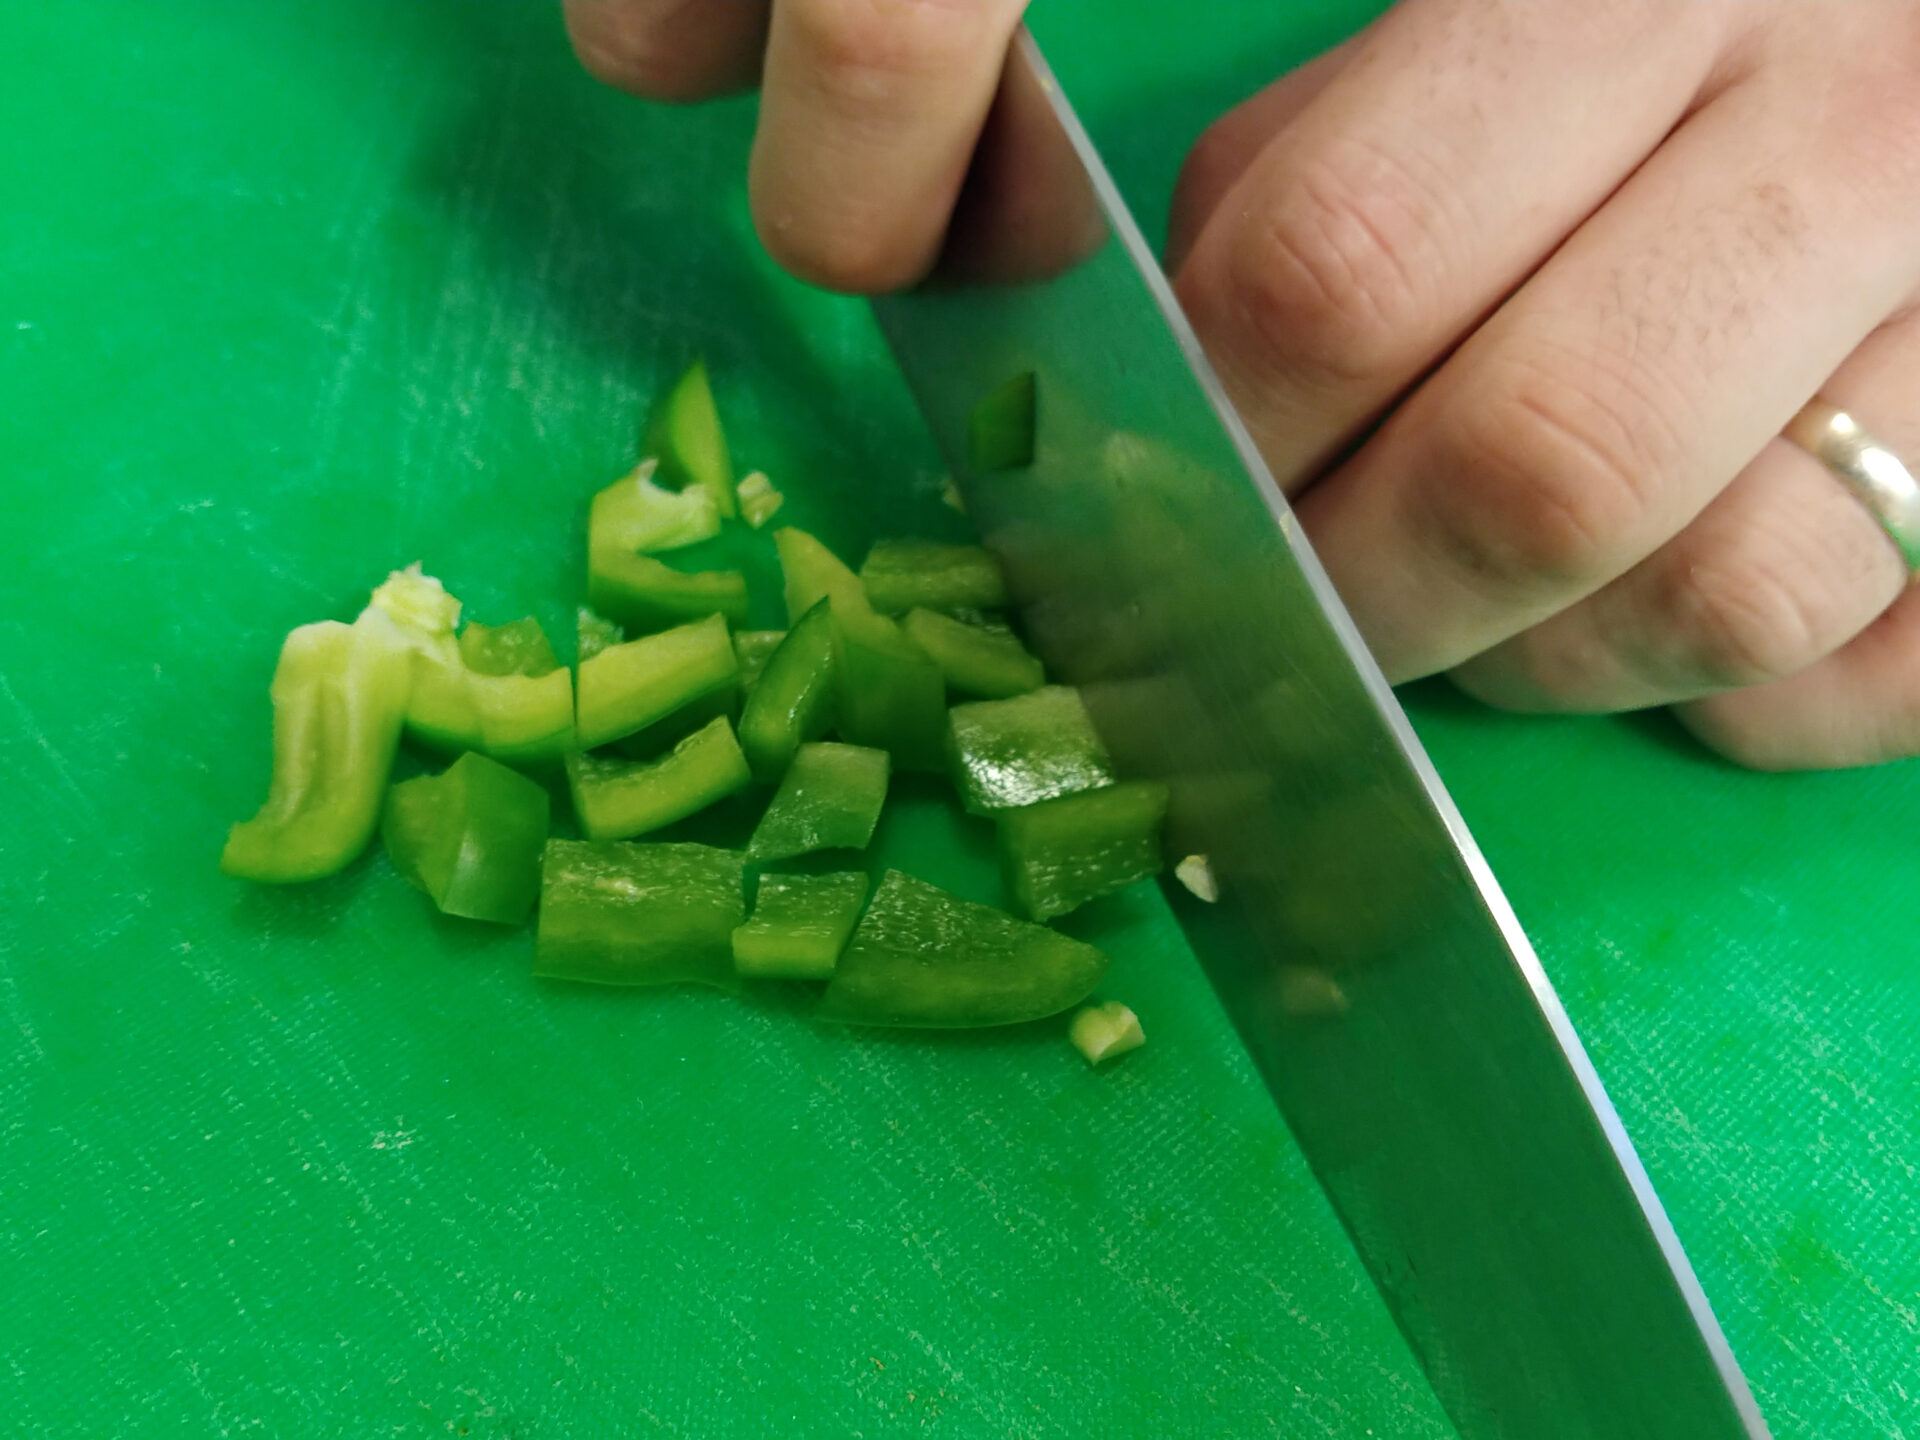
Cutting
Cut lengthwise to get noodle shapes (if the pepper is large, then cut into halves), which are perfect for dipping or stir-fry.
Or cut into dices by cutting through the noodle shapes.
Avocado is one of the healthiest vegetables out there.
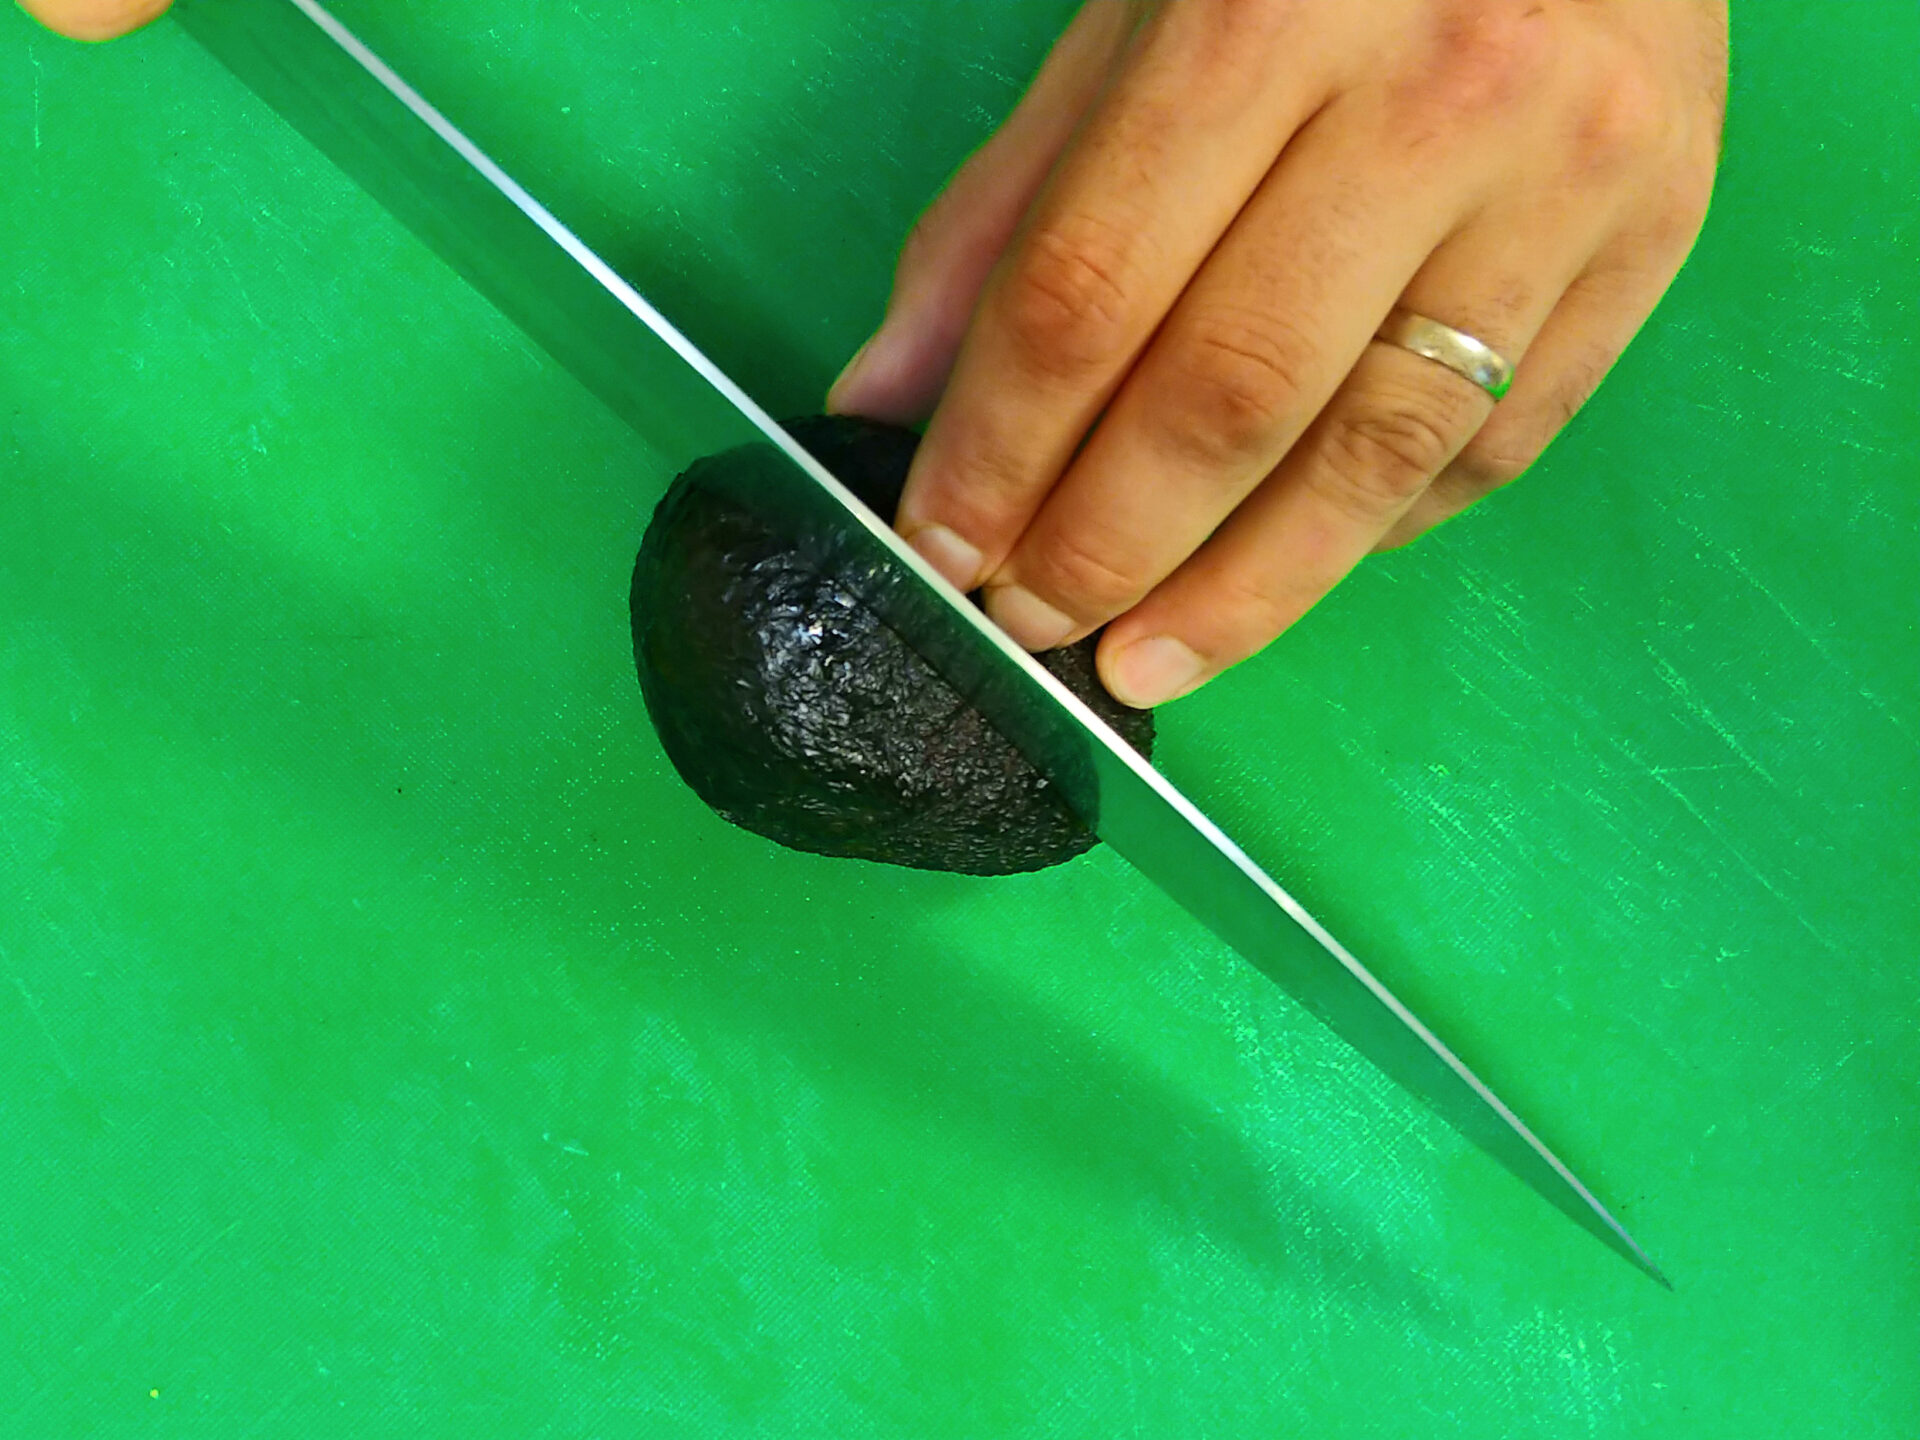
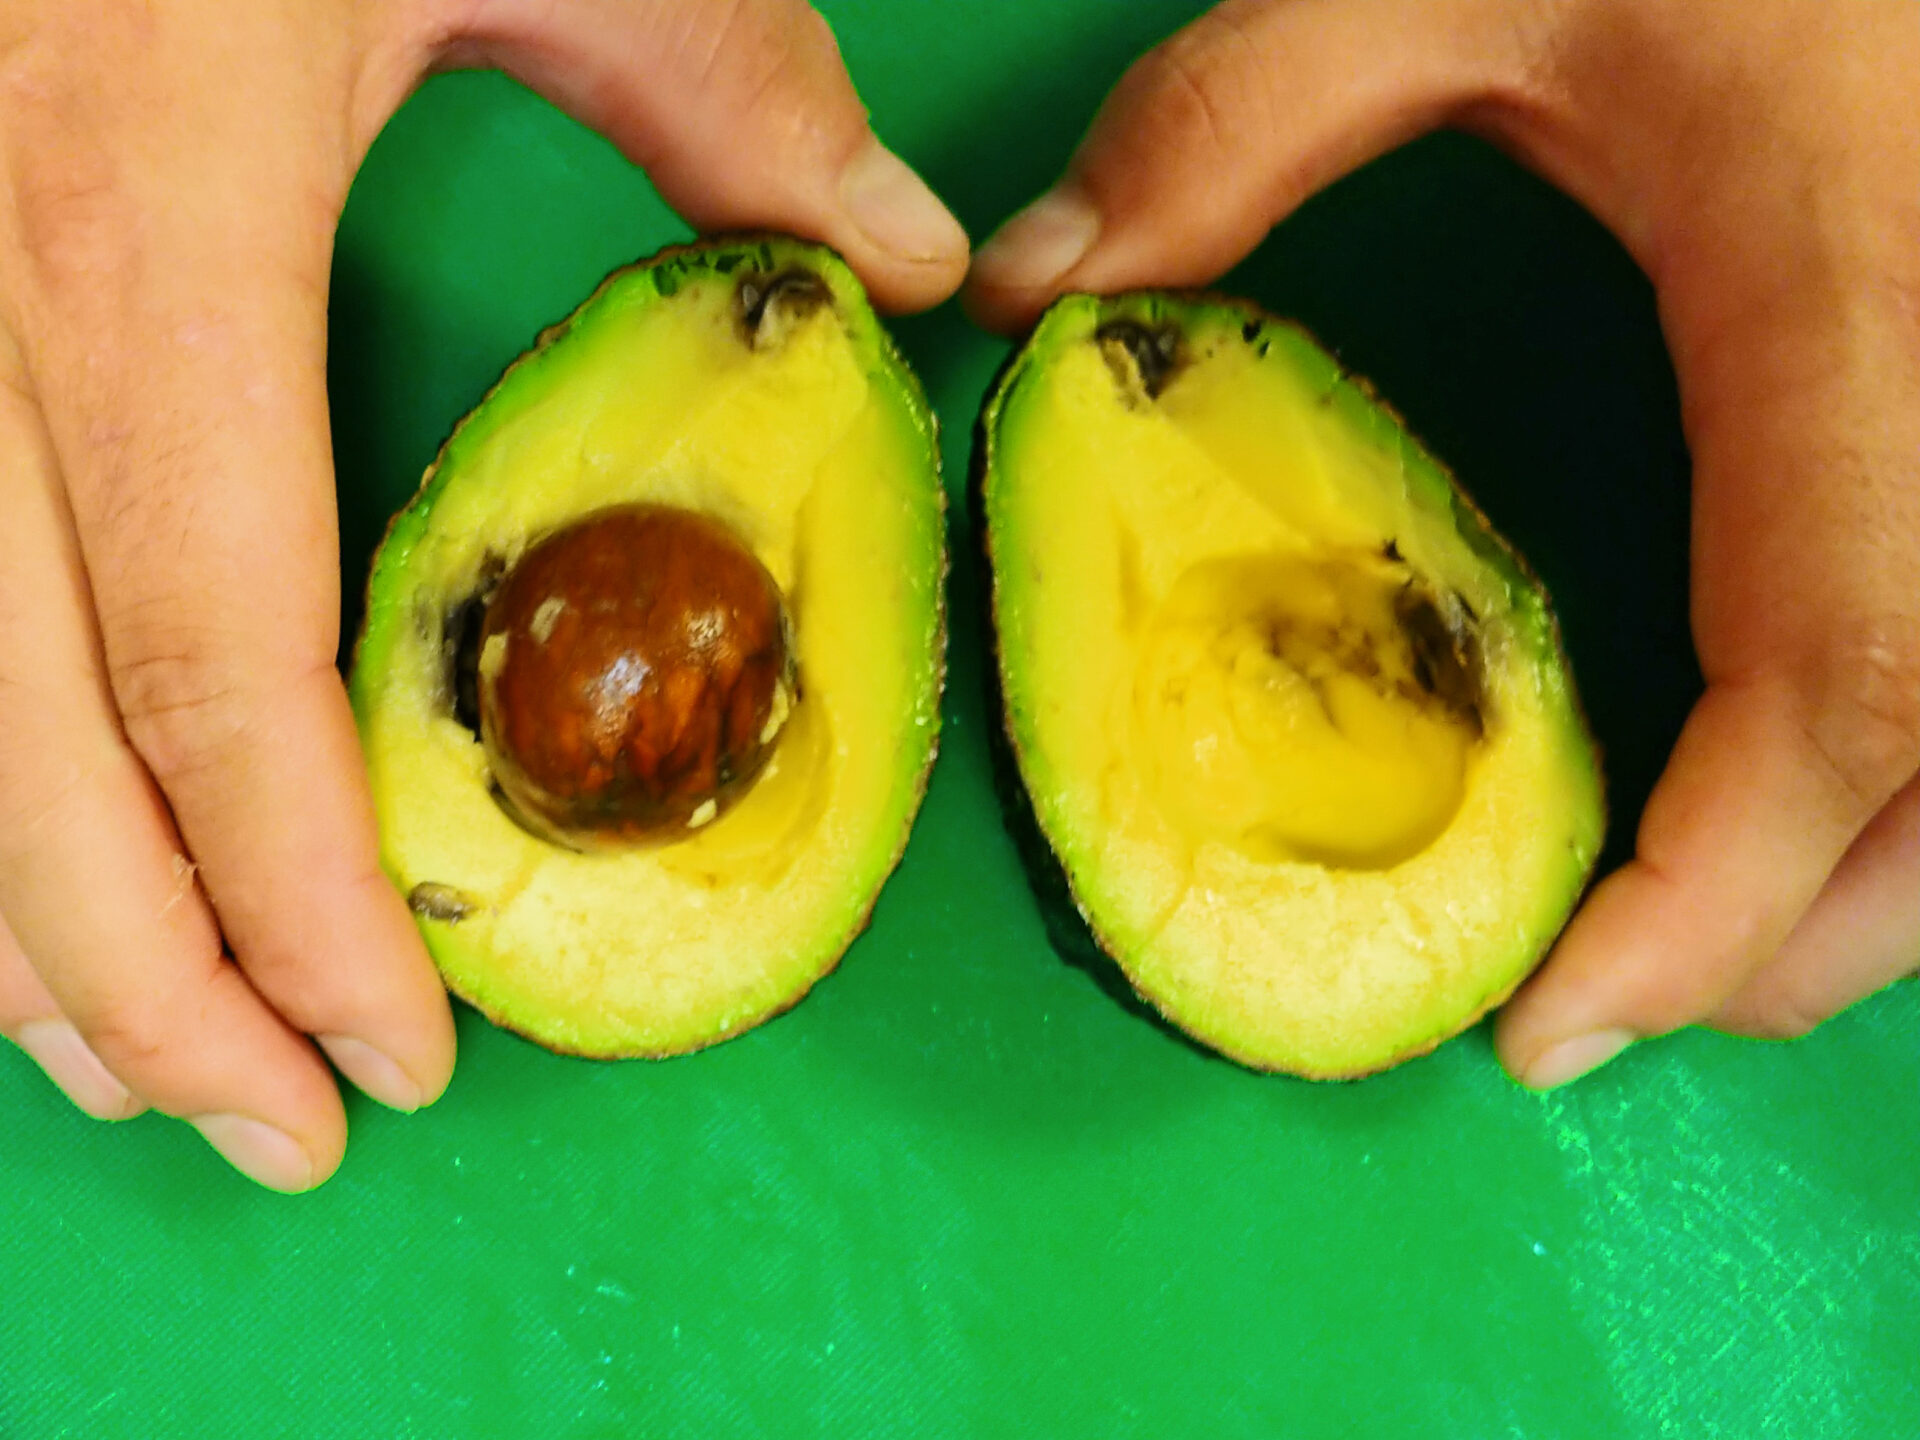
Before you peel it, remove the pit by cutting around the avocado from the bottom to top and back to create a circle around (during cutting make sure that knife is touching the pit). Then twist both halves into two separate halves.
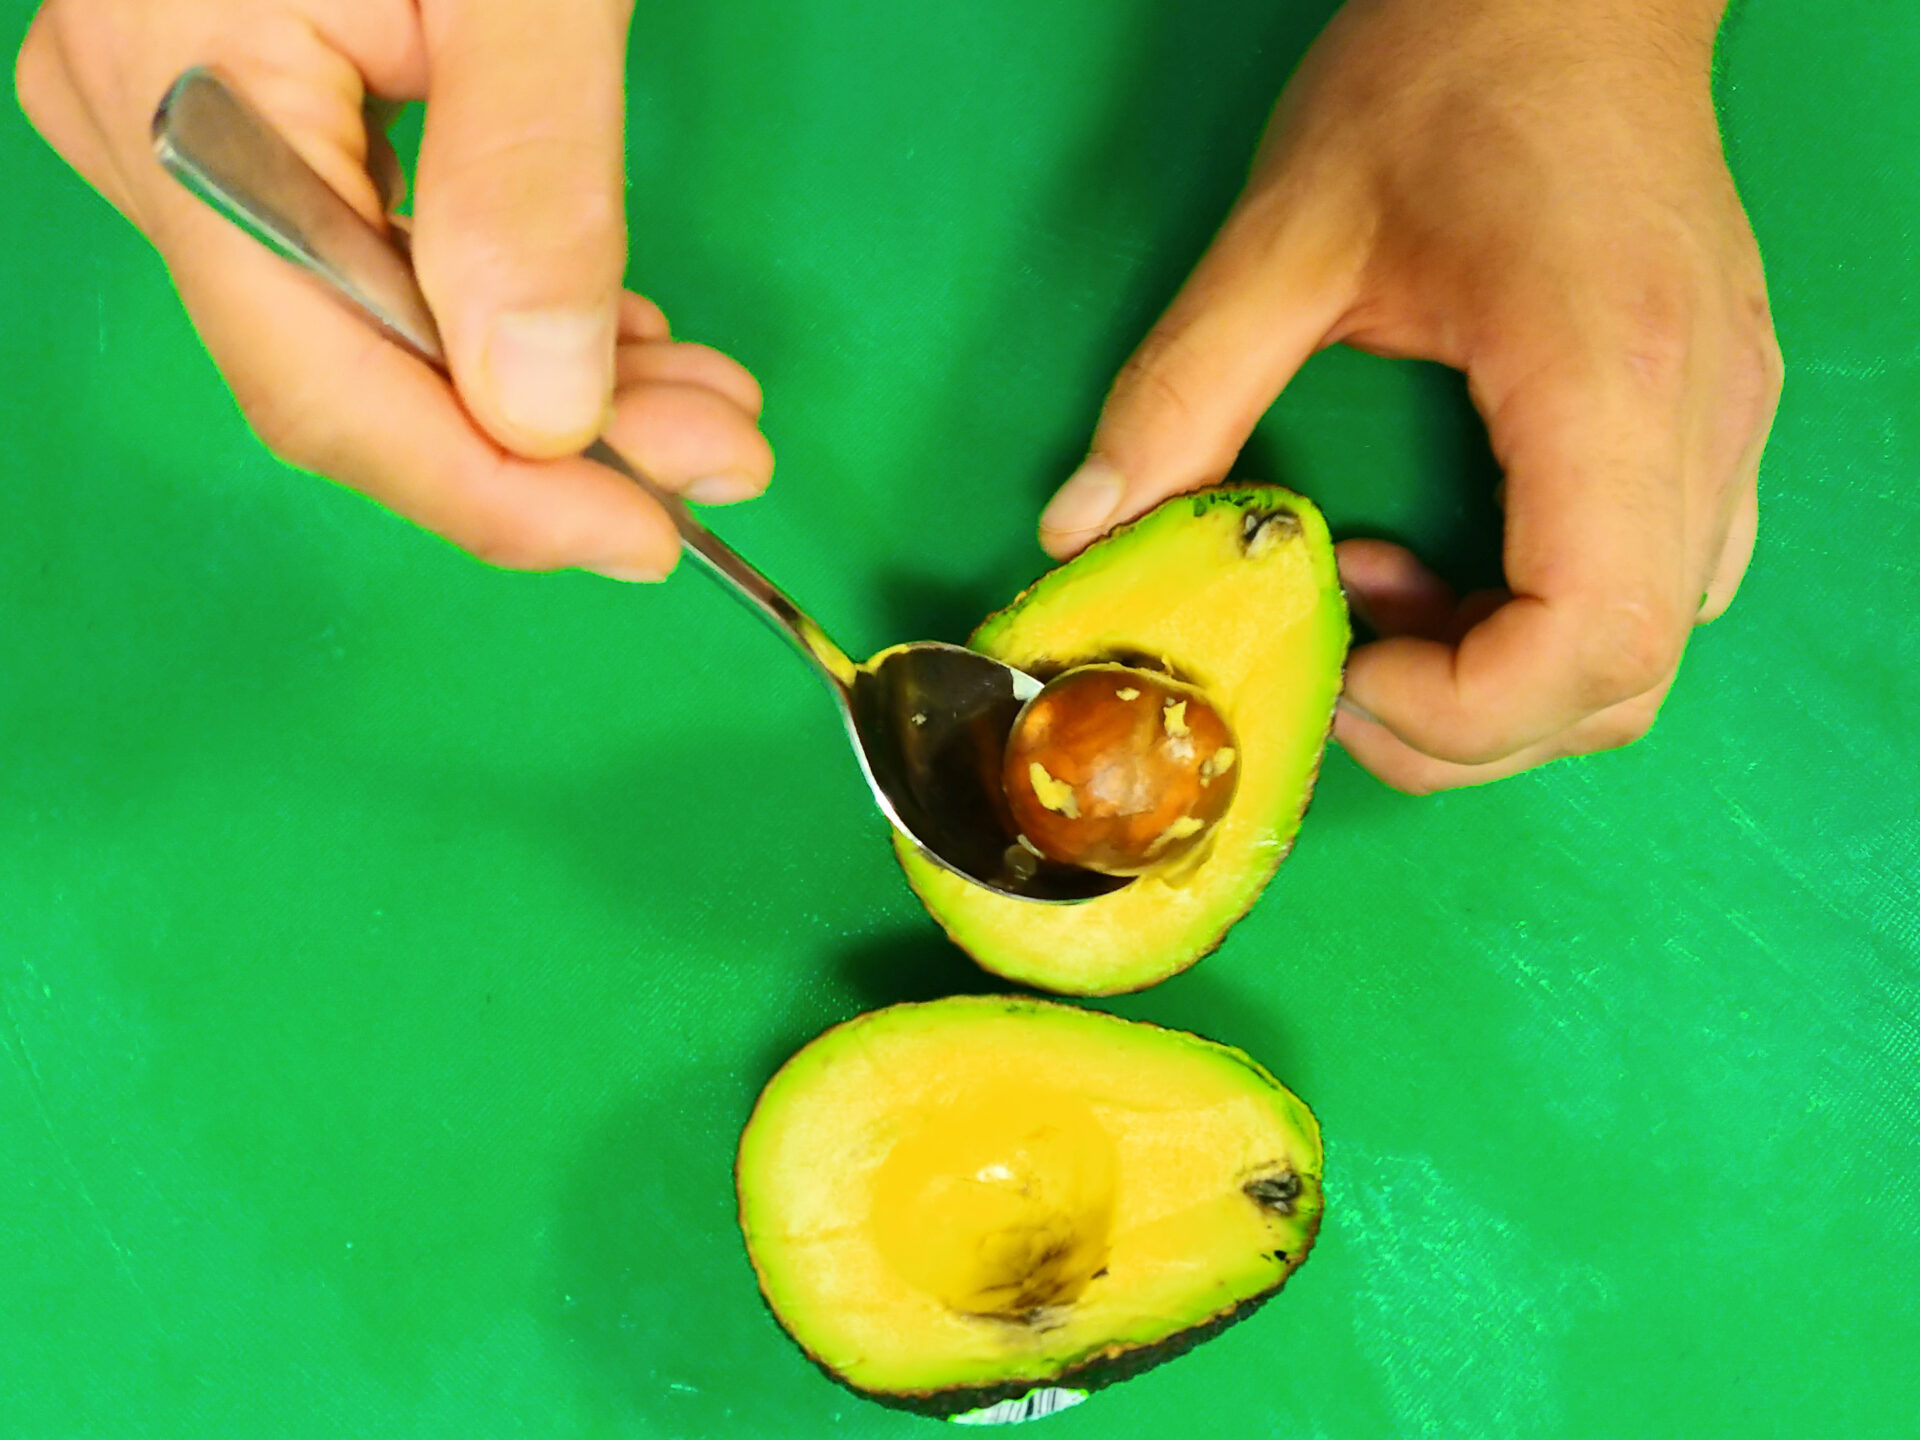
The pit will stay in one of the halves and can be simply removed with a teaspoon.
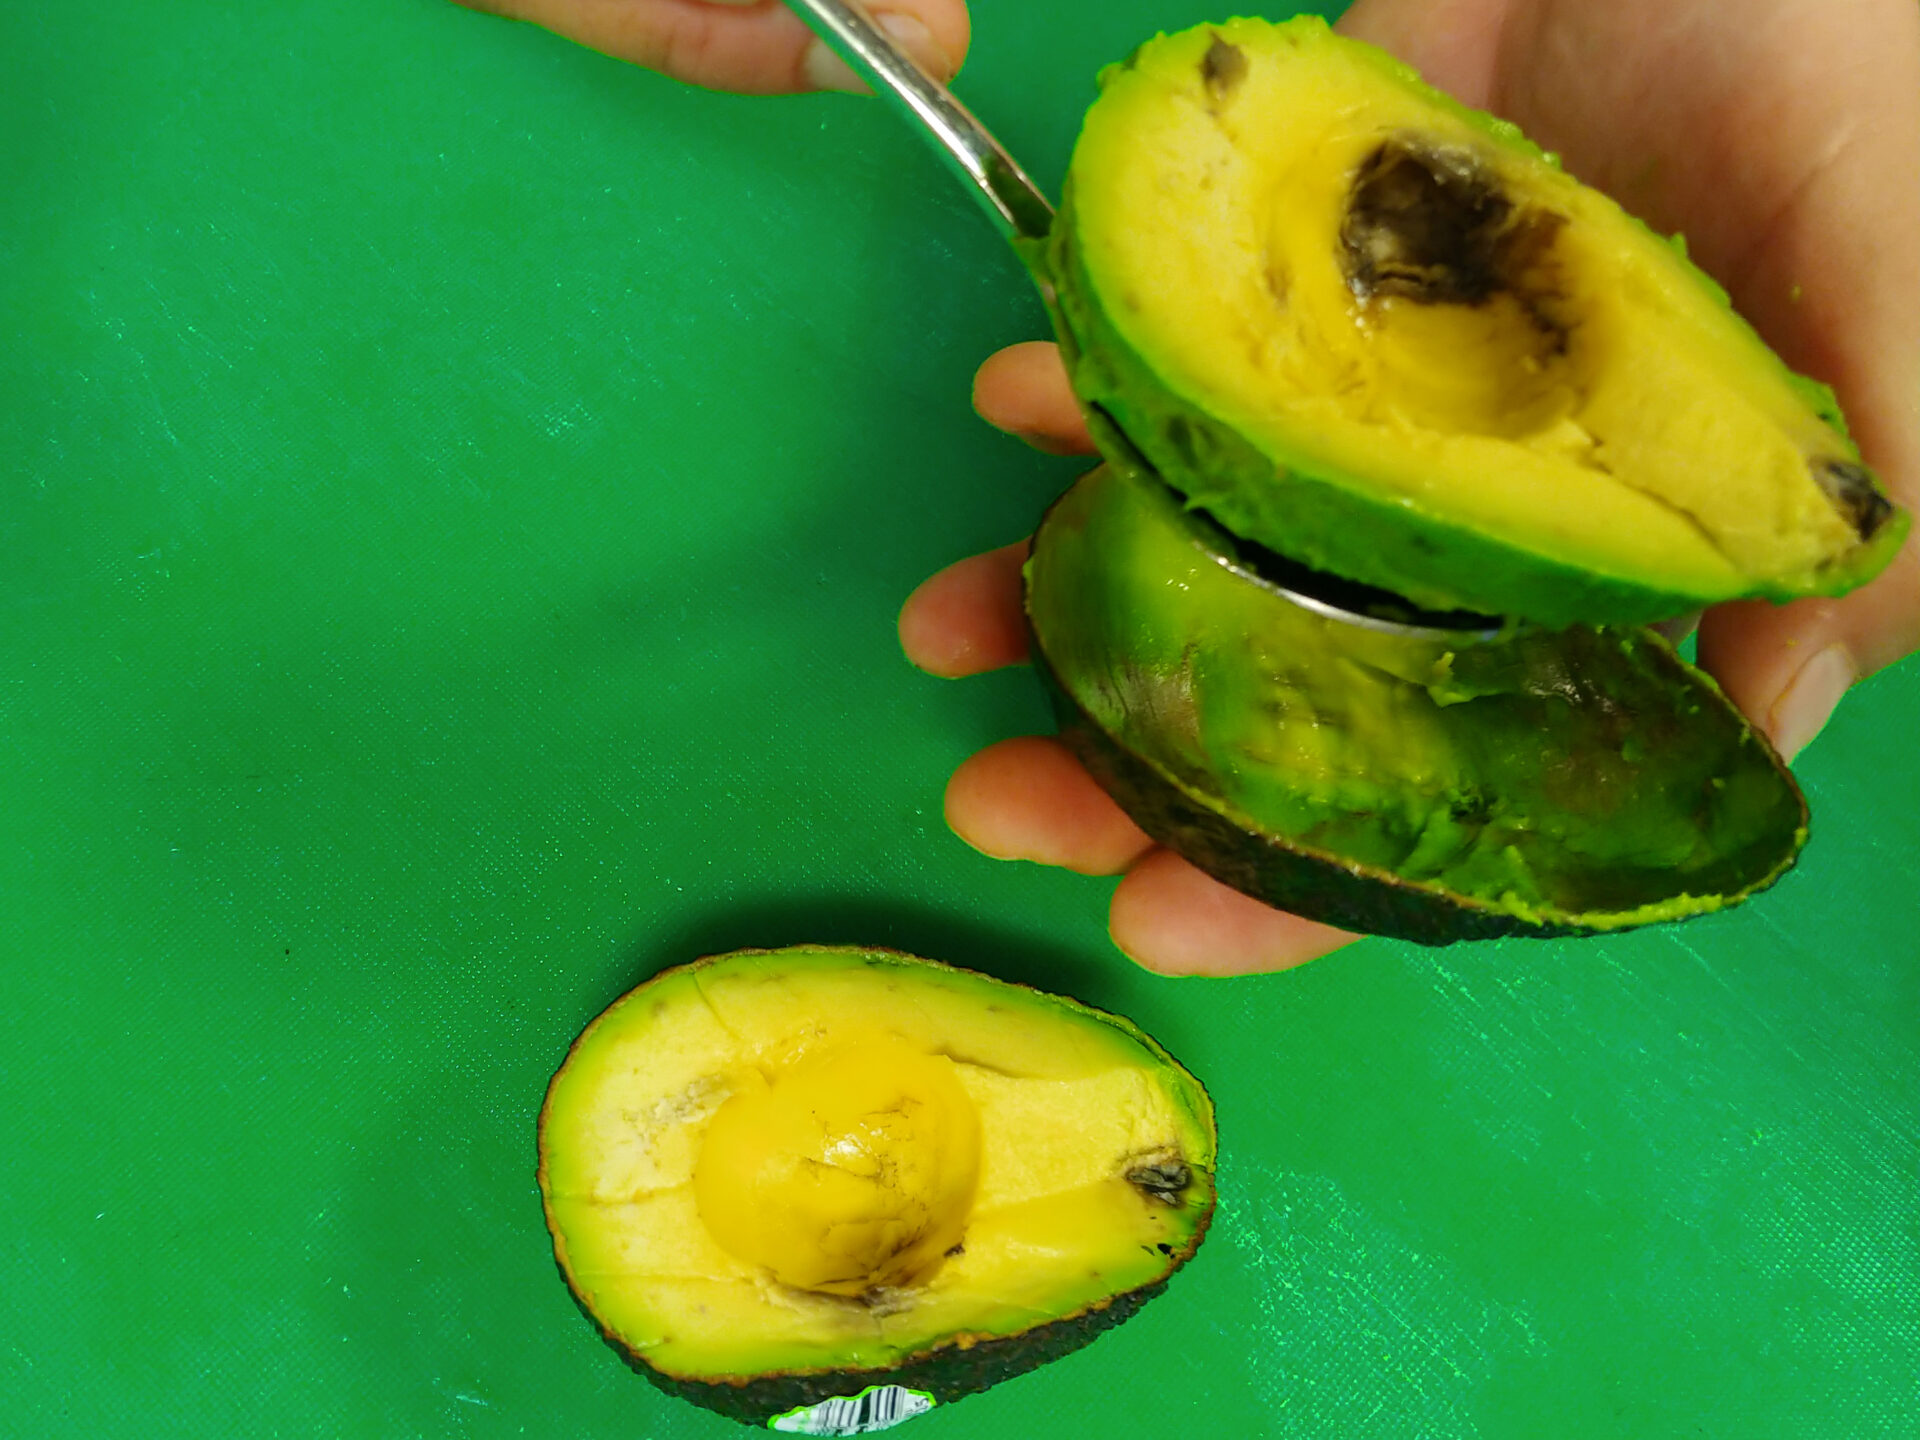
Peel the avocado by releasing the avocado from the peel using a soup spoon.
Slice, dice, mash, or puree.
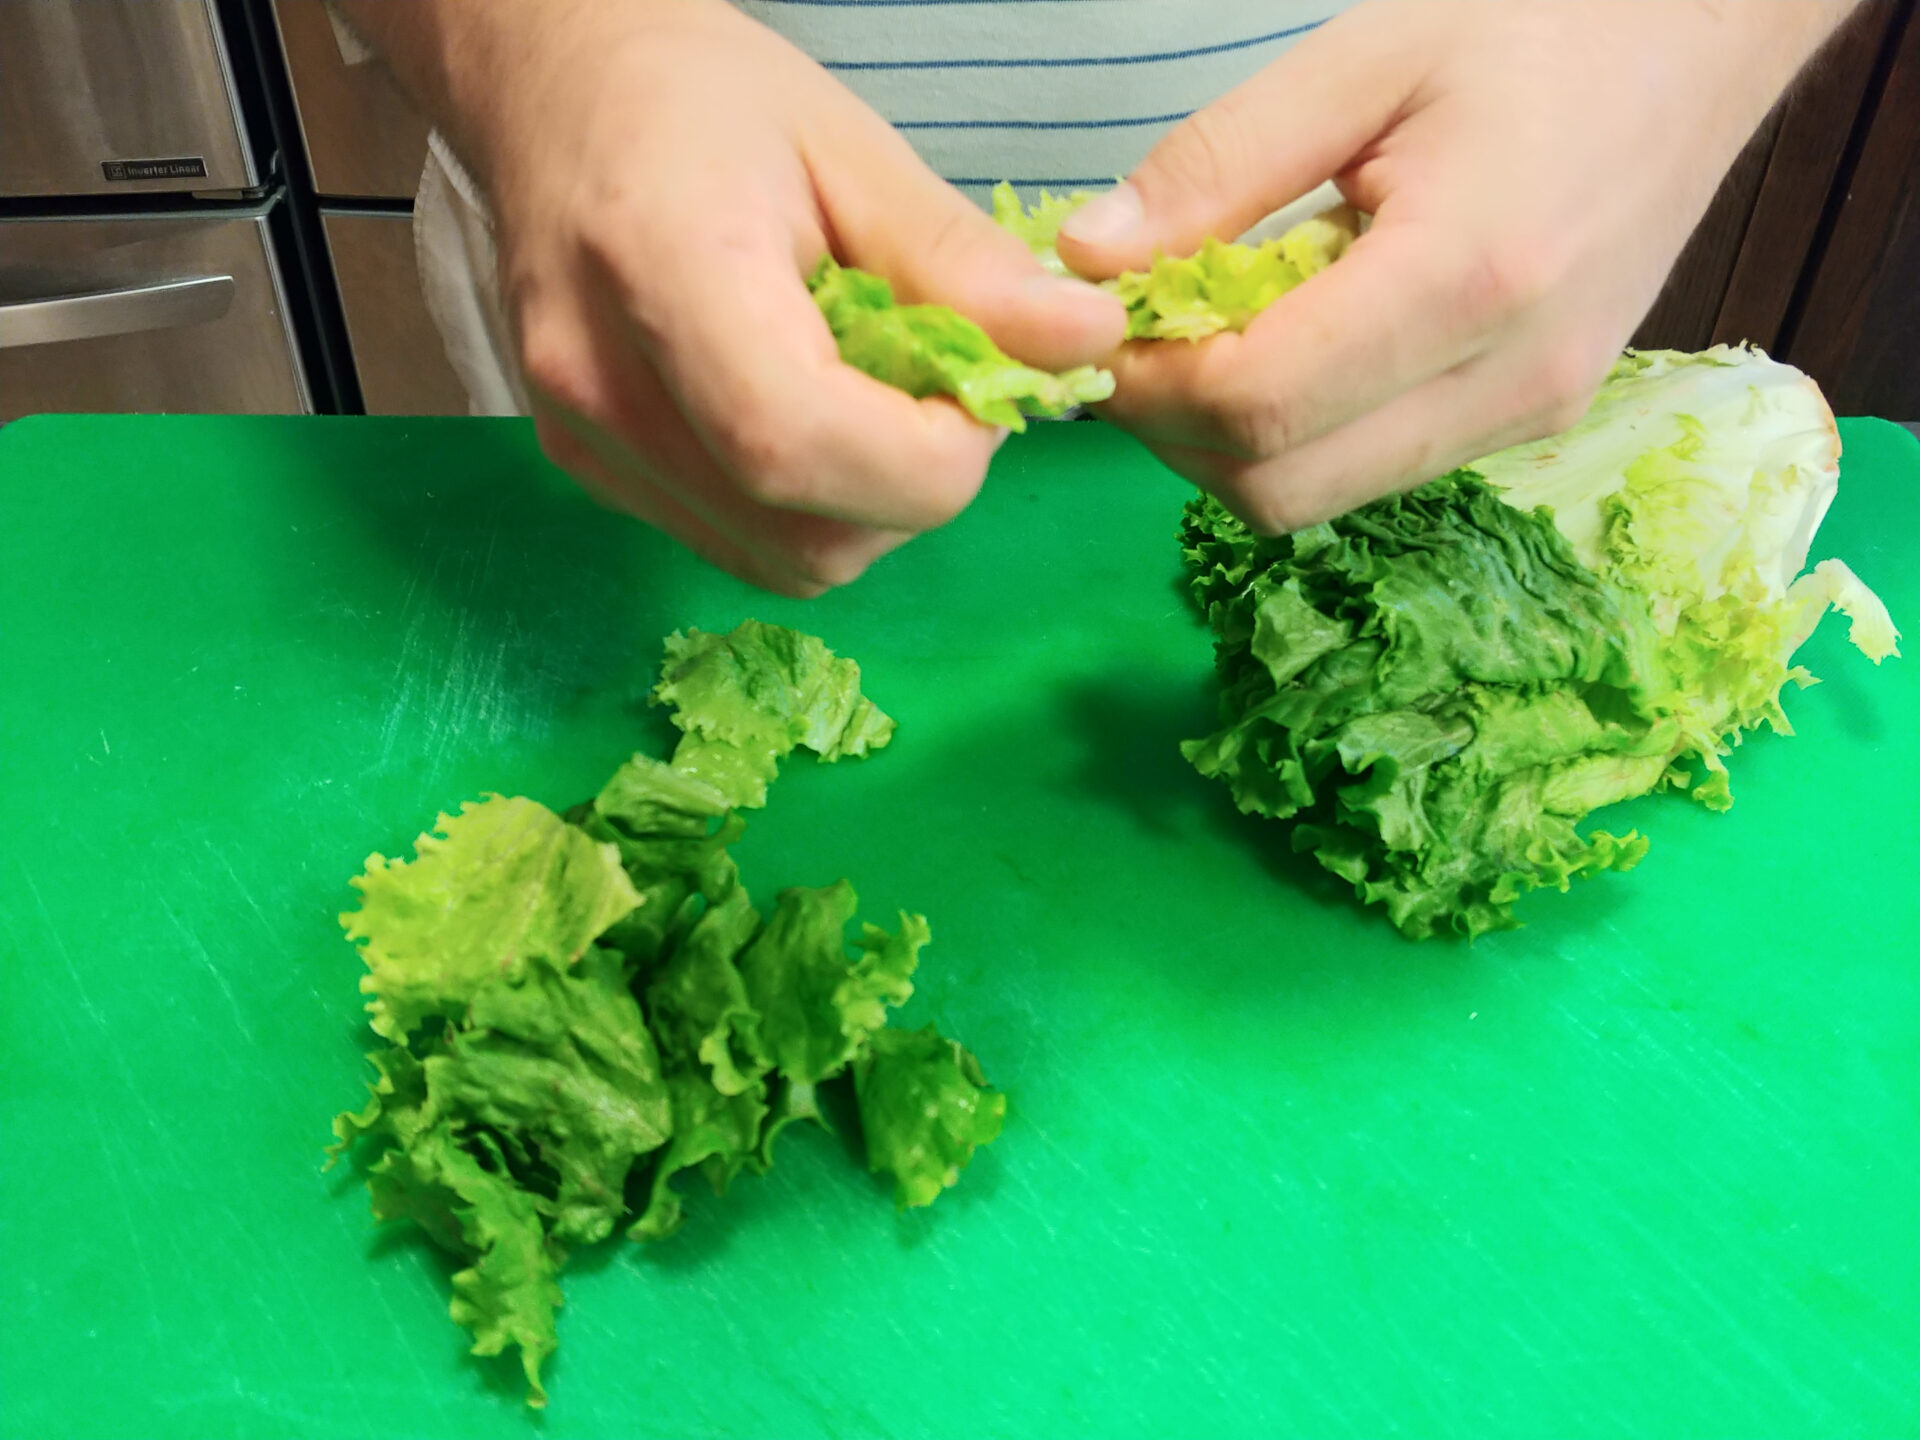
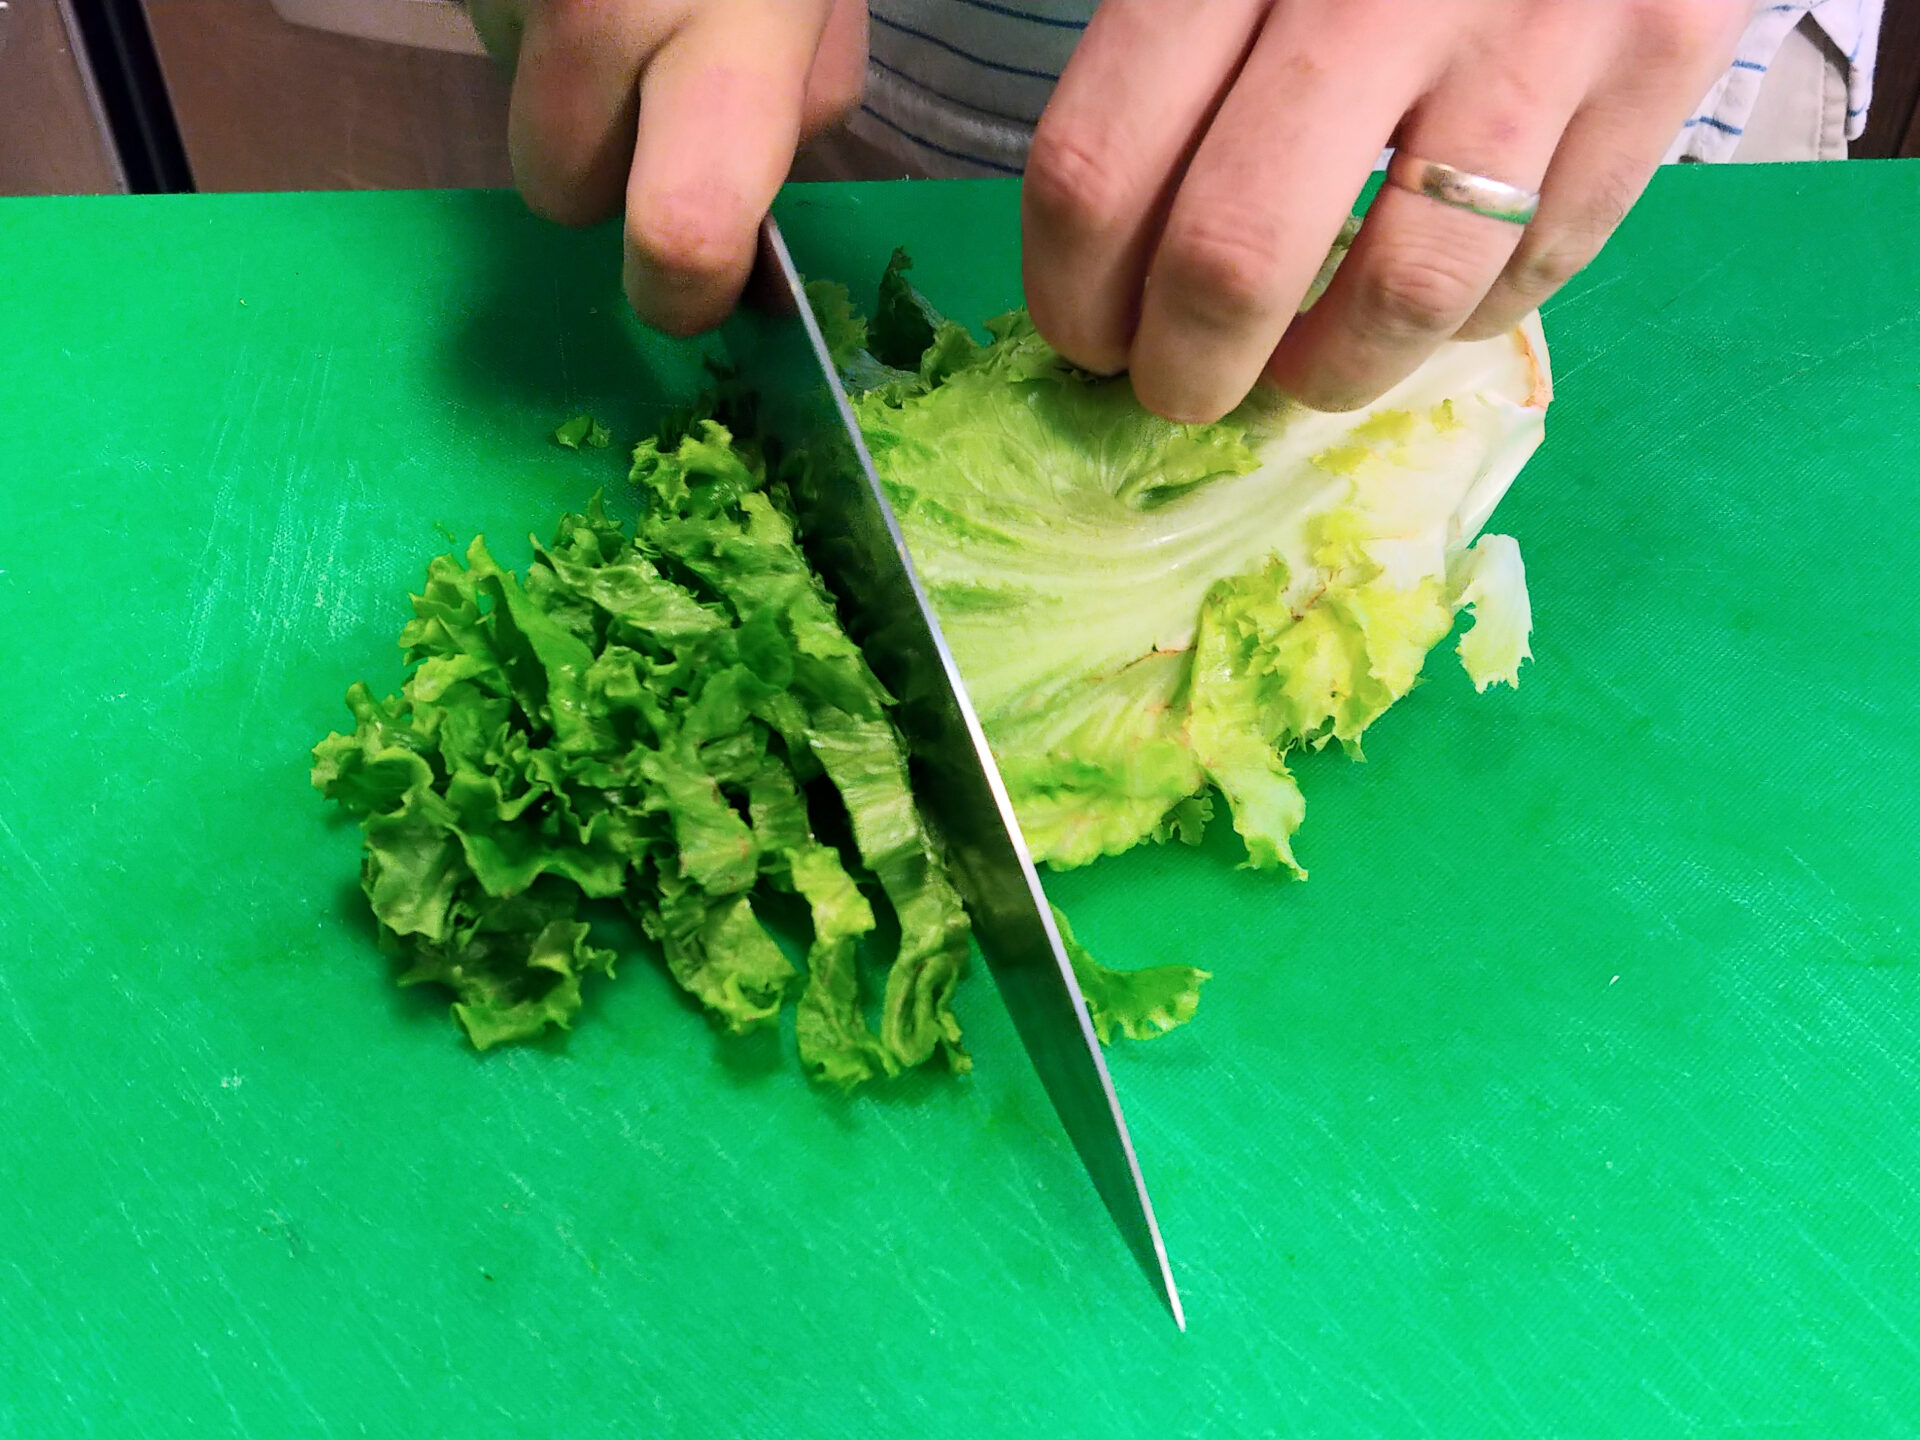
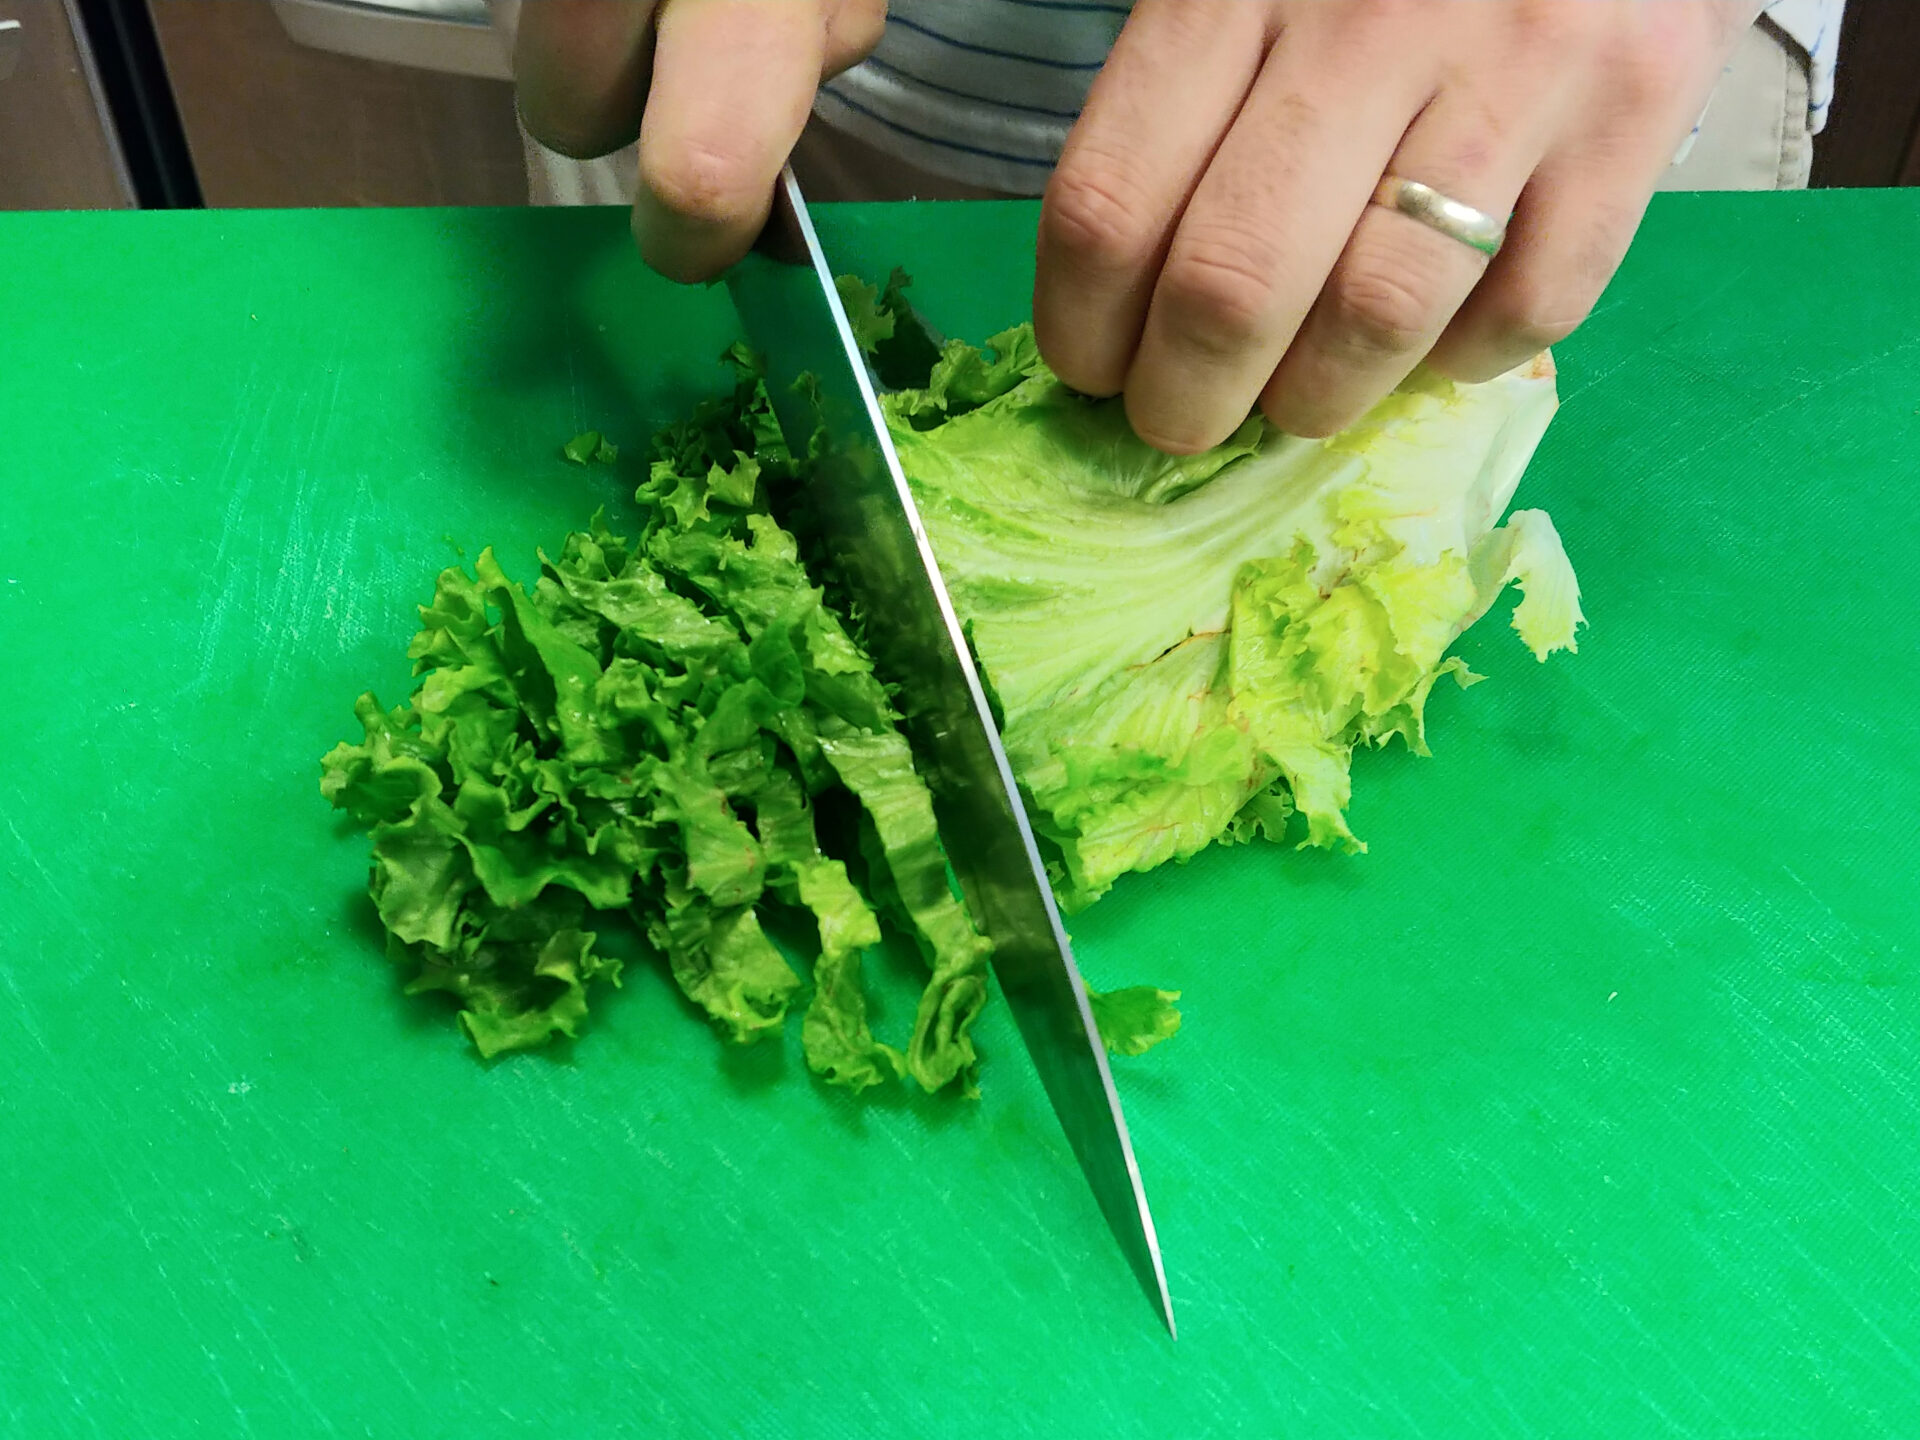
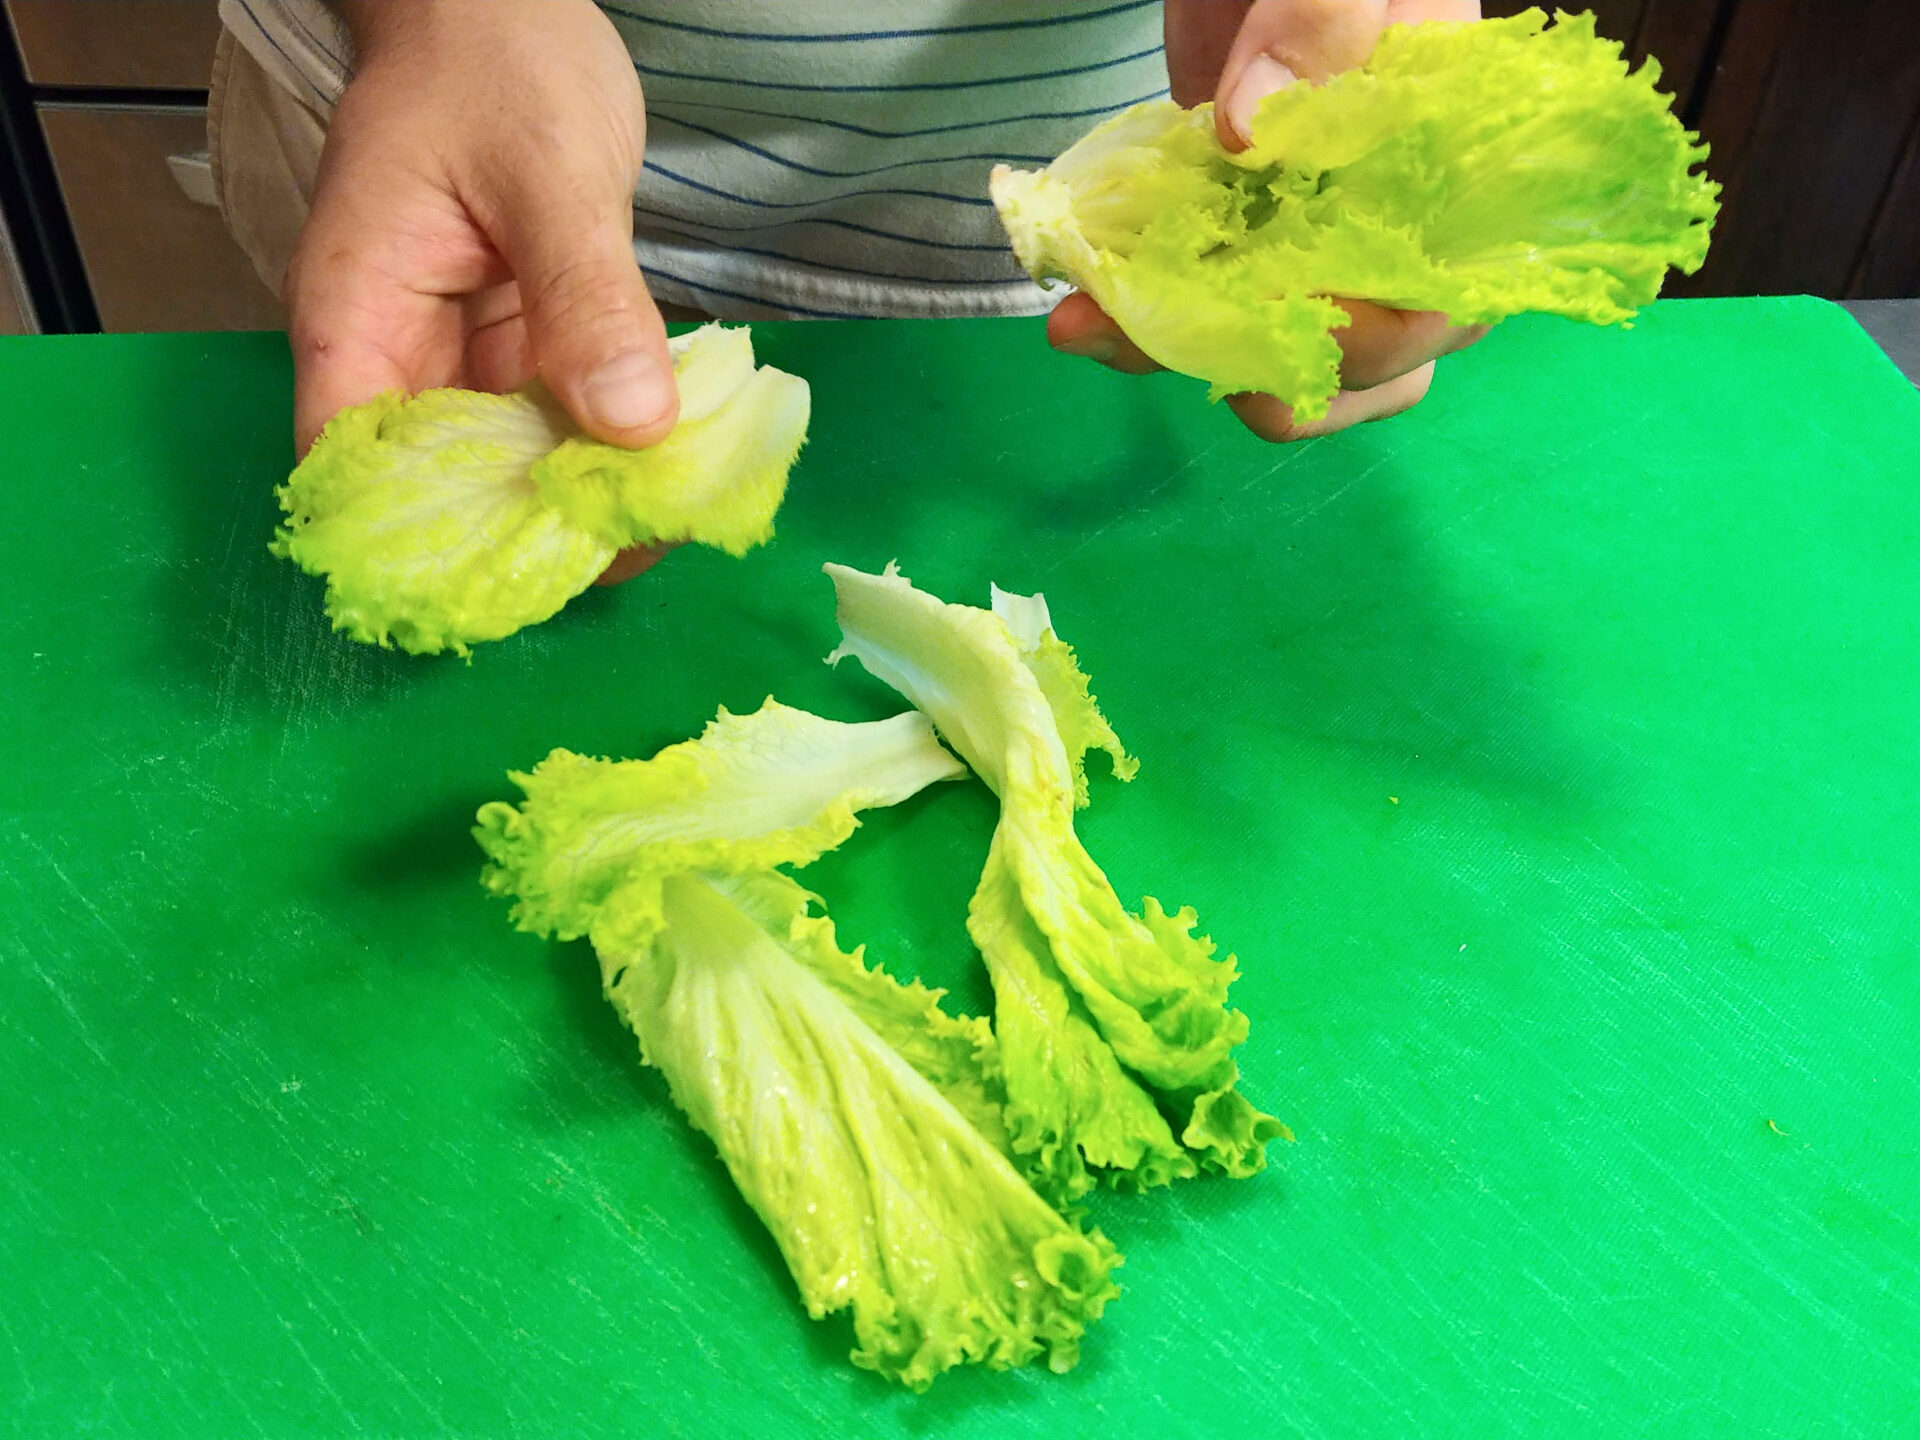
I mentioned that most fruit and vegetables need to be washed and it is especially true for lettuce. You need to wash any lettuce very thoroughly to make sure to remove all dirt. After washing, dry the lettuce before the next steps using a kitchen towel. Optionally, separate into single leaves after washing, and use a lettuce spinner to dry it.
If you buy a head of lettuce, remove first the top leaves which cover the vegetable (optionally remove even more if the lettuce is less fresh and the other layers do not look fresh).
Lettuce can be ripped by hand, or chopped into large pieces, or even roughly chopped through. Another option, that is especially appealing for smaller versions of lettuce, (ie., romaine or bib) is to separate and serve the whole lettuce leaves.
Herbs are not only healthy, but also really tasty.
Each herb needs to be treated a little differently, but the general rules are:
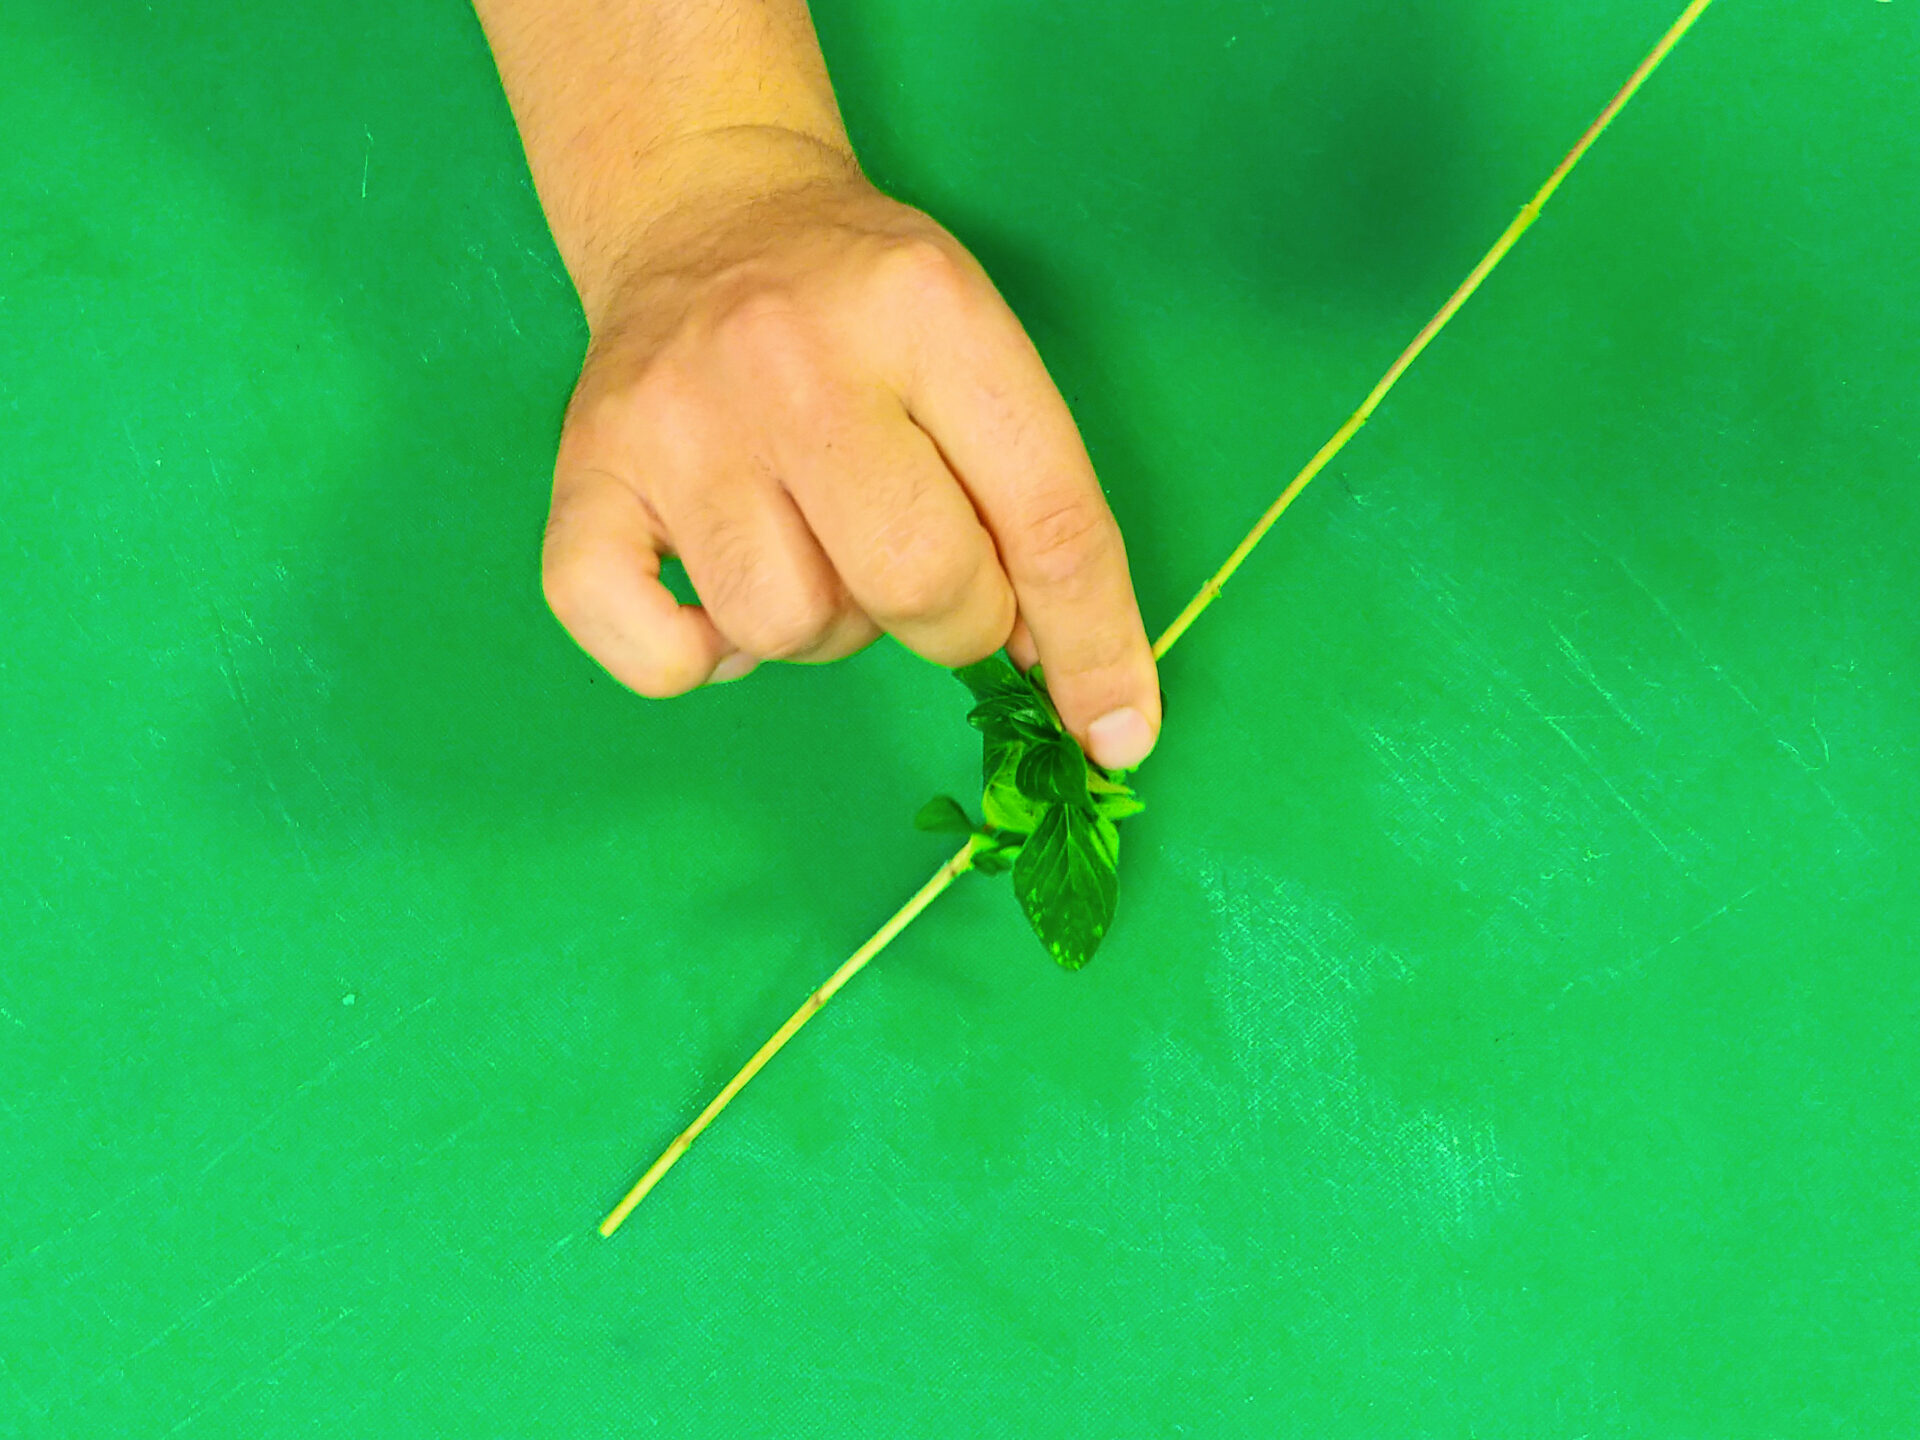
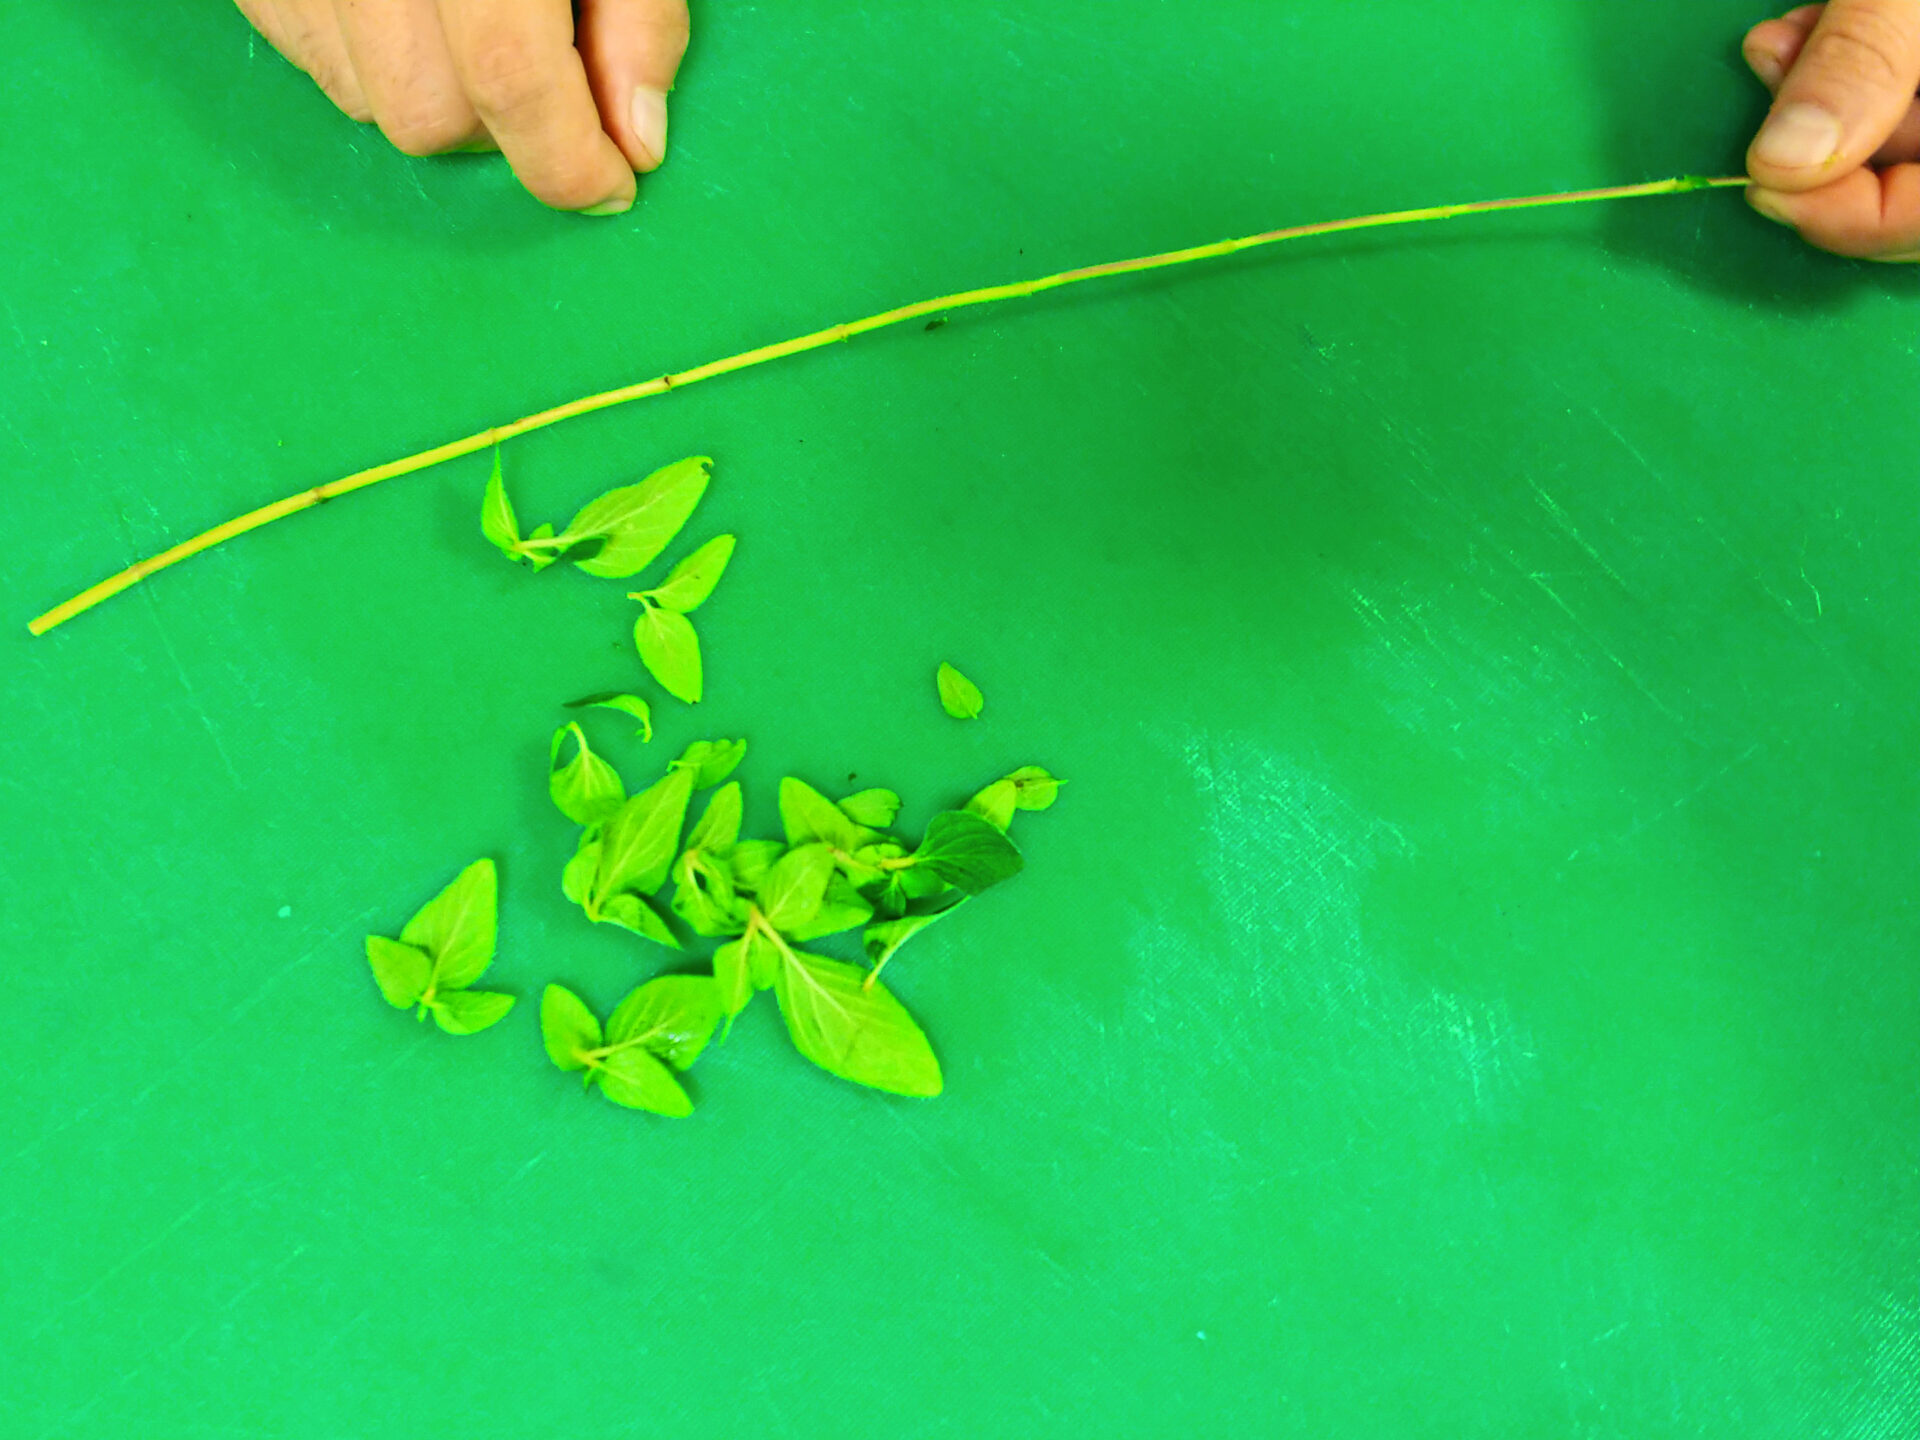
Remove the leaves from the stem (the stem is often hard and is not meant to be eaten with the exception of chives).
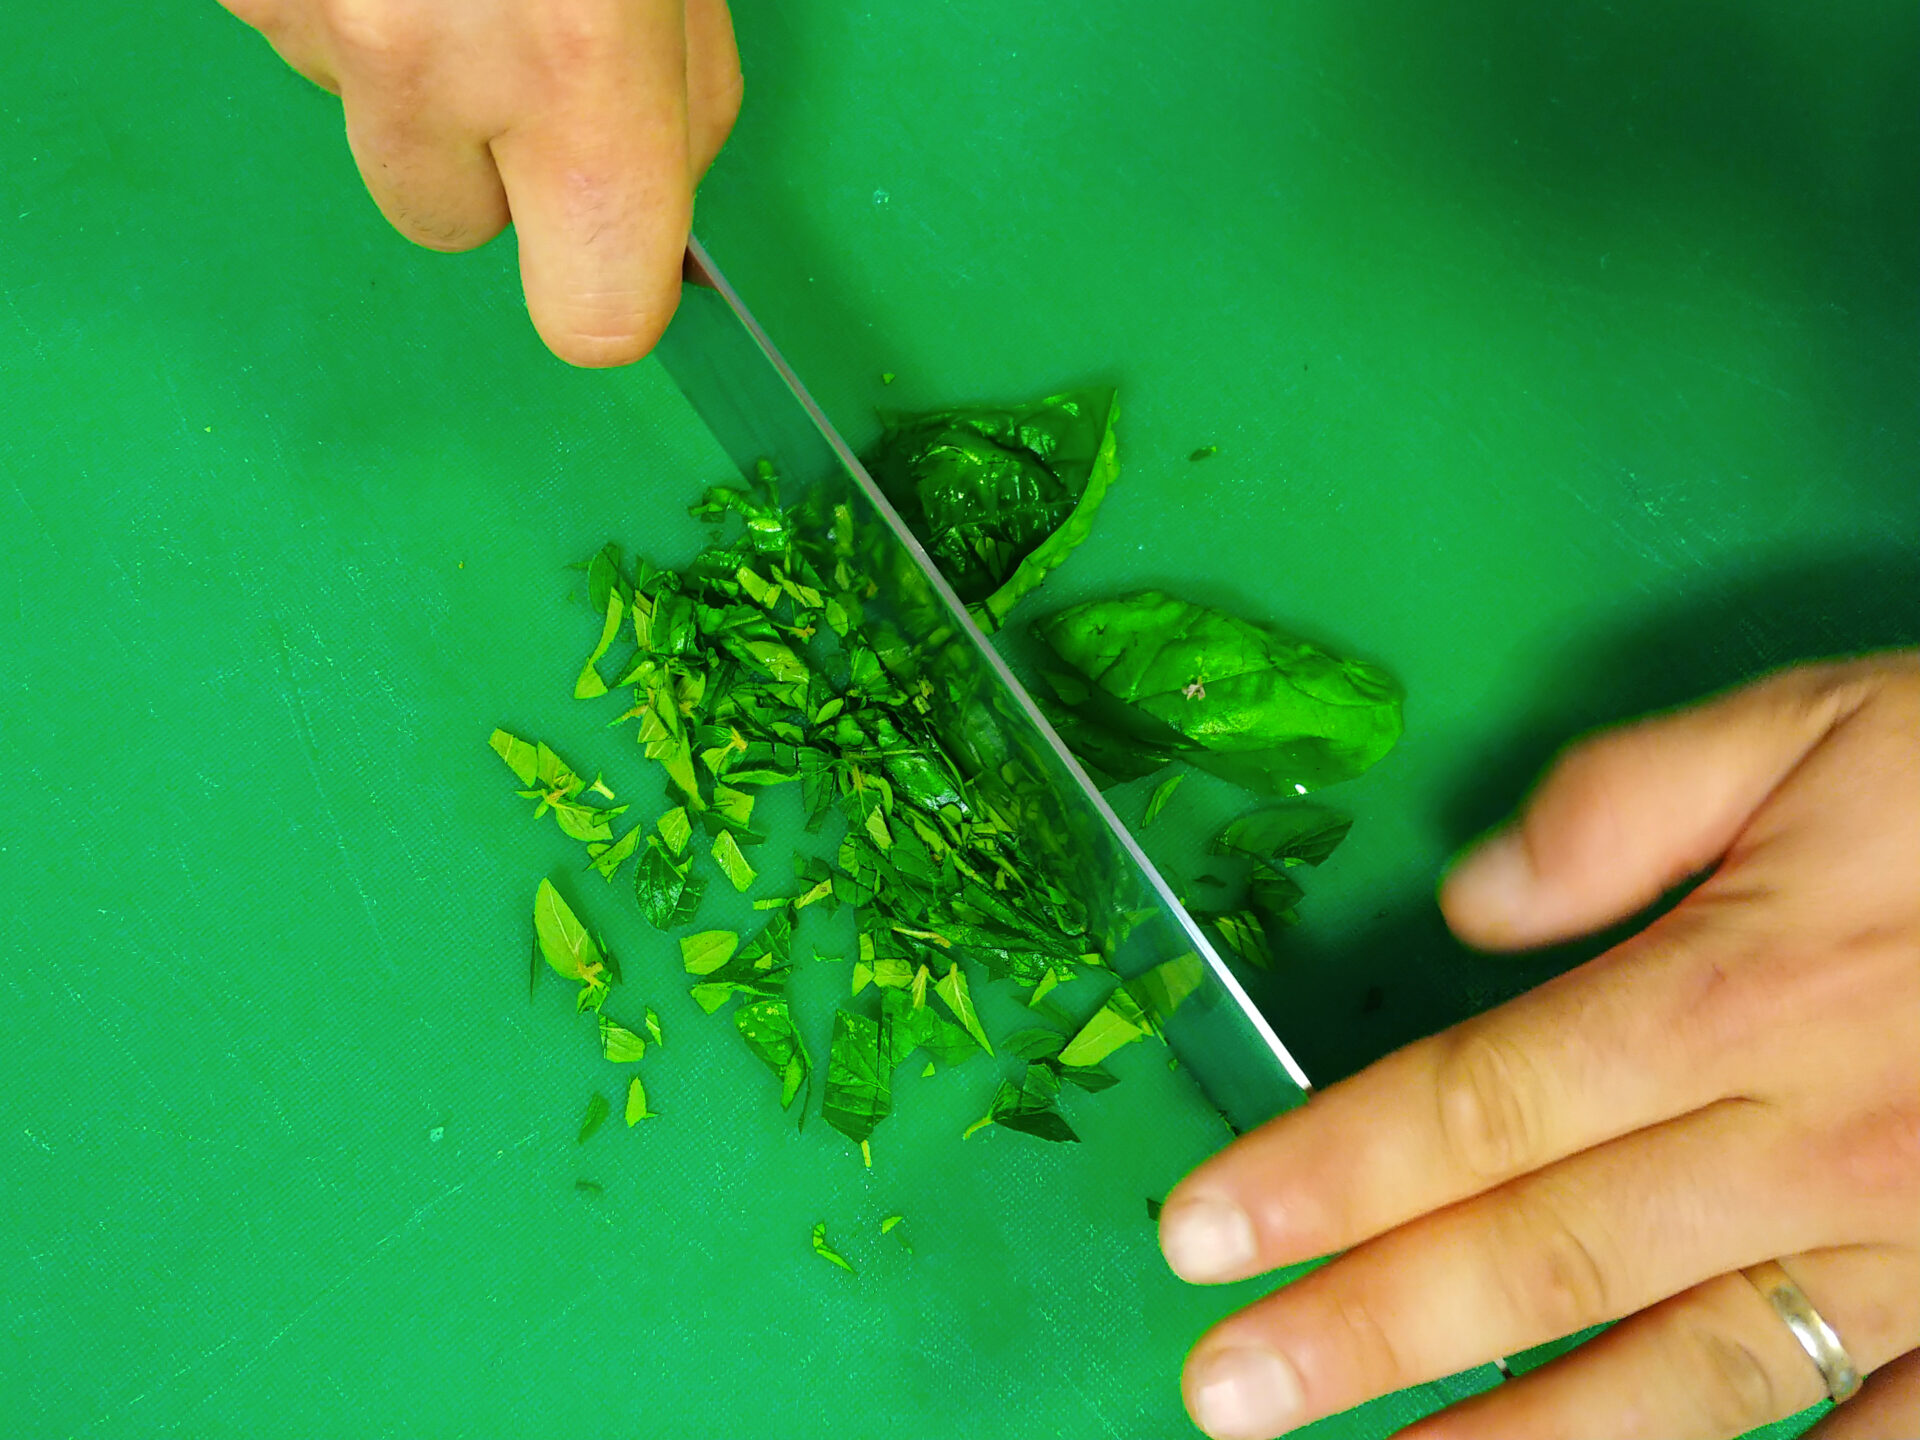
Roughly chop on a cutting board or simply cut directly into the salad using herb/regular scissors.
A bay leaf should be used whole in soups and stews but needs to be removed before serving.

Before you start cooking (or letting your kids cook), make sure that everyone is aware of proper knife cutting techniques and also proper knife handling.
Tom the Chef Founder
Share
Click on the icons below to share "Title of the item to share"