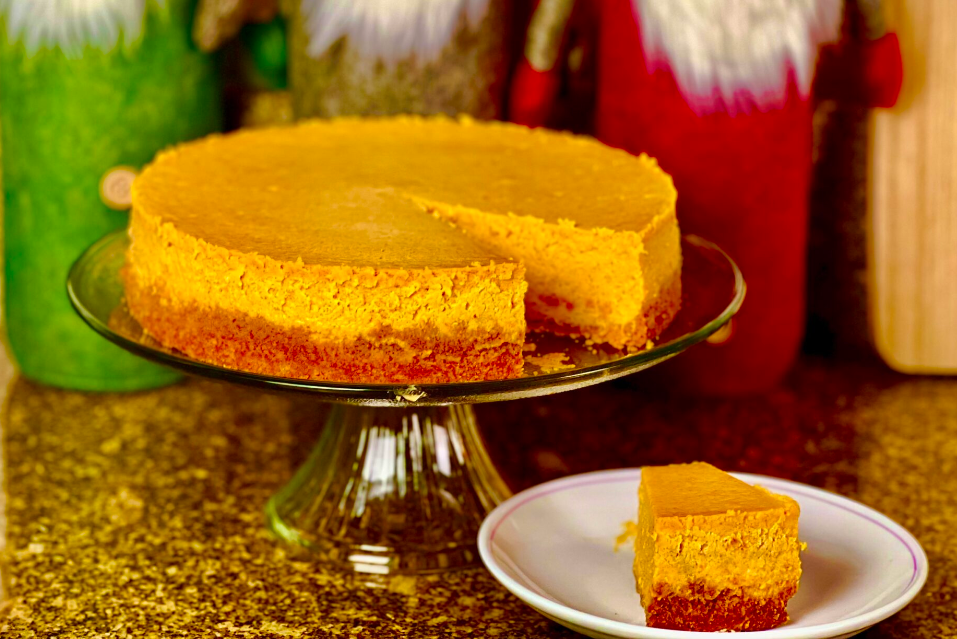
Spiced Sweet Potato Cheesecake
12 servings
This spiced sweet potato cheesecake is a must-have in your dessert collection, perfect for holiday baking or a simple weeknight treat.
Read moreWhile brownies might be my top choice, cheesecake is a close second. But honestly, I love all desserts equally – just like my nieces and nephews! This recipe is a delicious fusion of sweet potato pie and cheesecake, combining the best of both worlds.
Originally created in 2009 for a restaurant's fall dessert menu, this cheesecake quickly became a customer favorite. We served it with a bourbon caramel sauce and fresh whipped cream, but it's truly delightful all on its own.
x saved
 ChefLynn Cool Cook
November 3, 2024
Ingredients:
Crust:
- 9 graham crackers (about 1 sleeve)
- 3 TBSP of granulated sugar
- 5 TBSP of unsalted butter
- 2 TBSP of butter - room temperature (for the pan )
Filling:
- 1 ½ LB of cream cheese - room temperature (3 x 8 oz package)
- 1 ¼ cups of granulated sugar
- 4 eggs - room temperature (large)
- 1 LB of Hannah sweet potatoes (or other kind or a 15 oz can of sweet potato puree)
- ½ cup of plain yogurt (or sour cream or vanilla yougurt)
- 2 TBSP of all-purpose flour (1 ½ tbsp corn starch if gluten free)
- 1 TSP of vanilla extract
- 1 TSP of ground cinnamon
- 1 TSP of pumpkin pie seasoning
- Pinch of salt
Tools:
- 1x Measuring Cups
- 1x Measuring Spoons
- 1x Kitchen Mixer with Flat Beater Attachment (or hand mixer with large mixing bowl)
- 1x Silicone Spatula
- 1x Food Processor or Blender (if roasting the sweet potato yourself)
- 1x Cake Pan (9-inch spring form pan)
- 1x Roast Pan (large roasting pan for water bath)
- 1x • Aluminum foil to wrap pan
Directions:
1. Sweet Potatoes Preparation:
Note:
Apply this step only if you are not using canned sweet potatoes for your spiced sweet potato cheesecake.
- Roast sweet potatoes up to a day ahead – roast them at 425°F for 45 minutes to an hour until a fork inserts and comes out easily.
- Allow it to cool and then puree it in a food processor until smooth.
2. Crust for Spiced Sweet Potato Cheesecake:
- Preheat the oven to 350°F.
- Butter the bottom and sides of a 9-inch spring form pan.
- Grind the graham crackers, 3 TBSP sugar, and melted butter in a food processor until the mixture holds together when pressed in your hand.
- Press the mixture evenly into the bottom and a little up the sides of the prepared springform pan.
- Bake the crust at 350°F for 10 to 15 minutes until it is lightly golden then allow it to cool completely while you make the filling.
- After it is cool wrap the bottom and up the sides of the pan with a couple layers of aluminum foil to keep water from the water bath from getting inside and making the crust soggy. Place the wrapped pan inside a large roasting pan.
3. Filling for Spiced Sweet Potato Cheesecake:
- Using a stand mixer fitted with a flat beater attachment or a hand mixer, cream together the cream cheese and sugar until smooth and fluffy – about 5 mintues the scrape the sides and bottom of the bowl with a rubber spatula.
- Beat in the eggs one at a time, being sure to completely incorporate each egg before adding the next – after adding all four scrape the bowl again.
- Add the yogurt and spices and mix well to combine – scrape the bowl again.
- Add the sweet potato puree and mix well to combine.
- Add the flour and mix until it is just combined.
4. Assamble the Spiced Sweet Potato Cheesecake:
- Pour the filling into the crust.
- Place the roasting pan in the oven and add enough hot water to come about halfway up the sides of the spring form pan.
- Bake the cheesecake for 1 hour and 15 minutes – it may require an additional 15 minutes depending on your oven. The outer 2 inches should be well set and the middle should wobble.
- Turn off the oven and open the door.
- Leave the cheesecake in the oven to cool for 20 minutes.
- After 20 minutes remove it carefully from the water bath, remove the foil, and allow it to cool completely on a rack on the counter.
- After it is cooled completely, run a paring knife around the top edge – you don’t need to go all the way to the bottom of the pan, just about 1/2 inch down.
- Then wrap it with plastic wrap and refrigerate it for at least 4 hours but preferably over night before serving.
- Before removing the spring form pan run your knife around the top edge again to make sure it is released.
Notes:
- If you cool the cheesecake too quickly by putting it directly in the refrigerator it may crack – it will still, however, be DELICIOUS!!
- Serve with whipped cream – it is also delicious with a bourbon caramel sauce!
About the Author:
ChefLynnCool Cook
# 3
49 Followers
- Published Recipes: 23
- Av. Recipe Evaluation:
- Location: Florida, USA
- Member since: 2024-09-08
Recipes
Try Other Recipes from Same Category!
Banana Bread Recipe
 Tom the Chef Founder
Classic American Apple Pie
Spiced Pumpkin Walnut Bread
Apple Crisp
 Ethan. Rising Star
Pumpkin Cheesecake
Keto Cottage Cheese Cake Pops
 olivia.wyles Resident Chef
Classic Zucchini Bread Recipe
Banana Bread Recipe
Keto Chocolate Sunflower Spread Stuffed Cookie Bars
olivia.wyles Resident ChefStrawberry Cream Cake
ChefLynn Cool CookDisclaimer
- General Information Content on this page above, including the content provided on www.CookingHub.com, including all recipes, articles, and other materials, is for general informational purposes only. This content reflects the personal opinions and experiences of its authors and is not intended to provide professional dietary, medical, legal, or political advice. Please consult a qualified professional before making any decisions based on the information presented here.
- Content Ownership and Use Content on this page above, including content published on CookingHub.com is owned by the individual authors who created it. Only the authors can access, modify, or delete their content from the platform. Our content may be embedded on third-party websites and blogs without modification. No reimbursement will be provided for this use. If an author removes content from CookingHub.com, it will no longer be available through any embedded links.
- Limitation of Liability Neither www.CookingHub.com (operated by the CookingHub Foundation) nor content authors are responsible for any outcome or consequence resulting from the use of information on this site. This includes, but is not limited to:
- Food Safety: Any health risk related to food handling, food quality, or failure to follow USDA recommendations (including minimum safe cooking temperatures).
- Preparation Safety: The proper and safe handling of cooking equipment or its suitability for any given task.
- Recipe Outcomes: The final look, taste, or success of following a recipe.
- Ingredients and Equipment: The sourcing of ingredients, tools, equipment, or anything else related to the preparation and consumption of food.
- Nutritional and Dietary Information: The accuracy of nutritional data. This information is provided as a courtesy and should not replace advice from a medical provider. You are responsible for verifying that a diet is suitable for your personal health needs.
- Errors and Omissions: Any potential errors, typos, or unclear directions in articles and recipes.
- User Responsibility All readers, visitors, and users of embedded content are solely responsible for evaluating recipes and articles. You must make your own decisions about whether to follow the steps and recommendations provided. It is your responsibility to ensure that ingredients and preparation methods are safe and appropriate for your personal dietary restrictions and health conditions.
Share
Click on the icons below to share "Title of the item to share"