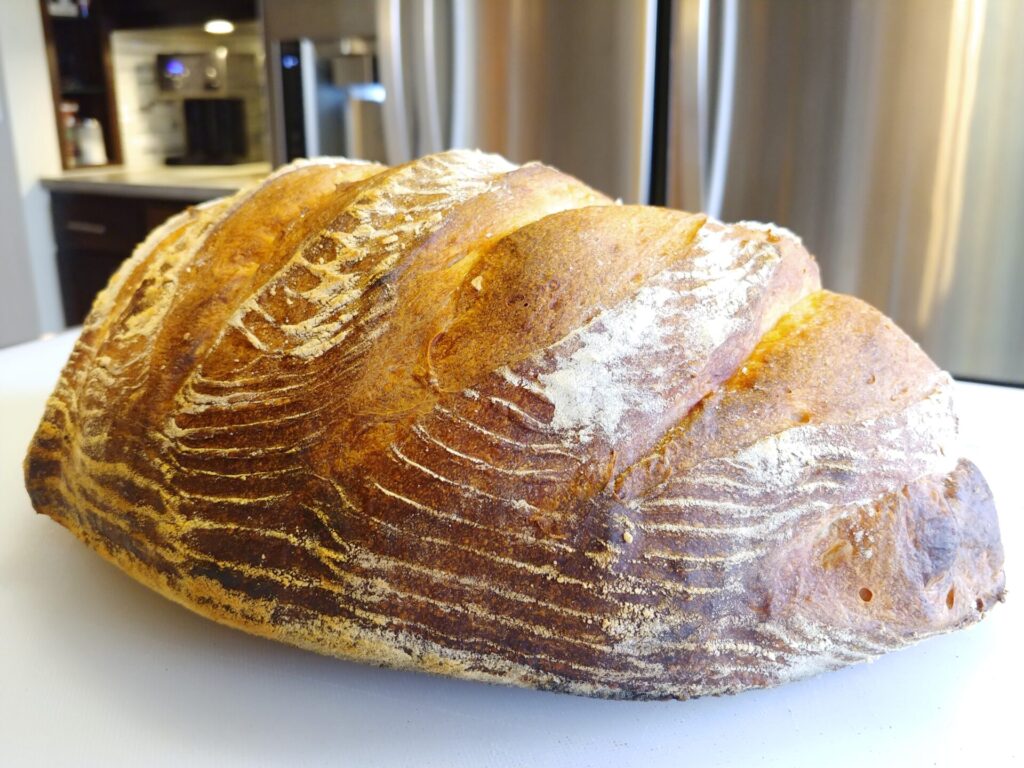
Rustic Bread or Baguettes
1 large loaf or 3 - 4 baguettes
You will love this bread for its flavors and textures. Let’s prepare together a rustic bread and French baguette from one dough. The crunch of the crust is more satisfying than most bread you can buy. The other great thing about this bread is that it will let your creativity grow: add options such as herbs, spices, peppers, etc. to make it the bread of your dreams! Prepare the bread from this great recipe on your grill or in your oven and bottomless satisfaction is guaranteed.
Read more
Did I say you can bake this bread on a grill? Baking bread on a grill is a no-brainer if you have a good grill (which can hold a stable temperature- around 450 - 500°F), a pizza stone, and a pizza paddle. I bake bread on our grill all year long (even in the winter), and that is why my bread always has a little bit of a smoky flavor, which elevates this bread to another dimension. But don't worry, this bread is great from a regular oven too.
Tip: Use the same dough to create a stunning baguette. One dough will give you 3 - 4 baguettes (based on your size requirements). Follow the same recipe, but form a baguette instead of doing the final raising in a basket, score, and bake.
x saved
 Tom the Chef Founder
November 8, 2023
Ingredients:
- 4 ½ cups of bread flour
- Extra flour for flouring surface
- 1 TSP of confectioners’ sugar
- 1 ½ TSP of active dry yeasts
- 1 TBSP of salt
- Optionally: 1 ½ TSP of caraway seeds
- 2 cups of water - preheat in microwave to lukewarm (about 90 to 100°F)
Tools:
- 1x Measuring Cups
- 1x Measuring Spoons
- 1x Piano Whisk
- 1x Kitchen Mixer with Hook Attachment or Large Mixing Bowl
- 1x Plastic Wrap
- 1x Bowl Scraper
- 1x Proofing Basket or Mixing Bowl with Kitchen Towel
- 1x Baking Sheets + Oven or Grill + Pizza Stone and Pizza Paddle
- 1x Razor or sharp knife
- 1x Small Heat Proof Bowl
- 1x Ice Cubes
Recipes
Best served with:
Directions:
1. Dough:
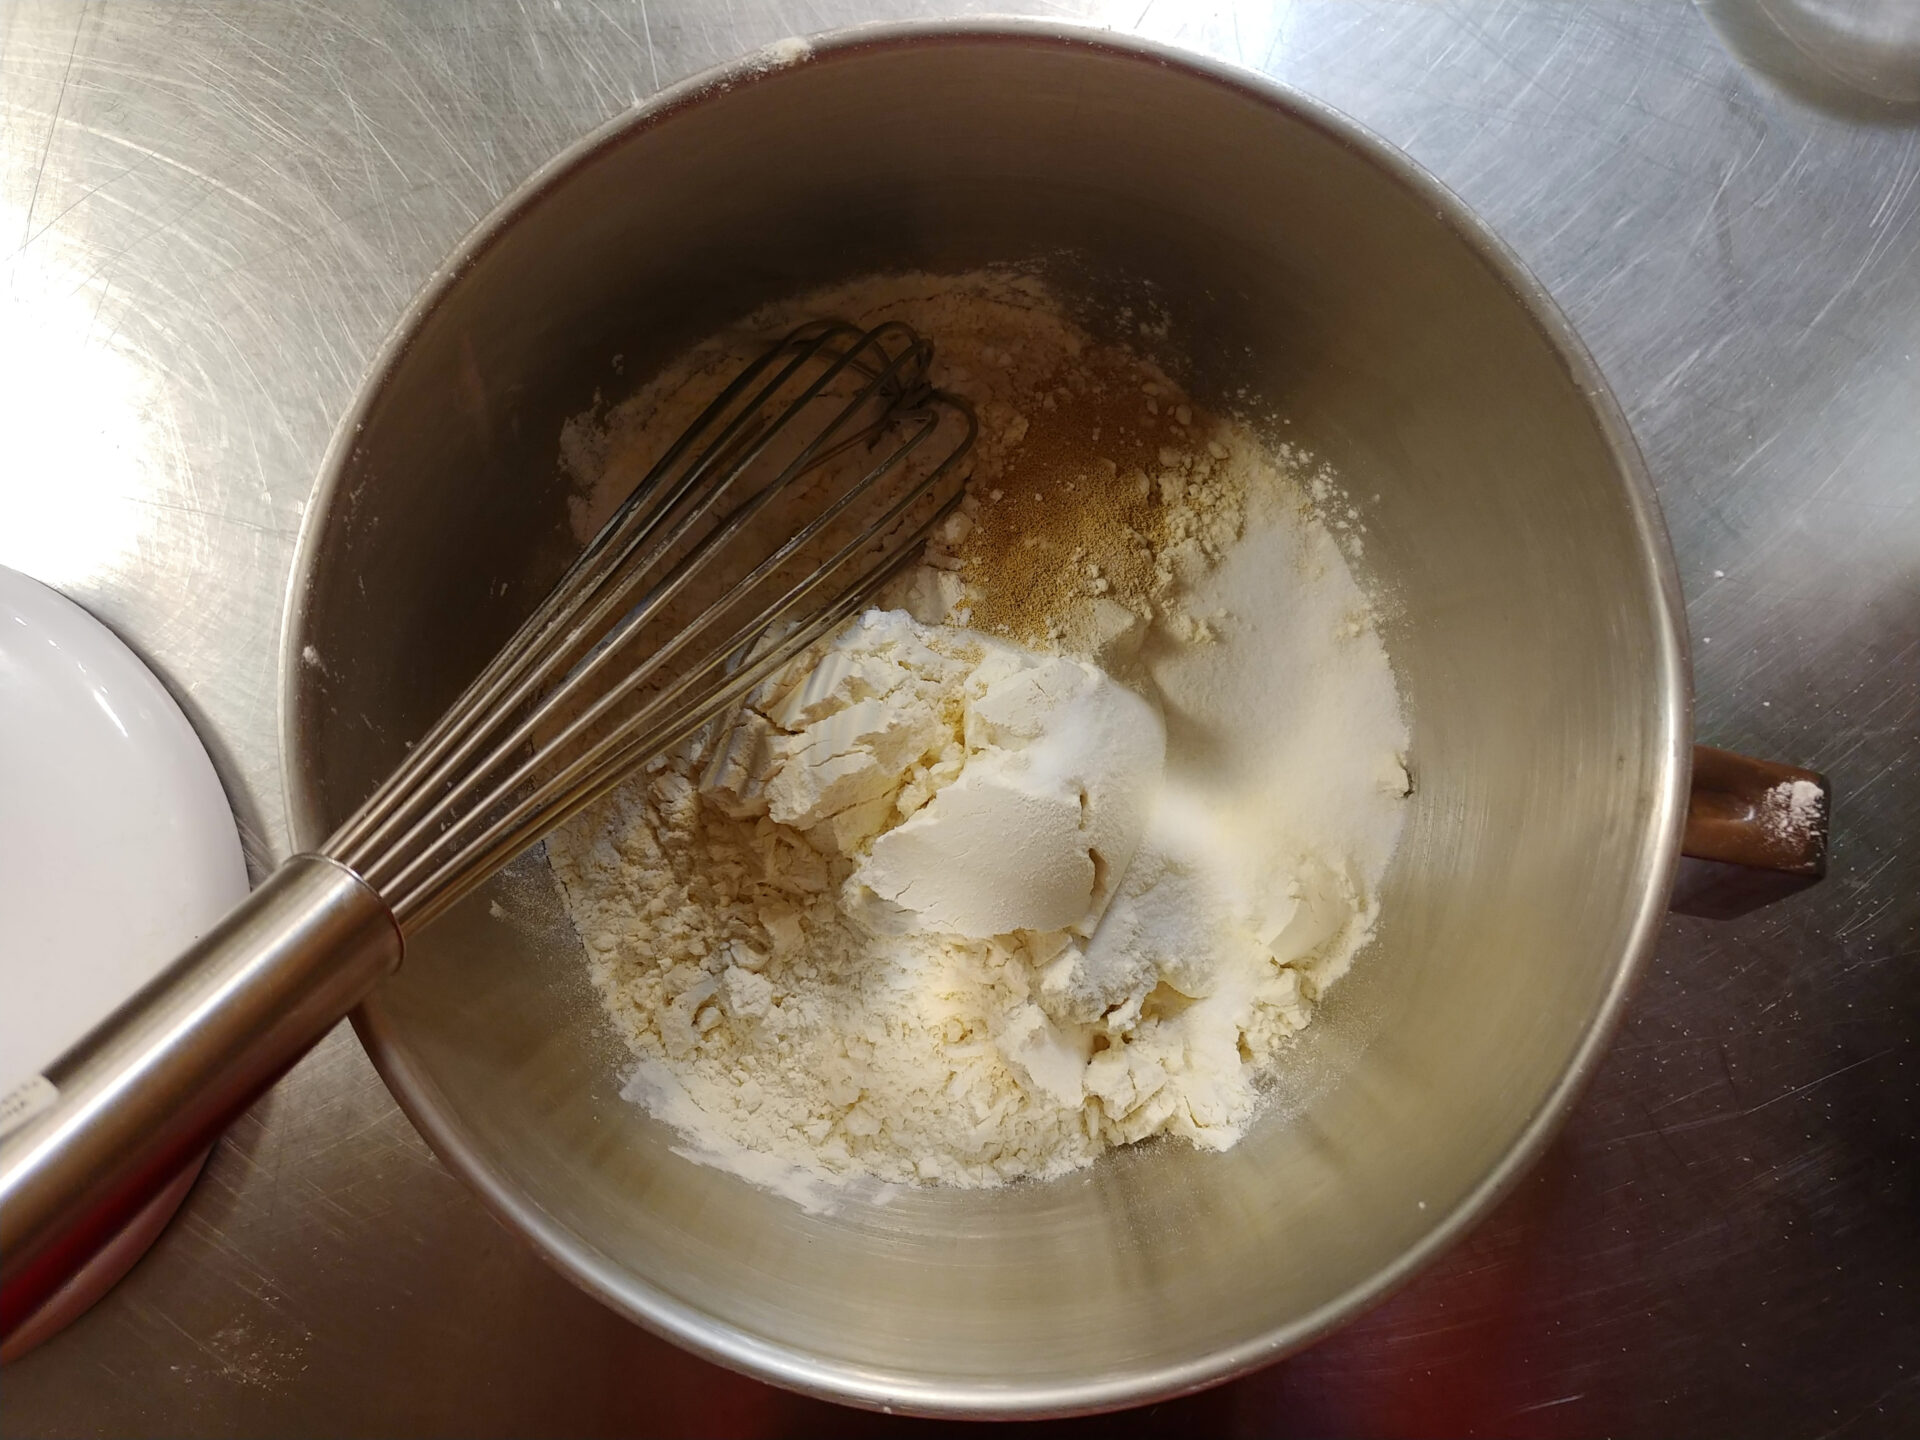
1.1. Add into the kitchen mixer with a hook attachment:
4 ½ cups of bread flour
1 TSP of confectioners’ sugar
1 ½ TSP of active dry yeasts
1 TBSP of salt
Optionally: 1 ½ TSP of caraway seeds
Briefly stir with a whisk just enough to combine all ingredients (about 1 minute).
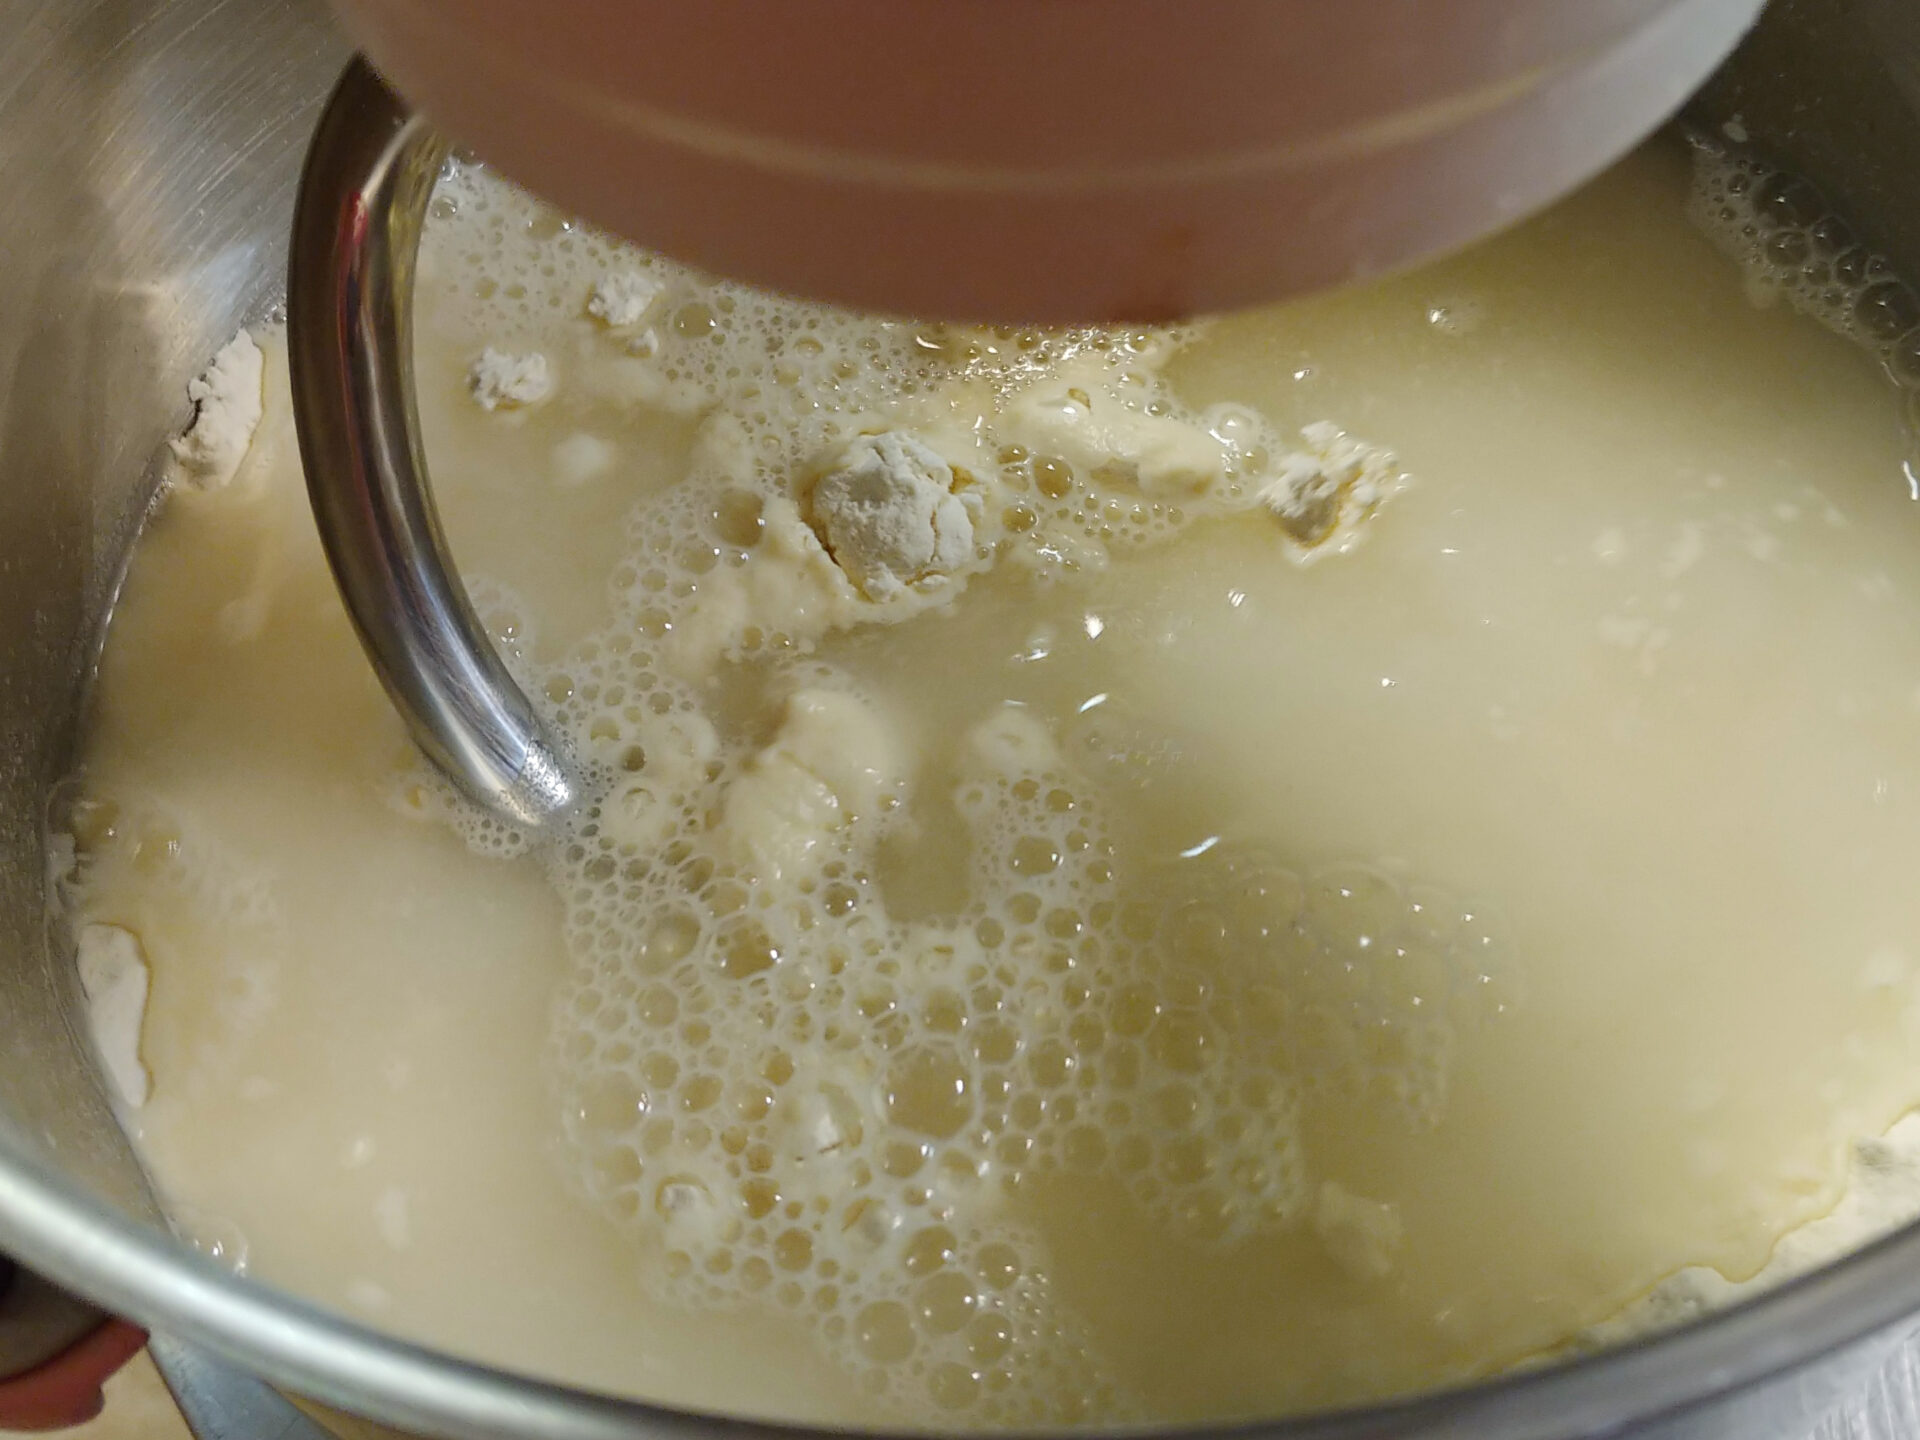
1.2. Add:
2 cups of water
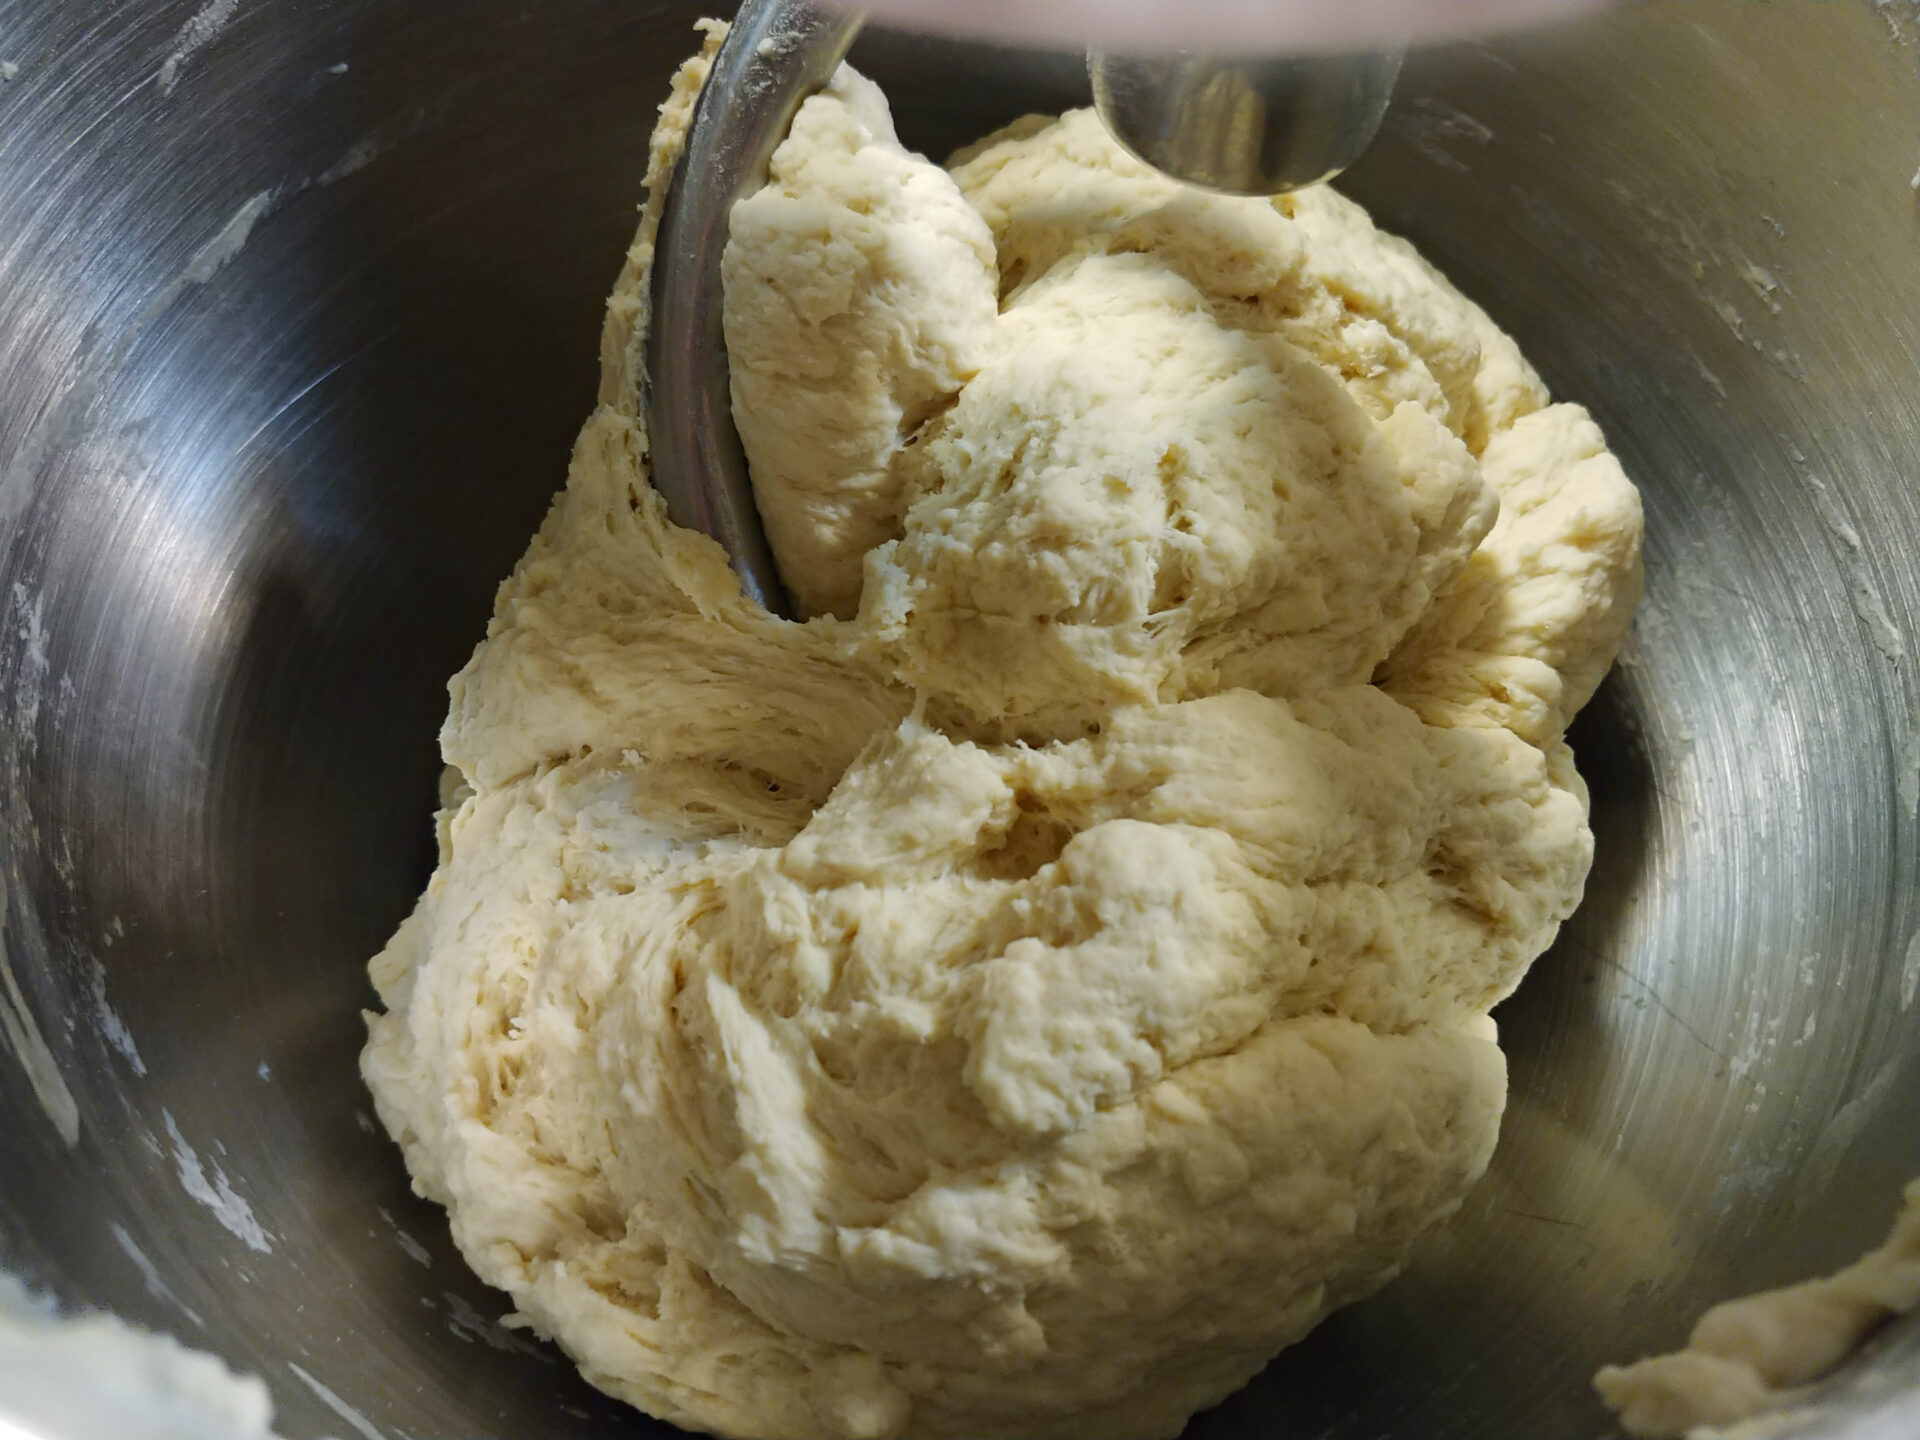
Knead on a low speed until all ingredients are partially incorporated (about 1 – 2 minutes).
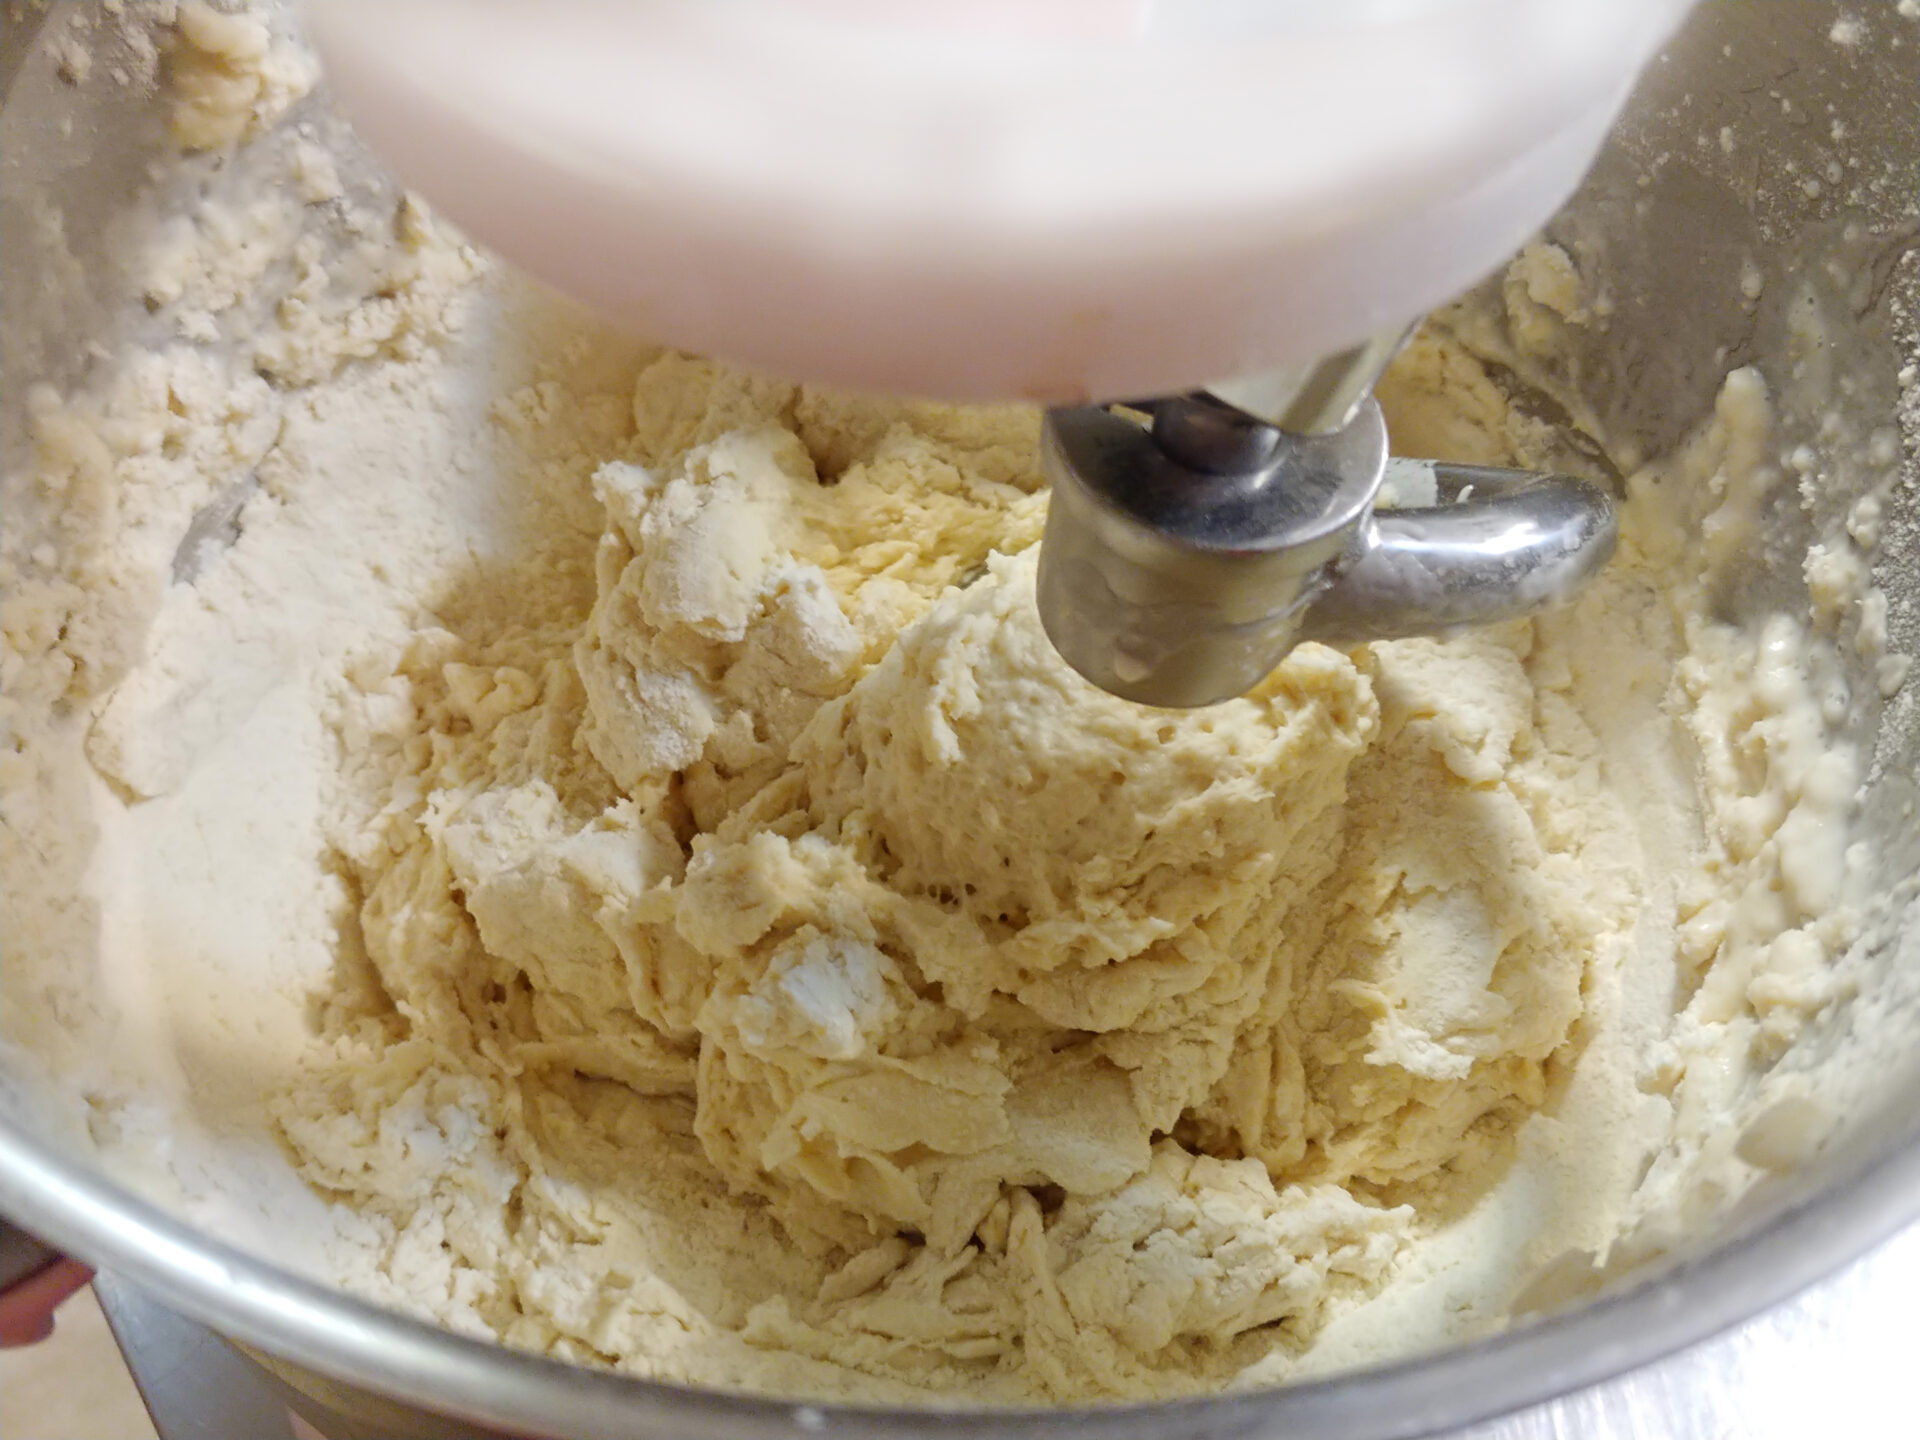
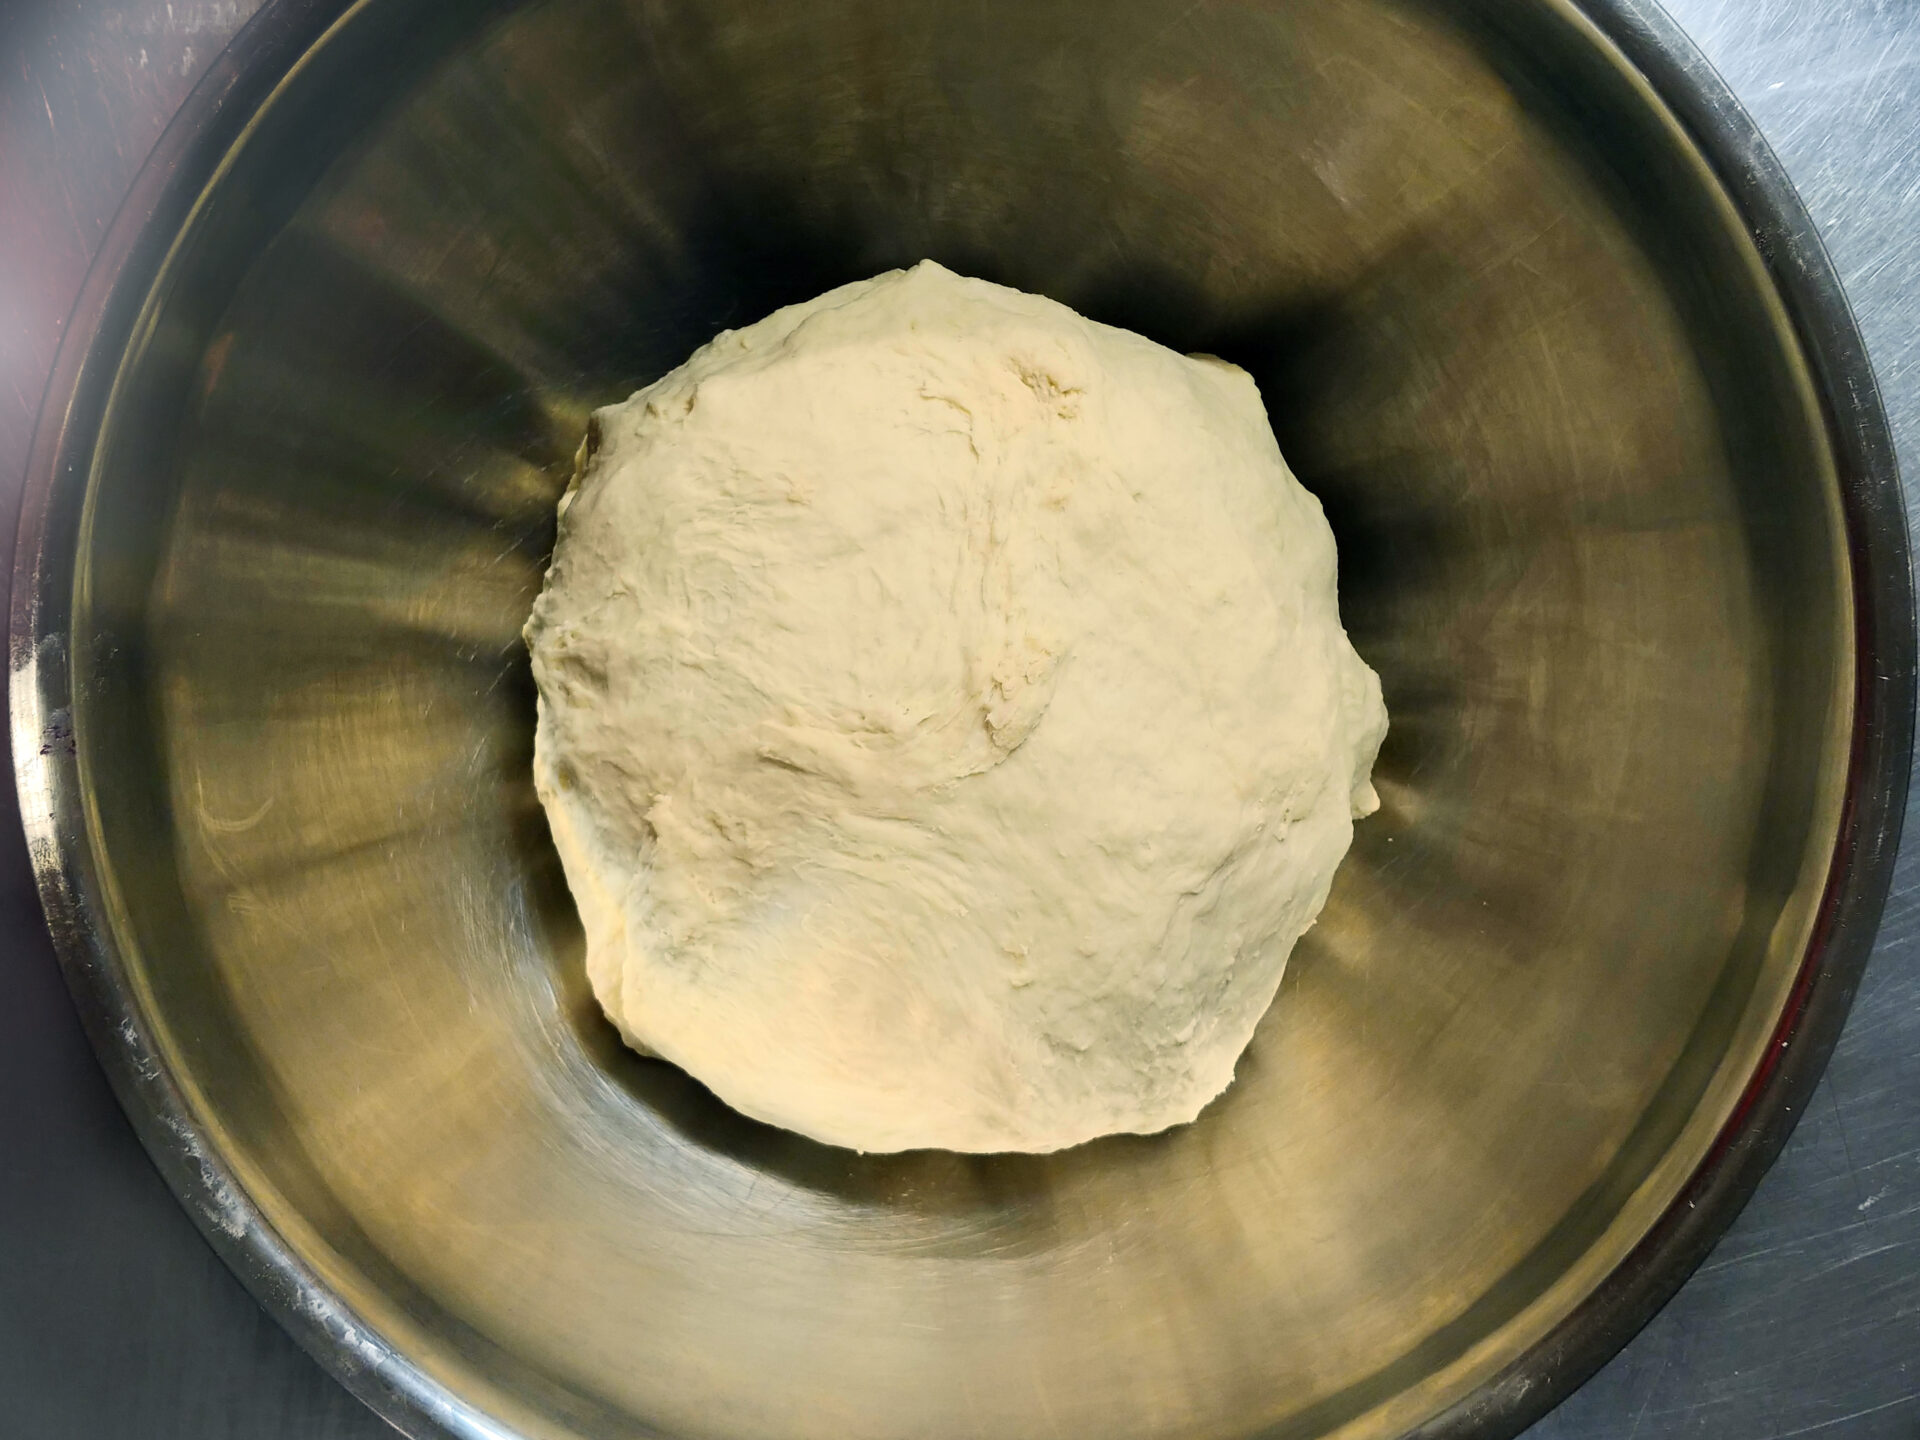
1.3. Then increase speed to medium-high and knead until a compact dough is formed (about 1 – 2 minutes).
Note:
- The dough should not be too sticky (at least not too much).
- If it sticks to the mixing bowl after about 2 to 3 minutes of processing, add 2 TBSP of flour and process for 1 – 2 minutes. That should solve the problem. If not, add a little more flour.
2. Rising the dough:
2.1.
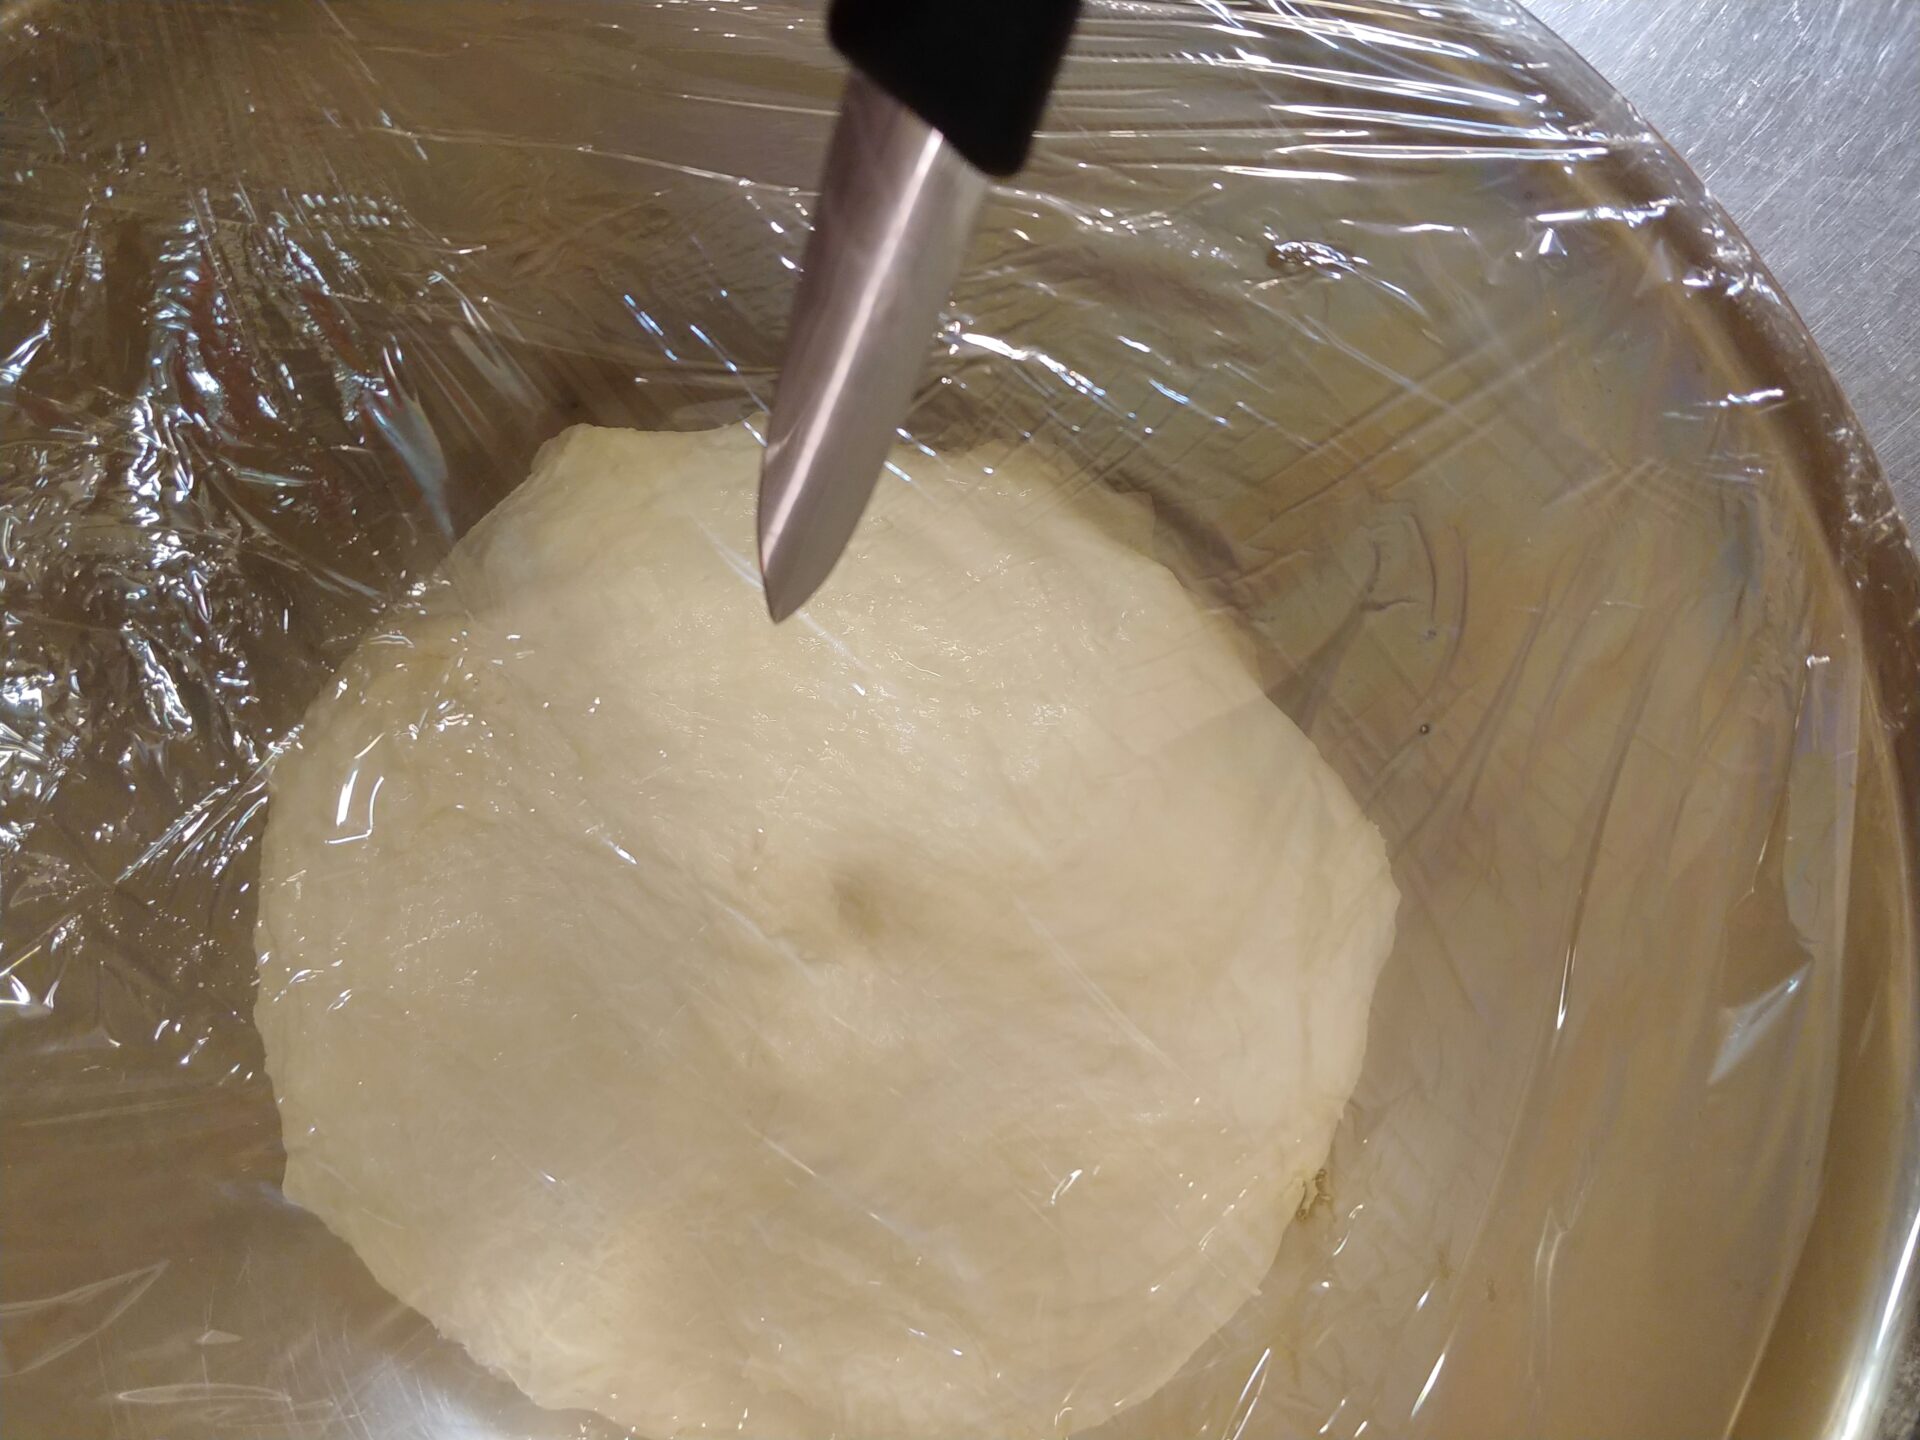
Remove the bowl with the dough from the mixer and cover the bowl with plastic wrap.
2.2.
Let it rise in a warm place until it doubles in size (about 1 ½ – 3 hours).
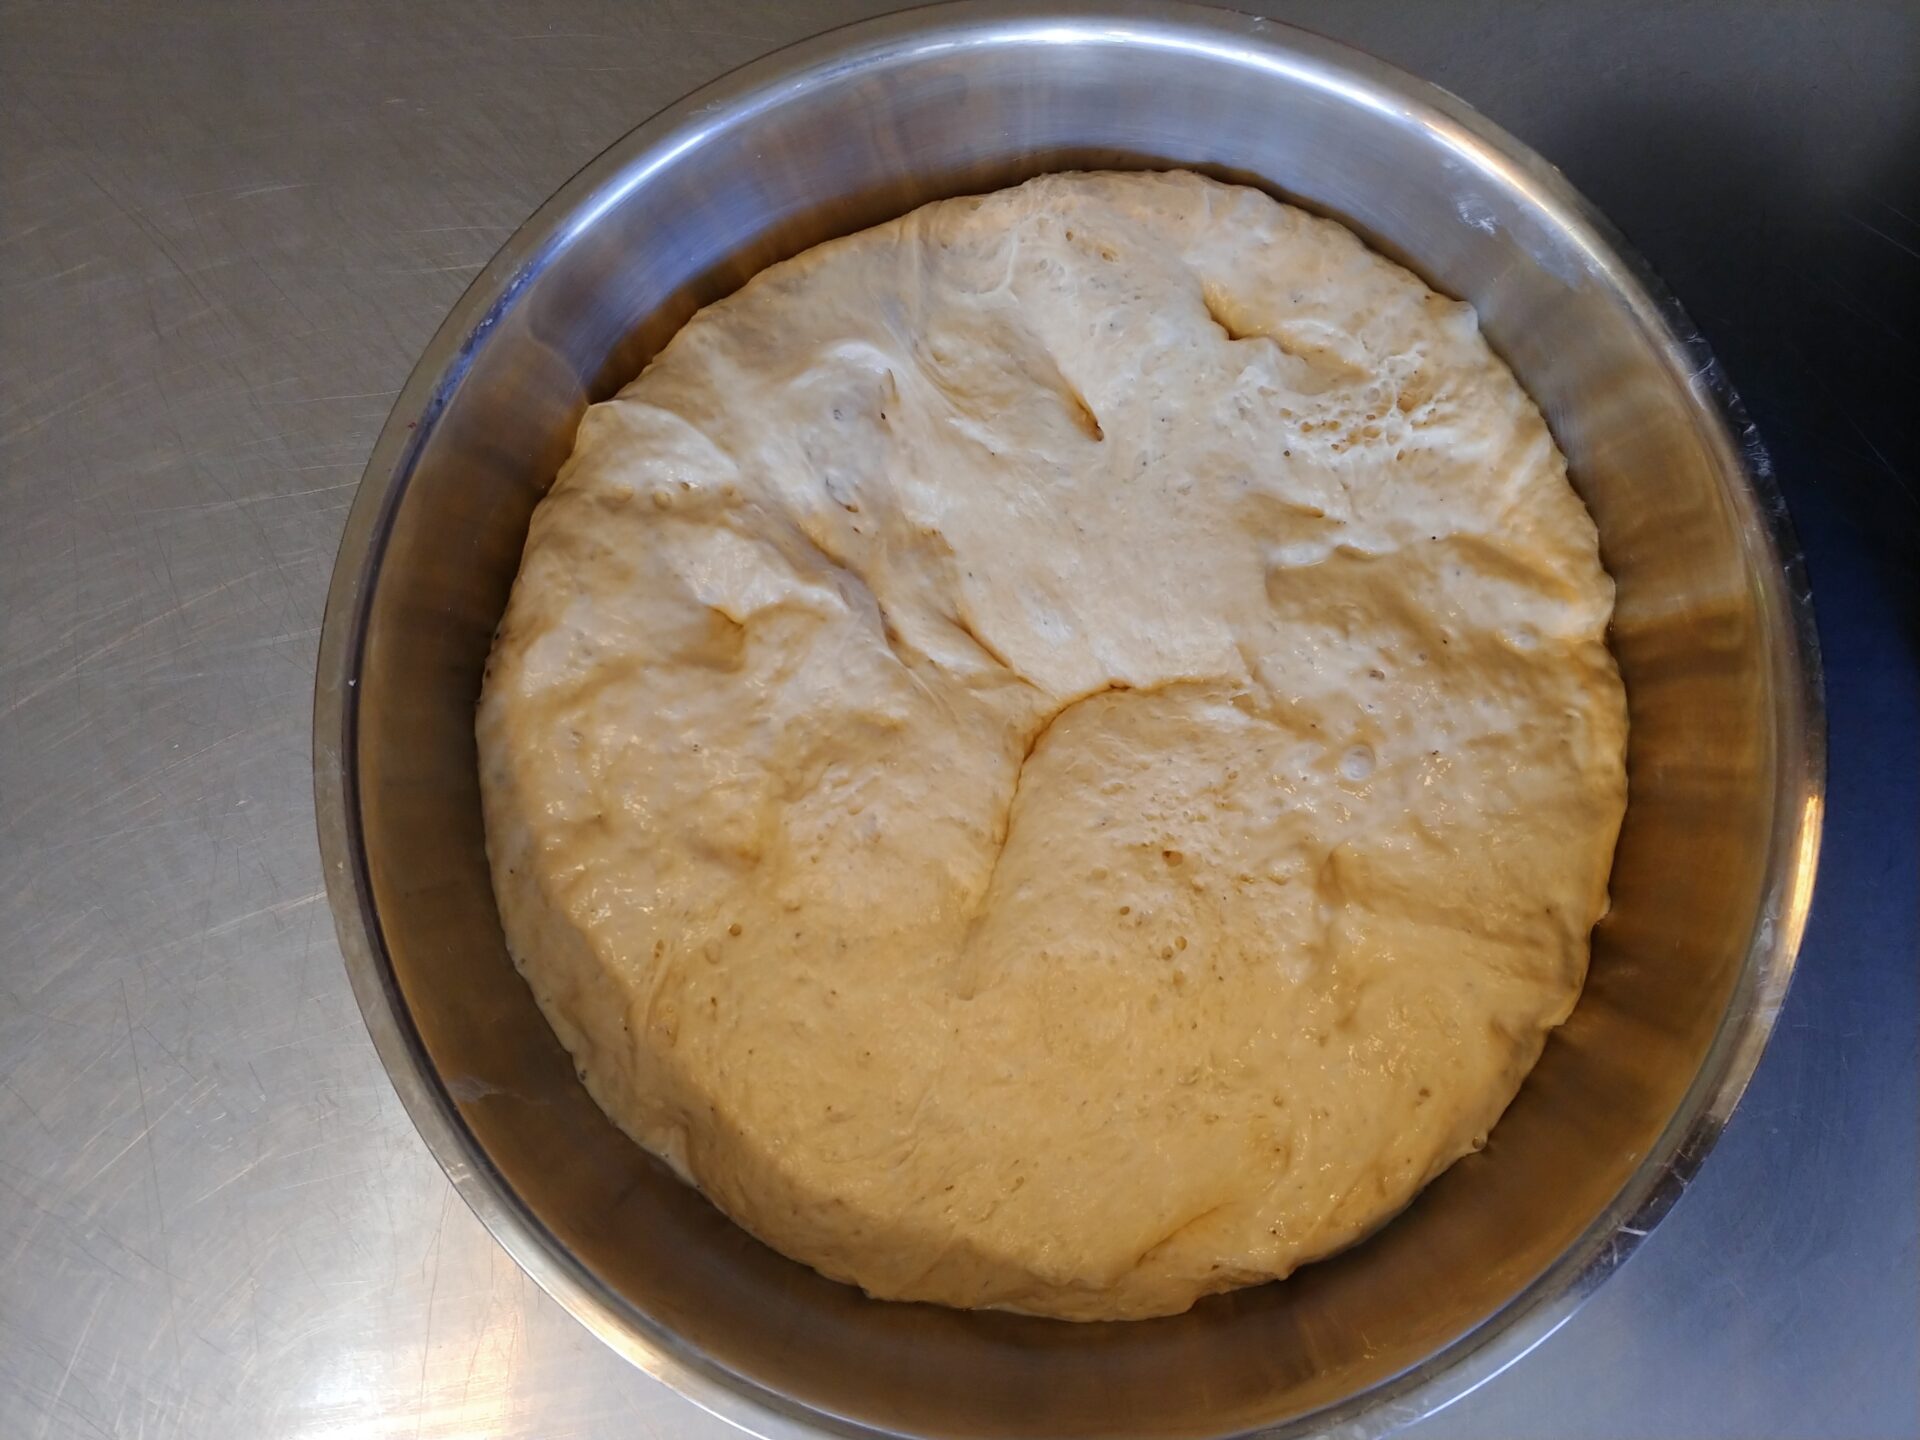
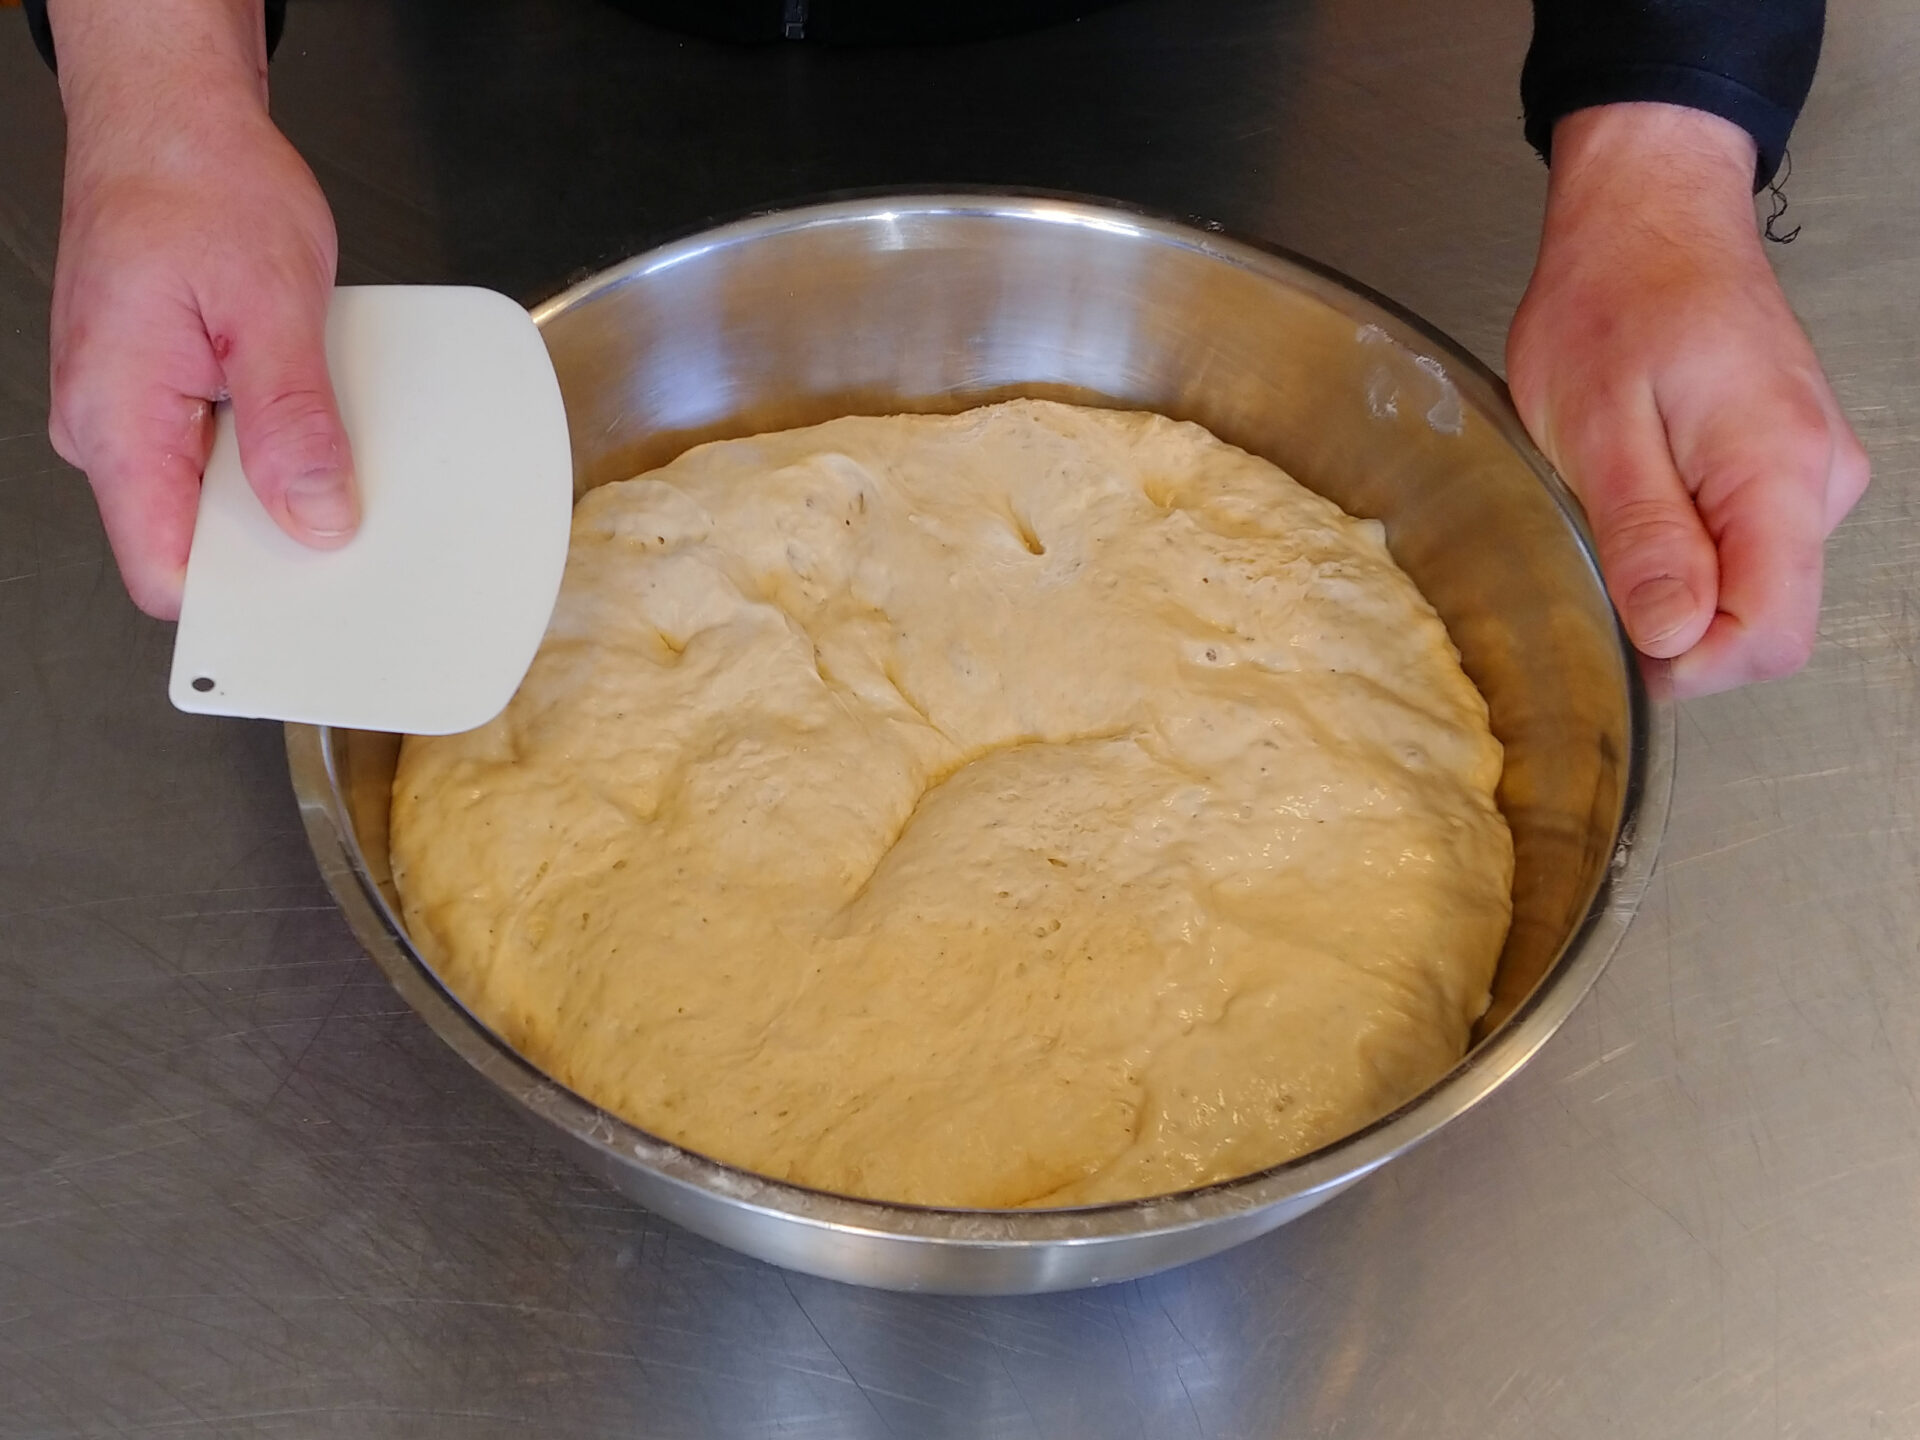
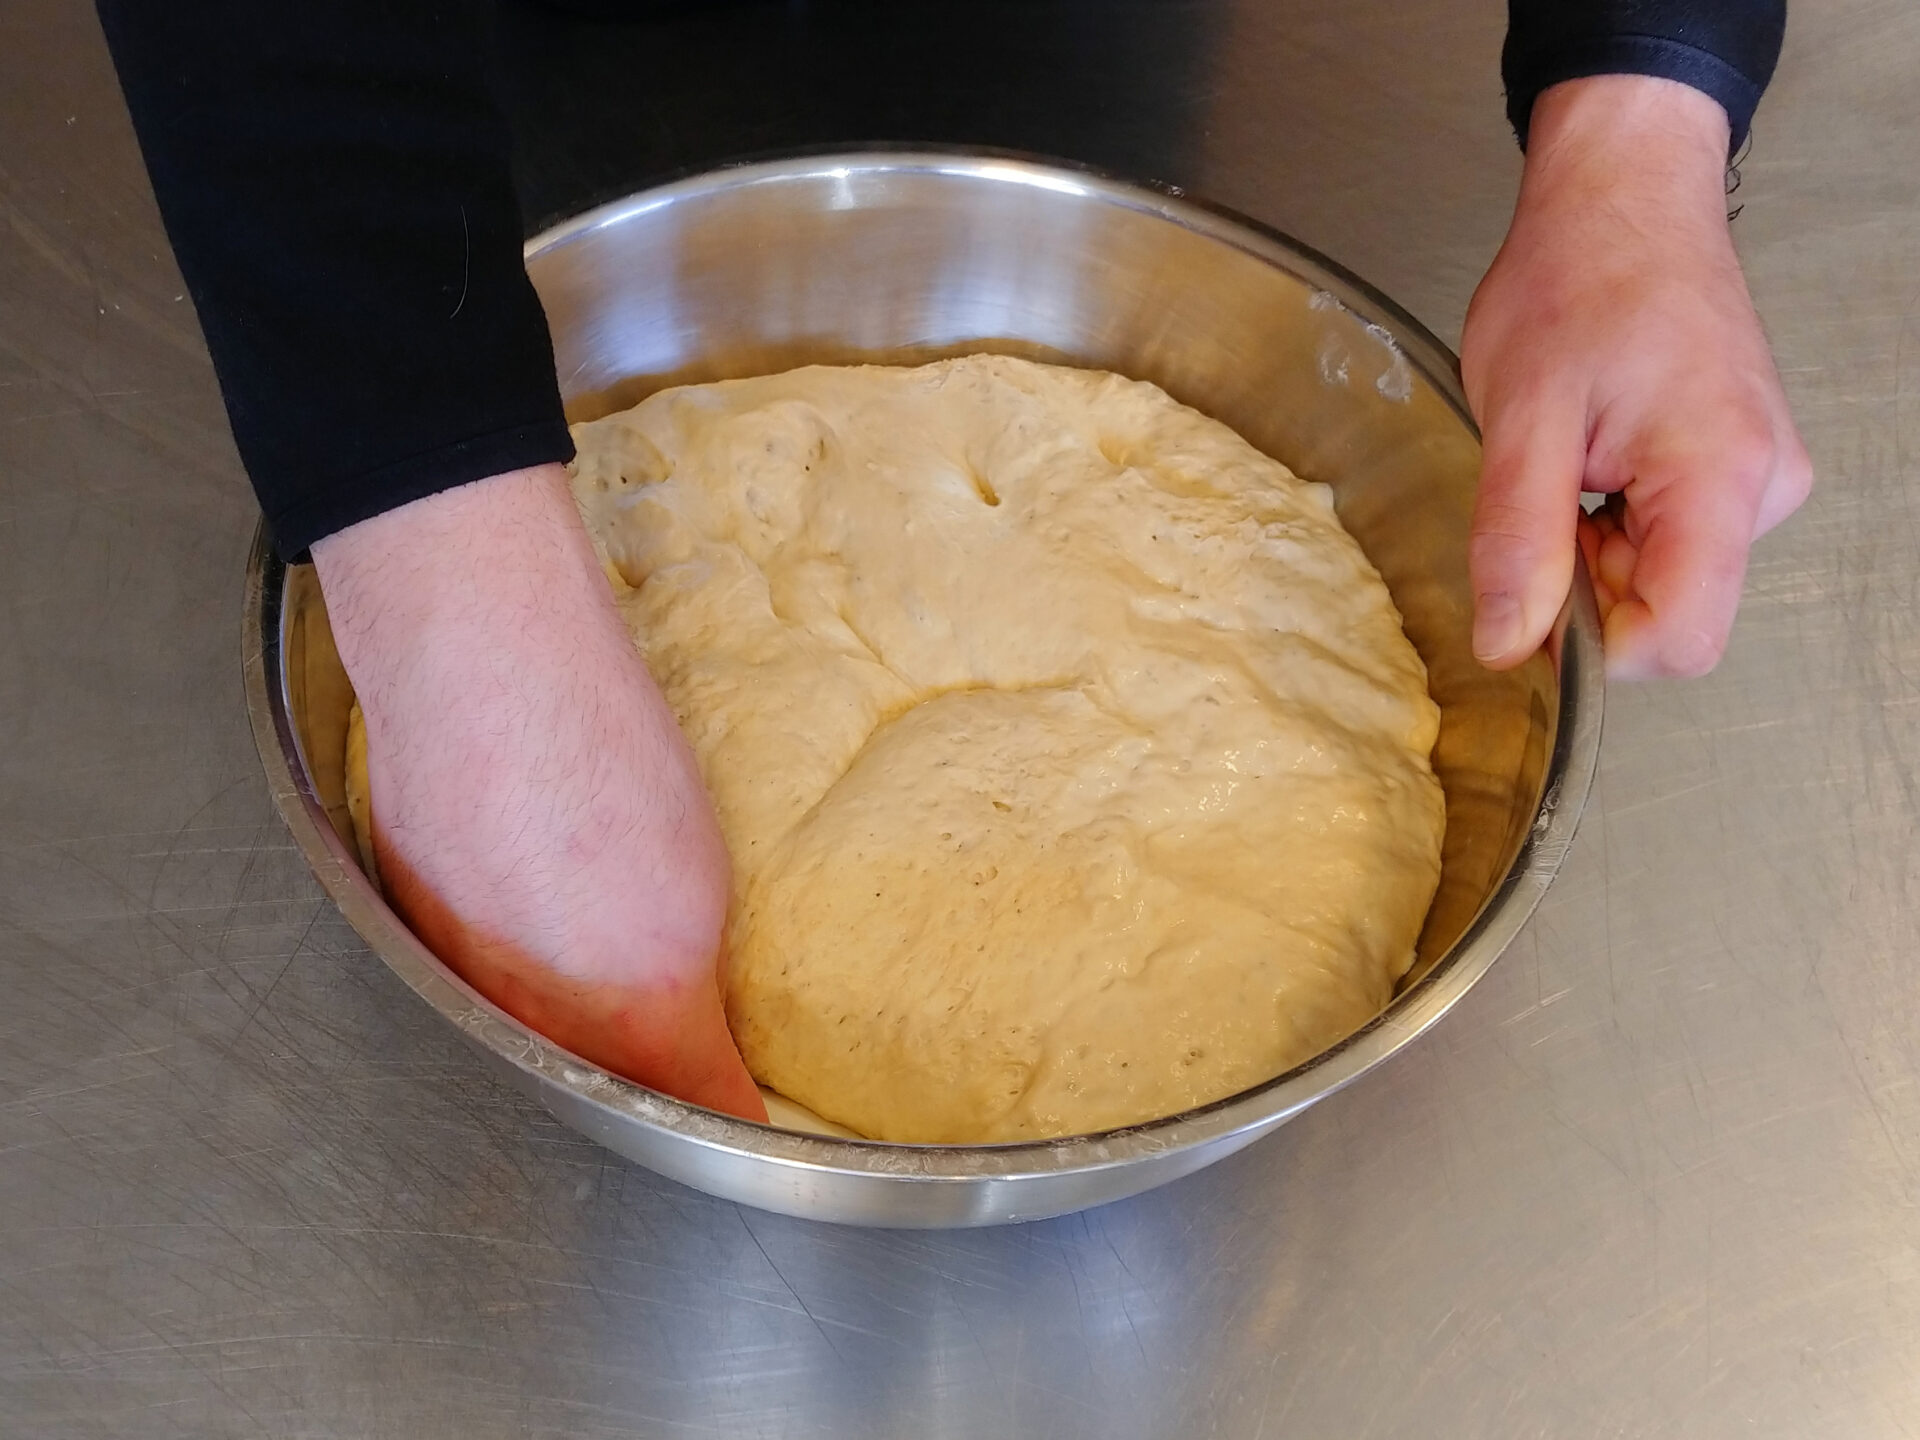
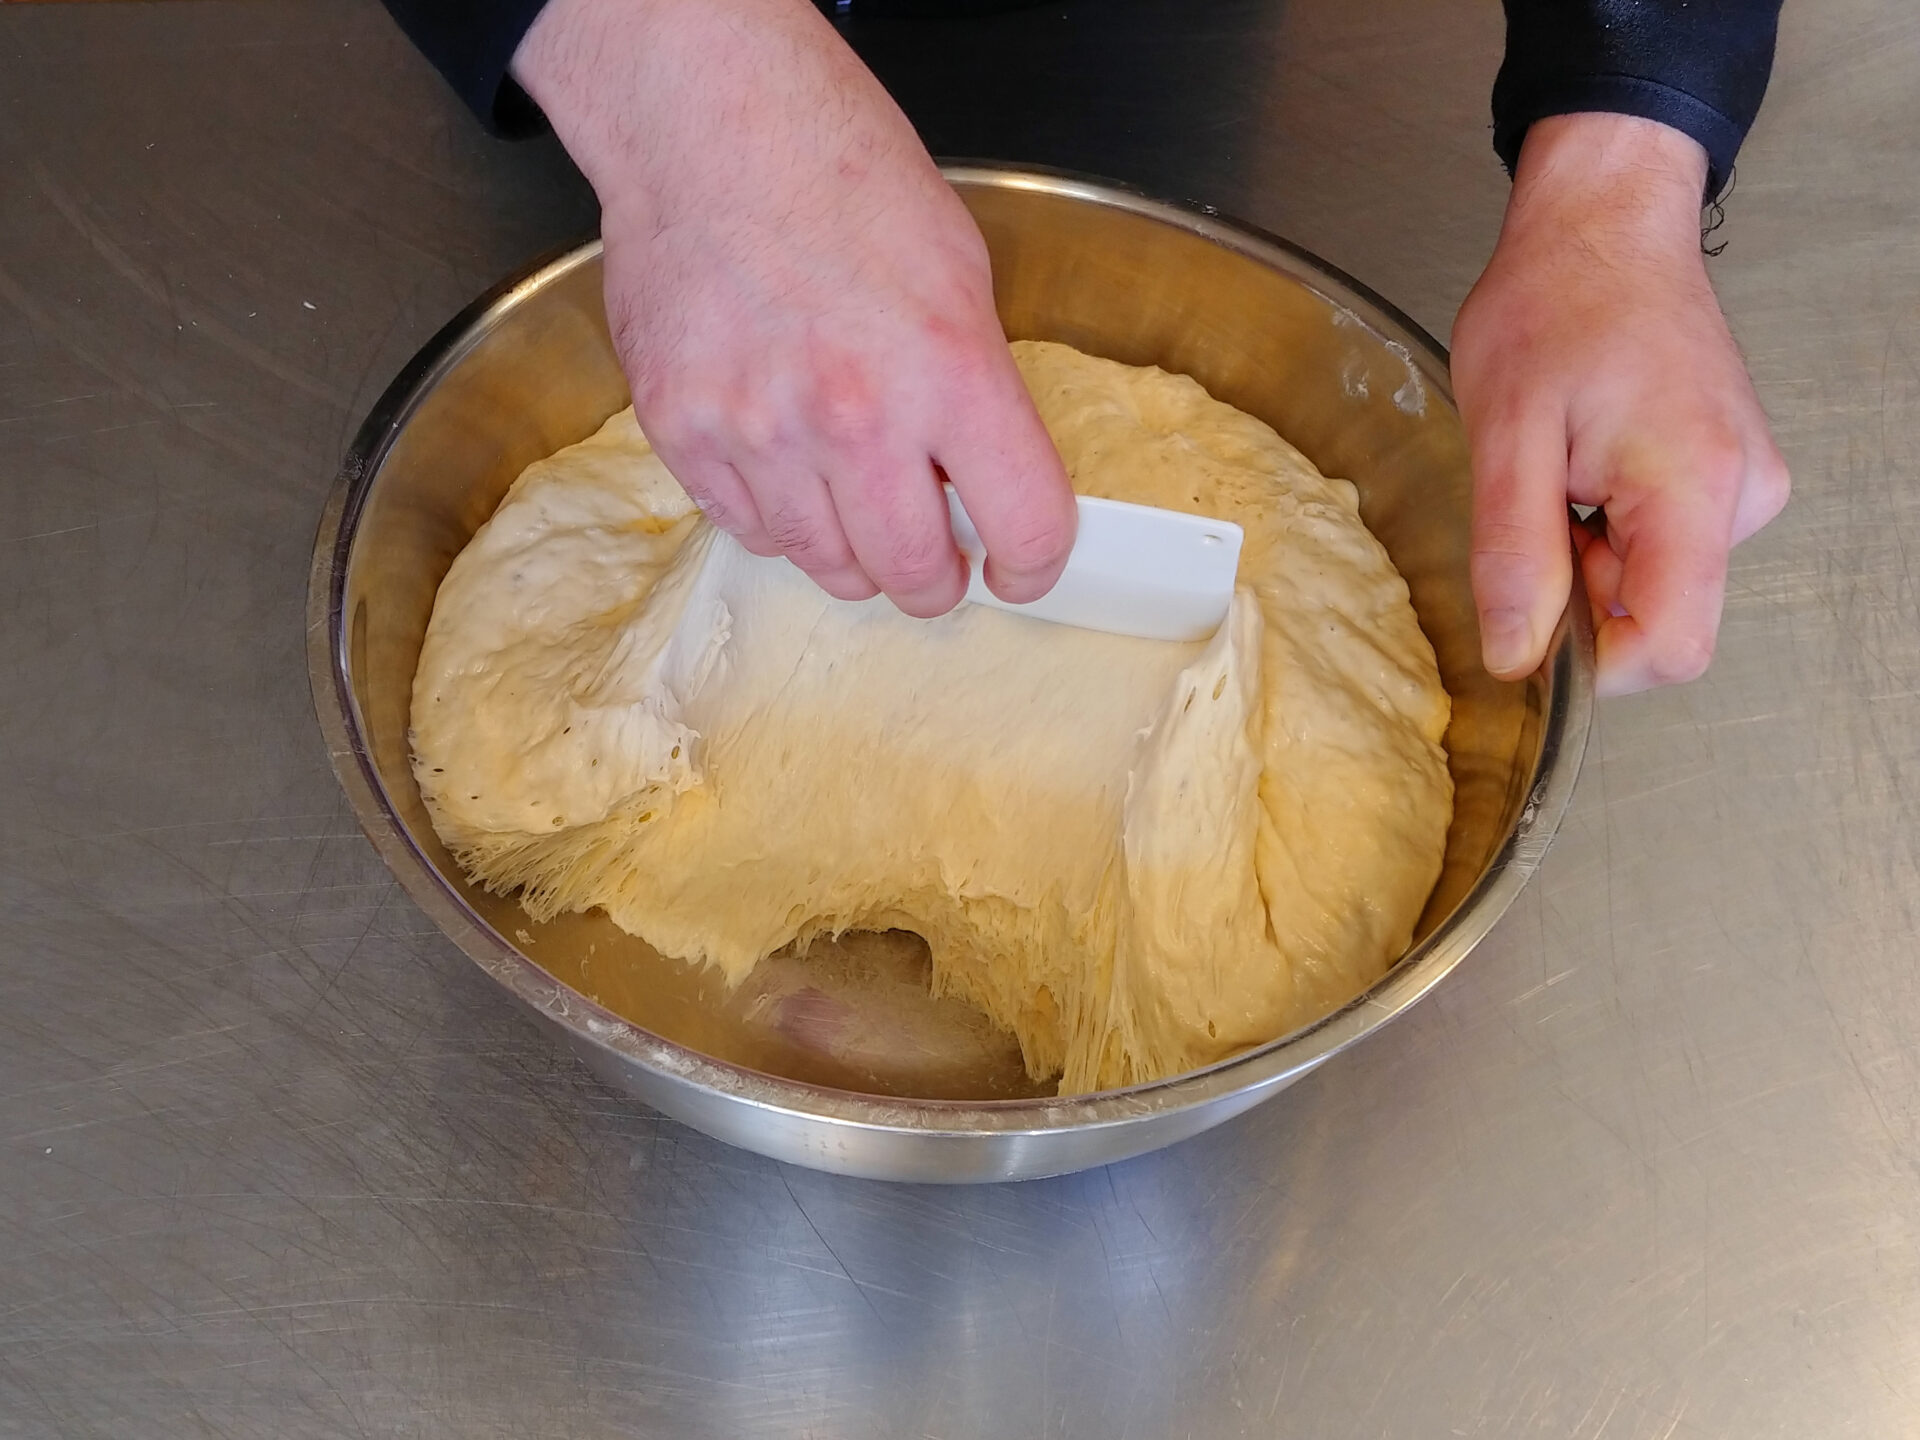
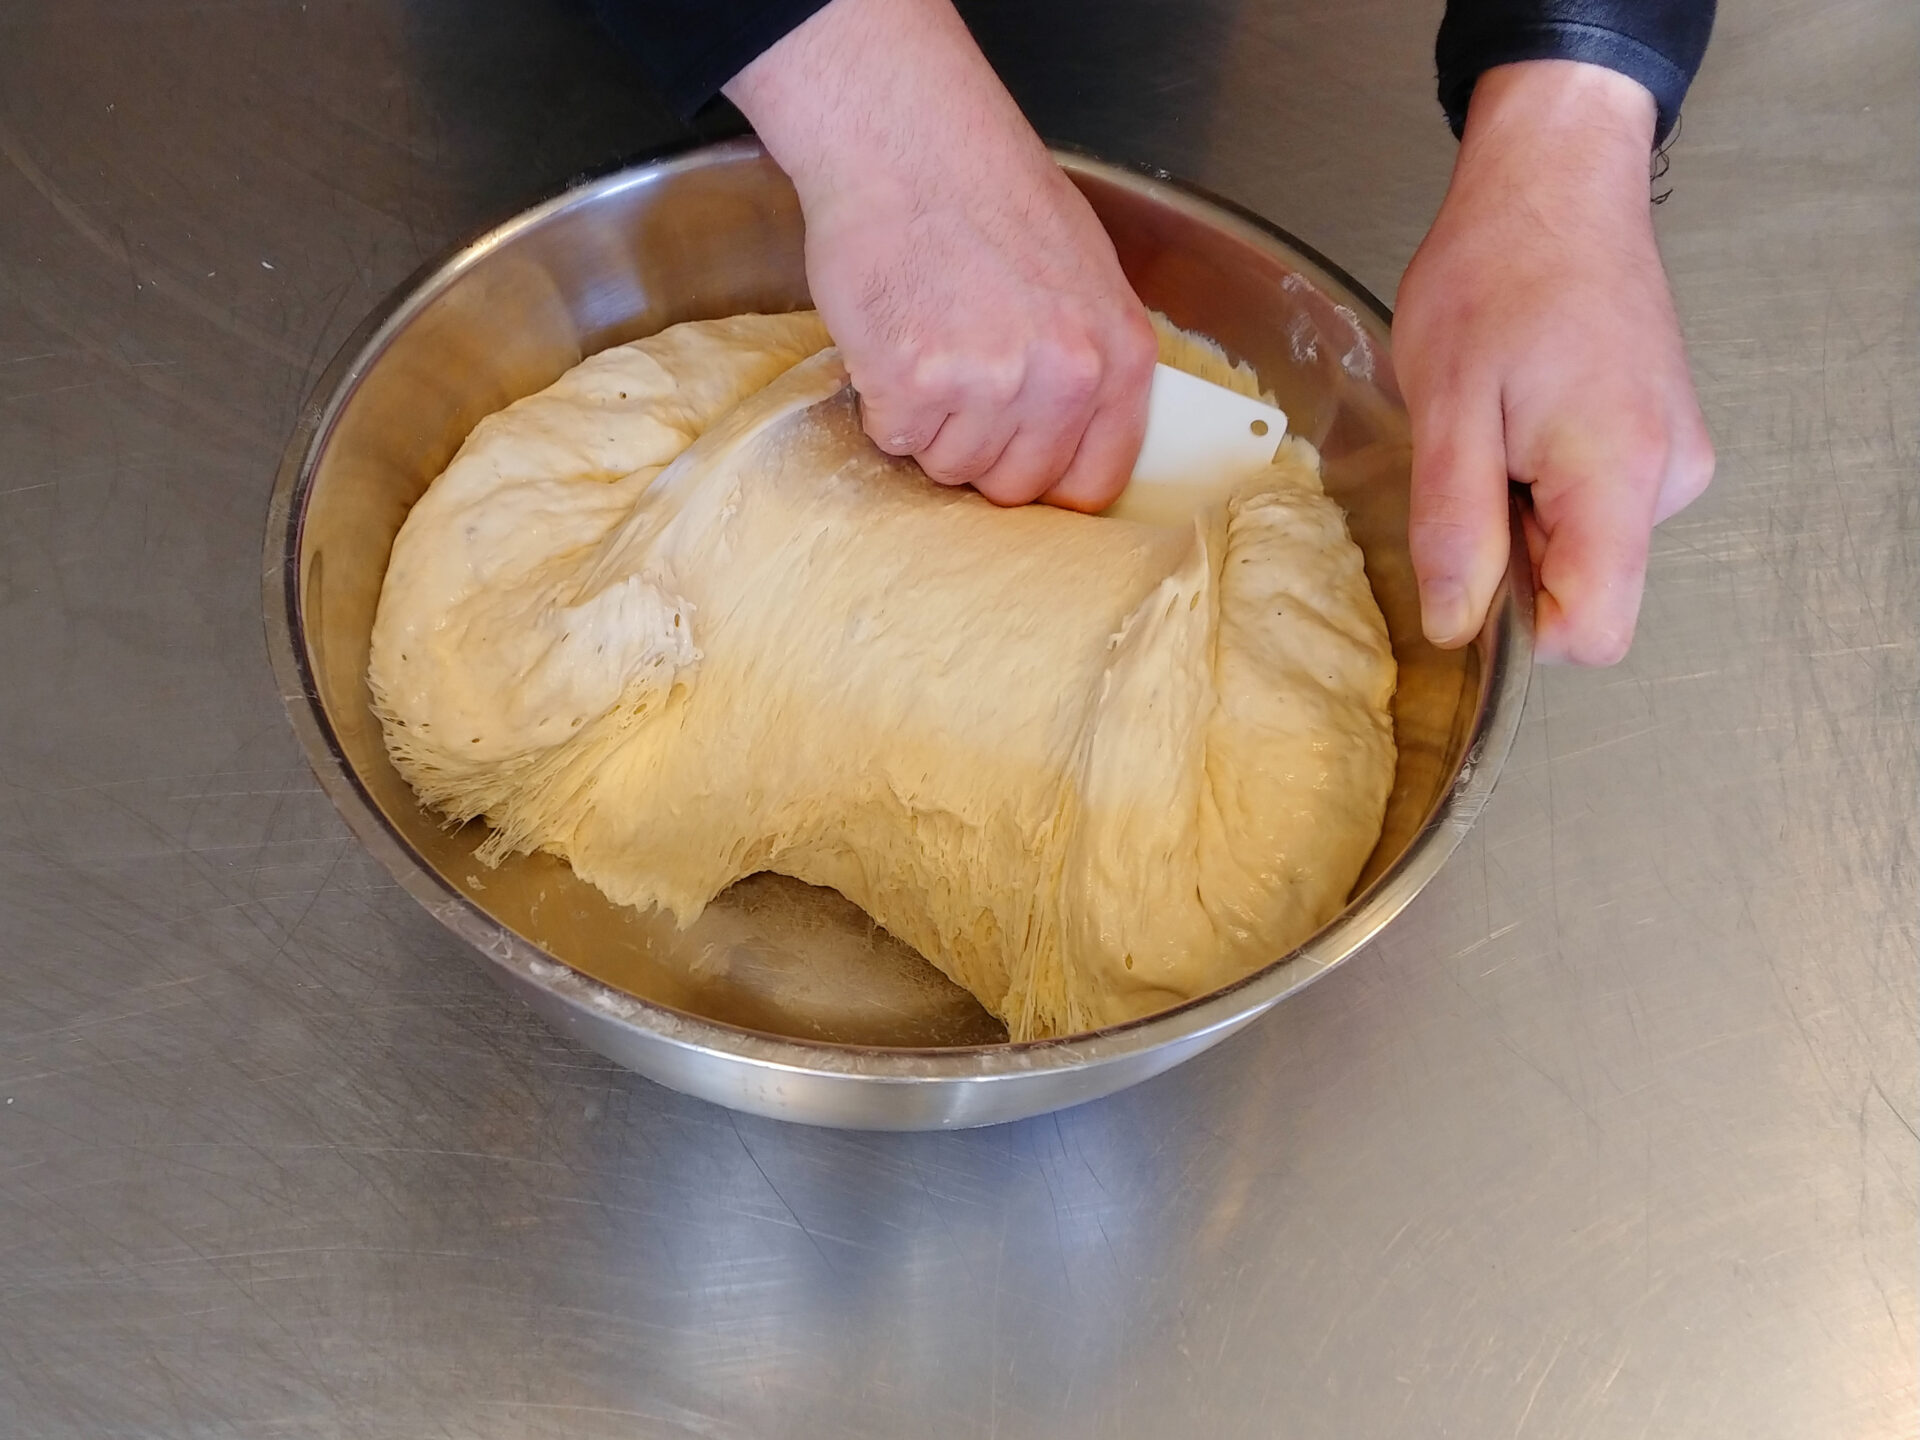
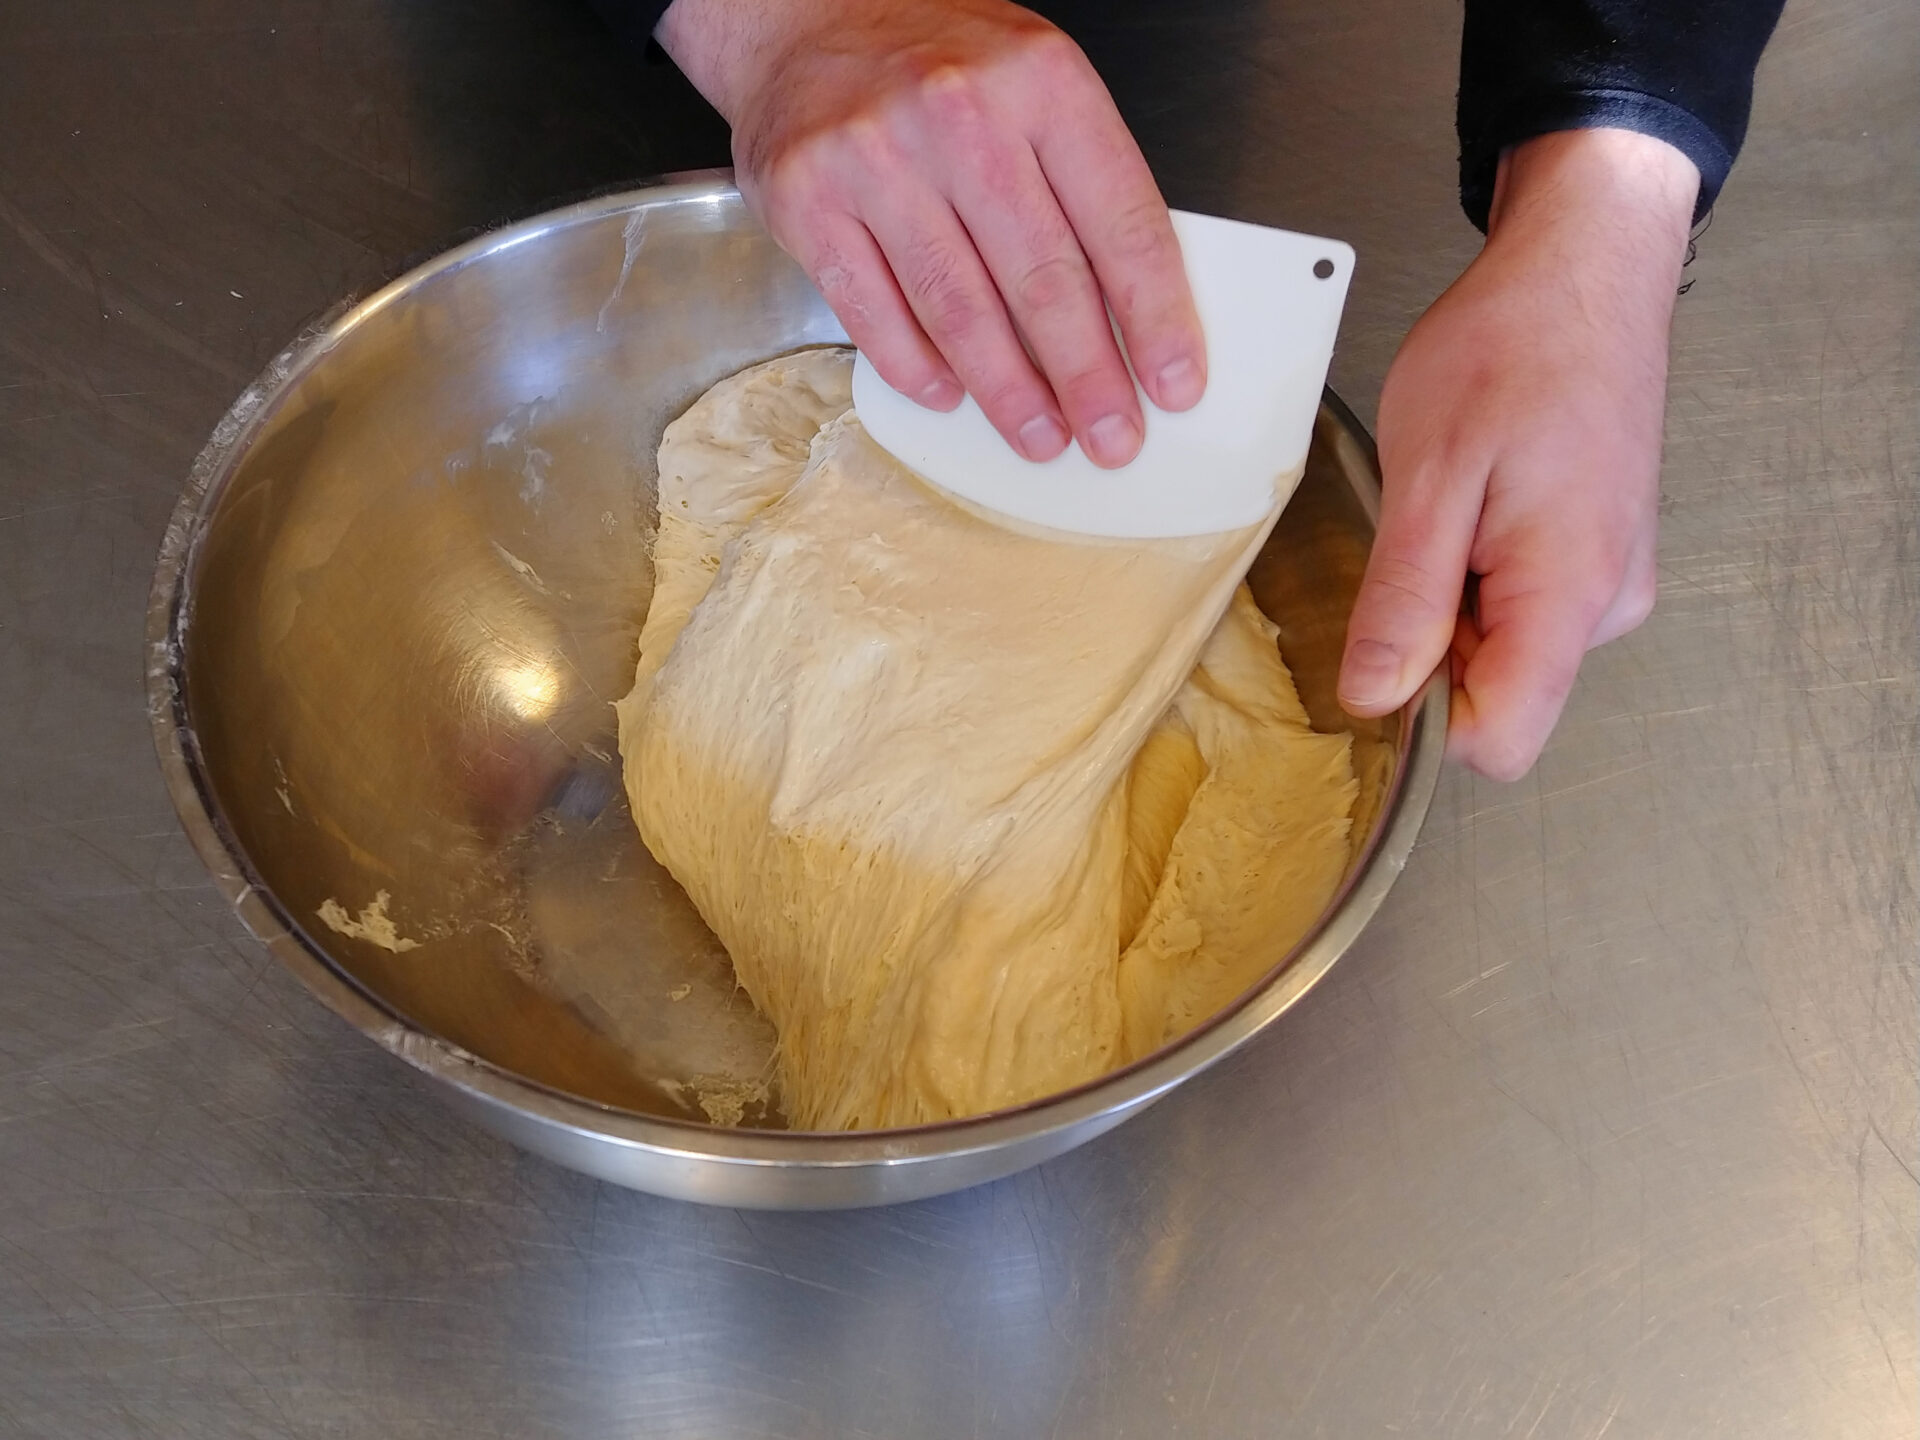
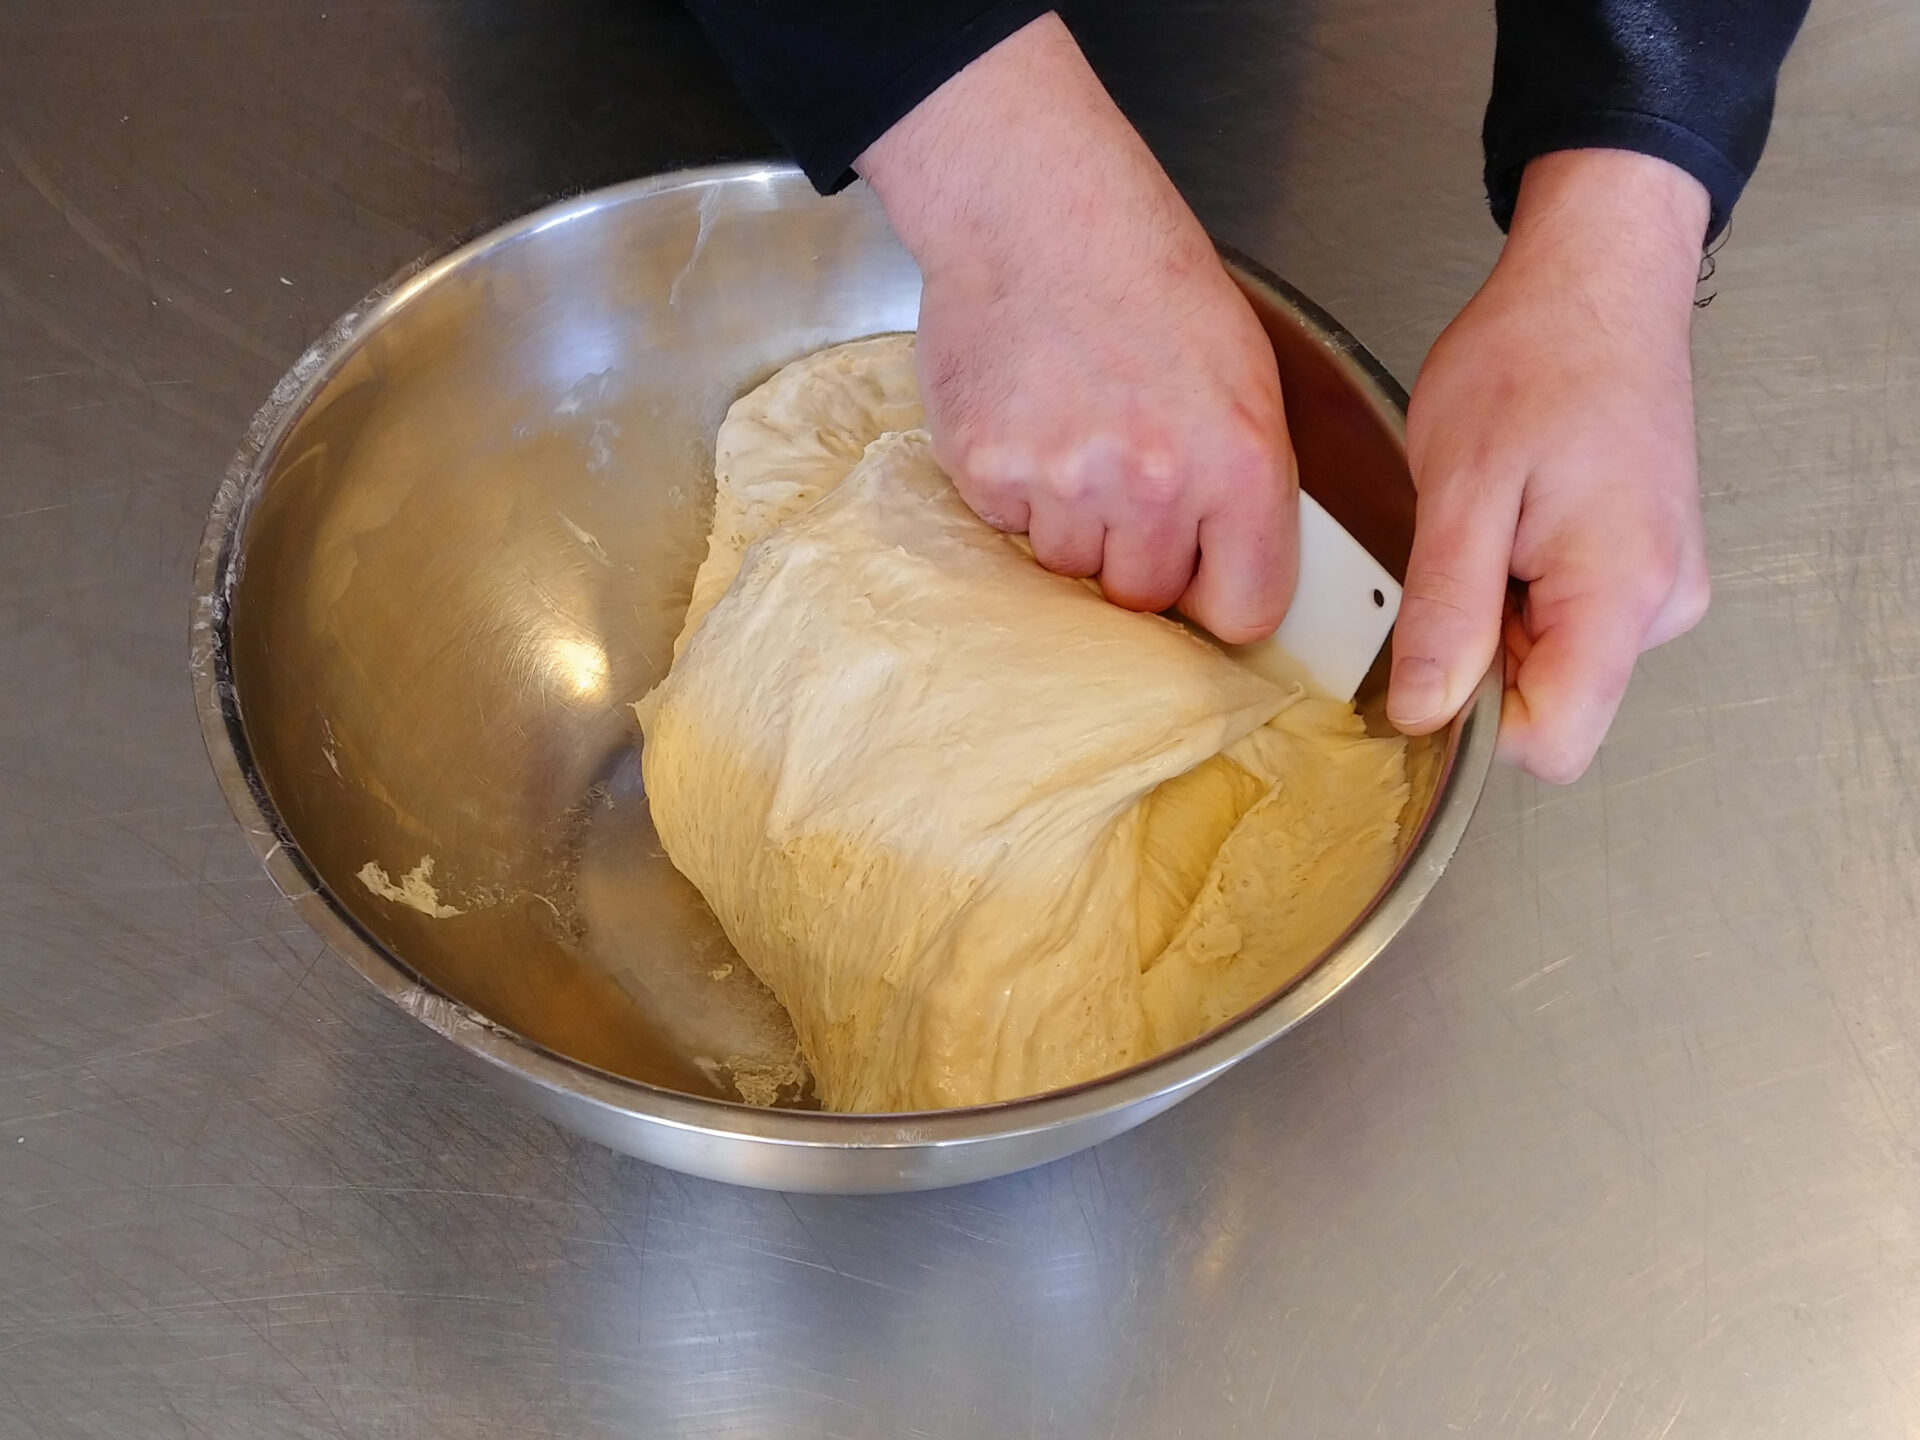
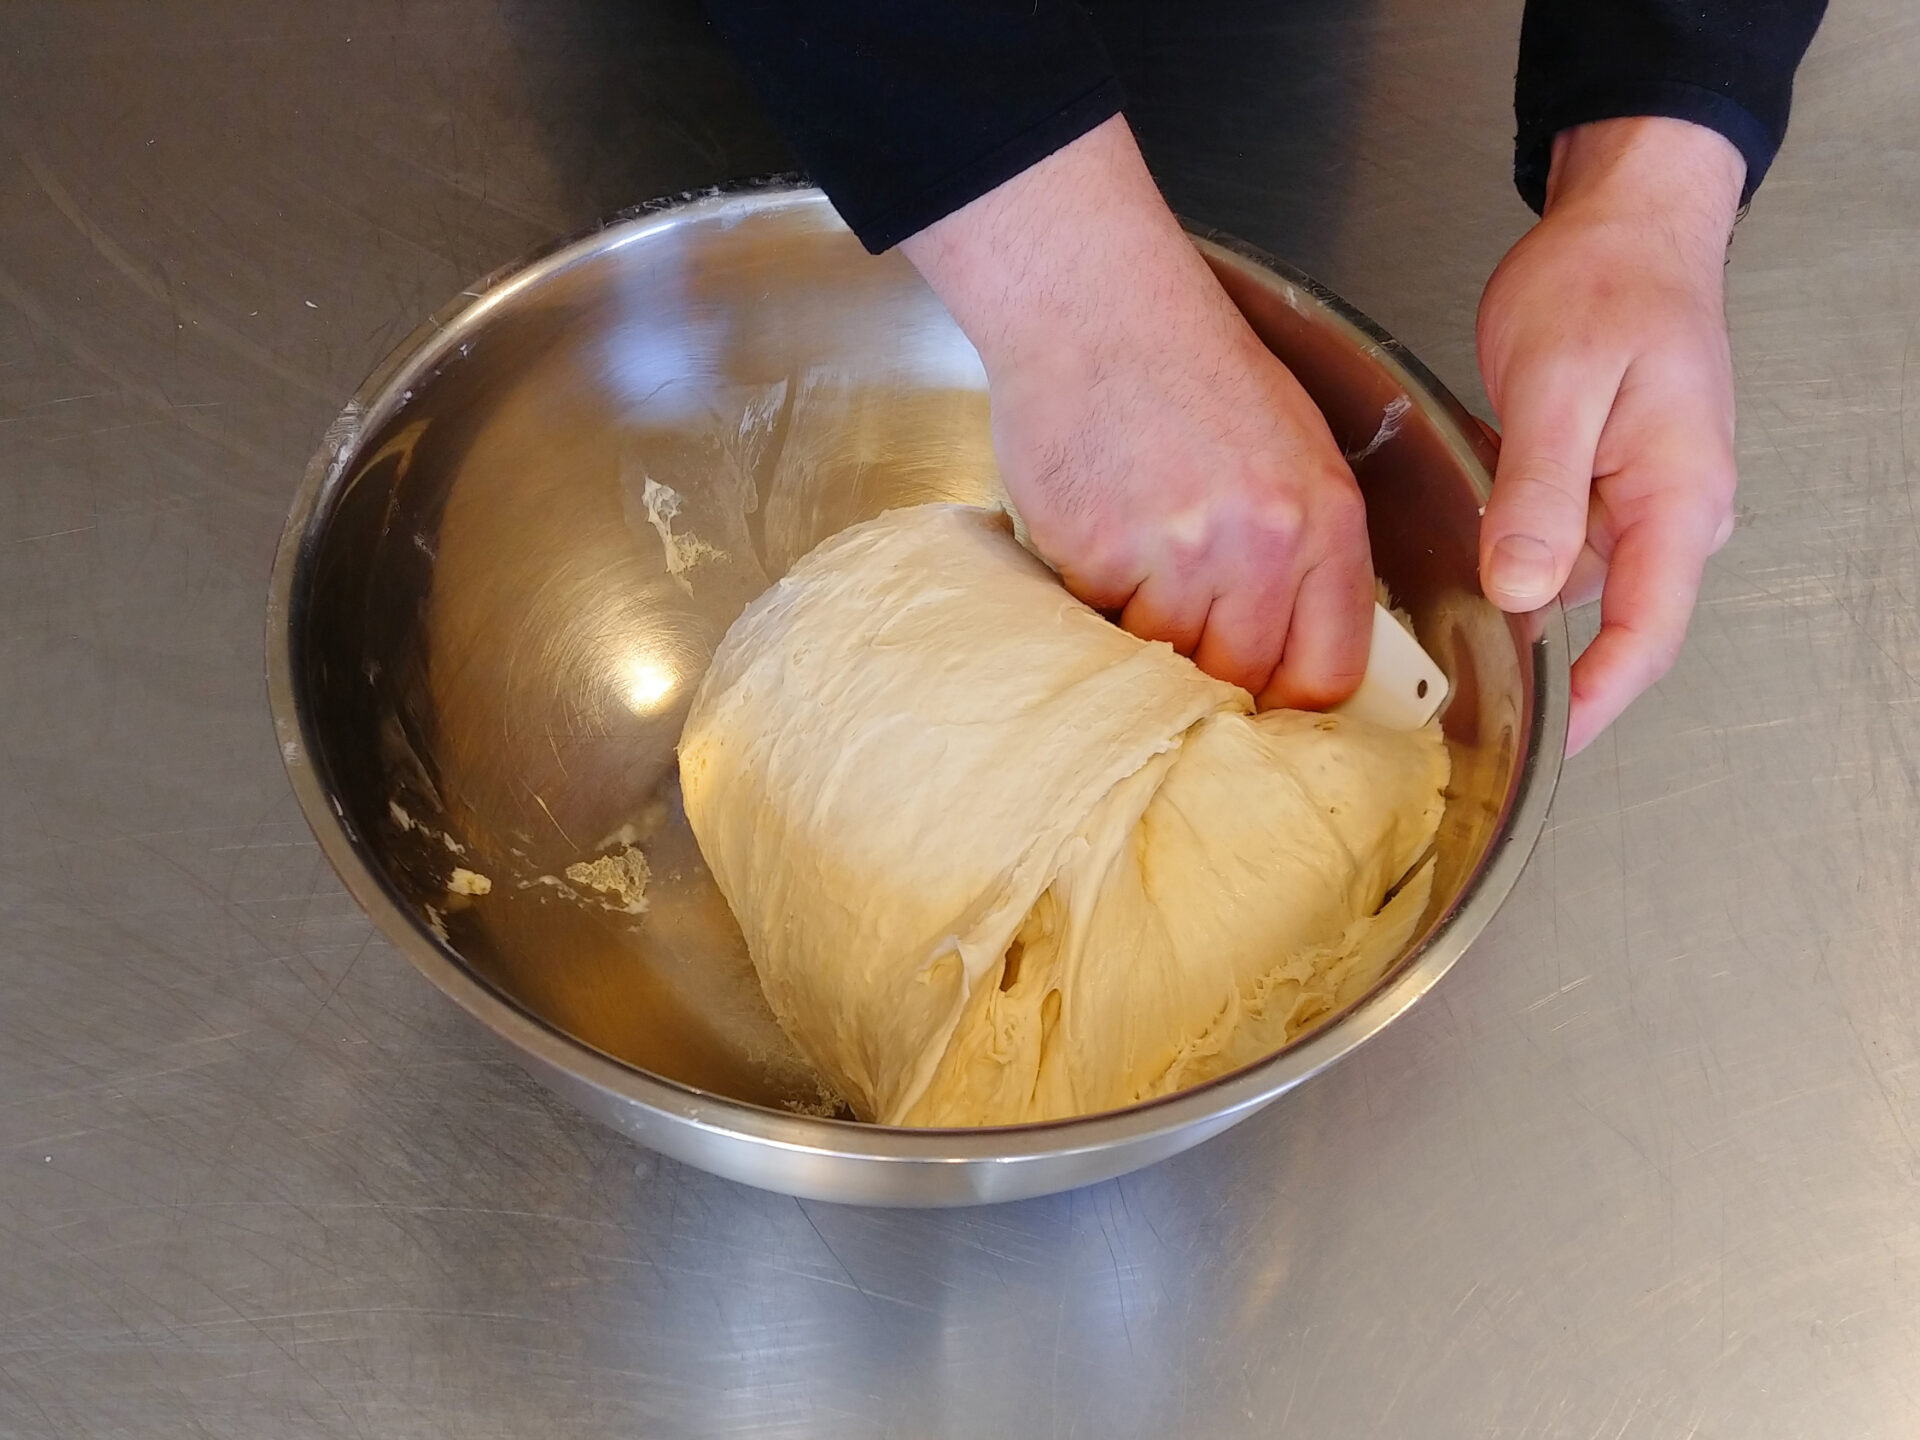
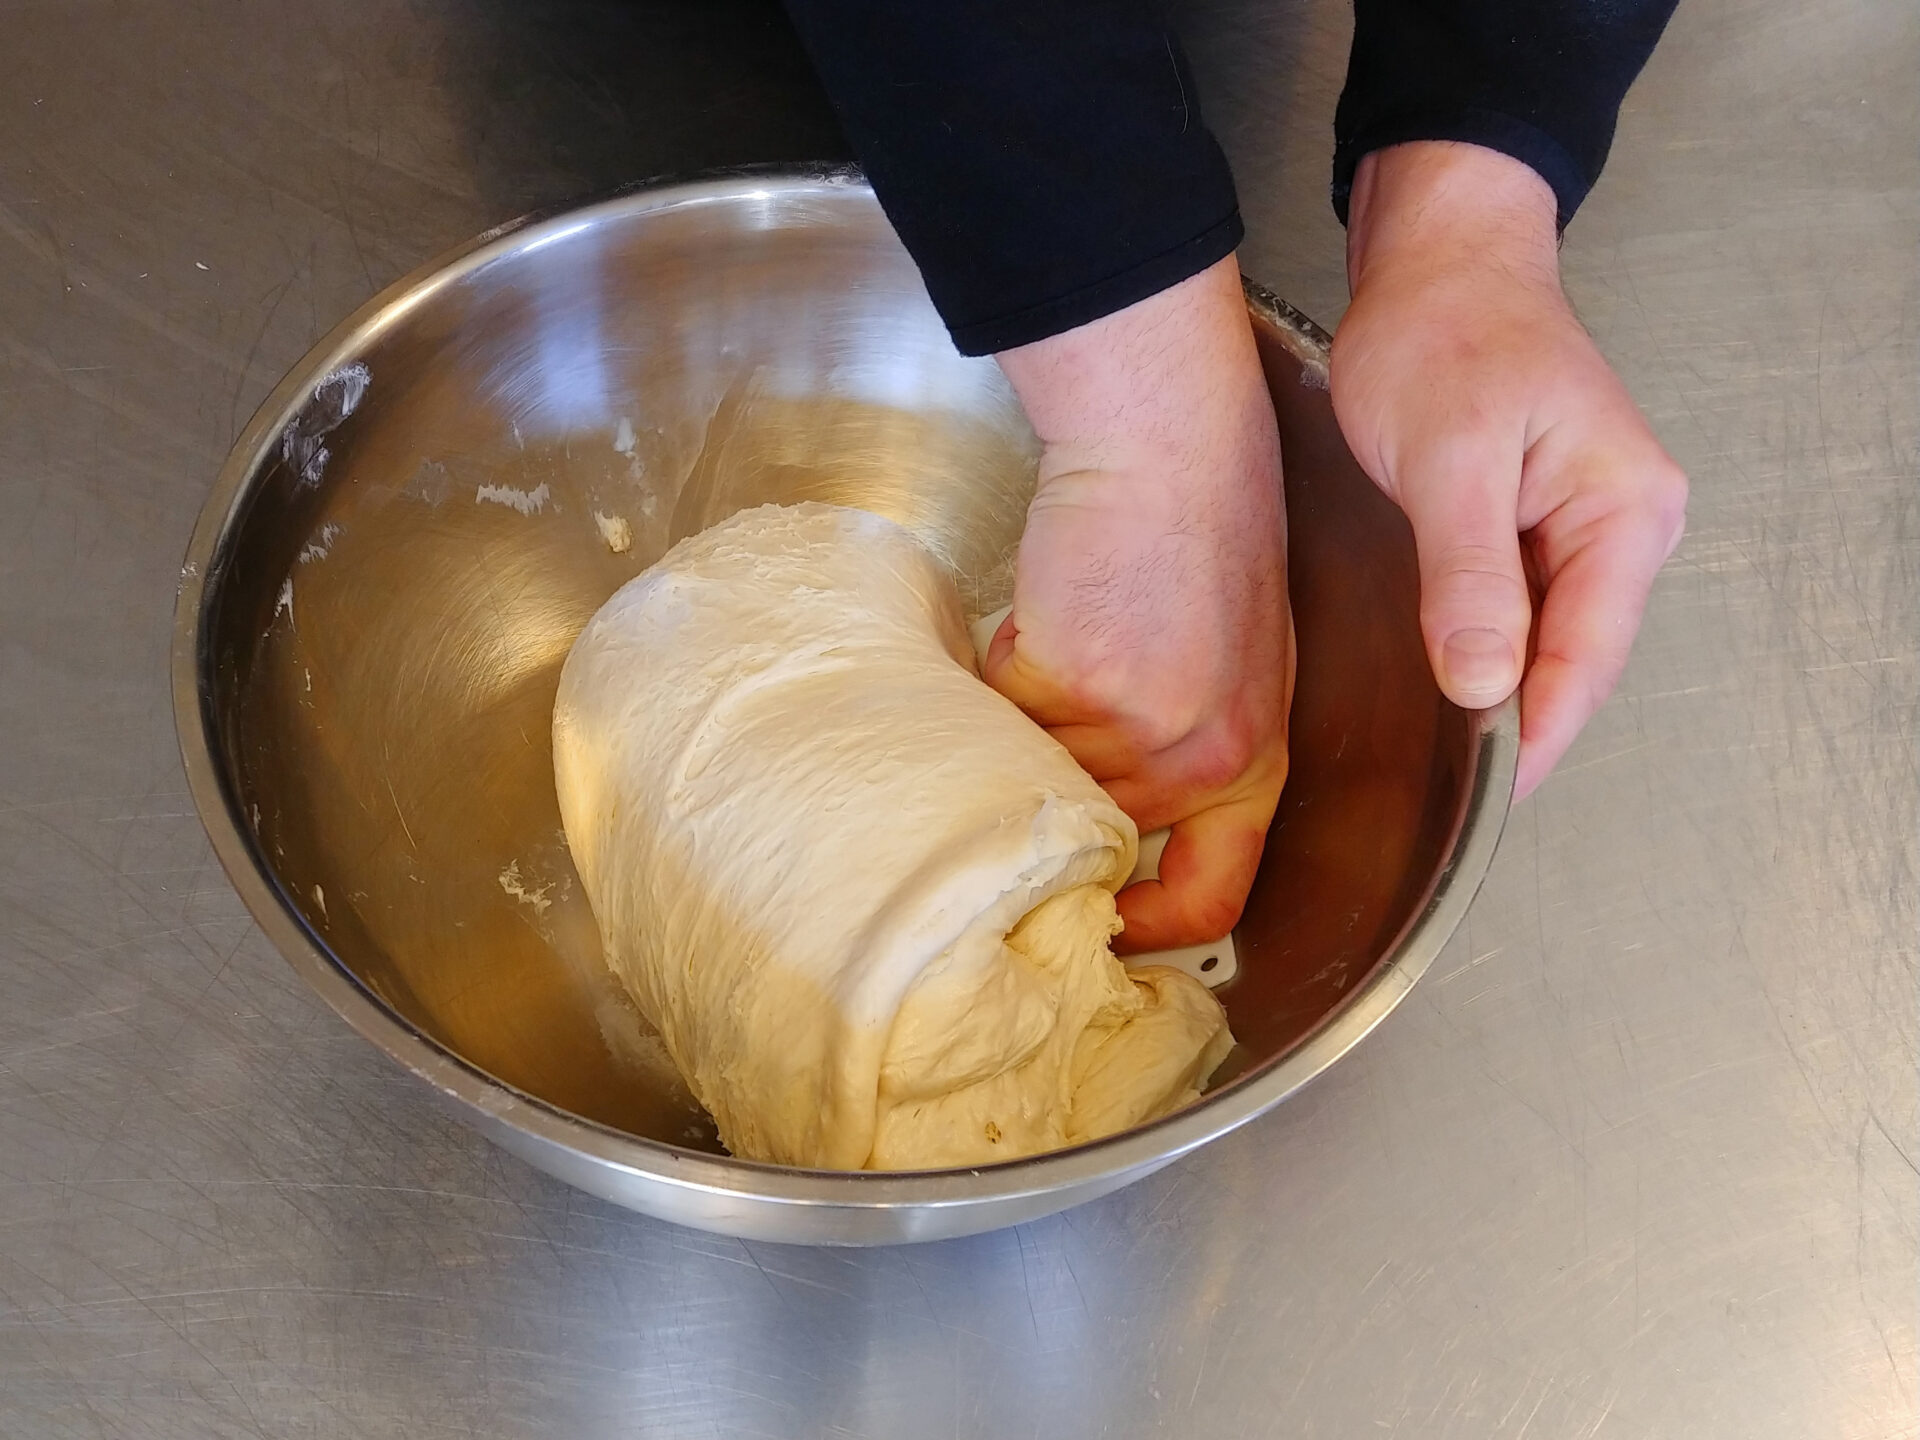
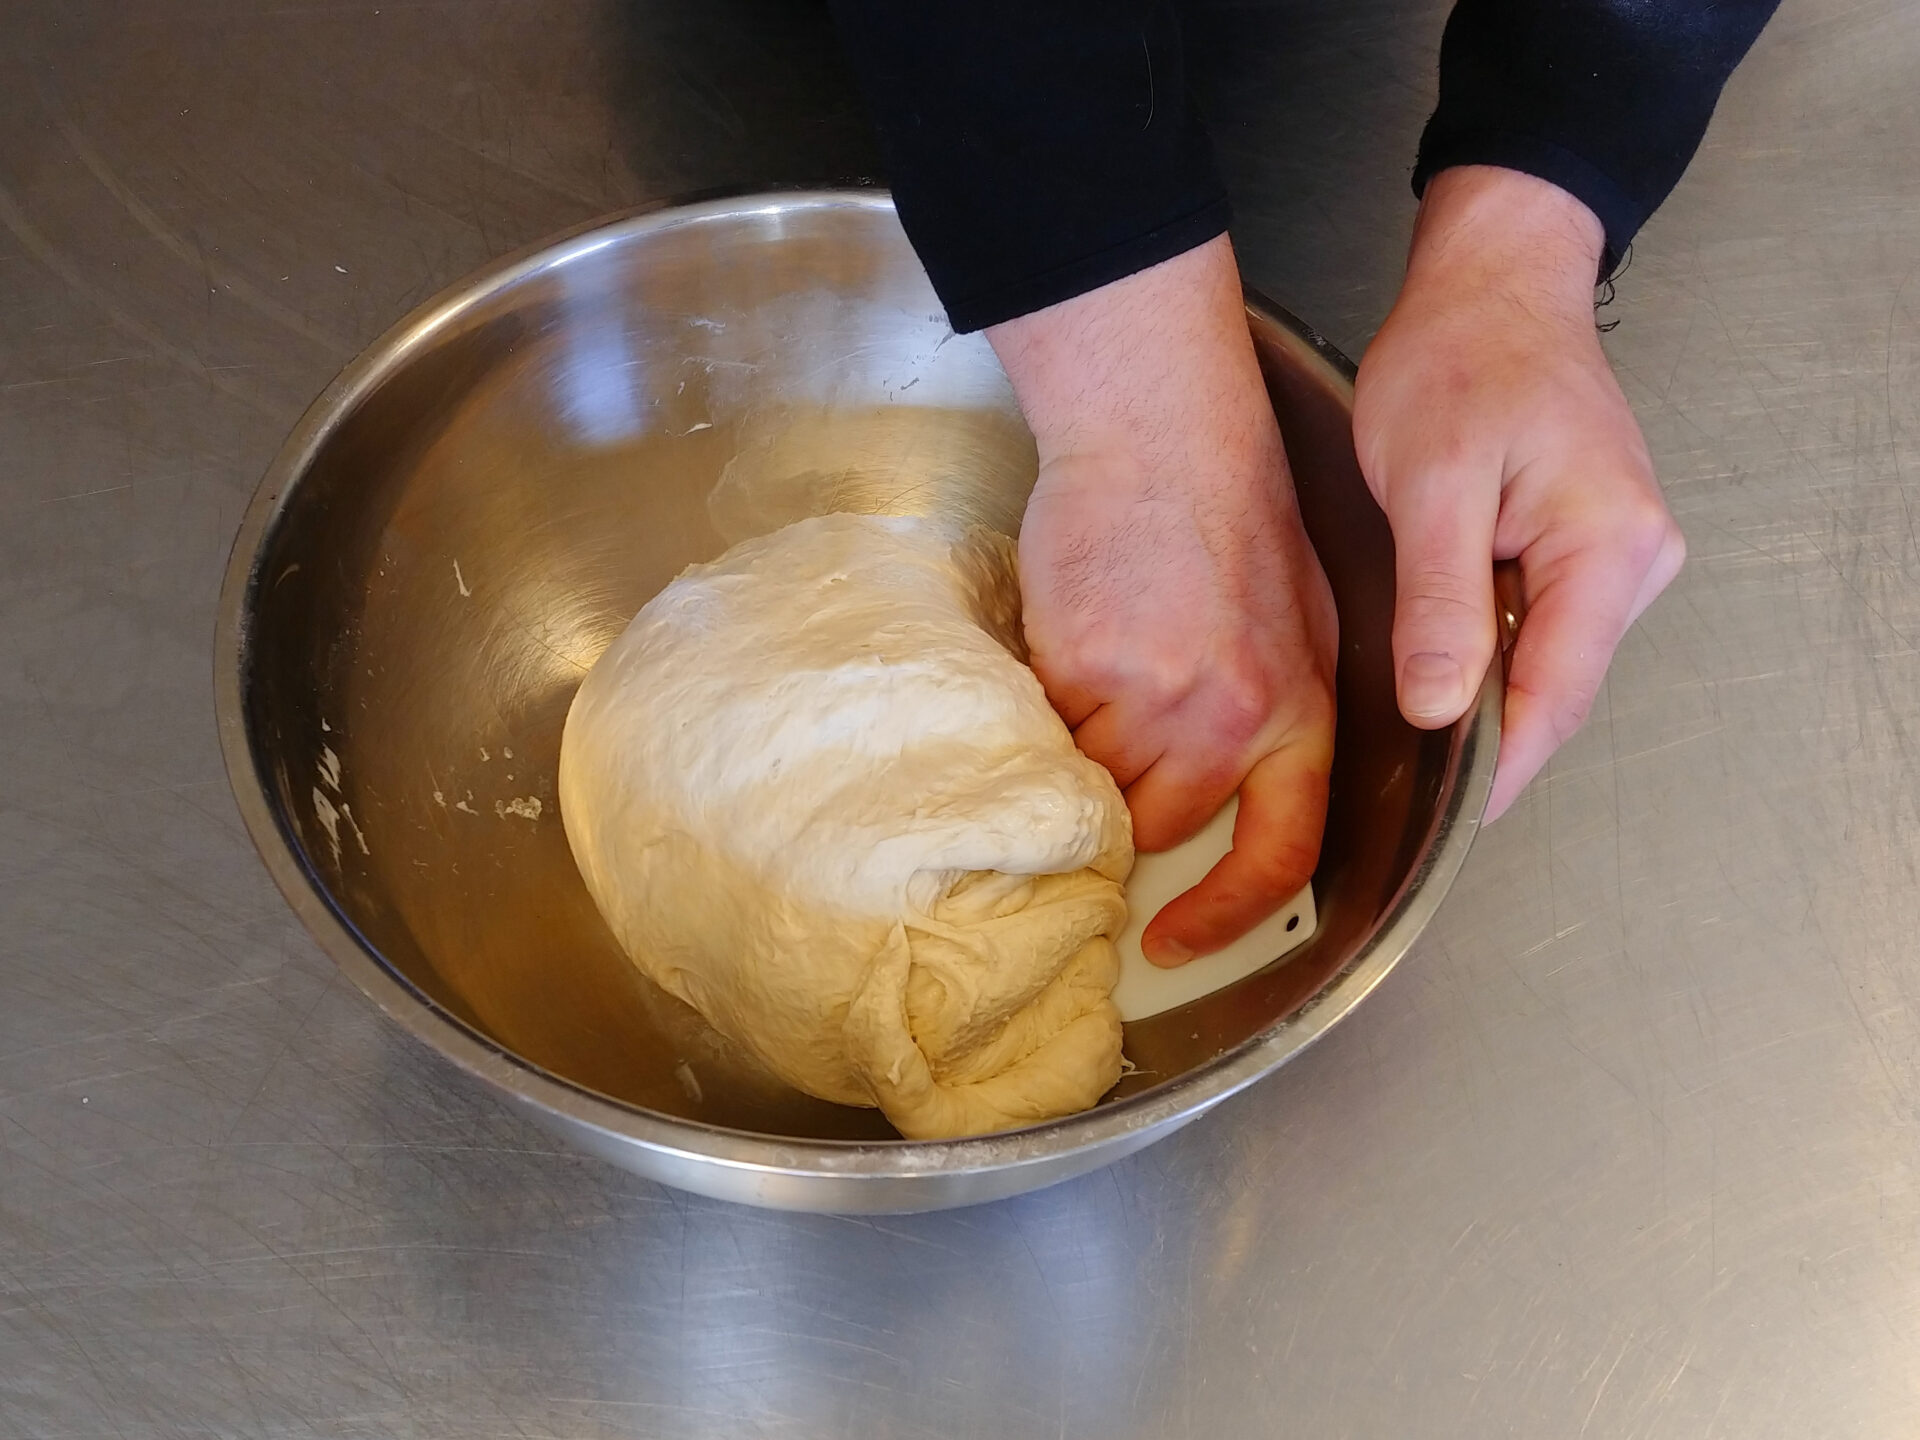
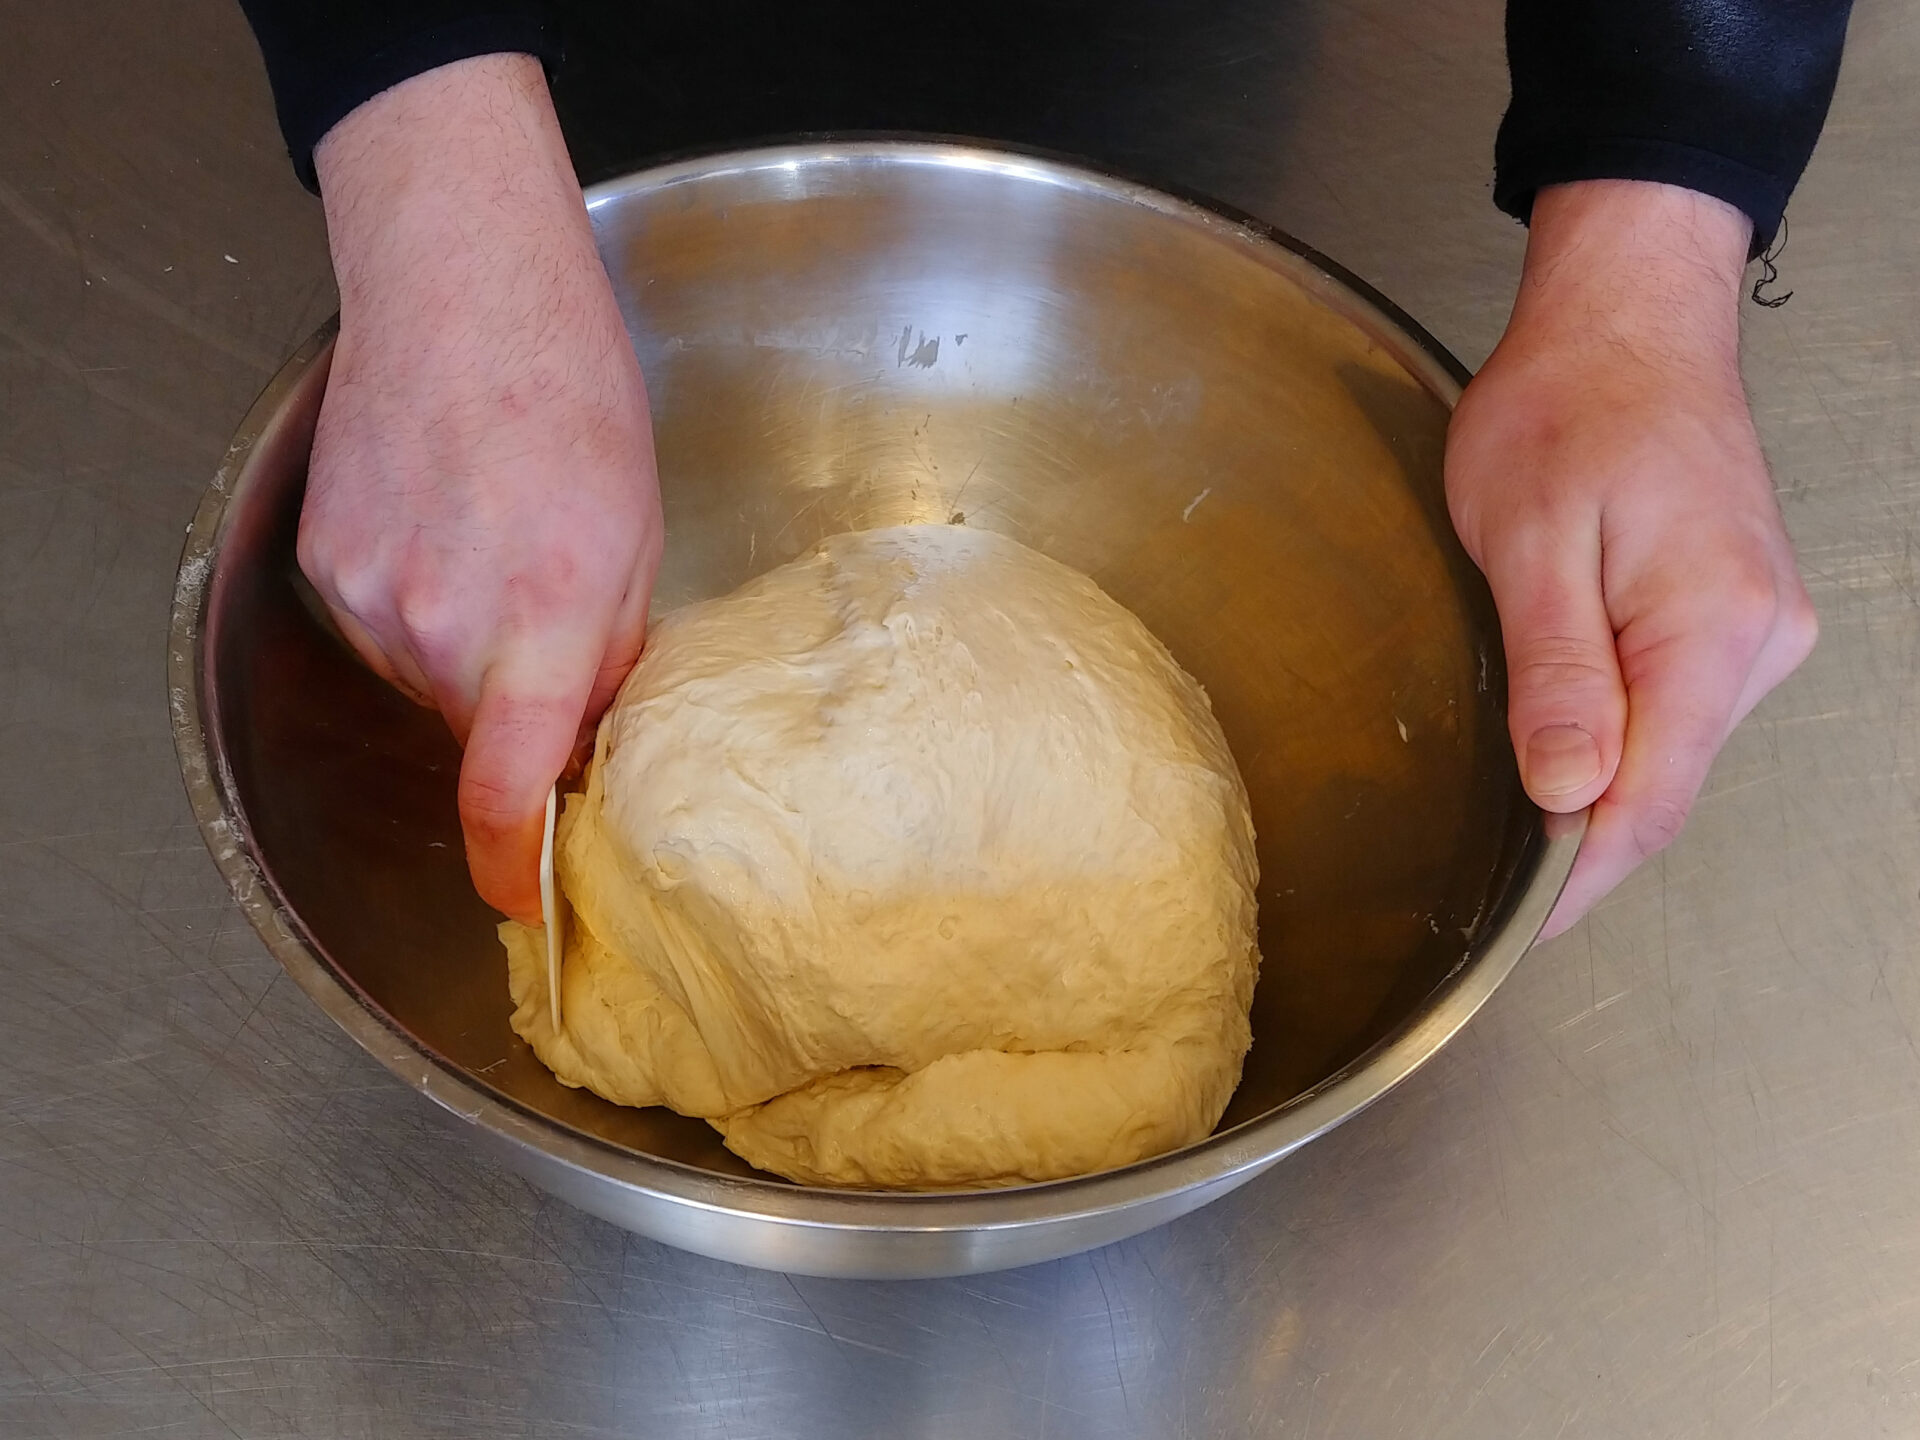
2.3. Deflate the dough right in the bowl using a dough scraper, folding the dough from one side, then over the other side of the dough, and finally press it down. Repeat this process a few times from all sides of the dough. After deflating, let the dough rise until it doubles in size before another deflation (about 1 – 2 hours). The deflation process is best to repeat at least 3 times, but more would be even better.
Note:
Intervals between deflating can be even longer (even overnight), so it’s better to make it fit with your schedule. If you want to rise your bread longer, keep it at room temperature (not in a warm place) and use a significantly larger bowl to provide the dough enough space while its’ rising. Make sure that the total rising time (including all deflations) won’t be longer than 24 hours.
3. Shaping:
Shape into a loaf of bread or baguette.
A. Shape bread:
Note:
Work on a surface (counter top) that has no flour on it.
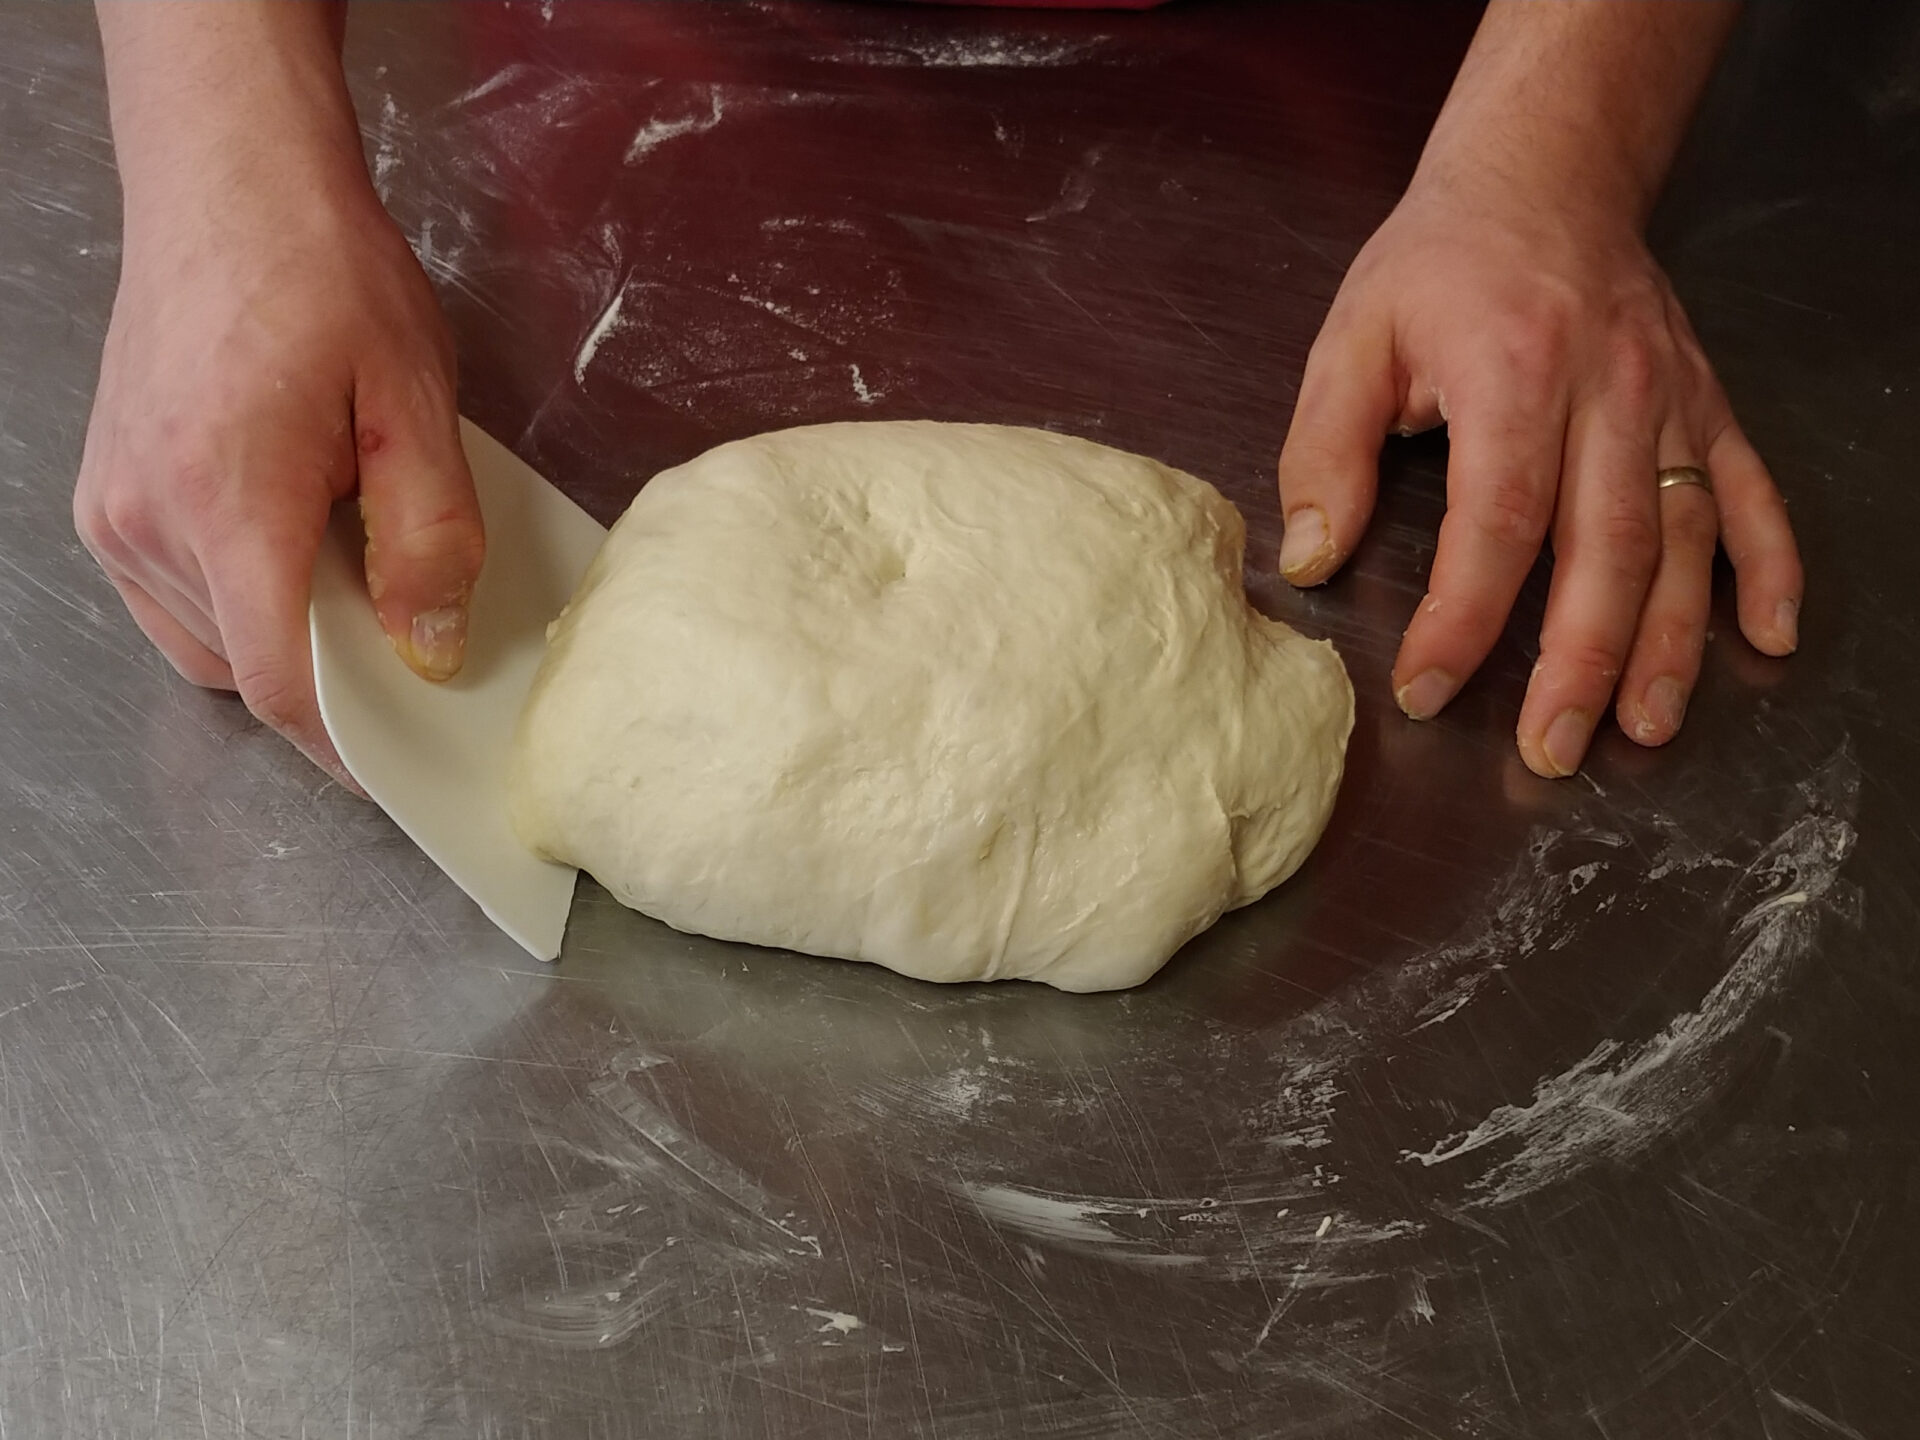
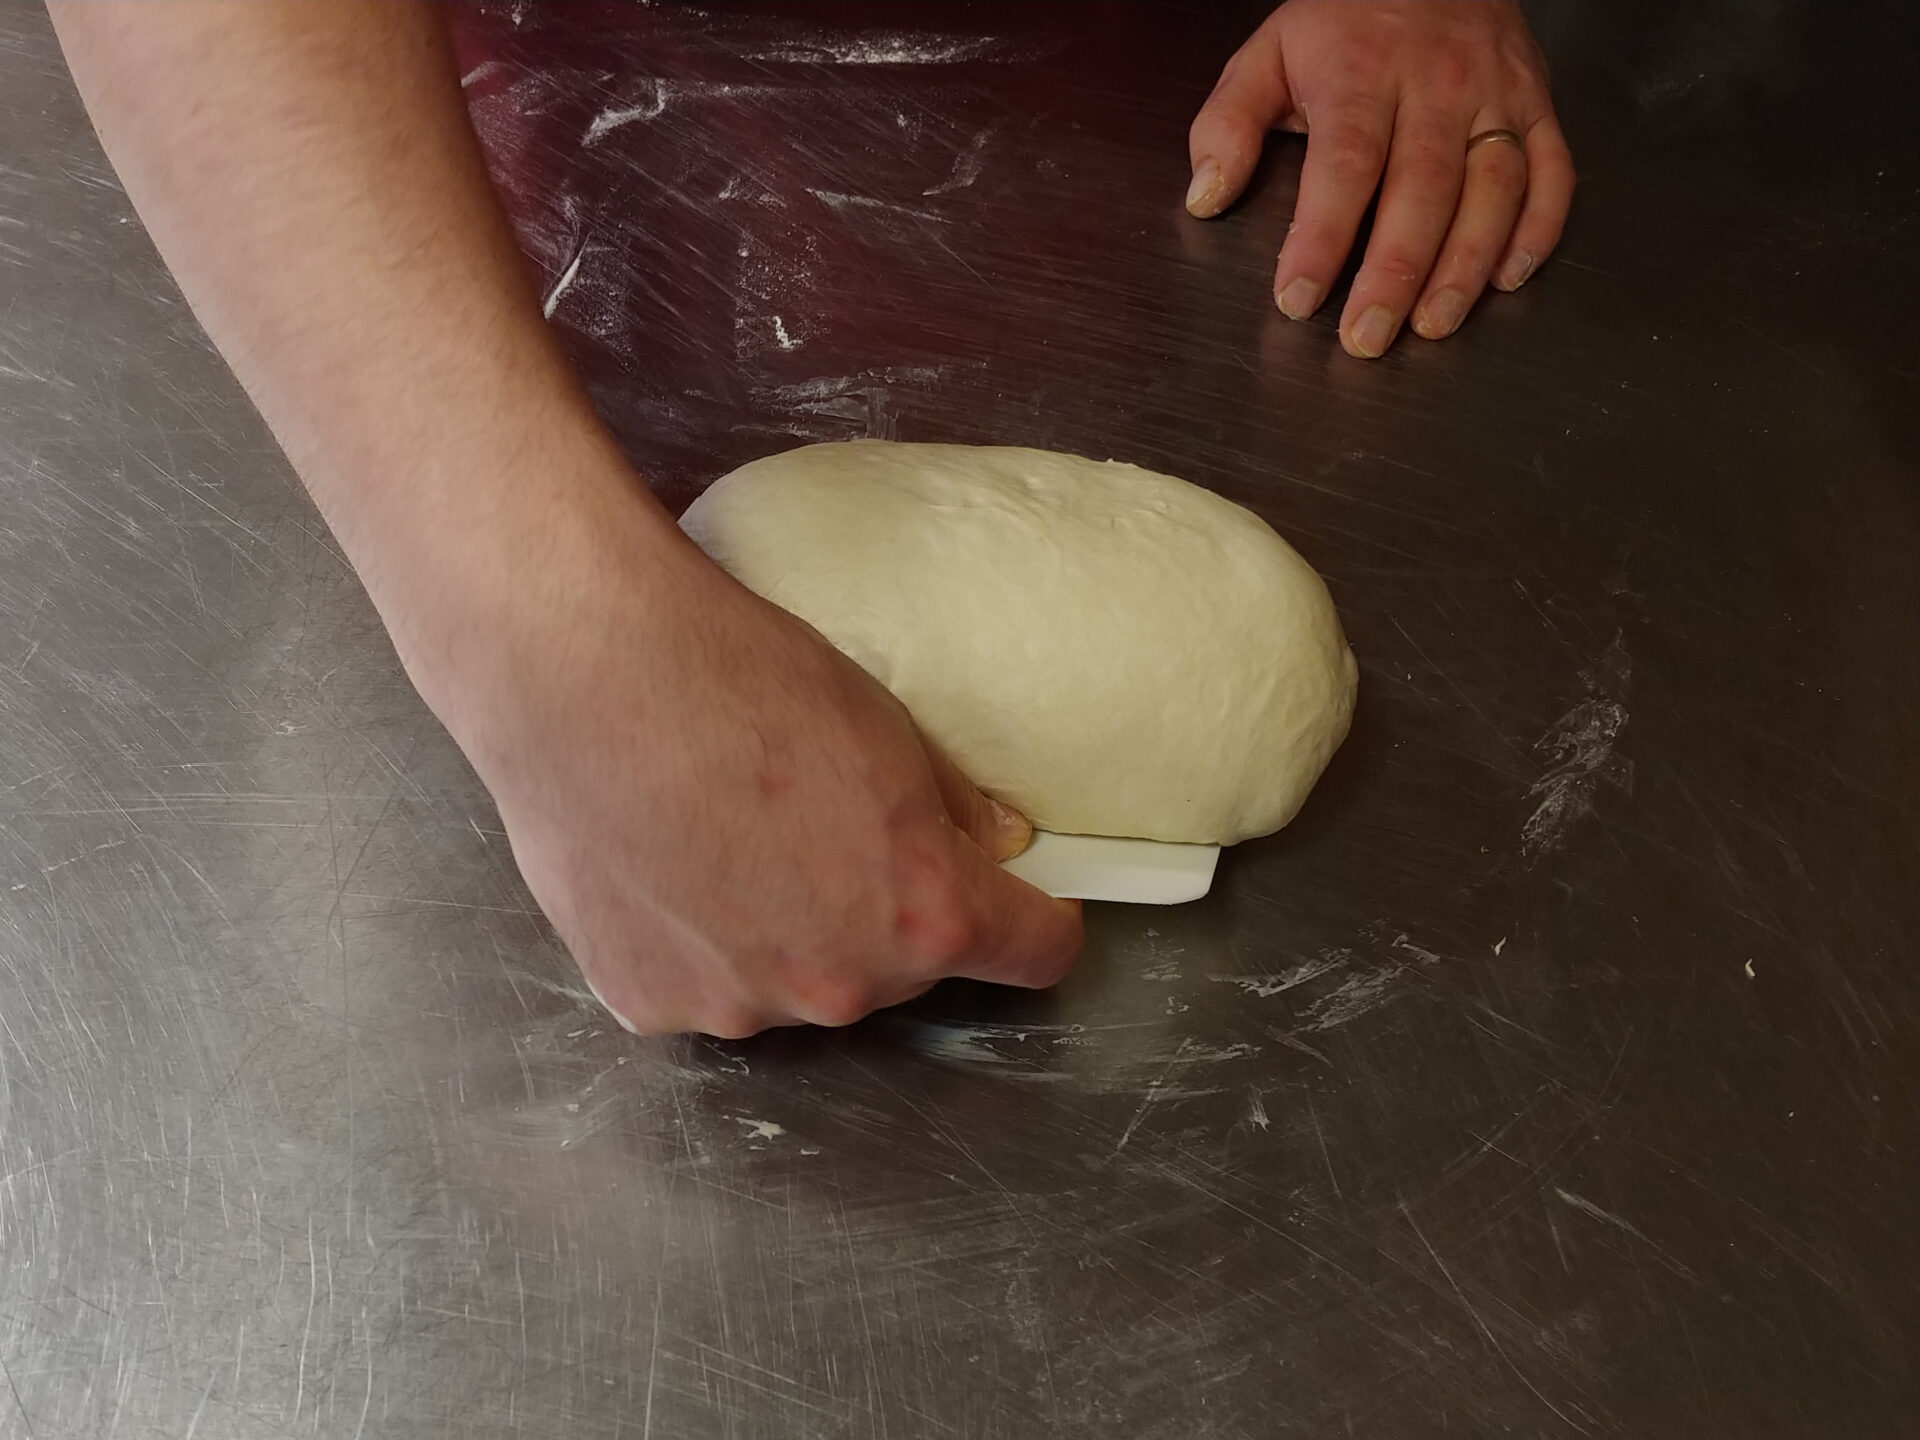
1.
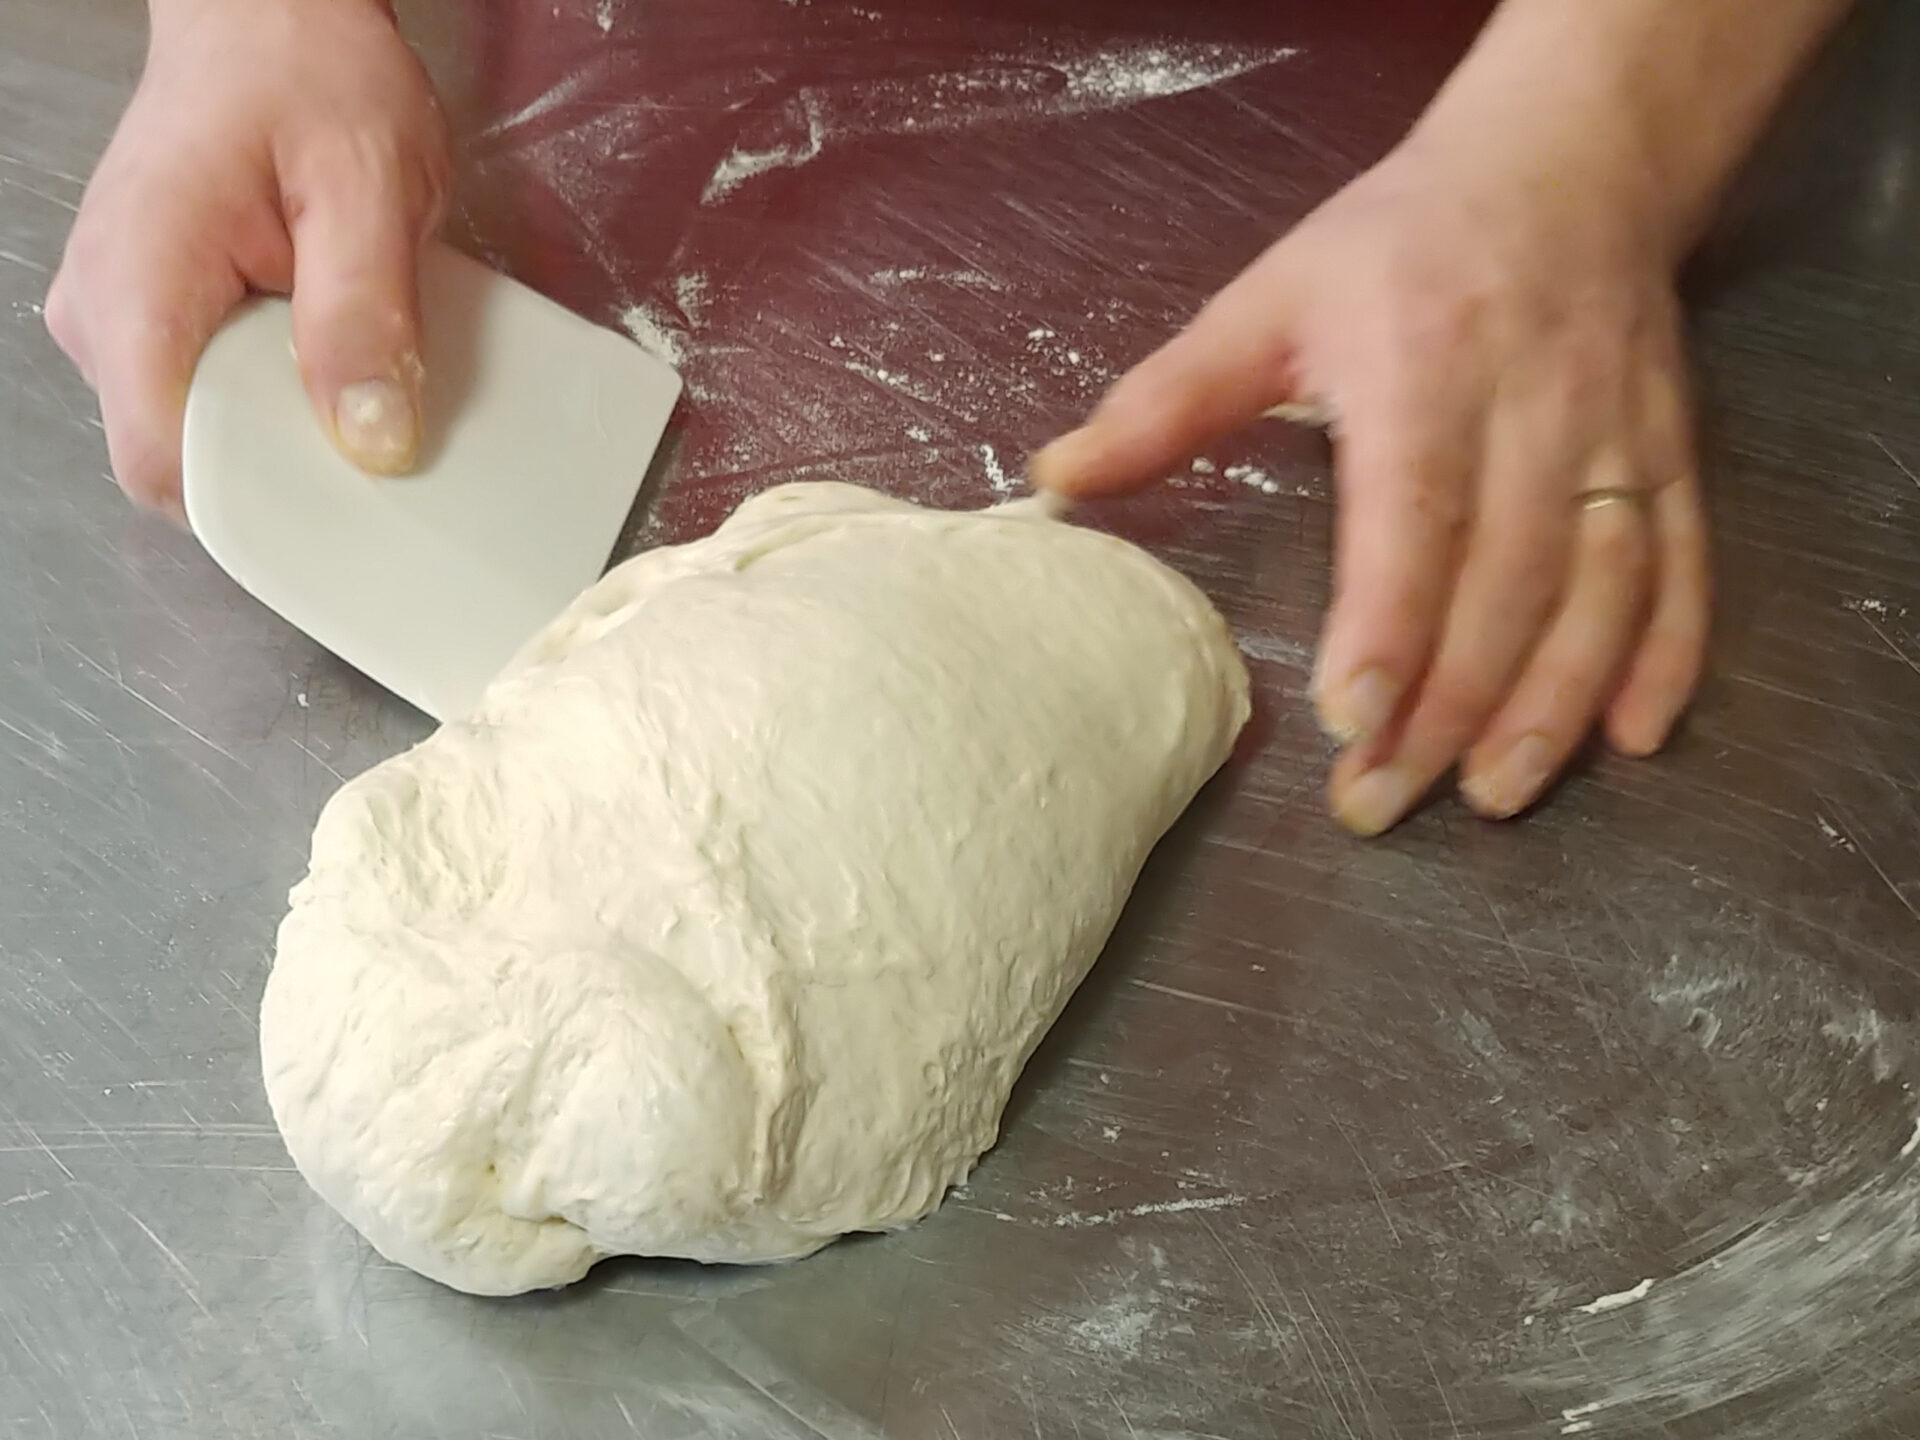
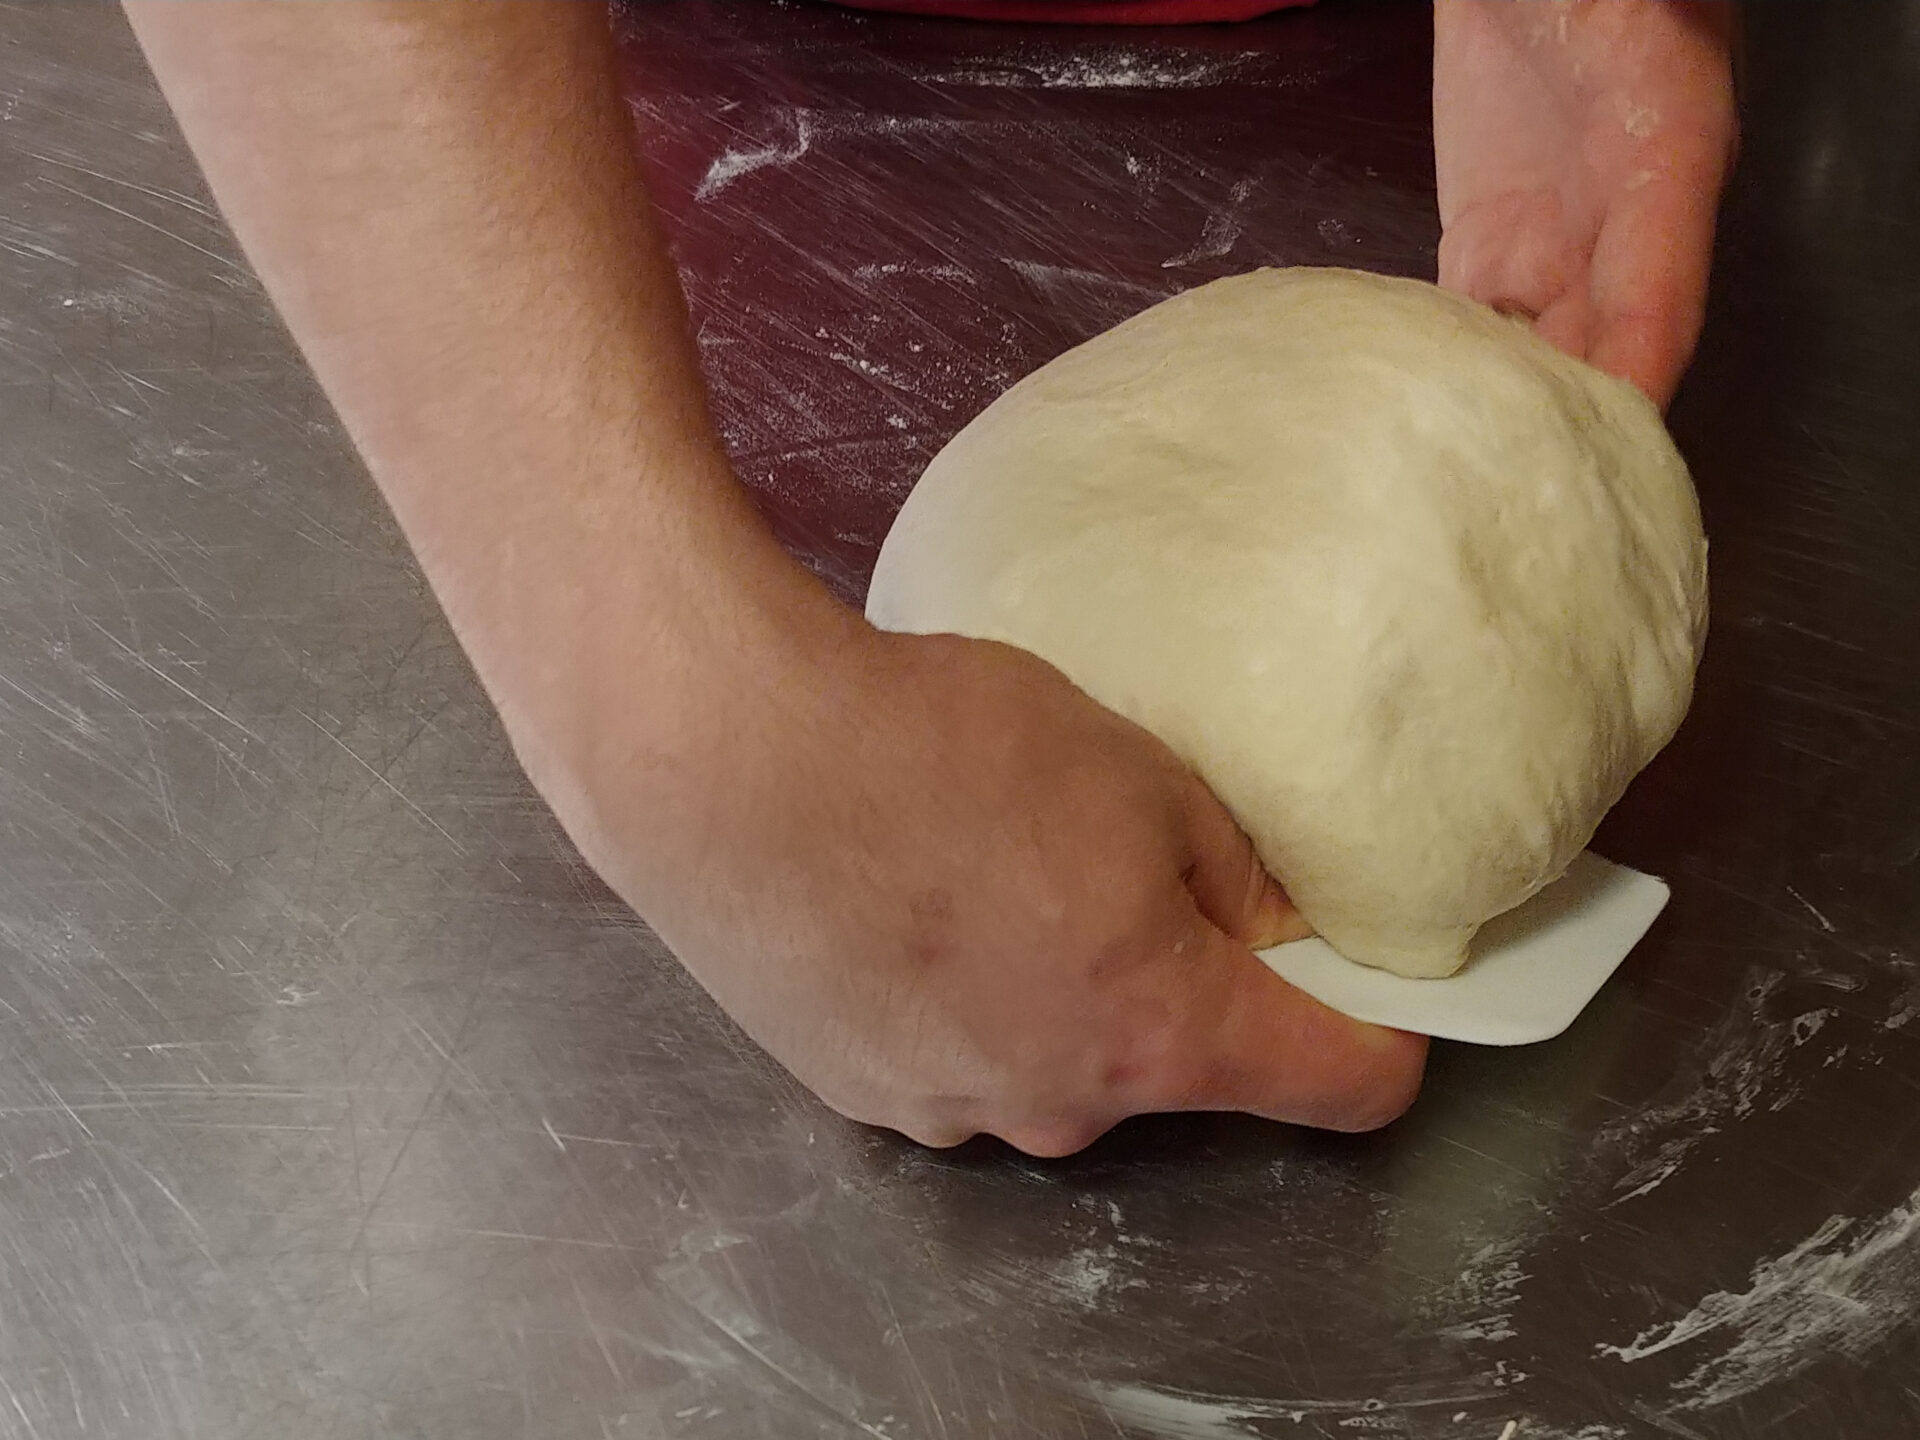
Place the dough on a surface and form the bread loaf by stretching the dough. To stretch the dough, place the bowl scraper at a slight angle against the bottom part of the dough while making sure that the bottom of the bowl scraper is touching the table.
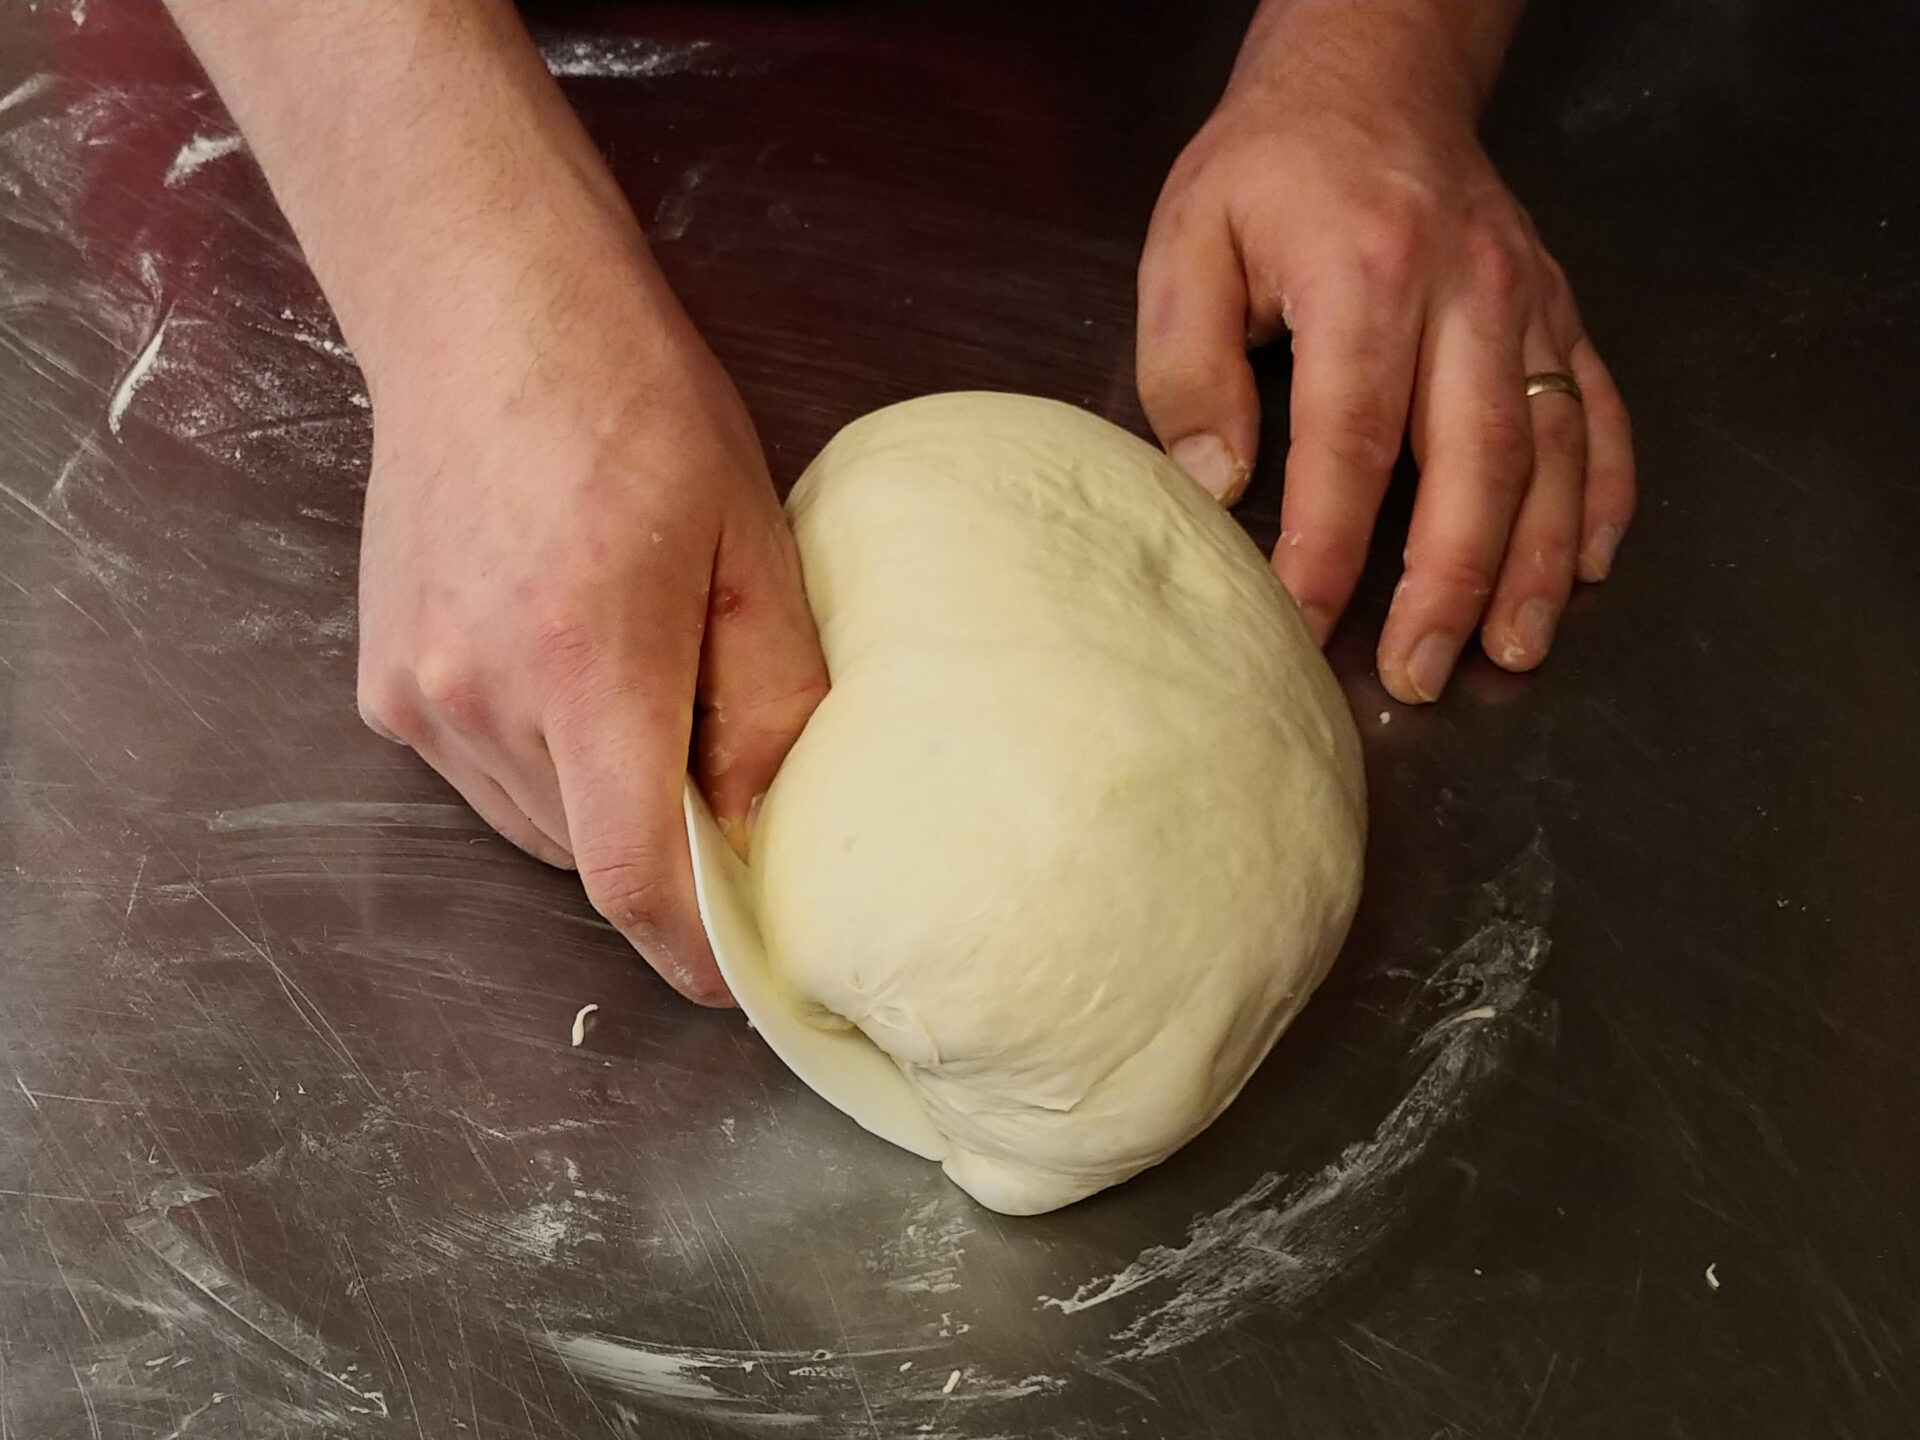
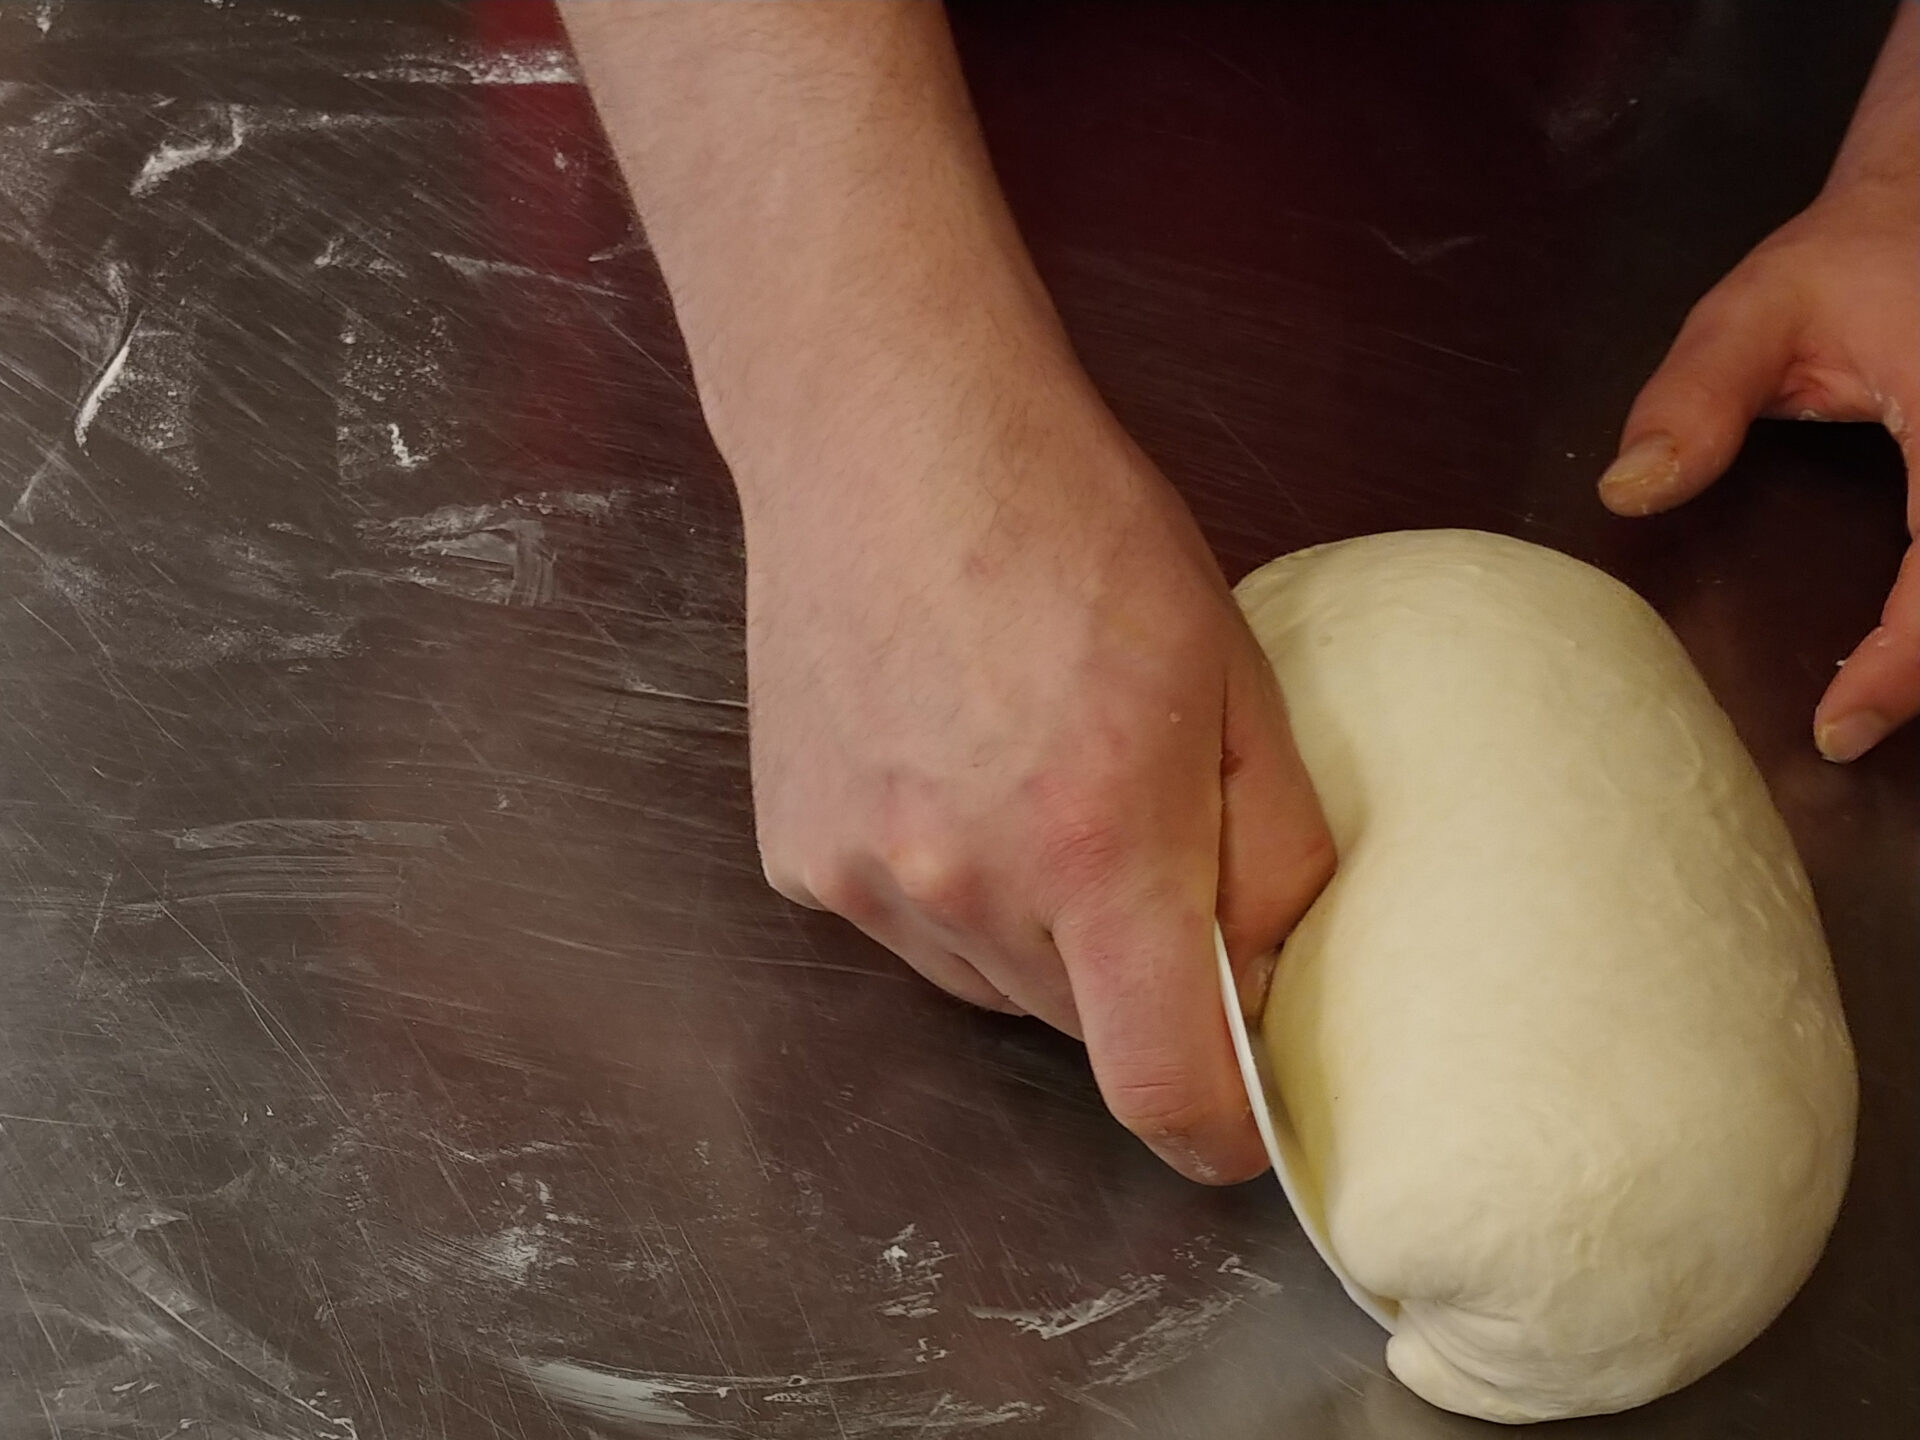
2.
Then, keeping one hand on the top of the dough, push the scraper to move the dough slightly. The dough will roll slightly and stretch at the same time.
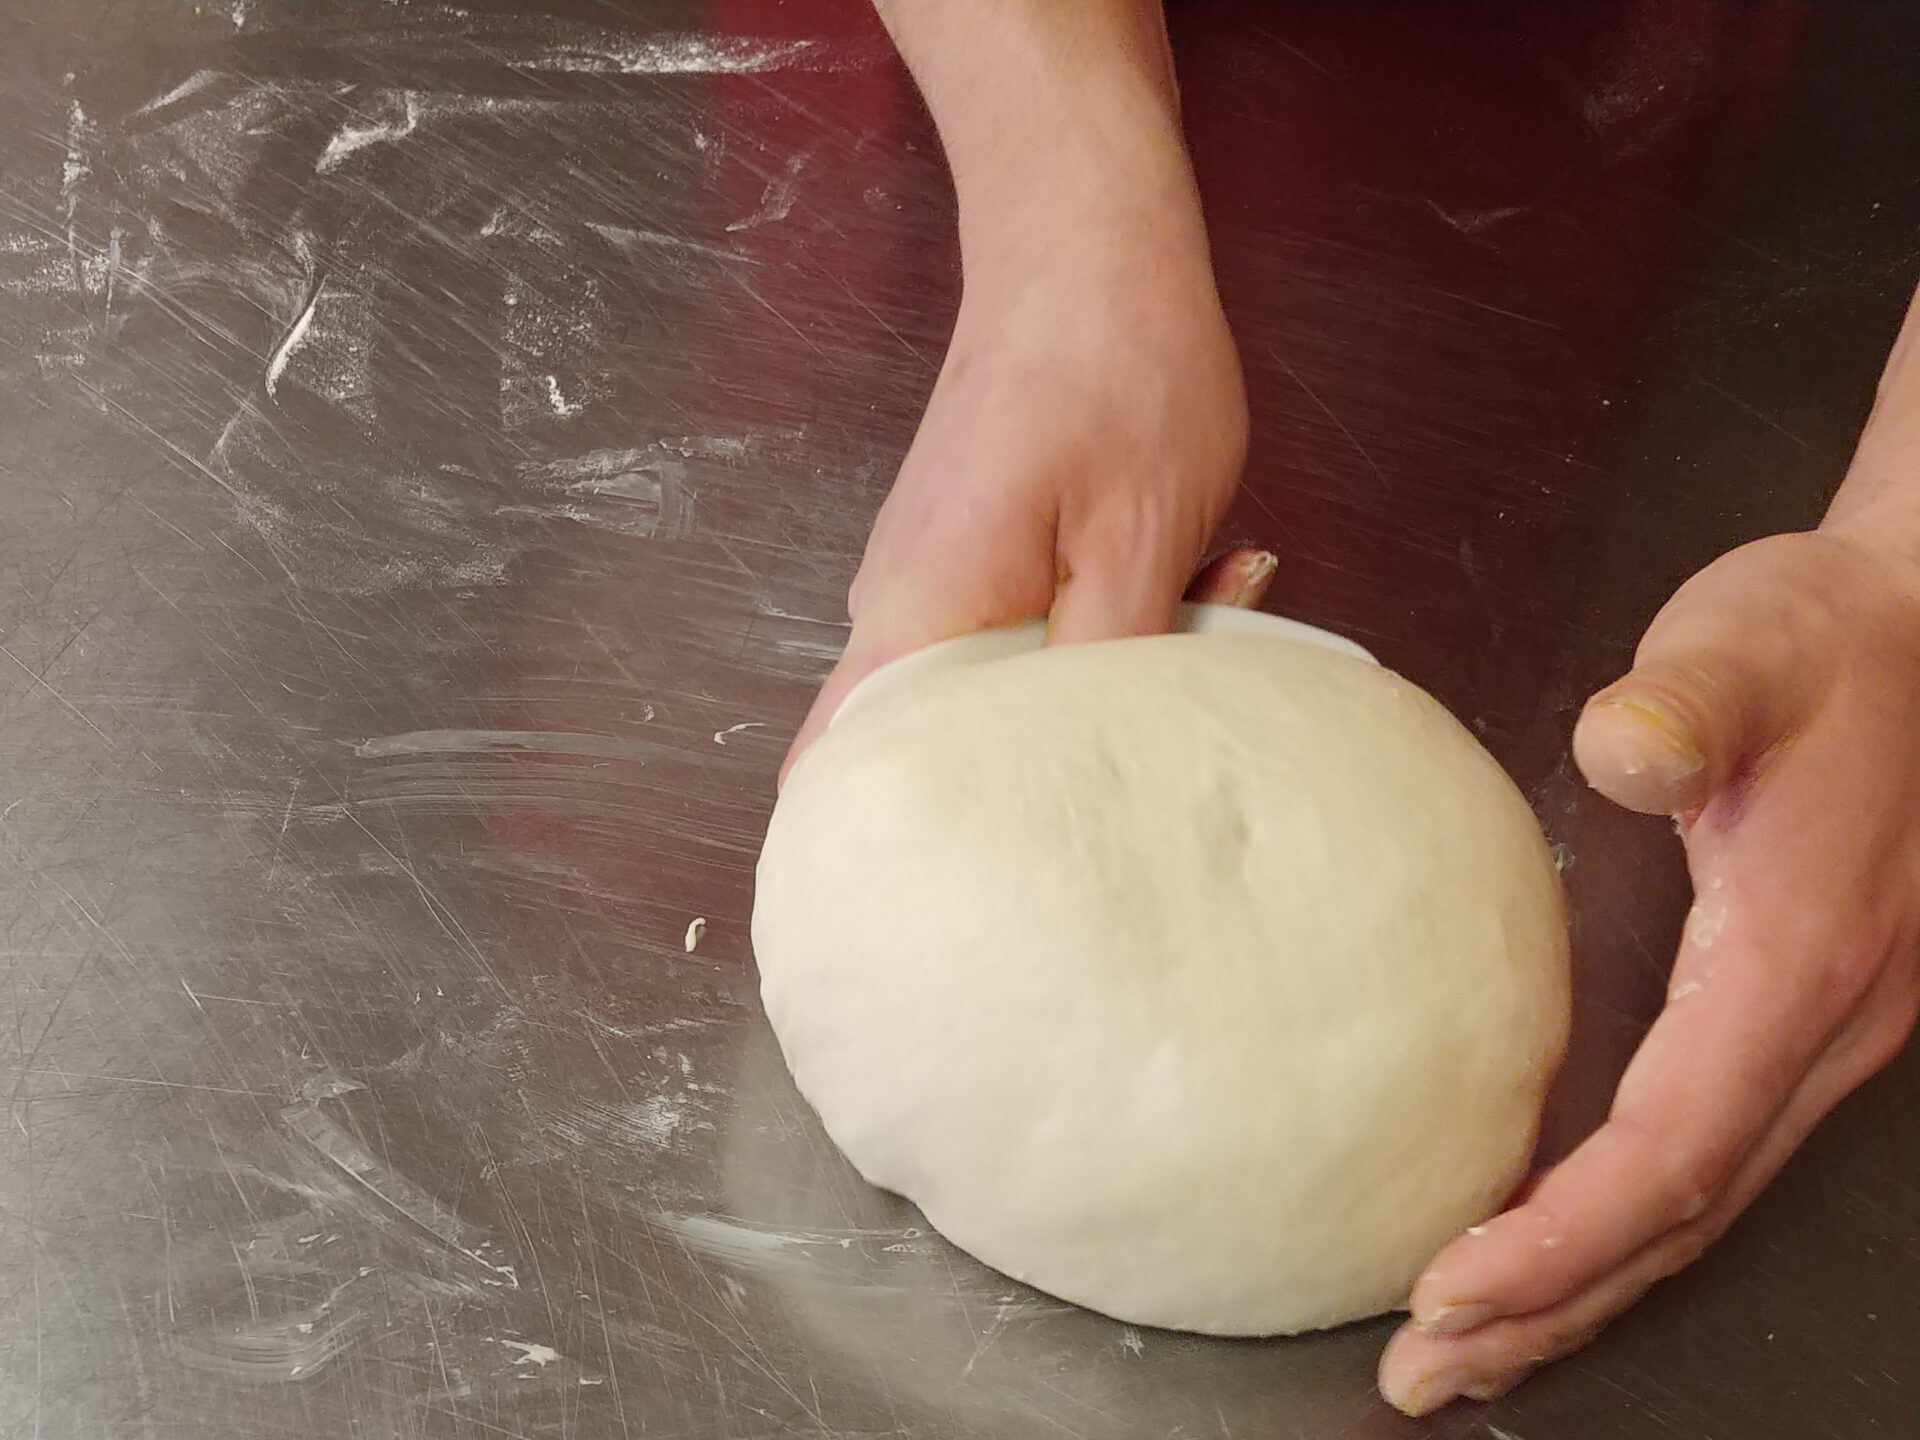
3.
Repeat this step a few times until a loaf of bread is shaped. Each time, turn the dough about 90° to the right (usually about 2 times from each of the four sides).
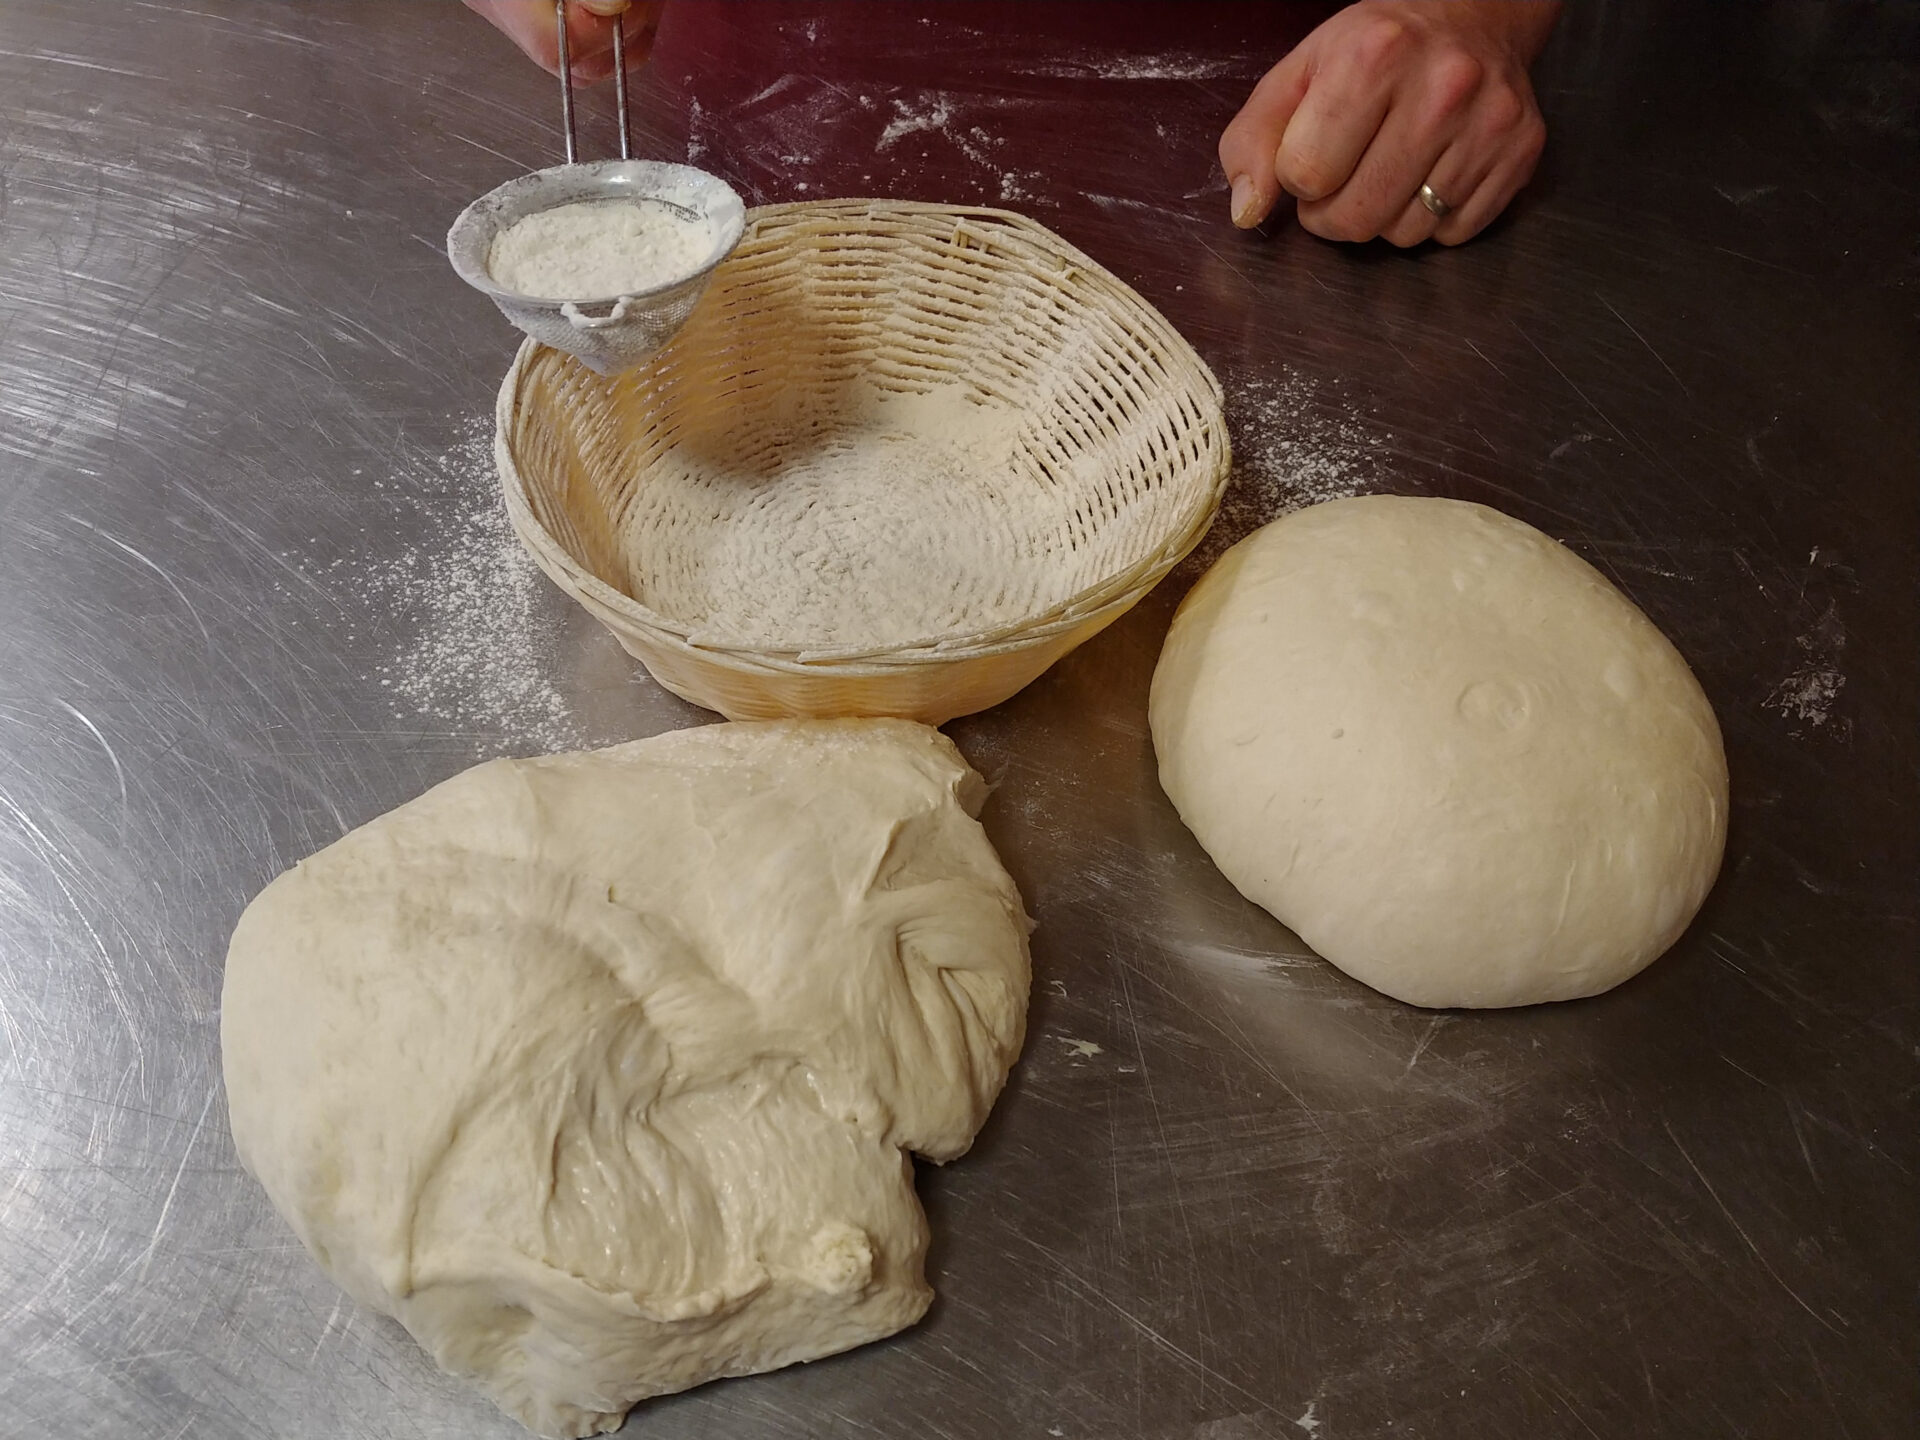
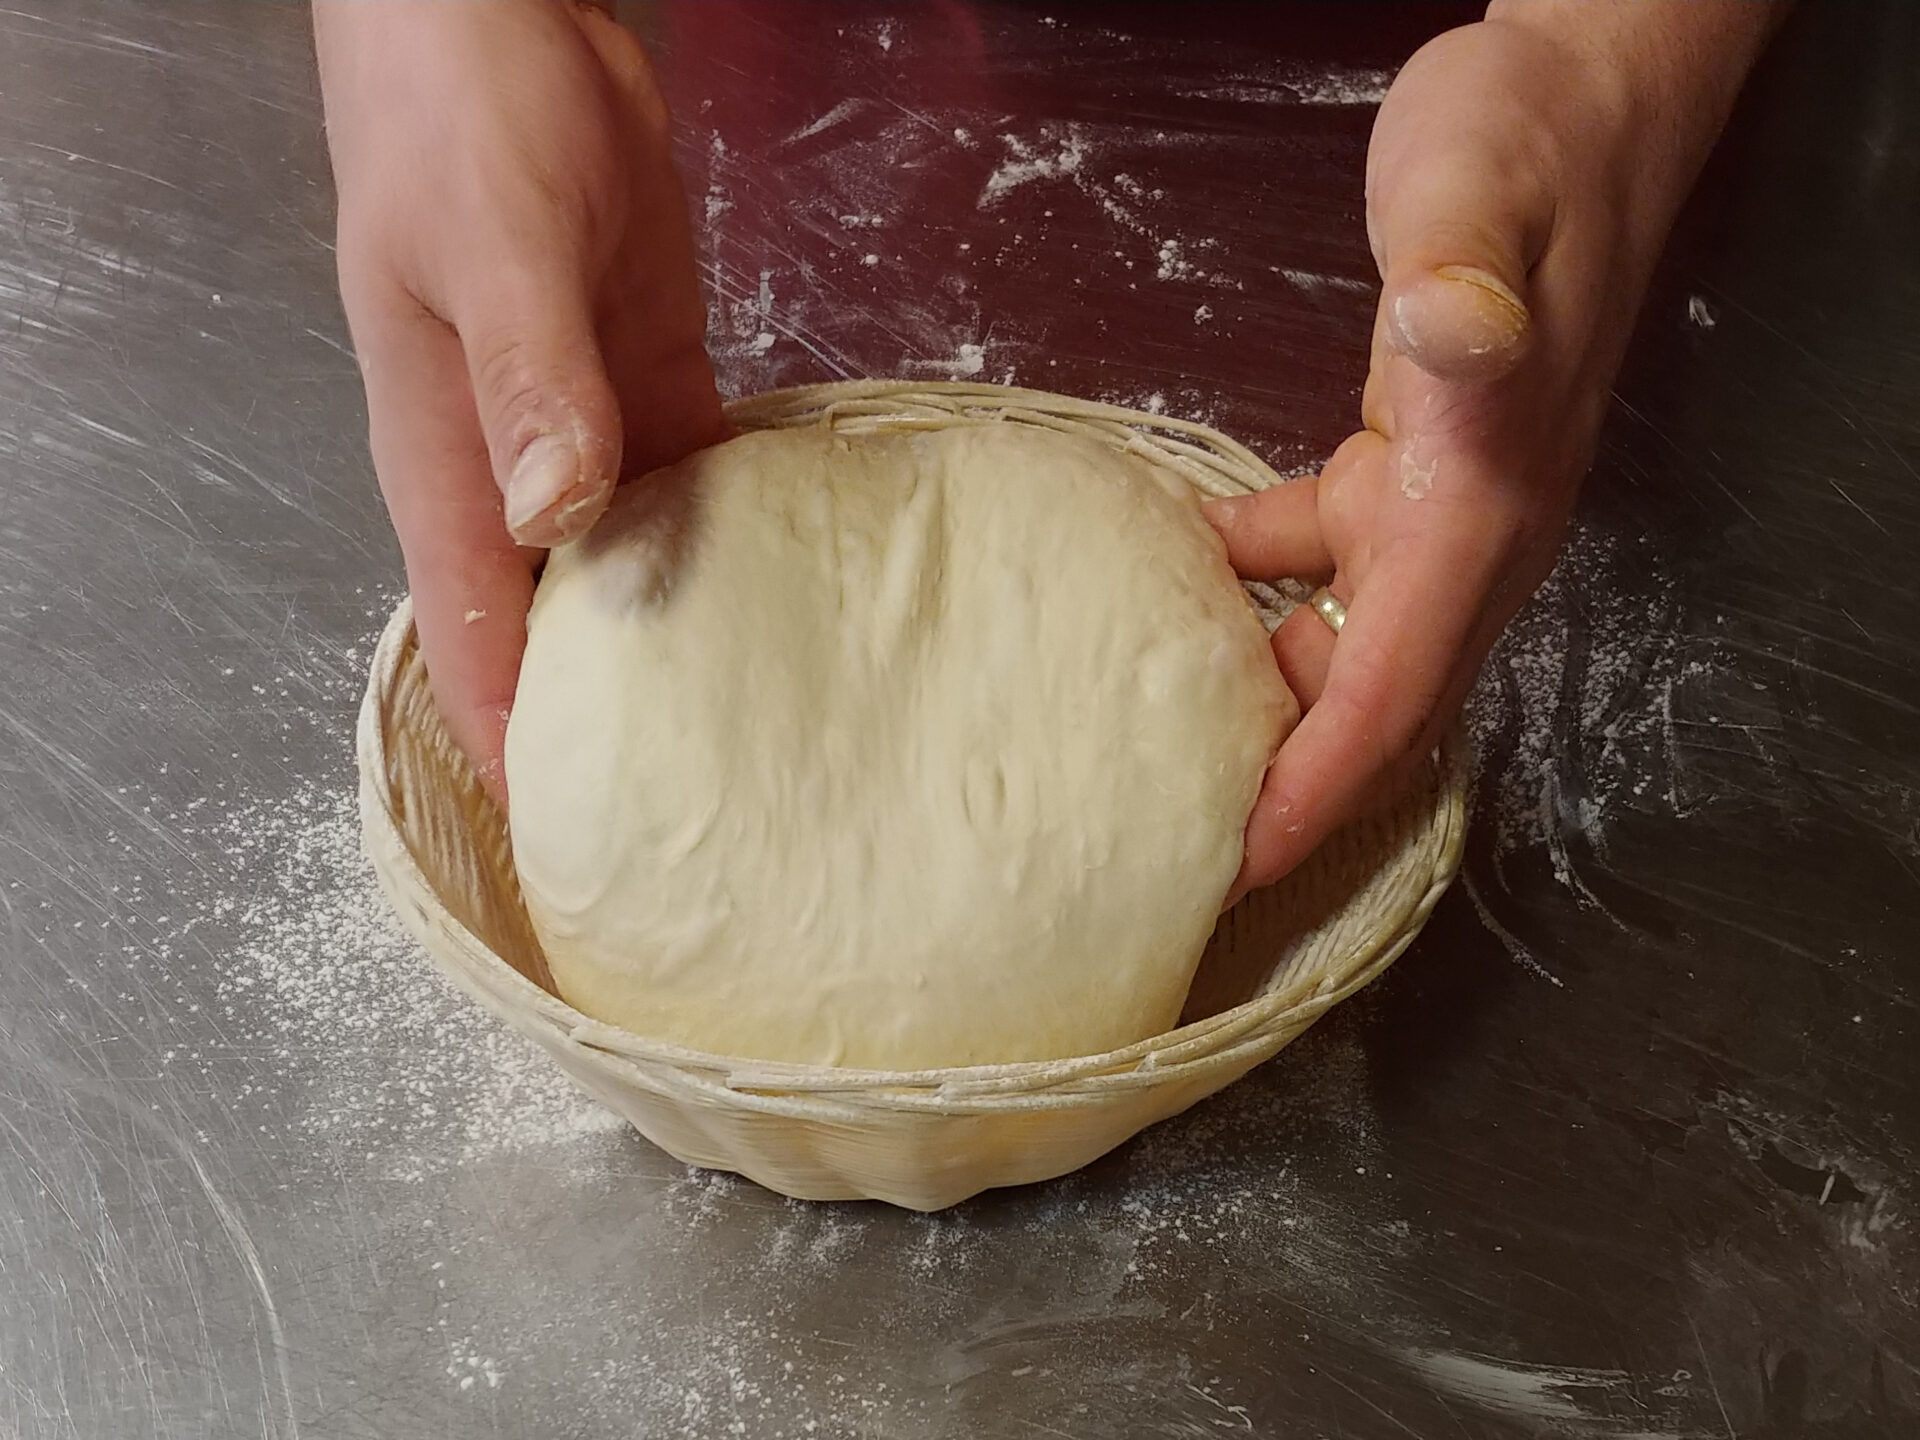
4.
Generously flour the proofing basket and place the shaped loaf in it.
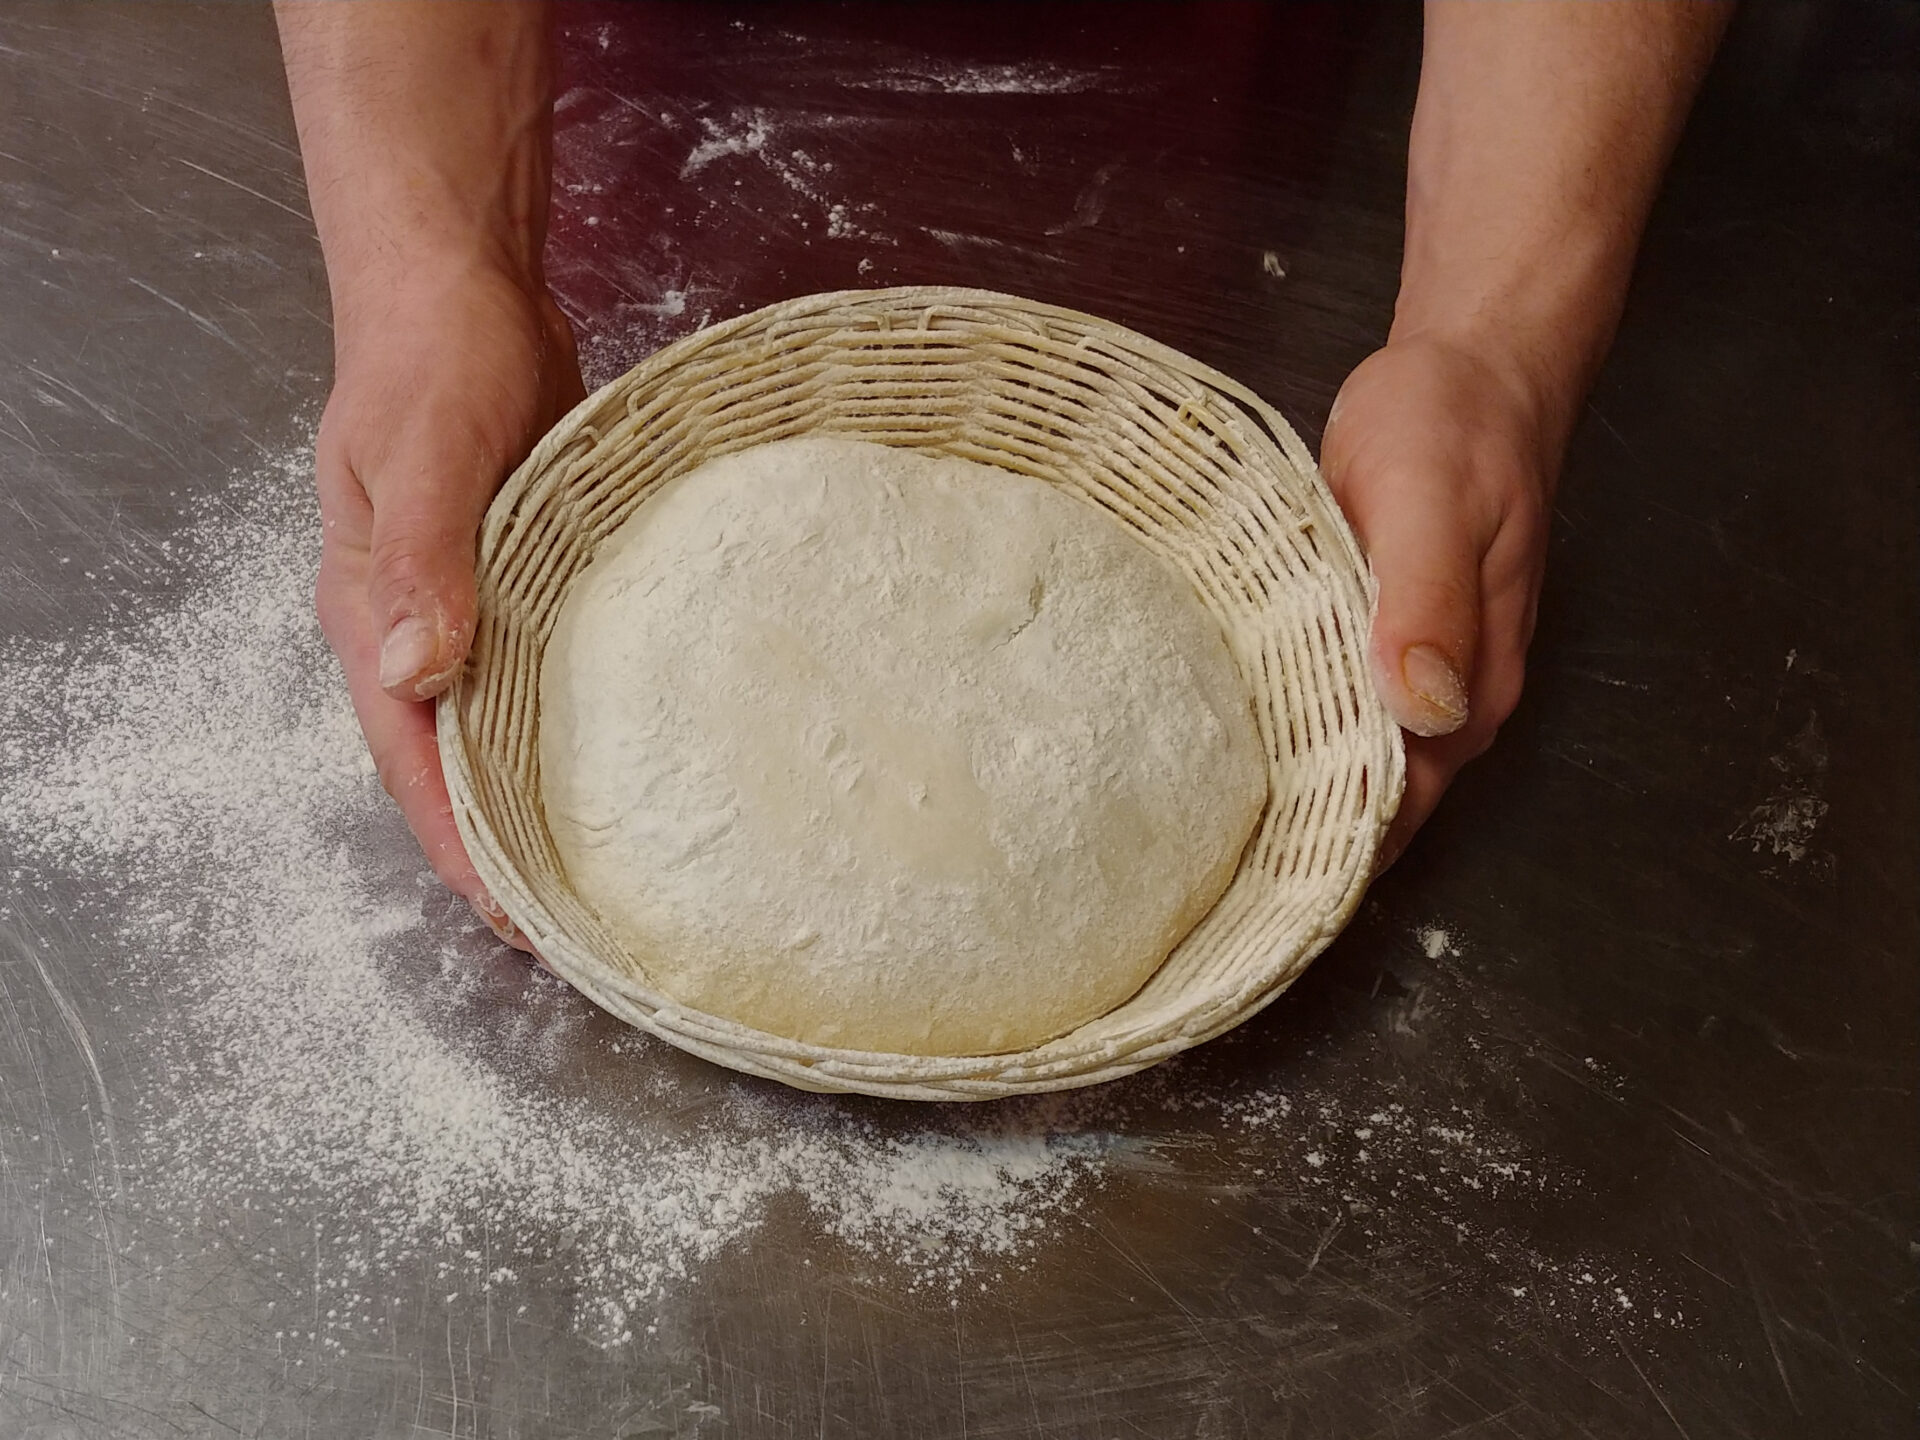
5.
Flour the top of the loaf.


B. Optionally shape like a baguette:
Note:
Work on a surface (counter top) that has no flour on it.
1.
Place dough on a surface and split into four even pieces using a dough scraper and scale (if you prefer smaller baguettes, you can separate it to even more parts than four).
2.
Form each piece into compact dough balls by stretching the dough. To stretch the dough, place the bowl scraper at a slight angle against the bottom part of the dough while making sure that the bottom of the bowl scraper is touching the table.
3.
Then, keeping one hand on the top of the dough, push the scraper to move the dough slightly. The dough will roll slightly and stretch at the same time.
4.
Repeat this step a few times until a nice dough ball is shaped. Each time, turn the dough about 90° to the right (usually about 2 times from each of the four sides).
5.
Place on a lightly floured surface and lightly flour the top. Cover the balls with a kitchen towel. Let rise for about 30 minutes.
6.
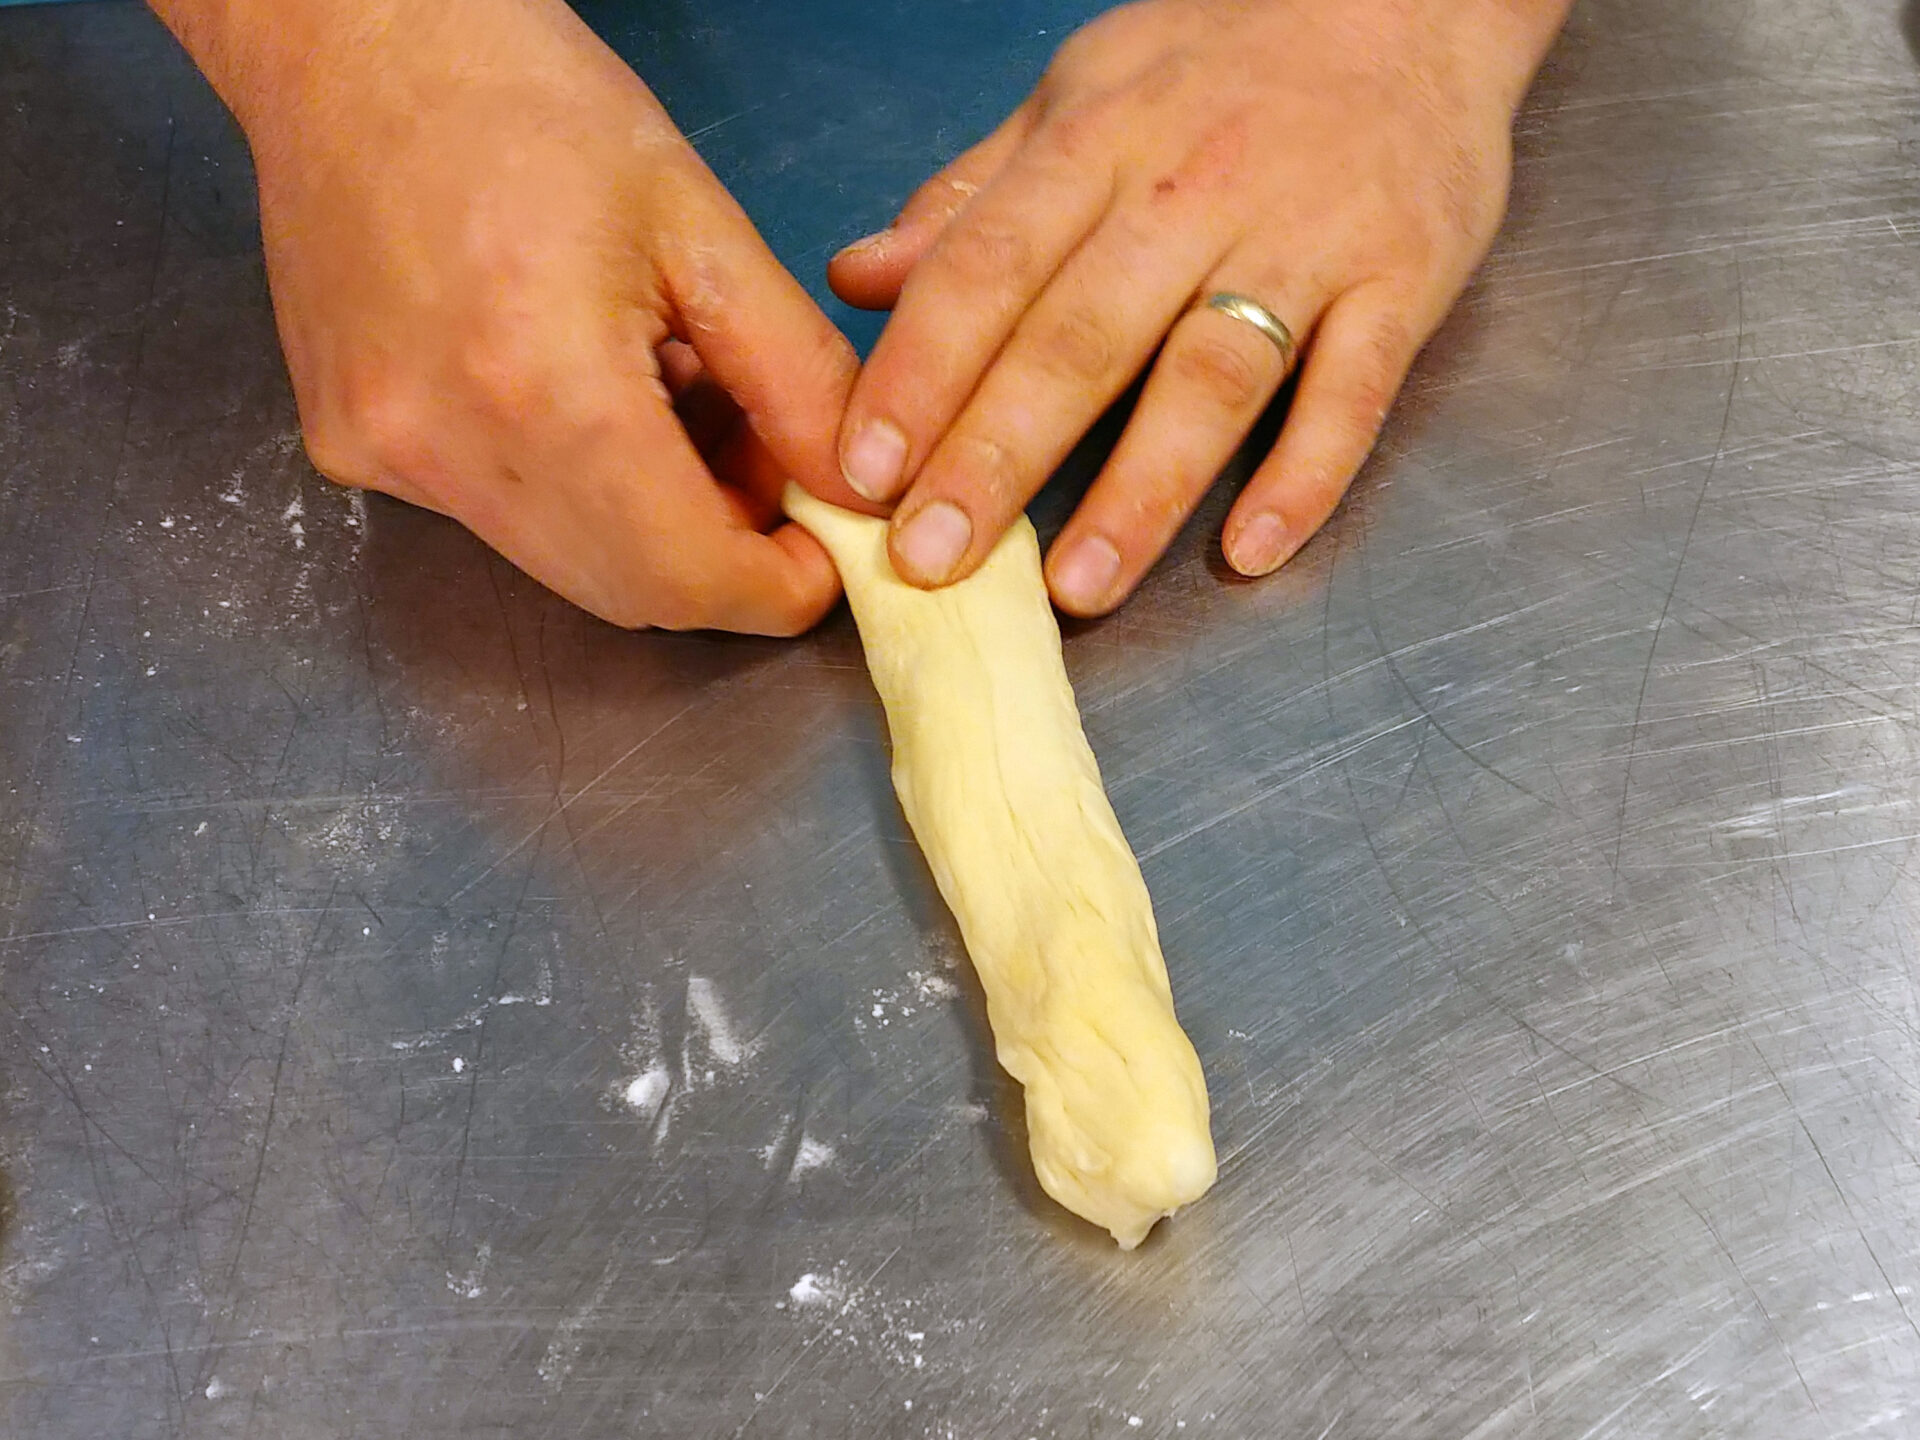
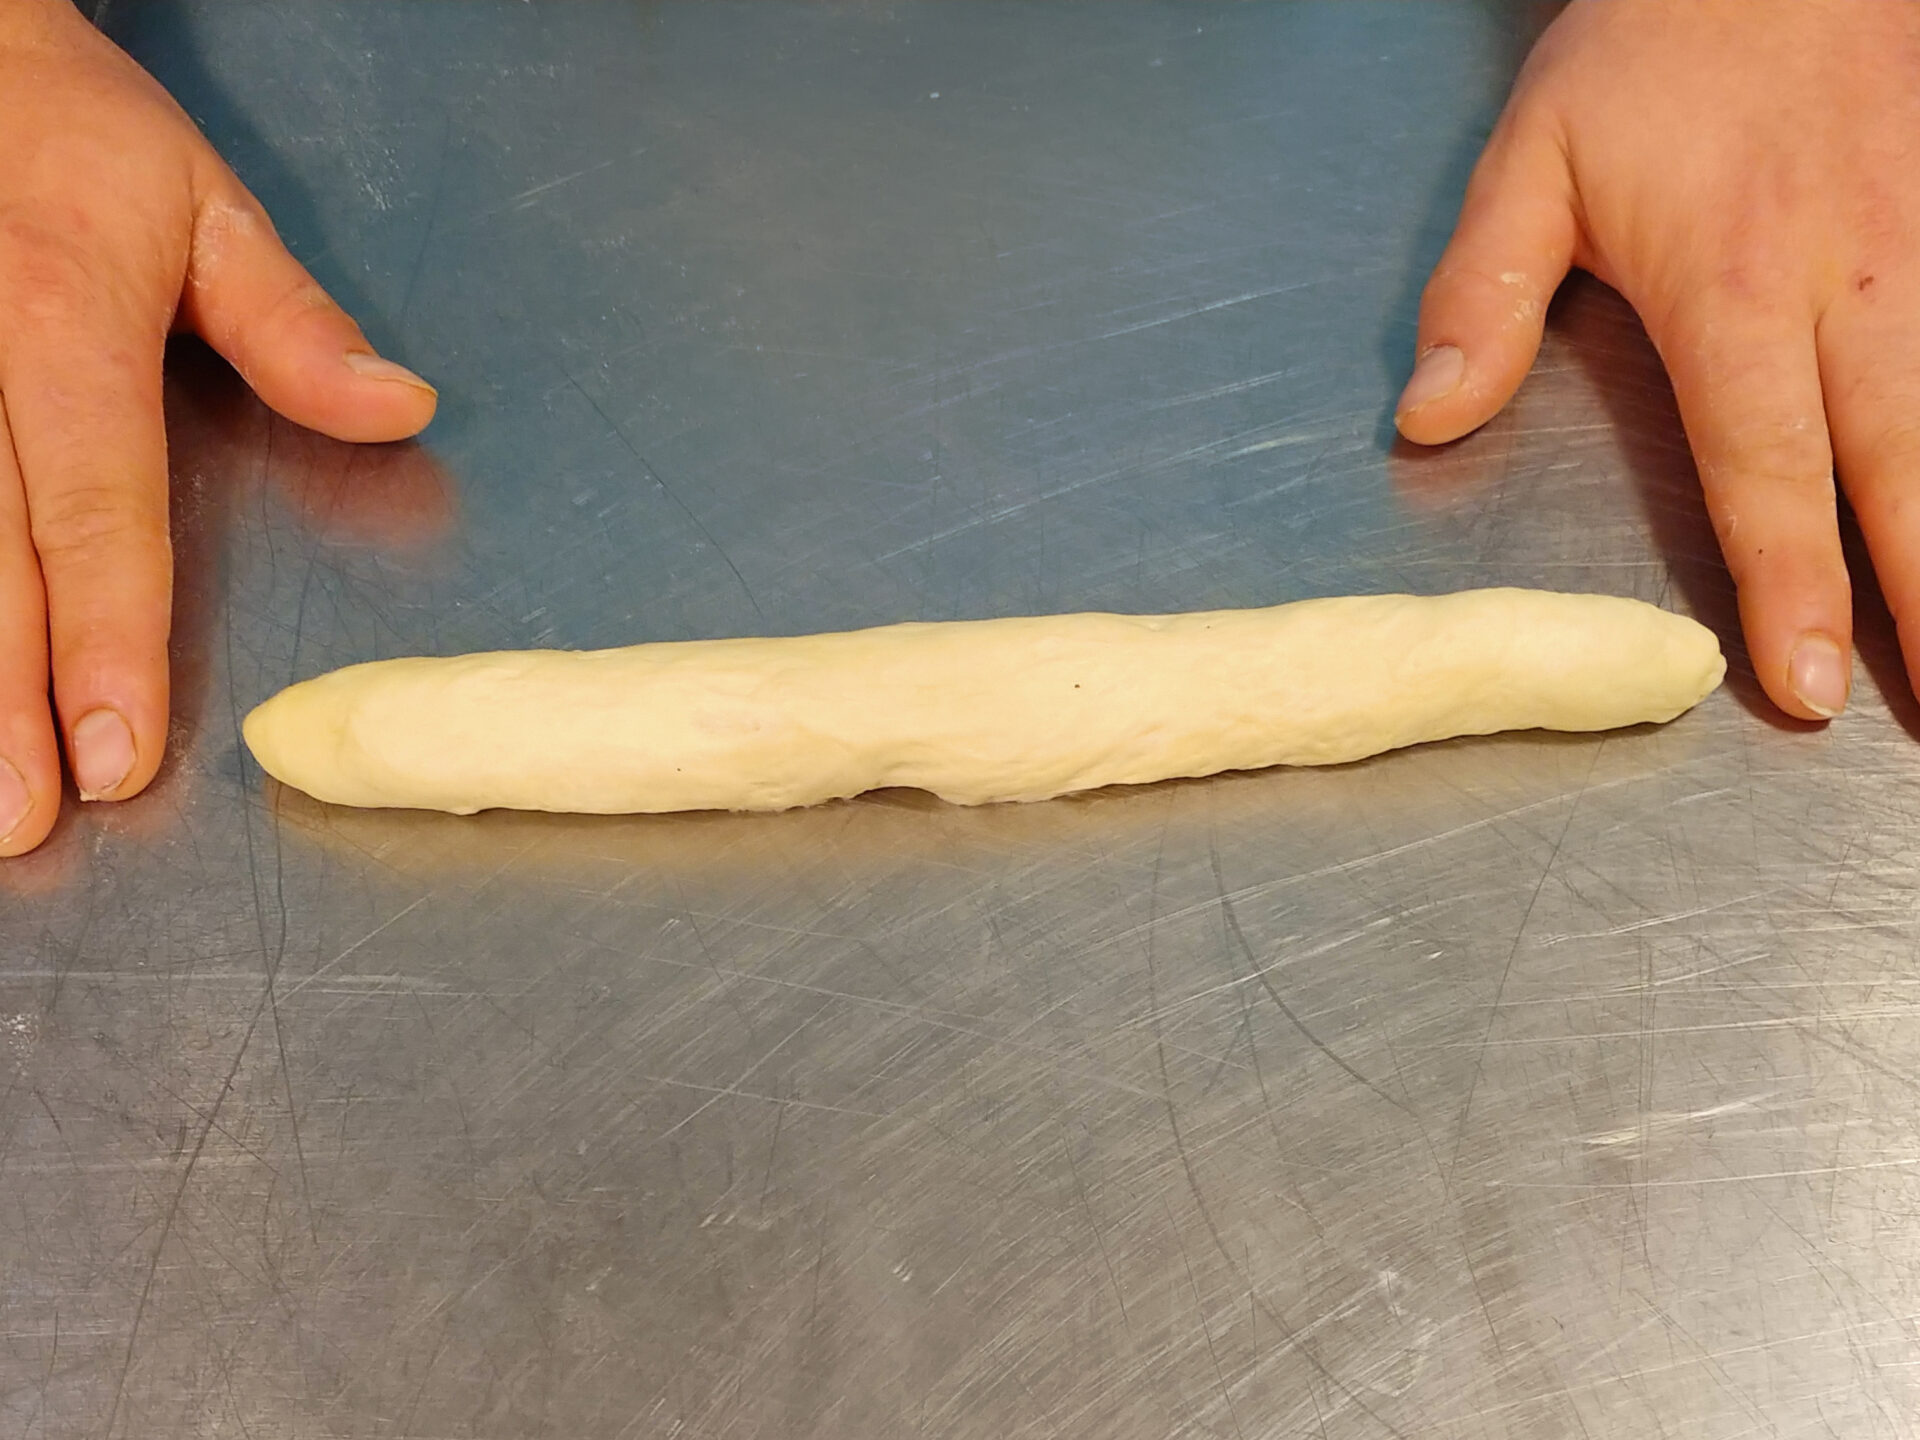
Start forming baguettes using your hands, roll each dough ball on a lightly floured surface into a long and skinny roll (no more than 1 ½” thick).
7.
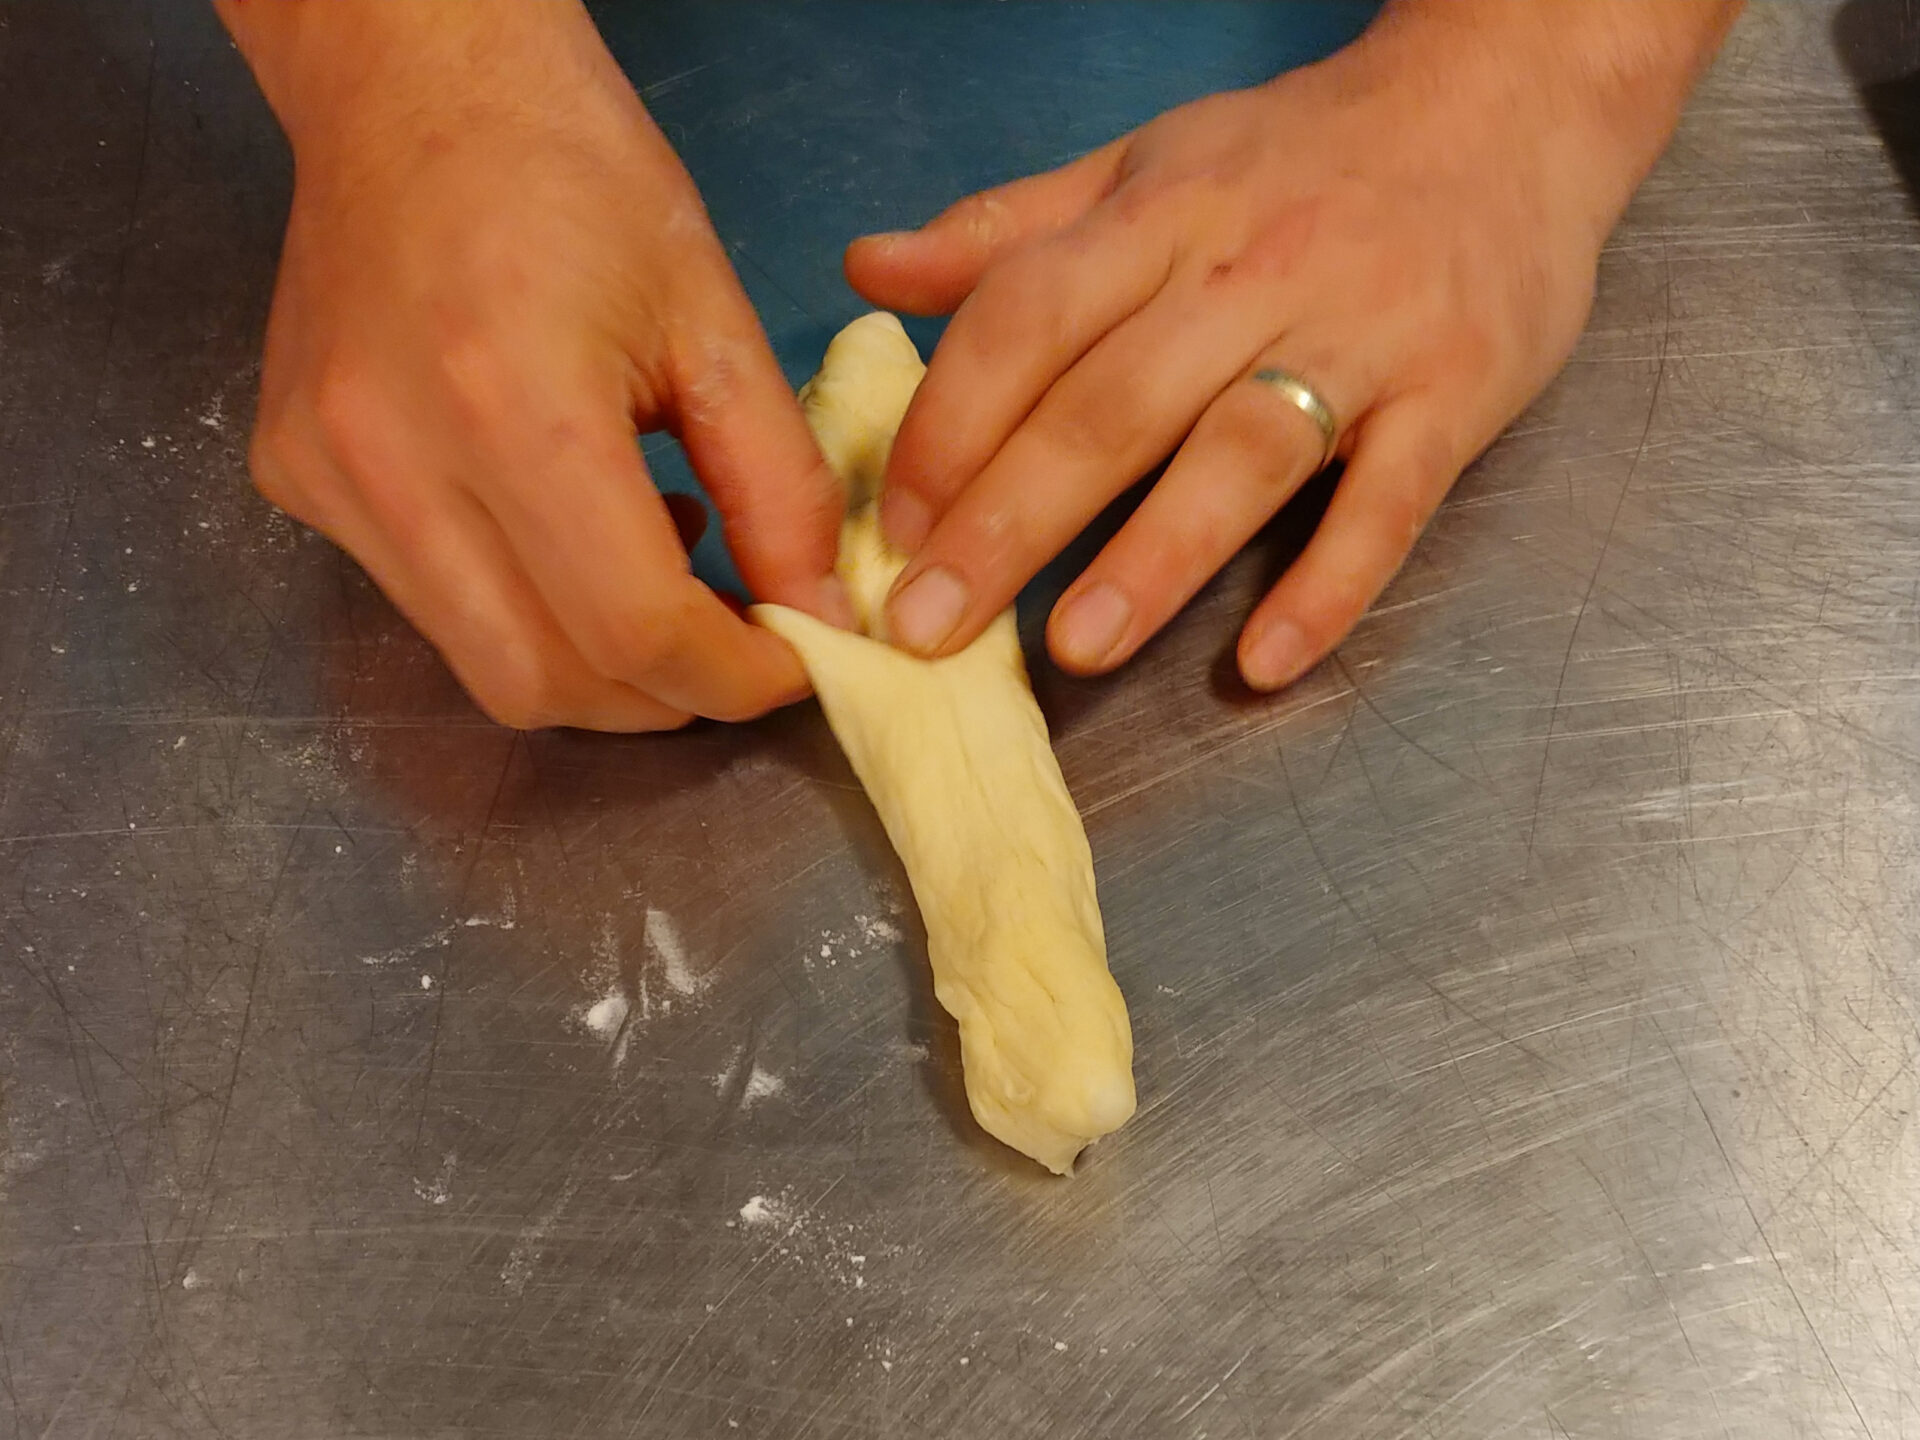
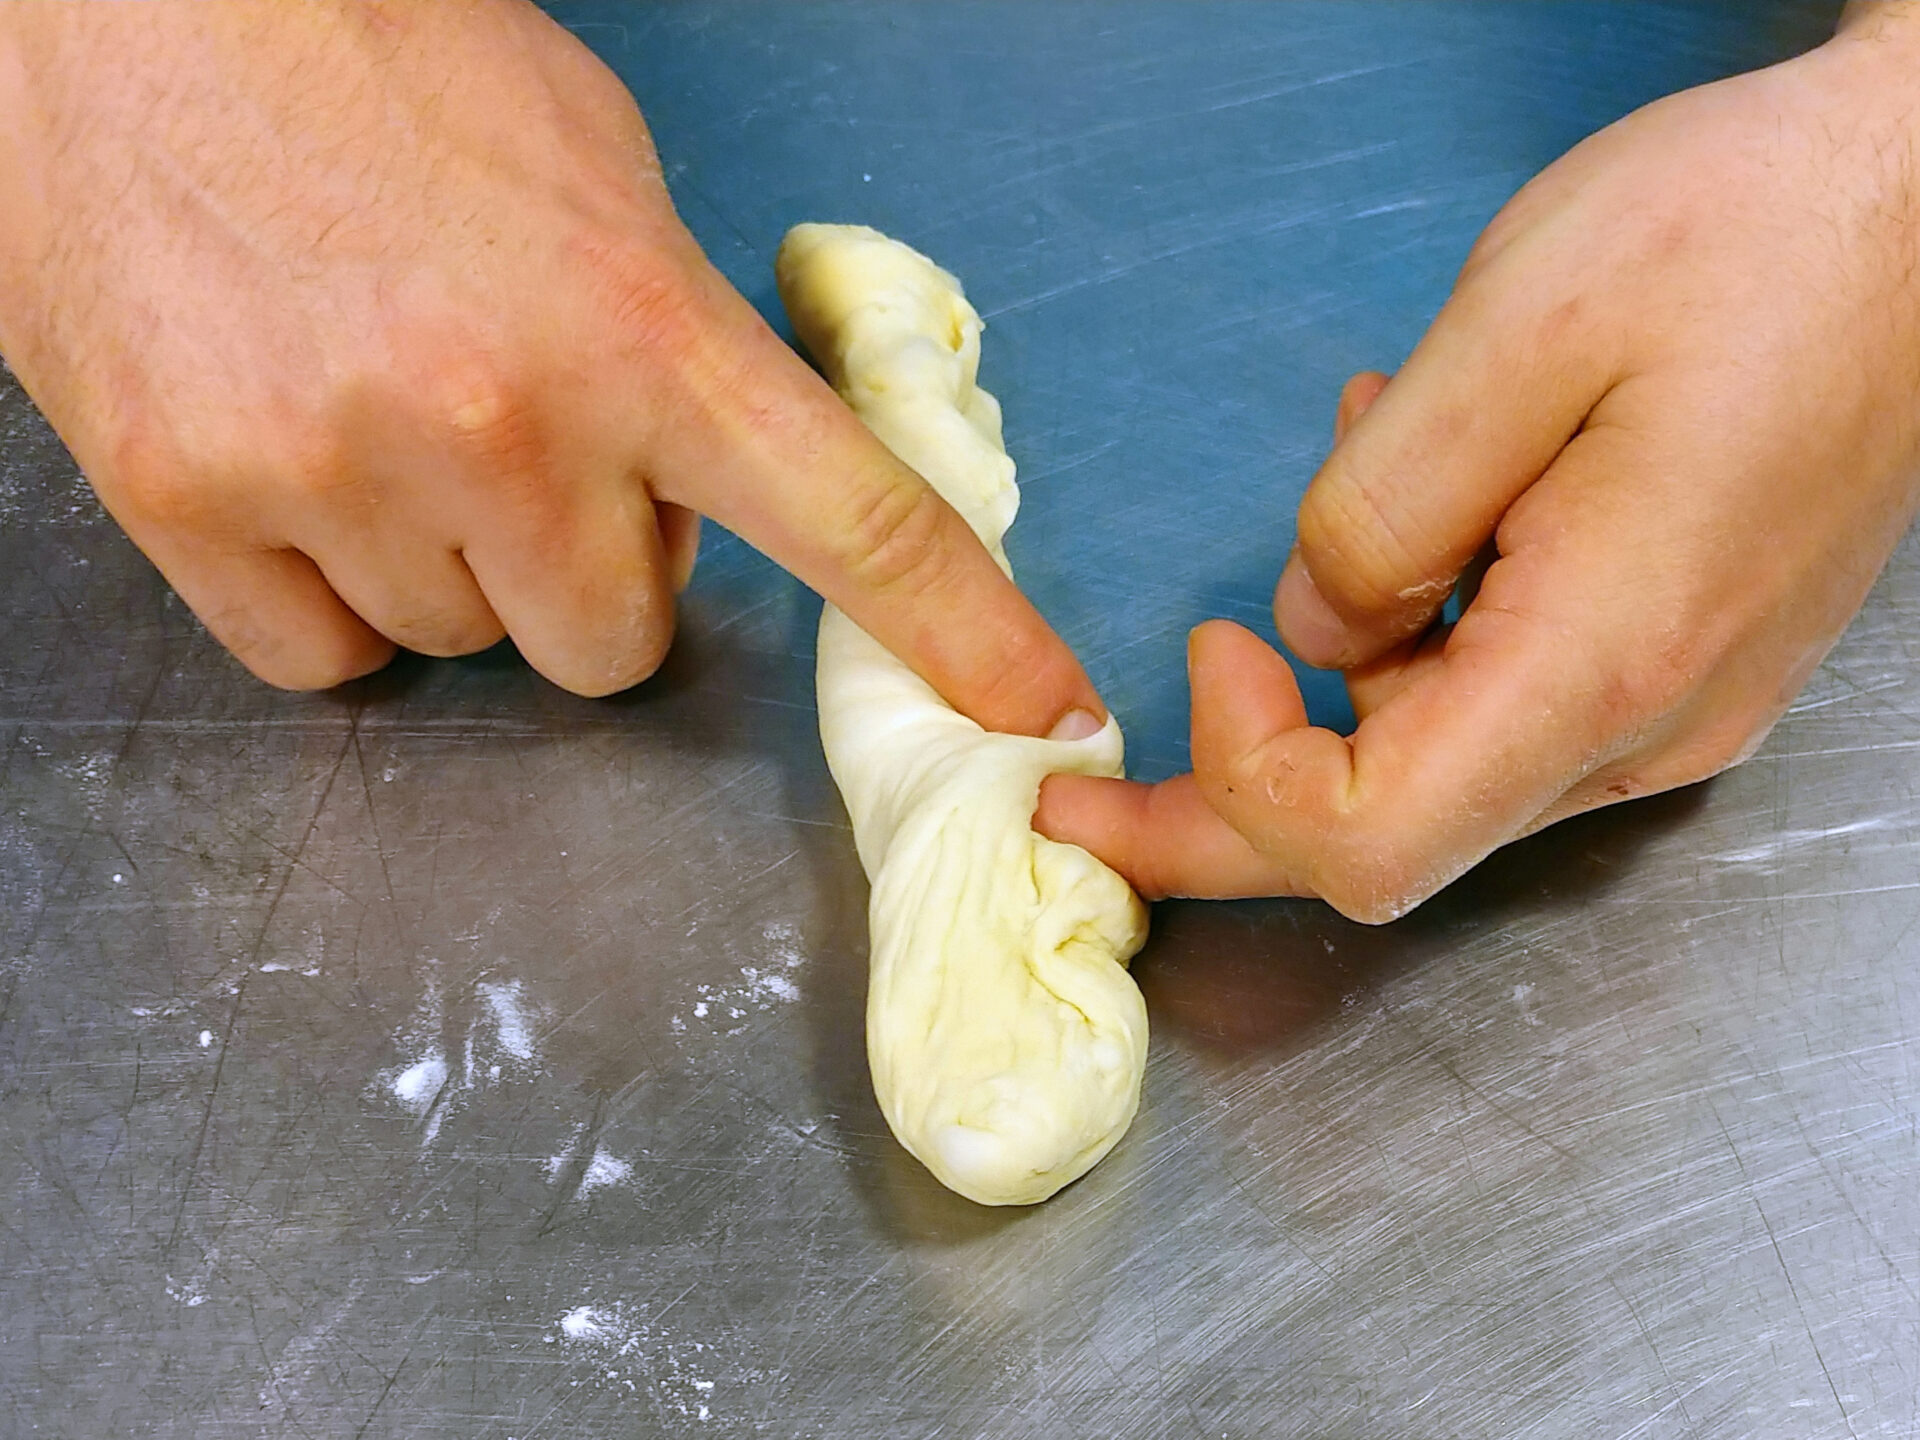
Then, lengthwise, fold the dough by taking one side and folding into the center.
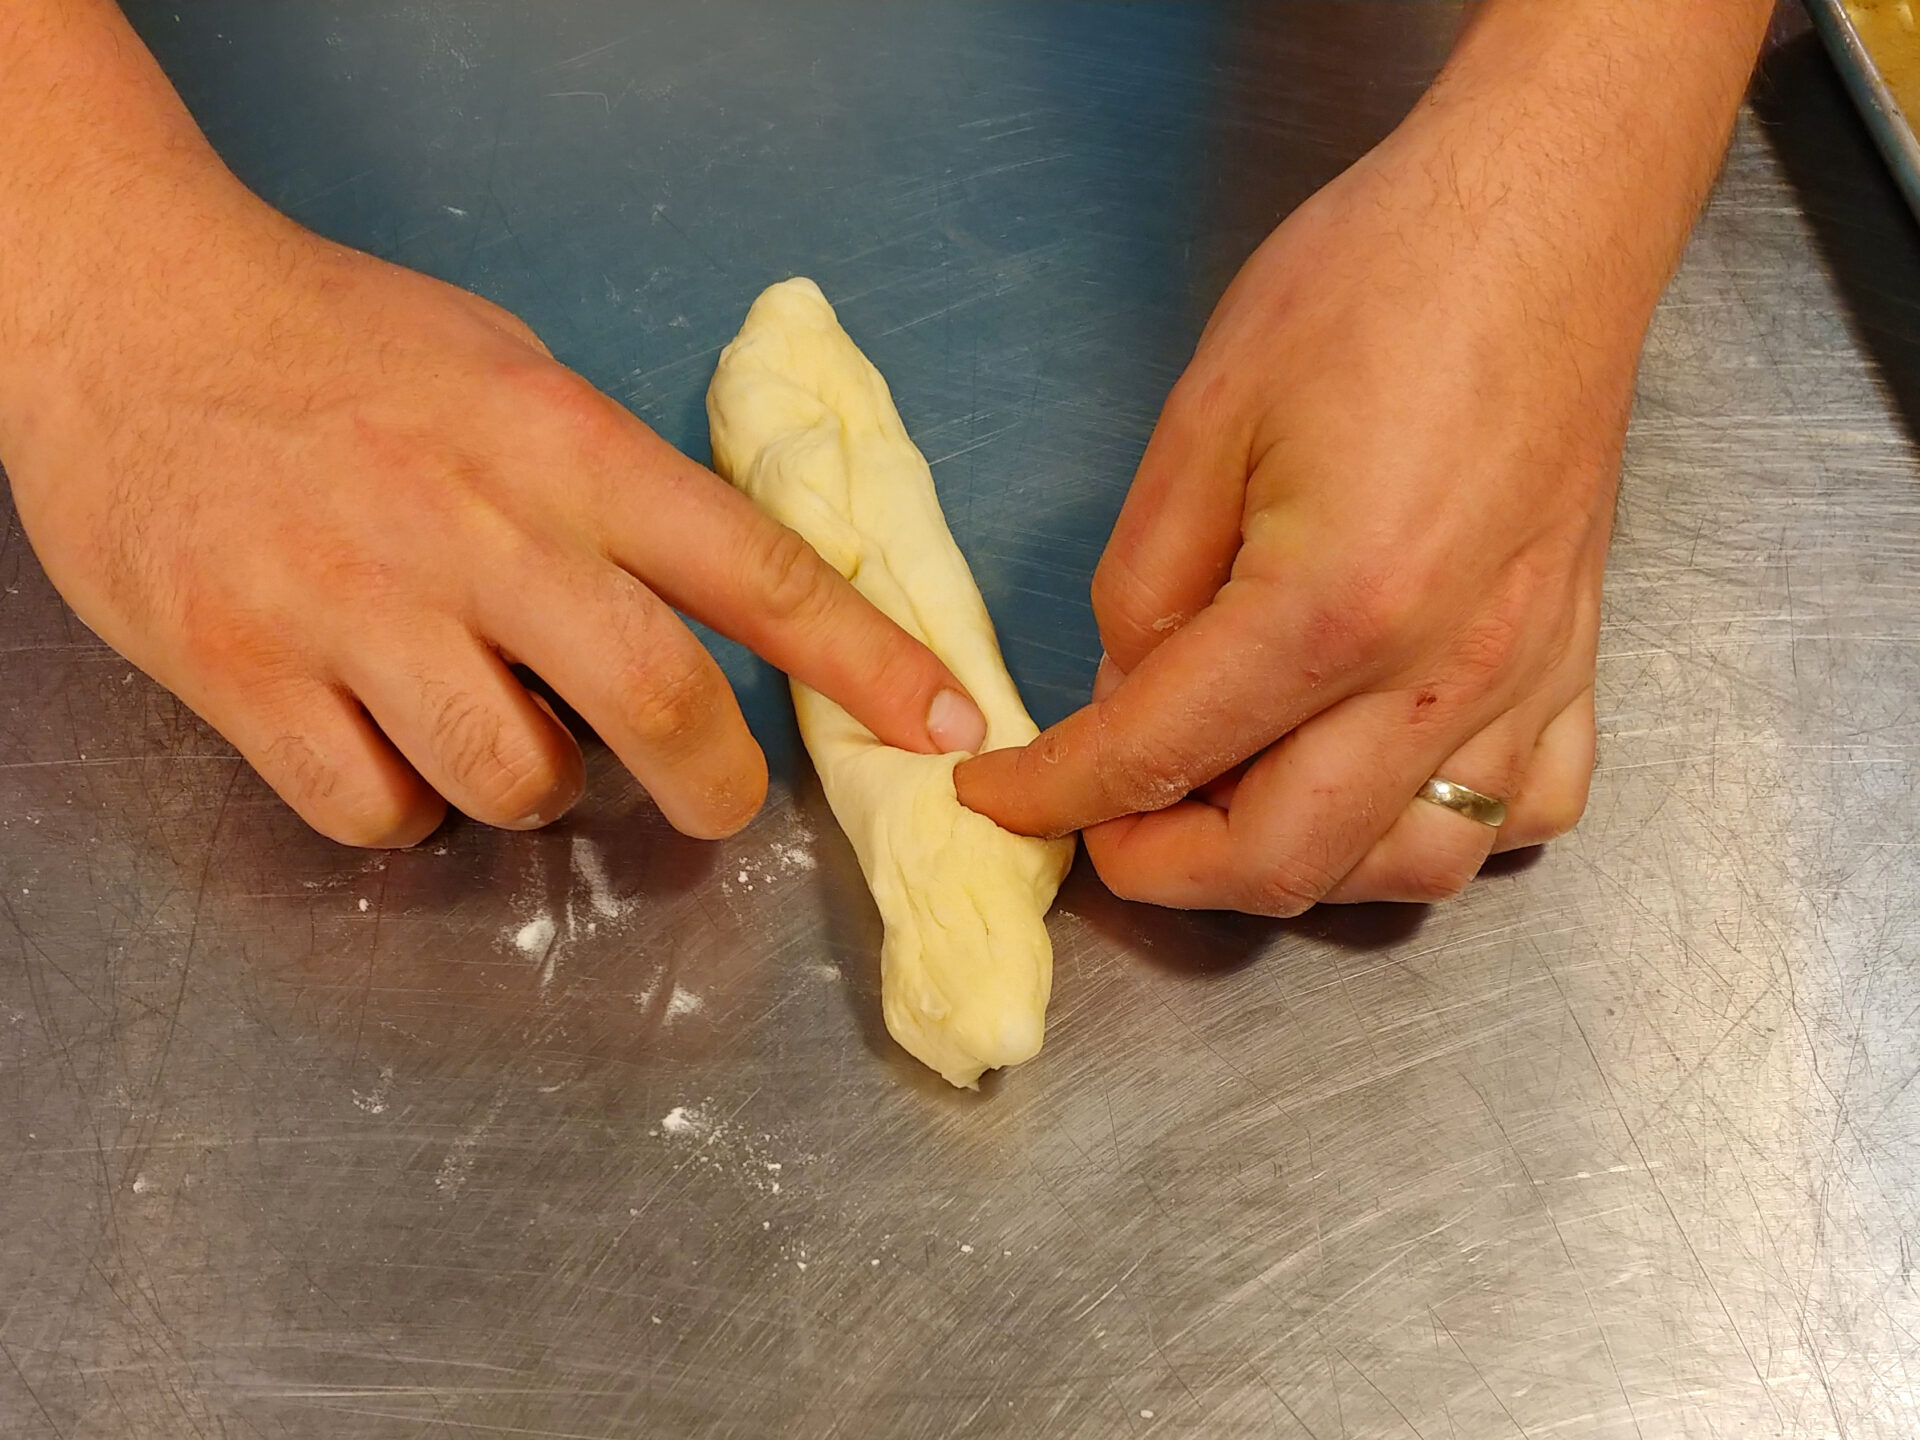
8.
Turn the dough 180° and fold the dough into the center again, but this time into the other side, over the folded side.
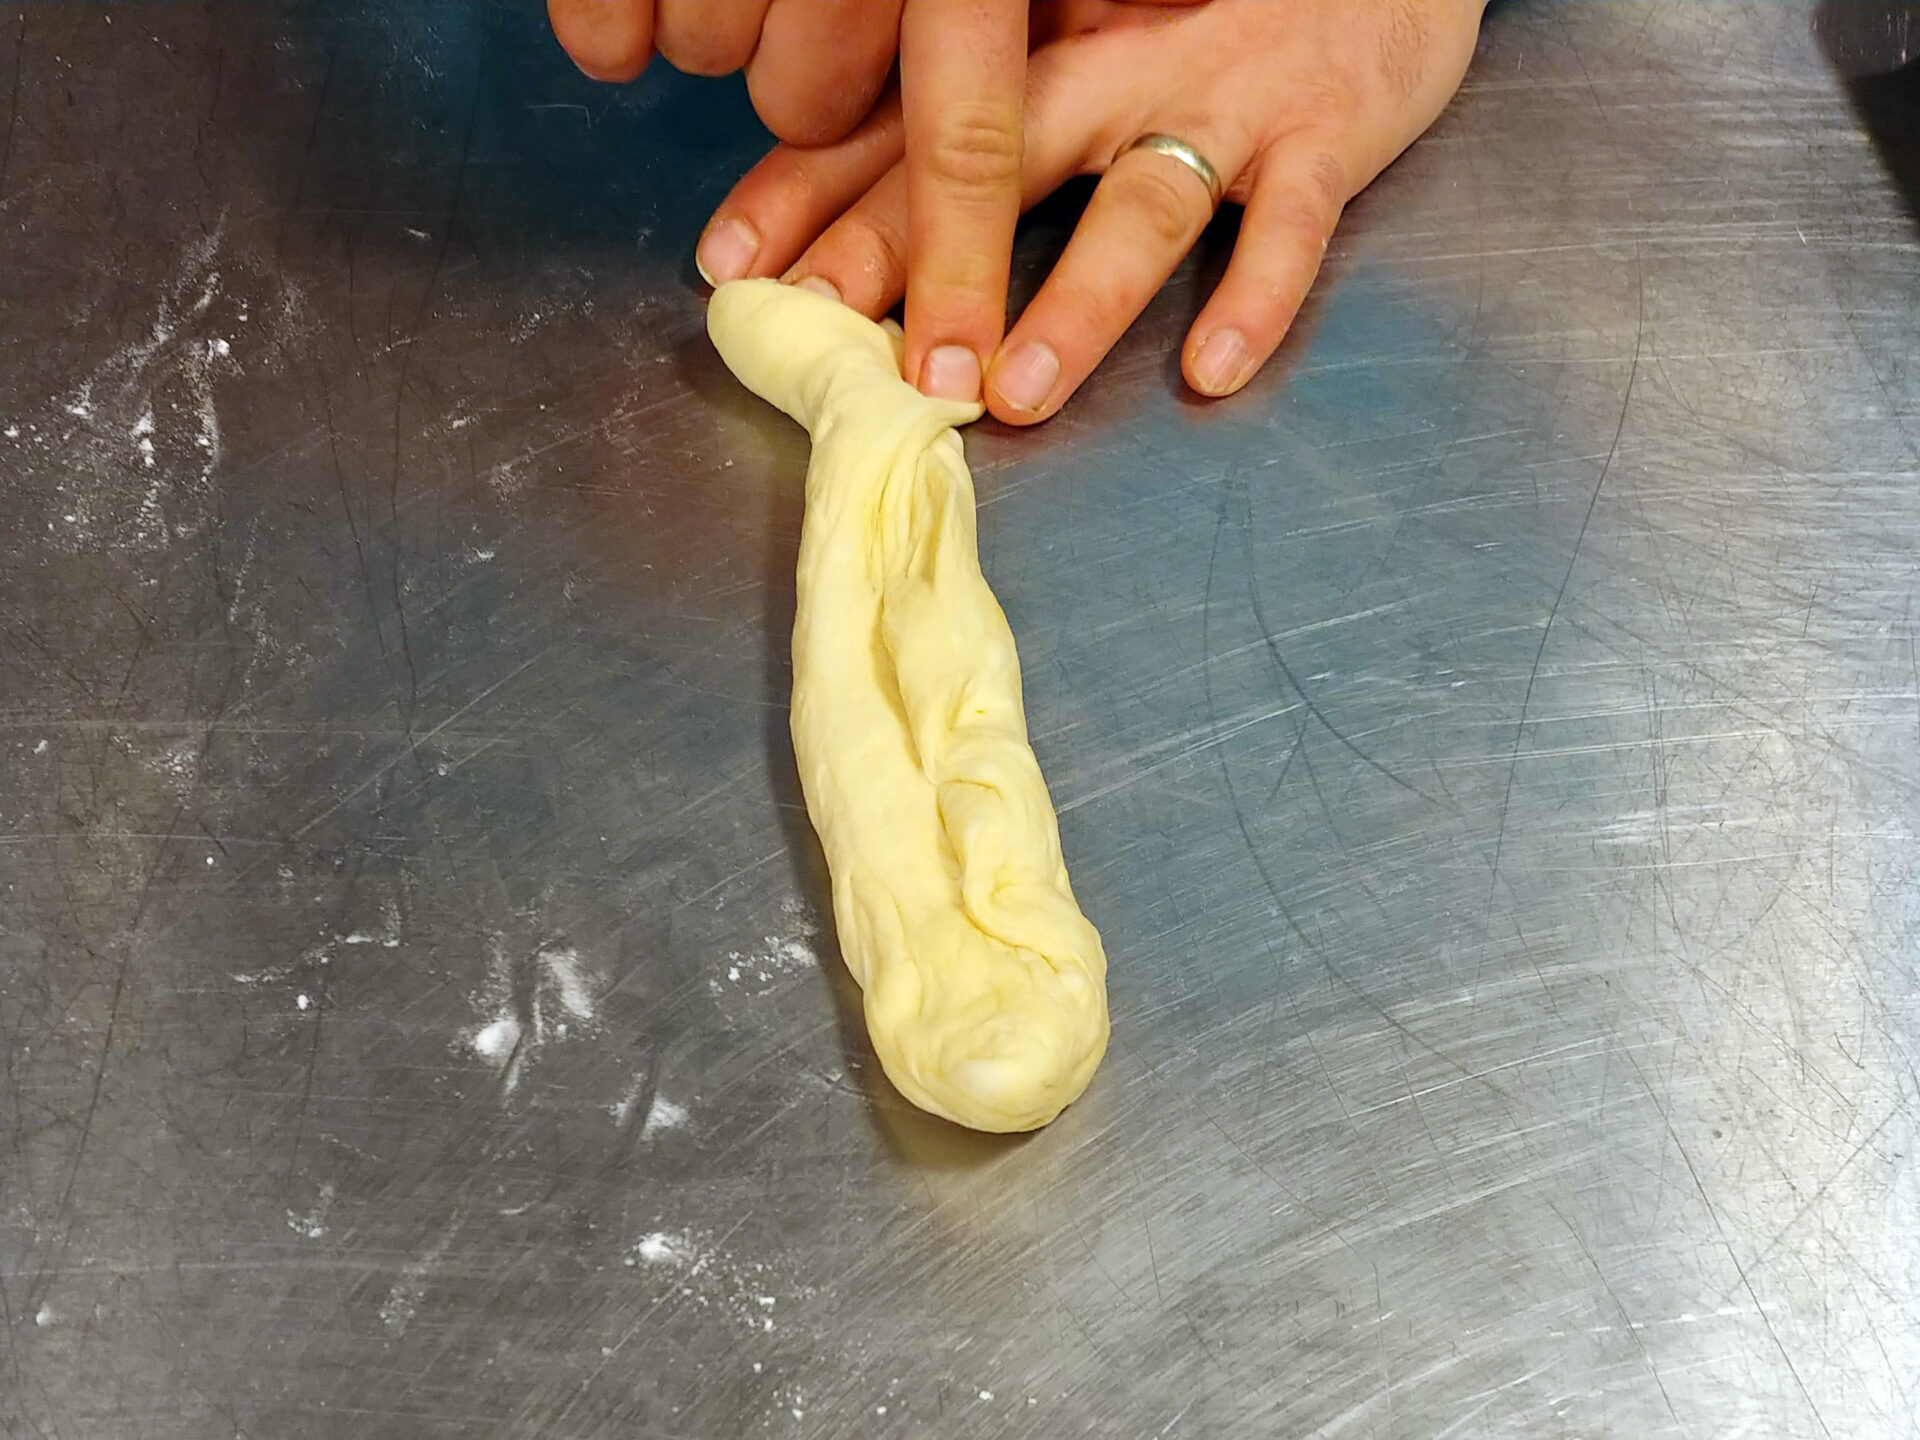
9.
Then, briefly roll it to a preferable thickness of 1”.
10.
Place all four rolls on parchment paper, placing them on an upside-down baking sheet (for oven preparation) or on a generously floured surface (for preparation on pizza stone). Lightly flour the tops and cover with a kitchen towel.
4. Proofing:
4.1.
Let your bread loafs proof in a proofing basket in a warm place for about 30 minutes before baking (do not go much longer than that). If you are preparing baguettes, let them proof no more than 15 minutes.
5. Baking:
Bake in the oven or on the grill with a pizza stone and pizza paddle.
A.
Oven baking:
1.
Preheat oven to 450°F with the first upside-down baking sheet in the center of your oven (without parchment paper) and a small heatproof bowl with water (in the bottom of the oven).
2.
Flip the raised bread from the basket onto a second upside-down baking sheet that is covered with parchment paper. If are you preparing baguettes, they are already there.
3.
Score the top of the bread with a razor (4 – 6 cuts on the top of the bread or 2 – 4 on the top of each baguette).
4.
Carefully slide the parchment paper with the bread (or baguettes) from the baking sheet to another baking sheet located in the oven.
5.
Add ice cubes to a small heatproof bowl with water. Optionally, add other ice cubes during baking for a crispier crust.
6.
Bake until done (about 20 – 40 minutes, depending on the thickness and shape of the bread, or 5 – 12 minutes, depending on the shape of the baguette). Test with a toothpick.
B.
Grill baking:
1.
Preheat the grill to 500°F. While preheating, keep a pizza stone on one side and a small heat-proof bowl with water on the other. Keep the temperature about 500°F, and if possible, focus on less direct heat with the fire, preferably on the side of the pizza stone.
2.
Flip the raised bread from the basket onto a lightly floured pizza paddle. If you are preparing baguettes, gently load them onto the pizza paddle by slowly sliding the pizza paddle under.
3.
Score the top of the bread with a razor (4 – 6 cuts on the top of the bread or 2 – 4 on each baguette).
4.
Carefully slide the bread or baguettes from the pizza paddle onto the pizza stone on the grill.
5.
Add ice cubes into a small heatproof bowl with water. Optionally, add other ice cubes during baking for a crispier crust.
6.
Bake until done (about 20 – 40 minutes, depending on the thickness and shape, or 5 – 12 minutes, depending on the shape of the baguette). Test with a toothpick.
You can freeze bread for later usage (it stays great in a freezer for up to a half year). Defrost in only 3 – 4 hours.
From Humble Dough to Rustic Delight: Rustic Bread or Baguettes
Read moreThere’s something truly magical about the aroma of freshly baked bread wafting through the air. It speaks of comfort, warmth, and a connection to time-honored traditions. Today, we’re going beyond simply enjoying that aroma; we’re diving headfirst into the world of bread baking, crafting a rustic loaf and classic French baguettes that will rival any artisan bakery.
This recipe isn’t just about following instructions; it’s about unlocking your inner baker, understanding the nuances of dough, and experiencing the sheer satisfaction of transforming simple ingredients into edible masterpieces. Whether you’re a seasoned baker or a curious novice, this journey promises to be both rewarding and delicious.
Rustic Bread or Baguettes: Four Ingredients and a World of Possibilities
At its core, this recipe celebrates the beauty of simplicity. With just four essential ingredients – bread flour, yeast, salt, and water – we’ll create a dough that’s bursting with potential. But don’t let the simplicity fool you; this dough is a blank canvas for your creativity. Add herbs, spices, or even peppers to customize your bread and make it truly your own.
The Knead for Speed: Mixing and the Magic of Gluten
Our adventure begins with a kitchen mixer and its trusty hook attachment. This dynamic duo will do the heavy lifting, kneading the dough and developing the gluten that gives bread its structure and elasticity. As the mixer works its magic, you’ll witness the transformation from a shaggy mass to a smooth, supple dough.
Patience is a Virtue: The Rise and Fall of Dough
Now comes the time to exercise patience, a crucial ingredient in any bread baking endeavor. We’ll allow our dough to rise in a warm place, witnessing its gradual expansion as the yeast works its magic. This rising process, known as proofing, is where the dough develops its flavor and airy texture.
But the journey doesn’t stop there. We’ll deflate the dough, folding it onto itself to further enhance its strength and texture. This process, repeated several times, is key to achieving a bread with a beautiful crumb and a satisfying chew.
Shaping the Dream: From Loaf to Baguette
With our dough well-rested and full of potential, it’s time to shape our creations. Whether you opt for a rustic loaf or slender baguettes, the process is a tactile experience, connecting you to the dough and allowing you to shape your vision.
For the loaf, we’ll gently stretch and fold the dough, creating a taut surface and a well-defined shape. For baguettes, we’ll divide the dough into portions, rolling and shaping them into long, slender forms.
The Final Act: Baking to Perfection
The culmination of our efforts lies in the baking process. Whether you choose the gentle heat of an oven or the fiery kiss of a grill, the transformation is mesmerizing. As the bread bakes, the aroma will fill your kitchen, teasing your senses and building anticipation.
A crucial tip for achieving a crisp crust is to introduce steam into the baking environment. This can be done by adding ice cubes to a heatproof bowl in the oven or grill. The steam creates a moist environment that allows the crust to develop its characteristic crunch.
A Feast for the Senses: Rustic Bread or Baguettes
Finally, the moment we’ve all been waiting for: slicing into the freshly baked bread and savoring its texture and flavor. The crust crackles invitingly as you cut through it, revealing a soft, airy interior. Whether enjoyed on its own or paired with your favorite dips and spreads, this bread is a testament to the power of simple ingredients and the joy of baking.
Beyond the Rustic Bread or Baguettes.: Embracing the Journey
This recipe is more than just a set of instructions; it’s an invitation to explore the world of bread baking, to connect with a timeless tradition, and to unleash your creativity in the kitchen. So gather your ingredients, embrace the process, and experience the satisfaction of creating something truly special with your own hands. Happy baking!
Read lessAbout the Author:
Tom the ChefFounder
# 1
210 Followers
- Published Recipes: 270
- Av. Recipe Evaluation:
- Location: Iowa, USA
- Member since: 2023-02-02
Recipes
Try Other Recipes from Same Category!
Multigrain Bread
Tom the Chef FounderCzech Rye Bread
Tom the Chef FounderGarlic-Herb Bread
Tom the Chef FounderDisclaimer
- General Information Content on this page above, including the content provided on www.CookingHub.com, including all recipes, articles, and other materials, is for general informational purposes only. This content reflects the personal opinions and experiences of its authors and is not intended to provide professional dietary, medical, legal, or political advice. Please consult a qualified professional before making any decisions based on the information presented here.
- Content Ownership and Use Content on this page above, including content published on CookingHub.com is owned by the individual authors who created it. Only the authors can access, modify, or delete their content from the platform. Our content may be embedded on third-party websites and blogs without modification. No reimbursement will be provided for this use. If an author removes content from CookingHub.com, it will no longer be available through any embedded links.
- Limitation of Liability Neither www.CookingHub.com (operated by the CookingHub Foundation) nor content authors are responsible for any outcome or consequence resulting from the use of information on this site. This includes, but is not limited to:
- Food Safety: Any health risk related to food handling, food quality, or failure to follow USDA recommendations (including minimum safe cooking temperatures).
- Preparation Safety: The proper and safe handling of cooking equipment or its suitability for any given task.
- Recipe Outcomes: The final look, taste, or success of following a recipe.
- Ingredients and Equipment: The sourcing of ingredients, tools, equipment, or anything else related to the preparation and consumption of food.
- Nutritional and Dietary Information: The accuracy of nutritional data. This information is provided as a courtesy and should not replace advice from a medical provider. You are responsible for verifying that a diet is suitable for your personal health needs.
- Errors and Omissions: Any potential errors, typos, or unclear directions in articles and recipes.
- User Responsibility All readers, visitors, and users of embedded content are solely responsible for evaluating recipes and articles. You must make your own decisions about whether to follow the steps and recommendations provided. It is your responsibility to ensure that ingredients and preparation methods are safe and appropriate for your personal dietary restrictions and health conditions.
Share
Click on the icons below to share "Title of the item to share"