
Cook, Learn, and Share to Fight Hunger.
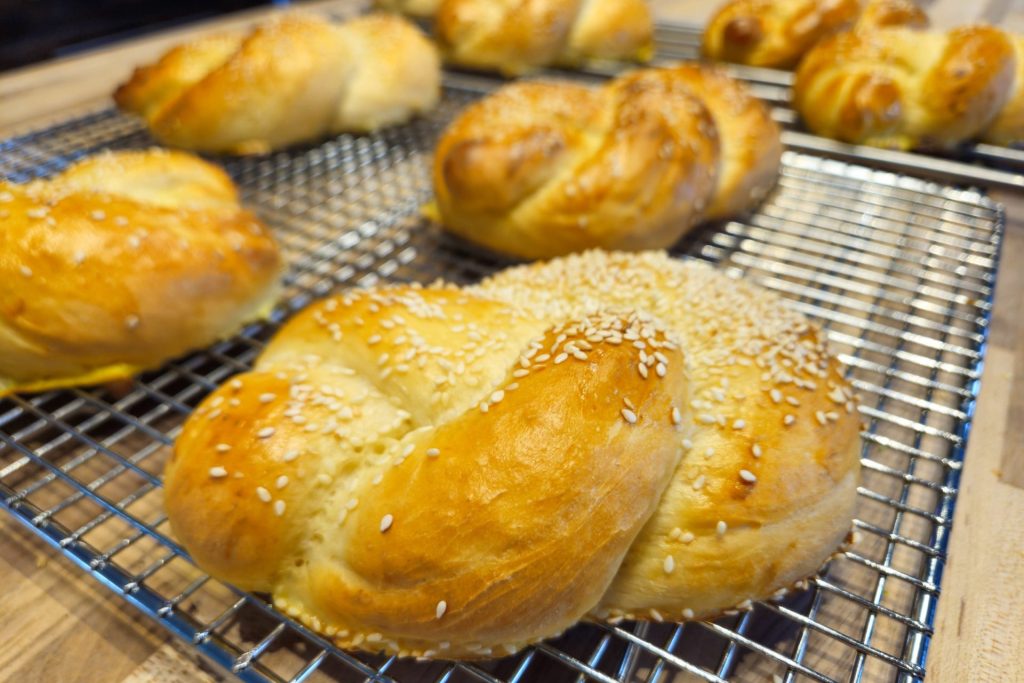
Pletýnka Bun on the cooling rack in close up side shot
  • 30 min.
  • 3 h.
  • 3/5

Ingredients:

Dough:

Brushing Mixture:

Optionally, Sprinkle With:

Recipes

Best served with:

Directions:

1. Dough:

Let’s start preparing the Pletýnka Bun by making the dough.

1.1. Place into a kitchen mixer with a hook attachment:

3 ¾ cups of bread flour
1 TBSP of active dry yeast
1 TSP of granulated sugar
2 TSP of salt

Shortly stir with a hand whisk just enough to combine all ingredients (about 15 – 30 seconds).

1.2. Add:

1 ¾ cups of lukewarm milk
4 TBSP of butter

Knead at low speed until all ingredients are partially incorporated (about 1 – 2 minutes).

1.3.

Then increase the speed to medium-high and knead until the compact dough is formed (usually another 2 – 3 minutes).

2. Rising the Dough:

2.1.

Remove the bowl from the kitchen mixer and cover it with a plate or plastic wrap.

2.2.

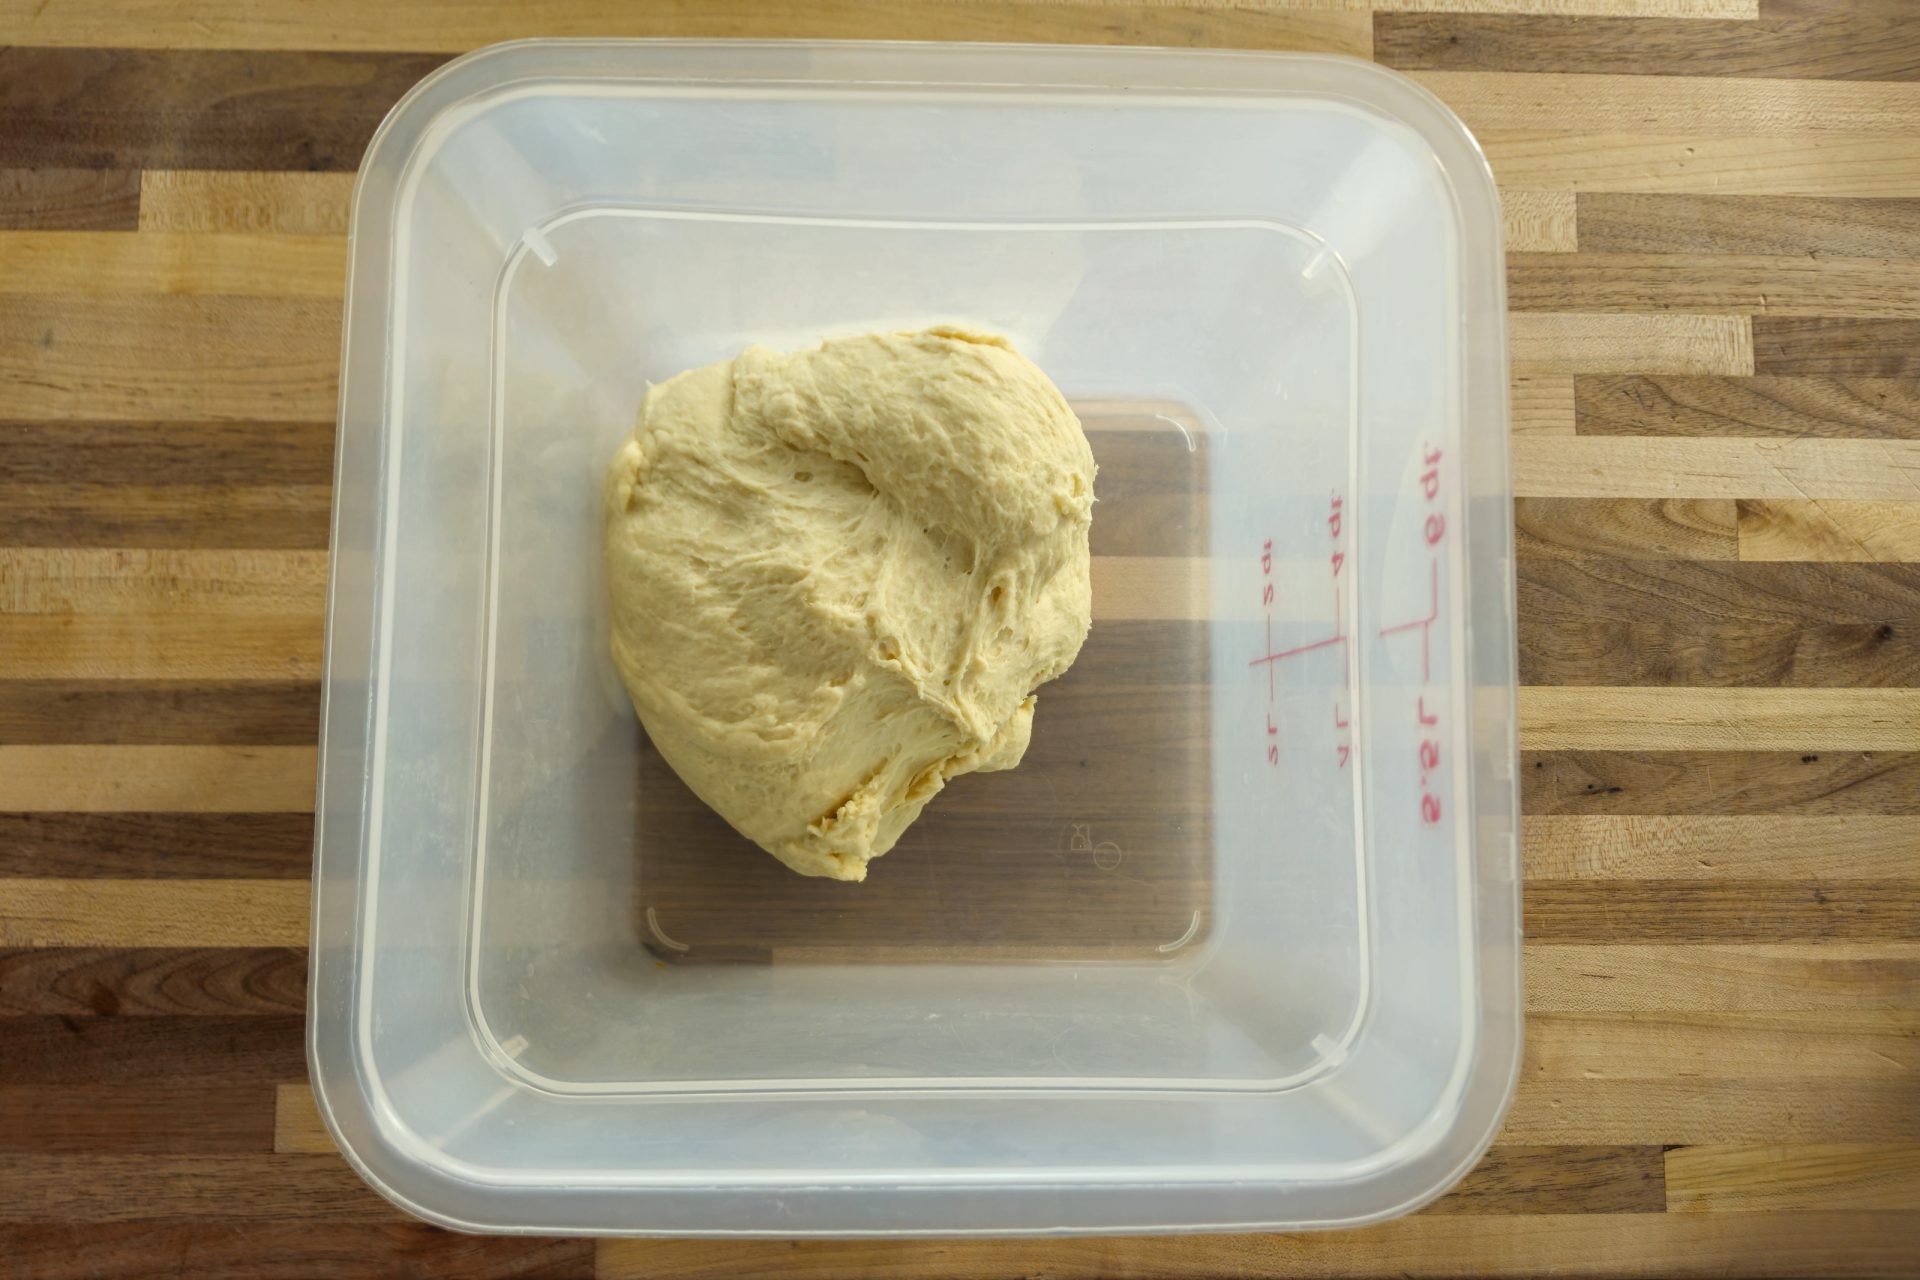
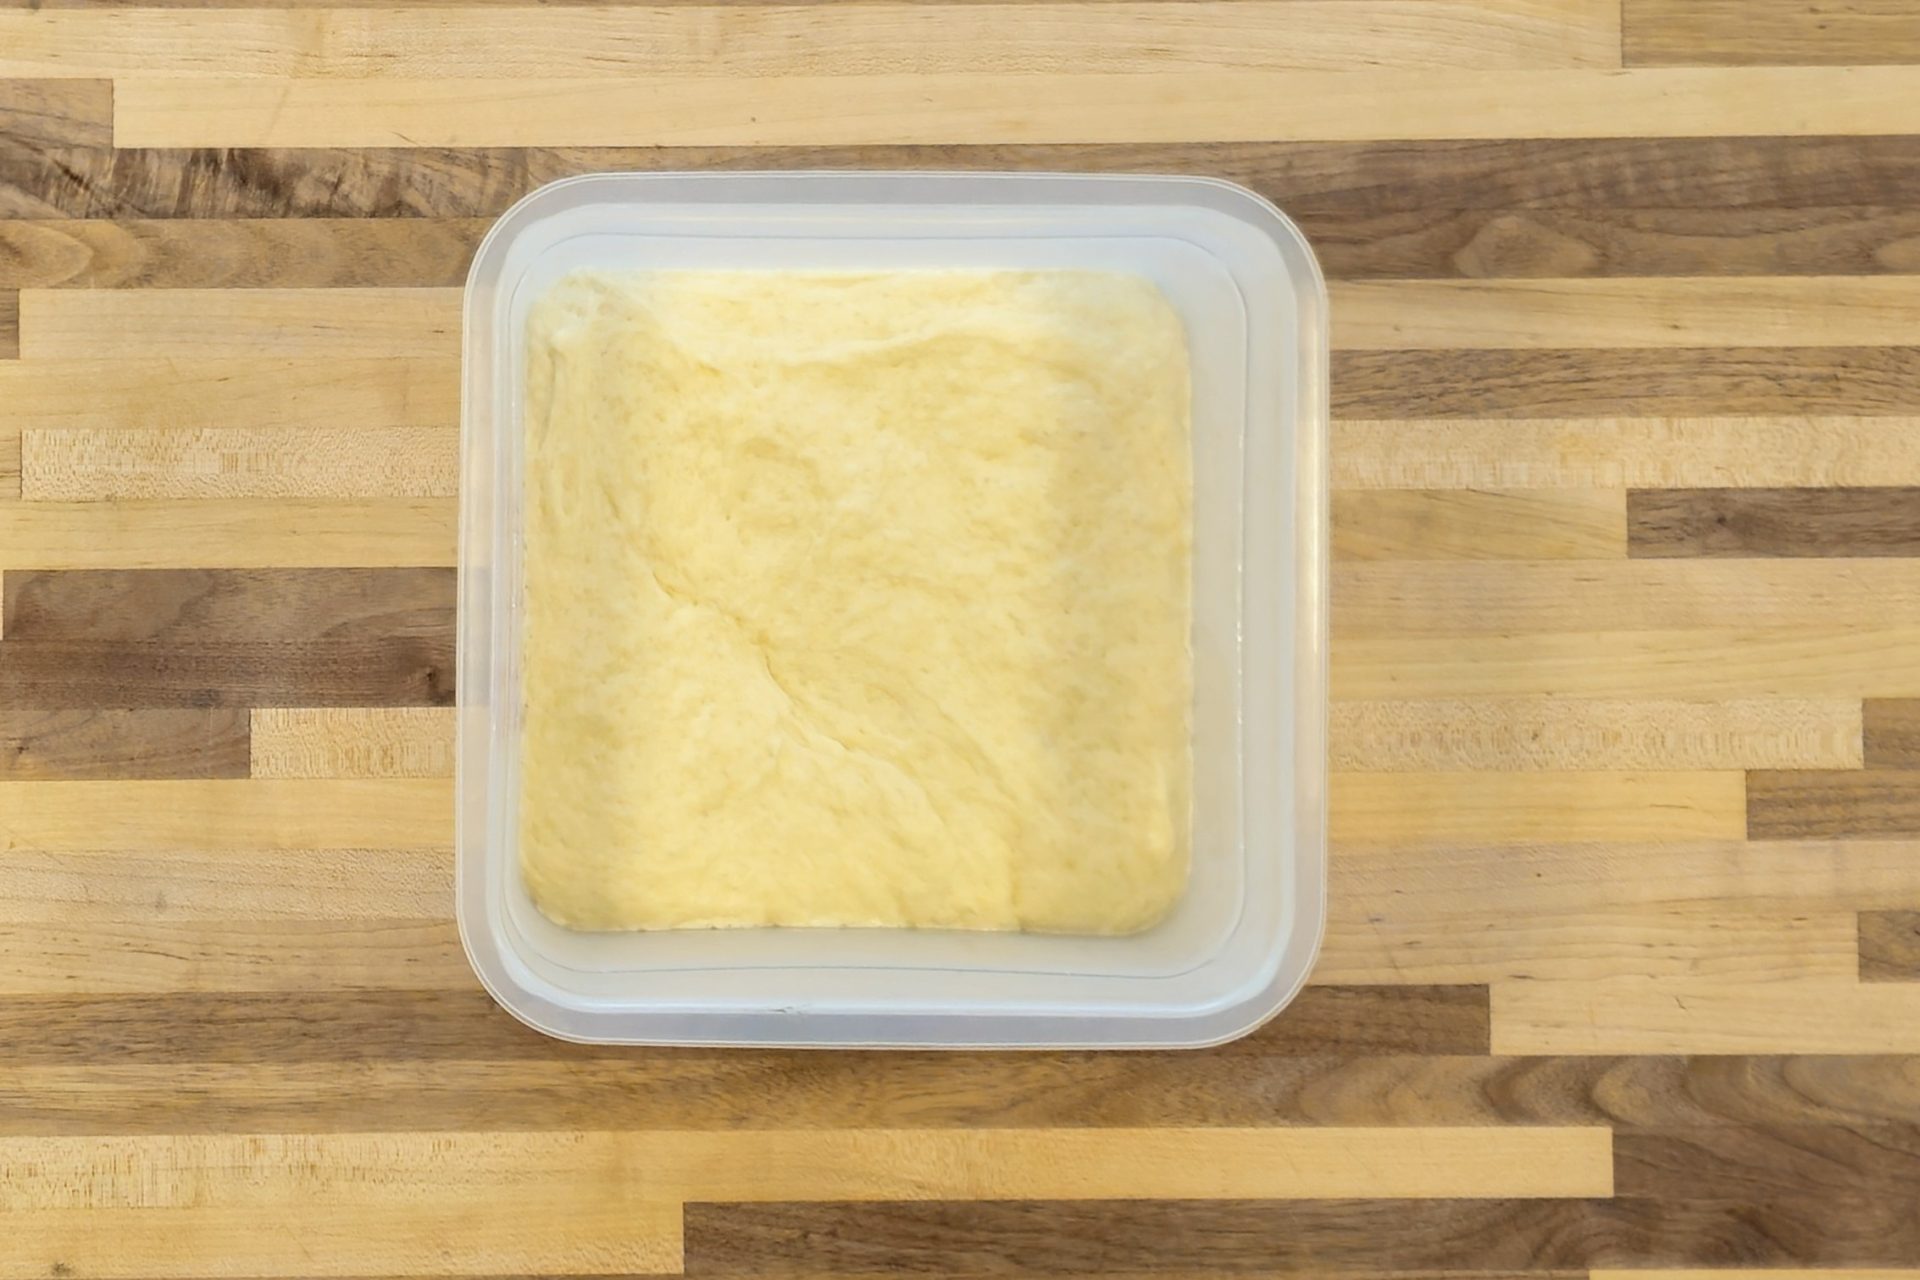
Let it rise in a warm place for about 2 hours or at room temperature for about 3 – 4 hours until it has at least doubled in size.

Plteynka_Bun_-_steps-01_3x2Plteynka_Bun_-_steps-03_3x2

3. Pre-shape the Dough into Compact Balls:

3.1.

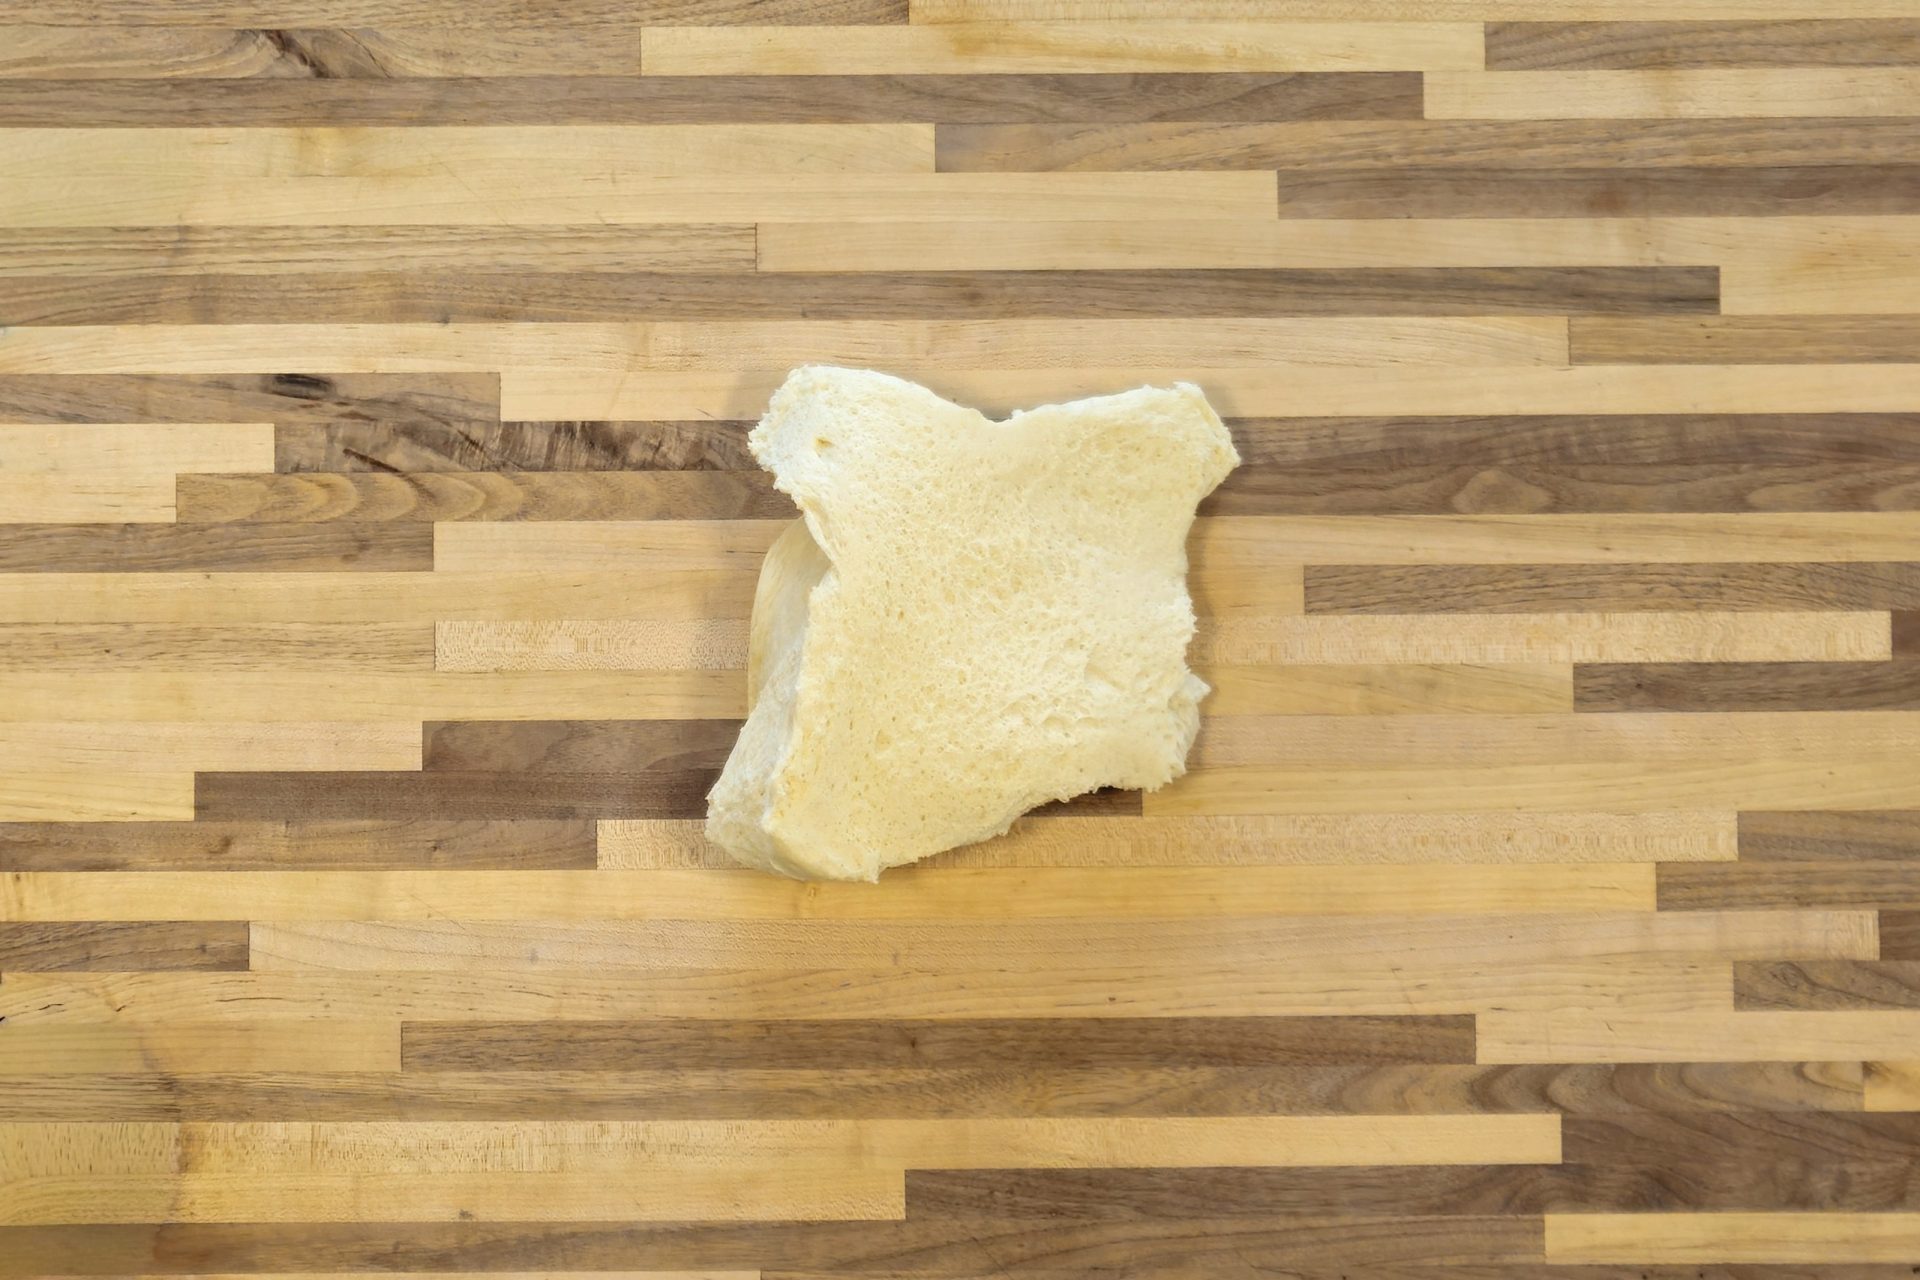
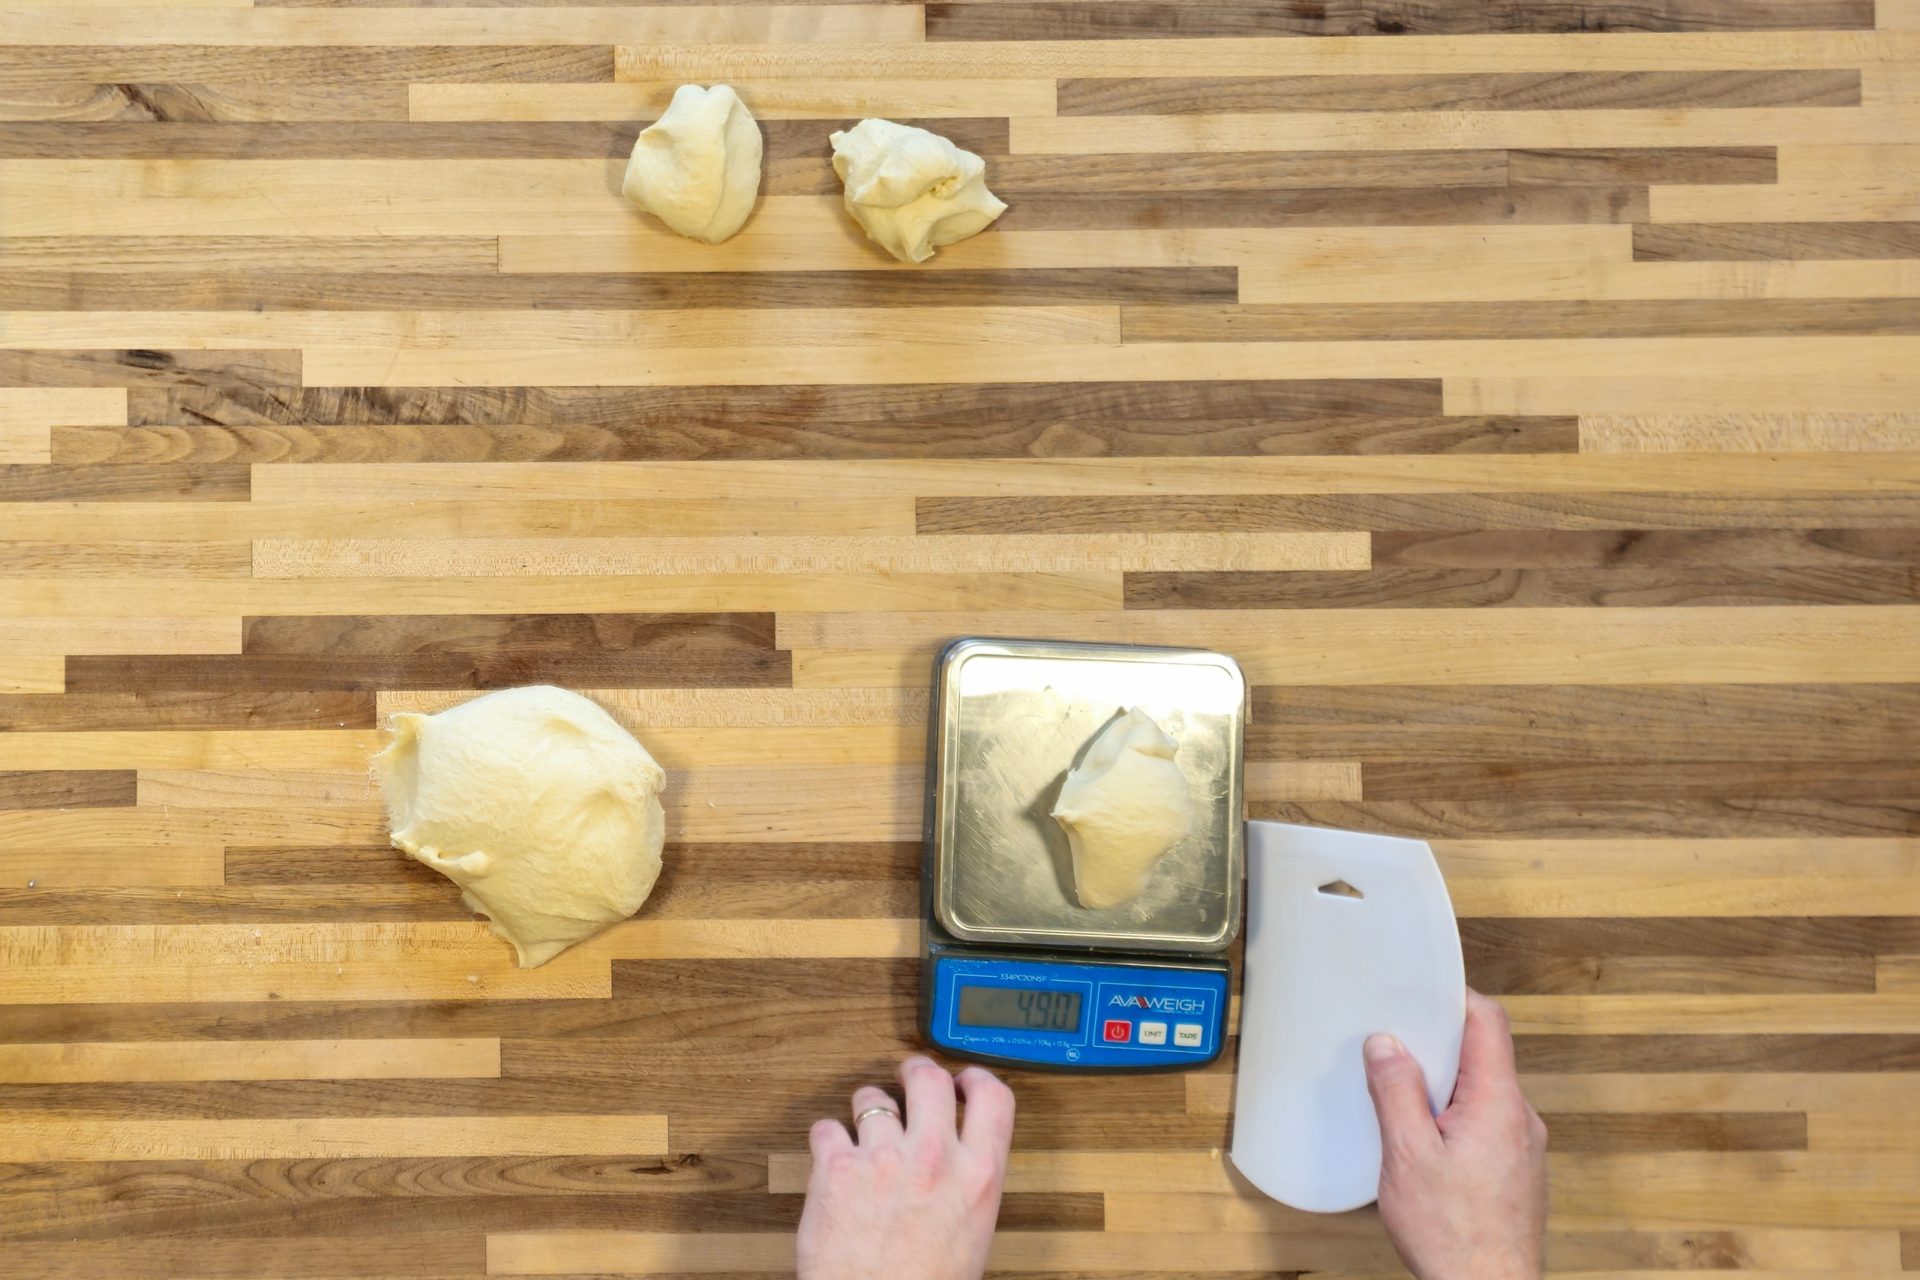
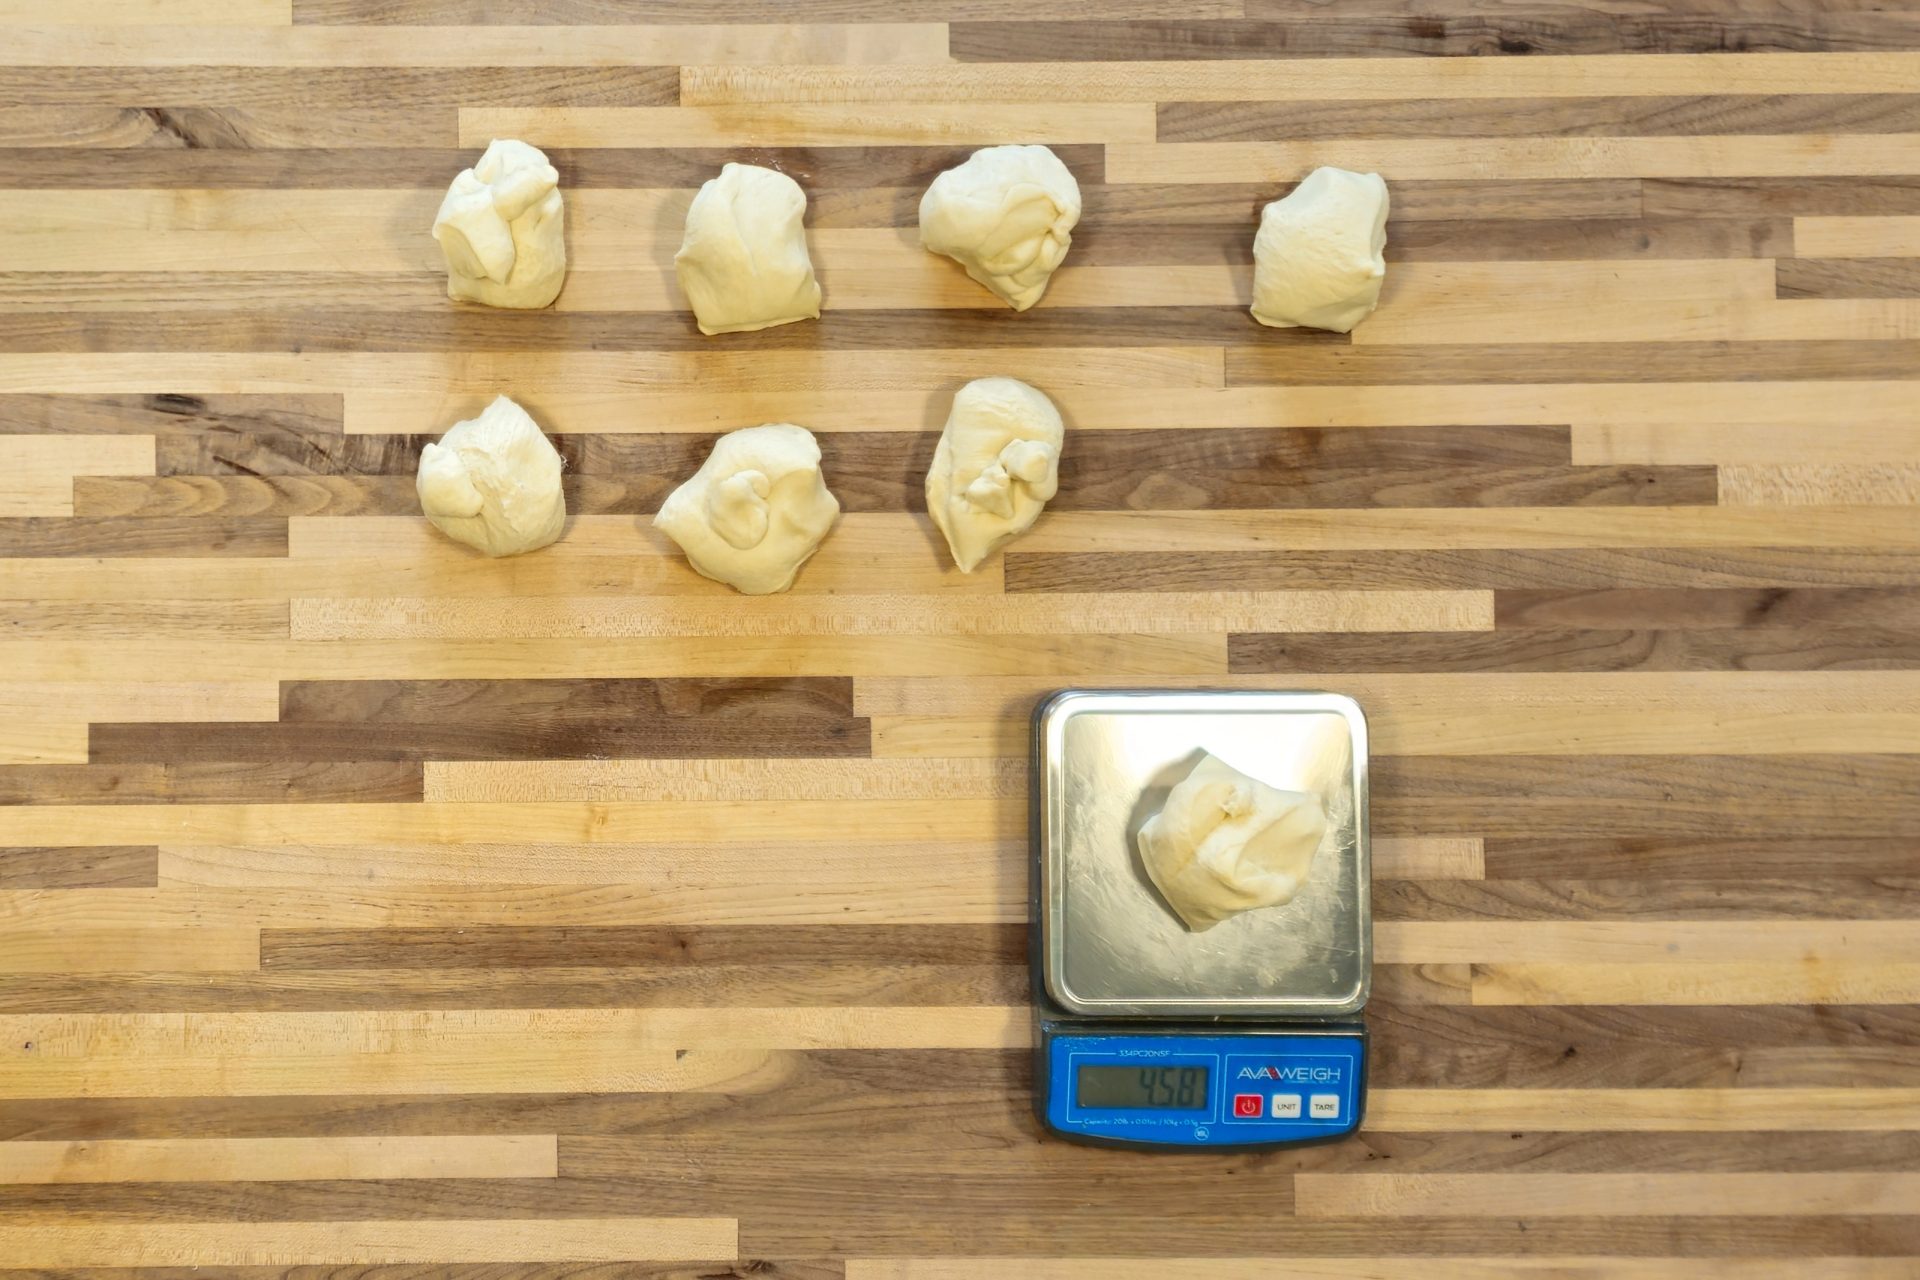
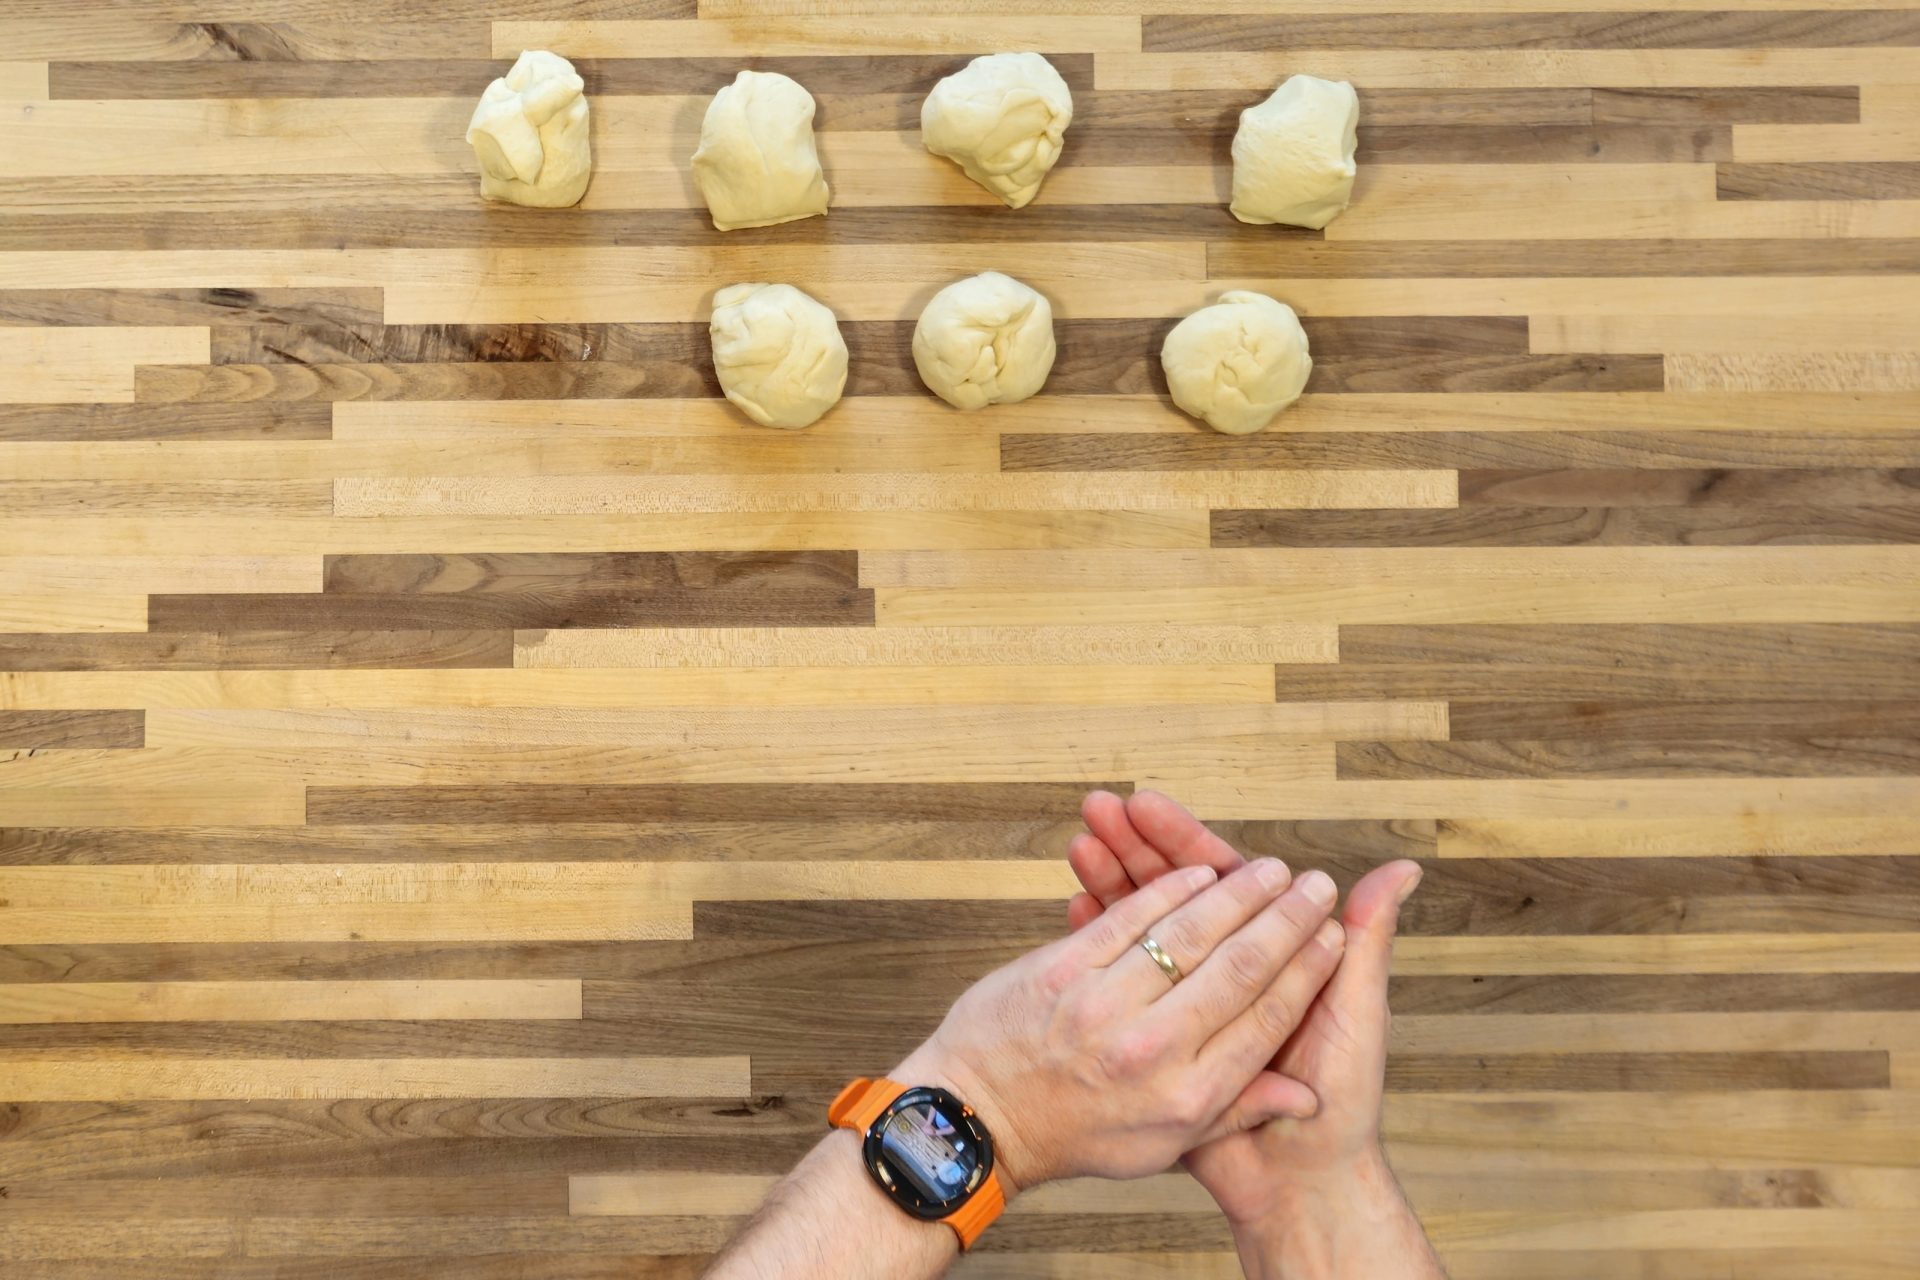
Place the dough on a clean surface (make sure there is no flour on it) and separate into 8 even pieces, about 5 oz each, using a bowl scraper and scale.

Plteynka_Bun_-_steps-04_3x2Plteynka_Bun_-_steps-05_3x2Plteynka_Bun_-_steps-06_3x2

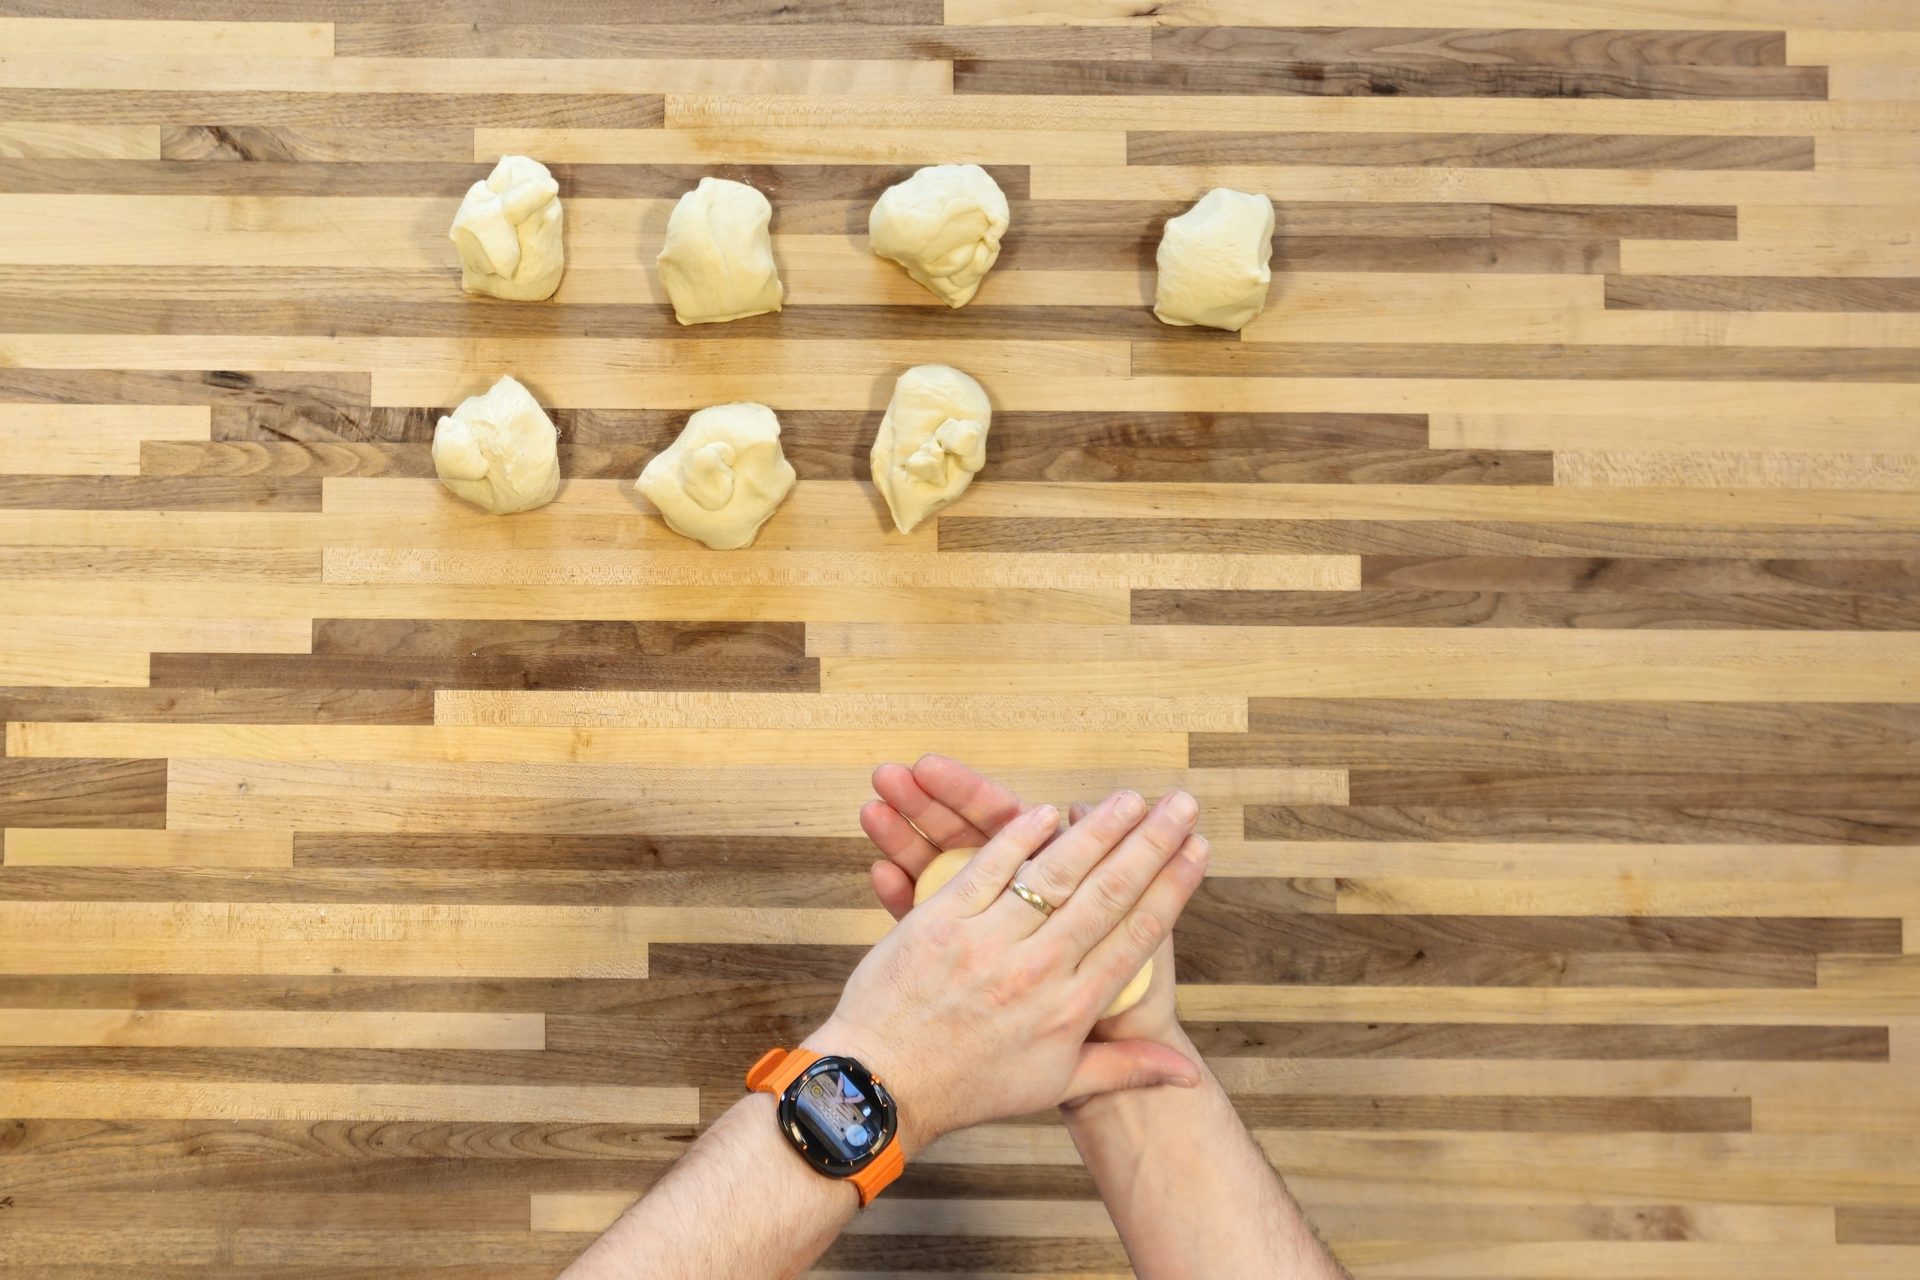
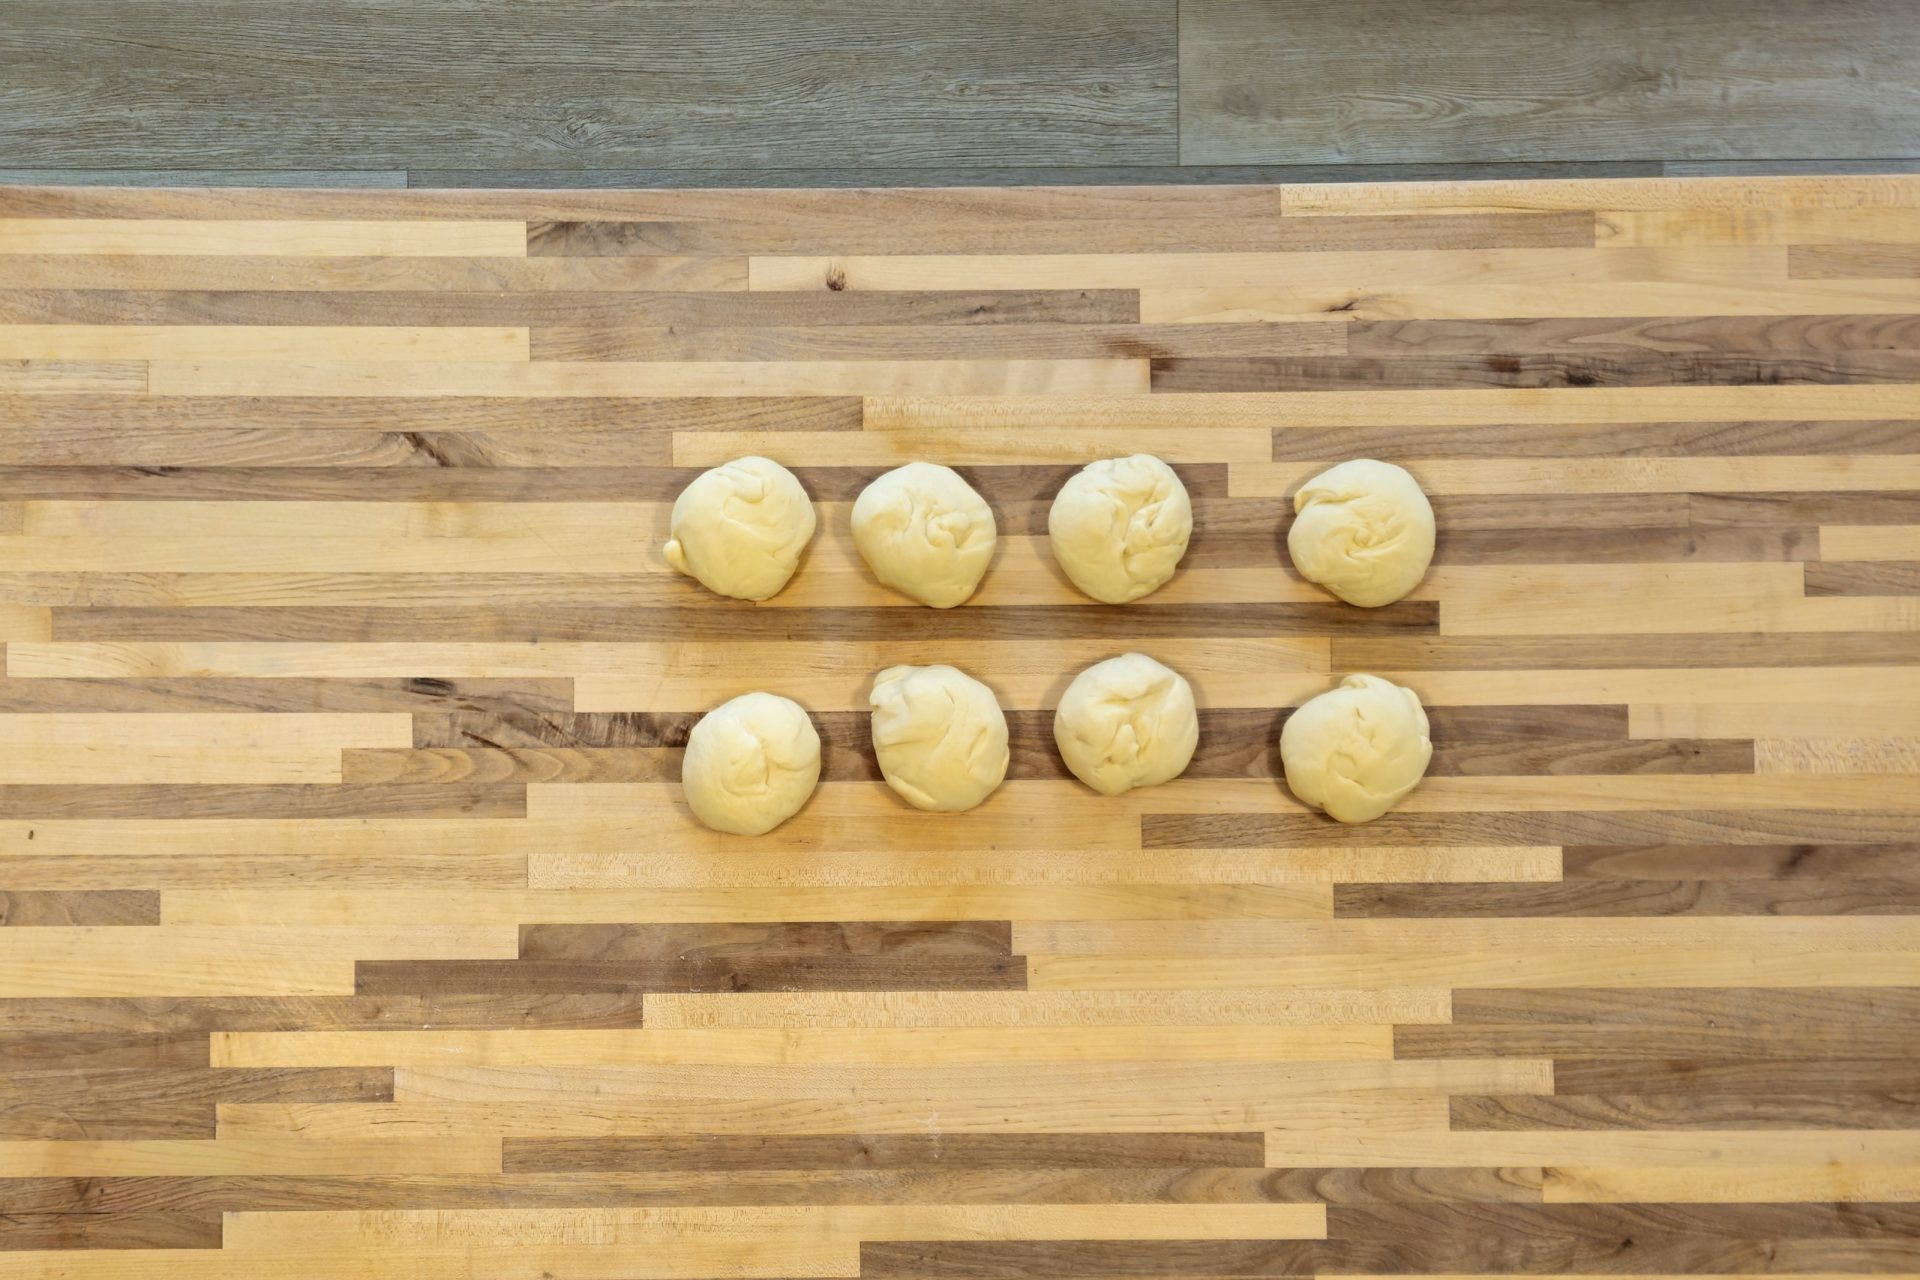
3.2.

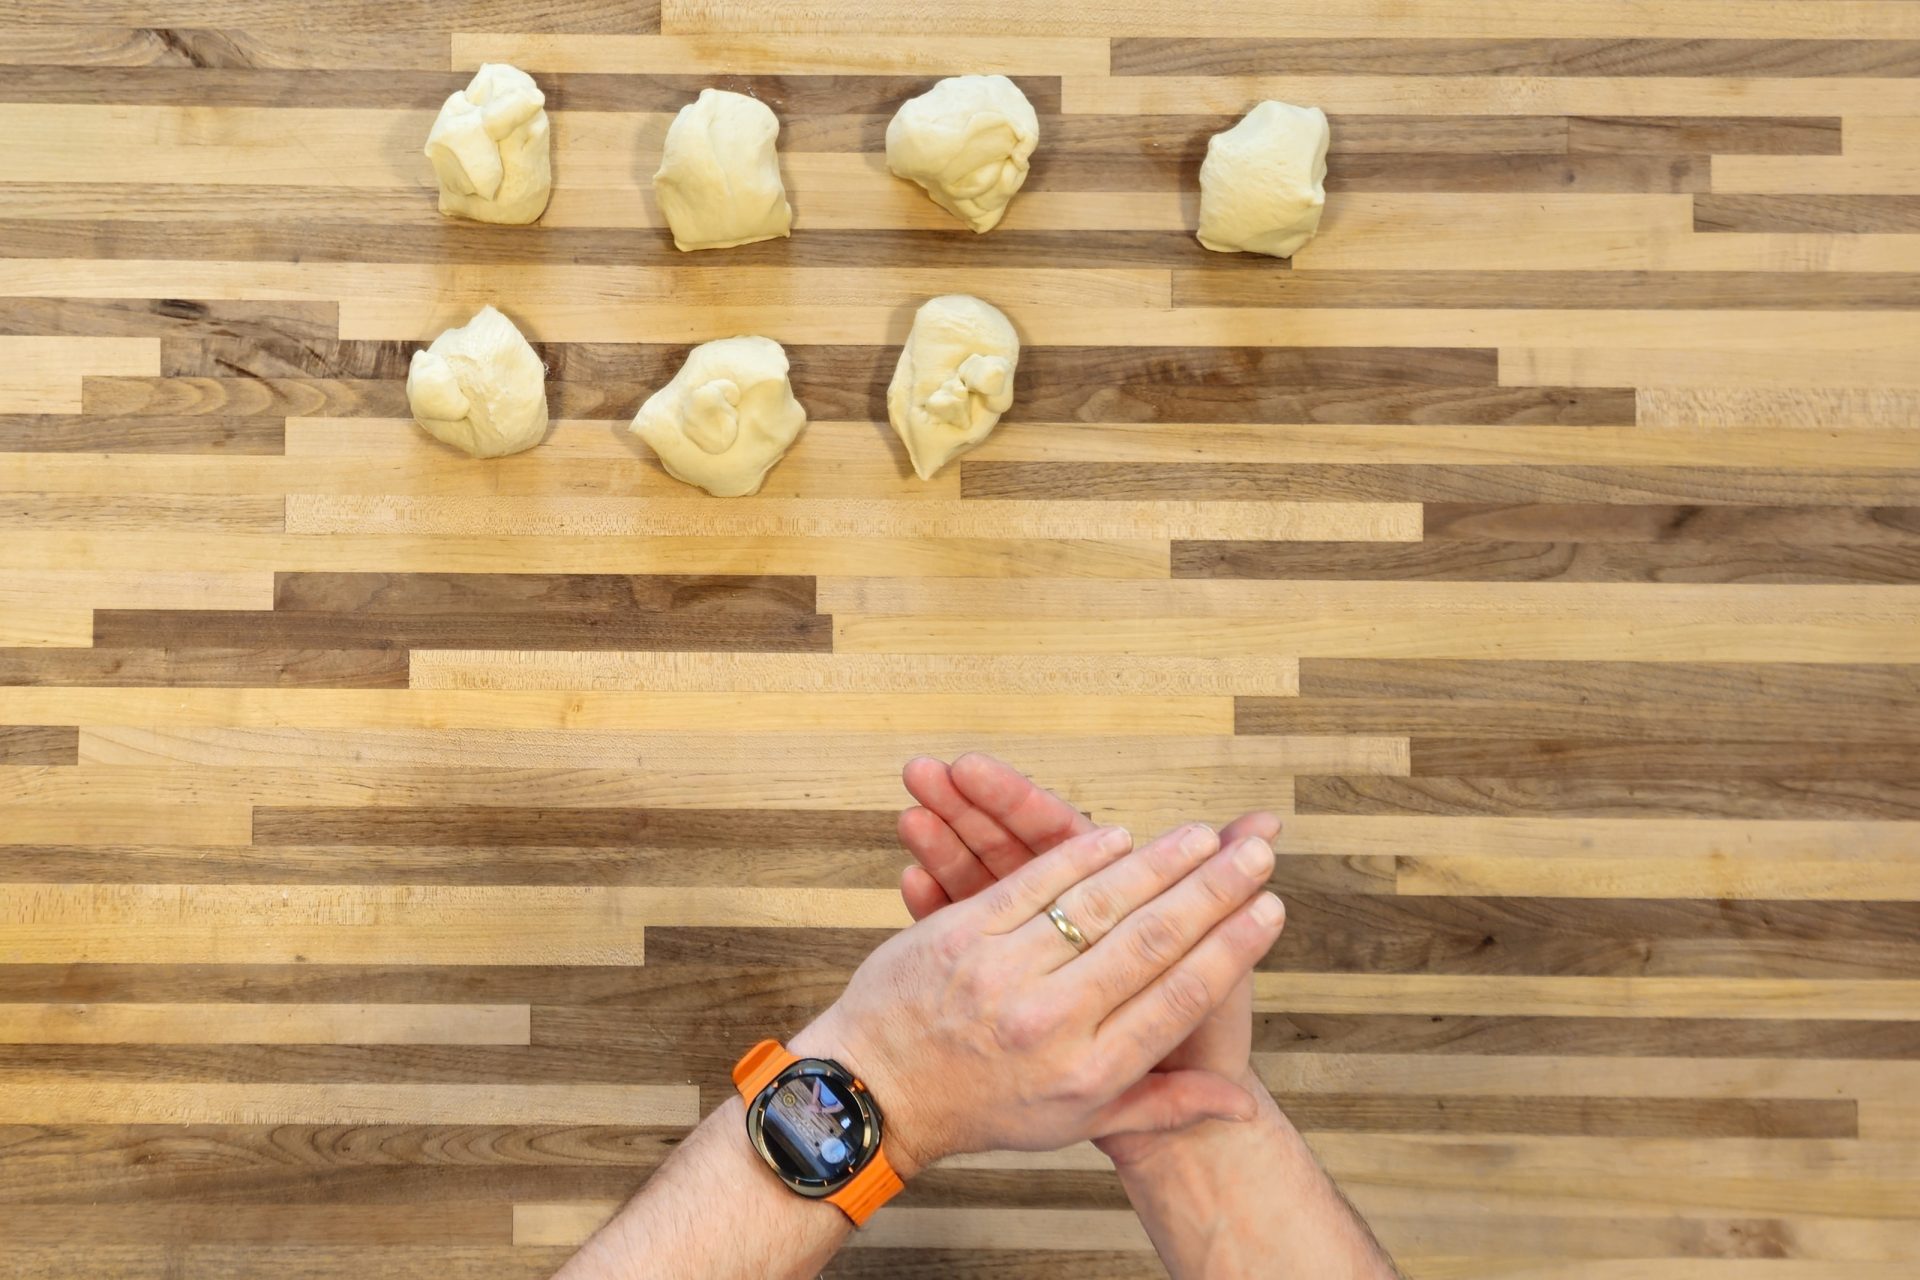
Form each piece of dough into compact dough balls simply using your hands.

Plteynka_Bun_-_steps-07_3x2Plteynka_Bun_-_steps-08_3x2Plteynka_Bun_-_steps-09_3x2

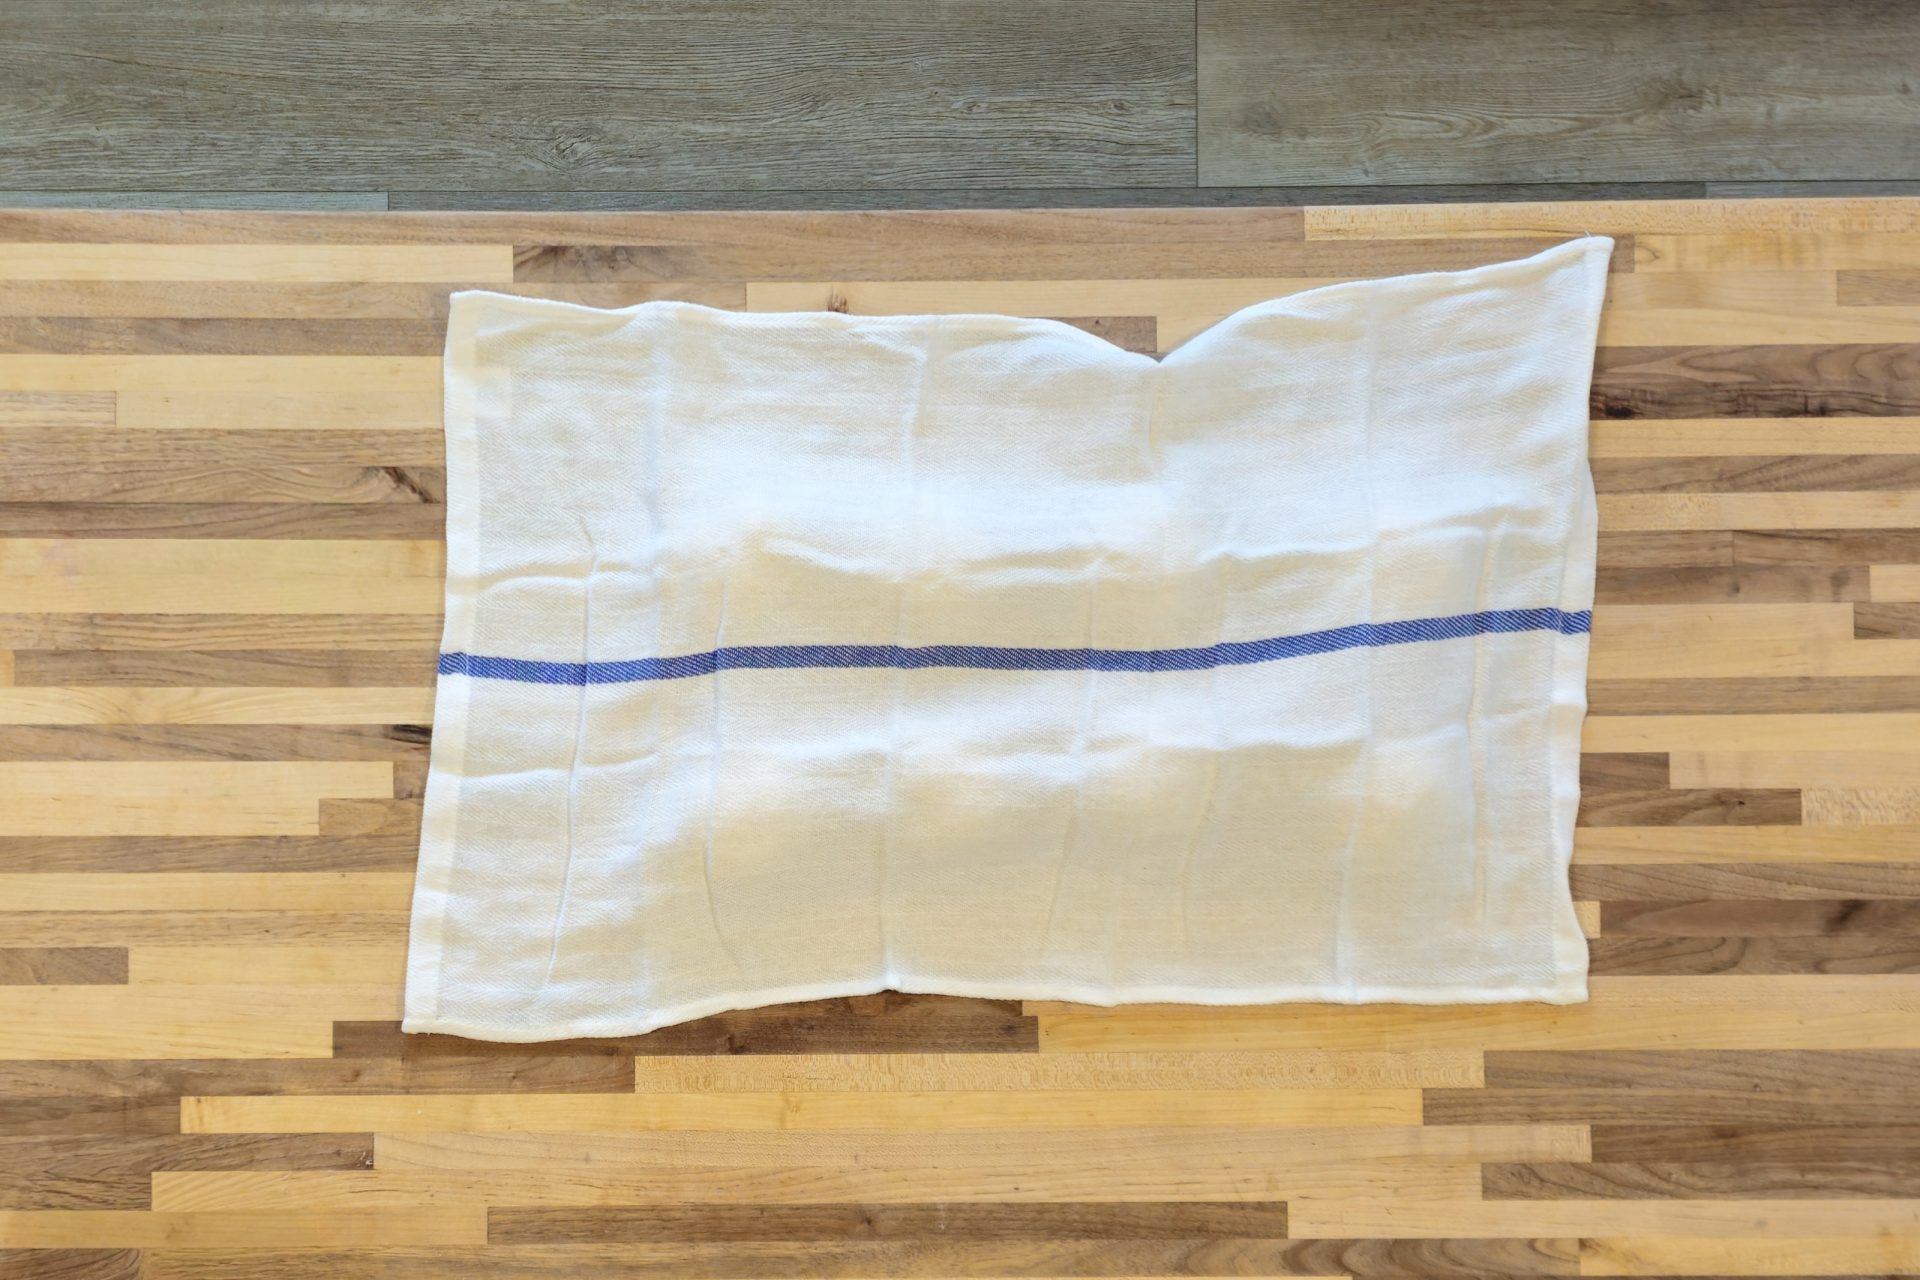
3.3.

Cover the balls with a dish towel and let rest for about 5 – 10 minutes before the next step.

Plteynka_Bun_-_steps-11_3x2Plteynka_Bun_-_steps-12_3x2

4. Set Oven to Preheat:

4.1.

Set oven to preheat at 420°F.

5. Pletýnka Bun Shaping:

Before you proceed:

  • Shape pletýnka buns one by one on a clean surface (do NOT flour the surface).
  • Make sure that the surface is perfectly cleaned (no residue of food, ingredients, etc.).
  • Since the dough includes butter, it will not stick to the surface. If it occasionally does, use your bowl scraper to release your dough.

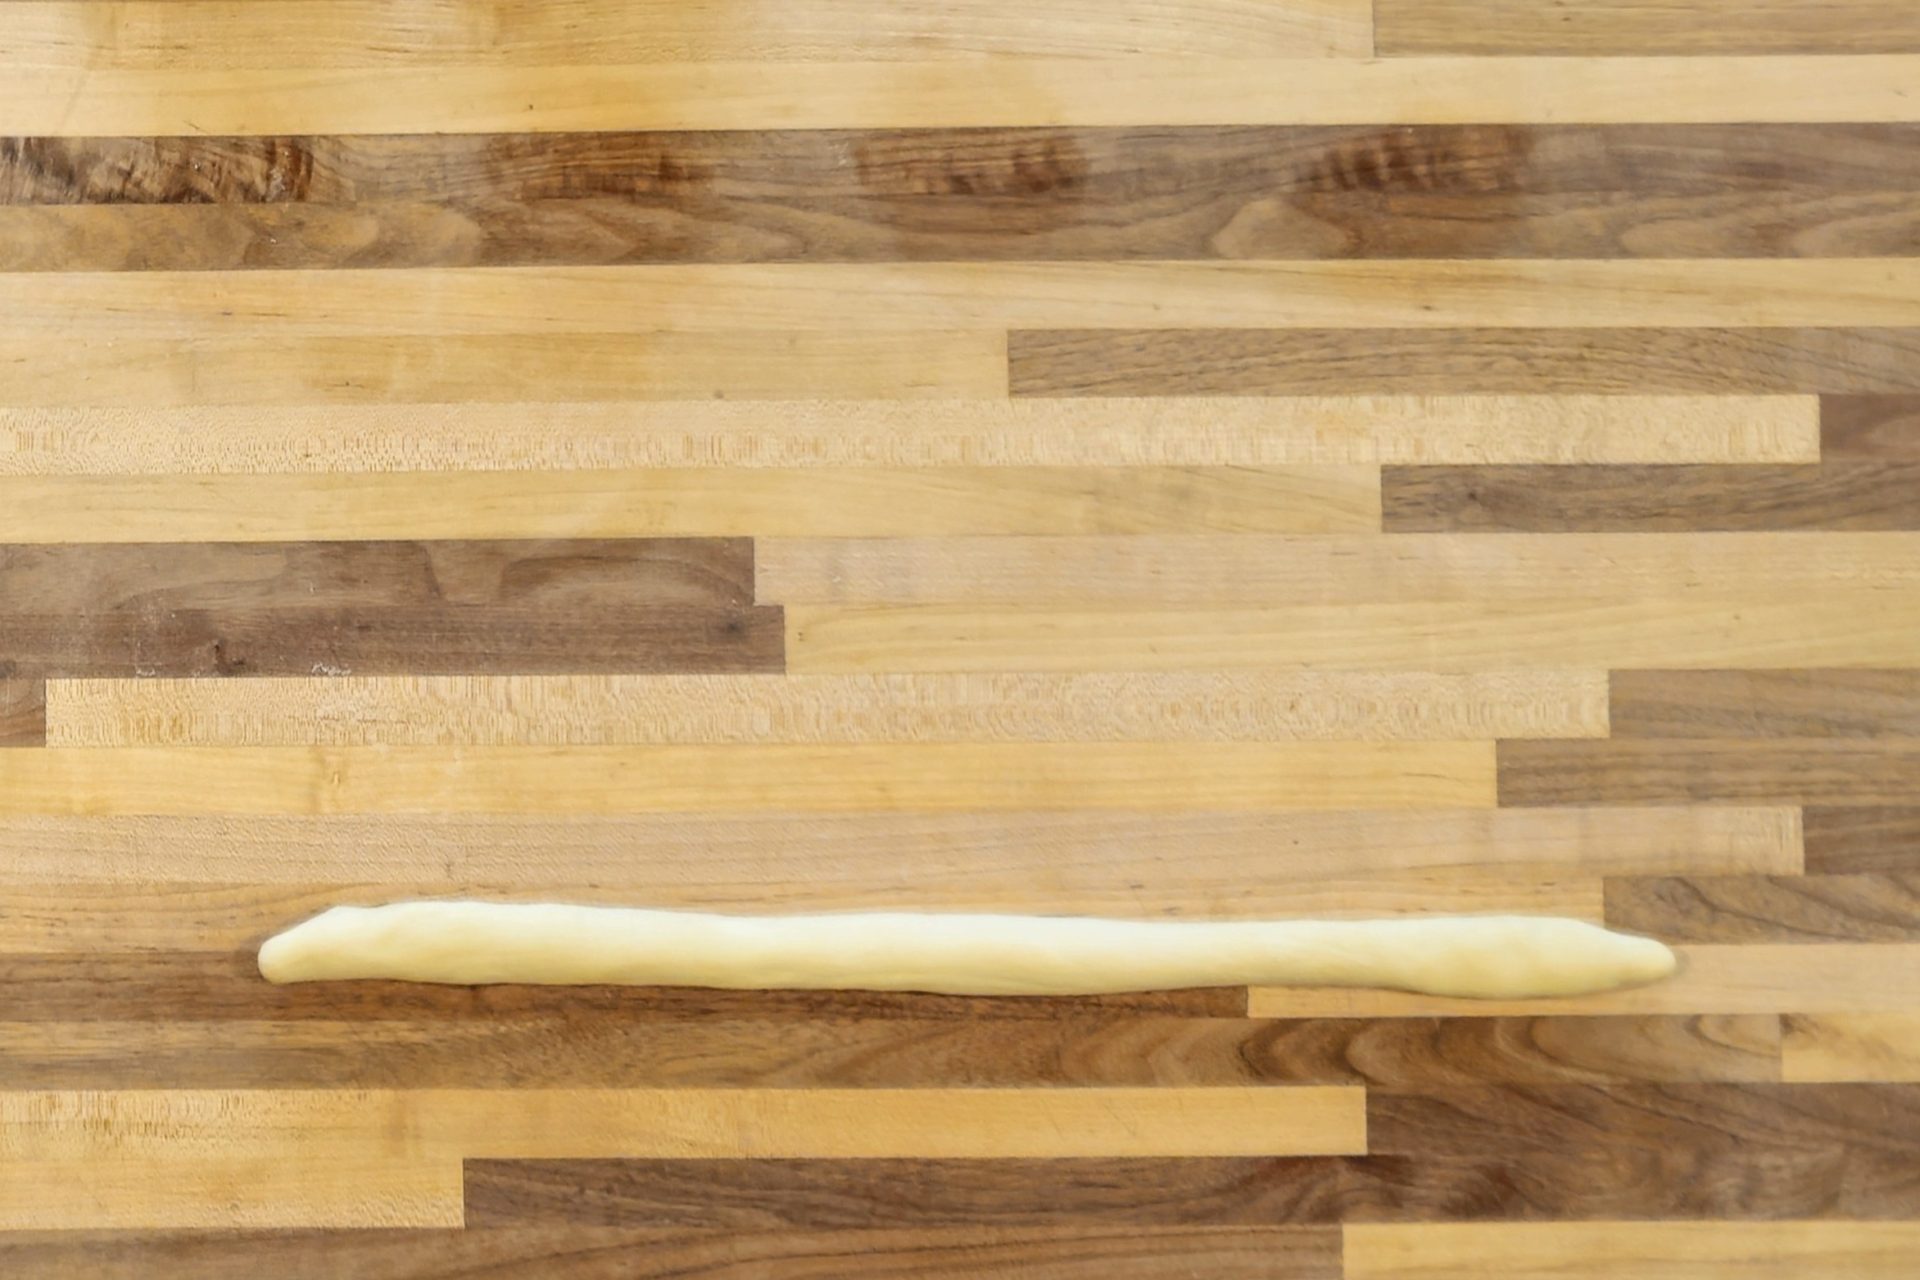
5.1.

Roll each piece into a strand – a long rope shape — with a thickness of about ½ – ¾” and a length of 12” – 16”.

5.2.

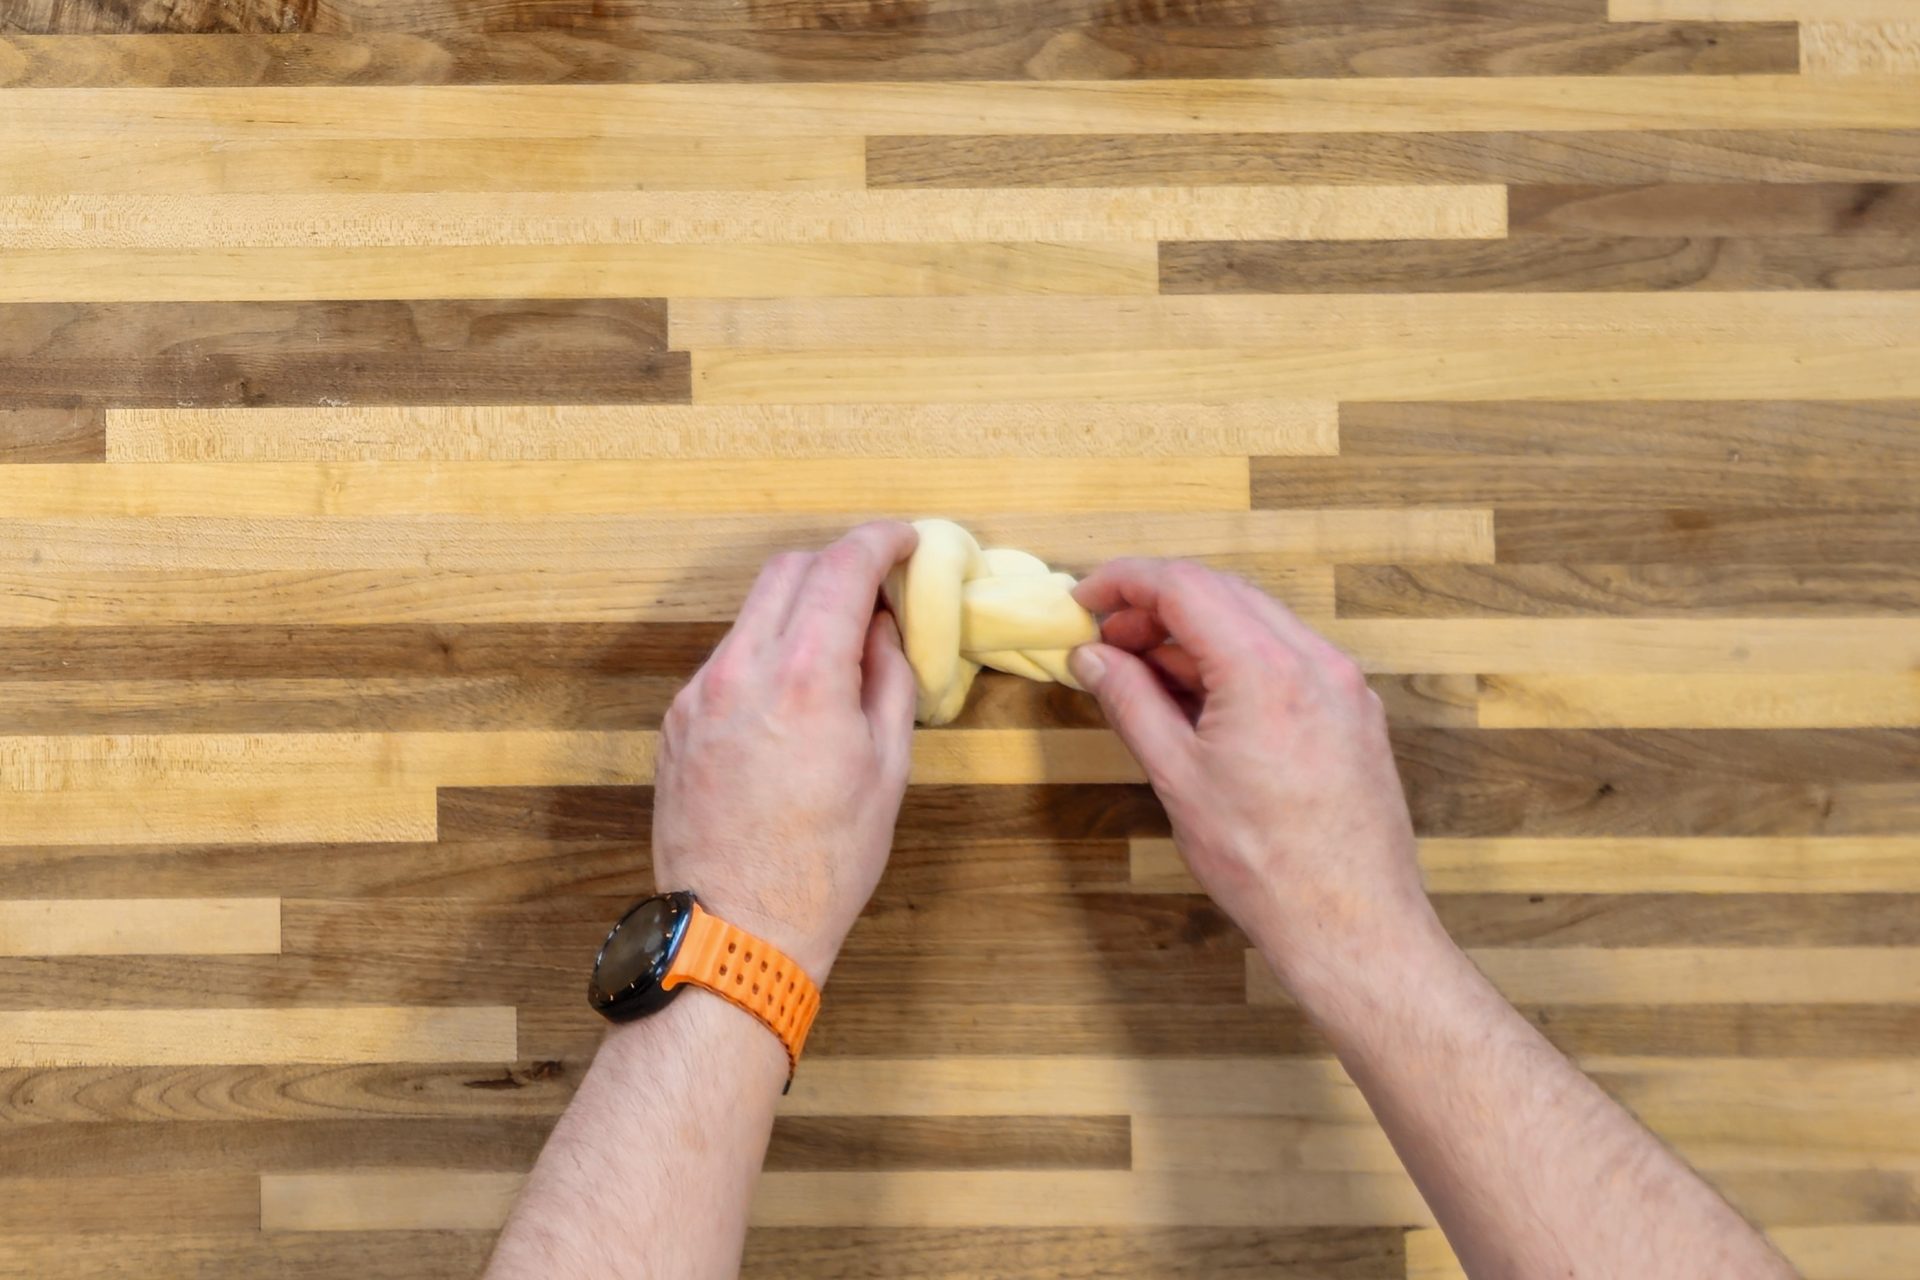
Braid the pletýnka bun from one strand in the following order:

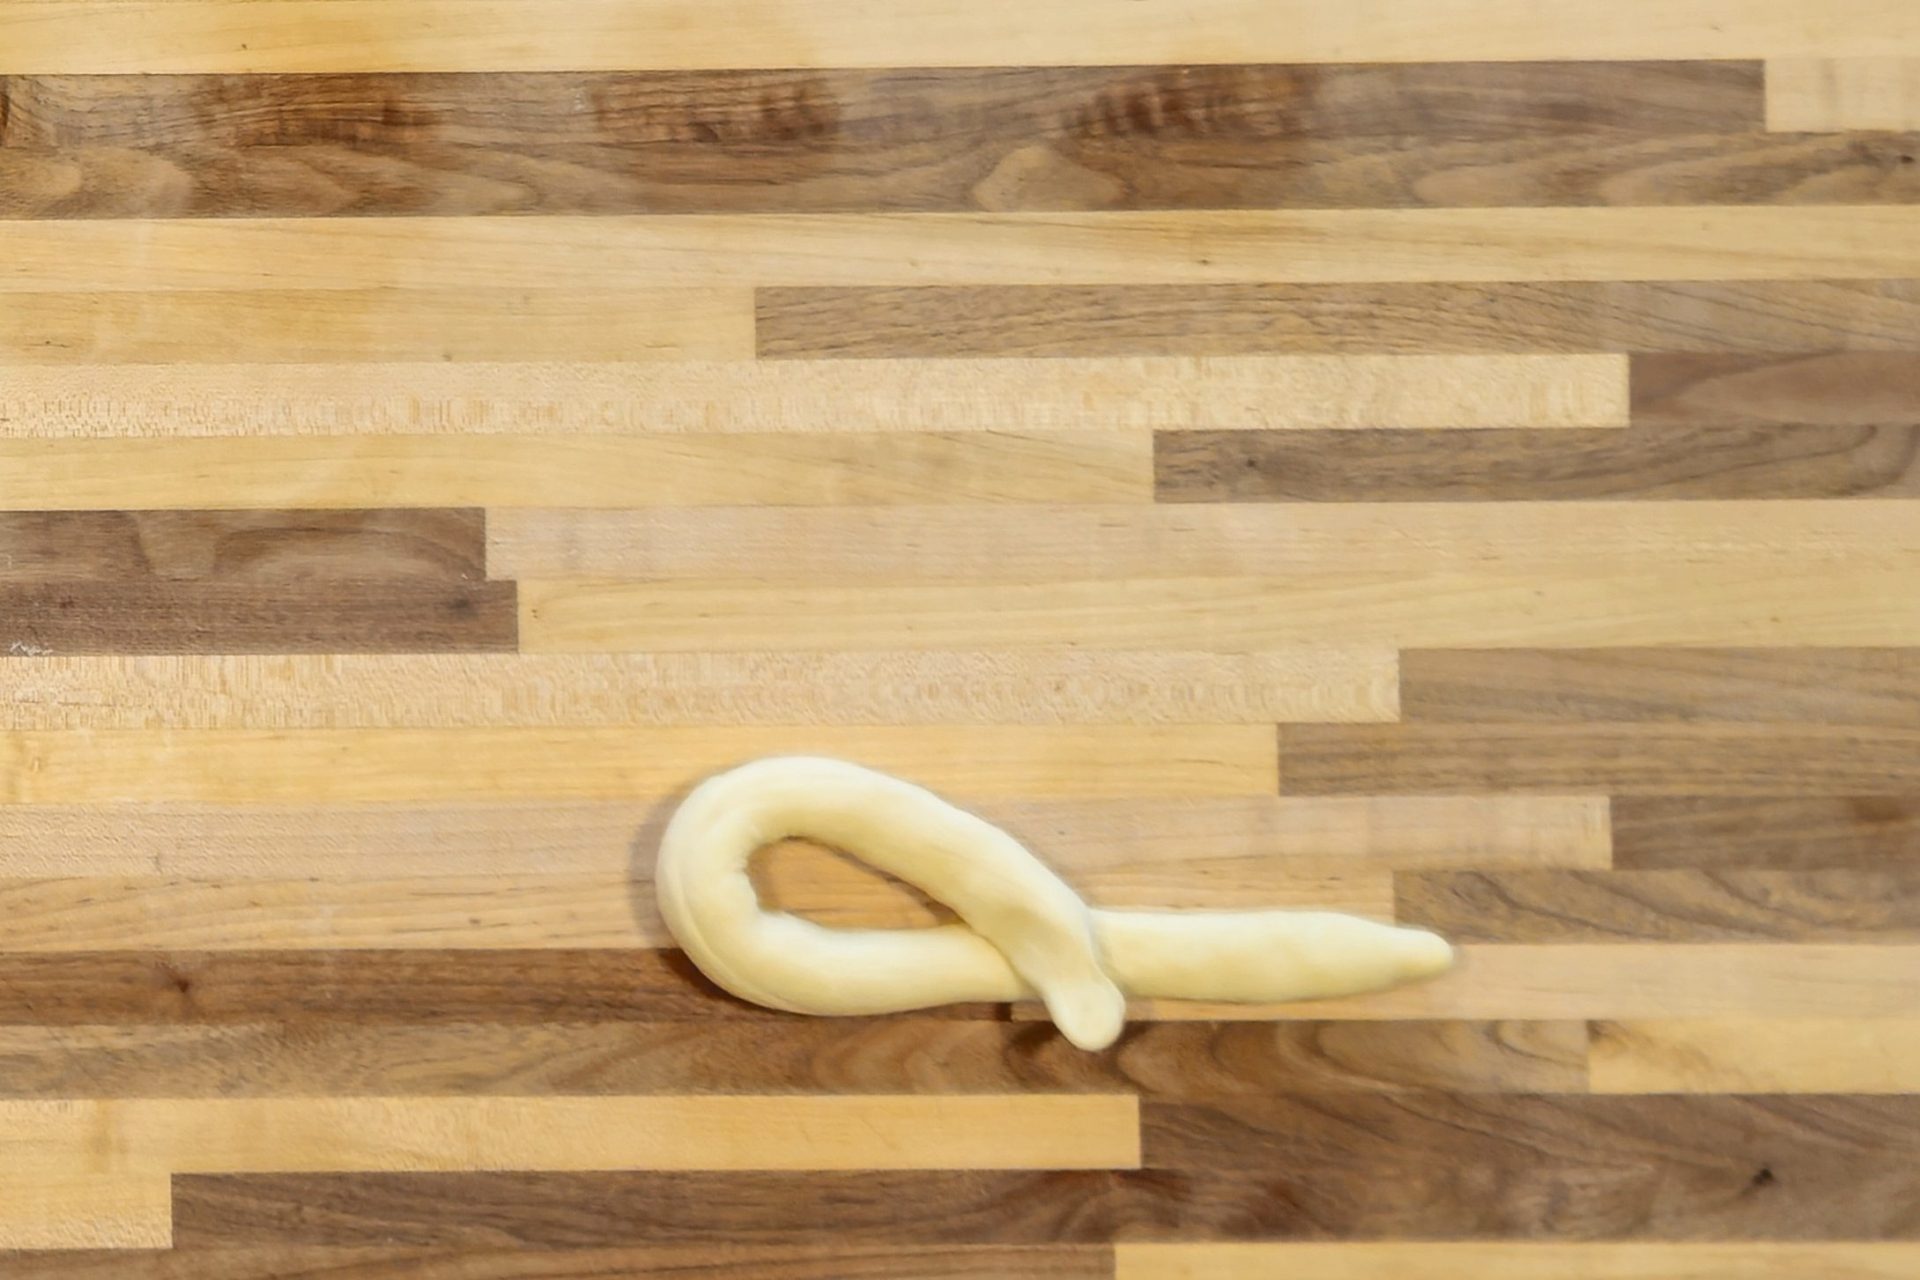
5.2.1. Take the left end of the strand and fold it halfway into the center (direction away from your body), and then connect the fold by lightly pressing it together with your right hand. This creates an “eye” on the left side.

Important: Keep the finger that presses it together on that spot to hold the connection.

Plteynka_Bun_-_steps-13_3x2Plteynka_Bun_-_steps-14_3x2

5.2.2.

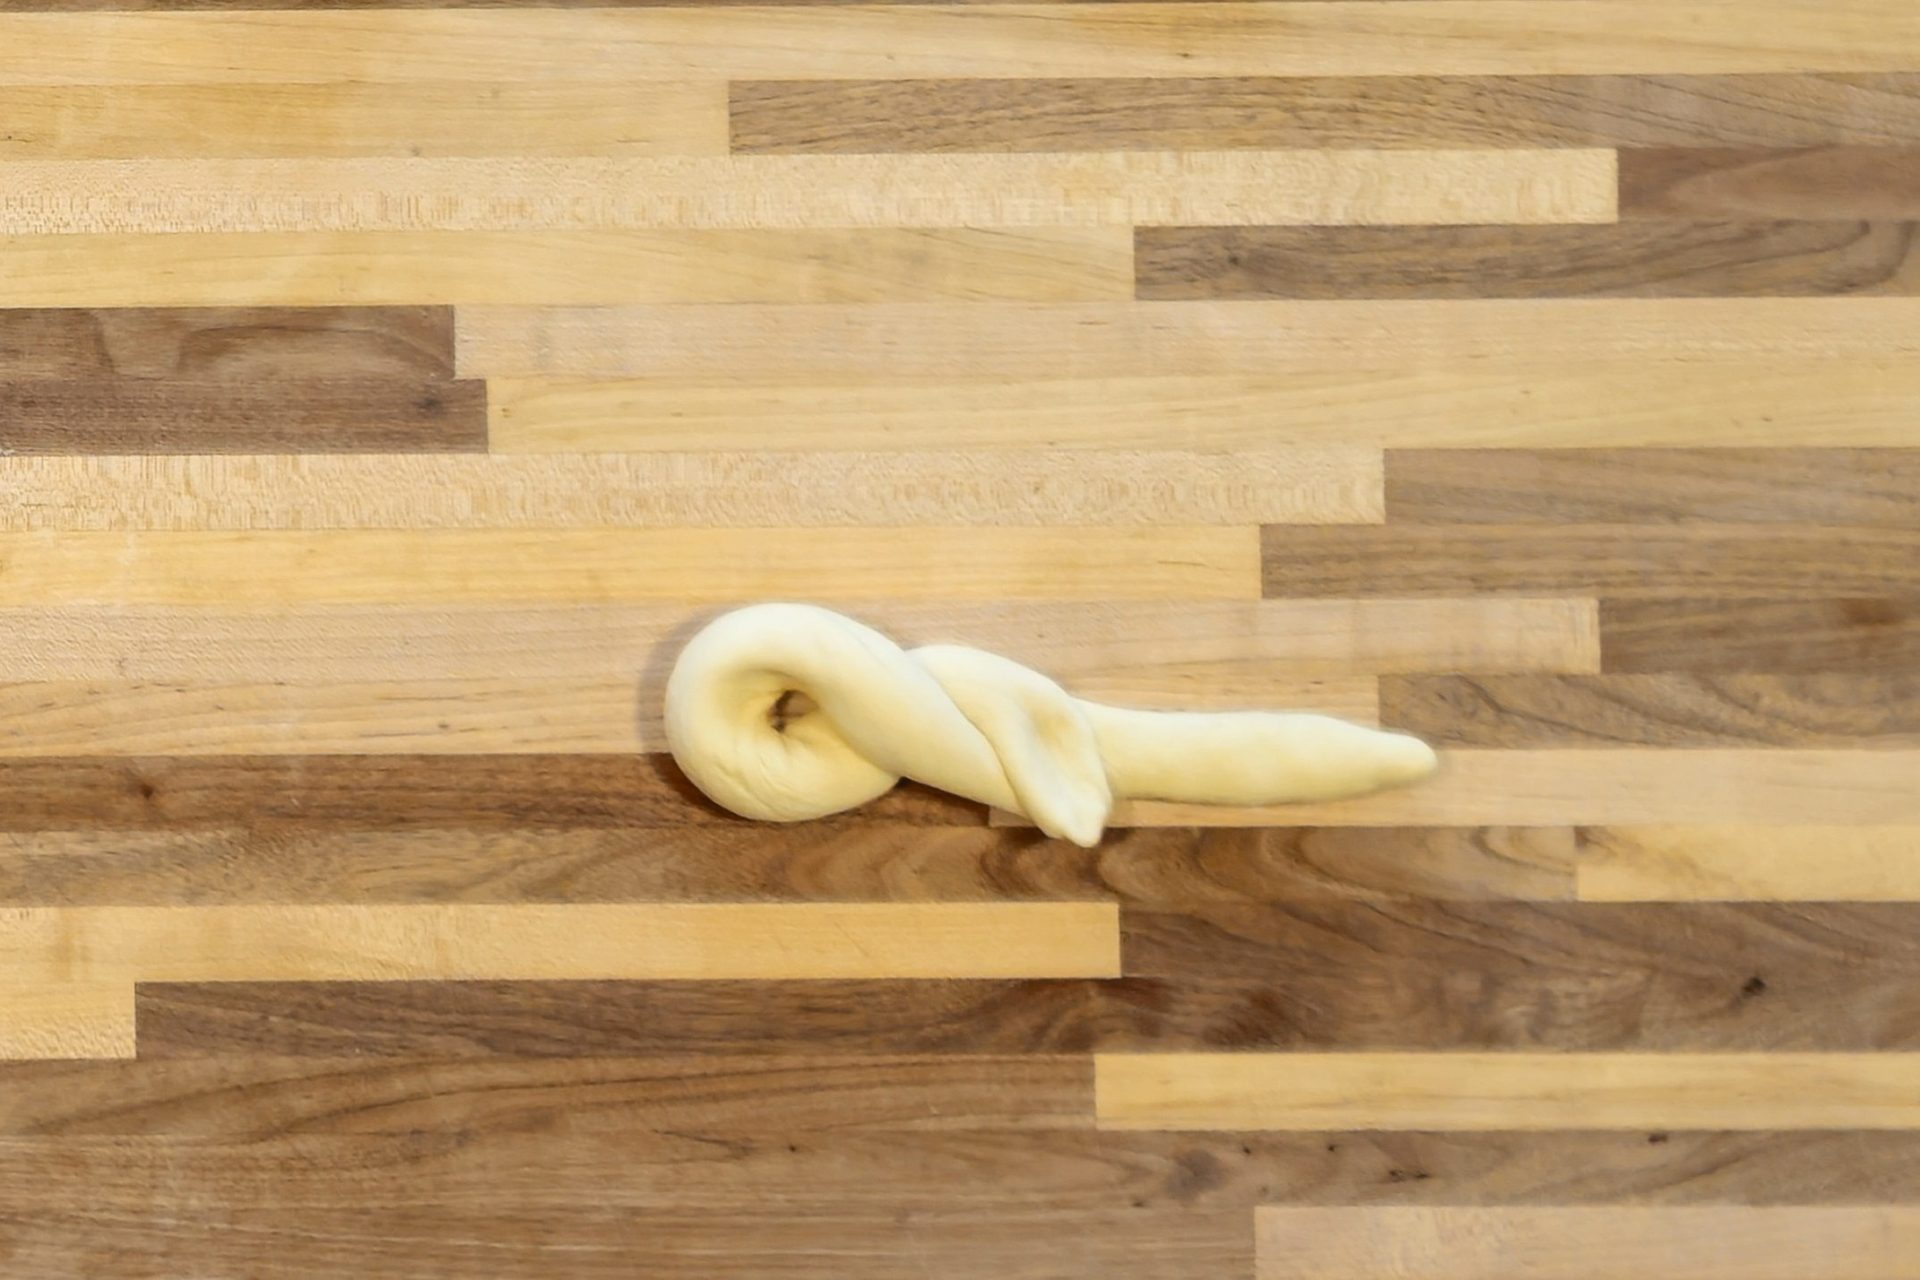
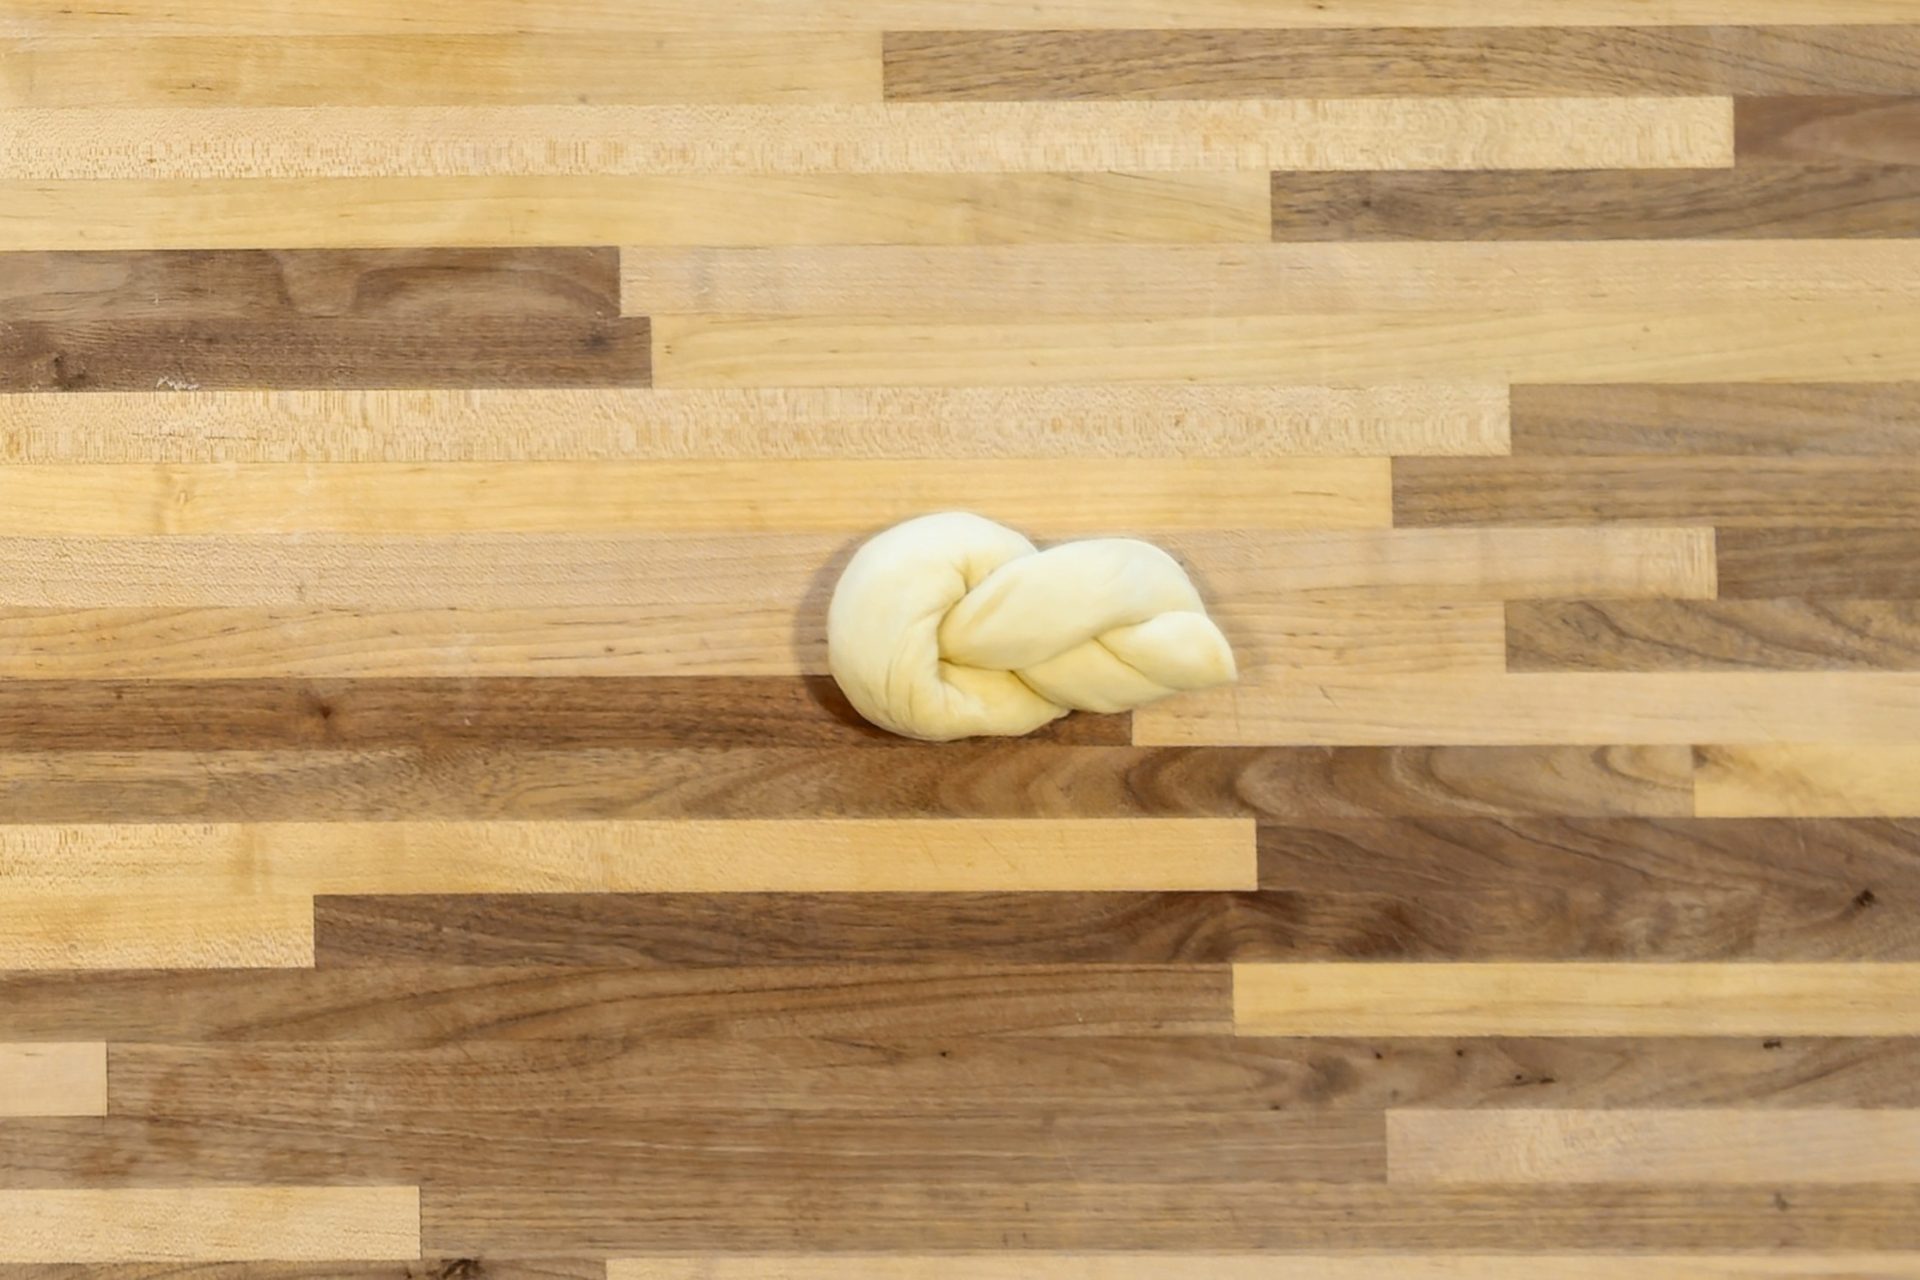
Then twist the “eye” on the left away from your body using your left hand.

Plteynka_Bun_-_steps-16_3x2

5.2.3.

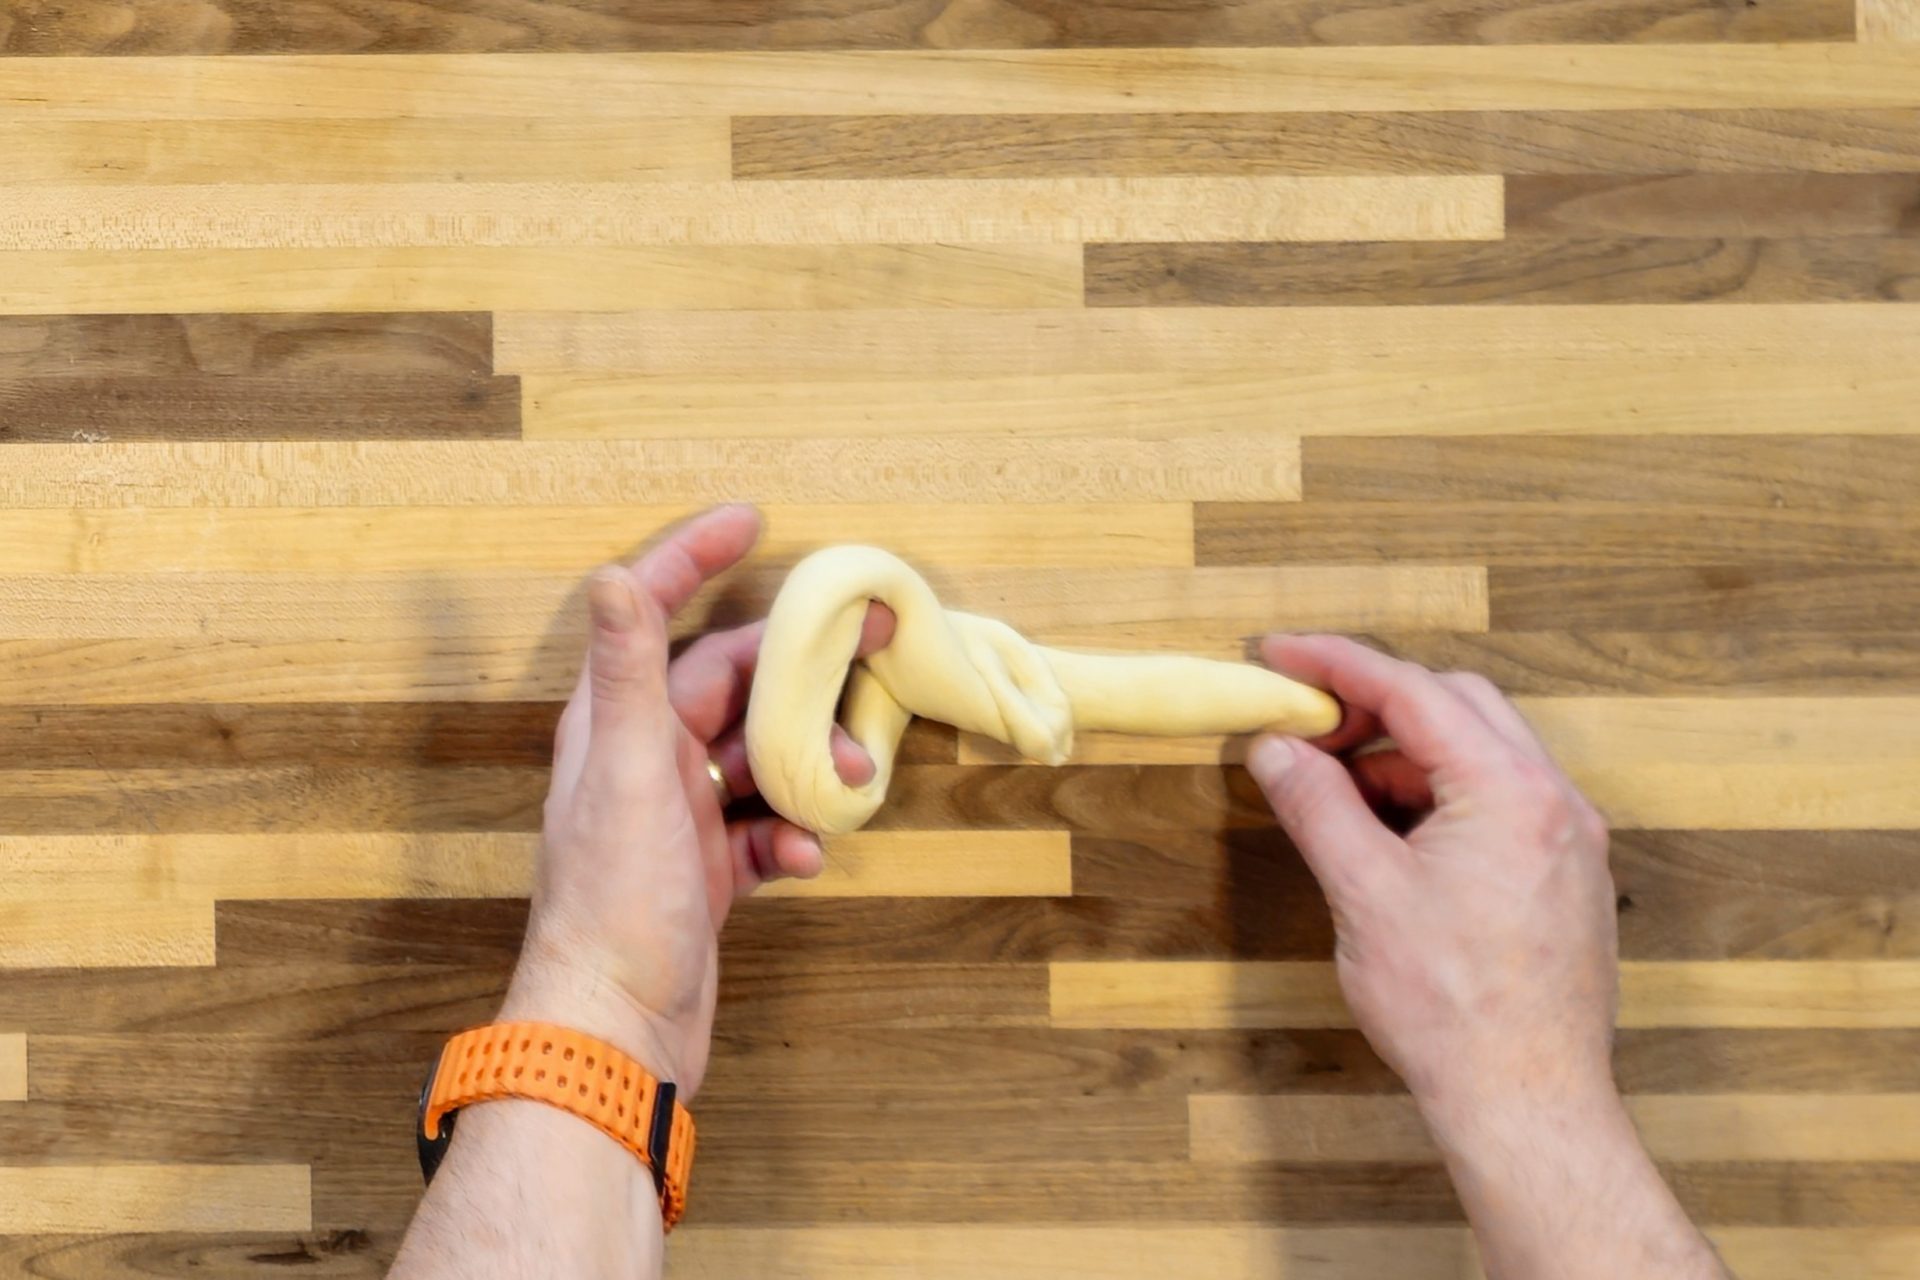
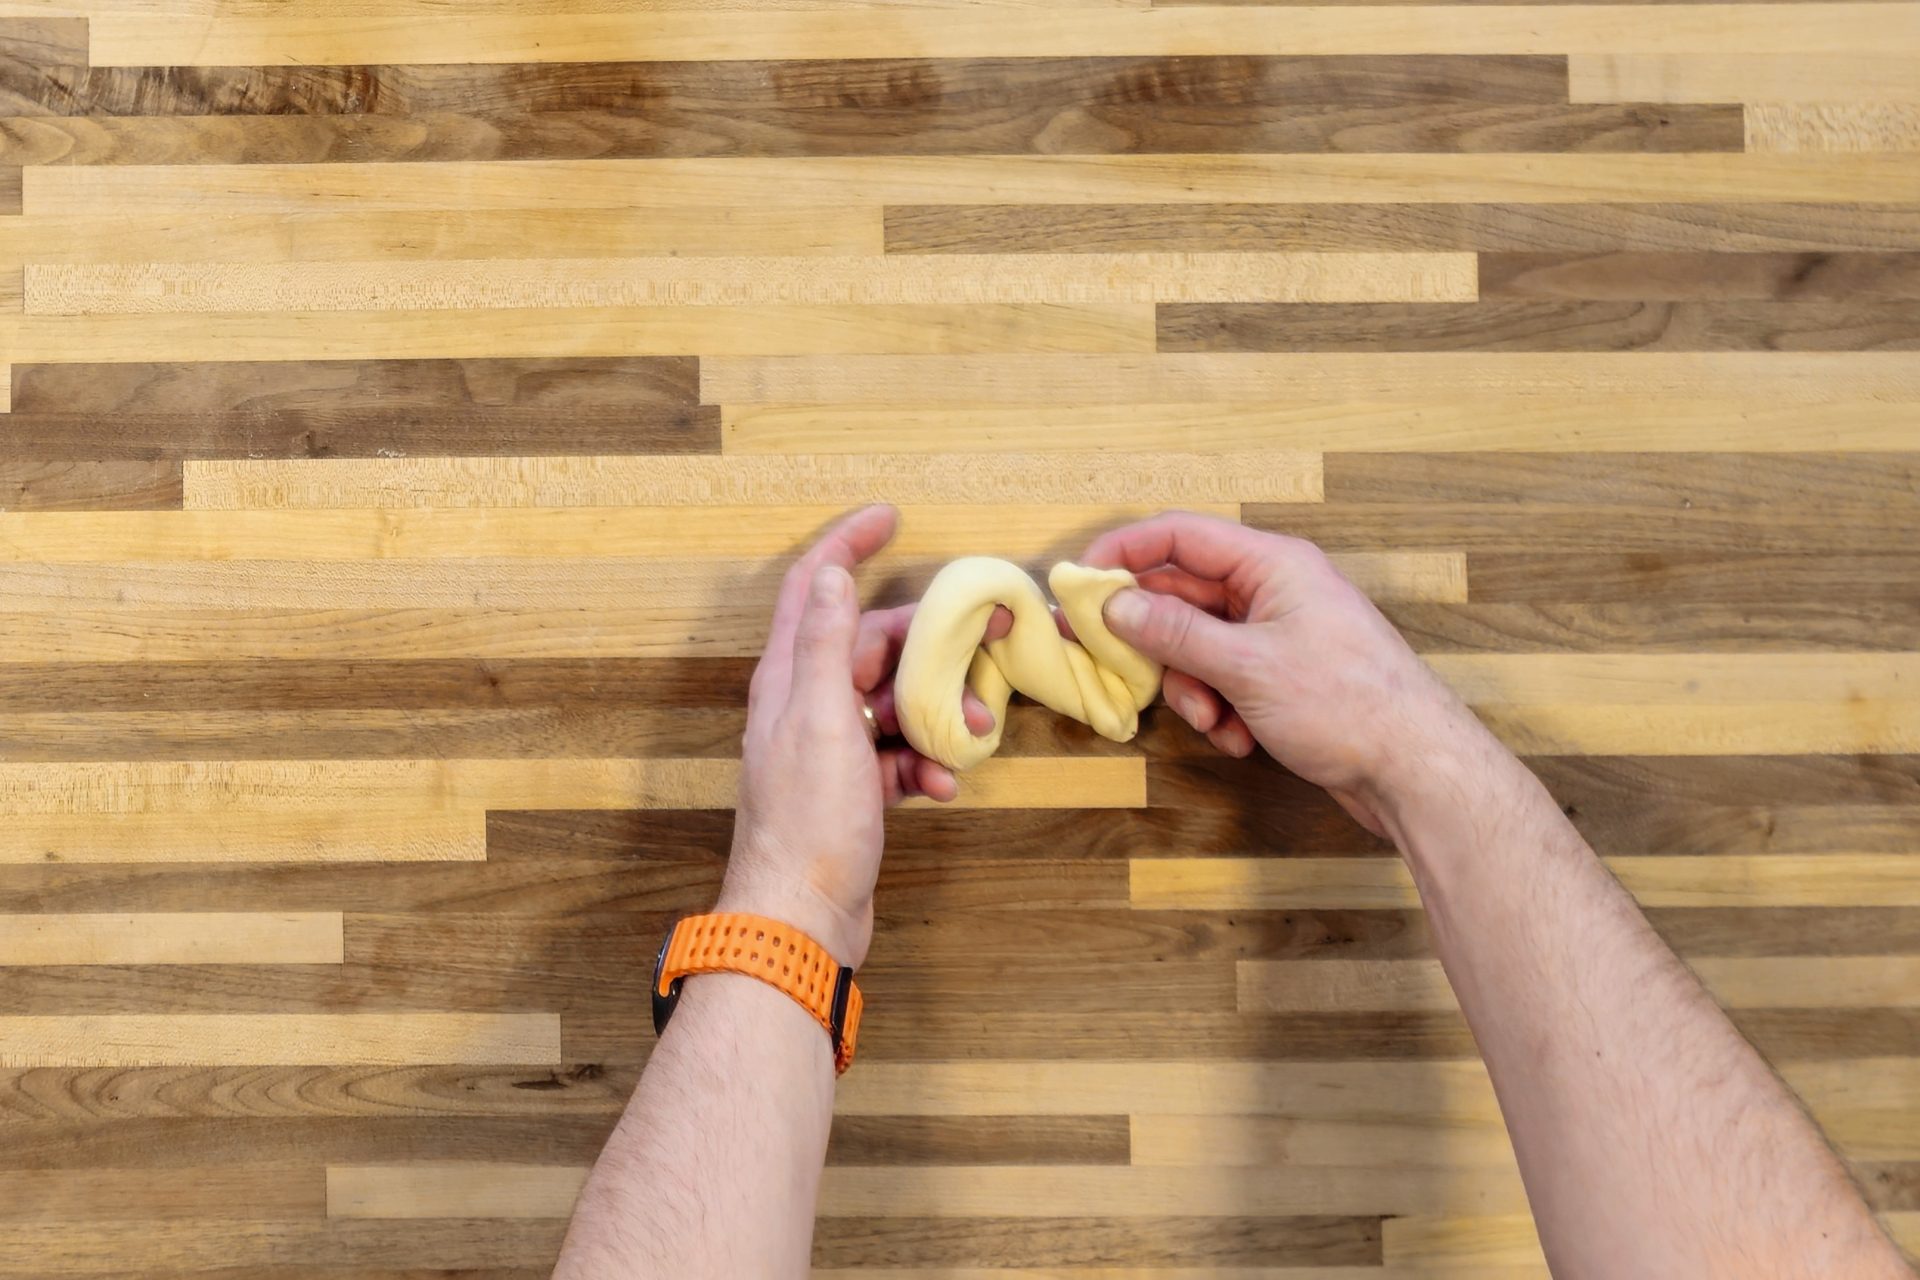
Then pull the right side of the strand all the way through the “eye” using your right hand (release the connection beforehand).

Plteynka_Bun_-_steps-17_3x2Plteynka_Bun_-_steps-18_3x2Plteynka_Bun_-_steps-19_3x2Plteynka_Bun_-_steps-20_3x2

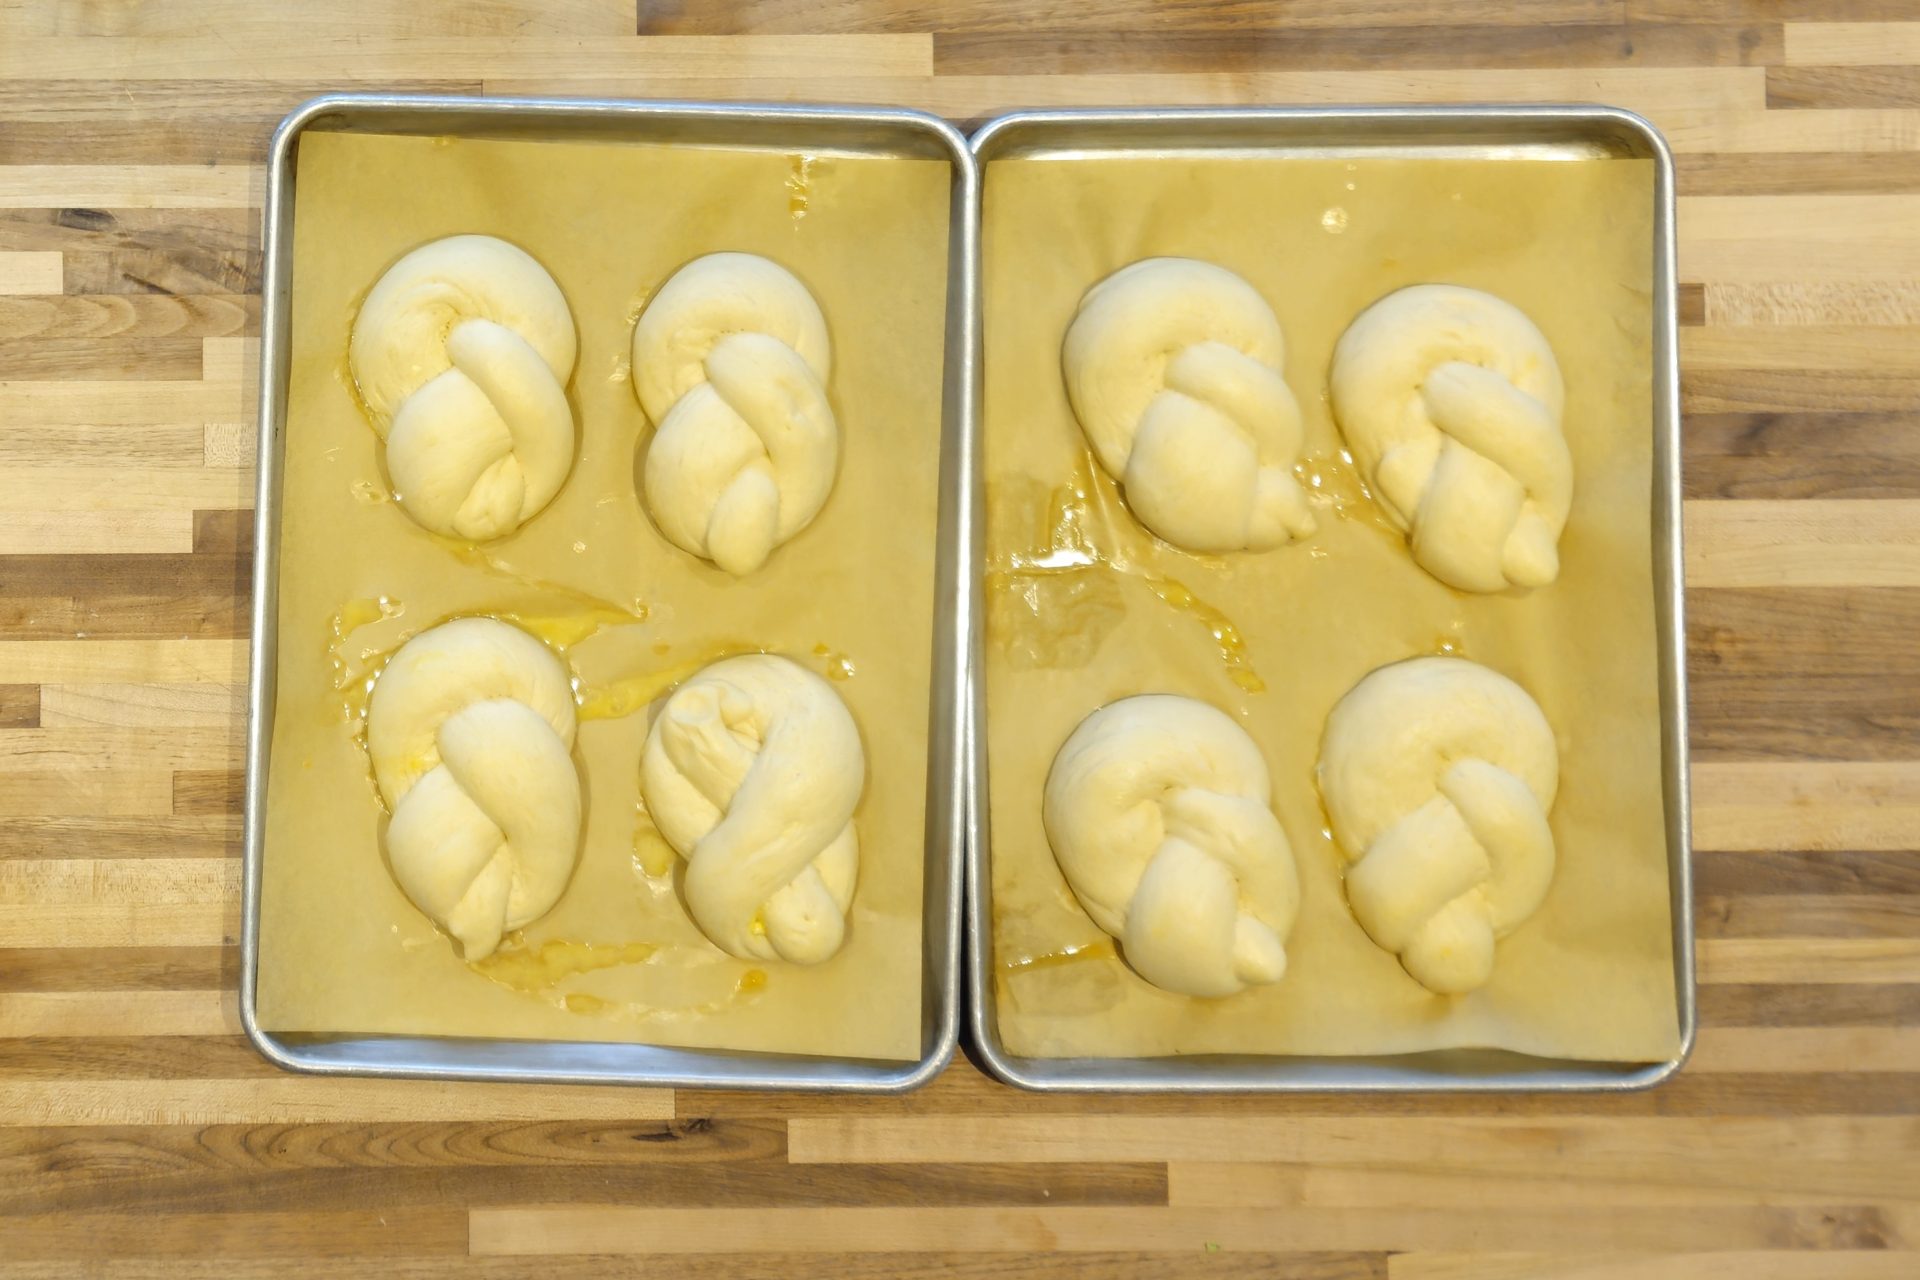
5.2.4. Place the pletýnka on the baking sheet and then process the same way with the remaining dough (after you are completely done, you should have 4 pletýnka buns on each baking sheet).

Important: Try to keep an even distance to make sure that they do not touch.

6. Proofing:

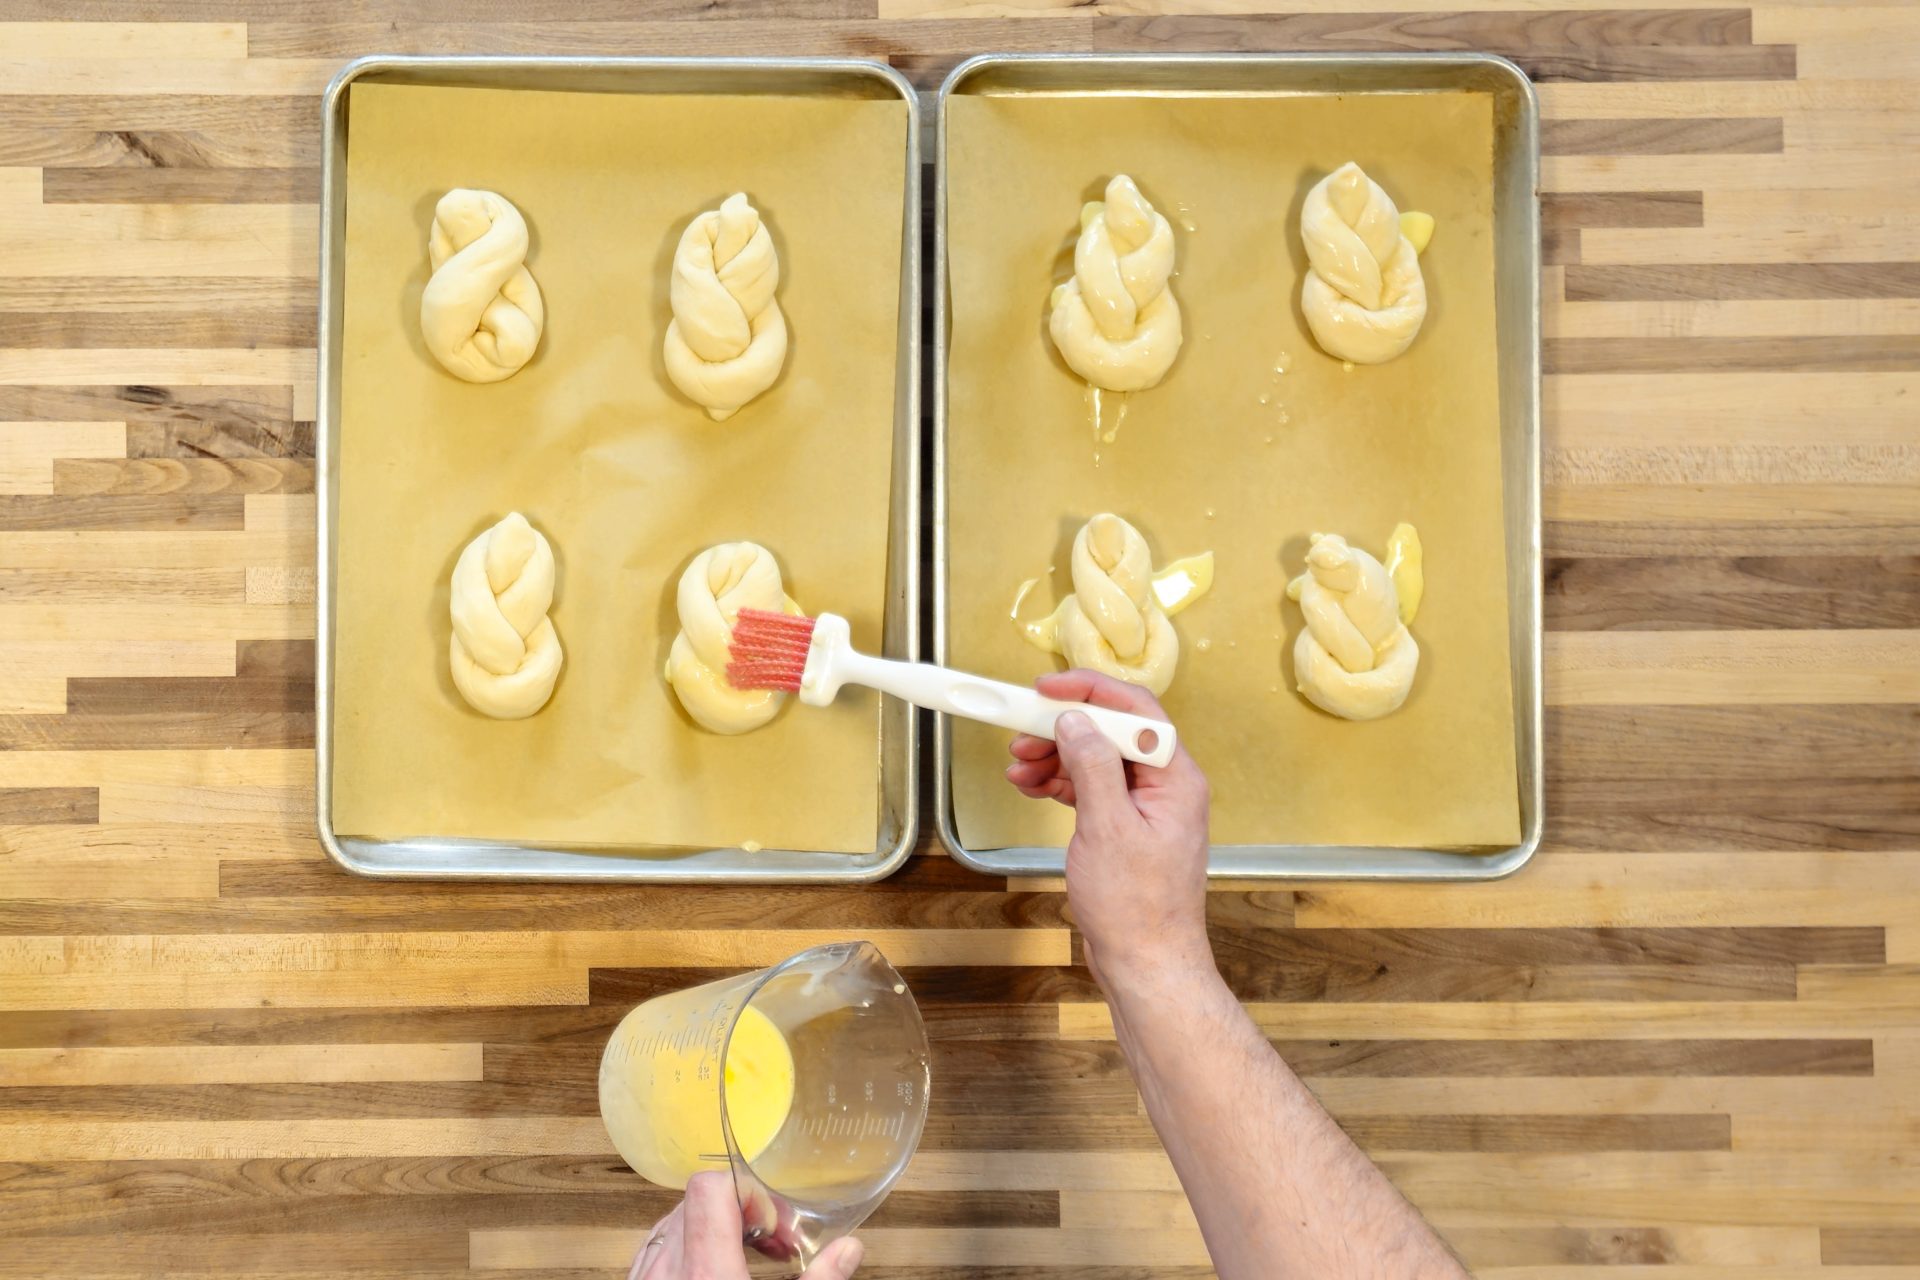
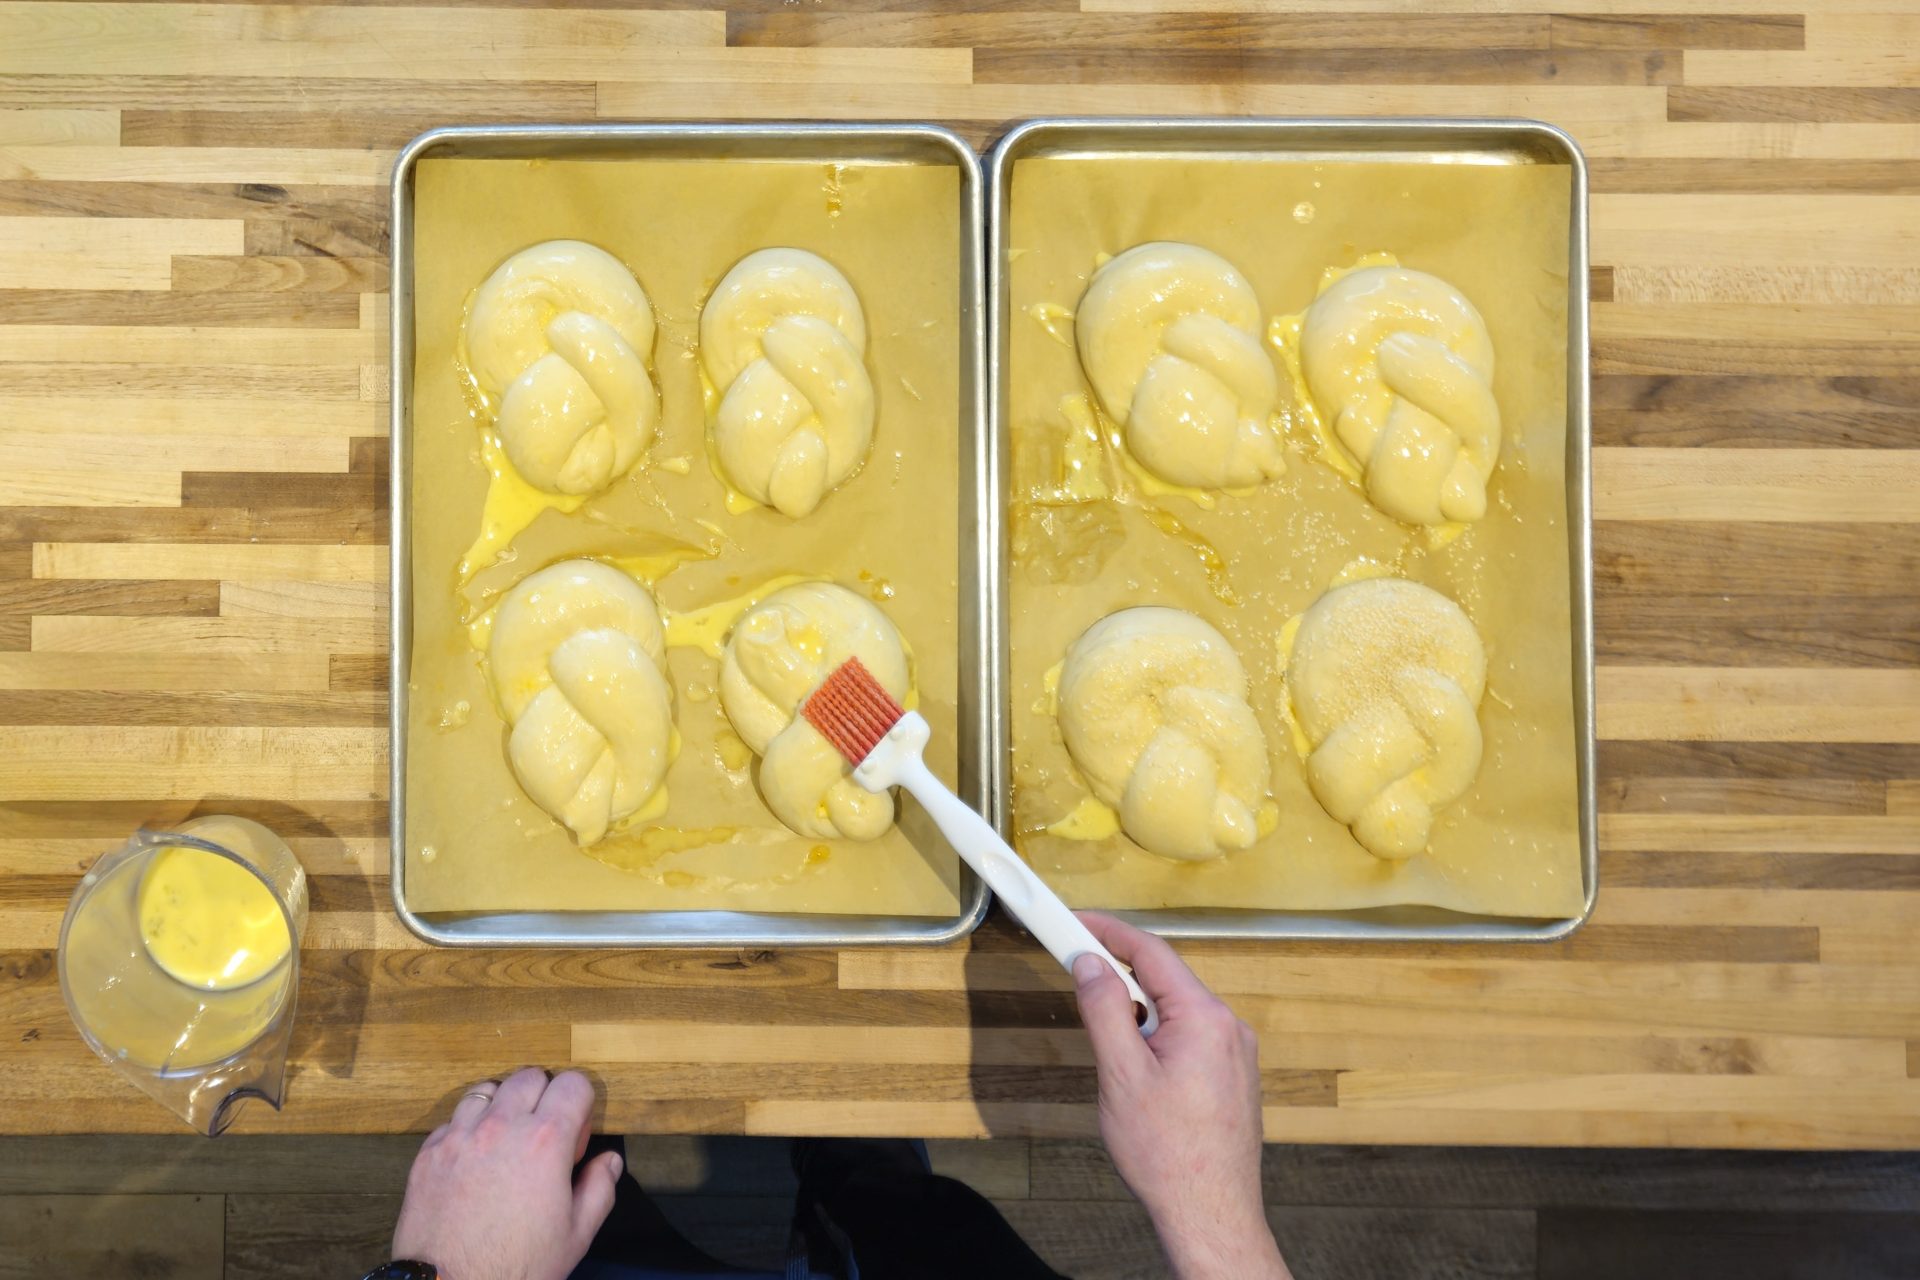
6.1. Prepare a brushing mixture by briefly hand-whisking 1 egg with ¼ cup of milk in a measuring pitcher or small mixing bowl and then brush all the buns.

Important: Keep the rest of the mixture for the second brushing.

Plteynka_Bun_-_steps-22_3x2Plteynka_Bun_-_steps-23_3x2

6.2. Then let it proof in a warm place until it has about doubled in size (usually about 30 minutes to 1 hour).

Tip:

  • Optionally, you can increase the proofing time until the pletýnka buns triple in size – that way, you will reach an airier consistency that is close to a hoagie bun.
  • But do not go crazy with the expansion, if you go over 3x the original size, you would be risking over-proofing, and the buns will expand too much and become too flat.

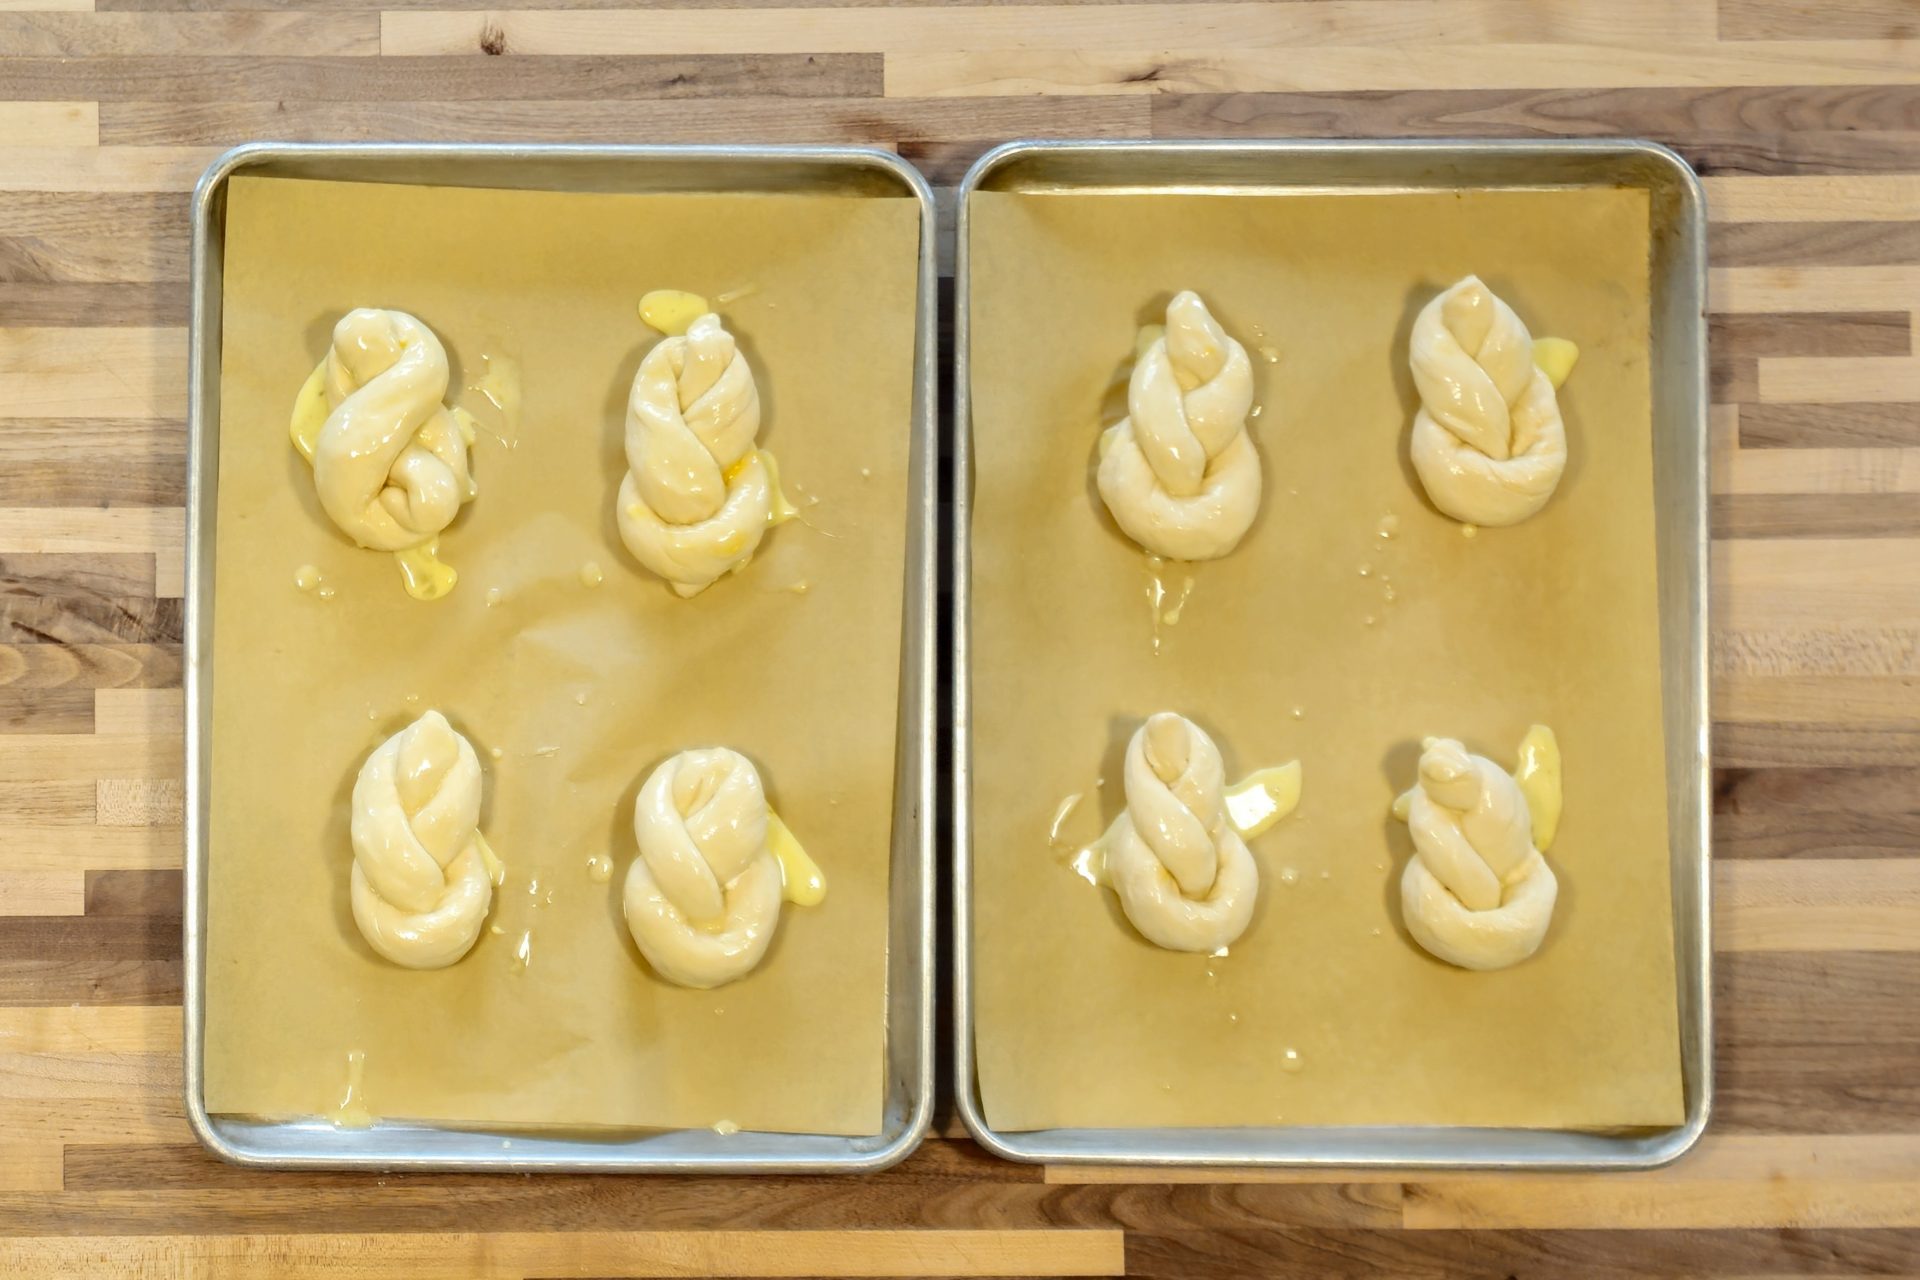
6.3.

Gently brush all the buns again with the remaining brushing mixture right before baking (when proofing to the final shape is completed).

Plteynka_Bun_-_steps-24_3x2Plteynka_Bun_-_steps-25_3x2

6.4.

Optionally, sprinkle with sesame seeds, crushed pepper flakes, sea salt, or poppyseeds.

7. Baking Pletýnka Bun:

7.1.

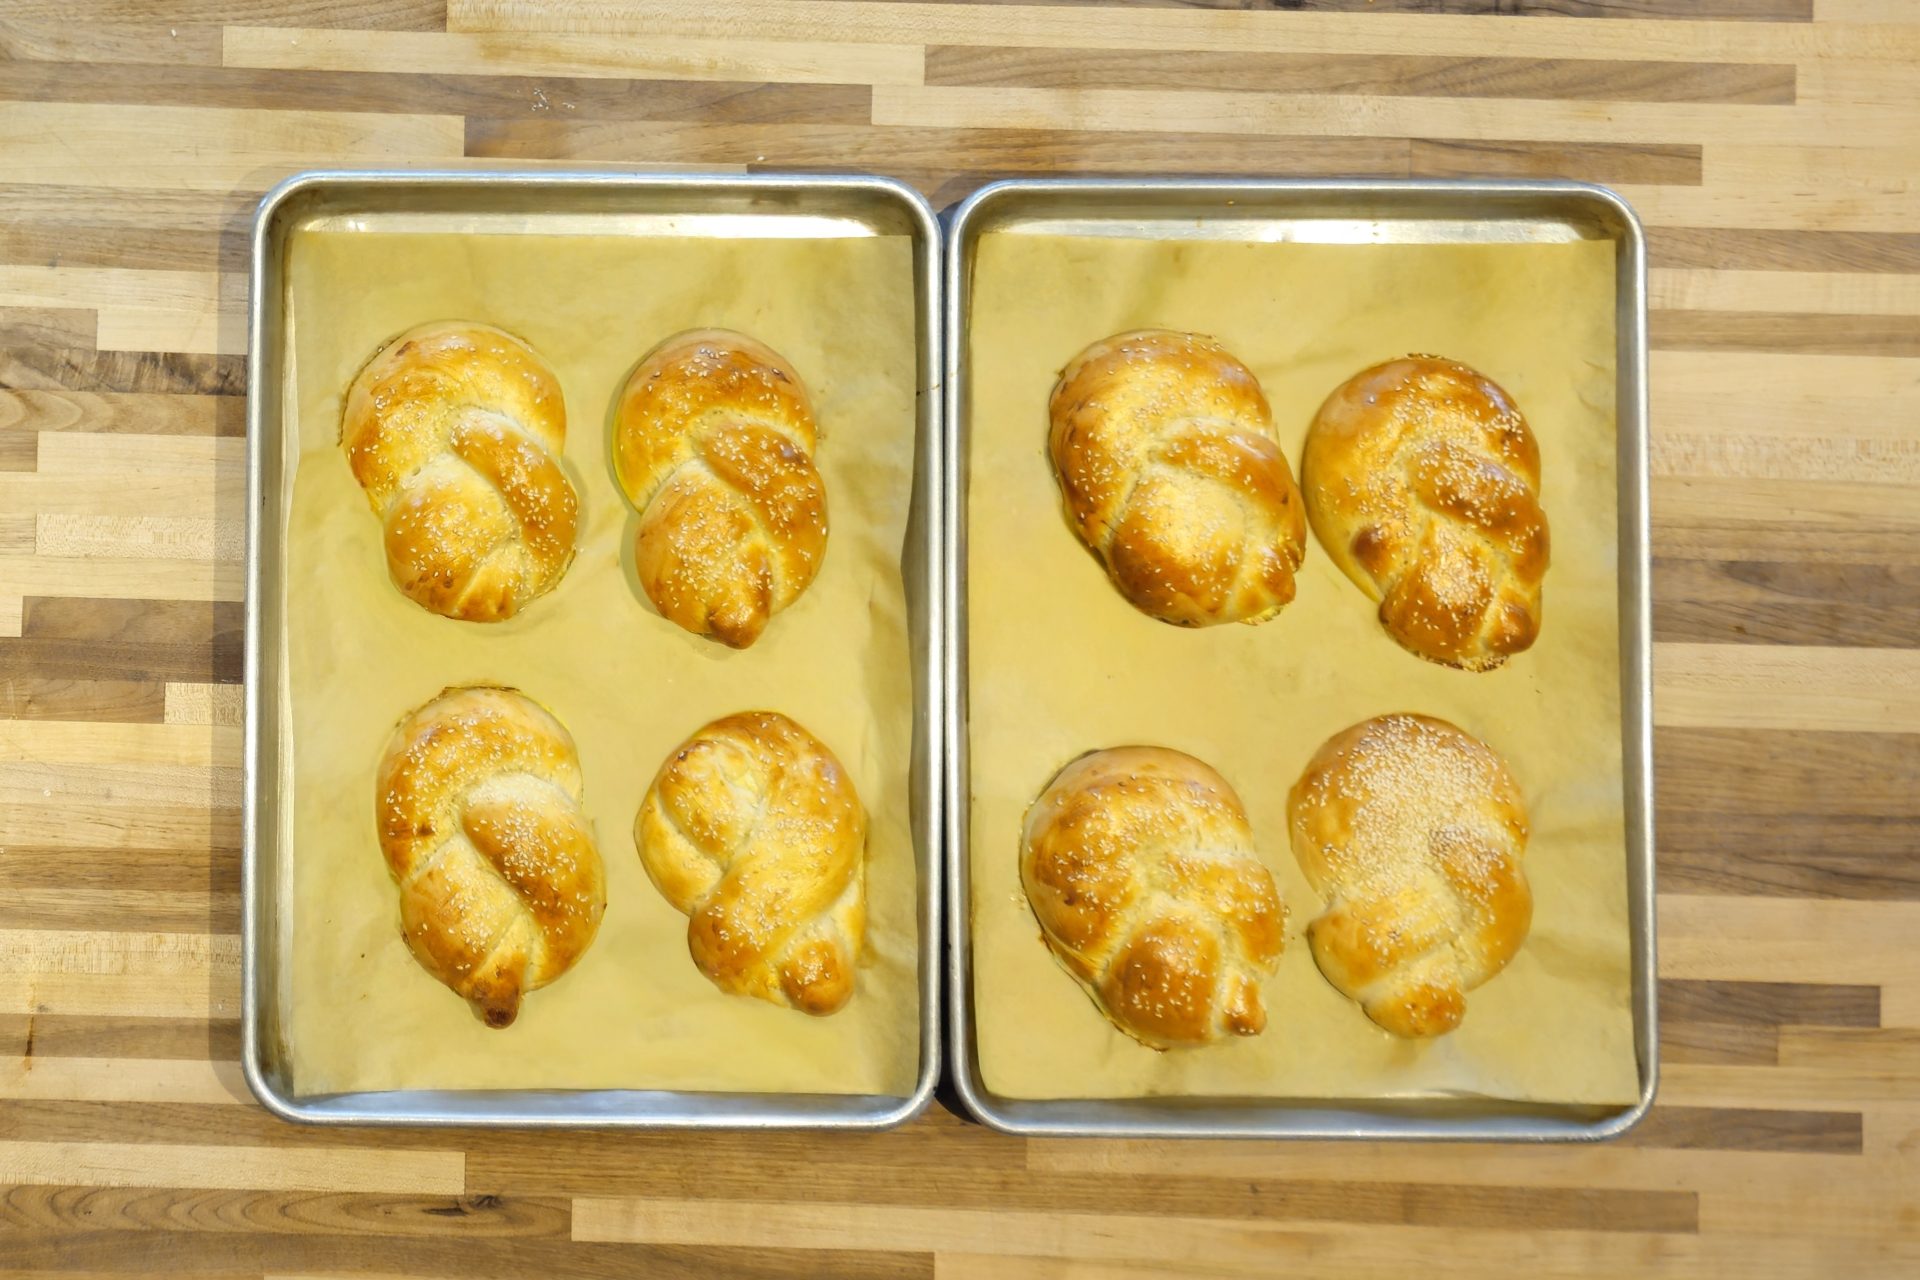
Bake in a preheated oven until a nice golden color is reached, which means the pletýnka buns are done (about 12 -15 minutes).

Plteynka_Bun_-_steps-27_3x2

7.2.

Rotate the baking sheets in the middle of baking.

7.3.

Test with a toothpick.

7.4.

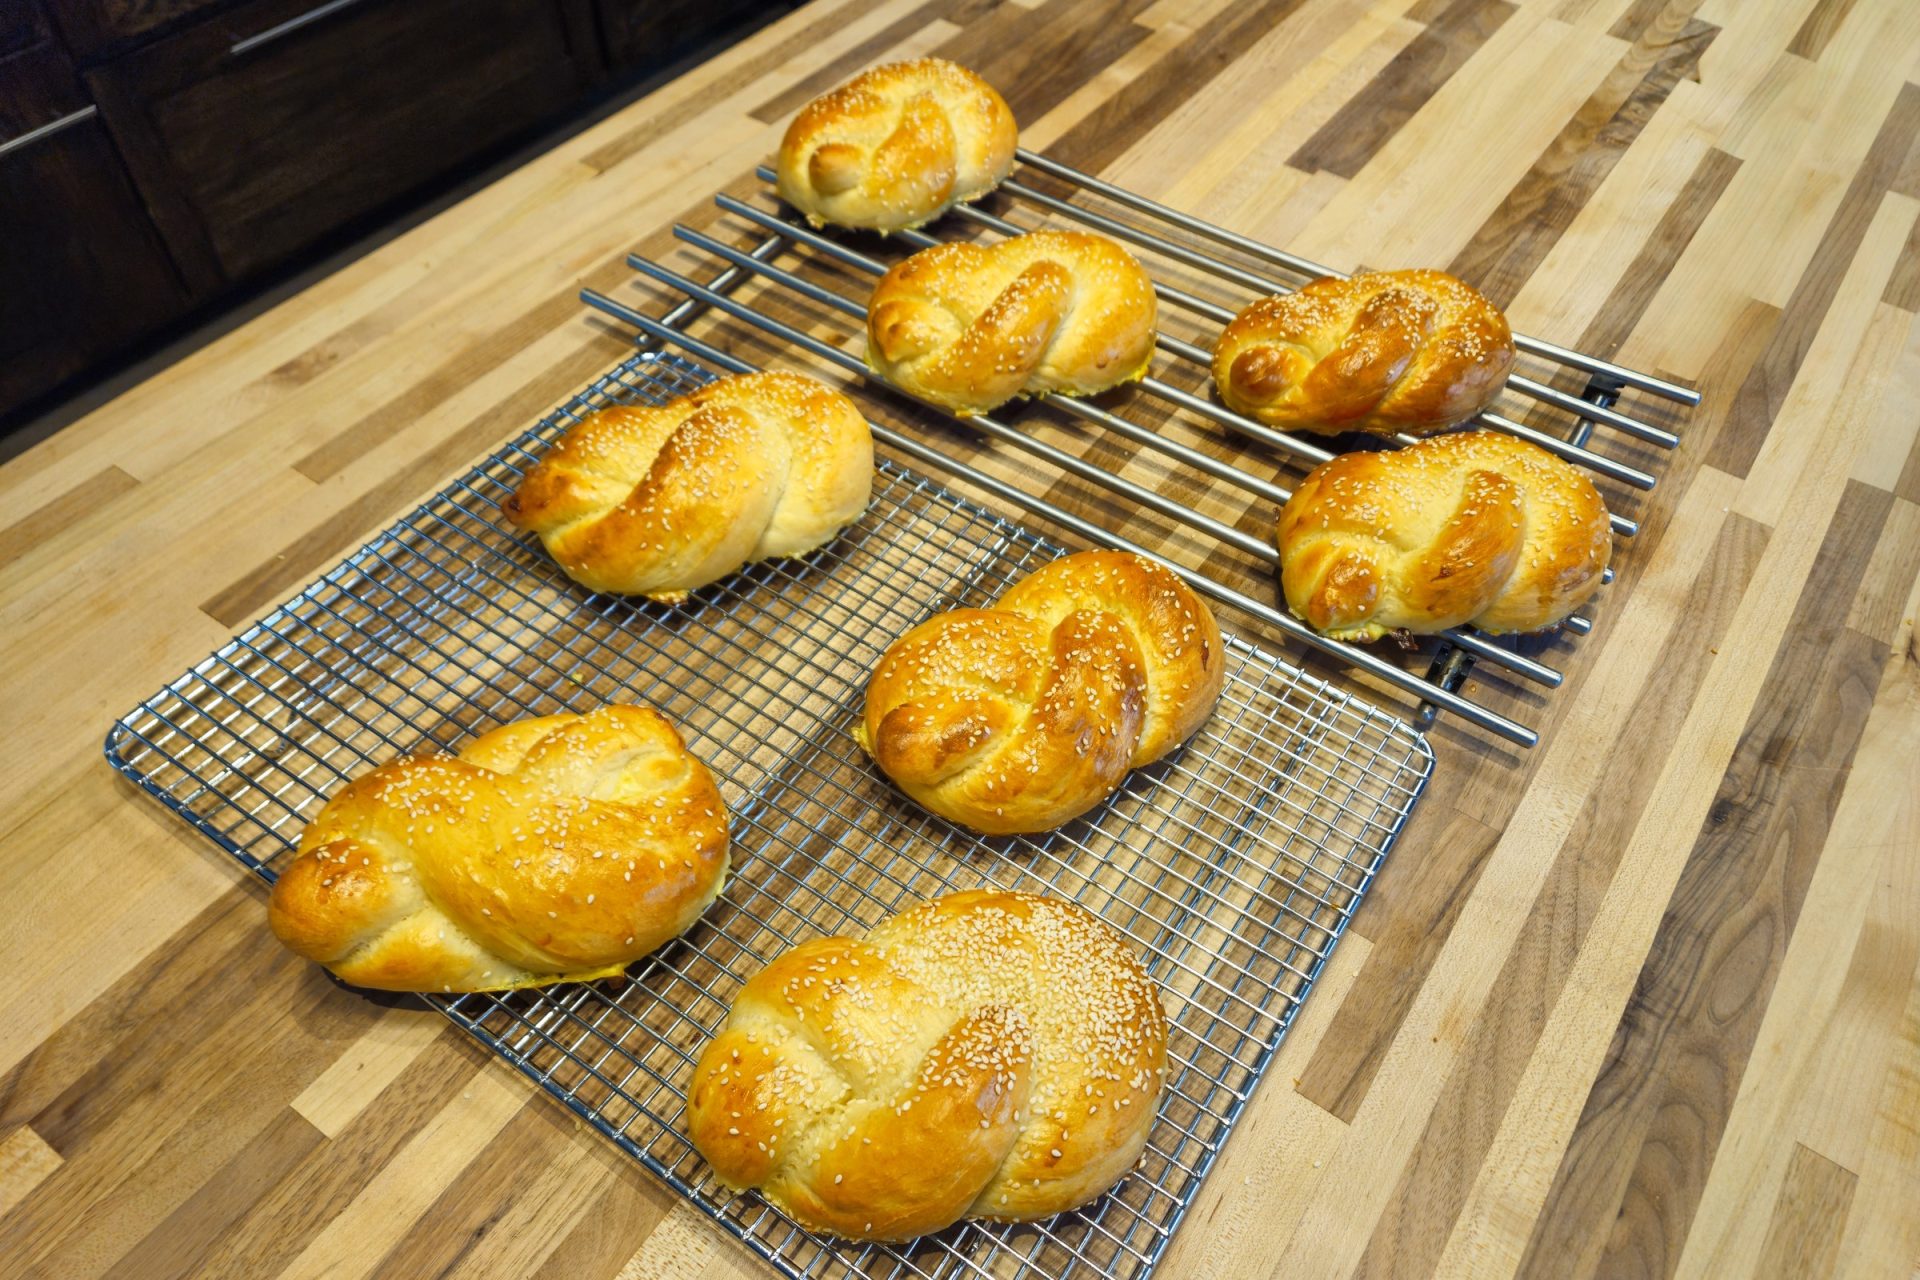
Then, cool on a cooling grate.

Plteynka_Bun-3_3x2_small

Tip:

You can bake more pletýnka buns than you need and freeze them for later usage (they stay great in the freezer for up to a half year). Defrost in only two hours.

Types of Flour

March 26, 2024

Welcome to the fascinating and often underestimated world of types of flour. For millennia, flour, in its myriad forms, has been a fundamental building block of human nourishment and culinary artistry. From the simplest rustic breads to the most delicate pastries, the choice of flour is a pivotal decision that profoundly shapes the outcome. This article will embark on a journey to explore the broad spectrum of types of flour, moving beyond the familiar to appreciate the subtle yet significant differences that make each category unique. Understanding the various types of flour is not just for professional bakers; it’s a key piece of knowledge for any home cook looking to elevate their culinary creations and truly grasp the science and art behind their favorite dishes. We will delve into what makes these types of flour distinct and how their inherent properties influence texture, structure, and flavor.

Tom the Chef Tom the Chef Founder
About the Author:
Tom the ChefFounder
# 1
  • Published Recipes: 288
  • Av. Recipe Evaluation:
  • Location: Iowa, USA
  • Member since: 2023-02-02

Disclaimer

  1. General Information Content on this page above, including the content provided on www.CookingHub.com, including all recipes, articles, and other materials, is for general informational purposes only. This content reflects the personal opinions and experiences of its authors and is not intended to provide professional dietary, medical, legal, or political advice. Please consult a qualified professional before making any decisions based on the information presented here.
  2. Content Ownership and Use Content on this page above, including content published on CookingHub.com is owned by the individual authors who created it. Only the authors can access, modify, or delete their content from the platform. Our content may be embedded on third-party websites and blogs without modification. No reimbursement will be provided for this use. If an author removes content from CookingHub.com, it will no longer be available through any embedded links.
  3. Limitation of Liability Neither www.CookingHub.com (operated by the CookingHub Foundation) nor content authors are responsible for any outcome or consequence resulting from the use of information on this site. This includes, but is not limited to:
    • Food Safety: Any health risk related to food handling, food quality, or failure to follow USDA recommendations (including minimum safe cooking temperatures).
    • Preparation Safety: The proper and safe handling of cooking equipment or its suitability for any given task.
    • Recipe Outcomes: The final look, taste, or success of following a recipe.
    • Ingredients and Equipment: The sourcing of ingredients, tools, equipment, or anything else related to the preparation and consumption of food.
    • Nutritional and Dietary Information: The accuracy of nutritional data. This information is provided as a courtesy and should not replace advice from a medical provider. You are responsible for verifying that a diet is suitable for your personal health needs.
    • Errors and Omissions: Any potential errors, typos, or unclear directions in articles and recipes.
  4. User Responsibility All readers, visitors, and users of embedded content are solely responsible for evaluating recipes and articles. You must make your own decisions about whether to follow the steps and recommendations provided. It is your responsibility to ensure that ingredients and preparation methods are safe and appropriate for your personal dietary restrictions and health conditions.