*3 – 4 TBSP for thick glaze or 4 – 5 for fine glaze.
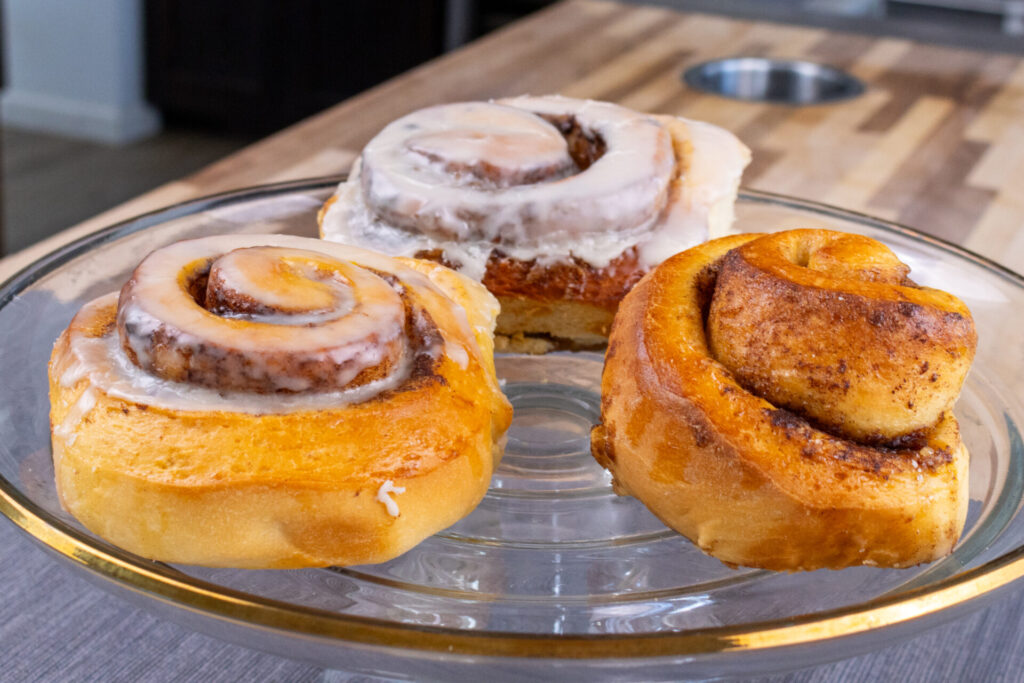
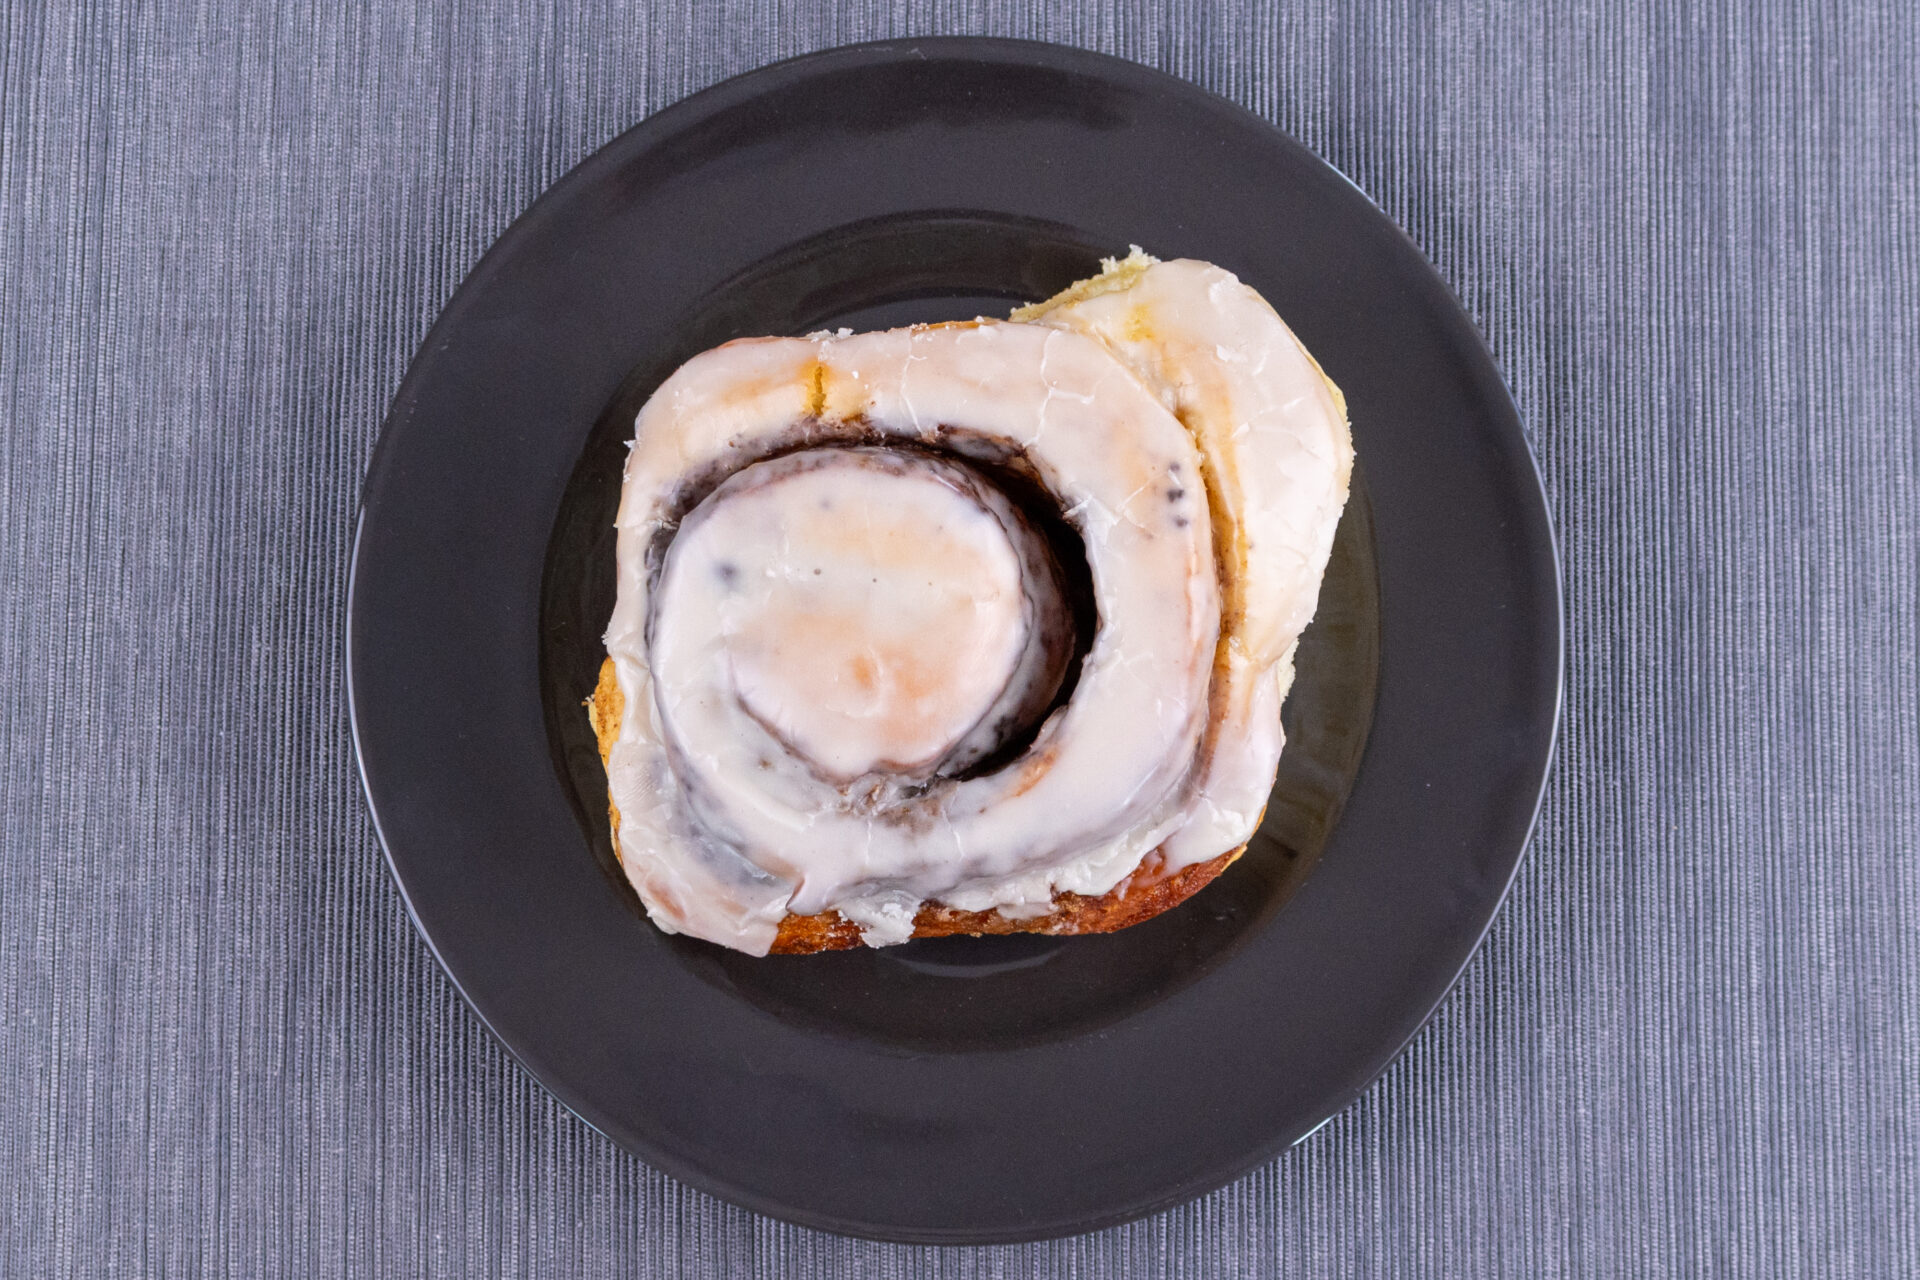
Cinnamon Buns
12 servings
Immerse yourself in the irresistible taste and the heavenly aroma of homemade cinnamon buns. This recipe, designed for simplicity and minimal effort, allows you to bring the warmth and sweetness of these delectable treats right into your kitchen. Enjoy the process as much as the result, and savor the unmatched...
Read more... satisfaction of home-baked cinnamon buns.
Read lessx saved
 Tom the Chef Founder
January 22, 2024
Ingredients:
Dough:
- 5 ½ cups of bread flour (or all-purpose)
- Extra flour for flouring surface
- 1 cup of granulated sugar
- 1 TBSP of active dry yeasts
- ½ TSP of salt
- 1 ¾ cups of milk - preheat in microwave to lukewarm (about 90 to 100°F)
- 2 eggs
- 1 stick of unsalted butter - room temperature (¼ LB)
Filling:
- 1 stick of unsalted butter - room temperature (adjust if needed, cut into small pieces )
- 1 cup of brown sugar (adjust if needed, or granulated sugar)
- 2 TBSP of cinnamon - ground (adjust if needed)
Optional glaze:
- 2 cups of confectioners’ sugar
- 3 – 5 TBSP of water (adjust if needed, *)
- 2 TBSP of vanilla extract
- Optionally: gel food coloring - follow the package’s instructions
Tools:
- 1x Measuring Cups
- 1x Measuring Spoons
- 1x Kitchen Mixer with Hook Attachment or Large Mixing Bowl
- 1x French Whisk
- 1x Plate
- 1x Rolling Pin
- 1x Chef’s knife
- 1x Measuring Pitcher or Small Glass/Ceramic Bowl
- 1x Silicone Brush
- 1x Baking Sheet with Parchment Paper or Silicone Matt
- 1x Medium Mixing Bowl (3 – 4 QT)
- 1x Silicone Brush
- 1x Cooling Rack (Optionally)
Directions:
1. Dough:
1.1. Place into the kitchen mixer with a hook attachment:
5 ½ cups of flour (part of the total amount)
1 cup of granulated sugar
1 TBSP of active dry yeasts
½ TSP of salt
Shortly stir with a whisk just enough to combine all ingredients (about 1 minute).
1.2. Add:
1 ¾ cups of lukewarm milk
2 eggs
1 stick of butter – room temperature
Knead on low speed until all ingredients are partially incorporated (about 1 – 2 minutes).
1.3.
Then, increase the speed to medium-high and knead until a sticky dough is formed (about 1 – 2 minutes).
2. Rising the Dough:
2.1.
Remove the mixing bowl from the mixer and cover it with a plate.
2.2. Let it rise in a warm place until it has doubled in size (about 1 – 2 hours).
Tip:
You can extend the rising time up to 4 hours at your convenience. Alternatively, you can set the dough to rise the evening before baking and bake it in the morning- in this case, let it rise on the countertop instead of a warm place.
3. Brushing mixture:
3.1.
Prepare a brushing mixture by briefly hand-whisking 1 egg with ½ cup of milk in a measuring pitcher (for whisking, you can also use a silicone brush).
4. Form buns:
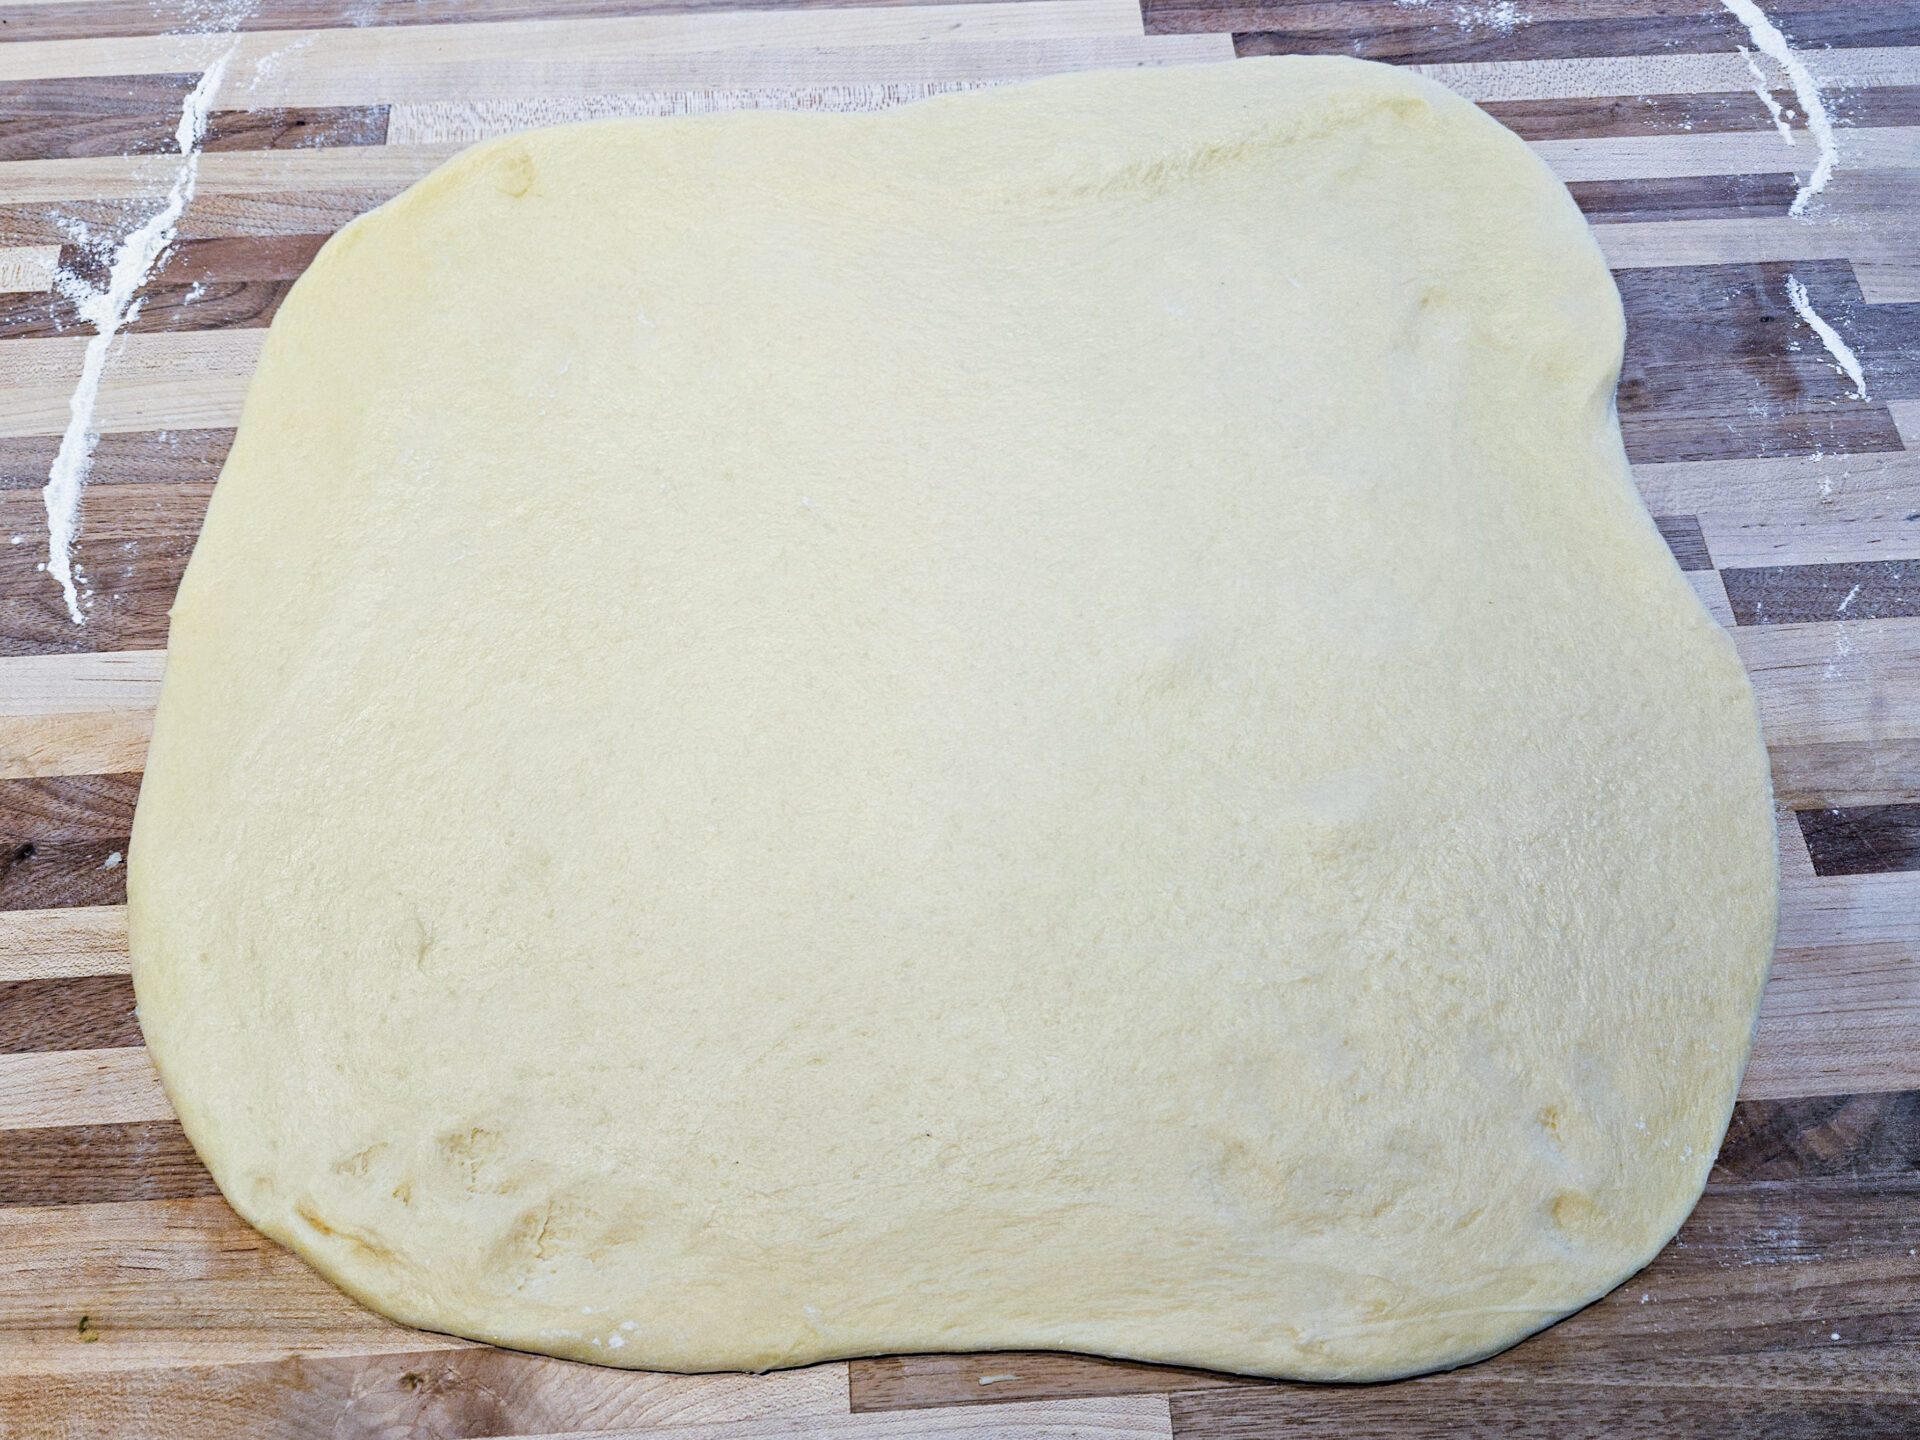
4.1. Place the dough on a lightly floured surface, and then, using a rolling pin, flatten it into a square shape (about 18 x 18”).
Tips:
- If the dough is too sticky to work with, consider incorporating more flour – simply place the dough back into the mixing bowl and add more flour. Process until fully incorporated. Work gradually, and do not add too much flour at the time.
- If the dough sticks to the rolling pin during rolling, consider gently flouring the top of the dough.
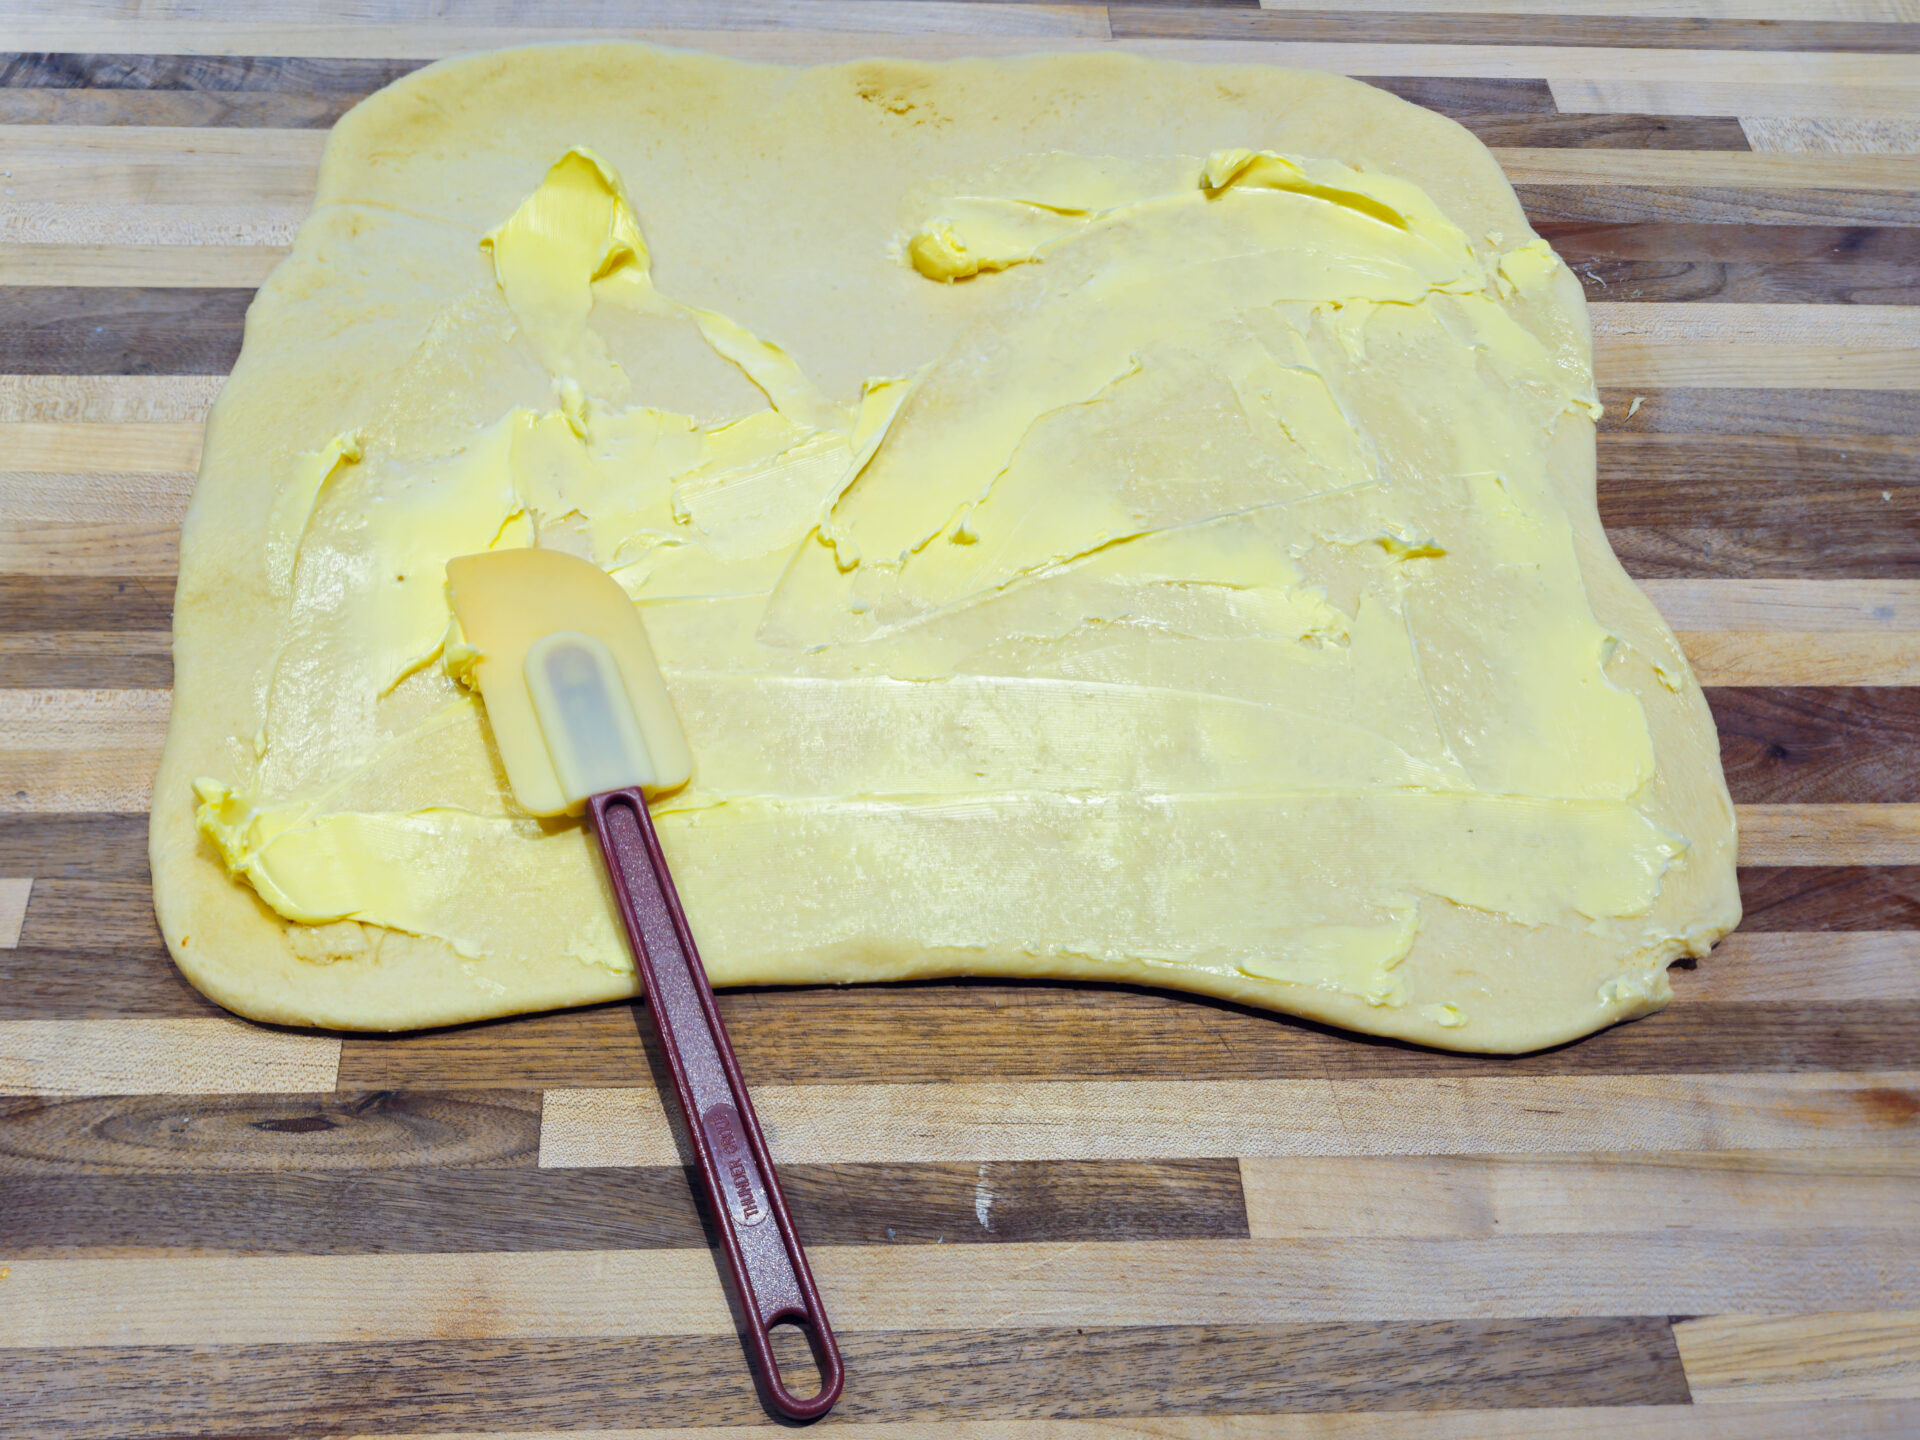
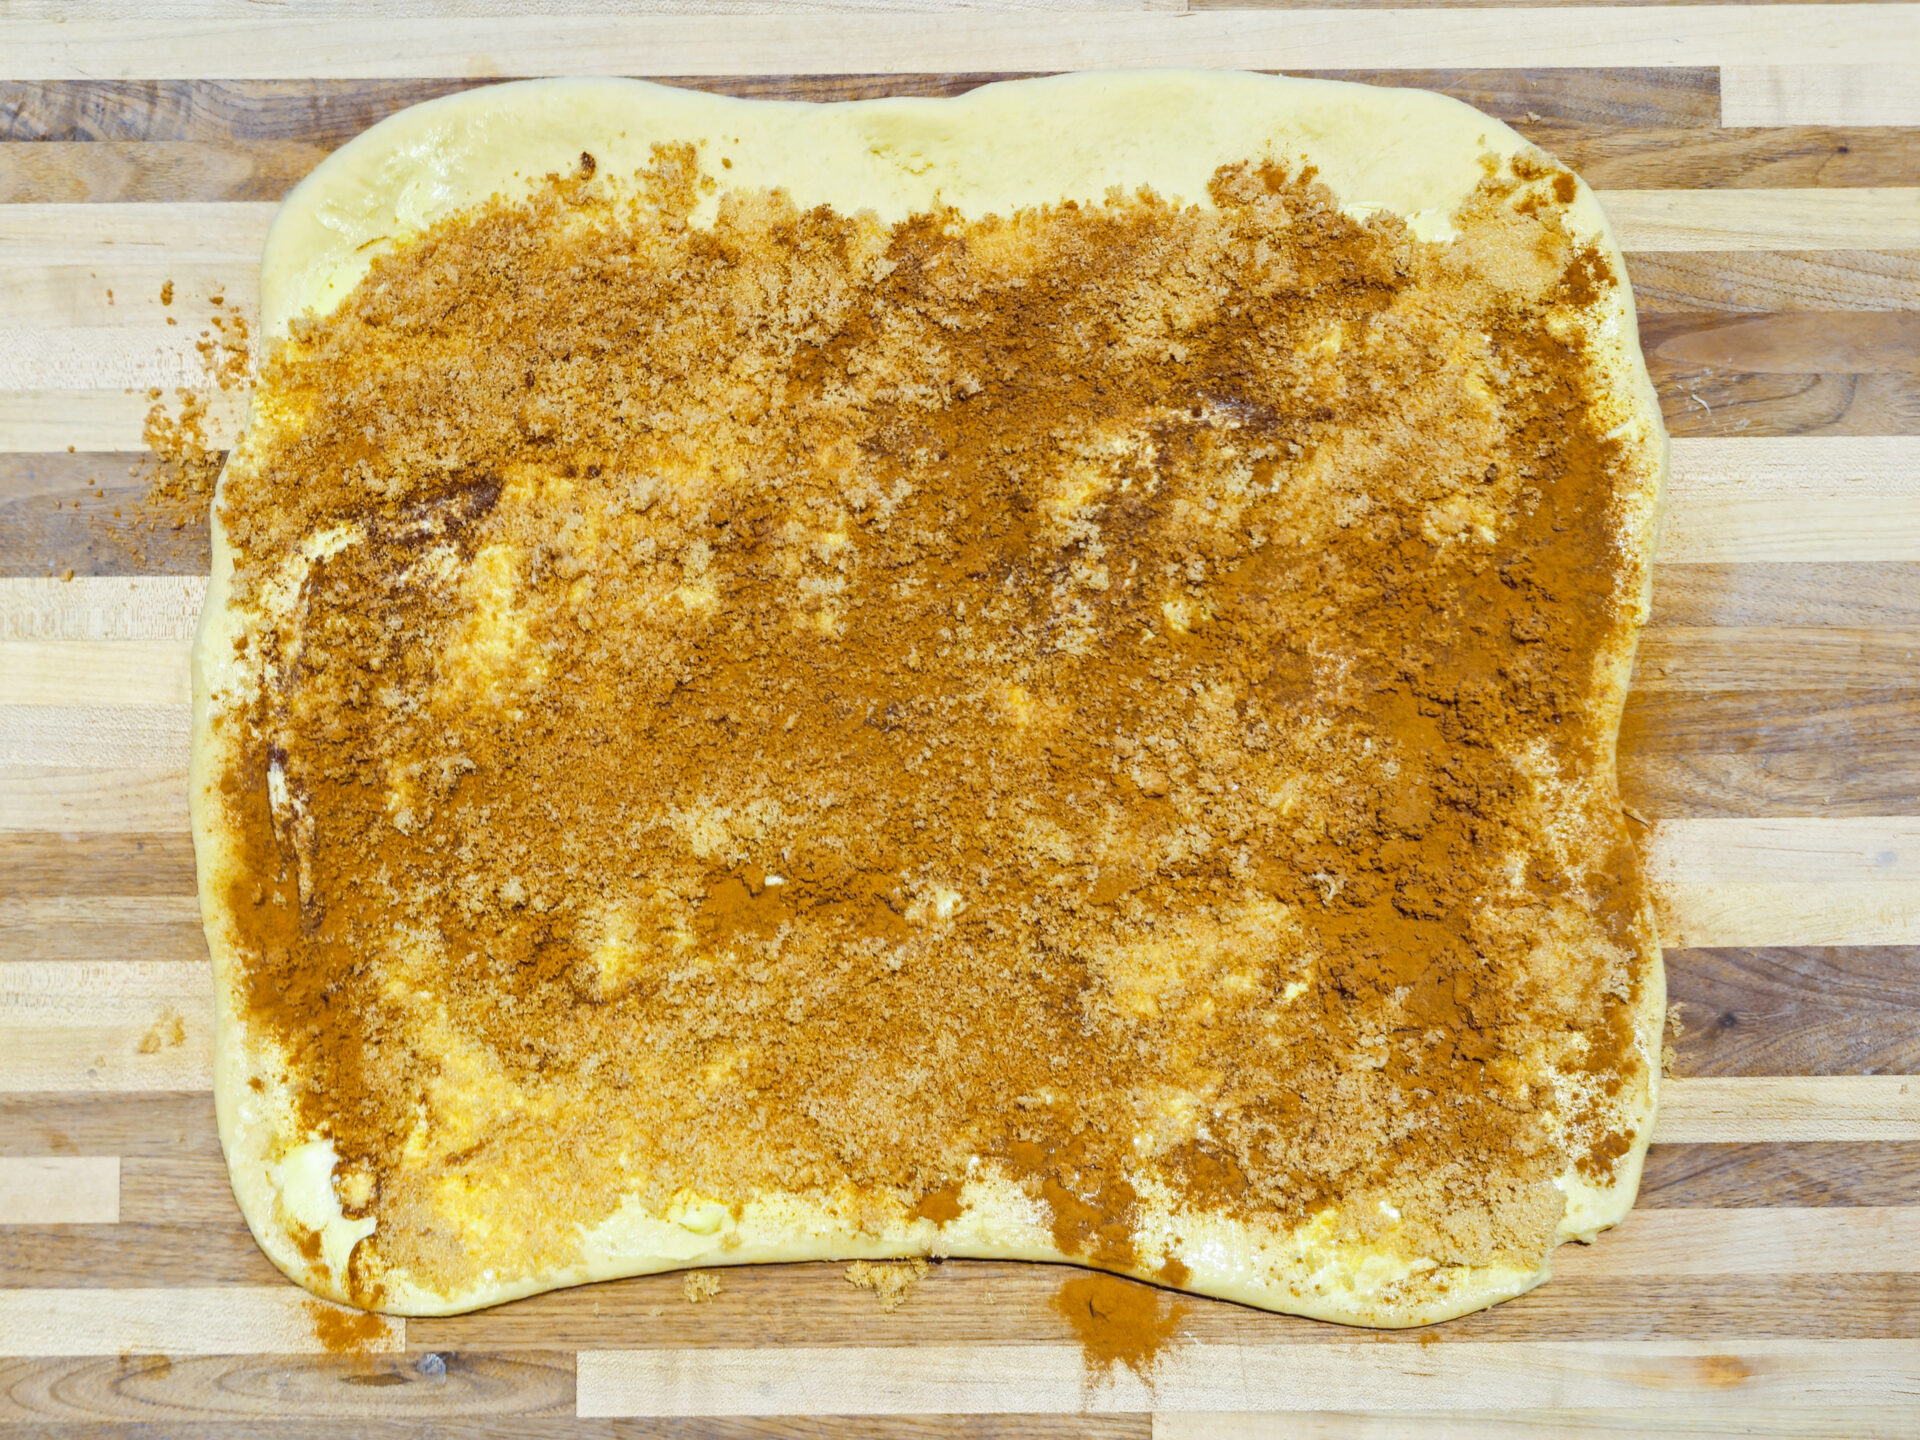
4.2. Add on the top of the dough:
1 stick of butter – cut into small pieces
Spread evenly with a silicone spatula to cover the entire surface of the dough, with the exception of a 1” strip on one side – the connection part further referred as a connection strip.
Explanation:
The 1” connection strip on one end will be used for connecting the roll together. This section will be brushed with a brushing mixture to connect the seam. You can choose any of the 4 sides.
Tip:
If the butter is too hard to spread, consider microwaving it to make it softer (do not microwave it too long in order to prevent melting).
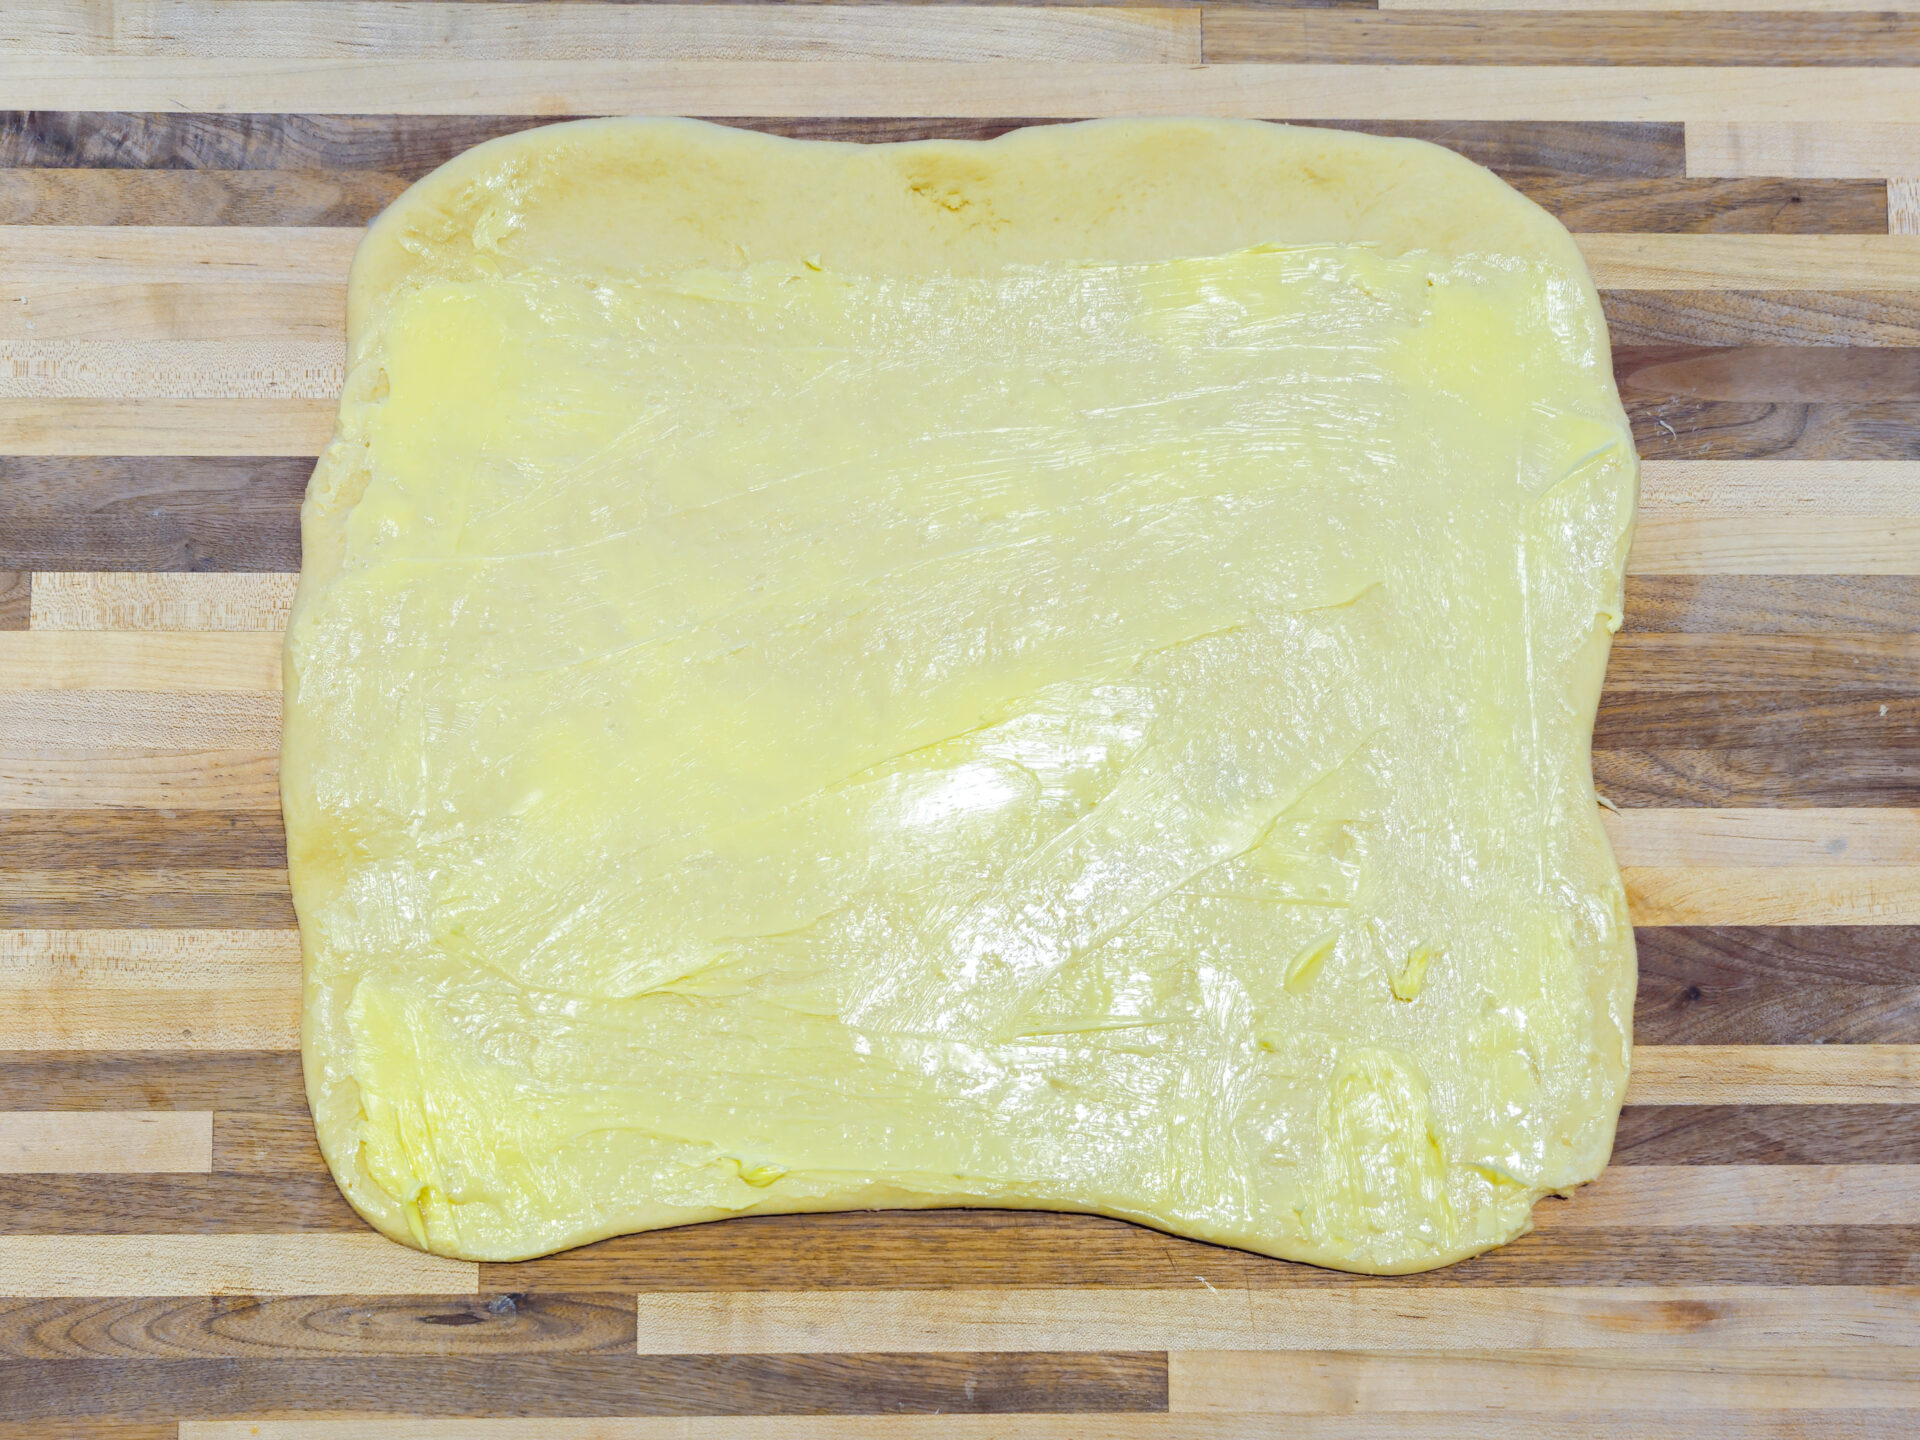
4.3. Then, evenly sprinkle the entire surface brushed with butter with:
1 cup of brown sugar
2 TBSP of ground cinnamon
4.4.
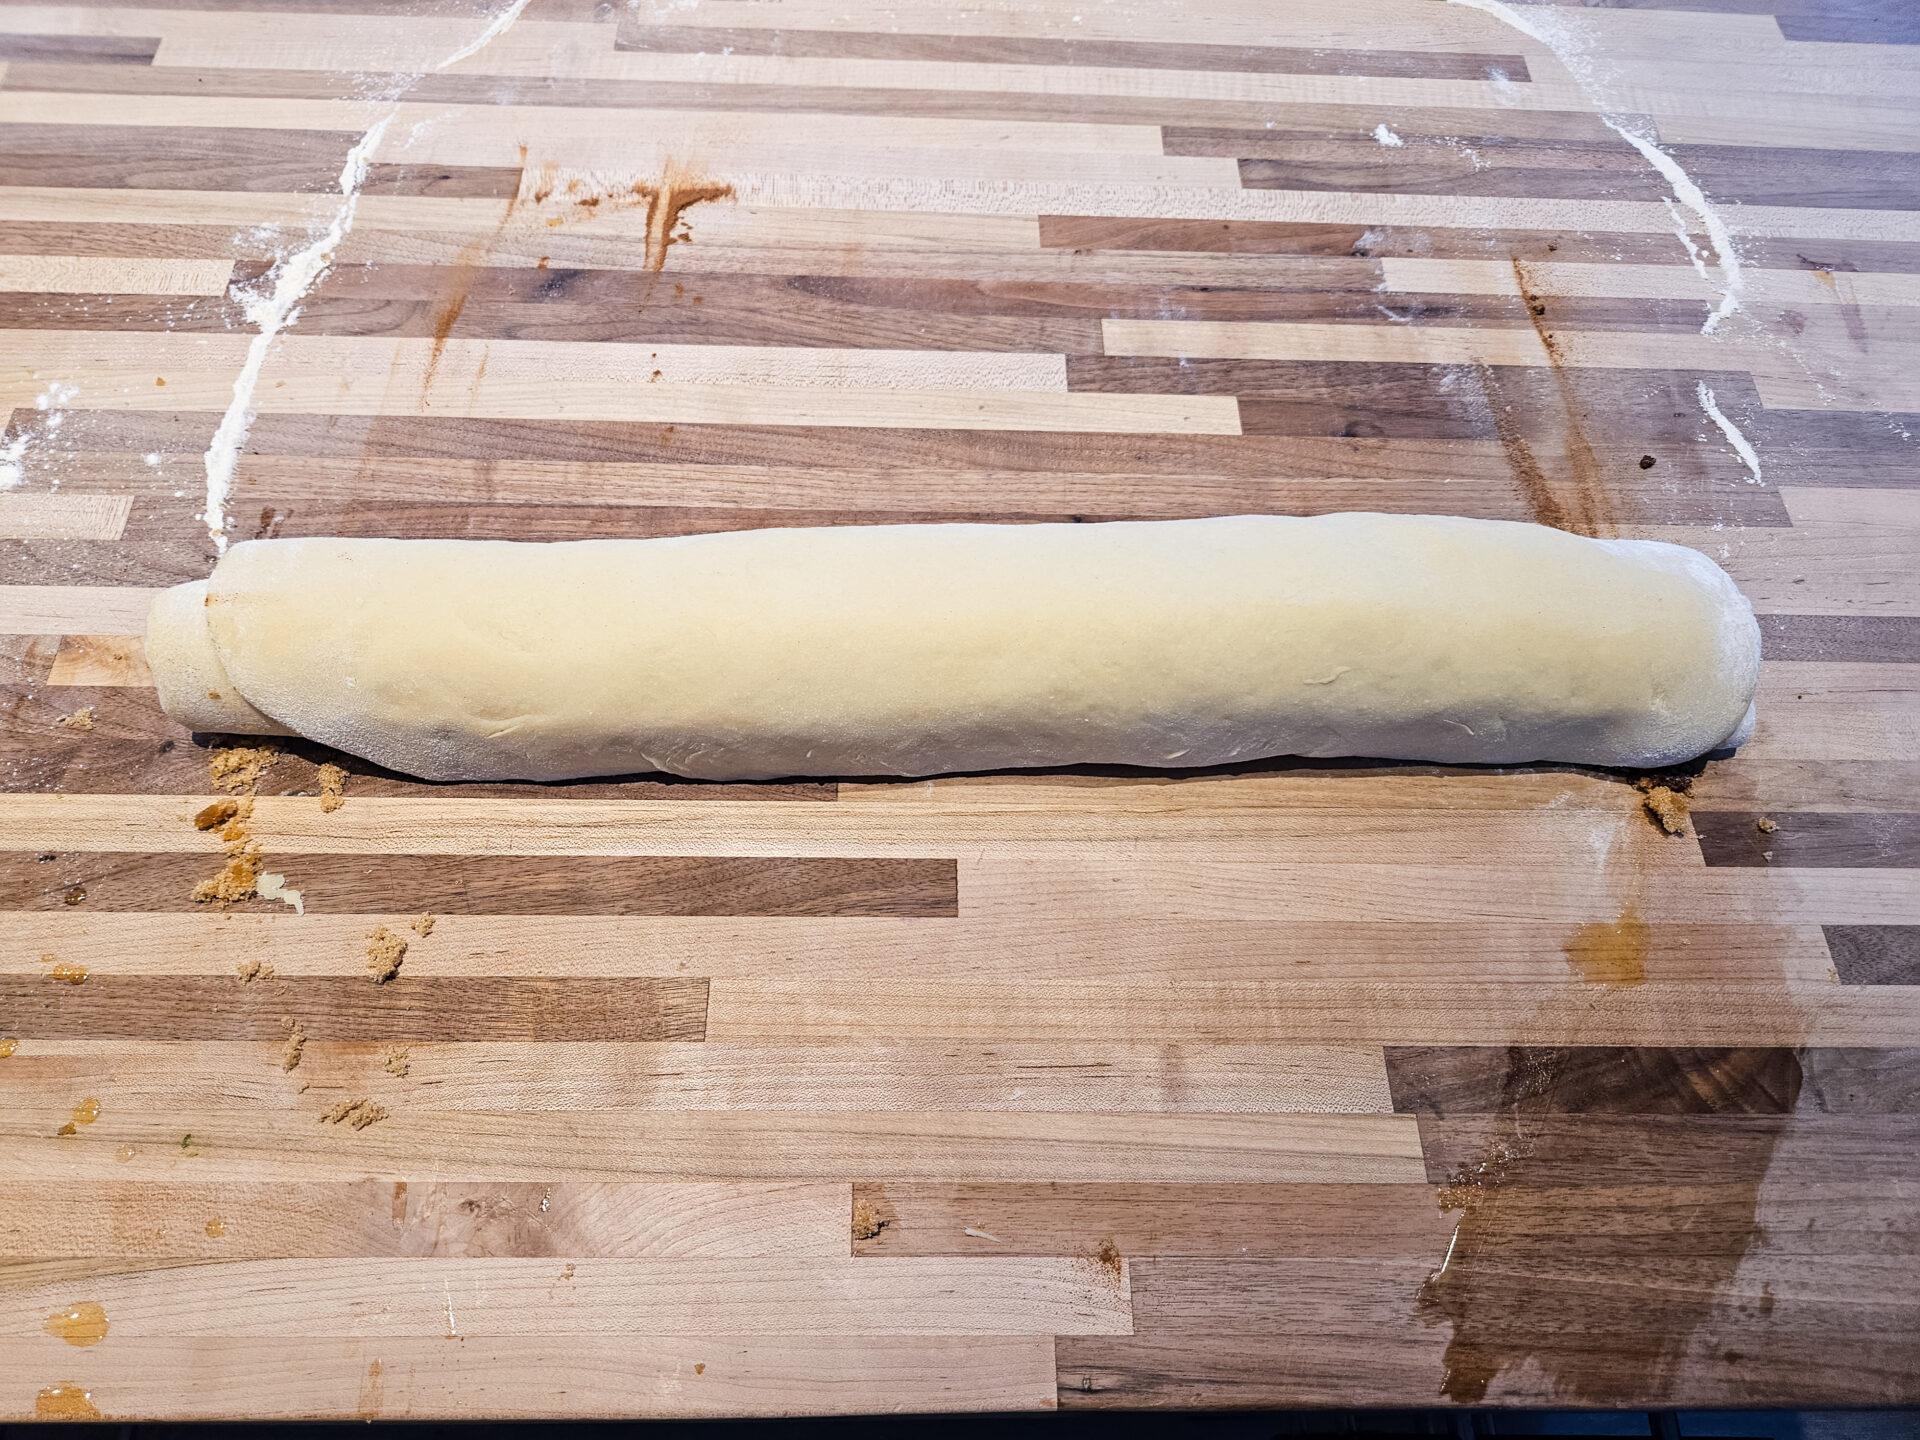
Brush the connection strip with the brushing mixture (the part without butter and sugar).
4.5.
Roll into a long roulade – start at the opposite end of the connection.
4.6.
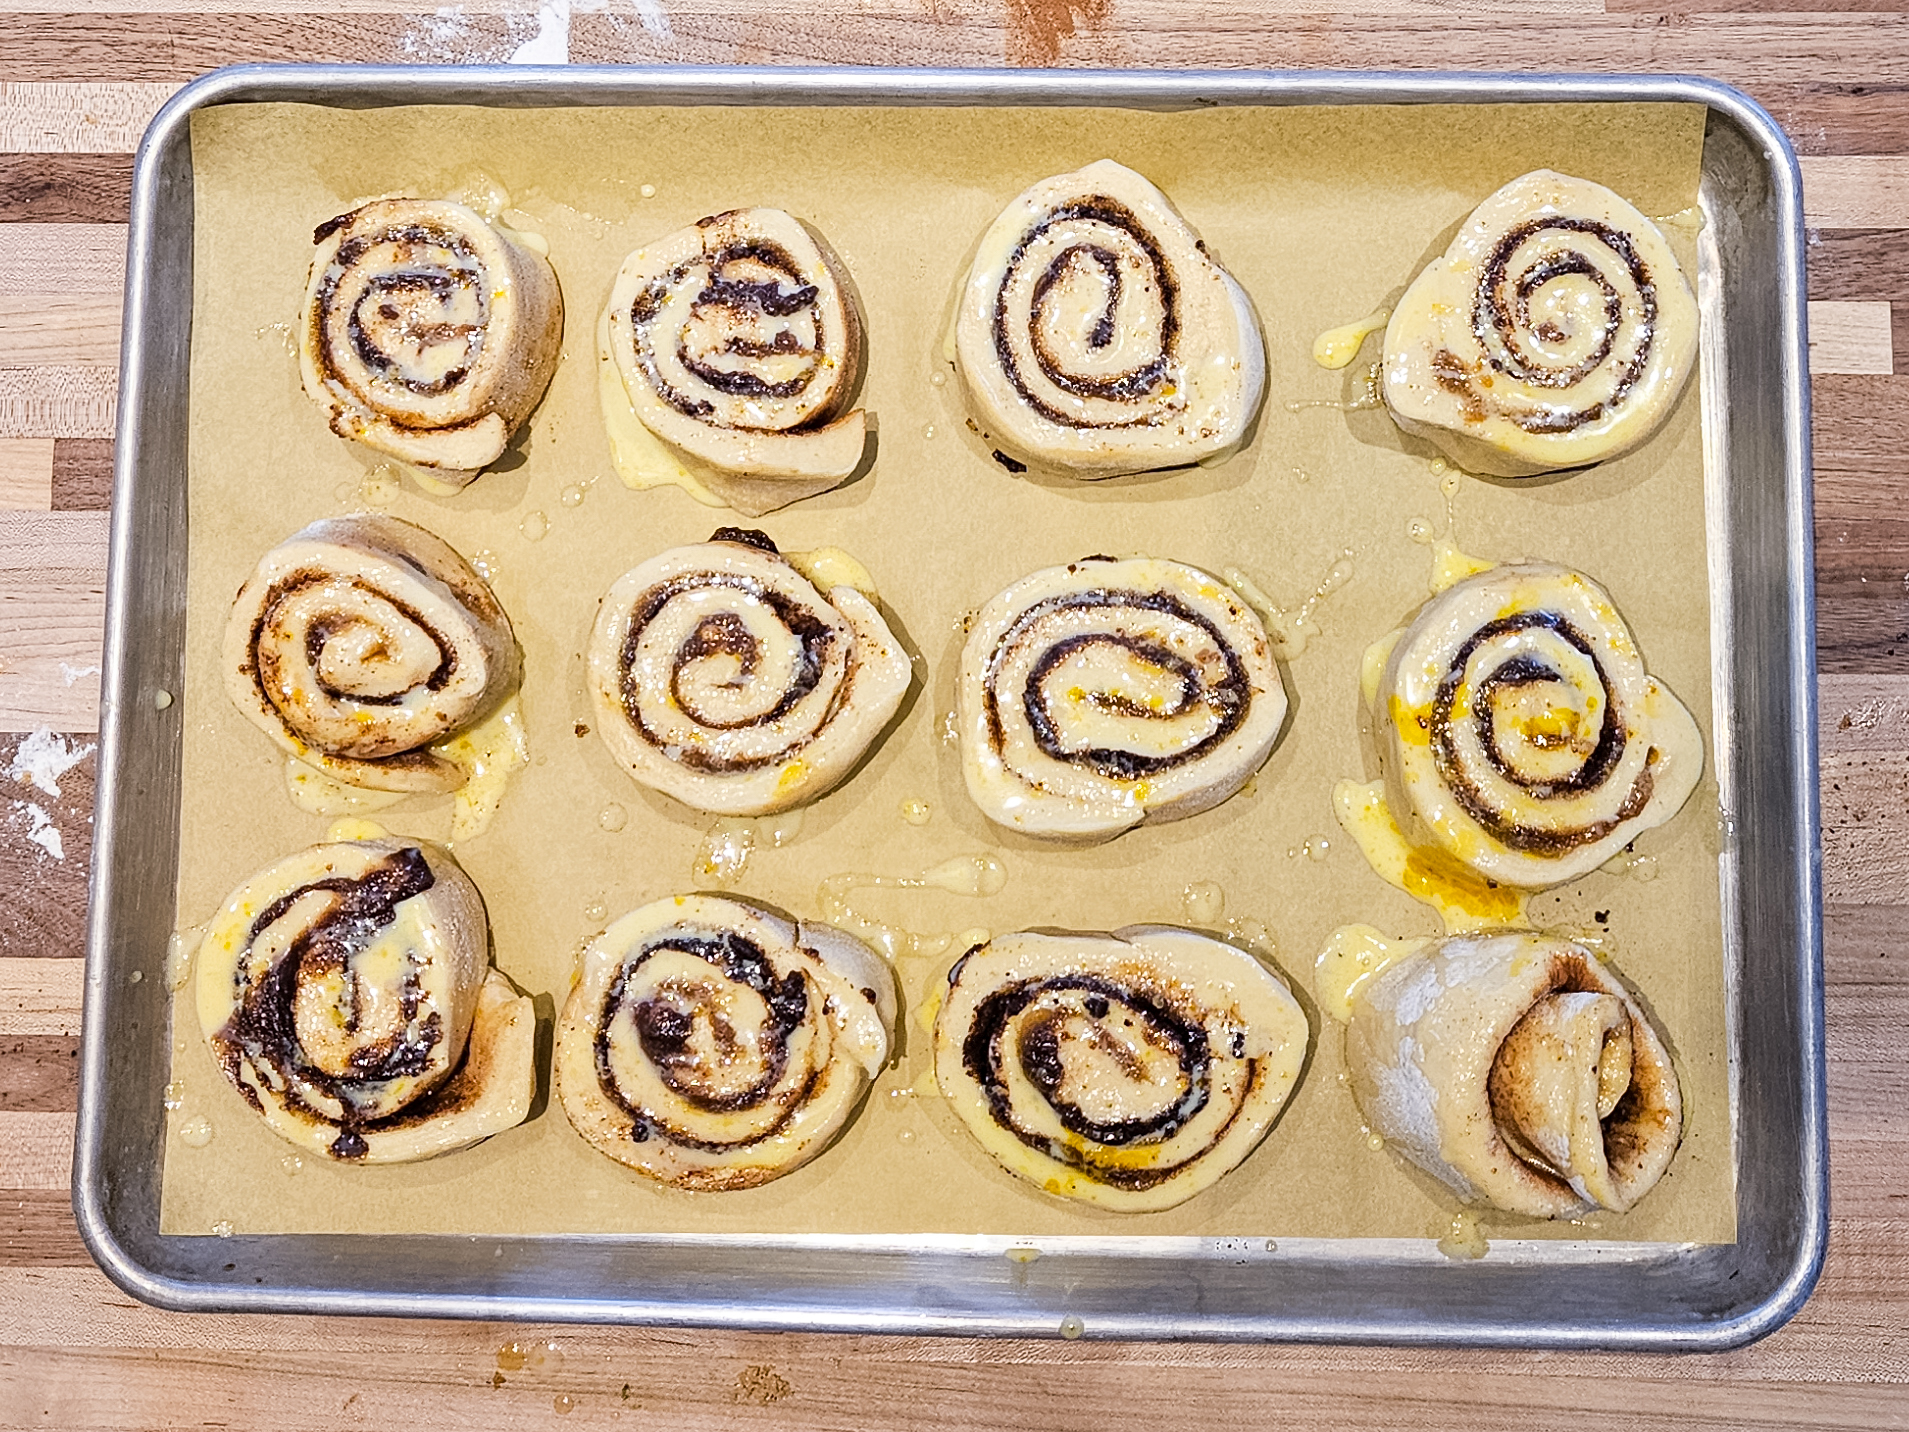
Then cut into 12 even cinnamon rolls using a knife.
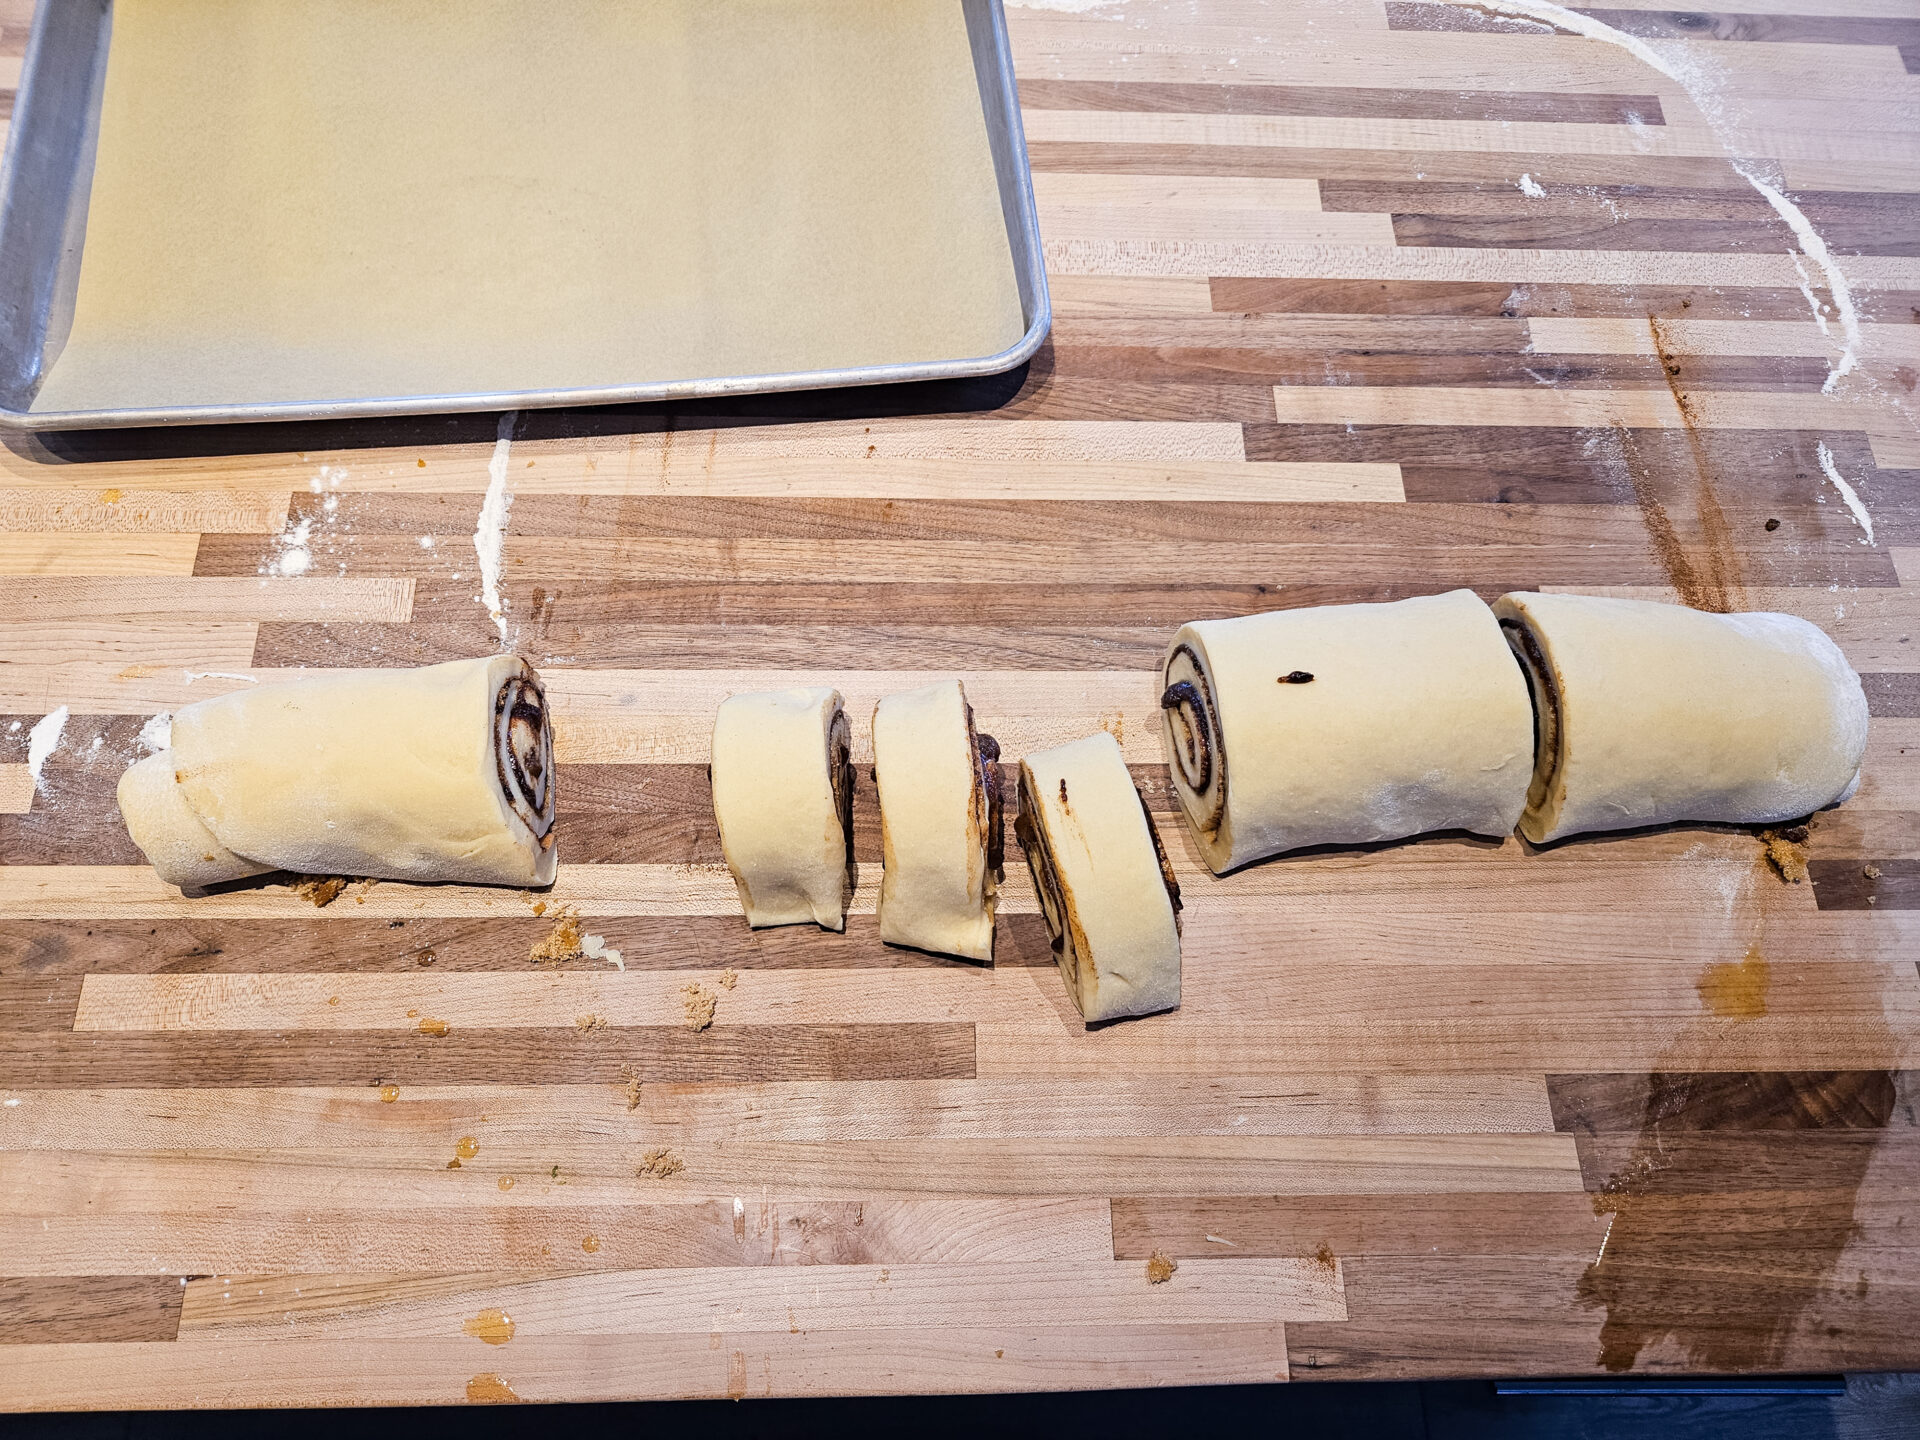
4.7.
Place on a baking sheet and keep even spaces between each bun and the edges.
5. Proofing:
5.1.
Brush all buns with part of the brushing mixture.
5.2.
Let them proof in a warm place until the buns expand at least 50% but preferably double (about 1 hour).
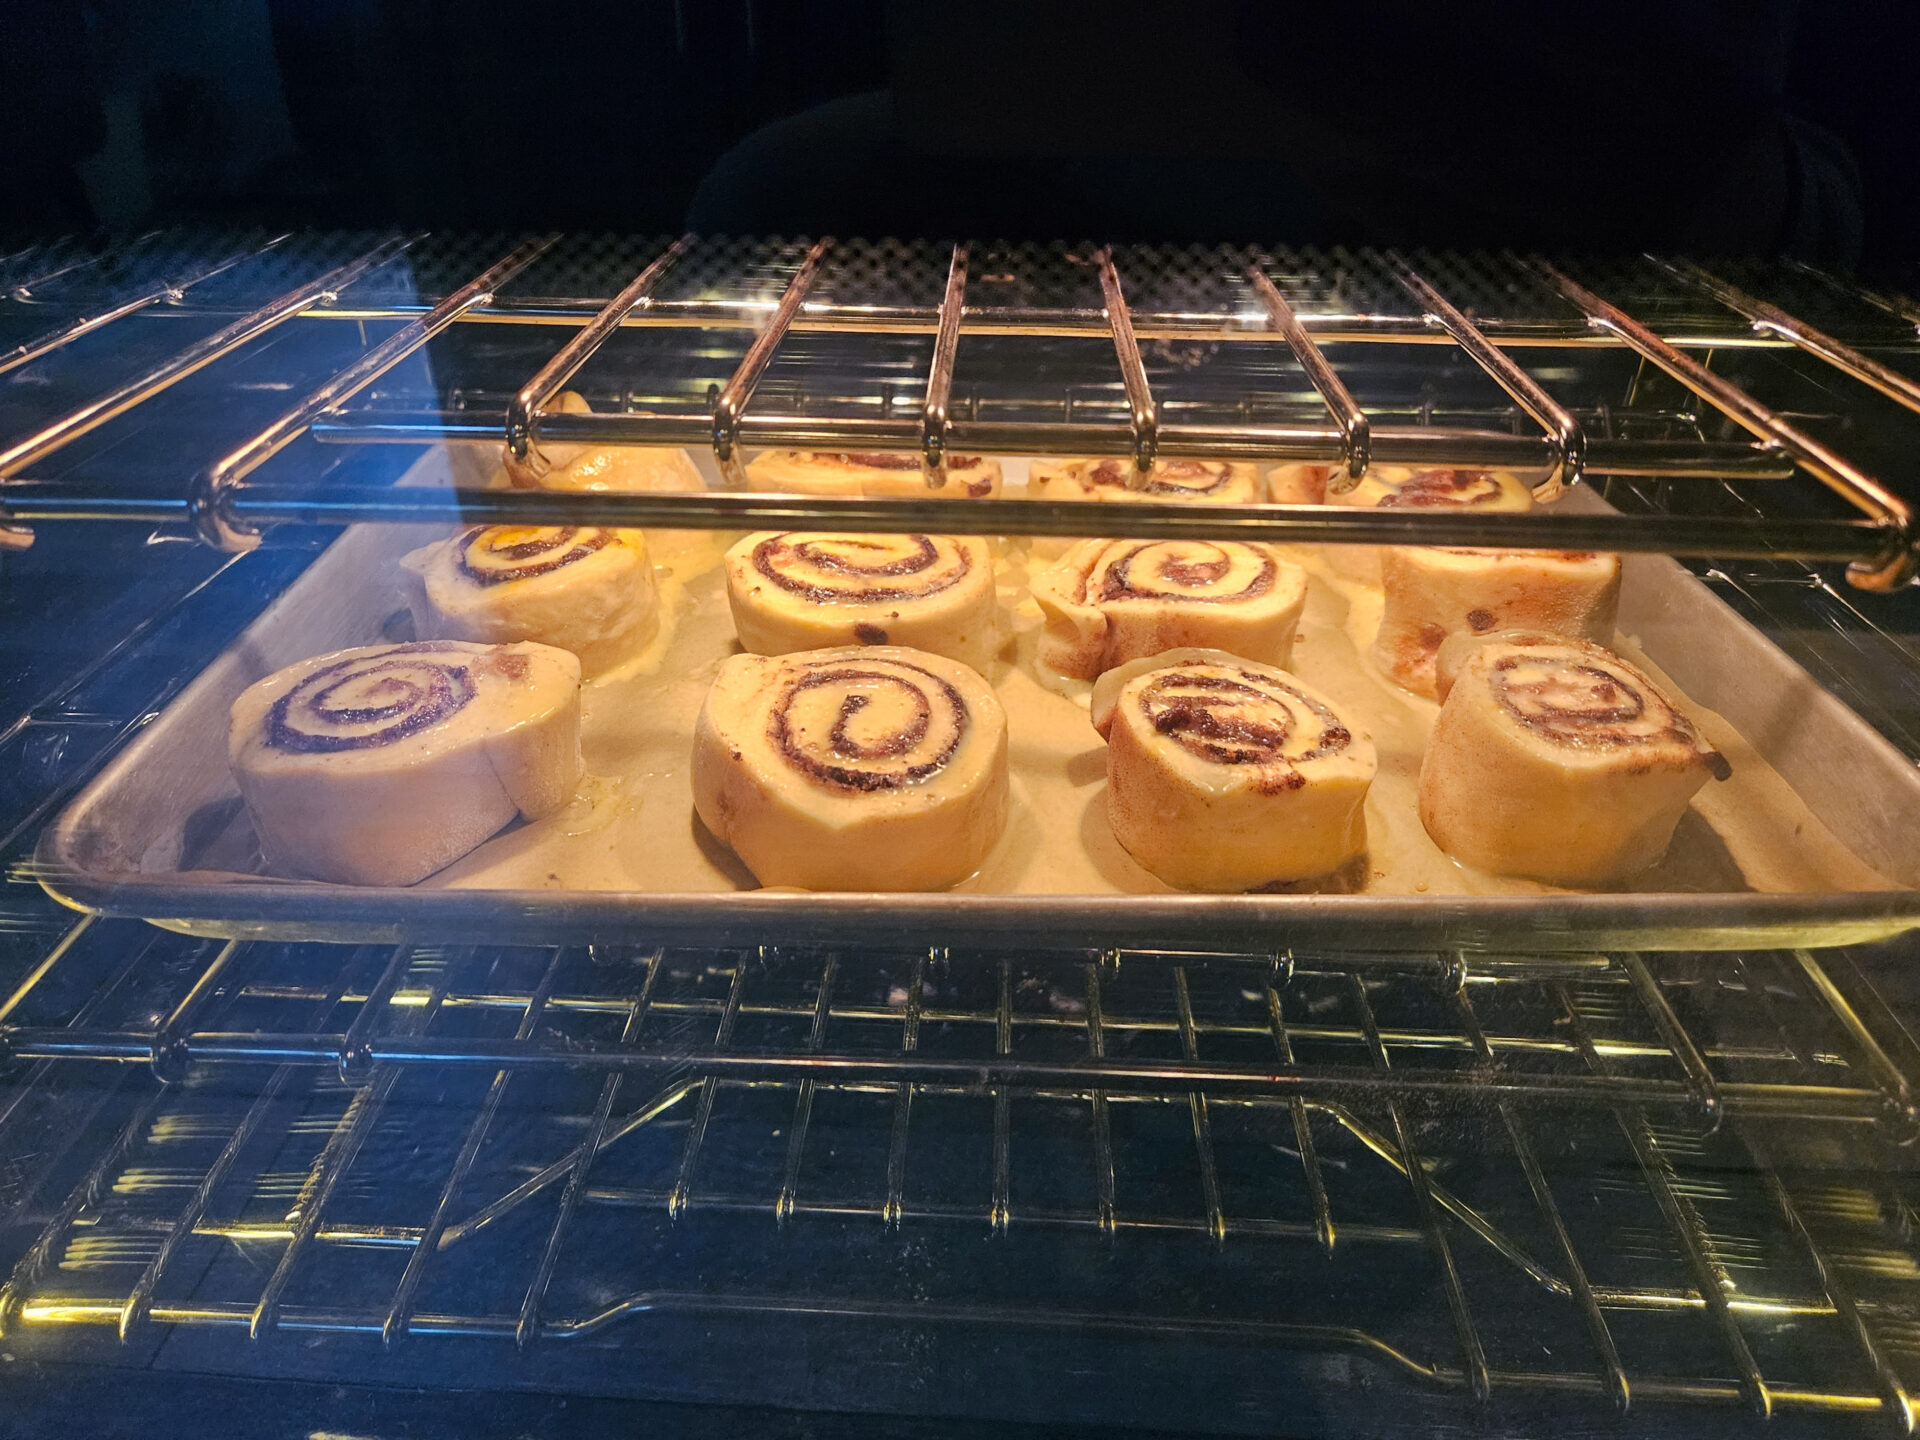
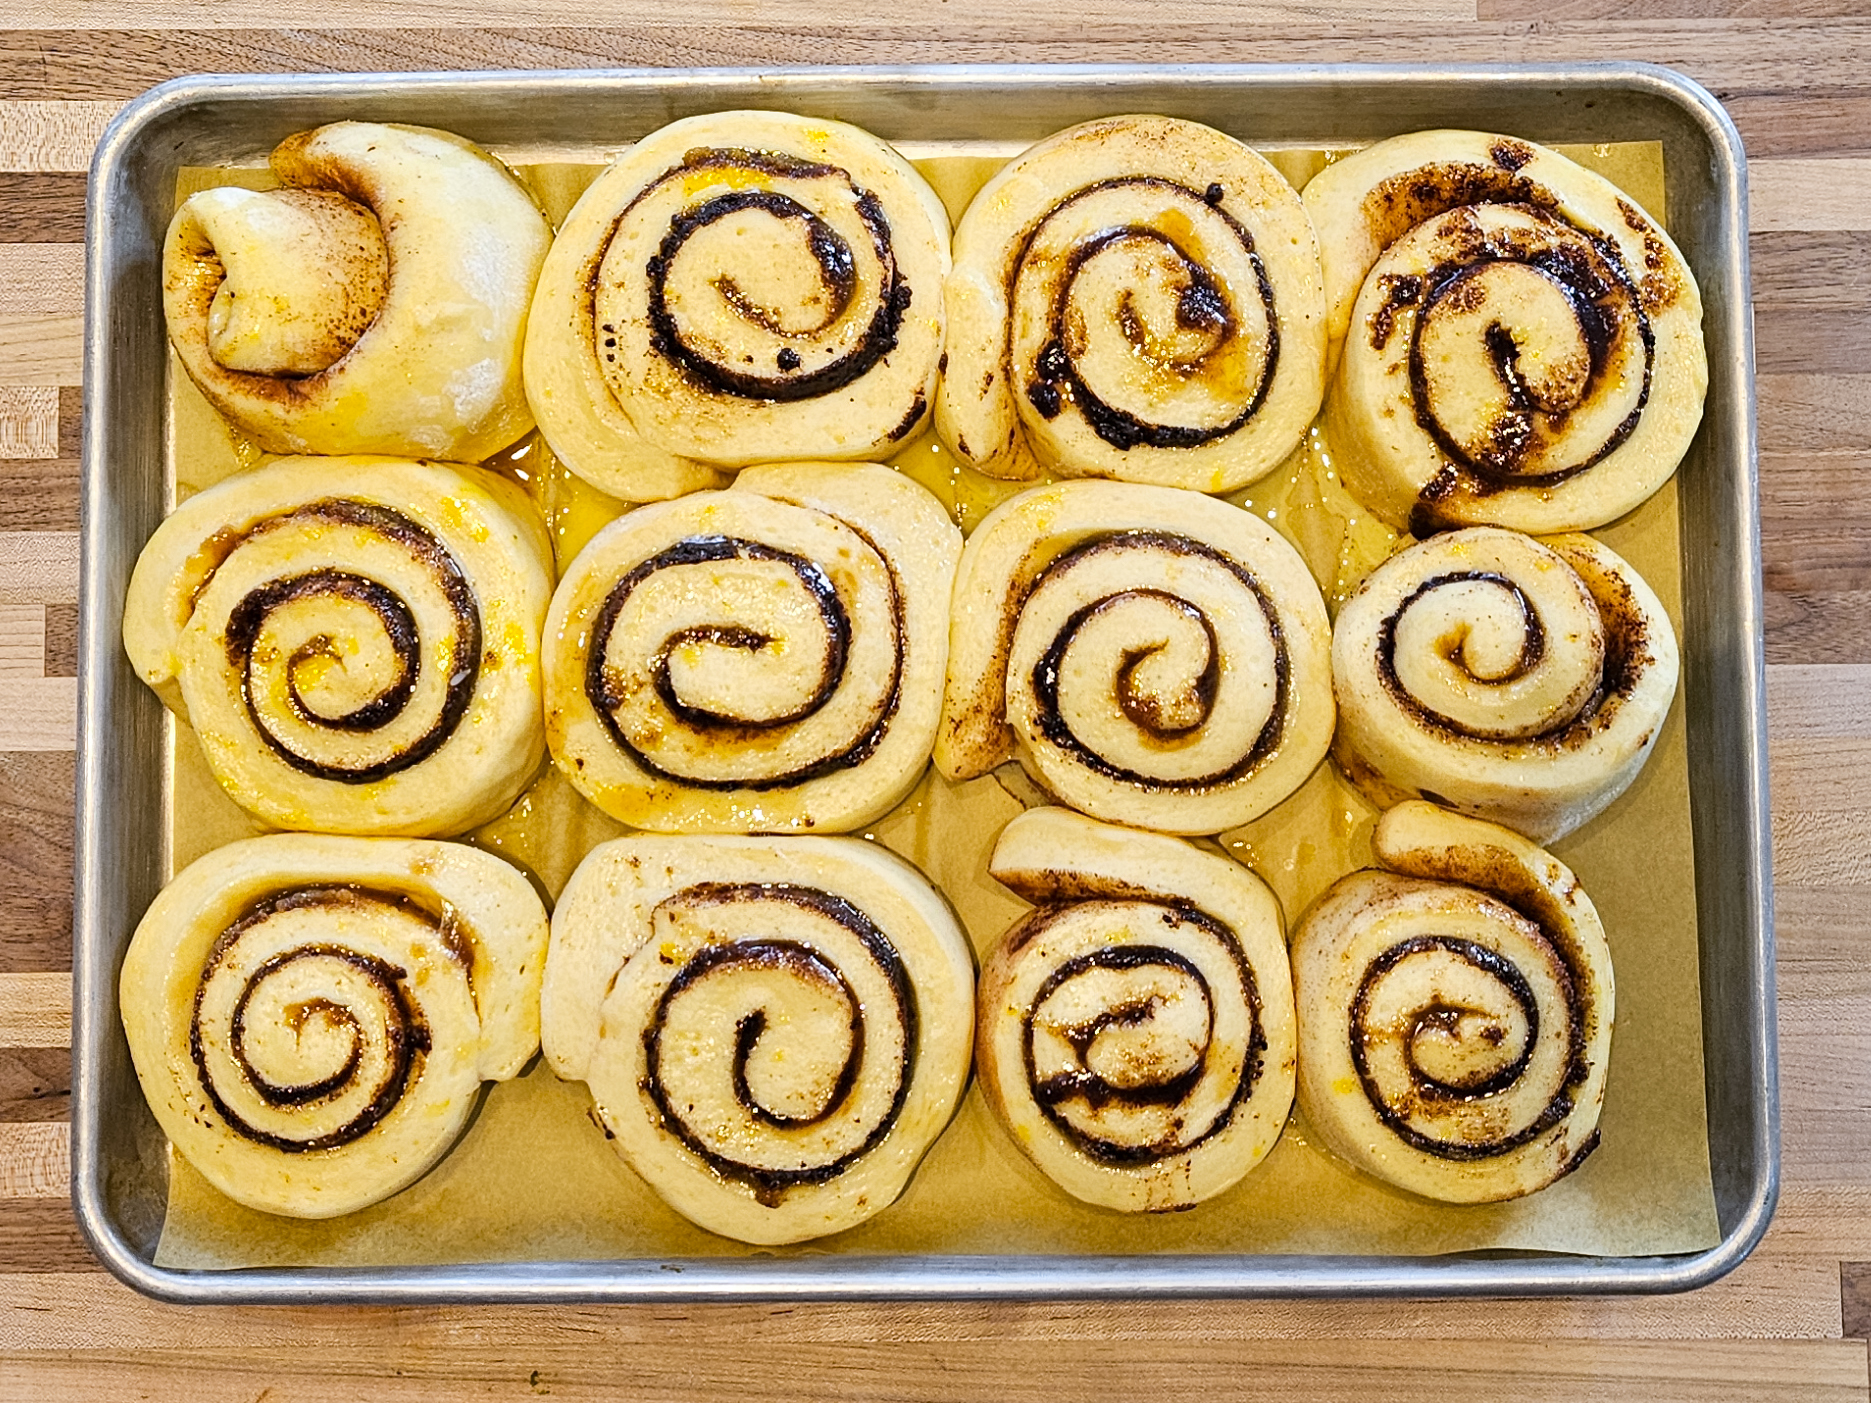
6. Baking:
6.1.
Preheat oven to 350°F.
6.2.
Brush again with the remaining brushing mixture.
6.3.
Bake in a preheated oven until all turn golden (about 20 – 25 minutes).
6.4.
Test with a toothpick.
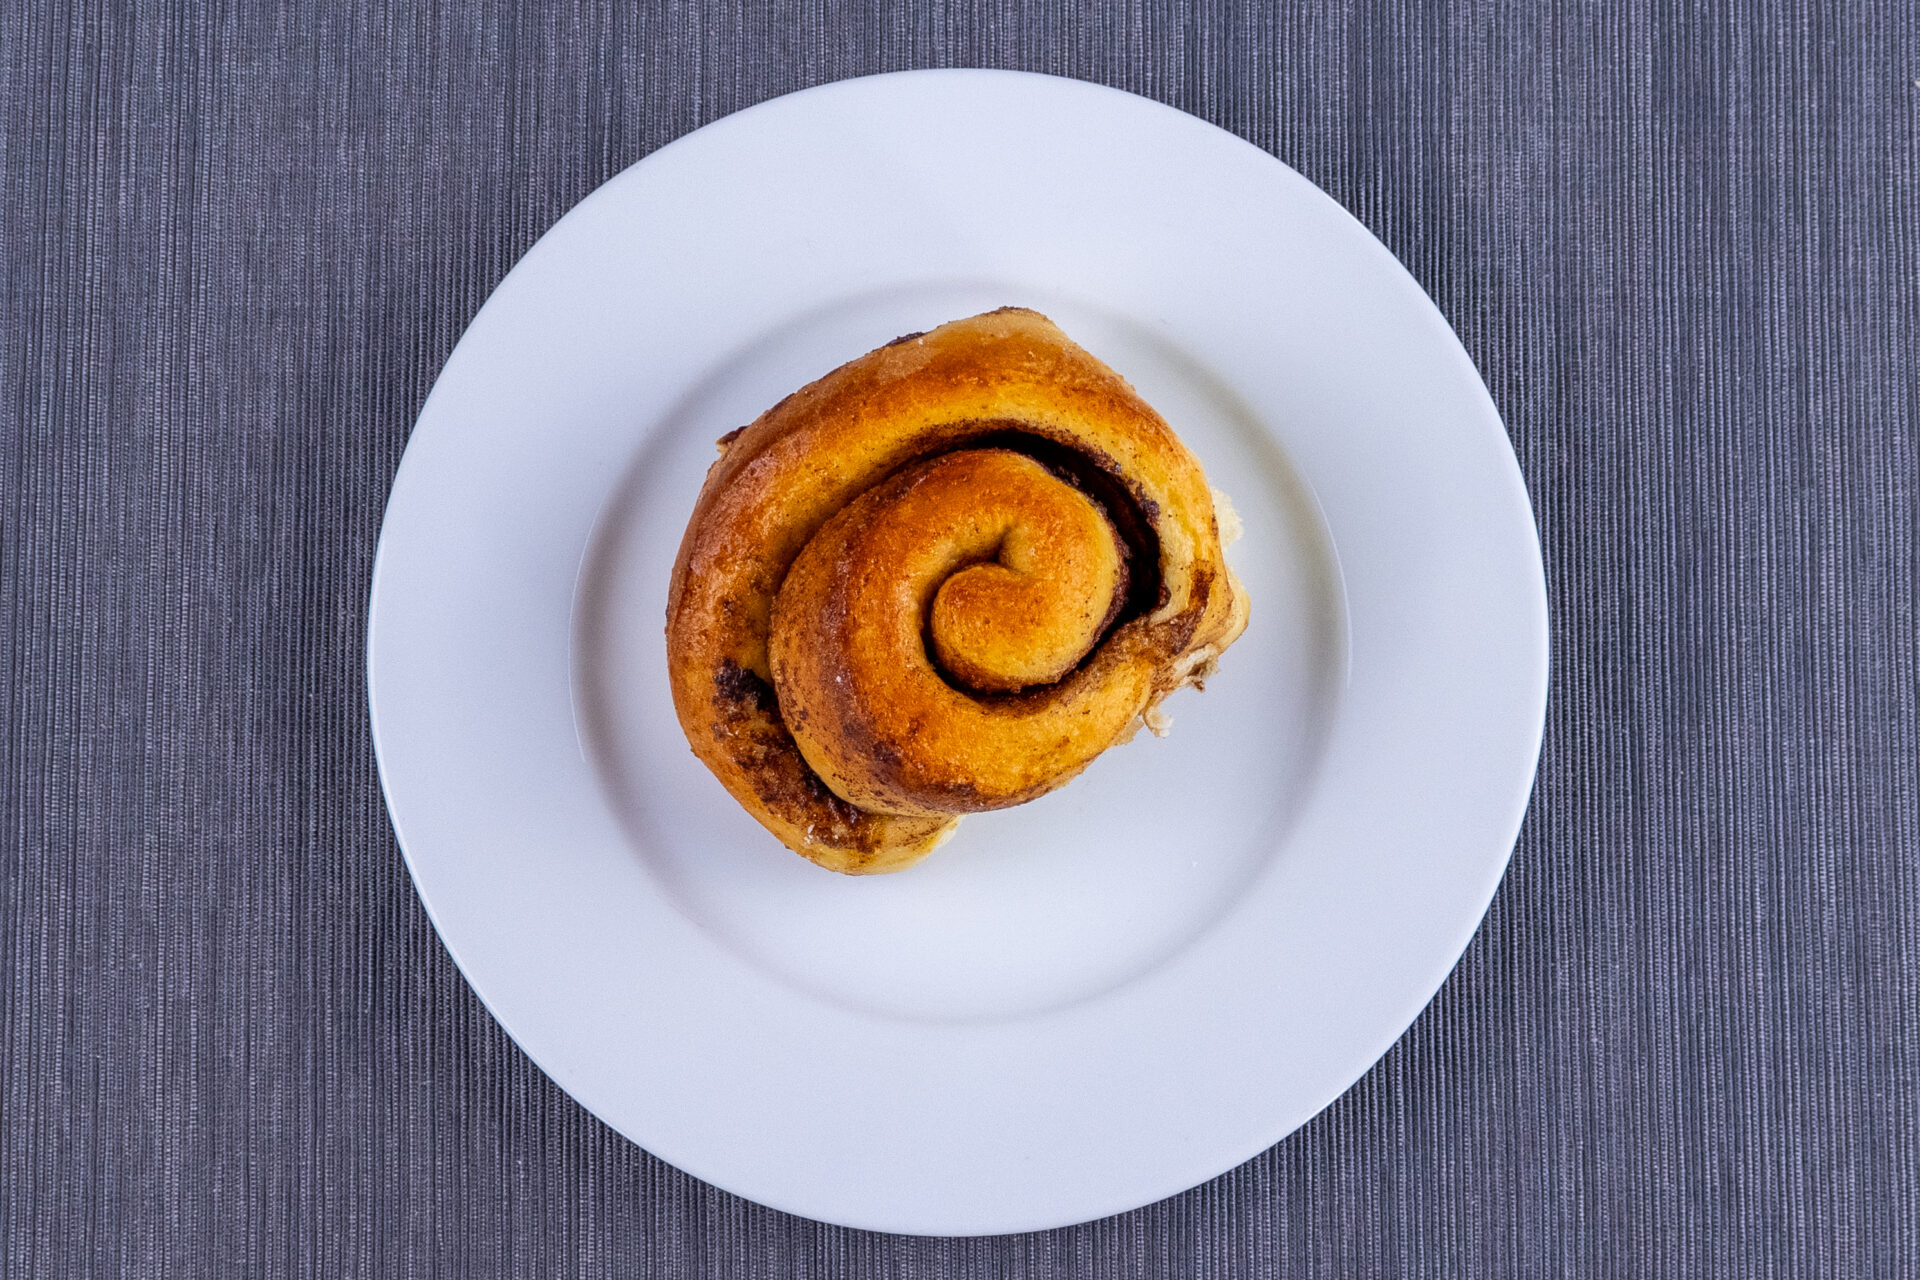
6.5.
Remove from the oven and let cool for at least 3 minutes before serving before dipping in glaze (it doesn’t need to be fully cooled, but it needs to be cool enough for you to be able to hold it in your hand).
7. Optional preparation:
Tip:
Work one by one, and after finishing the first one, try to determine if the glaze thickness meets your expectations. If you then find out that you would prefer a thicker glaze, simply stir in some confectioners’ sugar. If you then find out that you would like a thinner glaze, simply stir in some water.
7.1. Place all ingredients into a medium mixing bowl:
2 cups of confectioners’ sugar
3 – 5 TBSP of water
2 TSBP of vanilla extract
Optional: food coloring (follow the package’s instructions)
Thoroughly stir together with a whisk until fully incorporated (about 30 seconds).
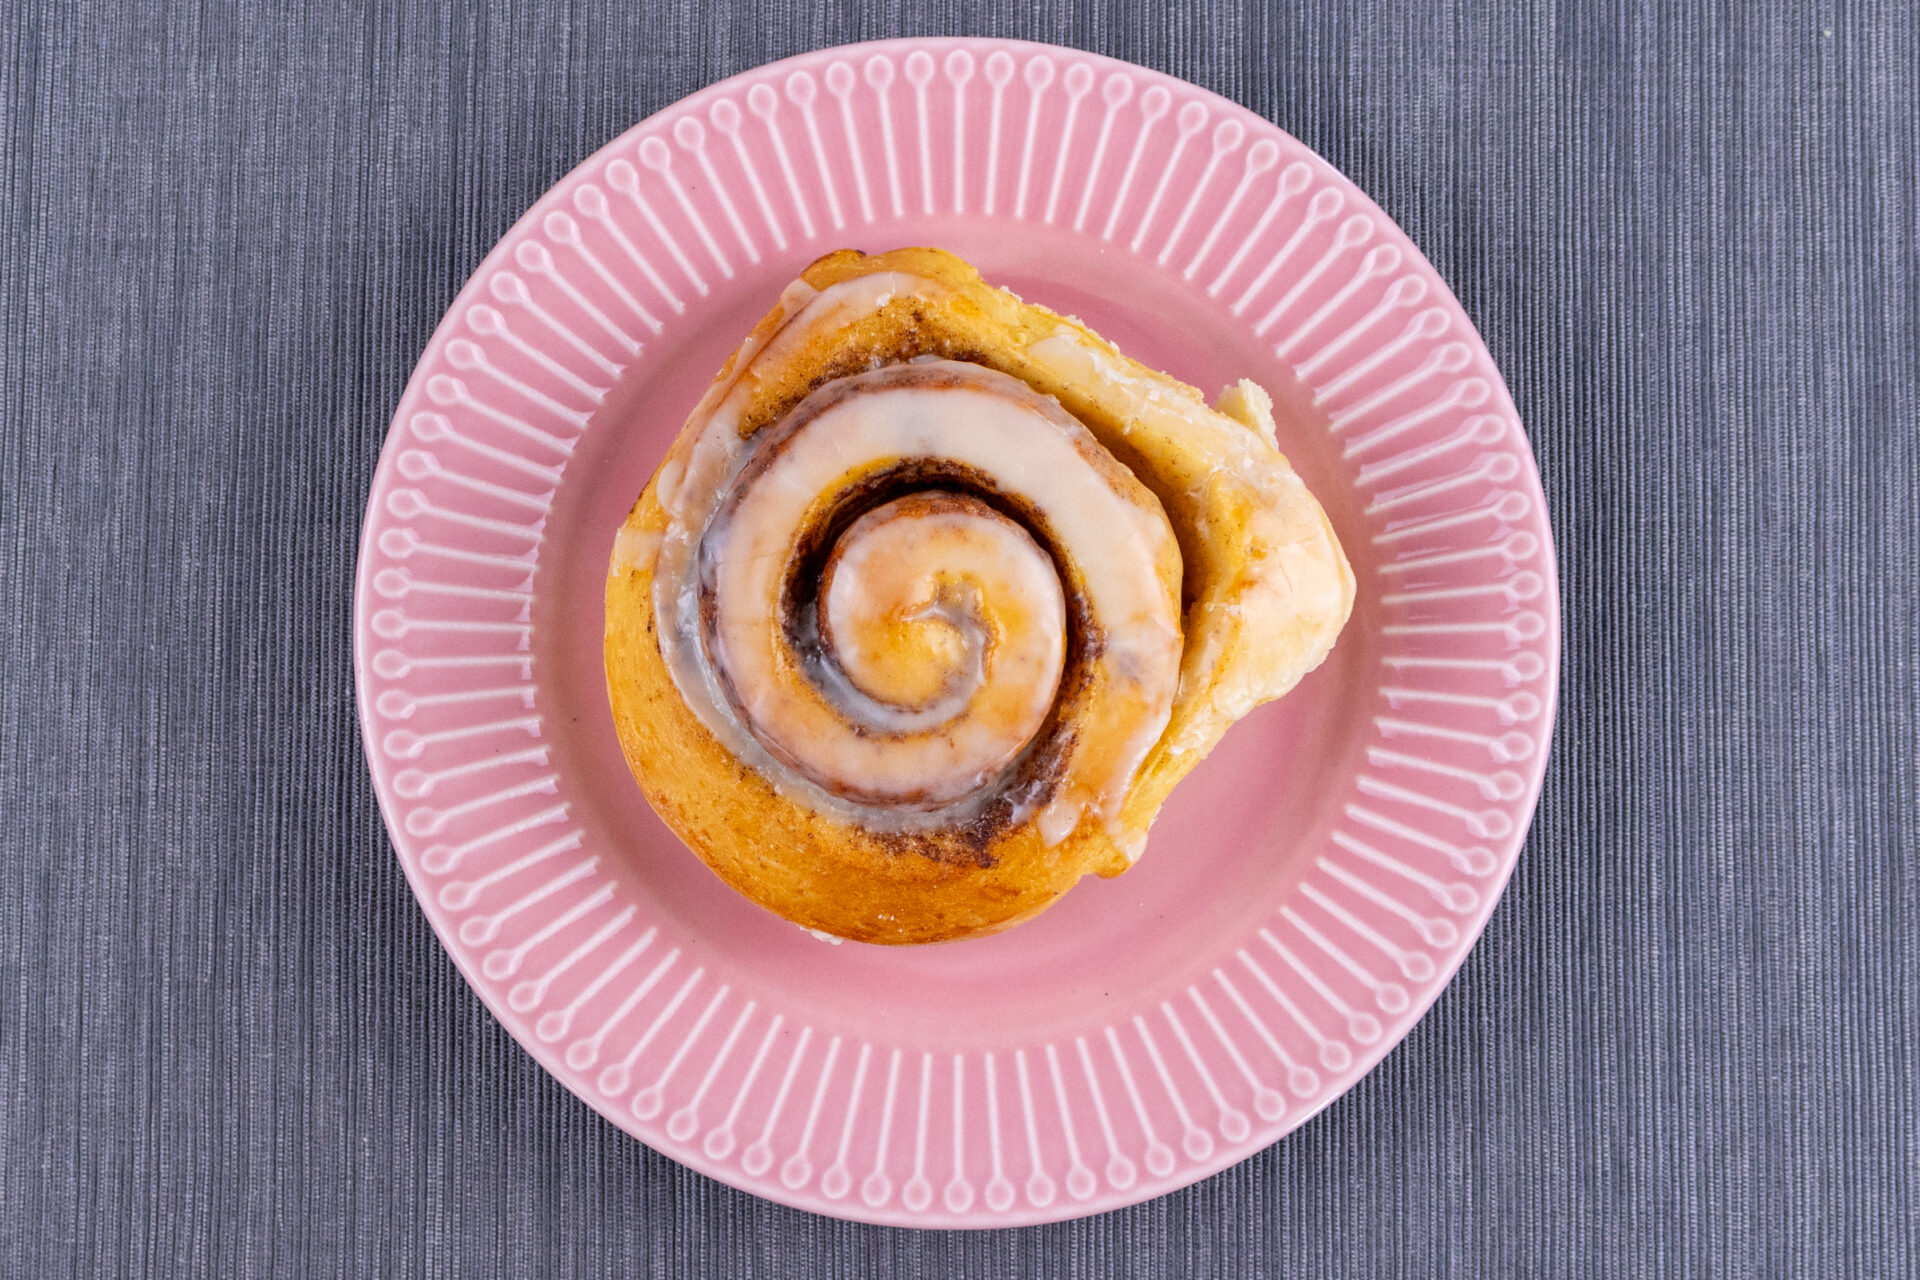
7.2.
Take each and place into the glaze (top part facing the glaze).
7.3.
Let sit in the glaze for a few seconds.
7.4.
Slowly take it out and let part of the glaze drip off for a few seconds before turning.
7.5.
Then, place it on a cooling rack, baking sheet, or plate.

7.6.
For best results, let the glaze harden at room temperature before serving (usually about 10 – 15 minutes).
About the Author:
Tom the ChefFounder
# 1
210 Followers
- Published Recipes: 270
- Av. Recipe Evaluation:
- Location: Iowa, USA
- Member since: 2023-02-02
Recipes
Try Other Recipes from Same Category!
Loupáčky Czech Poppy Seed Crescents
Tom the Chef FounderFrgal Kolach with Pear Filling
Tom the Chef FounderFrgal Kolach with Plum Filling
Tom the Chef FounderBanana Bread Recipe
Tom the Chef FounderSpiced Pumpkin Walnut Bread
Cornbread
 Ethan. Rising Star
Classic Zucchini Bread Recipe
Banana Bread Recipe
Easy Mixed Berry Turnovers
 ChefLynn Cool Cook
Easy Monkey Bread Recipe
Disclaimer
- General Information Content on this page above, including the content provided on www.CookingHub.com, including all recipes, articles, and other materials, is for general informational purposes only. This content reflects the personal opinions and experiences of its authors and is not intended to provide professional dietary, medical, legal, or political advice. Please consult a qualified professional before making any decisions based on the information presented here.
- Content Ownership and Use Content on this page above, including content published on CookingHub.com is owned by the individual authors who created it. Only the authors can access, modify, or delete their content from the platform. Our content may be embedded on third-party websites and blogs without modification. No reimbursement will be provided for this use. If an author removes content from CookingHub.com, it will no longer be available through any embedded links.
- Limitation of Liability Neither www.CookingHub.com (operated by the CookingHub Foundation) nor content authors are responsible for any outcome or consequence resulting from the use of information on this site. This includes, but is not limited to:
- Food Safety: Any health risk related to food handling, food quality, or failure to follow USDA recommendations (including minimum safe cooking temperatures).
- Preparation Safety: The proper and safe handling of cooking equipment or its suitability for any given task.
- Recipe Outcomes: The final look, taste, or success of following a recipe.
- Ingredients and Equipment: The sourcing of ingredients, tools, equipment, or anything else related to the preparation and consumption of food.
- Nutritional and Dietary Information: The accuracy of nutritional data. This information is provided as a courtesy and should not replace advice from a medical provider. You are responsible for verifying that a diet is suitable for your personal health needs.
- Errors and Omissions: Any potential errors, typos, or unclear directions in articles and recipes.
- User Responsibility All readers, visitors, and users of embedded content are solely responsible for evaluating recipes and articles. You must make your own decisions about whether to follow the steps and recommendations provided. It is your responsibility to ensure that ingredients and preparation methods are safe and appropriate for your personal dietary restrictions and health conditions.
Share
Click on the icons below to share "Title of the item to share"