Turkish Sandwich Bread
8 servings (2 loaves)
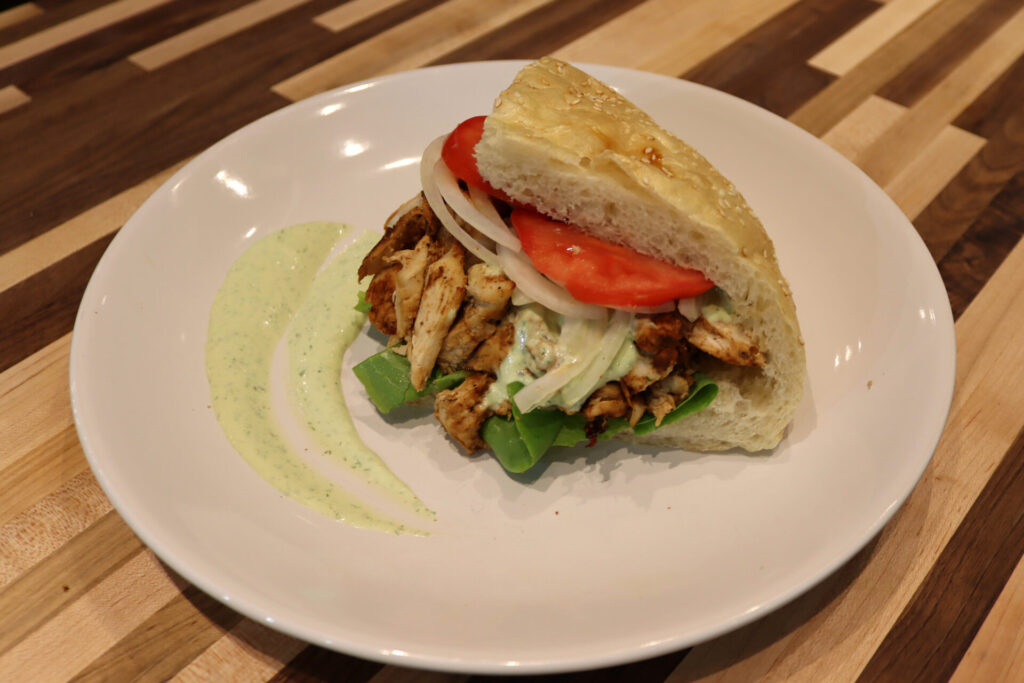
Are you looking for original sandwich bread? Turkish Sandwich Bread is a soft and flavorful recipe. This simple recipe makes two flatter loaves (about 2” tall) that are cut into quarters. You then simply cut a pocket into each quarter and fill it with your favorite ingredients. This is a...
Read more... tasty and original alternative to pita bread and can be used for serving gyros, hummus, or any kind of sandwich you desire.
Read lessx saved
 Tom the Chef Founder
November 8, 2023
Ingredients:
Dough
- 3 ⅓ cups of bread flour
- 2 TBSP of granulated sugar
- 1 TBSP of active dry yeasts
- 2 TSP of salt
- 1 ¾ cups of lukewarm milk (about 90 to 100°F) (preheat in kettle or microwave)
- 3 TBSP of Extra Virgin Olive Oil
Brushing mixture & topping:
- 1 egg
- ¼ cup of milk
- 1 TBSP of white sesame seeds
Directions:
Common mistake:
A common problem is that the dough always seems sticky, especially during the final kneading process. This is why some bakers often panic and add extra flour. This is not a good way to go since the final baked product will end up denser than it should. It is very important to not add any more flour and instead knead as long as needed until the dough stops sticking to the bowl and becomes compact and flexible.
1. Dough:
1.1. Place into a kitchen mixer with hook attachment:
3 ⅓ cups of bread flour
2 TBSP of granulated sugar
1 TBSP of active dry yeasts
2 TSP of salt
Briefly stir with a whisk just enough to combine all ingredients (about 1 minute).
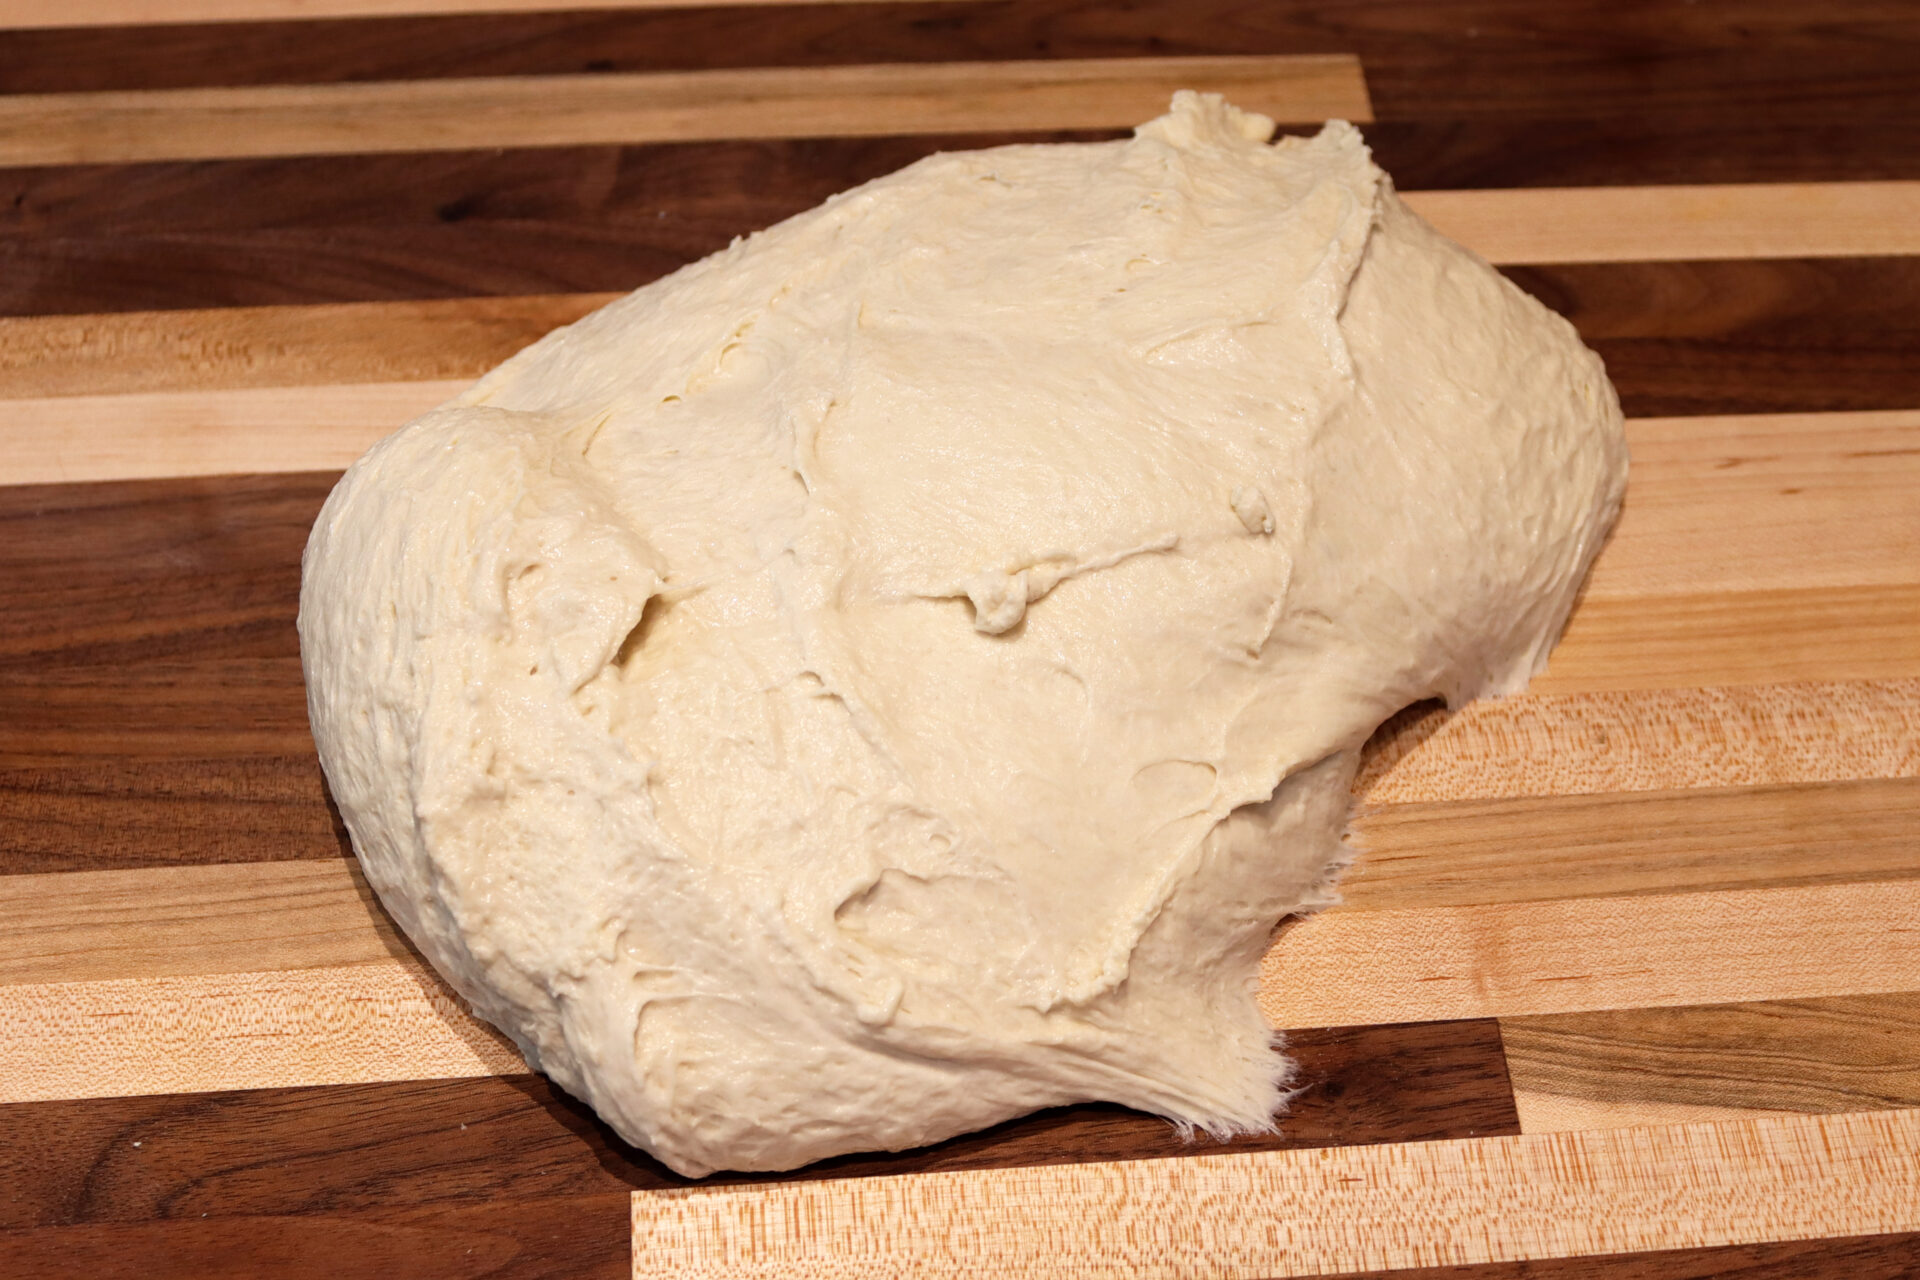
1.2. Rising the dough:
1 ¾ cups of lukewarm water
3 TBSP of Extra Virgin Olive Oil
Knead on low speed until all ingredients are partially incorporated (about 1 – 2 minutes).
1.3.
Then increase speed to medium-high and knead until the dough is compact and stops sticking to the bowl (about 7 – 9 minutes).
2. Rising the dough:
2.1.
Remove the bowl from the mixer and cover it with plastic.
2.2.
Let it rise in a warm place until it has tripled in size (about 1 – 2 hours).
3. Shaping:
Note:
Work on a surface (countertop) that has no flour on it.
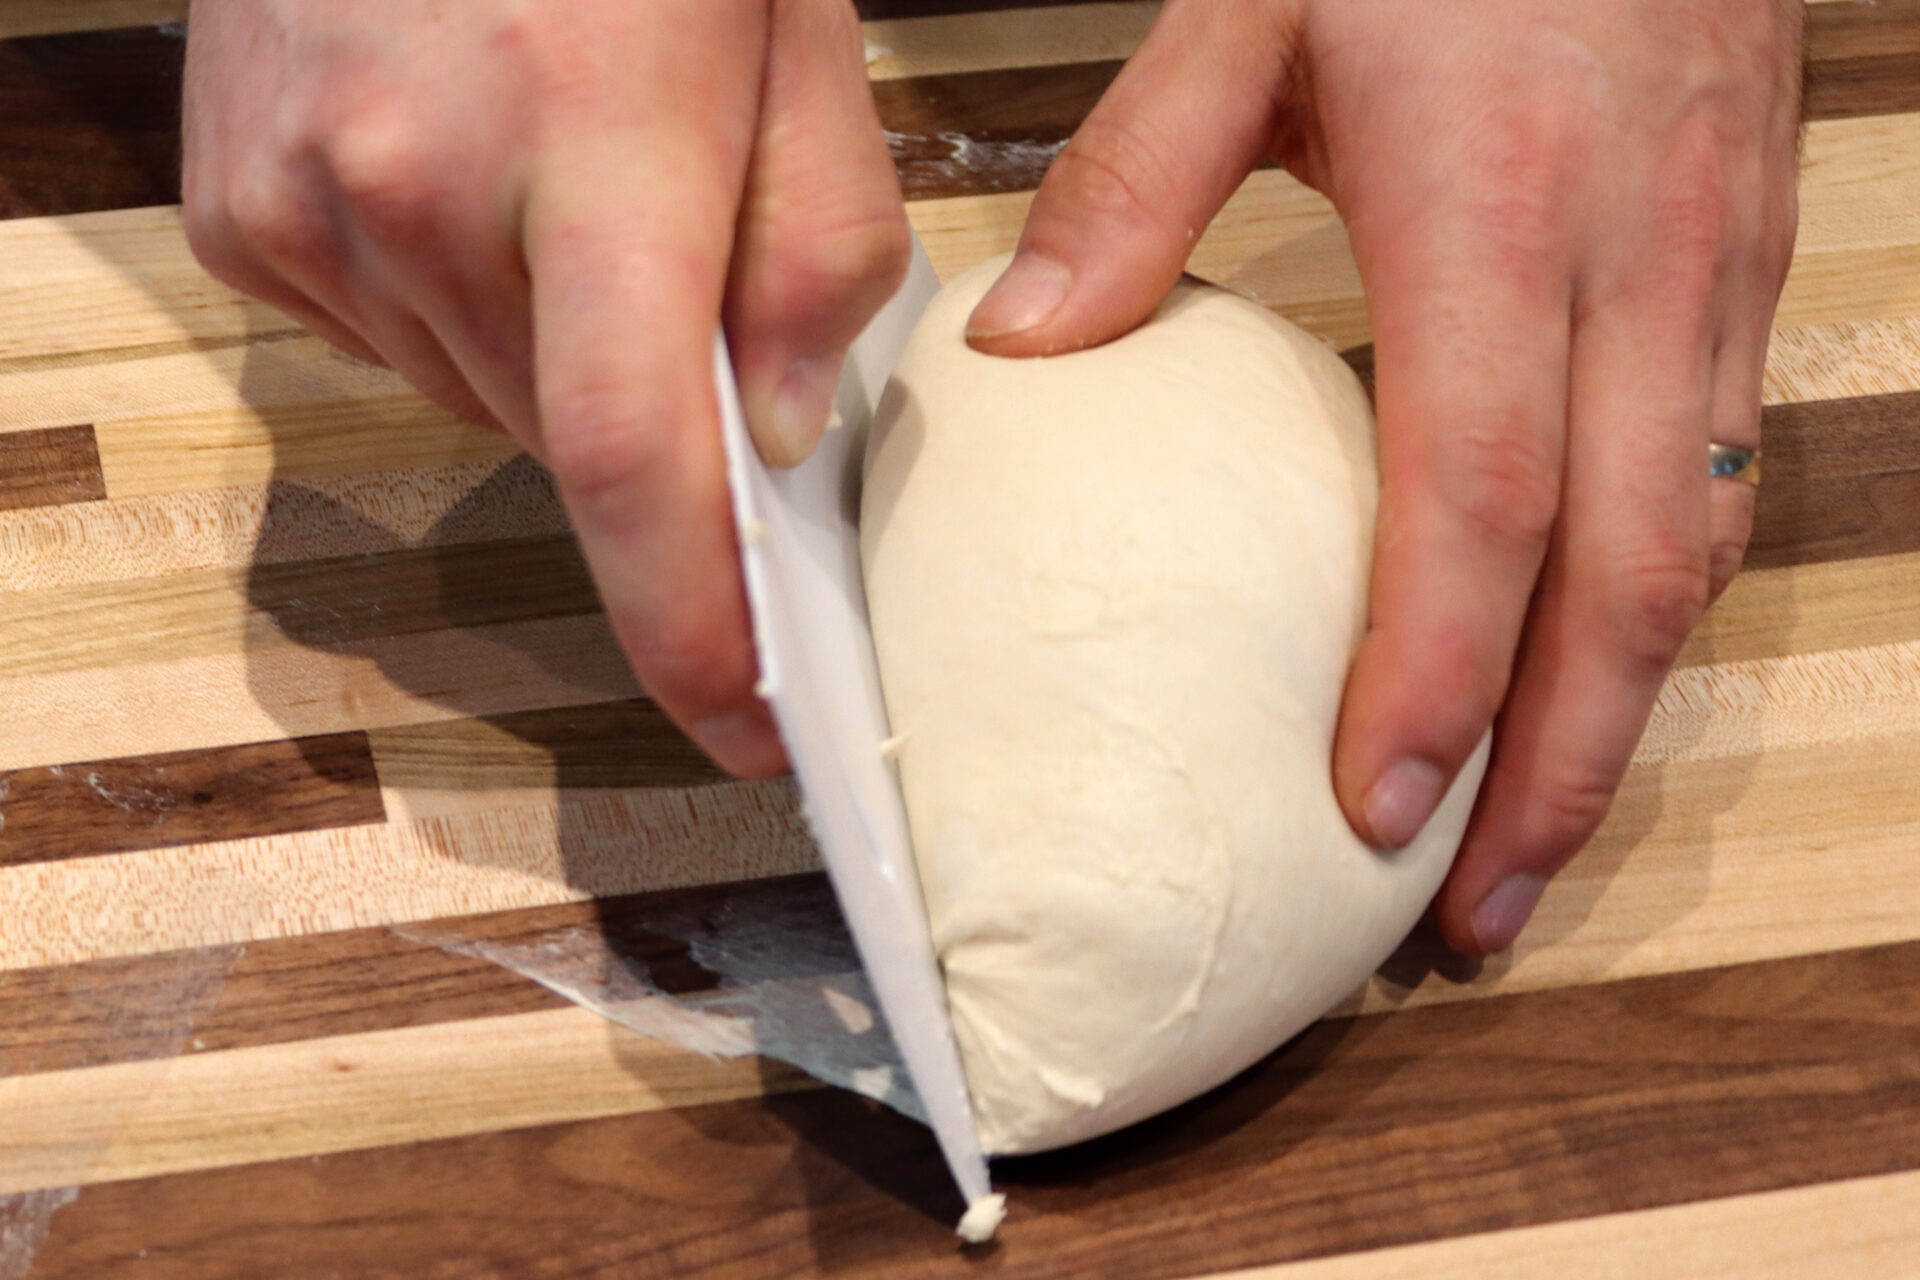
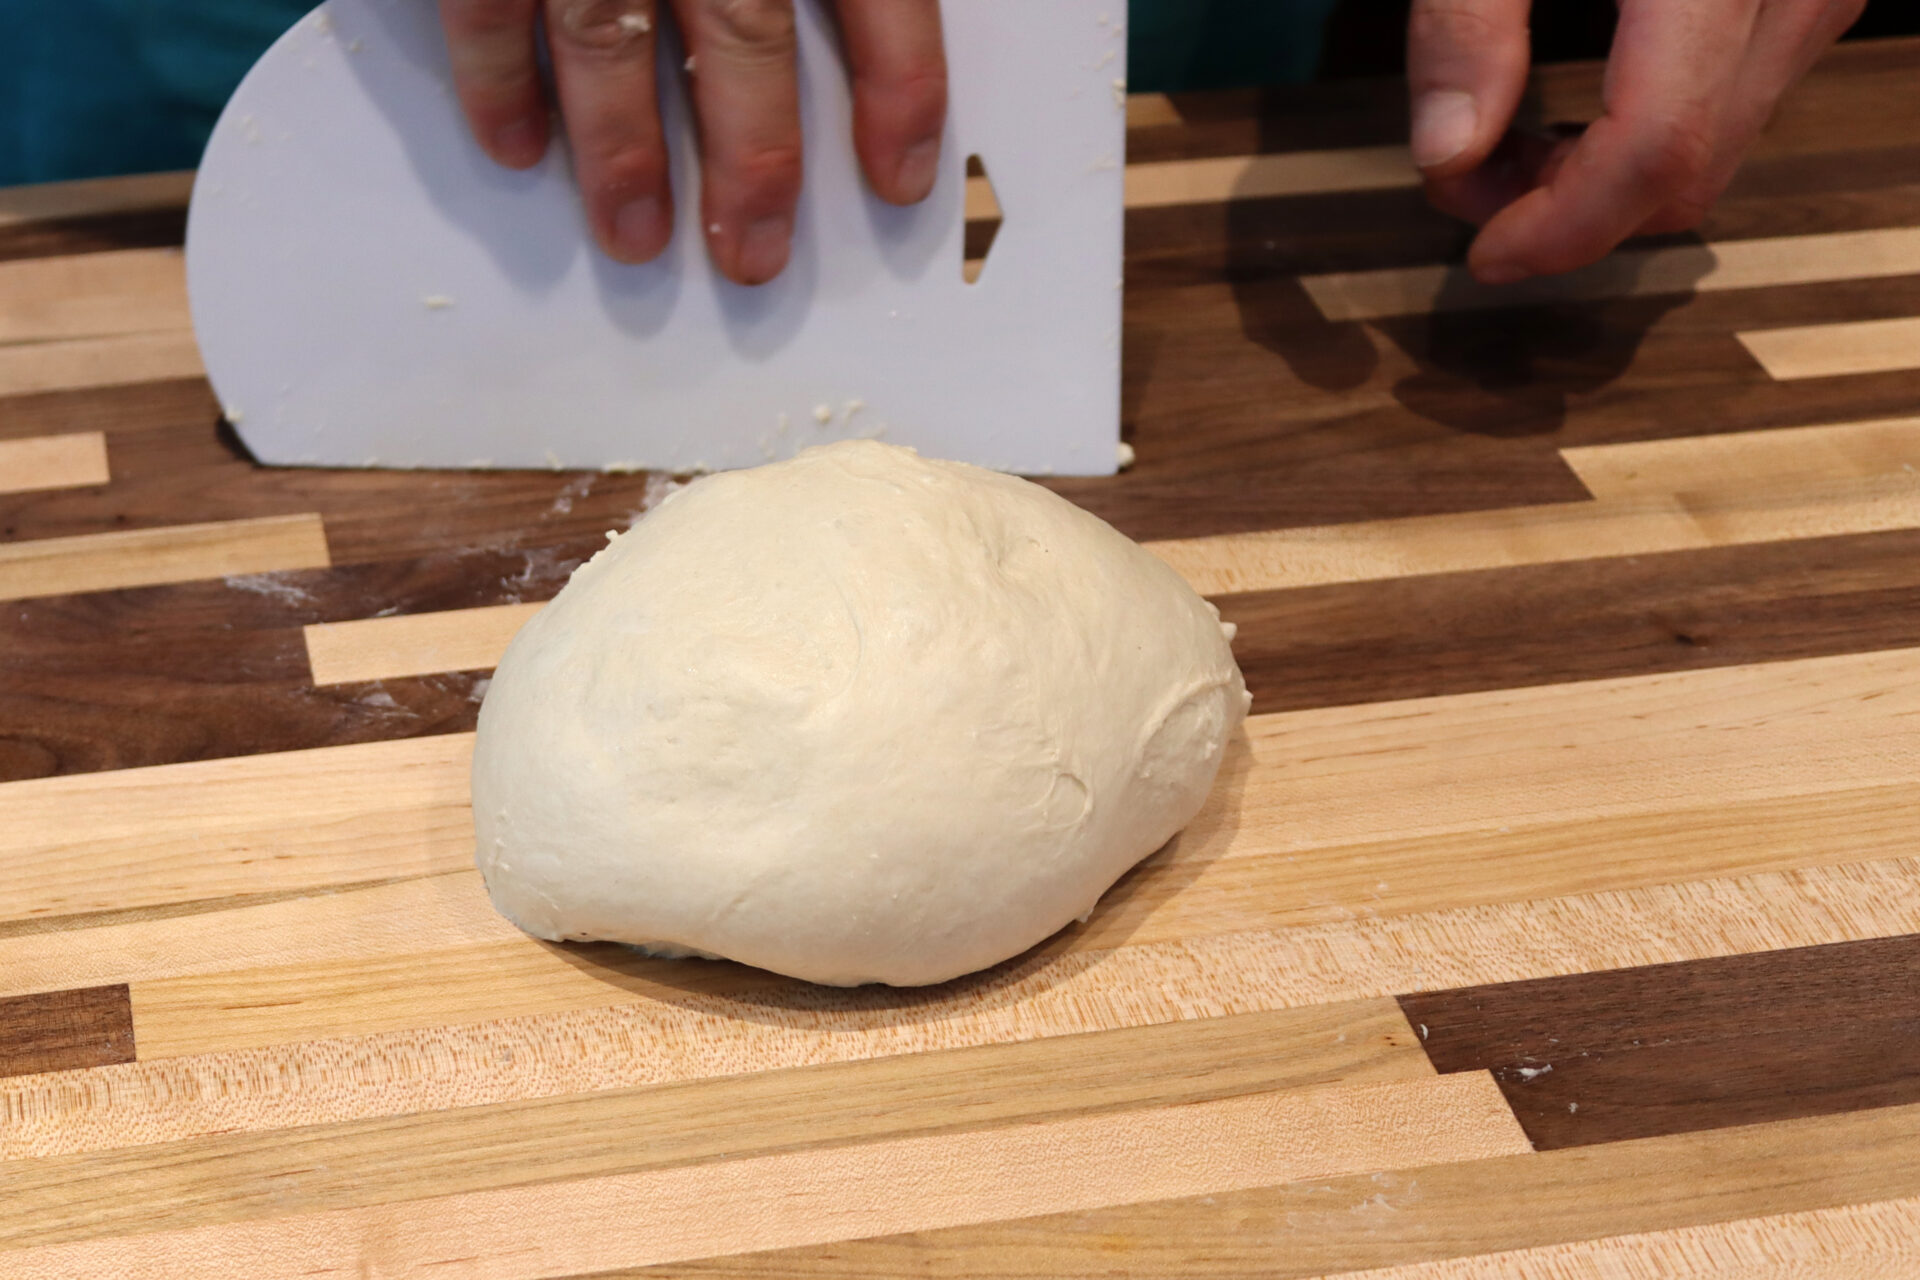
3.1.
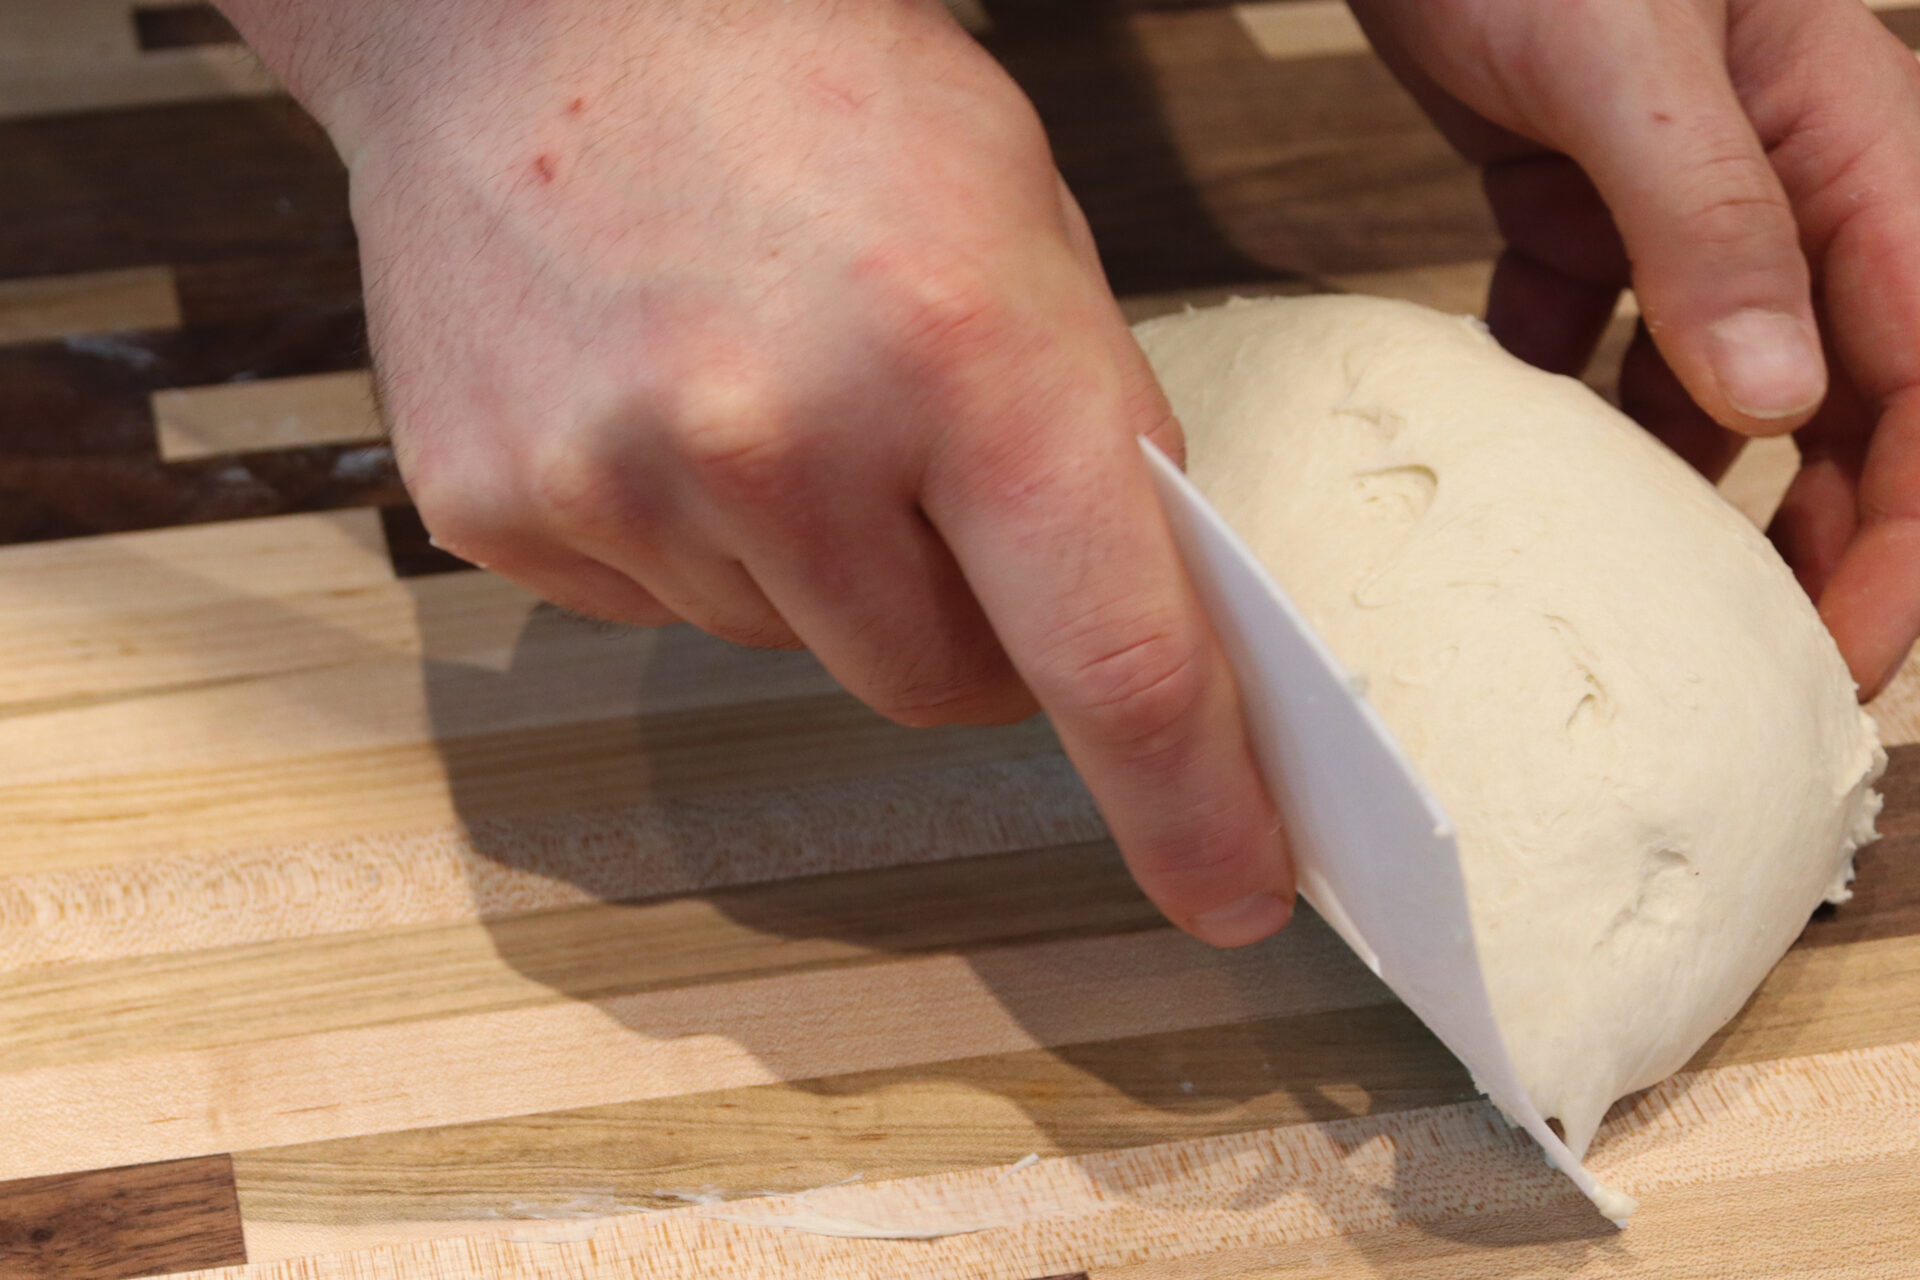
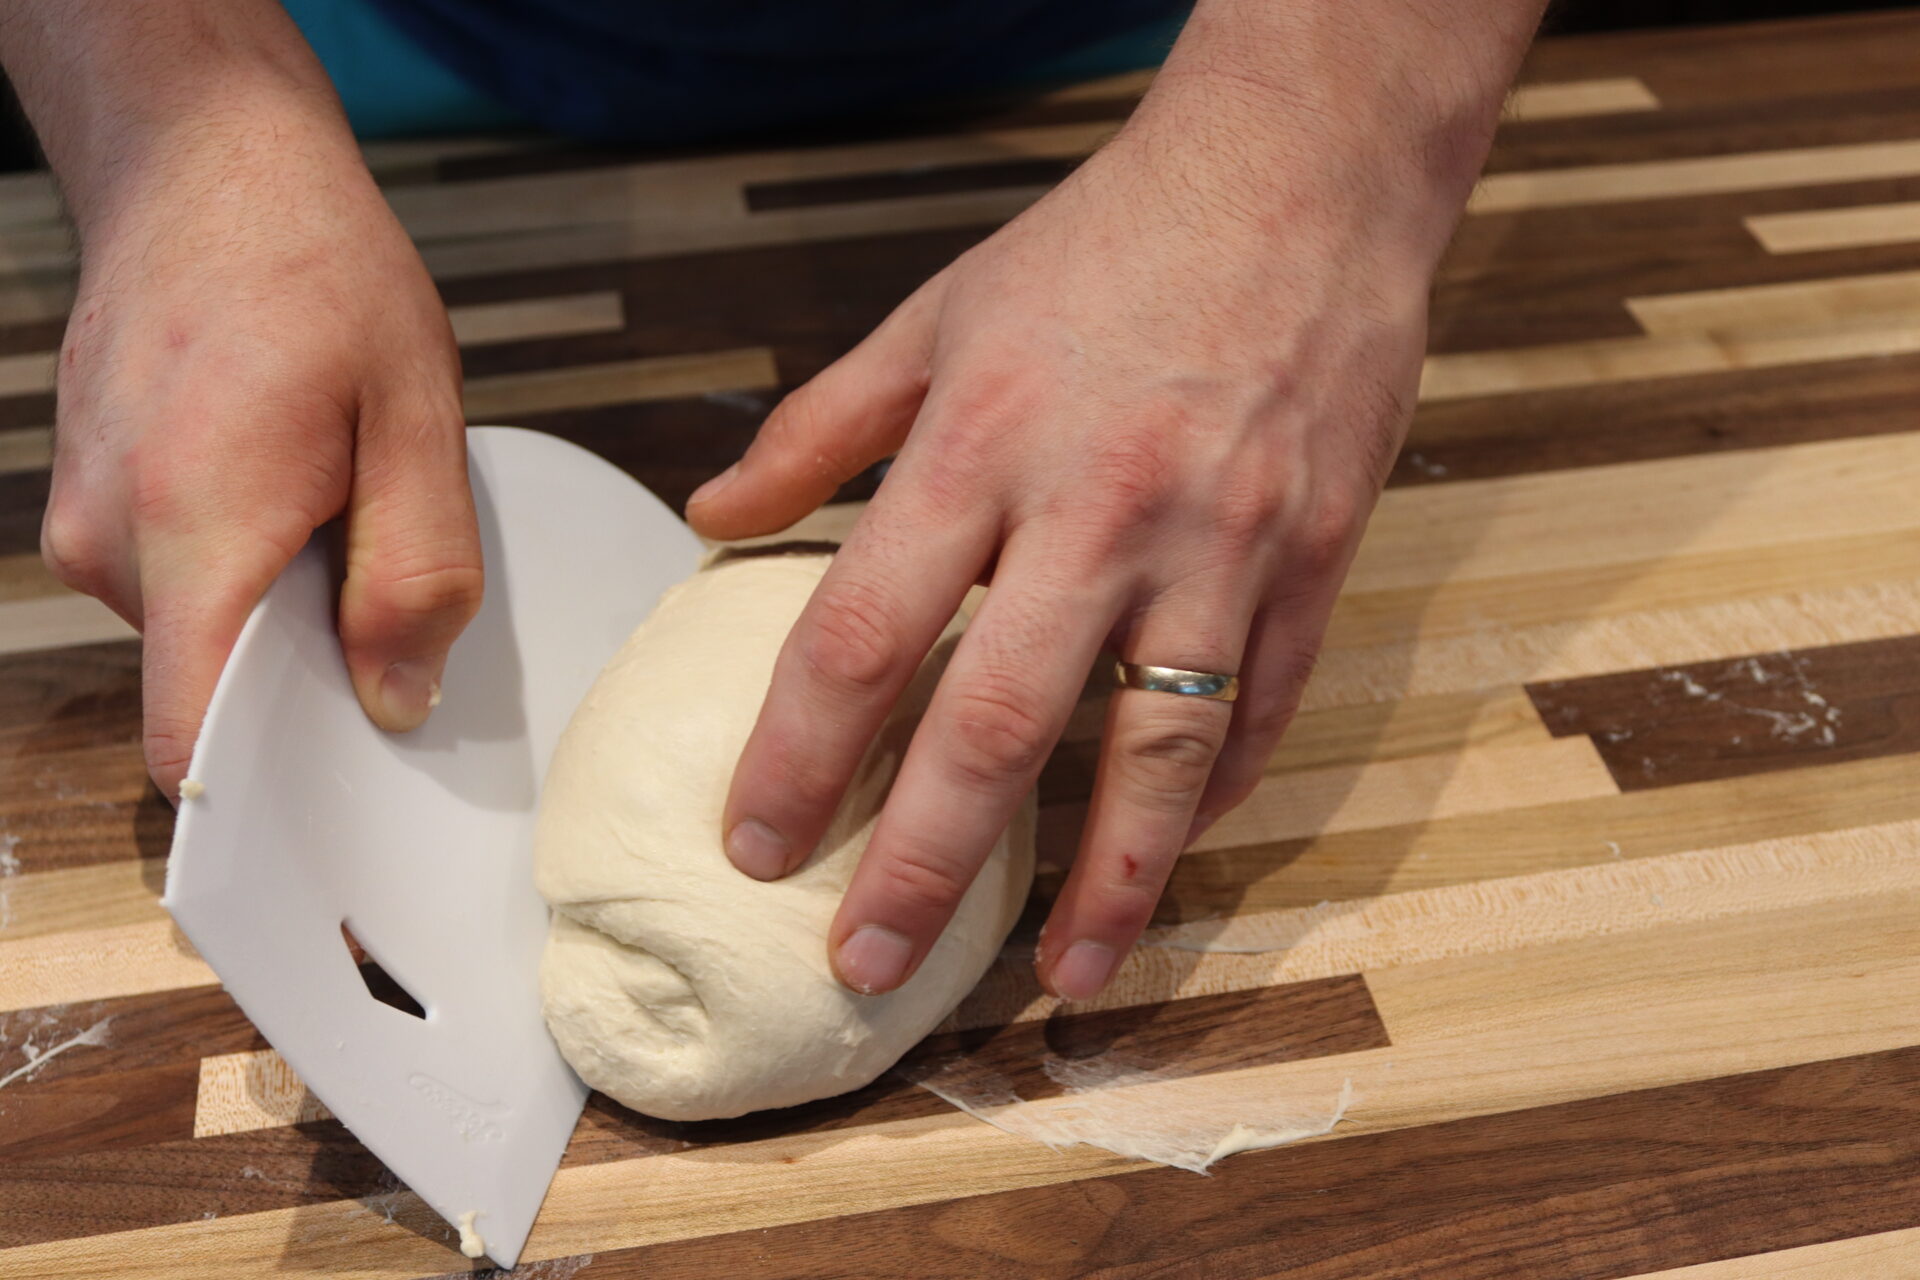
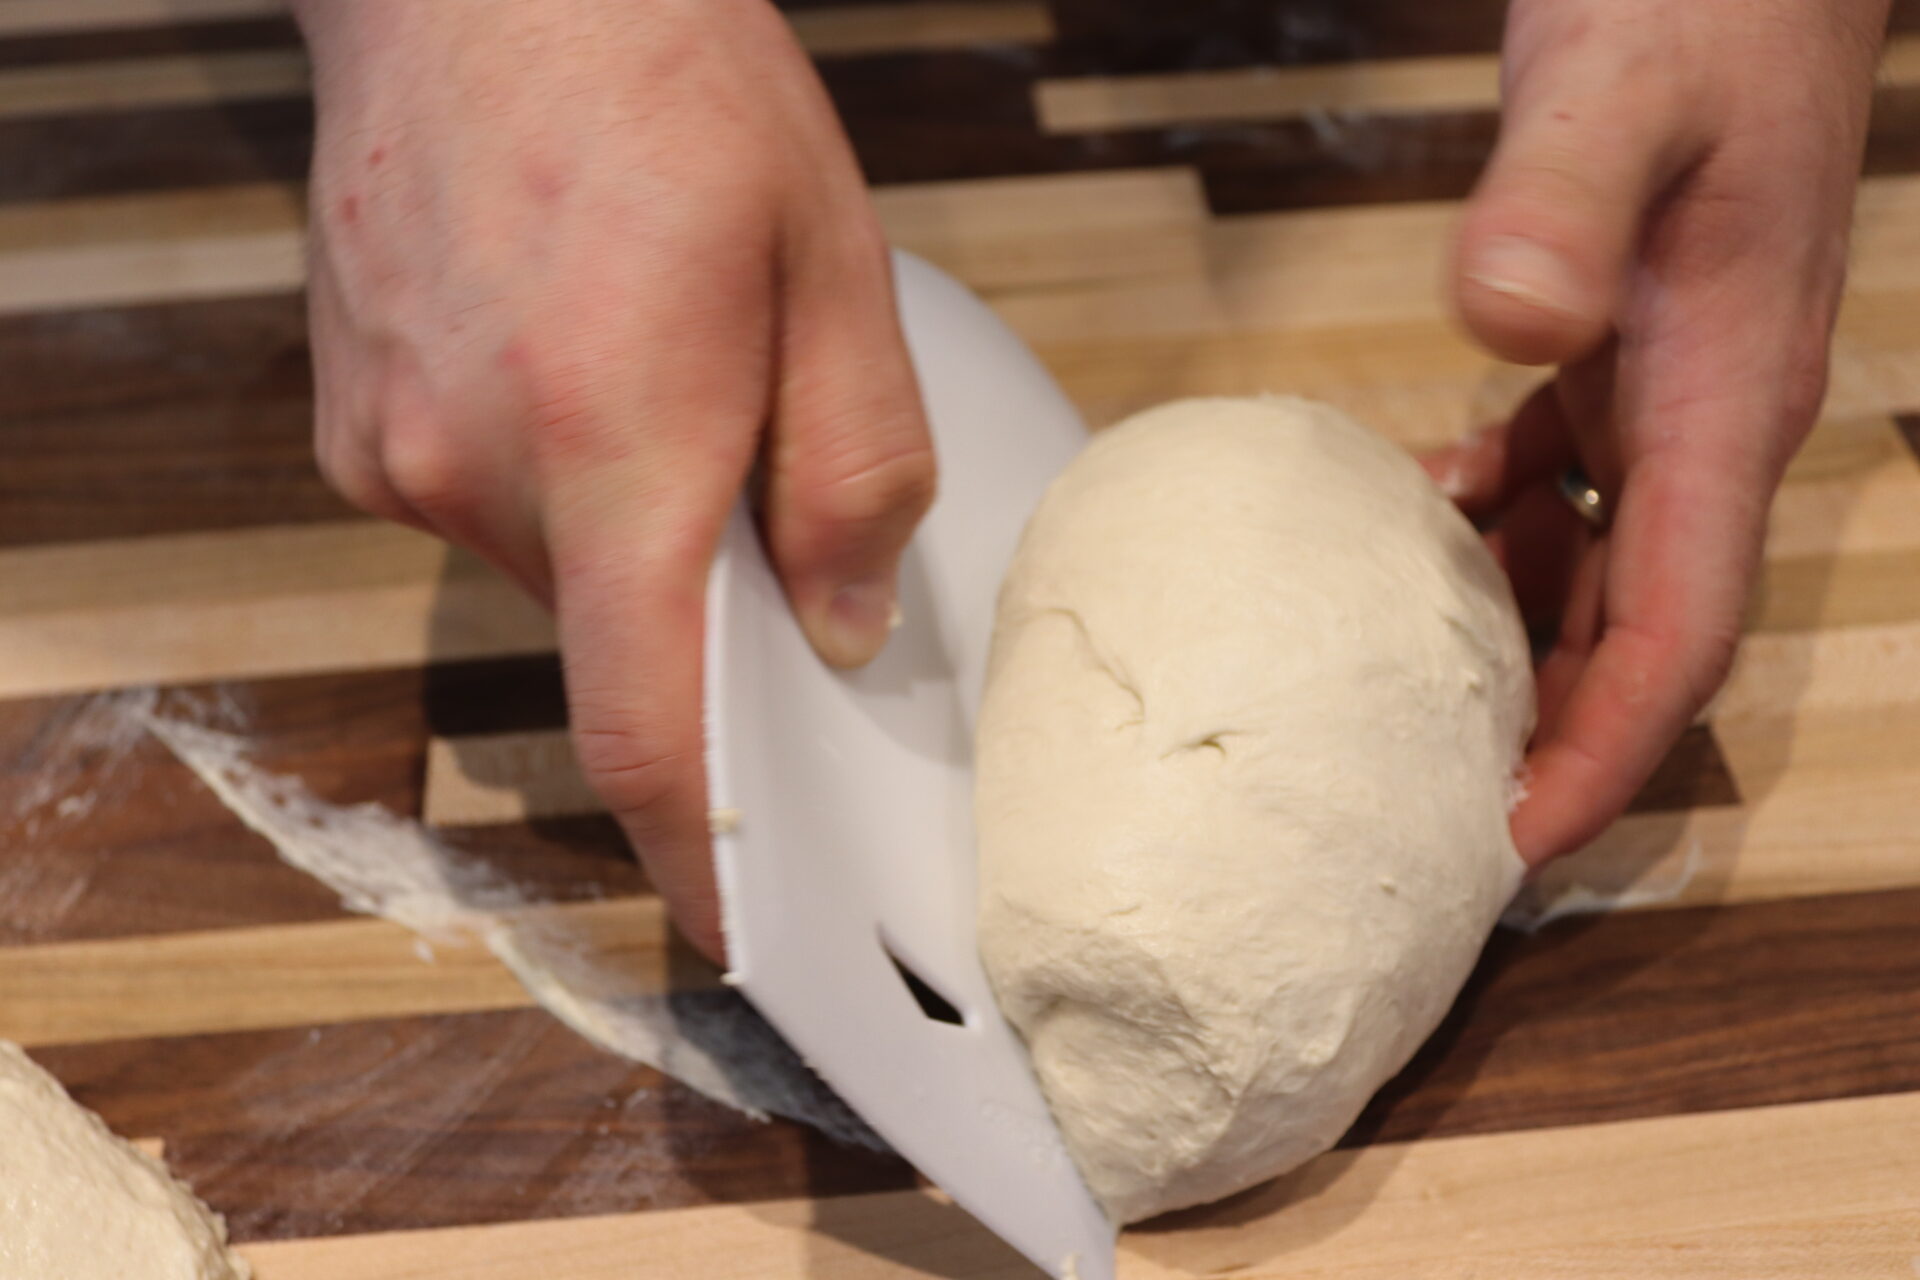
Place the dough on a work surface and separate the dough into 2 even pieces using a dough scraper.
3.2.
Form each piece of dough into a compact dough ball by stretching it, which also stretches the gluten, with the dough scraper:
3.2.1.
To stretch the dough, place the dough scraper at a slight angle against the bottom part of the dough (between the dough and the table).
3.2.2.
Then, keeping one hand on the top of the dough, push the scraper so it slightly moves the dough on the surface. The dough will slightly roll and stretch at the same time. Repeat this step and each time rotate the bun about 90° until the compact dough ball is shaped (about 2 – 3 times from each of the four sides).
3.2.3
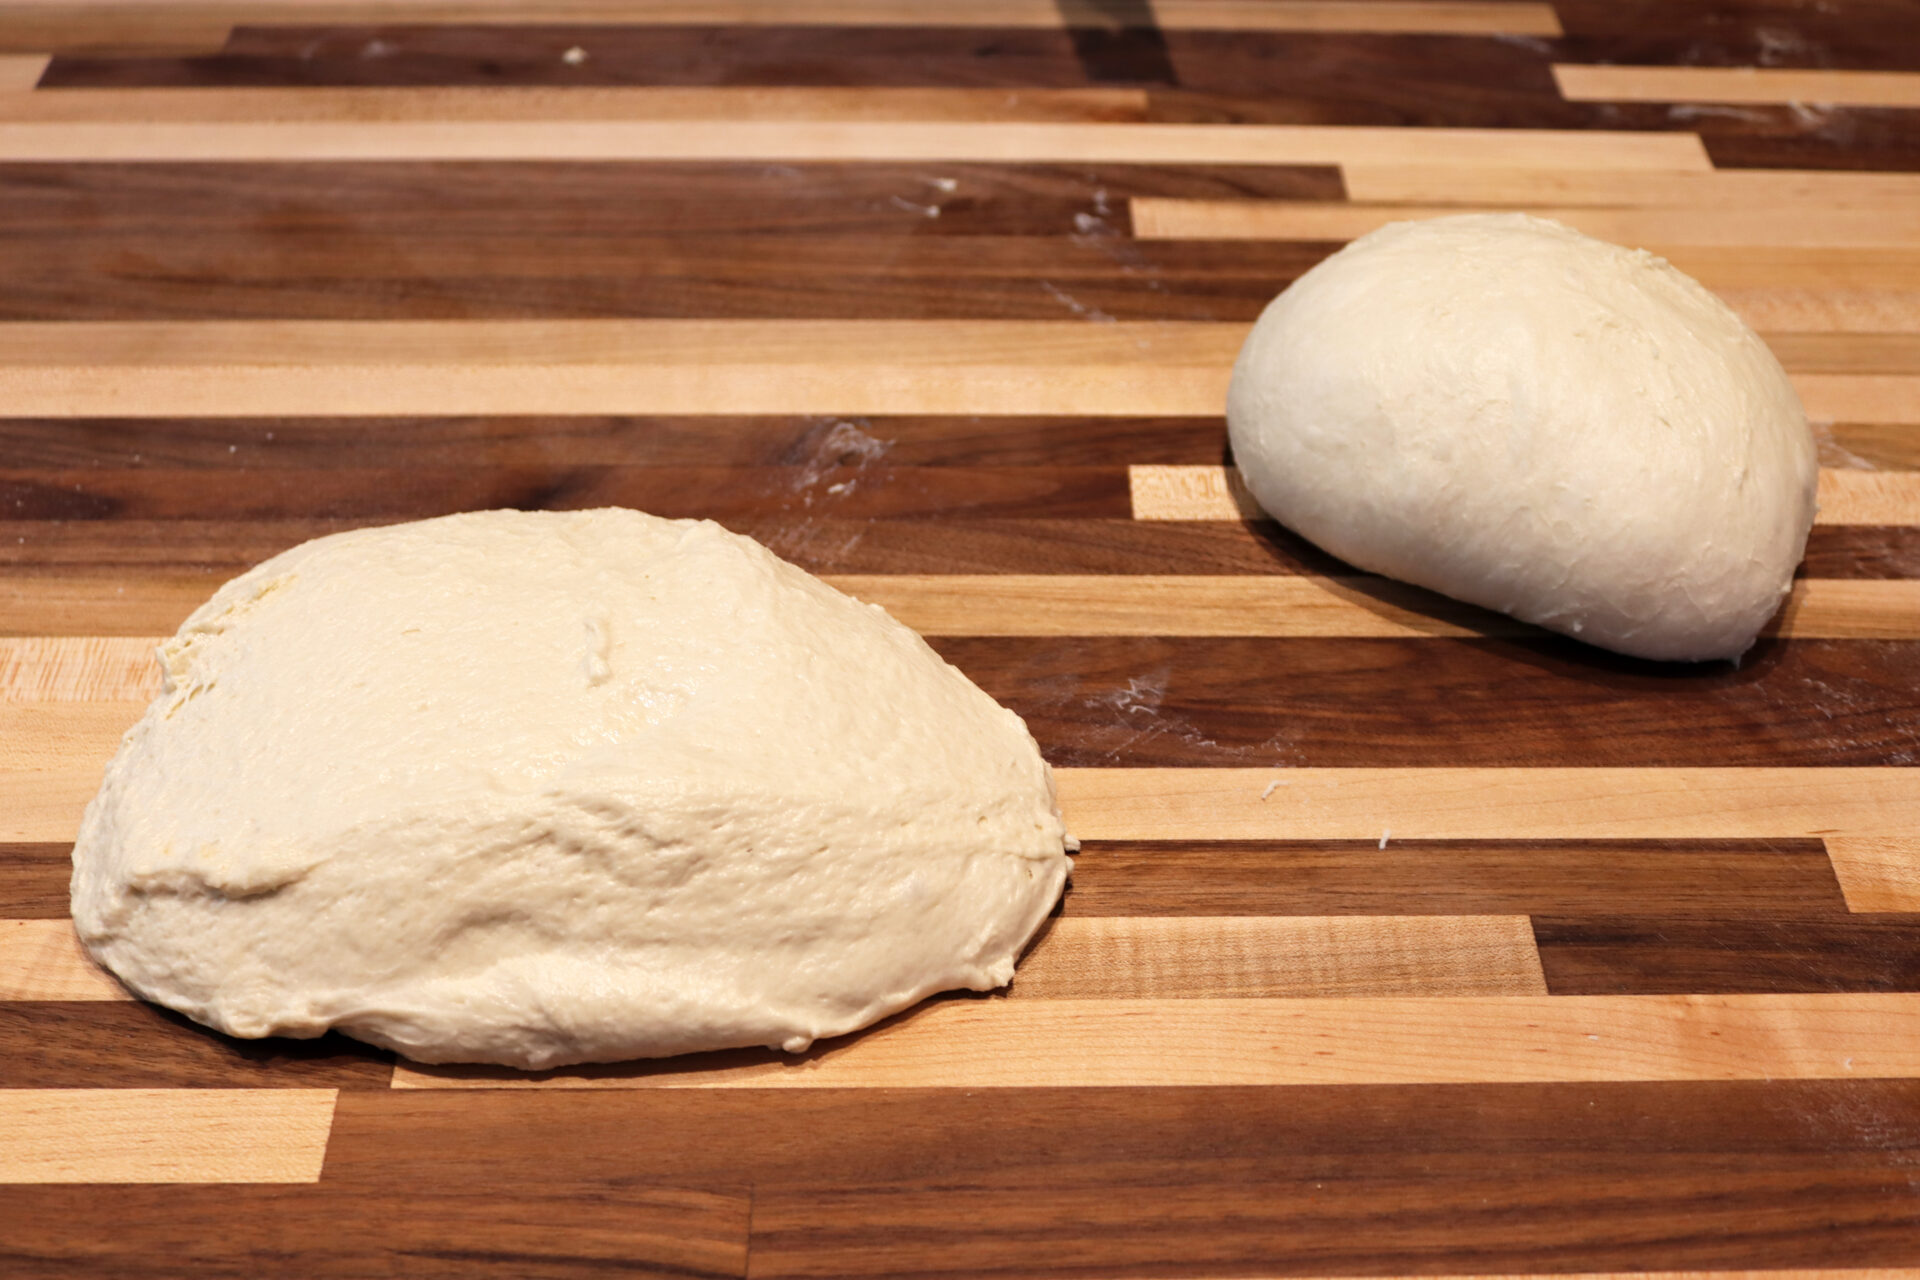
Following this proofing process will turn these compact dough balls into flat Turkish bread loaves.
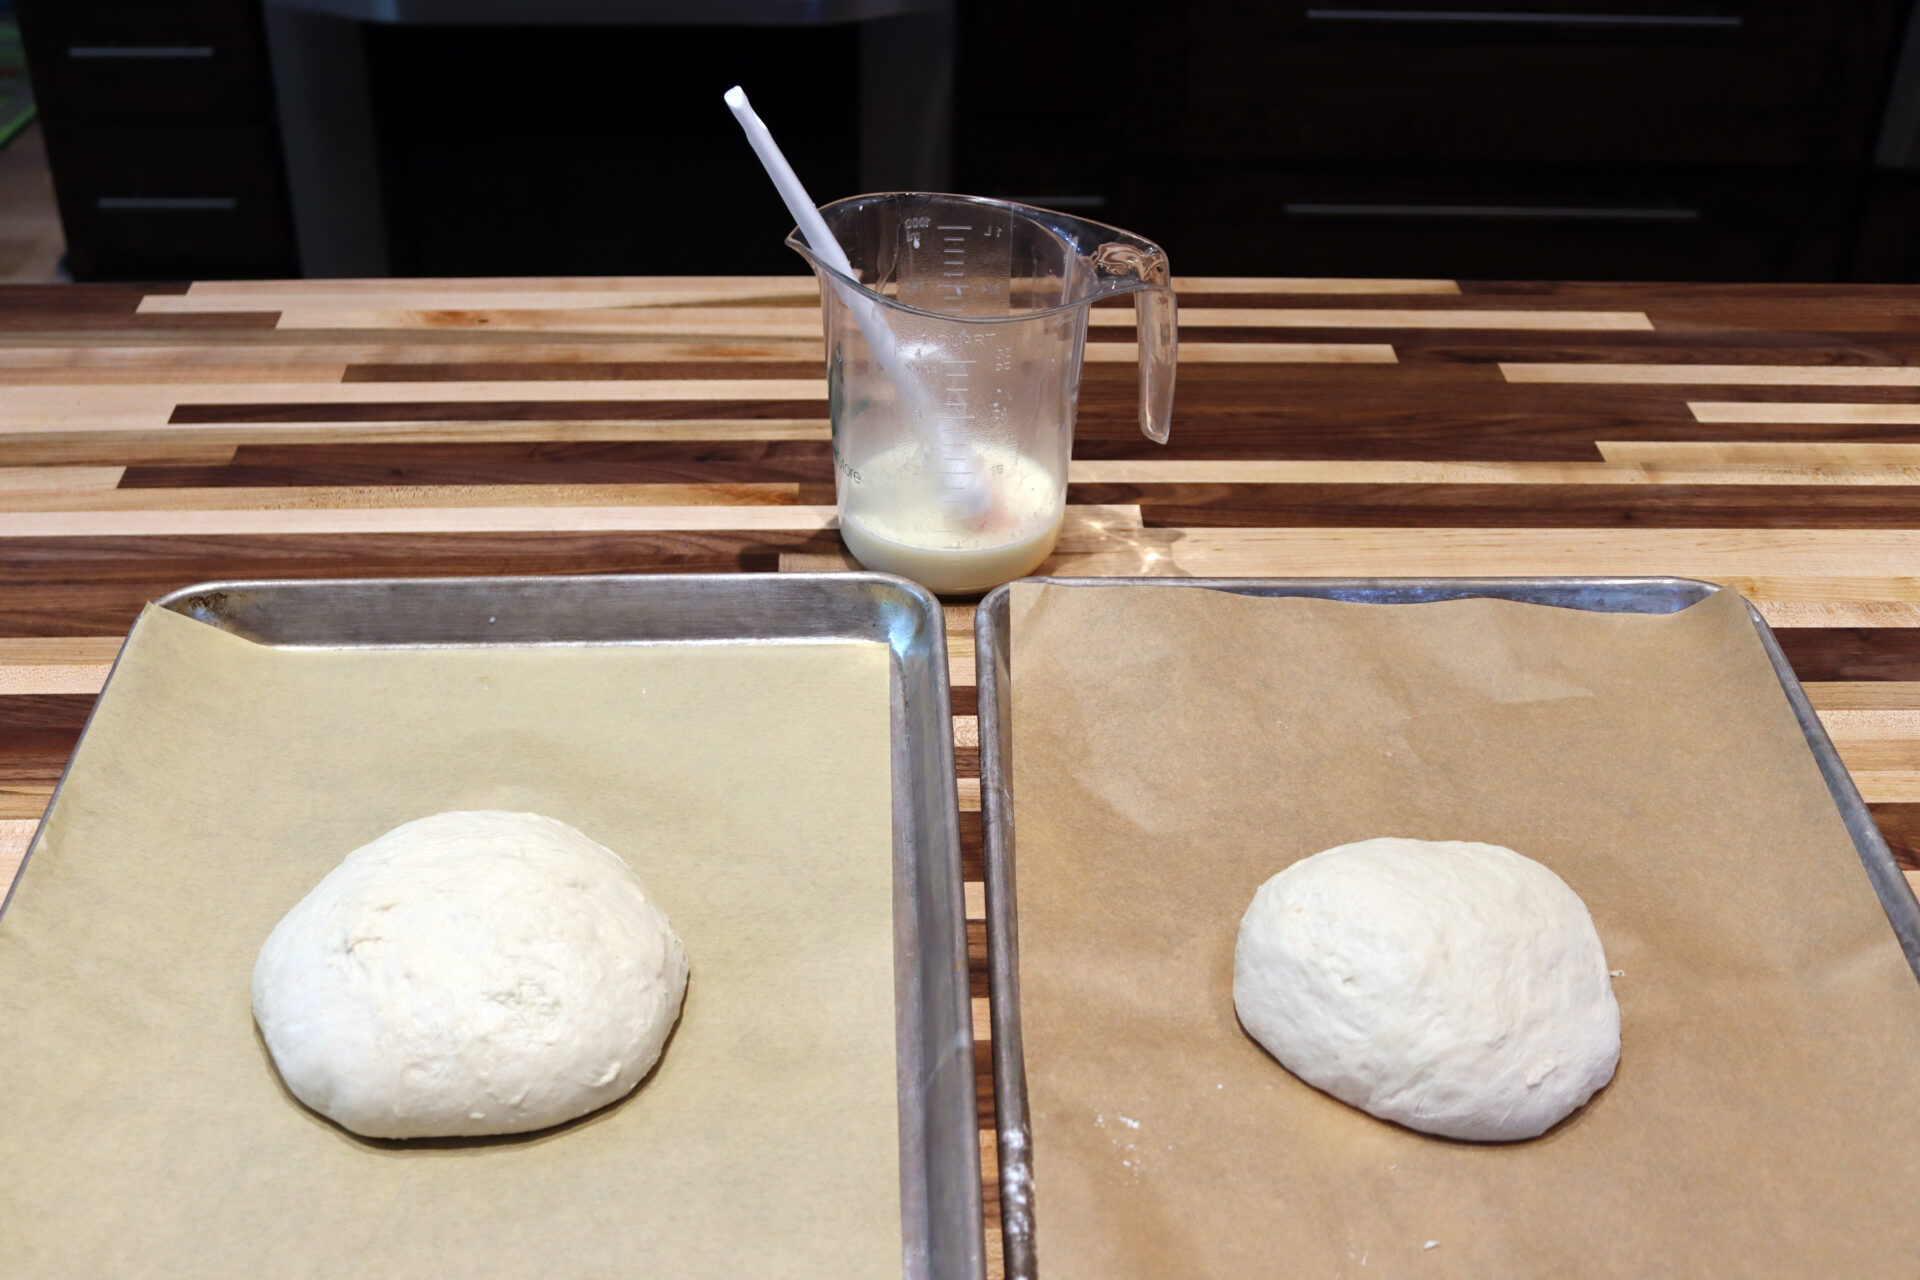
3.3.
Place each of them on the baking sheet.
4. Proofing:
4.1.
Prepare a brushing mixture by briefly hand whisking 1 egg with ¼ cup of milk in a small mixing bowl.
4.2.
Then brush both balls (keep the rest for a second brushing).
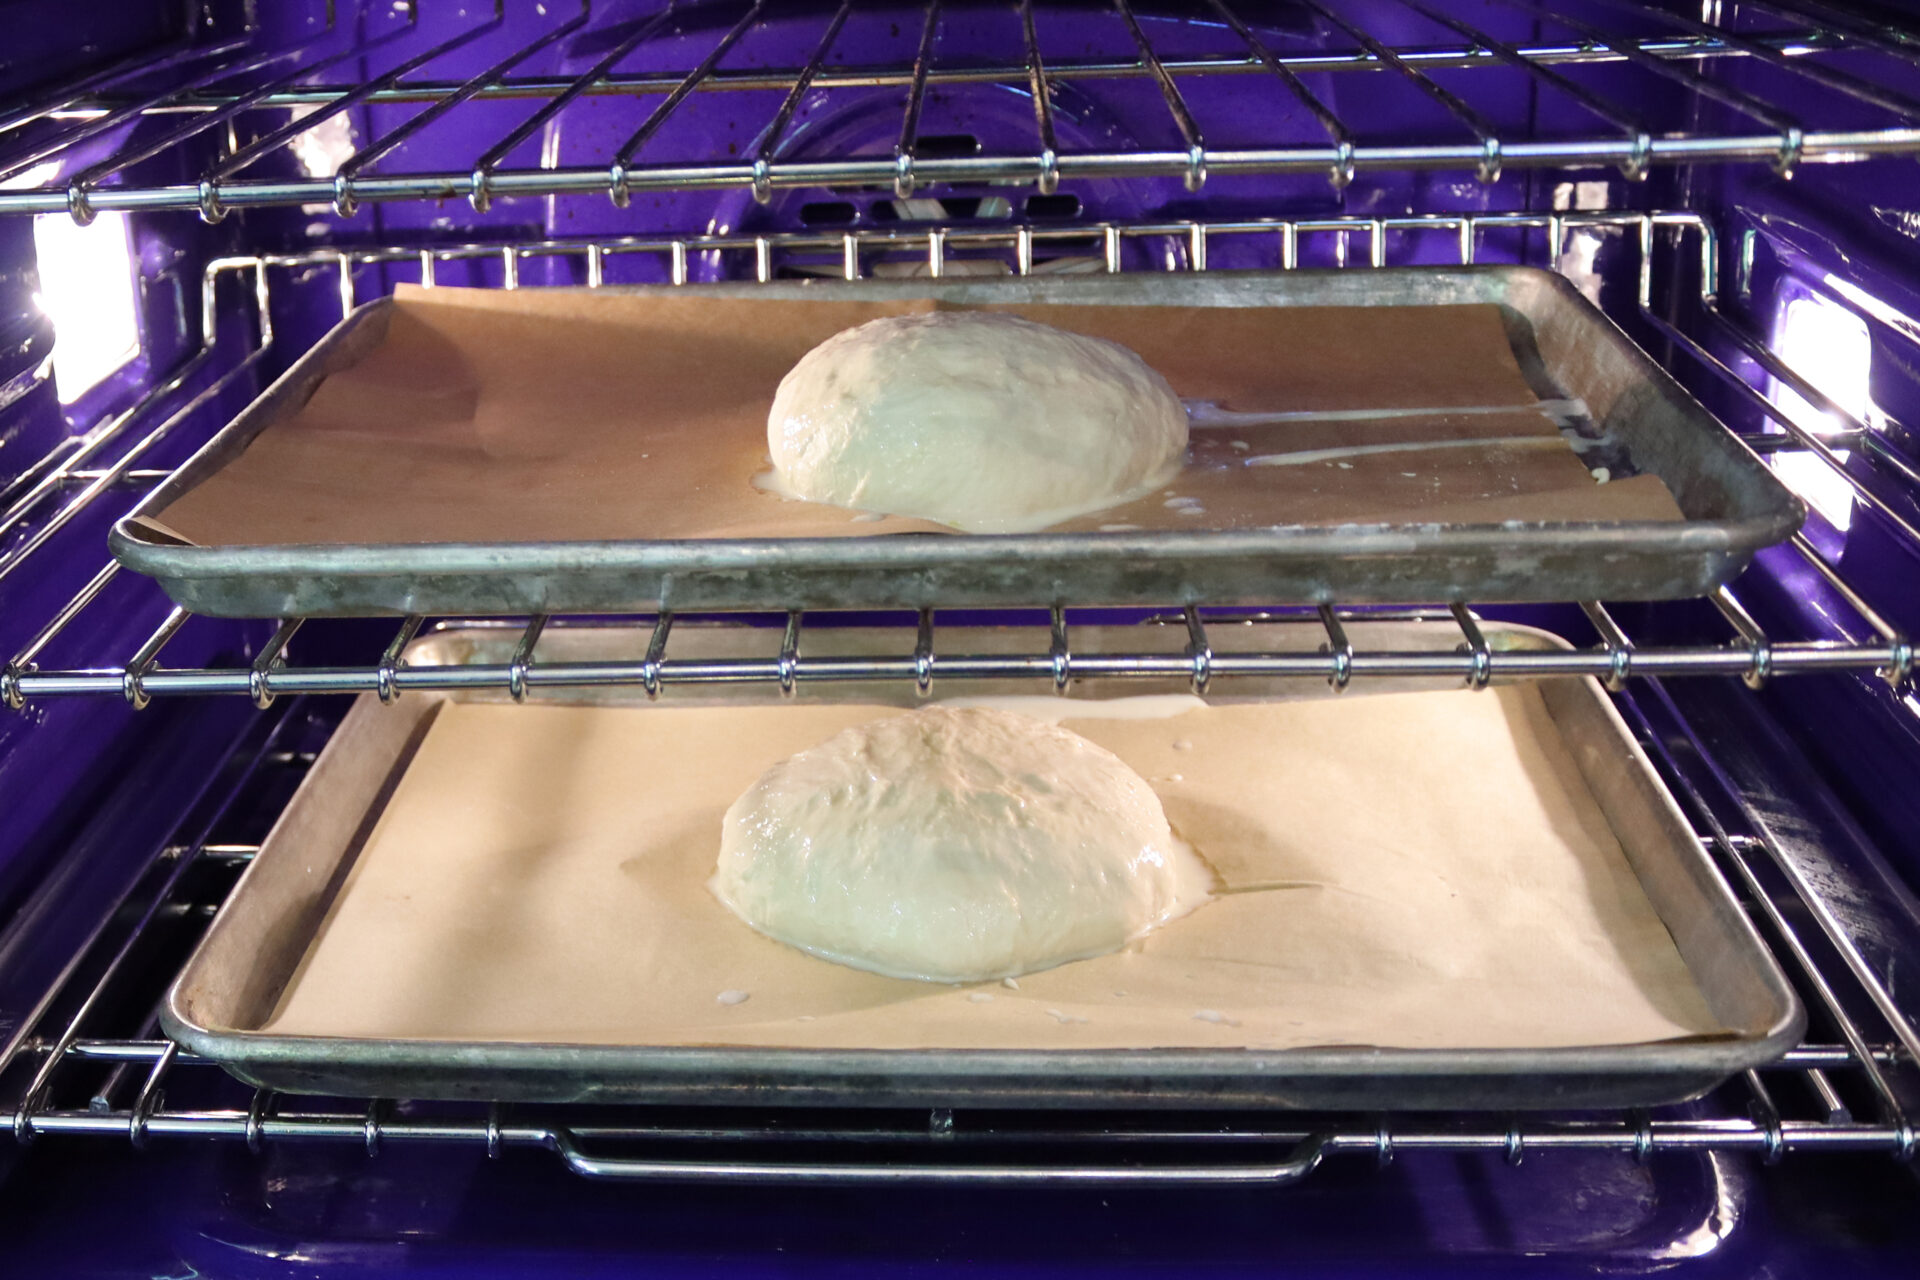
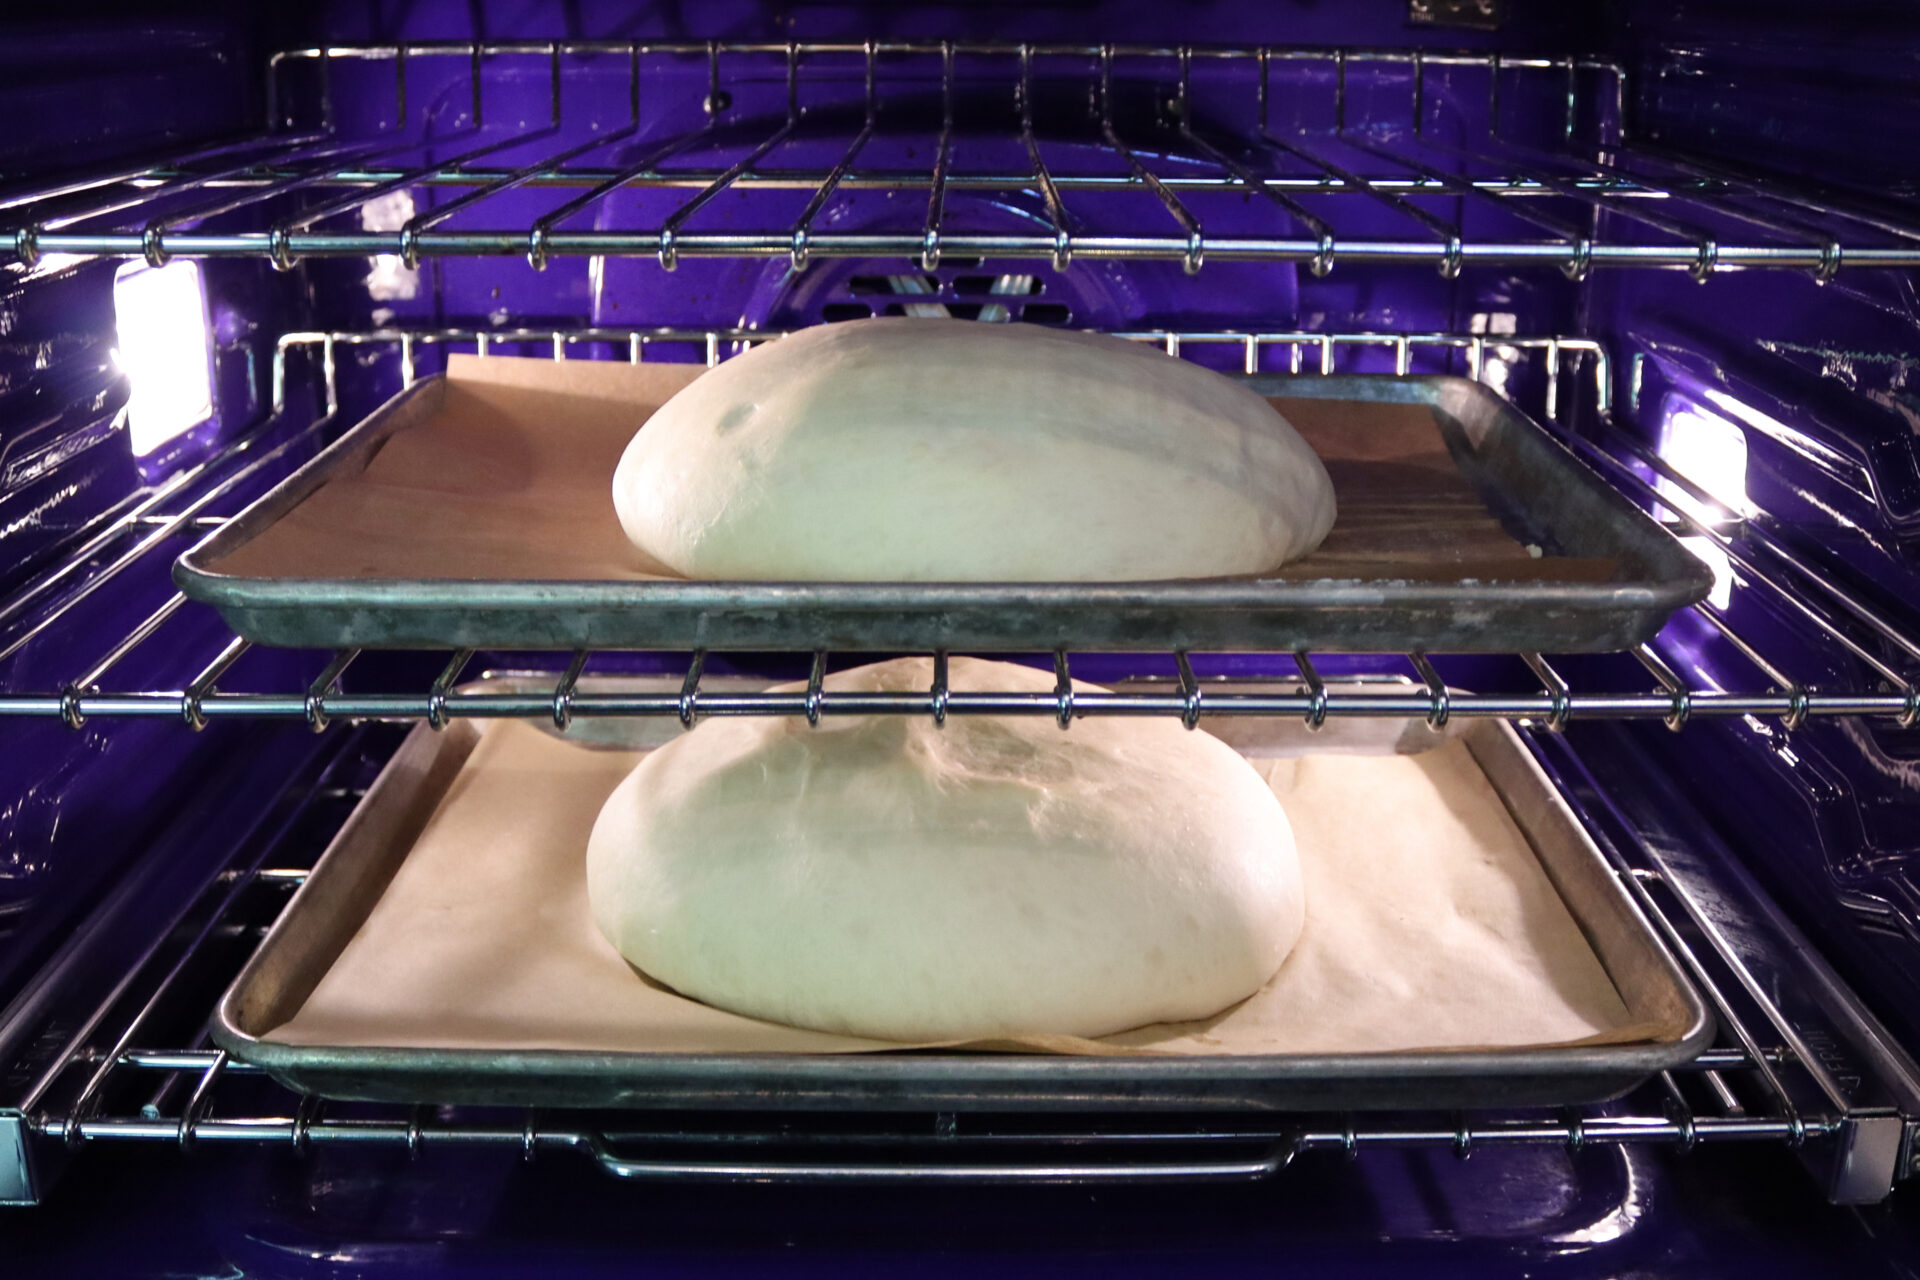
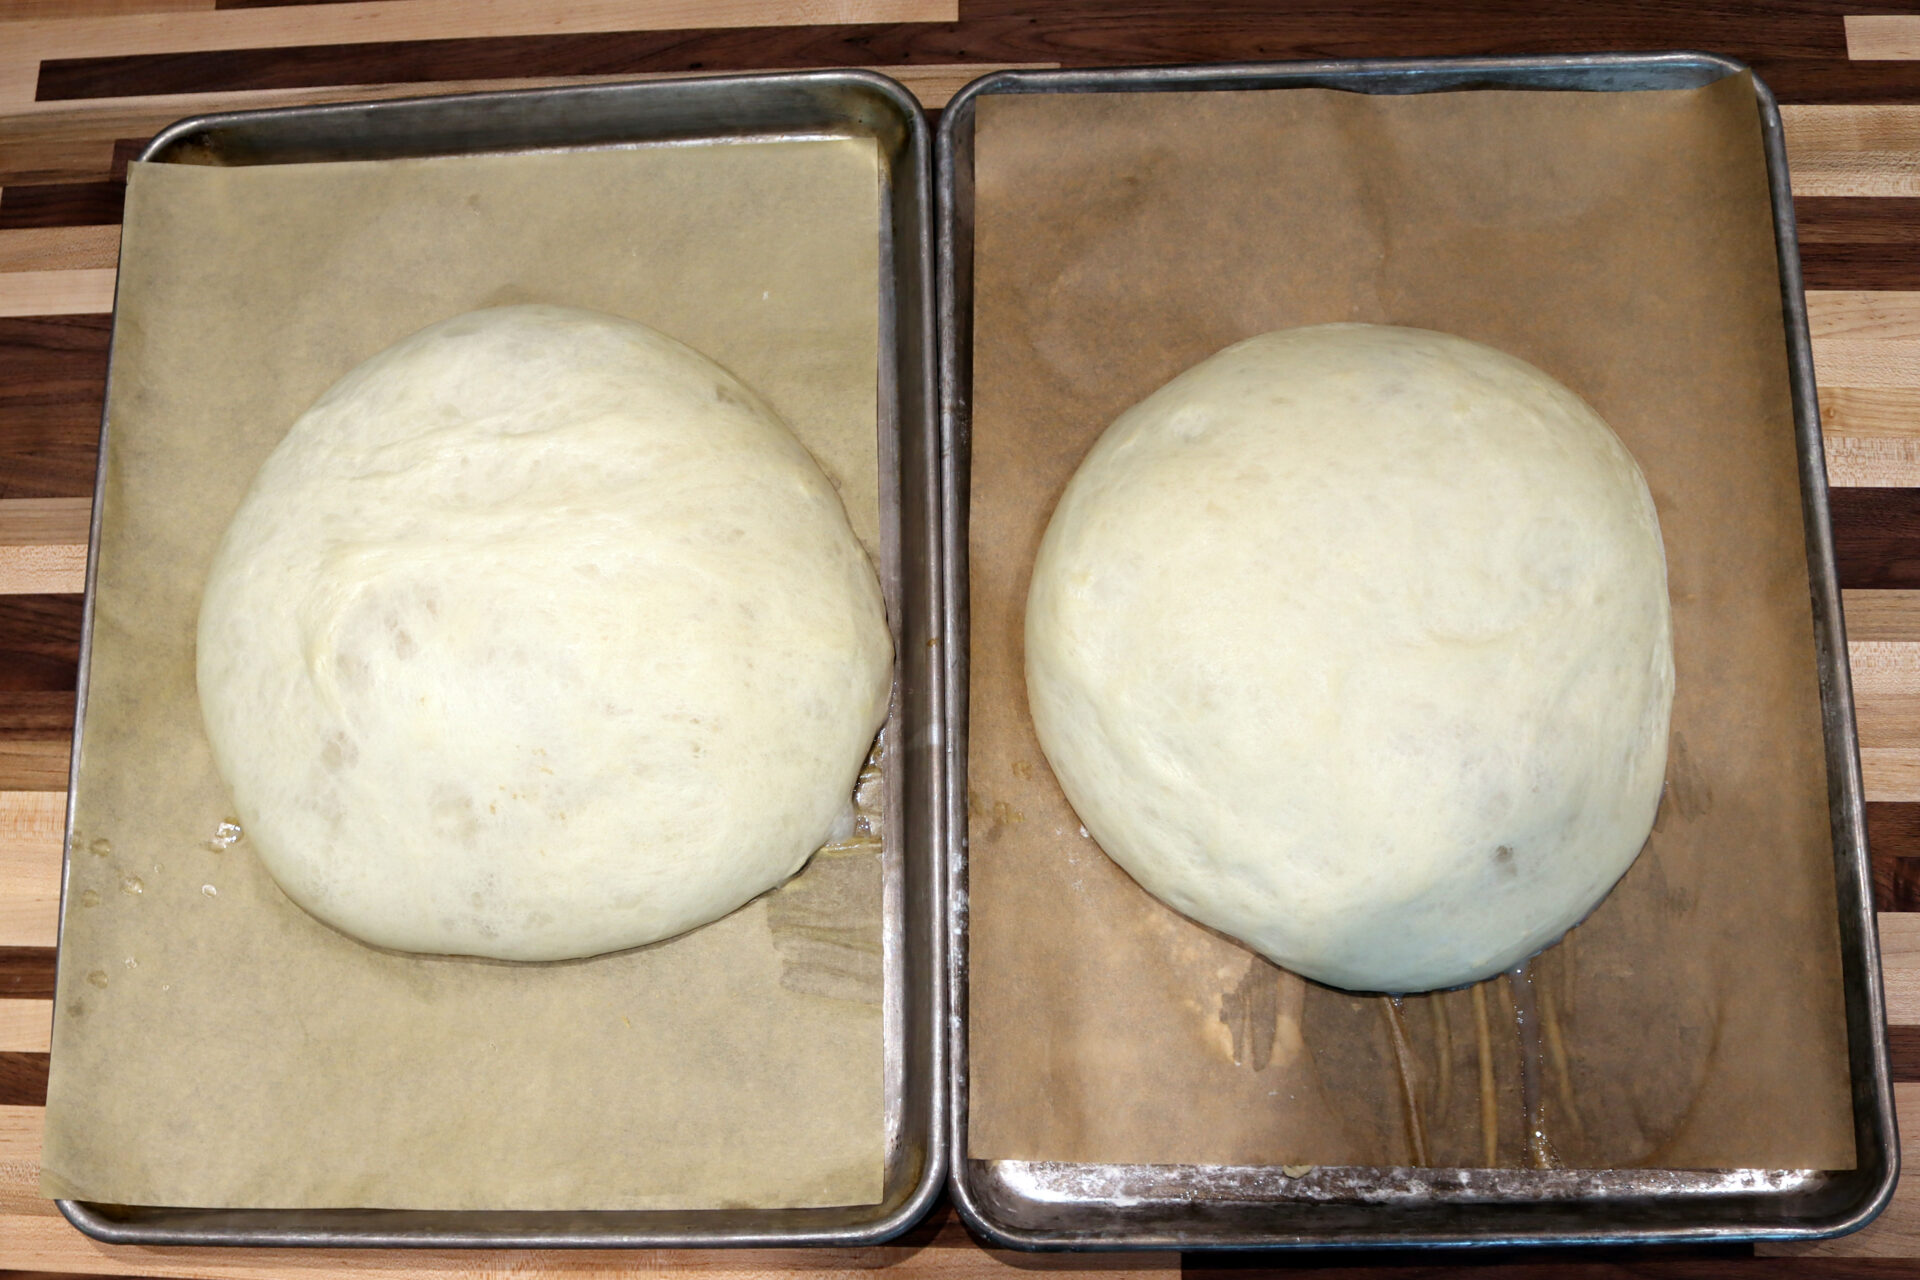
4.3.
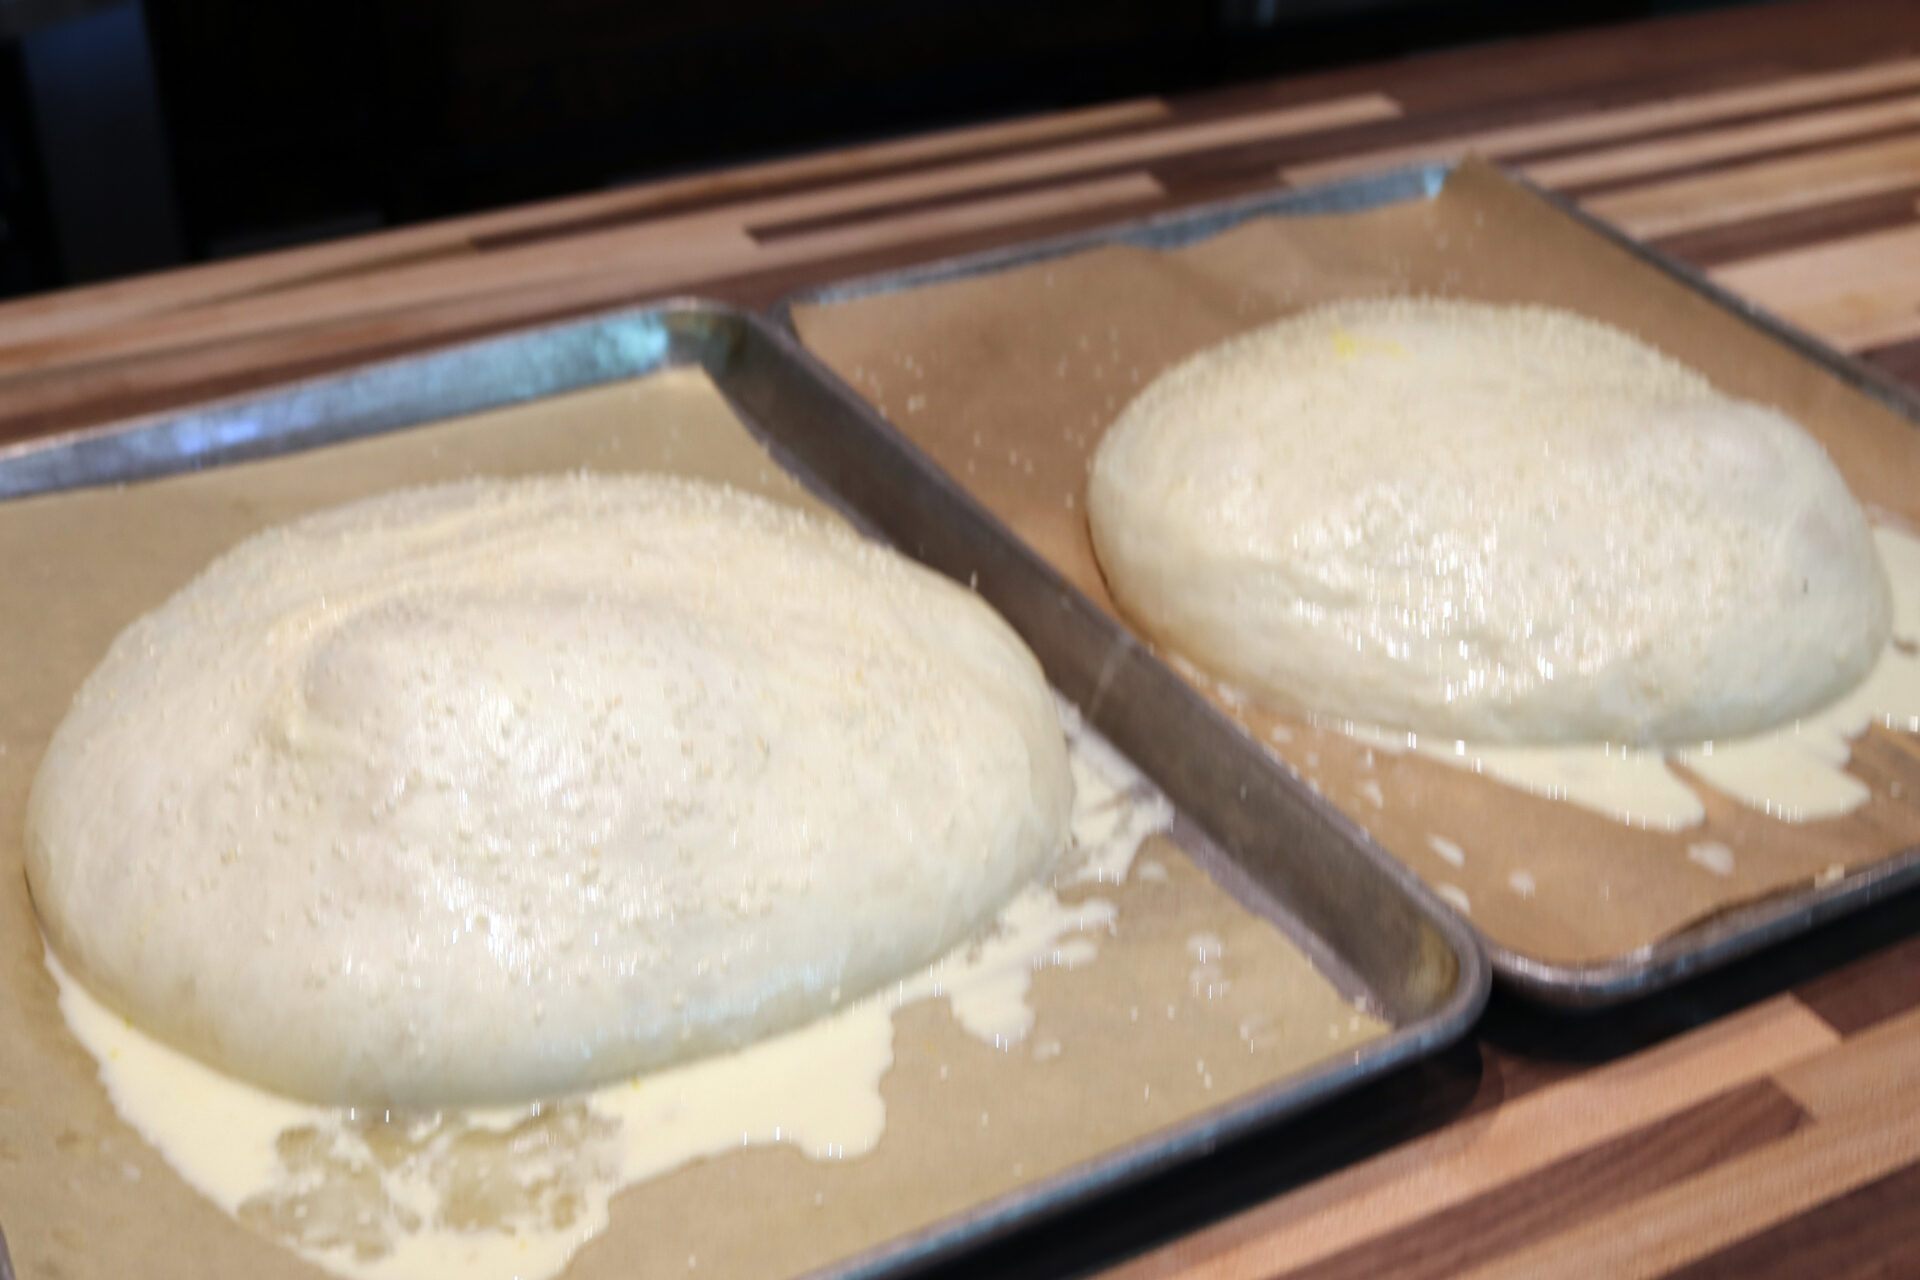
Then let them proof in a warm place until both dough balls expand and turn into wide loaves with a 9–10” diameter (usually about 1–2 hours, but it can take longer if your dough ends up denser).

5. Baking preparation:
5.1.
Set oven to 350°F.
5.2.
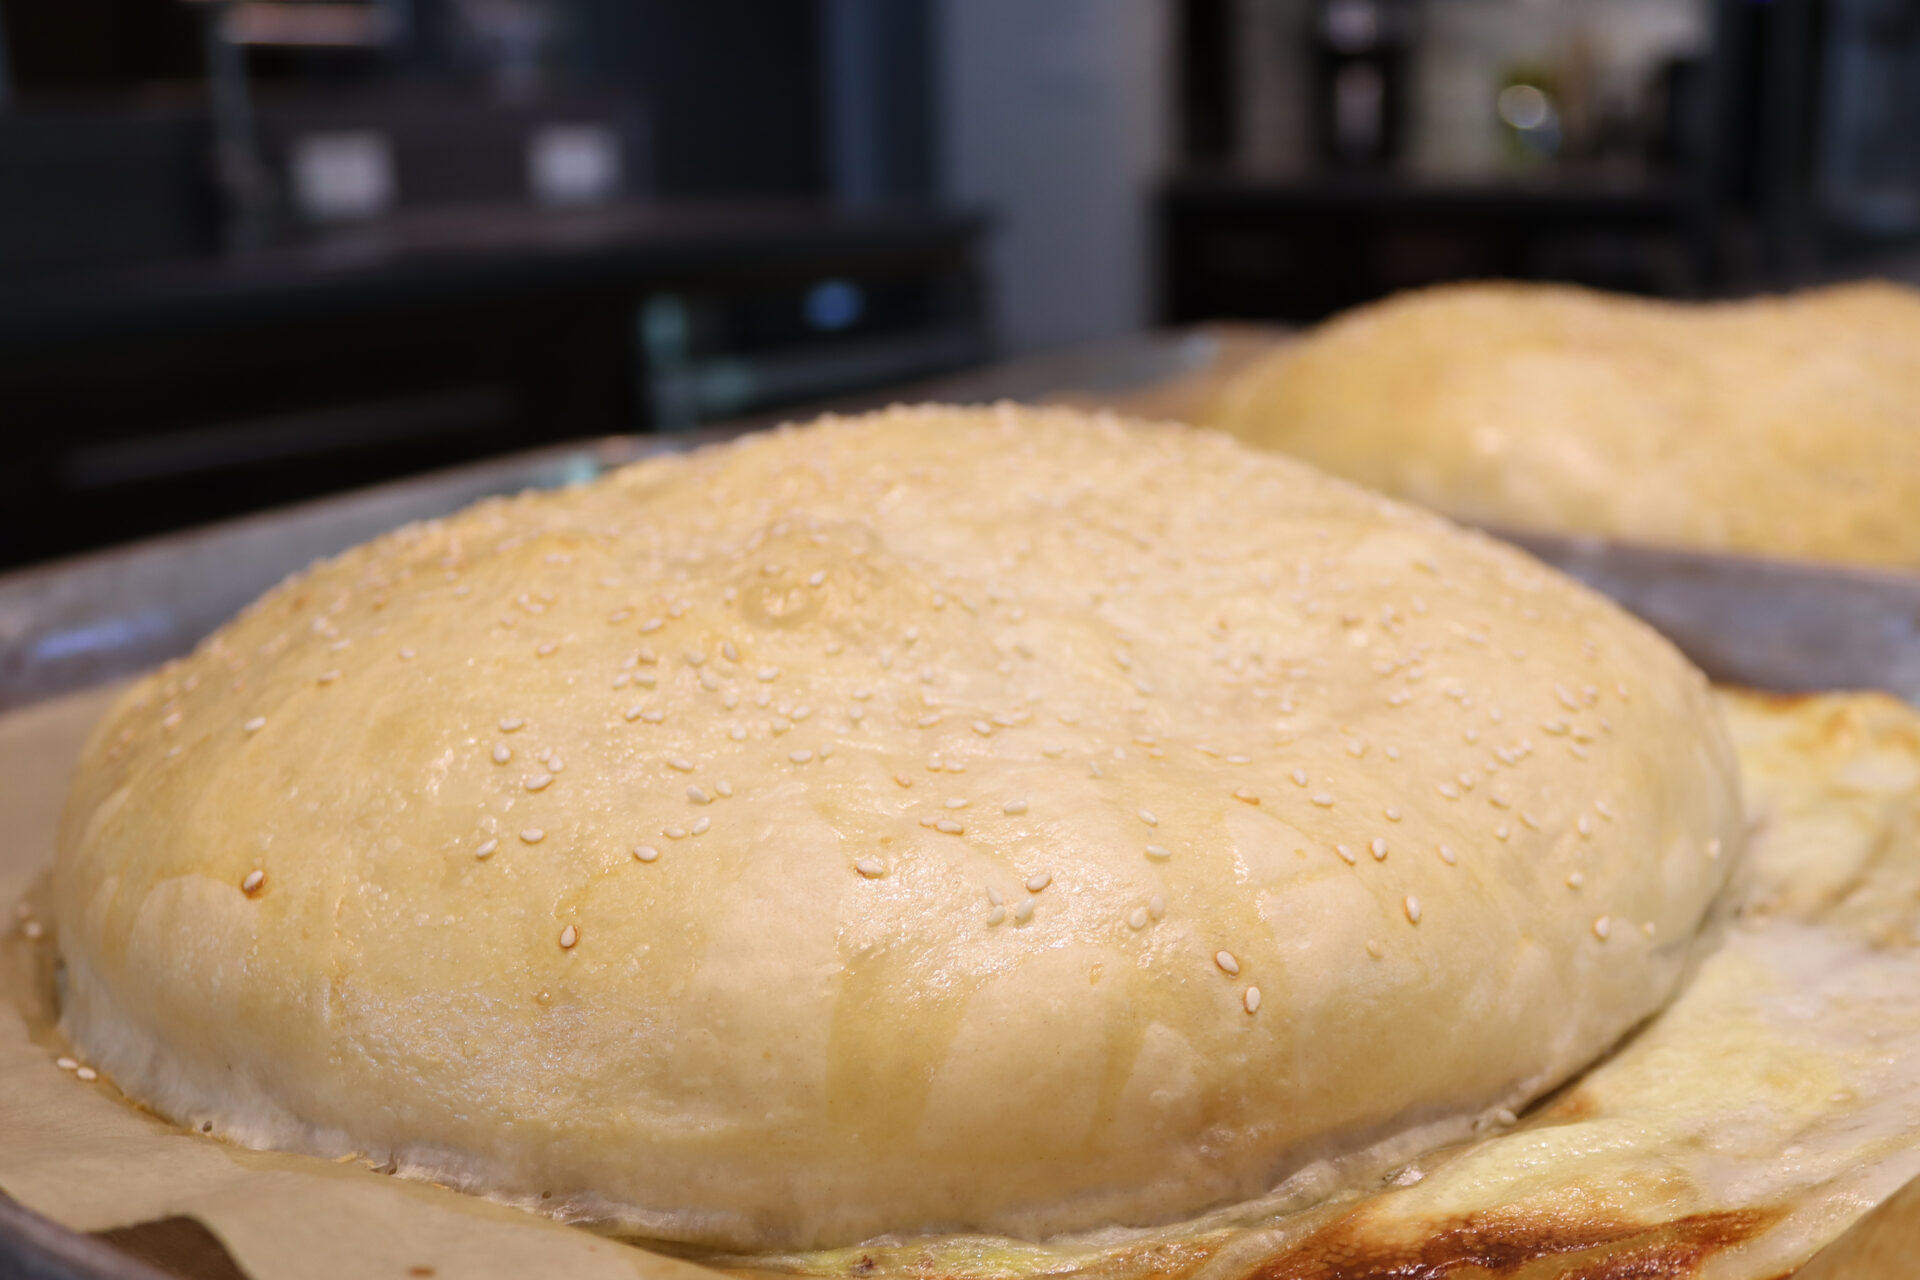
Gently brush both loaves using the remaining brushing mixture.
5.3.
Sprinkle with sesame seeds.
6. Baking:
6.1.
Bake in a preheated oven until done (about 12 – 15 minutes). Rotate the baking sheets in the middle of baking.
6.2.
Test with a toothpick.
6.3.
Then cool on the cooling grate.
7. Final cutting:
7.1.
When the bread is fully cooled, cut each into quarters.
7.2.
Then, cutting from the tip of the bread, carefully cut a pocket (watch your fingers and do not put them in the way of the blade).
- You can increase the rising time for up to four hours based on your convenience.
- You can bake more Turkish bread than you need and freeze it for later usage (it stays great in the freezer for up to a half year). Defrost in only three hours.
About the Author:
Tom the ChefFounder
# 1
210 Followers
- Published Recipes: 270
- Av. Recipe Evaluation:
- Location: Iowa, USA
- Member since: 2023-02-02
Recipes
Try Other Recipes from Same Category!
Soft Dinner Rolls Recipe
Czech Rolls Rohliky Recipe
Tom the Chef FounderPagáče (Pagache) with Cracklings
Tom the Chef FounderBurger Buns
Tom the Chef FounderDisclaimer
- General Information Content on this page above, including the content provided on www.CookingHub.com, including all recipes, articles, and other materials, is for general informational purposes only. This content reflects the personal opinions and experiences of its authors and is not intended to provide professional dietary, medical, legal, or political advice. Please consult a qualified professional before making any decisions based on the information presented here.
- Content Ownership and Use Content on this page above, including content published on CookingHub.com is owned by the individual authors who created it. Only the authors can access, modify, or delete their content from the platform. Our content may be embedded on third-party websites and blogs without modification. No reimbursement will be provided for this use. If an author removes content from CookingHub.com, it will no longer be available through any embedded links.
- Limitation of Liability Neither www.CookingHub.com (operated by the CookingHub Foundation) nor content authors are responsible for any outcome or consequence resulting from the use of information on this site. This includes, but is not limited to:
- Food Safety: Any health risk related to food handling, food quality, or failure to follow USDA recommendations (including minimum safe cooking temperatures).
- Preparation Safety: The proper and safe handling of cooking equipment or its suitability for any given task.
- Recipe Outcomes: The final look, taste, or success of following a recipe.
- Ingredients and Equipment: The sourcing of ingredients, tools, equipment, or anything else related to the preparation and consumption of food.
- Nutritional and Dietary Information: The accuracy of nutritional data. This information is provided as a courtesy and should not replace advice from a medical provider. You are responsible for verifying that a diet is suitable for your personal health needs.
- Errors and Omissions: Any potential errors, typos, or unclear directions in articles and recipes.
- User Responsibility All readers, visitors, and users of embedded content are solely responsible for evaluating recipes and articles. You must make your own decisions about whether to follow the steps and recommendations provided. It is your responsibility to ensure that ingredients and preparation methods are safe and appropriate for your personal dietary restrictions and health conditions.
Share
Click on the icons below to share "Title of the item to share"