Strawberry Cream Cake
6 servings
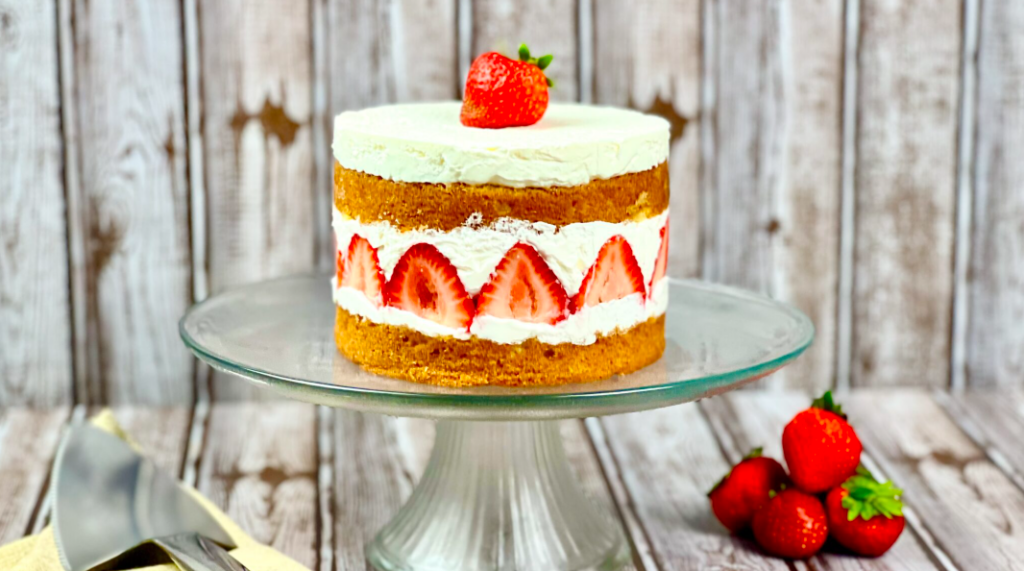
Indulge in the ultimate summer dessert: our Strawberry Cream Cake! This recipe takes the classic strawberry shortcake to a whole new level. Imagine a moist, delicate vanilla cake layered with lightly sweetened whipped cream and an abundance of fresh, juicy strawberries. It's a simple yet elegant dessert perfect for any...
Read more... occasion. This recipe yields 6 servings and takes approximately 2 hours and 58 minutes from start to finish, including a 2-hour cooling time. Get ready to impress with this show-stopping cake that's as beautiful as it is delicious! You will need basic baking equipment including a mixing bowl, a stand or hand mixer, a rubber spatula, a cake stand and optional acetate sheets.
Read lessx saved
 ChefLynn Cool Cook
December 27, 2024
Ingredients:
For the Cake
- ¾ cup of all-purpose flour
- ½ TSP of baking soda
- 1/8 TSP of kosher salt
- 6 TBSP of unsalted butter
- ½ cup of granulated sugar
- 1 egg (large)
- 5 ½ TBSP of heavy cream
- ½ TBSP of distilled white vinegar
- 1 TSP of vanilla extract (or 1 tbsp if you don't have a vanilla bean)
- 1 vanilla bean
For the Filling
- 1 ½ cups of heavy cream
- ¼ cup of confectioners’ sugar
- splash of vanilla extract
- 10 - 12 large strawberries
Tools:
- 1x Measuring Cups
- 1x Measuring Spoons
- 1x Chef’s knife
- 1x Cutting Board
- 1x Kitchen Mixer with Whisk Attachment (or hand mixer with mixing bowl)
- 1x Medium Mixing Bowl (3 – 4 QT)
- 1x Silicone Spatula
- 1x Cake Pan (6" diameter)
- 1x Icing Spatula (Optional)
- 1x Cooling Rack (Optional)
Directions:
1. For the Cake:
Let’s start with the preparation of the Strawberry Cream Cake.
1.1.
Preheat the oven to 350°F.
1.2.
Add the vinegar to the heavy cream, mix, and set aside.
1.3.
In the bowl of a stand mixer or a mixing bowl with a hand mixer, cream together the butter and granulated sugar for about 2 minutes.
1.4.
Once well combined add in the egg and vanilla extract and vanilla bean pulp and mix to combine.
1.5.
Add in half of the flour mixture and mix to combine. Then add half the cream/vinegar and mix to combine. Repeat this with the other half of both. Being careful not to over mix.
1.6.
Prepare a 6-inch baking pan with baking spray and put a round of parchment in the bottom, then spray the parchment.
1.7.
Put the batter in the pan and smooth it out. Tap on the counter to release any large air bubbles.
1.8.
Bake at 350°F for 35 – 40 minutes or until a toothpick inserted in the center comes out clean.
1.9.
Remove the cake from the oven and cool it in the pan on a rack for 10-15 minutes. Then inherit it on to the rack and remove the parchment from the bottom.
1.10.
Cool the cake to room temperature and place it in the fridge while you prepare the cream and strawberries.
2. For the Cream:
2.1.
Add all the ingredients to the bowl of a stand mixer fitted with the whisk attachment to a large bowl with a hand mixer.
2.2.
Beat on low to combine and increase the speed gradually to high.
2.3.
Beat until stiff peaks form.
3. Build the Strawberry Cream Cake:
3.1.
Cut the tops off the strawberries and cut them in half. If they aren’t the same height trim them so they are.
3.2.
Cut the cake in half to form two equal disks.
3.3.
Using a piece of food grade acetate, parchment, or a springform pan lined with plastic place the top of the cake cut side up on a cake stand or in the pan.
3.4.
Add a small amount of the whipped cream and spread it over the cake layer.
3.5.
Arrange the strawberries cut side out around the cake on top of the cream.
3.6.
Fill the center of the strawberry ring with more cream and fill in any spaces as best you can. Fill with enough cream to come just above the strawberries.
3.7.
Place the second layer of cake on top with the cut side down and press it gently.
3.8.
Top with the rest of the whipped cream and place in the refrigerator for an hour or two to firm up a bit.
3.9.
After well chilled, carefully remove the cake from the acetate and top with another strawberry or a few to garnish.
About the Author:
ChefLynnCool Cook
# 3
49 Followers
- Published Recipes: 23
- Av. Recipe Evaluation:
- Location: Florida, USA
- Member since: 2024-09-08
Recipes
Try Other Recipes from Same Category!
Banana Bread Recipe
 Tom the Chef Founder
Pumpkin Cheesecake
Classic Zucchini Bread Recipe
Banana Bread Recipe
Keto Chocolate Sunflower Spread Stuffed Cookie Bars
 olivia.wyles Resident Chef
Eggnog Pumpkin Flan Cake – "Holiday Chocoflan"
ChefLynn Cool CookSpiced Sweet Potato Cheesecake
ChefLynn Cool CookKey Lime Cheesecake Bars
ChefLynn Cool CookEasy & Fudgy Brownies
Chocolate Peanut Butter Rice Krispies Treats
Disclaimer
- General Information Content on this page above, including the content provided on www.CookingHub.com, including all recipes, articles, and other materials, is for general informational purposes only. This content reflects the personal opinions and experiences of its authors and is not intended to provide professional dietary, medical, legal, or political advice. Please consult a qualified professional before making any decisions based on the information presented here.
- Content Ownership and Use Content on this page above, including content published on CookingHub.com is owned by the individual authors who created it. Only the authors can access, modify, or delete their content from the platform. Our content may be embedded on third-party websites and blogs without modification. No reimbursement will be provided for this use. If an author removes content from CookingHub.com, it will no longer be available through any embedded links.
- Limitation of Liability Neither www.CookingHub.com (operated by the CookingHub Foundation) nor content authors are responsible for any outcome or consequence resulting from the use of information on this site. This includes, but is not limited to:
- Food Safety: Any health risk related to food handling, food quality, or failure to follow USDA recommendations (including minimum safe cooking temperatures).
- Preparation Safety: The proper and safe handling of cooking equipment or its suitability for any given task.
- Recipe Outcomes: The final look, taste, or success of following a recipe.
- Ingredients and Equipment: The sourcing of ingredients, tools, equipment, or anything else related to the preparation and consumption of food.
- Nutritional and Dietary Information: The accuracy of nutritional data. This information is provided as a courtesy and should not replace advice from a medical provider. You are responsible for verifying that a diet is suitable for your personal health needs.
- Errors and Omissions: Any potential errors, typos, or unclear directions in articles and recipes.
- User Responsibility All readers, visitors, and users of embedded content are solely responsible for evaluating recipes and articles. You must make your own decisions about whether to follow the steps and recommendations provided. It is your responsibility to ensure that ingredients and preparation methods are safe and appropriate for your personal dietary restrictions and health conditions.
Share
Click on the icons below to share "Title of the item to share"