Cook, Learn, and Share to Fight Hunger.

Tips Before You Start

  • You will need just two bowls to do so (for egg whites and for egg yolks). One could be the kitchen mixer bowl (if you are doing whipped egg whites first), or you can use just two regular bowls.
  • I like to prepare the exact amount of eggs to make sure that I don’t end up accidently using an incorrect amount.
  • It is much easier to separate eggs while they are chilled. If a recipe calls for room temperature egg whites or egg yolks, it is best to separate them while chilled, and then let them reach room temperature on the countertop while covered to prevent drying out.

1. Crack Eggs:

1.1

Cracking eggs first helps you to separate the egg shell into two parts in the following step. How you do that is totally up to you.

1.2.

I find it easiest to crack the egg on the bowl’s edge or to use a dull knife. Either option lets you have a precise crack, which is almost like a cut. Some people prefer to crack them on solid flat surface.

Egg Separation-02Egg Separation-03

2. Split the Egg Shell Into Two Parts:

A.

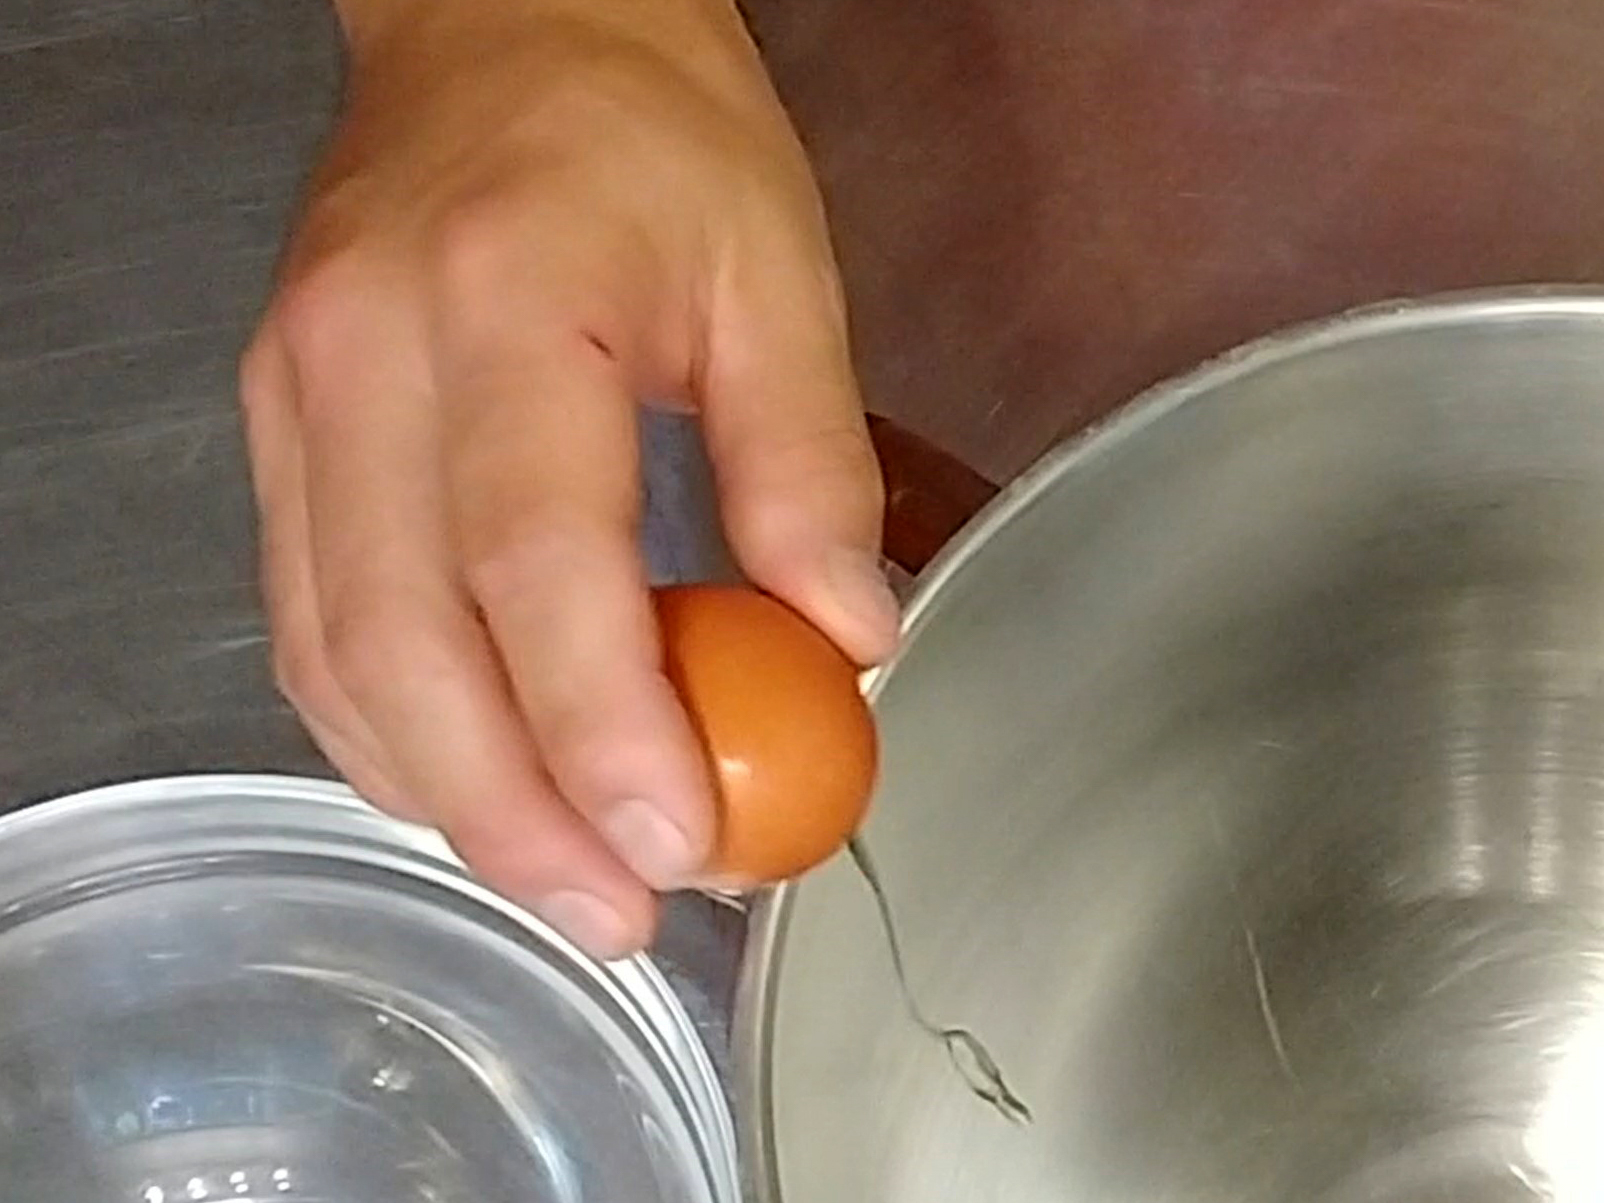
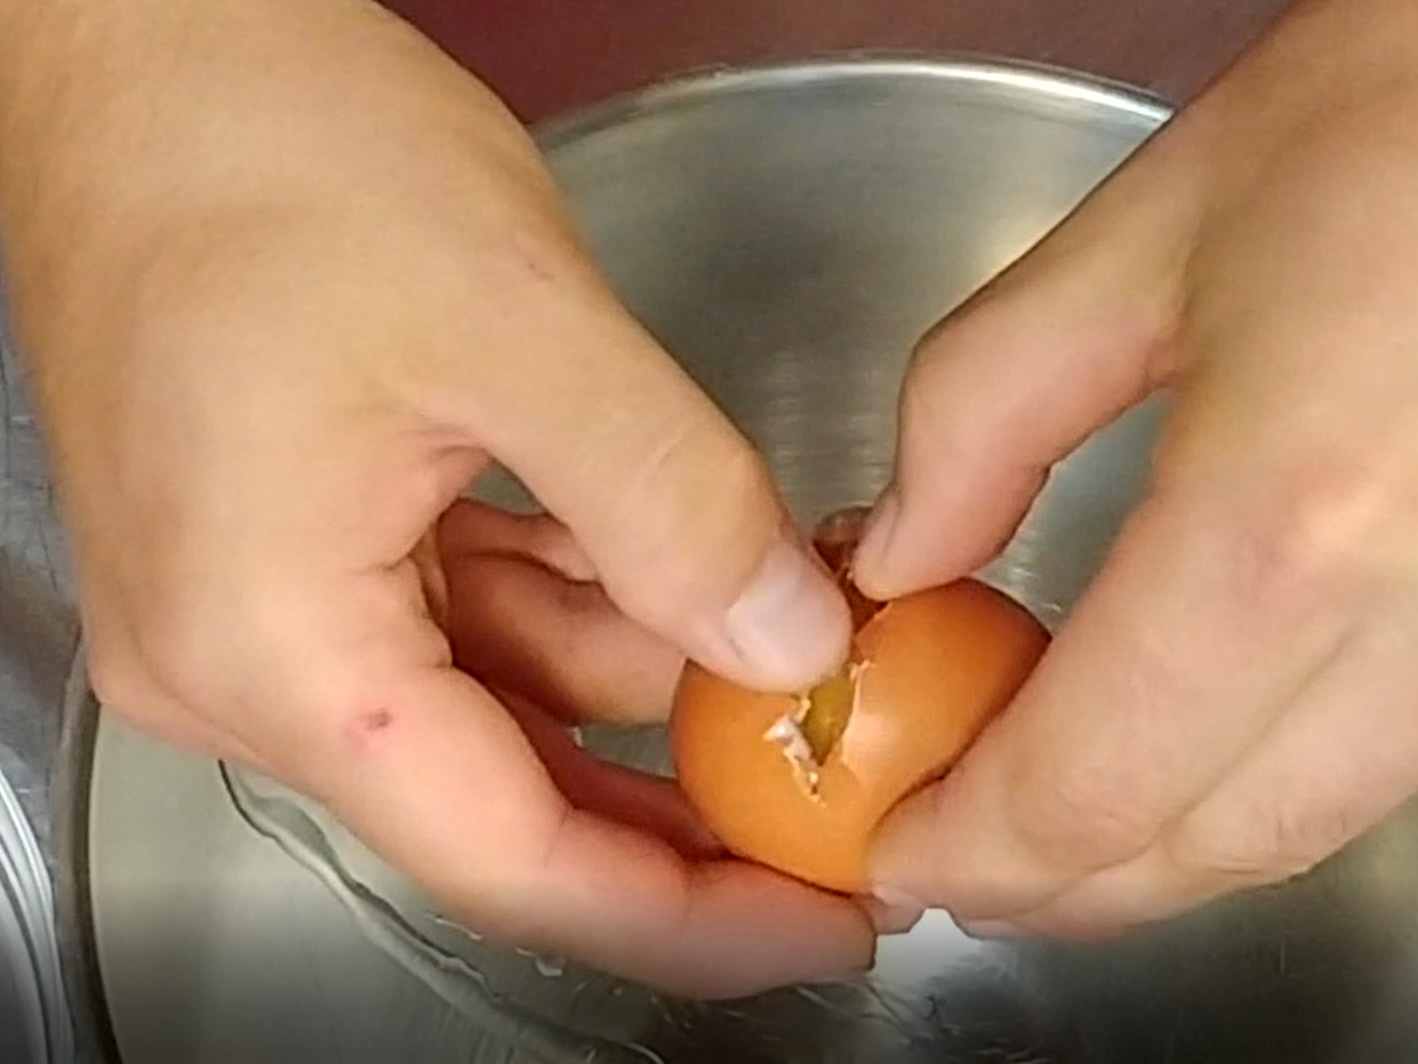
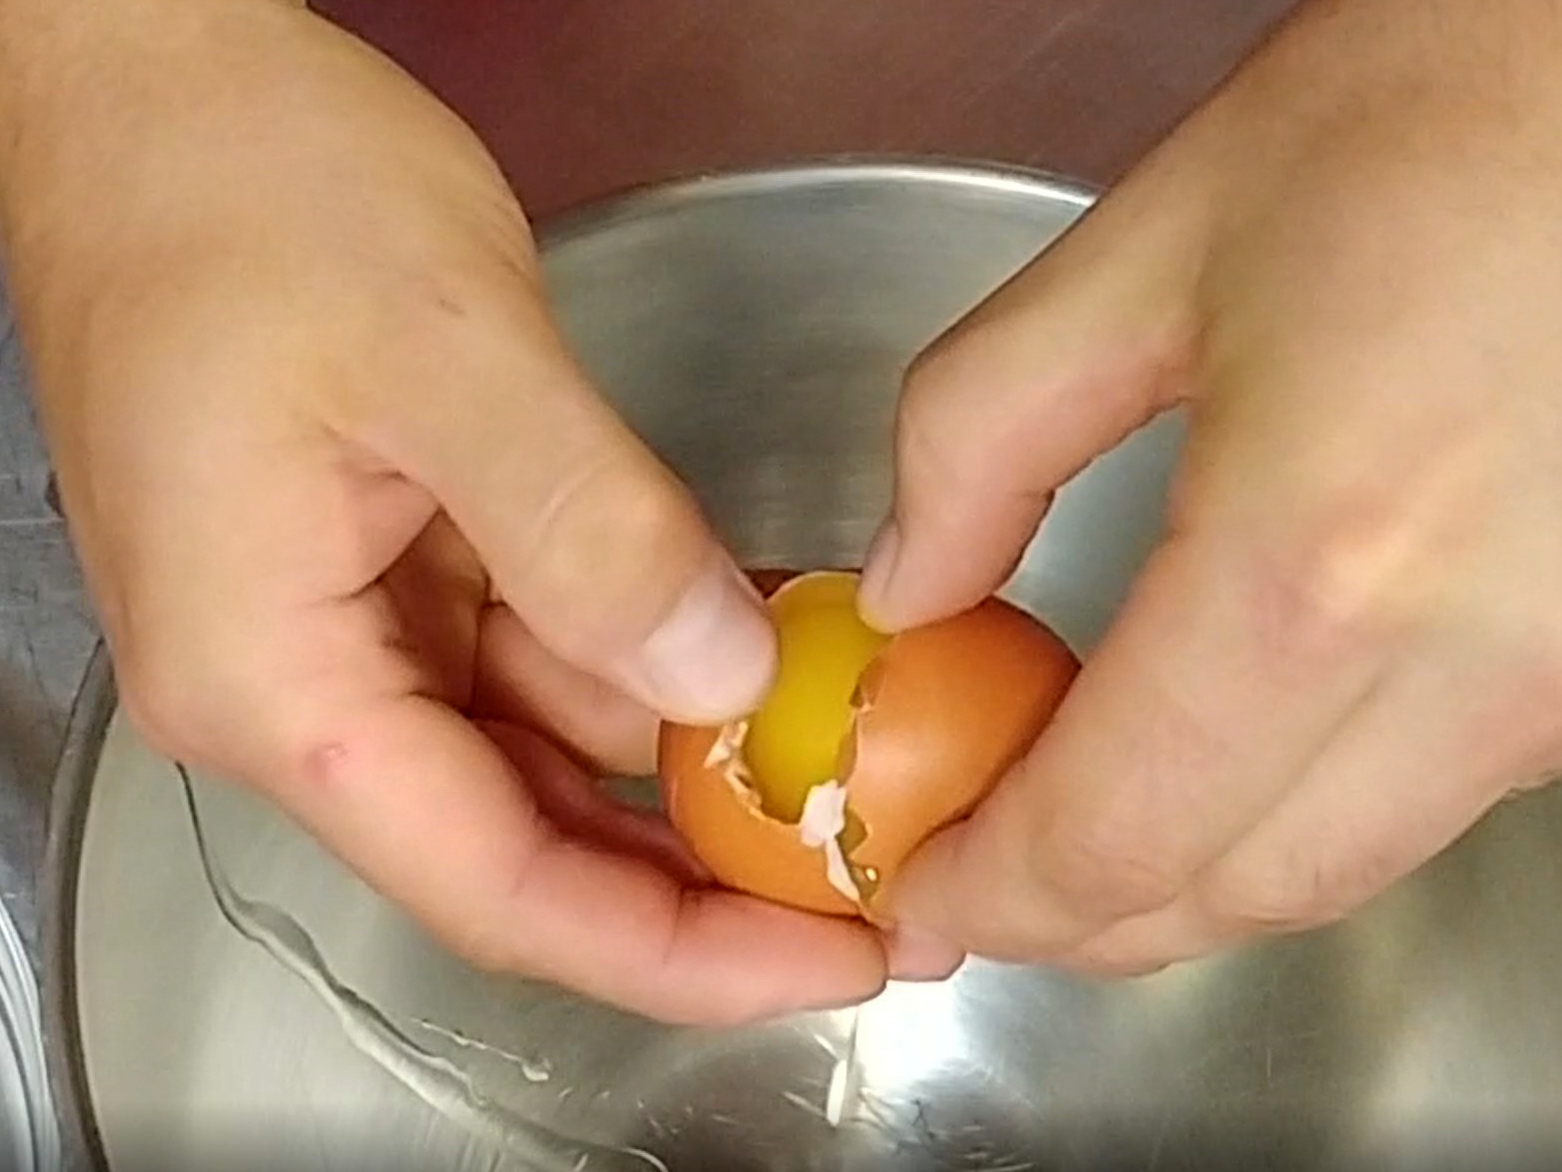
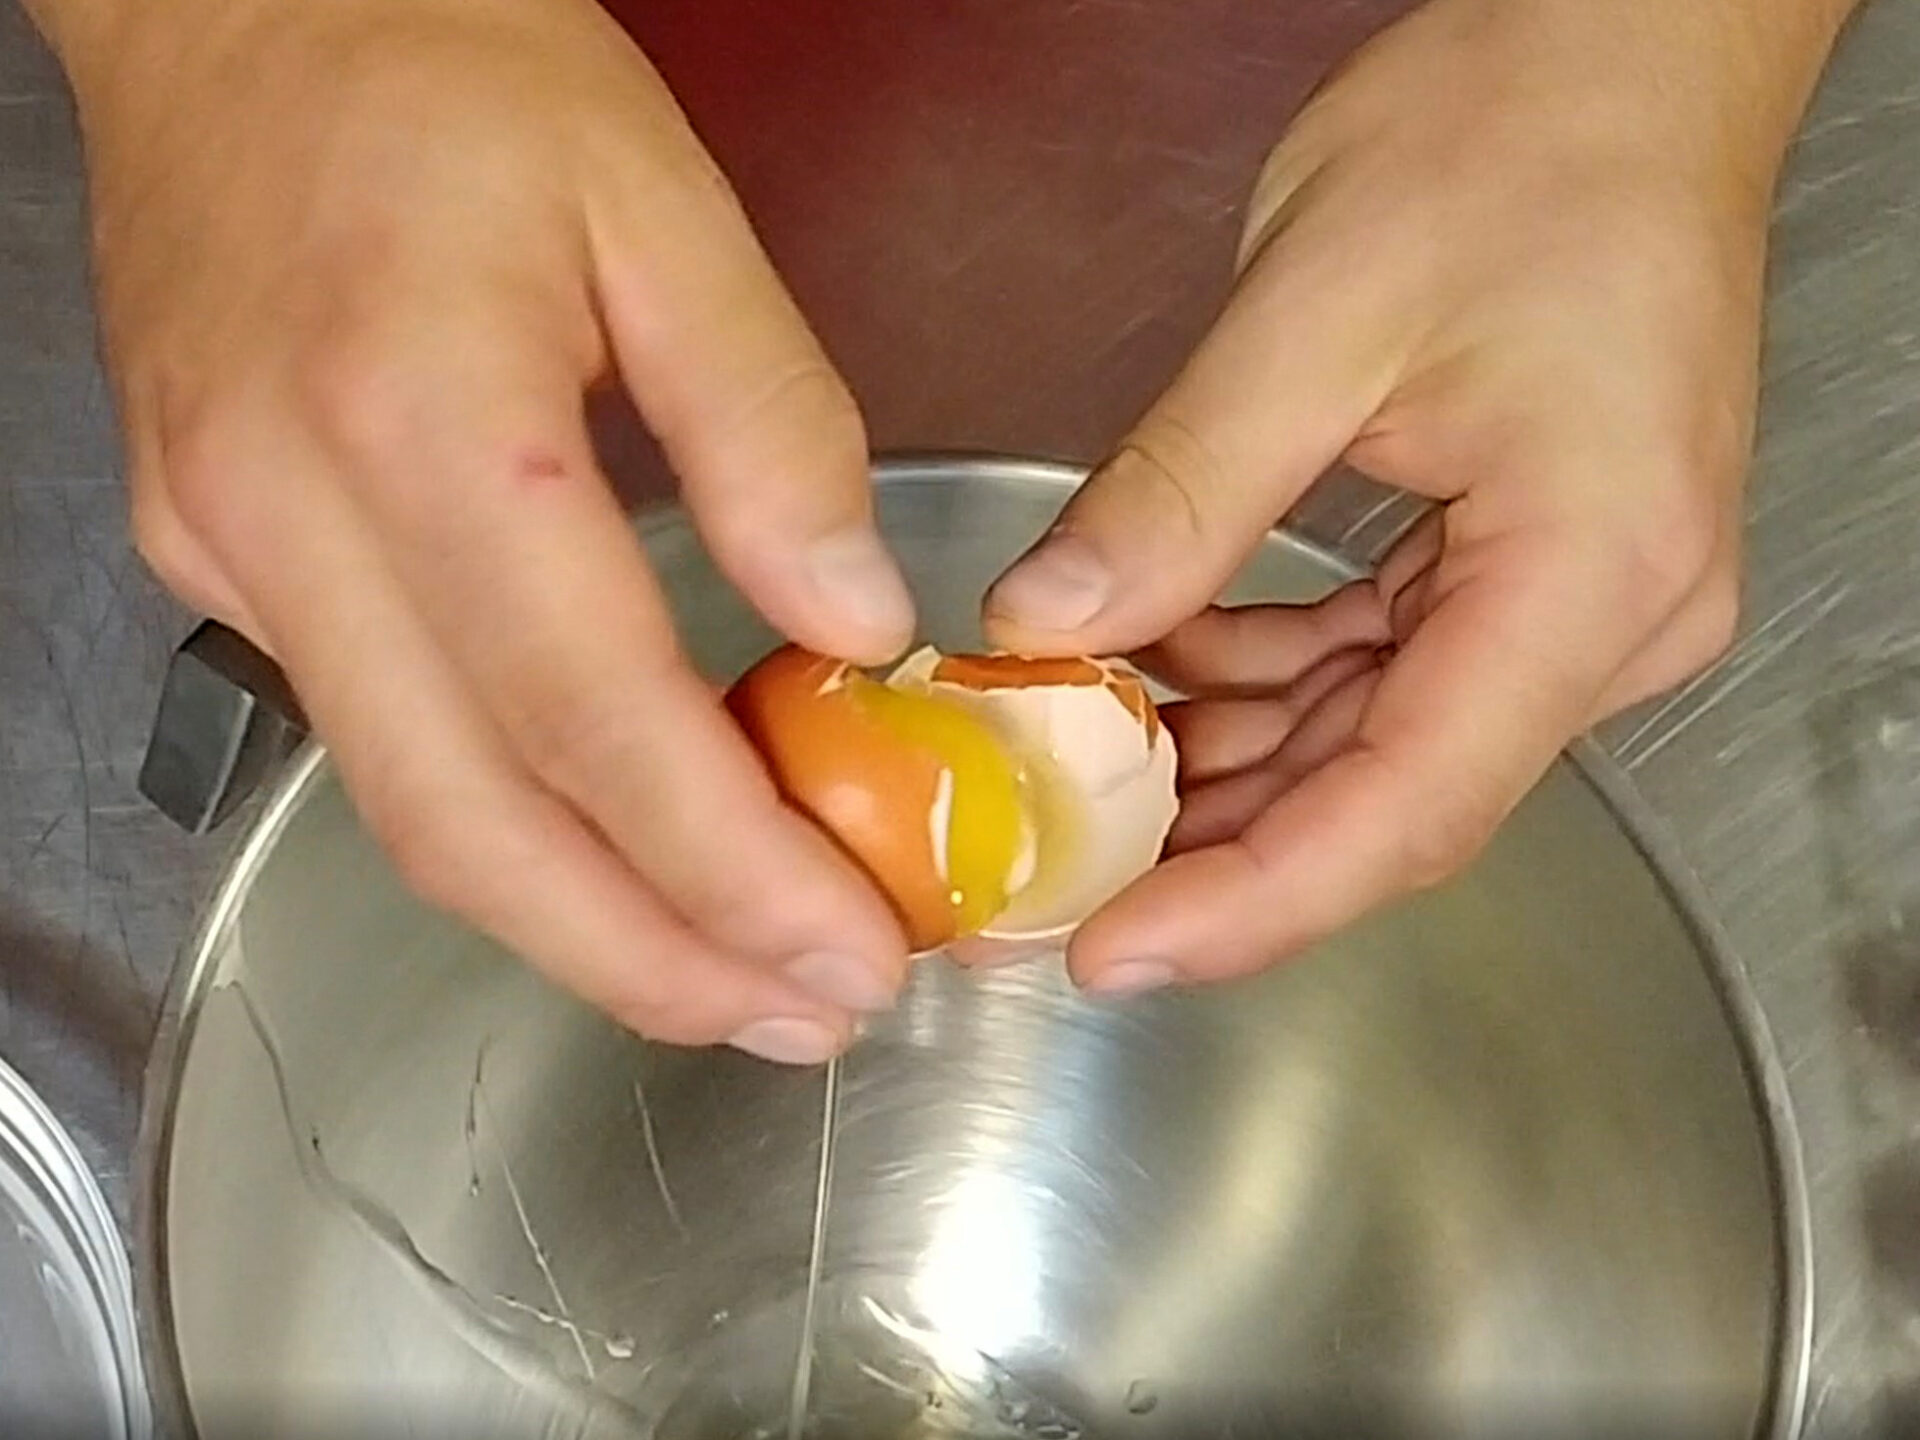
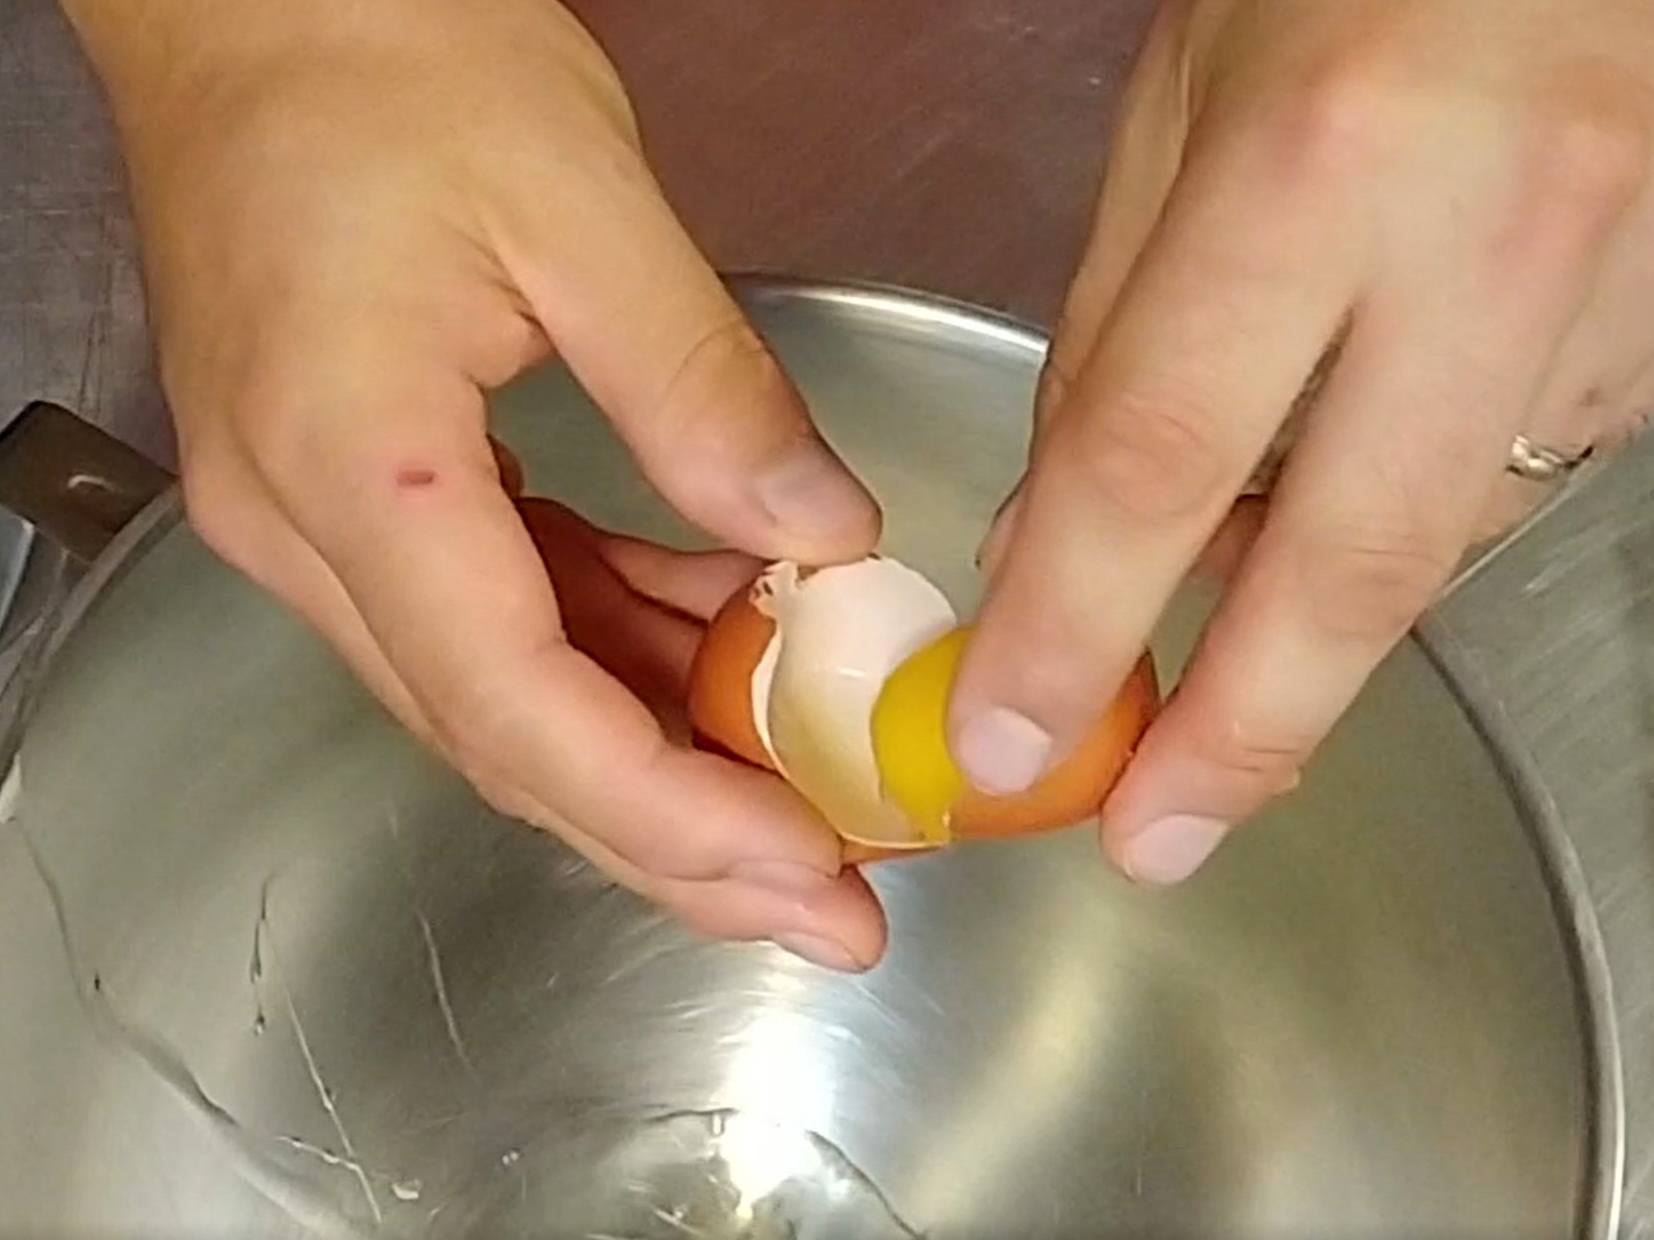
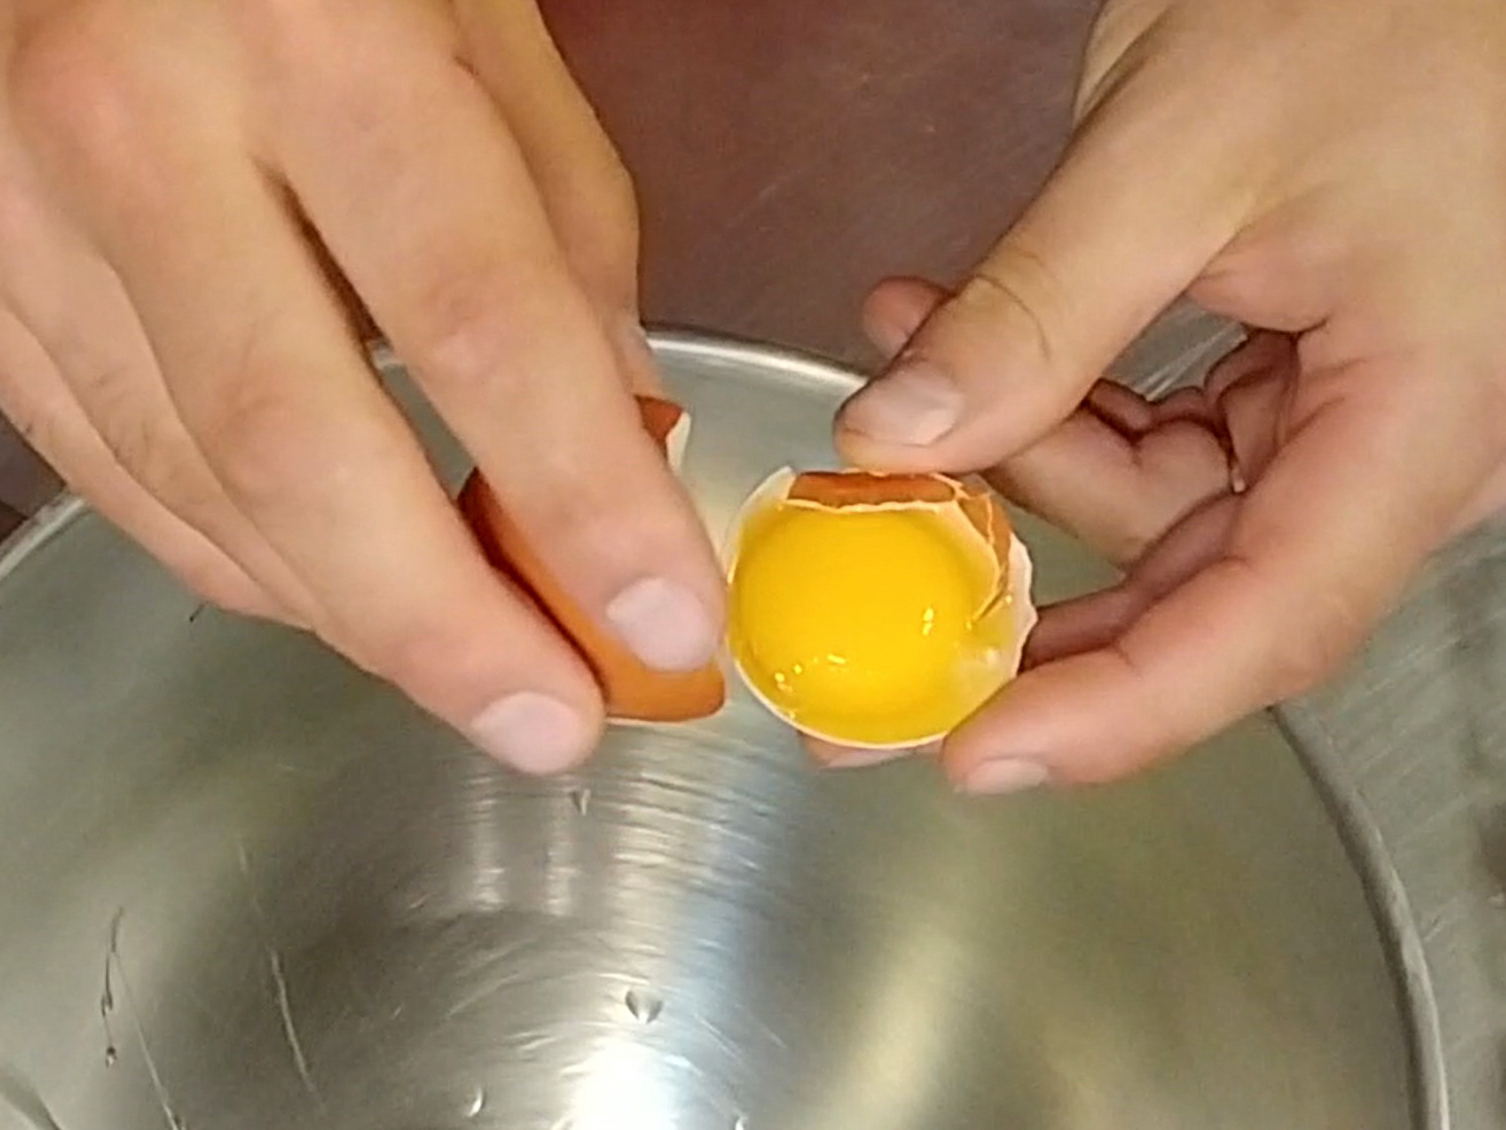
Place both thumbs close to the place of the future crack and perform a fast but short movement towards the bowl’s edge to perform the crack. After cracking the egg, hold it straight up (the bottom part of the egg should point down), and then pull the egg into two parts. Let the yolk rest in the bottom half of the egg shell while the egg white is dripping down.

B.

Or, hold the egg in one hand and perform a short but fast motion with a dull knife to perform the crack. After cracking the egg, hold it straight up (the bottom part of the egg should point down), and then using both hands, pull the egg into two parts. Let the yolk rest in the bottom half of the eggshell while the egg white drips down.

Egg Separation-04Egg Separation-05Egg Separation-06

3. Complete Egg Separation:

3.1.

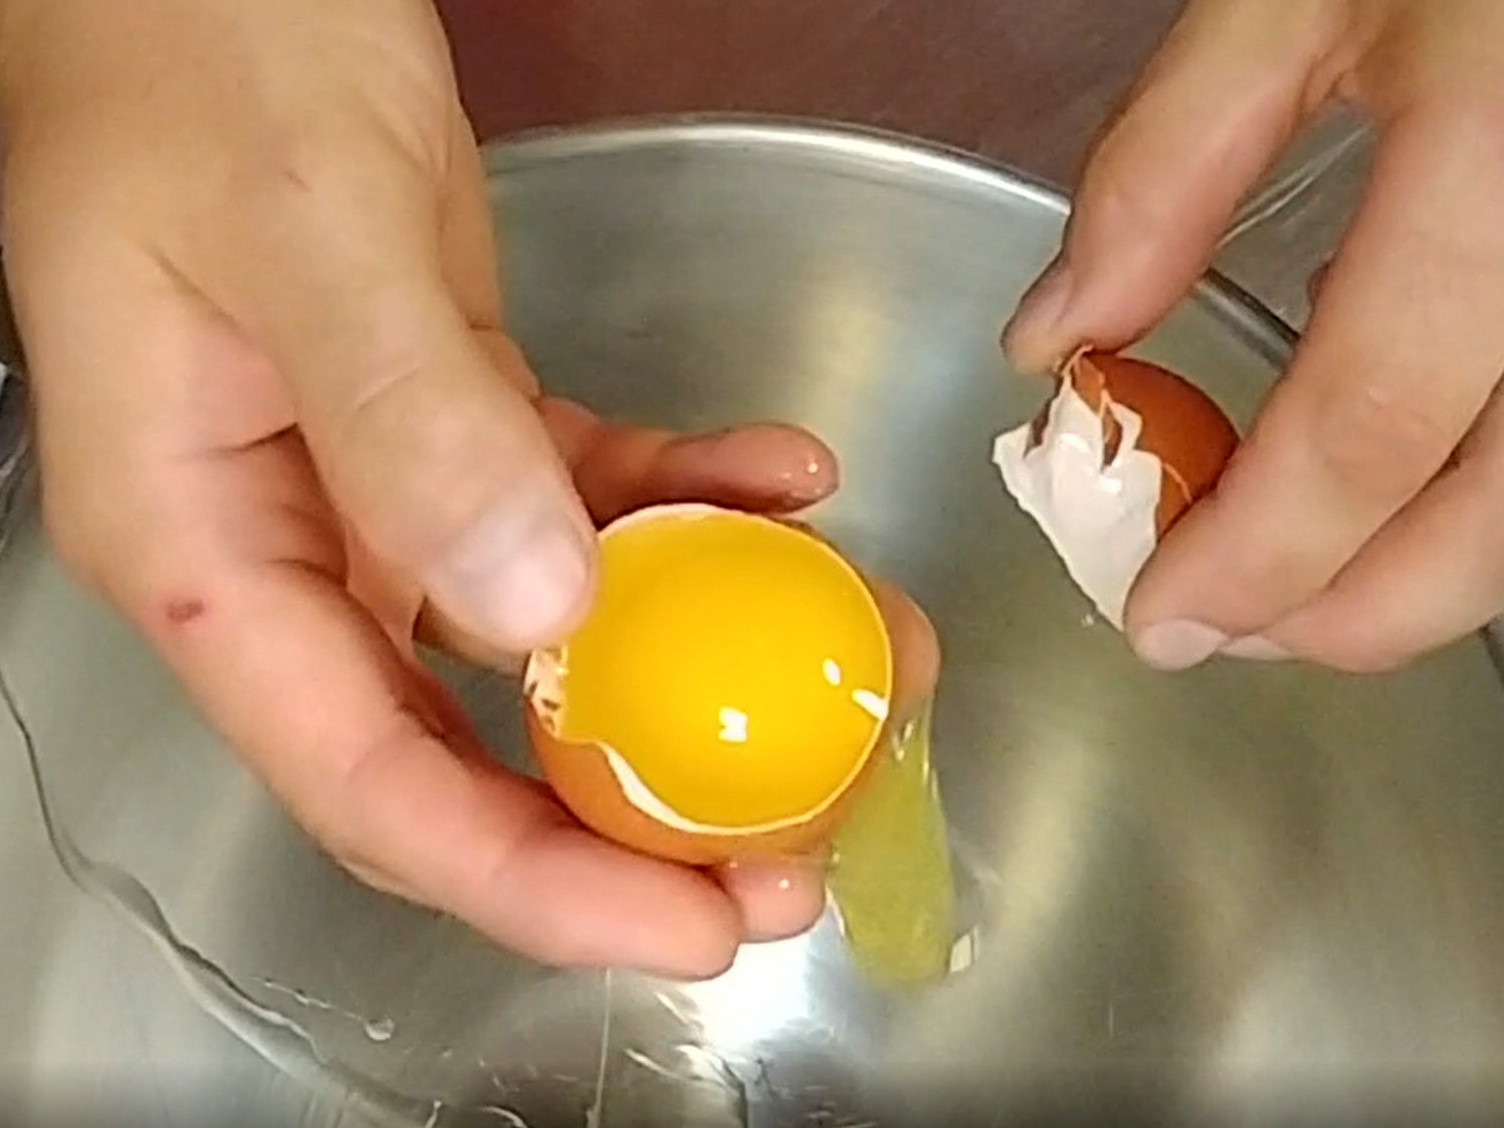
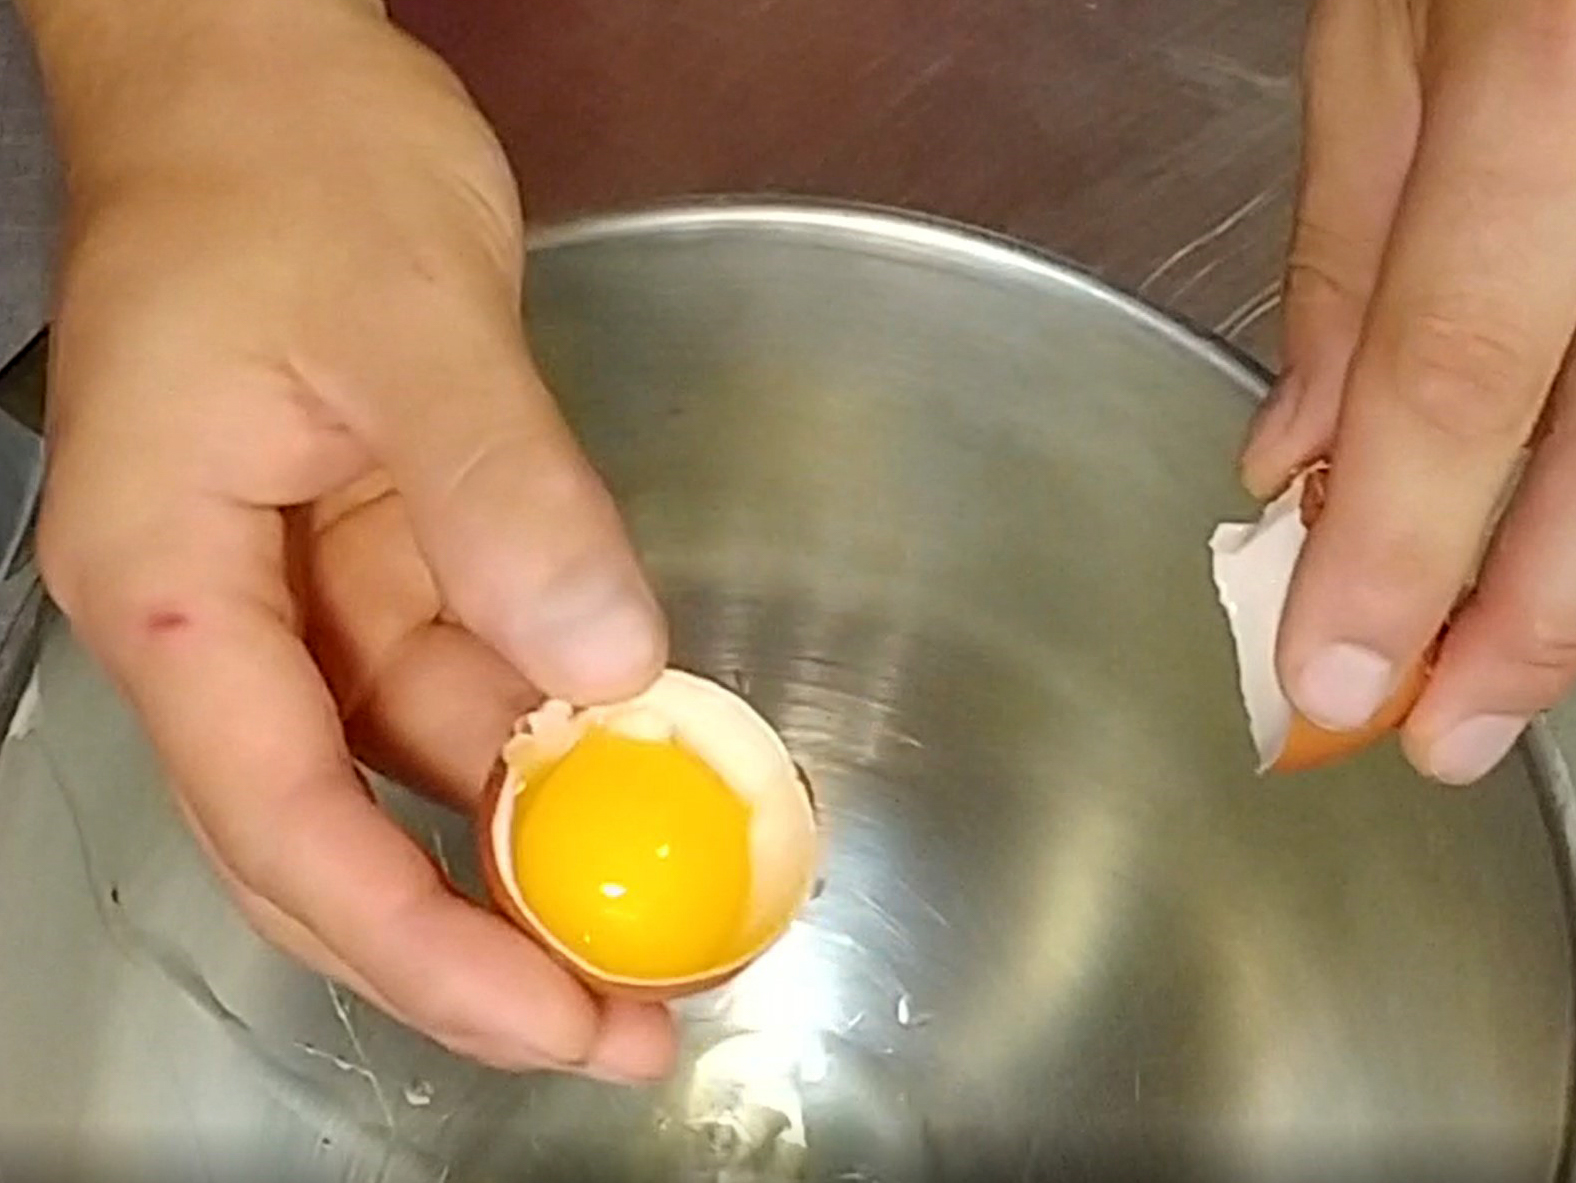
When the top part of the eggshell is empty, carefully pour the yolk with the remaining whites into that part while taking advantage of the part of the egg white dripping off.

3.2.

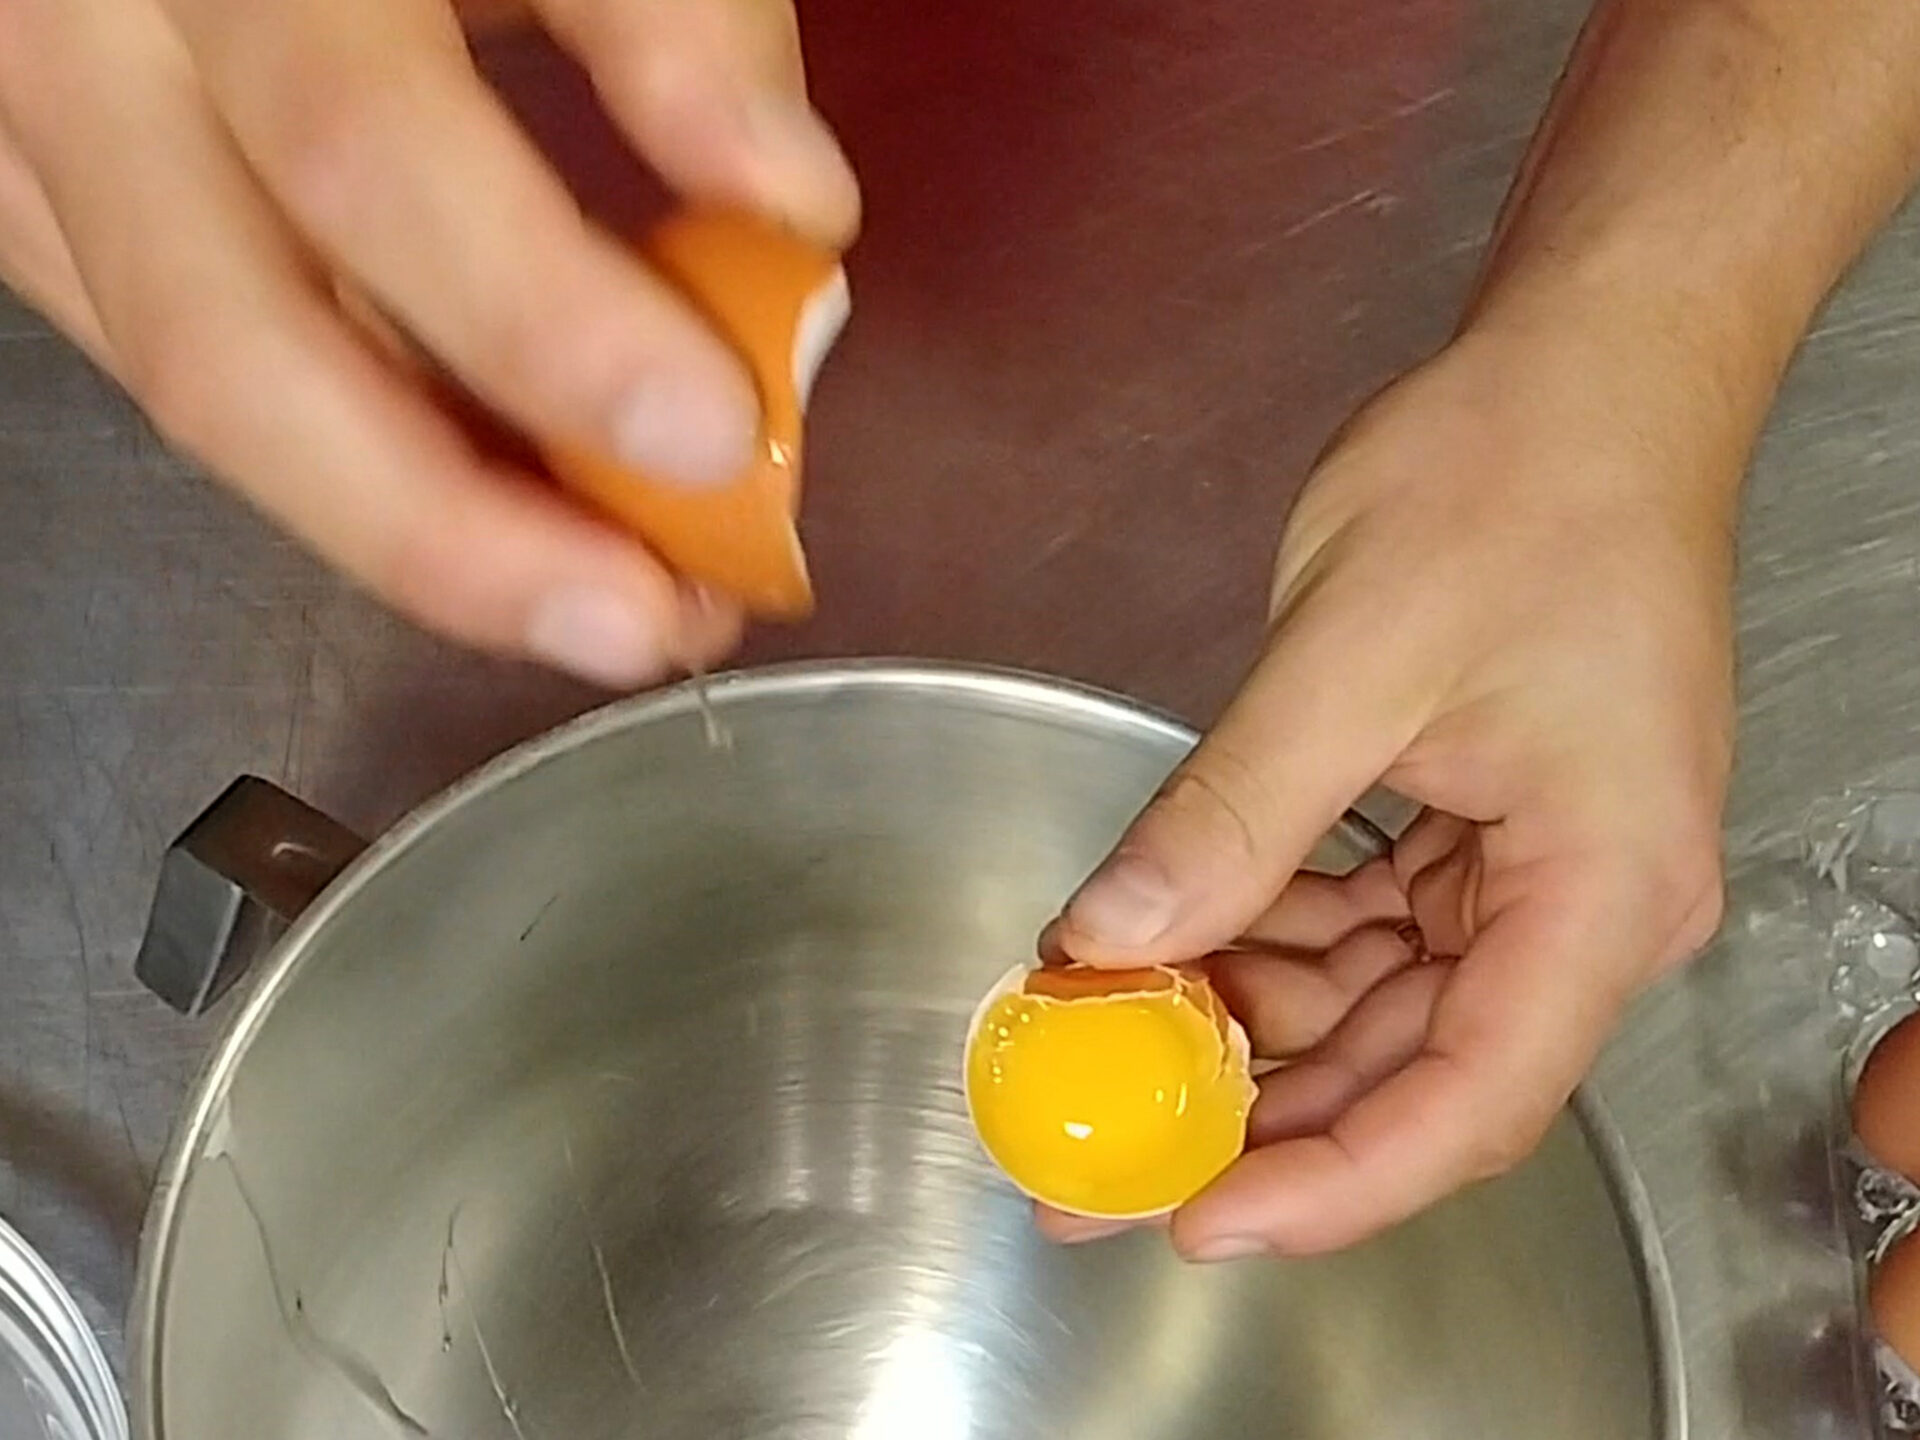
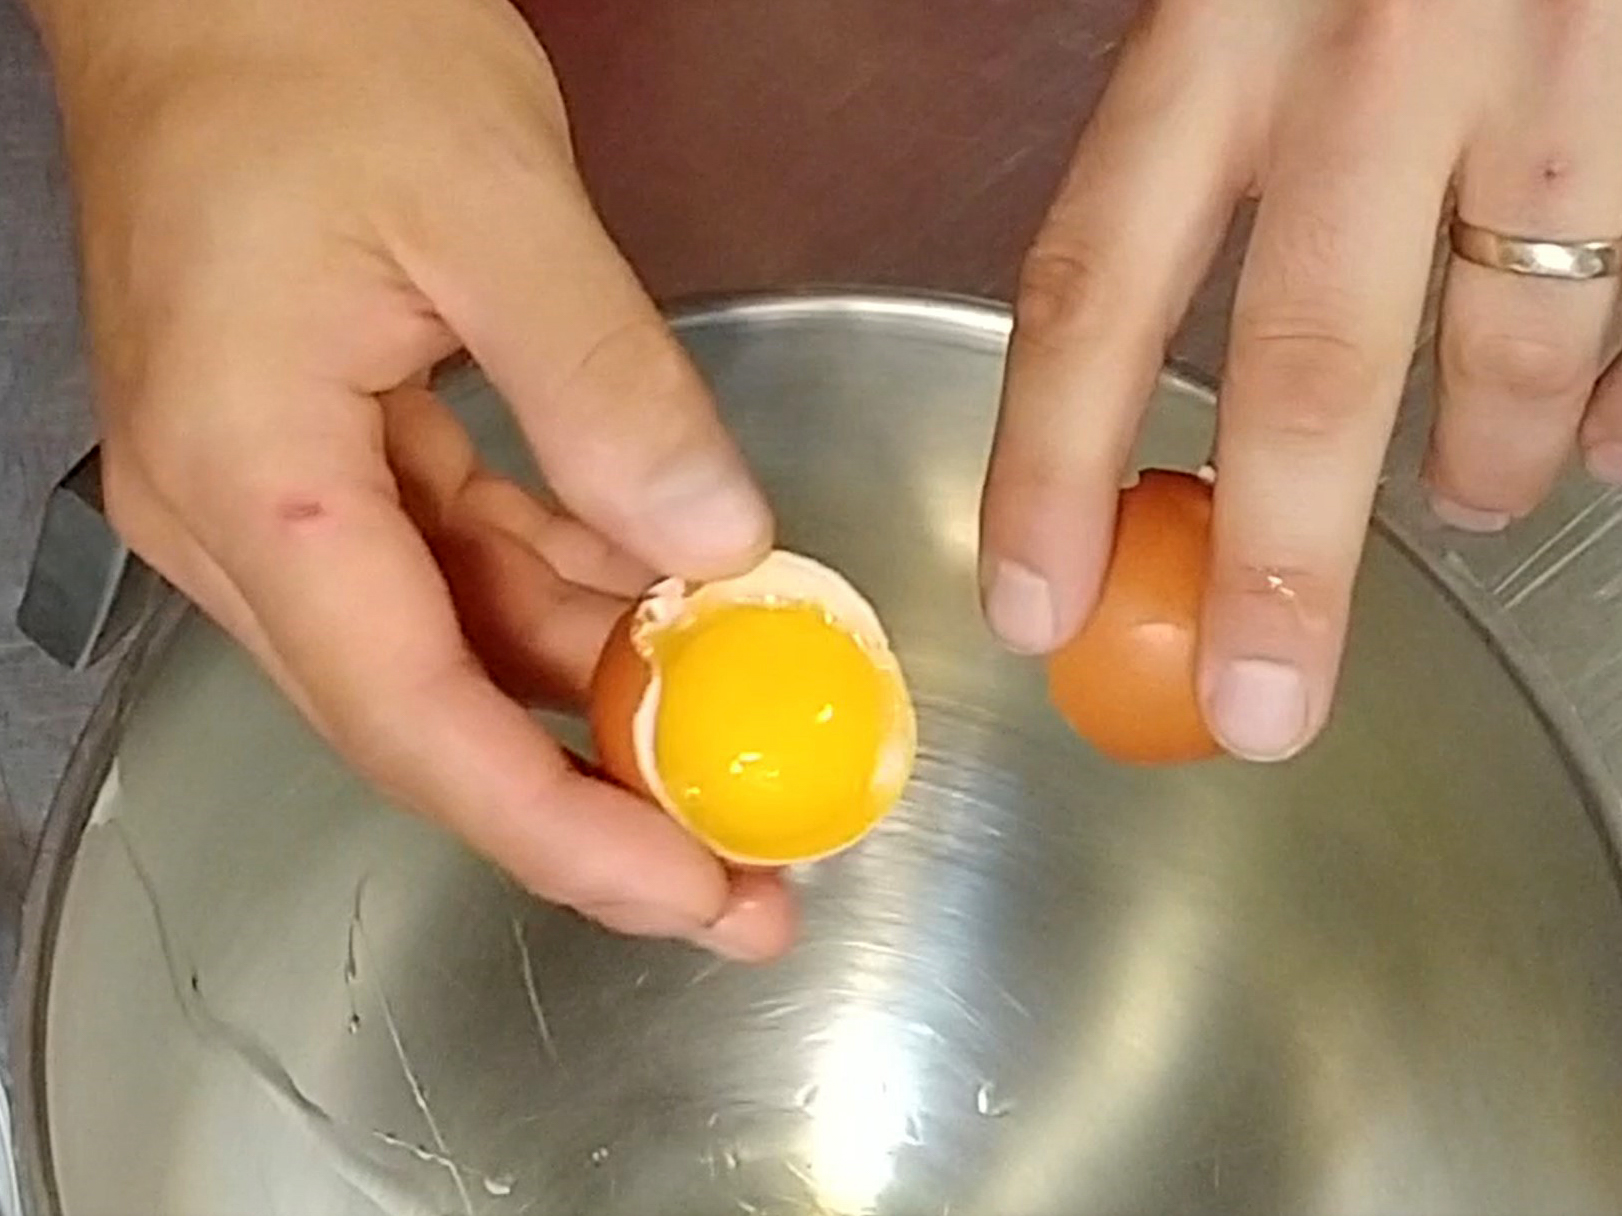
Repeat this step by pouring the yolk with the remaining whites back into the empty halves until all of the whites are sitting in the bowl.

3.3.

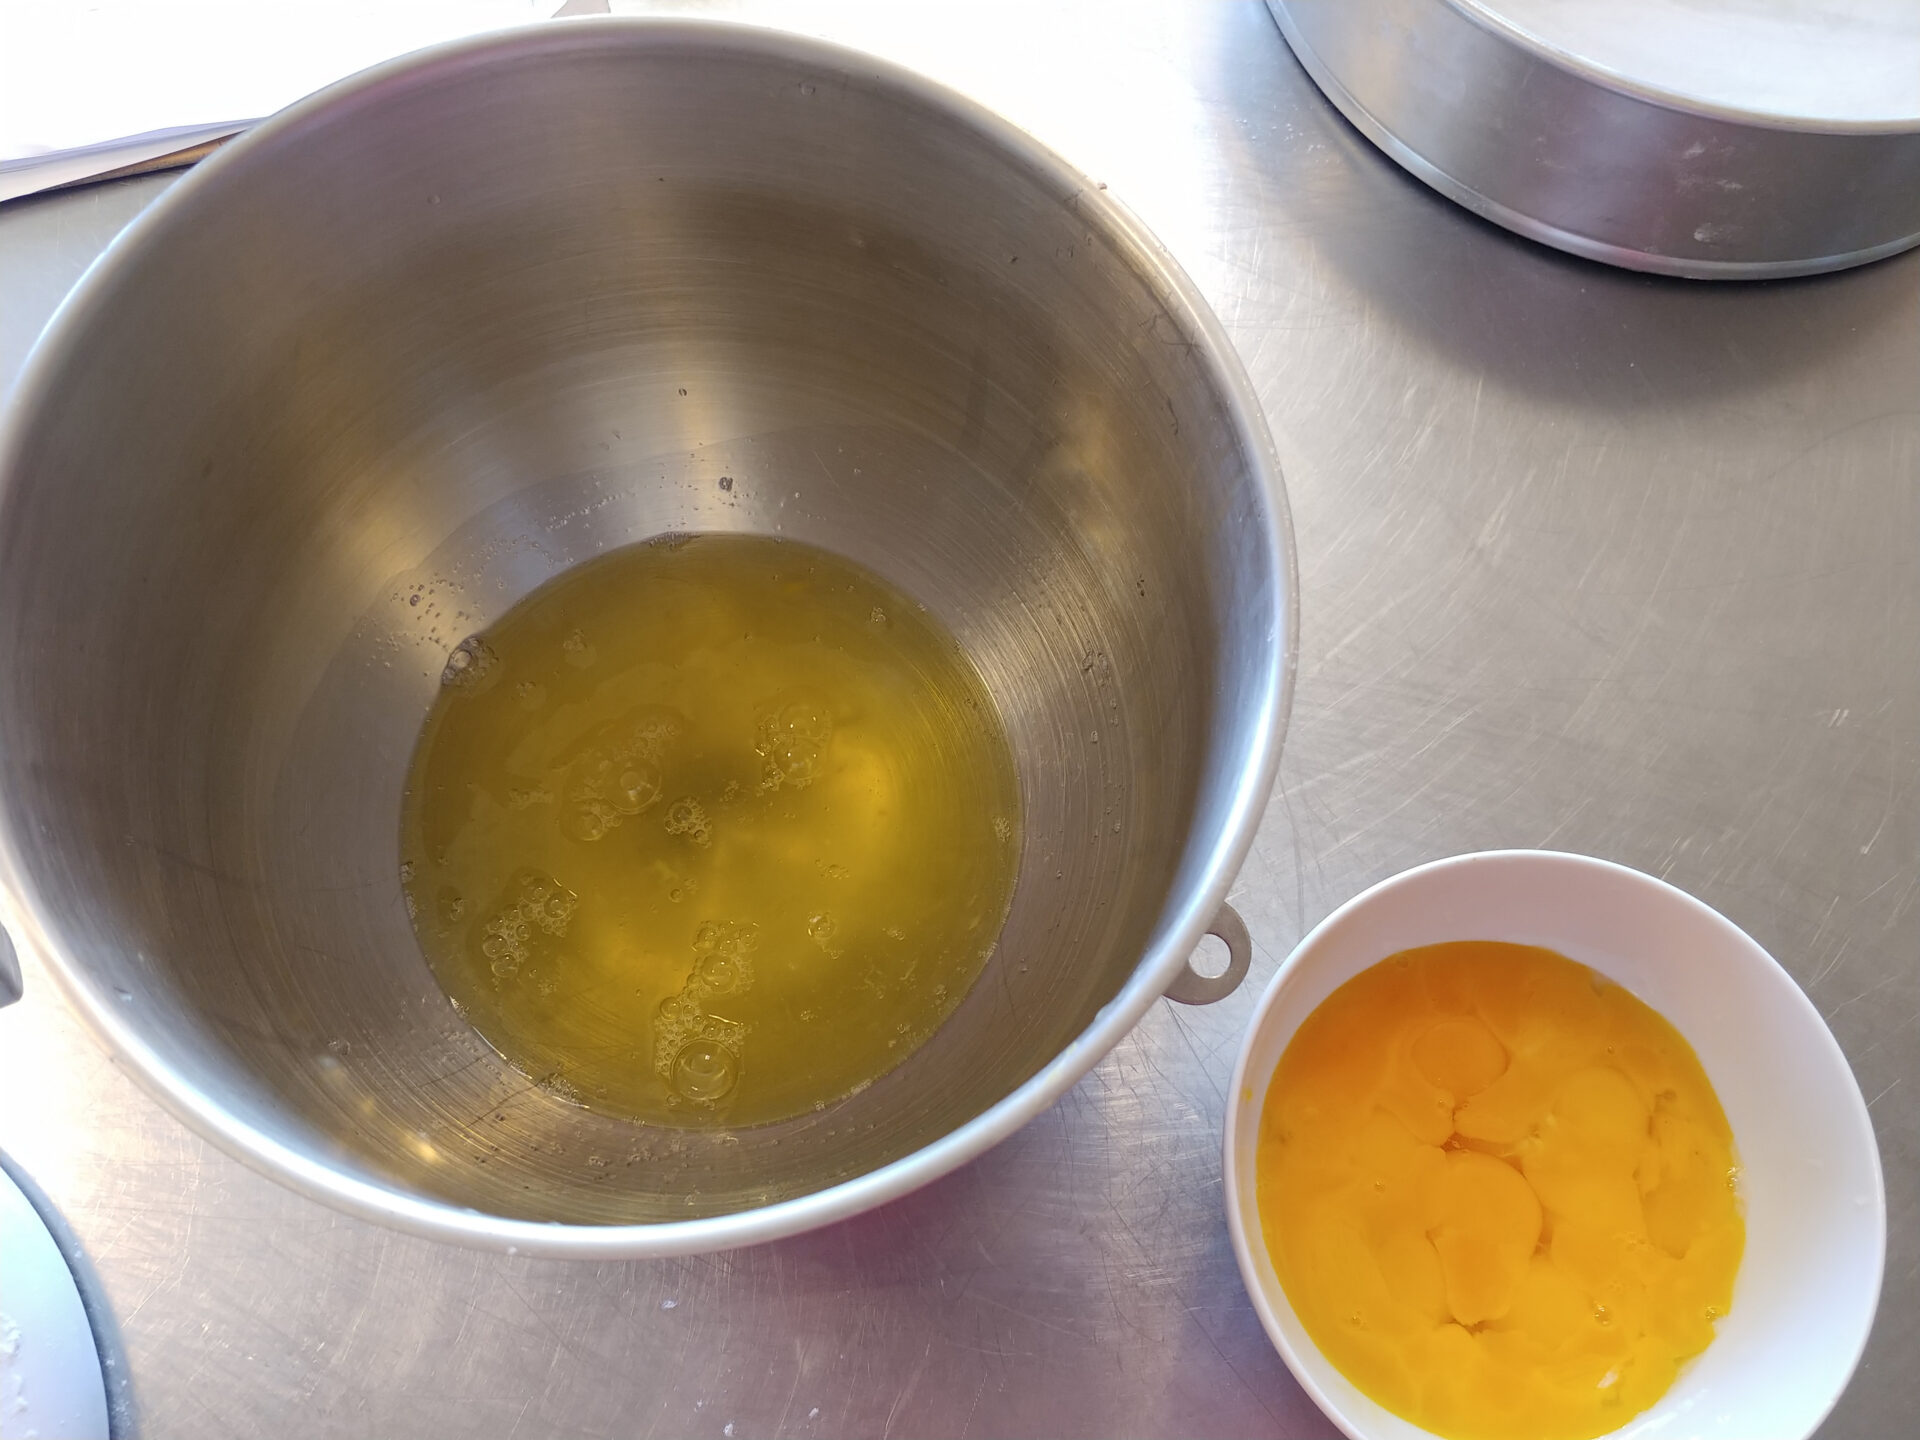
Then, place the egg yolk into the bowl designated for egg yolks.

3.4.

Another method is to let the egg yolk and the white slide into the fingers of one hand that are held over the bowl. The white part drips down while the yolk is stopped by your fingers.

Egg Separation-07Egg Separation-08Egg Separation-09Egg Separation-10Egg Separation-11Egg Separation-12Egg Separation-01

How to Make it Easier?

If you feel insecure about this process, you may consider using a third helping bowl too. It will help you to prevent mistakes of letting the yolk break into the whites:

  • Crack the egg and place the egg white into the extra bowl.
  • If the result is successful, you then pour the egg whites into the other bowl (where the future egg whites will accumulate).
  • If this fails, you will have the choice to not use that egg.
  • Then you repeat the steps with the other eggs.

Don’t get intimidated!

It may sound hard, but it really is not. The best way to gain confidence is to practice, but even the first time will be successful if you follow these steps. You may be a little slower, which is totally fine for the beginning.

About the Author:
Tom the ChefFounder
# 1
  • Published Recipes: 269
  • Av. Recipe Evaluation:
  • Location: Iowa, USA
  • Member since: 2023-02-02

Disclaimer

  1. General Information Content on this page above, including the content provided on www.CookingHub.com, including all recipes, articles, and other materials, is for general informational purposes only. This content reflects the personal opinions and experiences of its authors and is not intended to provide professional dietary, medical, legal, or political advice. Please consult a qualified professional before making any decisions based on the information presented here.
  2. Content Ownership and Use Content on this page above, including content published on CookingHub.com is owned by the individual authors who created it. Only the authors can access, modify, or delete their content from the platform. Our content may be embedded on third-party websites and blogs without modification. No reimbursement will be provided for this use. If an author removes content from CookingHub.com, it will no longer be available through any embedded links.
  3. Limitation of Liability Neither www.CookingHub.com (operated by the CookingHub Foundation) nor content authors are responsible for any outcome or consequence resulting from the use of information on this site. This includes, but is not limited to:
    • Food Safety: Any health risk related to food handling, food quality, or failure to follow USDA recommendations (including minimum safe cooking temperatures).
    • Preparation Safety: The proper and safe handling of cooking equipment or its suitability for any given task.
    • Recipe Outcomes: The final look, taste, or success of following a recipe.
    • Ingredients and Equipment: The sourcing of ingredients, tools, equipment, or anything else related to the preparation and consumption of food.
    • Nutritional and Dietary Information: The accuracy of nutritional data. This information is provided as a courtesy and should not replace advice from a medical provider. You are responsible for verifying that a diet is suitable for your personal health needs.
    • Errors and Omissions: Any potential errors, typos, or unclear directions in articles and recipes.
  4. User Responsibility All readers, visitors, and users of embedded content are solely responsible for evaluating recipes and articles. You must make your own decisions about whether to follow the steps and recommendations provided. It is your responsibility to ensure that ingredients and preparation methods are safe and appropriate for your personal dietary restrictions and health conditions.